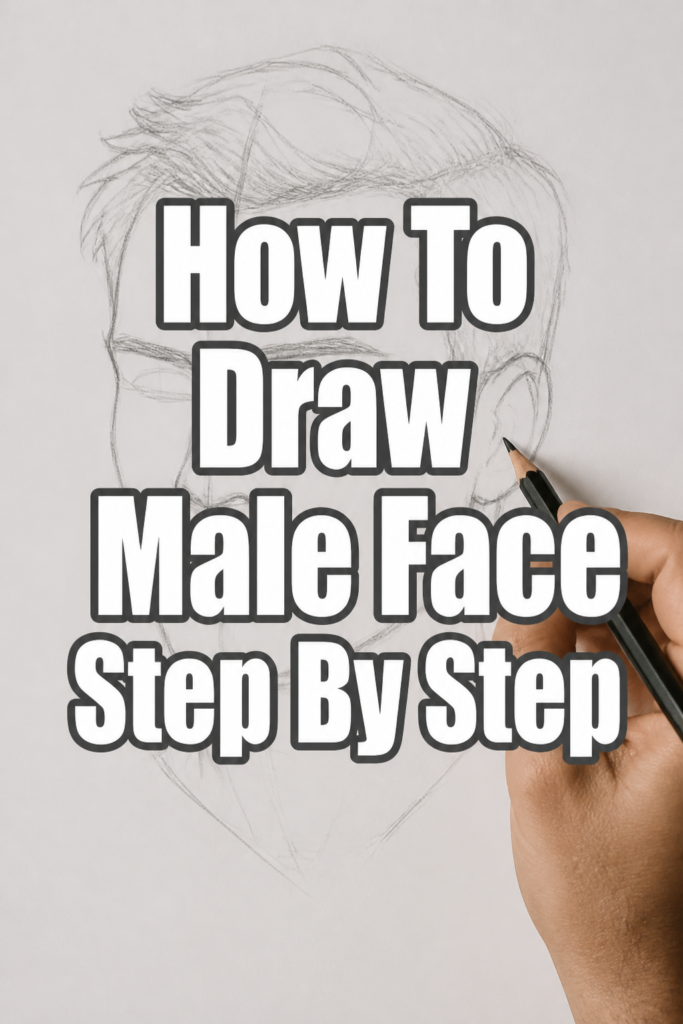
🎨 How To Draw Male Face Step By Step

& Painting
No rigid rules or pretension. Just practical guides, medium comparisons, and encouraging tips to help you enjoy the drawing & painting process.
I spent years drawing faces that looked like lopsided potatoes before I finally learned the underlying structure of the human head.
This guide uses the same professional techniques I used to transition from messy sketches to realistic portraits.
You can master these proportions with a bit of patience and the right construction lines.
Quick Overview
Drawing a male face requires an understanding of anatomy and the specific angles that define masculine features.
- Time needed: 45 to 60 minutes
- Difficulty: Intermediate
- What you’ll need: Graphite pencils (HB, 2B, 4B), a kneaded eraser, a ruler, and smooth drawing paper.
Step-by-Step Instructions
Step 1: Sketch the Initial Sphere
Start by drawing a perfect circle in the center of your paper.
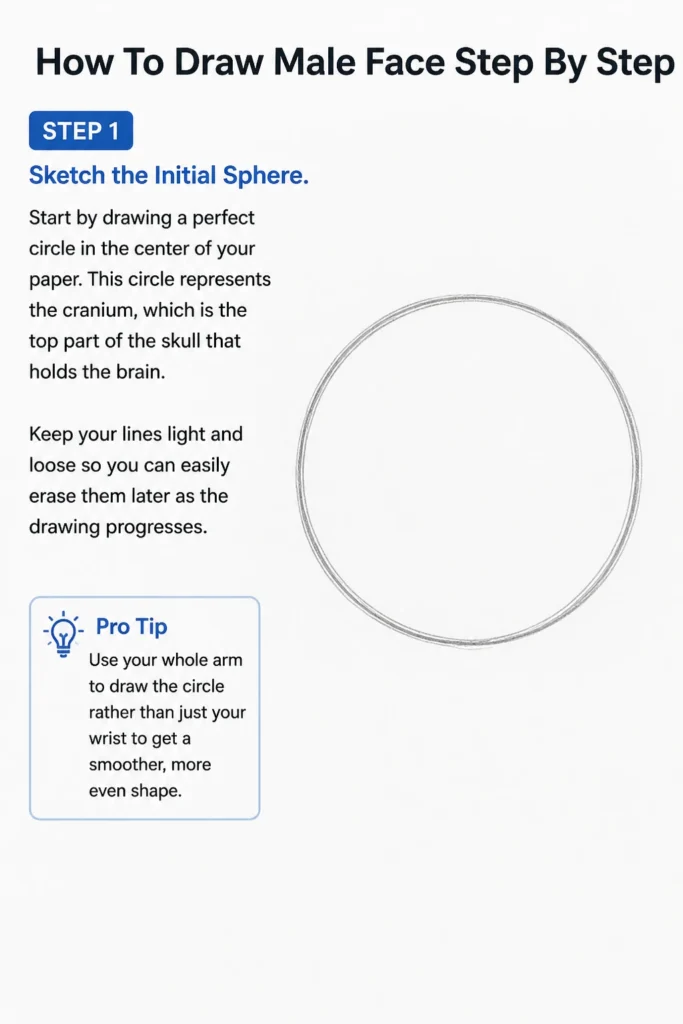
This circle represents the cranium, which is the top part of the skull that holds the brain.
Keep your lines light and loose so you can easily erase them later as the drawing progresses.
Pro Tip: Use your whole arm to draw the circle rather than just your wrist to get a smoother, more even shape.
Step 2: Establish the Vertical Axis
Draw a straight vertical line down the center of your circle.
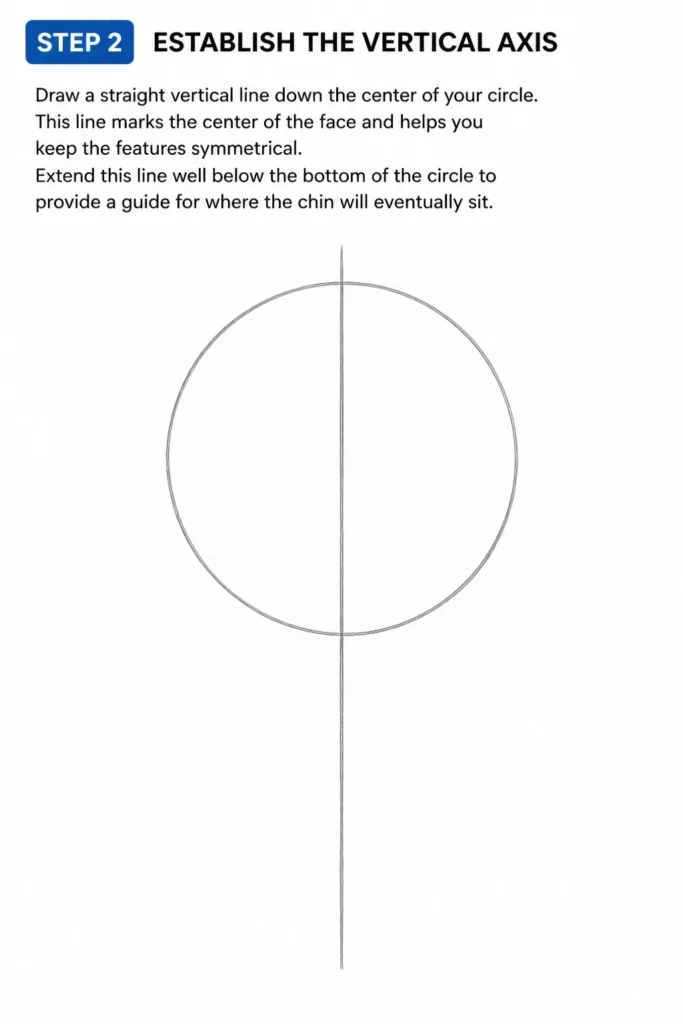
This line marks the center of the face and helps you keep the features symmetrical.
Extend this line well below the bottom of the circle to provide a guide for where the chin will eventually sit.
Step 3: Flatten the Sides of the Head
Recognize that the human head is not a perfect sphere but is actually flatter on the sides.
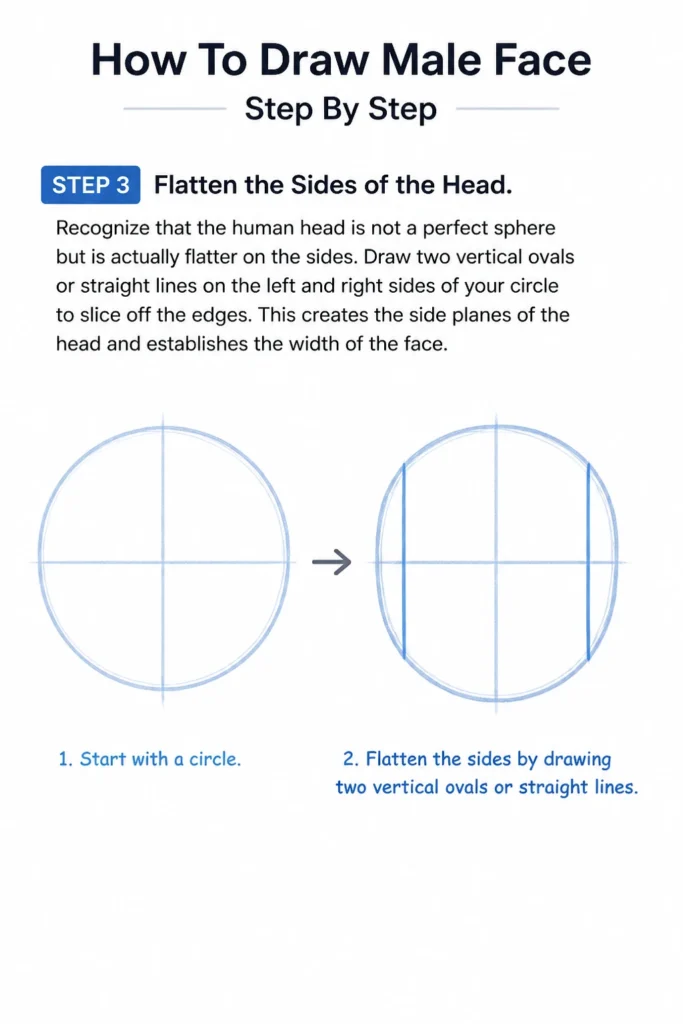
Draw two vertical ovals or straight lines on the left and right sides of your circle to “slice” off the edges.
This creates the side planes of the head and establishes the width of the face.
Step 4: Divide the Face into Thirds
Mark the brow line across the middle of the sphere where the side planes begin.
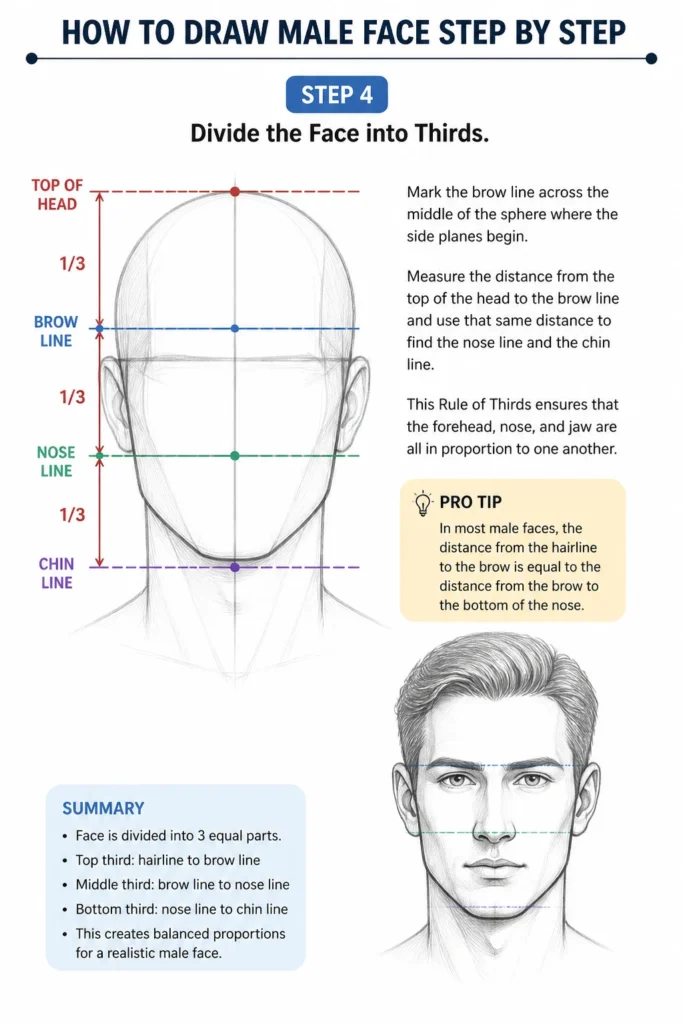
Measure the distance from the top of the head to the brow line and use that same distance to find the nose line and the chin line.
This “Rule of Thirds” ensures that the forehead, nose, and jaw are all in proportion to one another.
Pro Tip: In most male faces, the distance from the hairline to the brow is equal to the distance from the brow to the bottom of the nose.
Step 5: Construct the Jawline
Connect the sides of the circle to the bottom of your center vertical line to form the jaw.
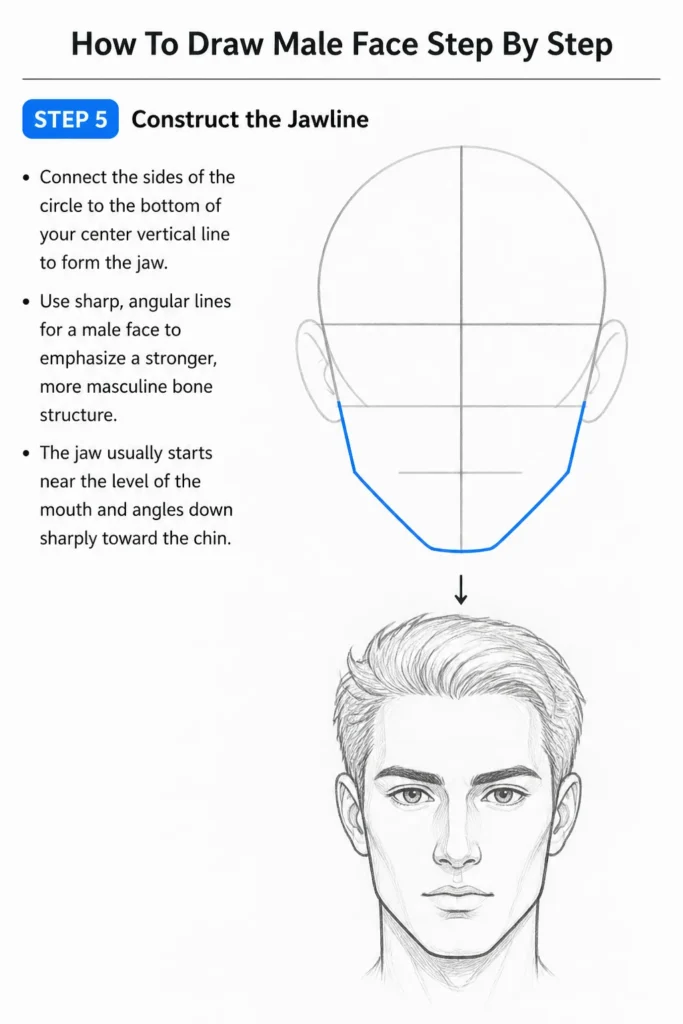
Use sharp, angular lines for a male face to emphasize a stronger, more masculine bone structure.
The jaw usually starts near the level of the mouth and angles down sharply toward the chin.
Step 6: Place the Eyes and Brow
Position the eyes on a horizontal line halfway between the top of the head and the bottom of the chin.
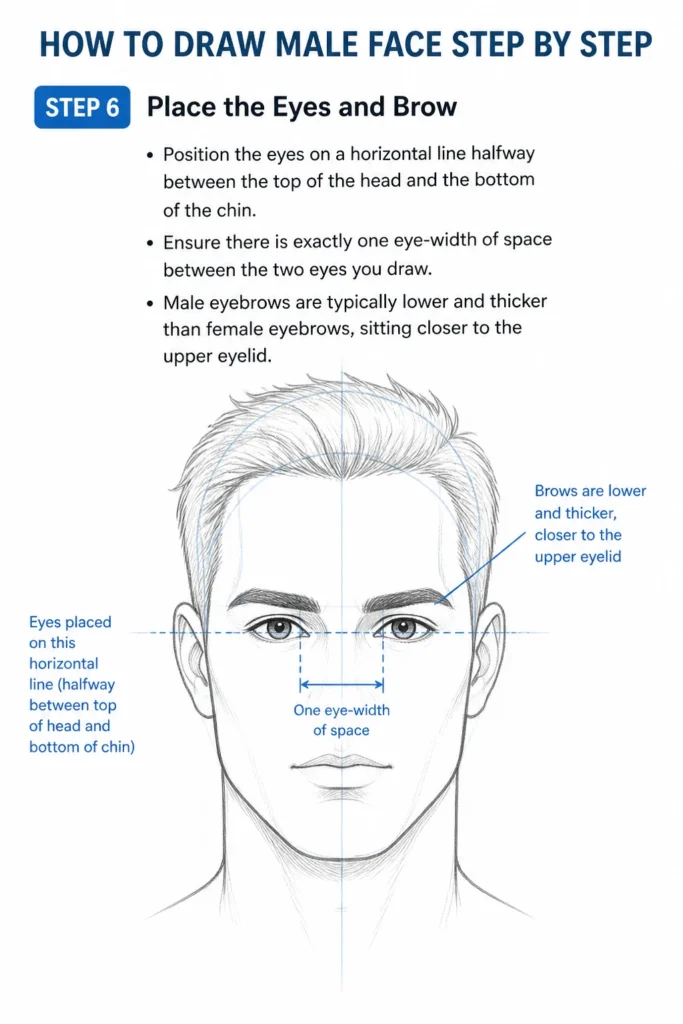
Ensure there is exactly one eye-width of space between the two eyes you draw.
Male eyebrows are typically lower and thicker than female eyebrows, sitting closer to the upper eyelid.
Step 7: Define the Nose Structure
Build the nose by starting at the brow line and following the bridge down to the nose line you marked earlier.
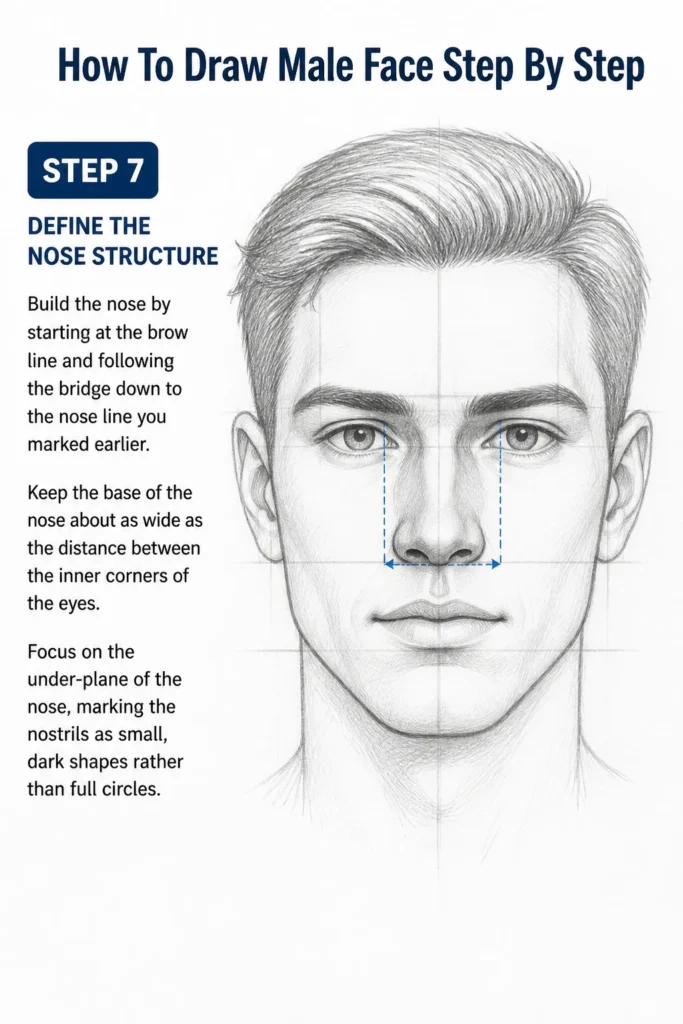
Keep the base of the nose about as wide as the distance between the inner corners of the eyes.
Focus on the under-plane of the nose, marking the nostrils as small, dark shapes rather than full circles.
Step 8: Map the Mouth and Lips
Locate the mouth line about one-third of the way down from the nose to the chin.
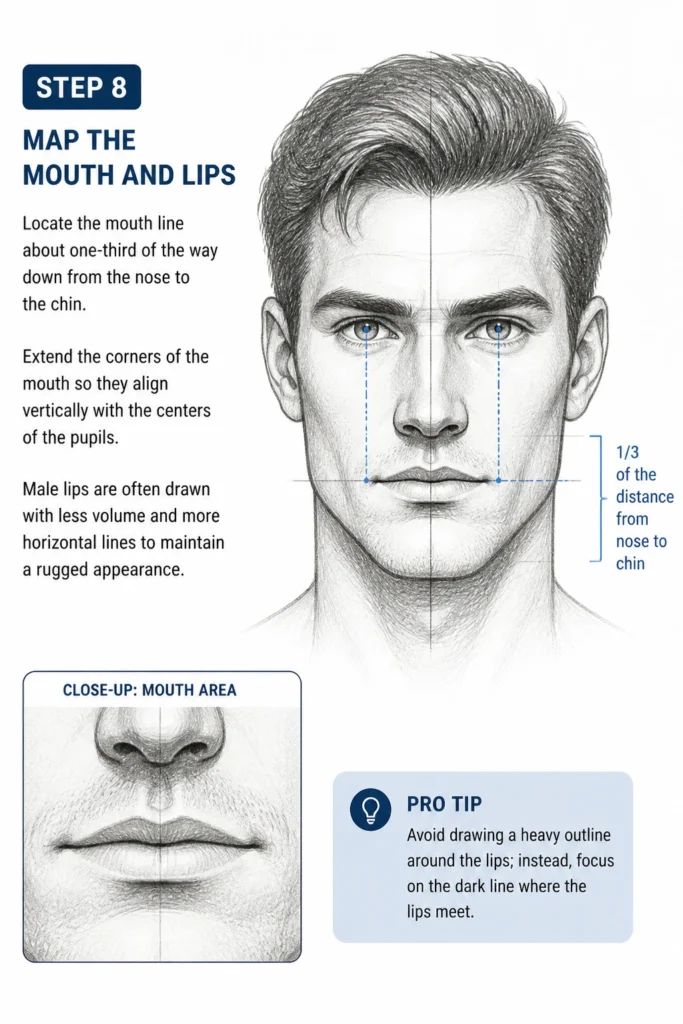
Extend the corners of the mouth so they align vertically with the centers of the pupils.
Male lips are often drawn with less volume and more horizontal lines to maintain a rugged appearance.
Pro Tip: Avoid drawing a heavy outline around the lips; instead, focus on the dark line where the lips meet.
Step 9: Align the Ears
Draw the ears on the sides of the head, fitting them between the brow line and the nose line.
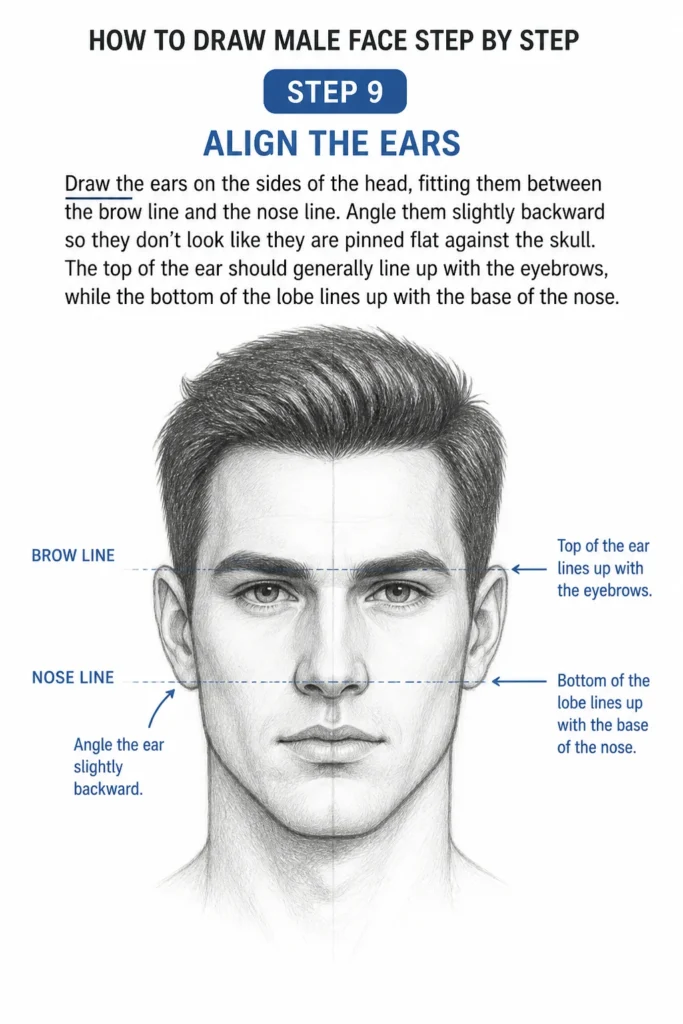
Angle them slightly backward so they don’t look like they are pinned flat against the skull.
The top of the ear should generally line up with the eyebrows, while the bottom of the lobe lines up with the base of the nose.
Step 10: Add the Hair and Finishing Touches
Sketch the hairline above the brow line, remembering that hair has volume and sits slightly above the skull.
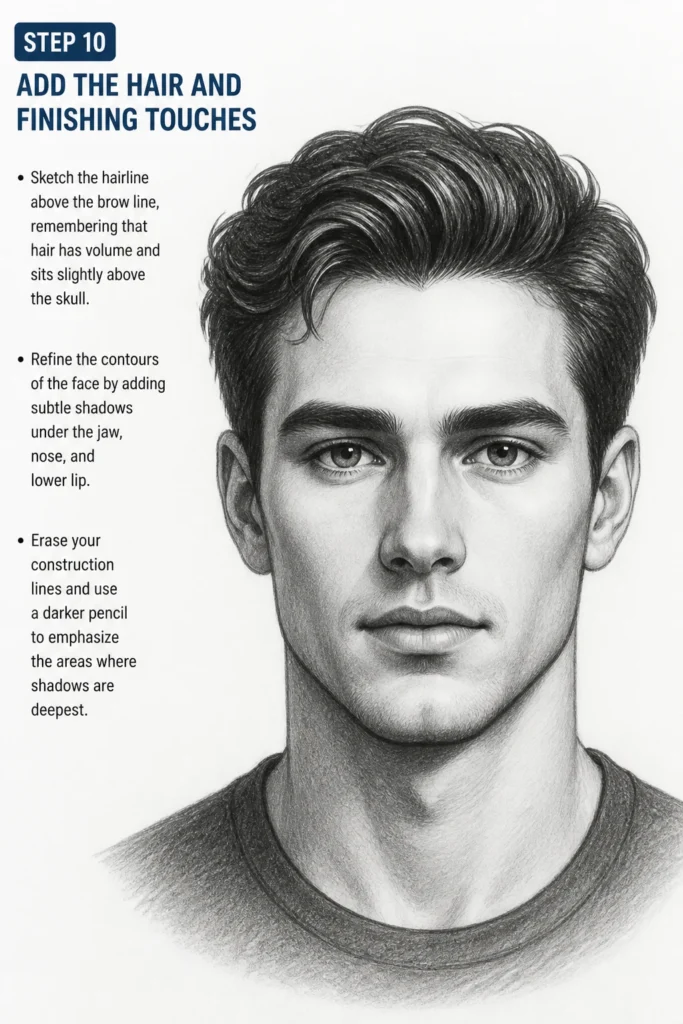
Refine the contours of the face by adding subtle shadows under the jaw, nose, and lower lip.
Erase your construction lines and use a darker pencil to emphasize the areas where shadows are deepest.
Common Mistakes to Avoid
Placing Eyes Too High
Many beginners place the eyes near the top of the forehead because they forget how much space the top of the skull takes up. This makes the face look squashed and the forehead look nonexistent. Always remember that the eyes sit roughly in the middle of the entire head height.
Softening the Jawline Too Much
If you use overly rounded lines for the jaw and chin, the face may lose its masculine characteristics. Male anatomy typically features more prominent bone structure and sharper angles. Use straight lines for the transition from the ear to the chin to maintain a strong look.
Making the Neck Too Thin
A thin neck can make a male head look out of balance or cartoonish. The male neck is generally thicker and starts closer to the ears than the female neck. Ensure the neck lines connect firmly to the jaw area to give the head proper support.
Over-Detailing the Lips
Drawing every single line on the lips often makes them look feminine or like they are covered in makeup. For a male face, focus on the center line of the mouth and the shadow beneath the lower lip. Keeping the upper lip thinner and less defined usually yields a more realistic result.
Troubleshooting
The Face Looks Asymmetrical
This usually happens when you don’t check your drawing from different angles. Try holding your paper up to a mirror or flipping your digital canvas horizontally. This reveals errors in symmetry that your eyes have become accustomed to while drawing.
The Features Look Flat
If your drawing lacks depth, you might be ignoring the planes of the face. Remember that the nose sticks out and the eyes sit back in sockets. Adding a bit of shading to the side of the nose and the eye sockets will immediately create a three-dimensional effect.
The Eyes Look Like They Are Floating
Floating eyes occur when there is no connection to the brow or the bridge of the nose. Ensure you sketch the brow ridge and the subtle shadows that connect the inner corners of the eyes to the nose bridge. This grounds the eyes within the skeletal structure of the face.
Key Takeaways
- Use a circle and a center line to establish the basic foundation of the head.
- Apply the Rule of Thirds to ensure the forehead, nose, and jaw are proportionally balanced.
- Place the eyes at the vertical midpoint of the head, not at the top.
- Use angular lines and thicker brows to emphasize masculine facial features.
- Align the ears between the brow line and the base of the nose for correct placement.
- Always add volume to the hair so it sits above the construction line of the skull.
Frequently Asked Questions
How do I make the face look older?
To age a male face, you should add deeper lines around the eyes, mouth, and forehead. You can also make the jawline slightly less sharp and add more texture to the skin. Thinning the hair or receding the hairline also contributes significantly to an older appearance.
What is the best way to draw stubble or a beard?
Avoid drawing individual hairs one by one across the entire face. Instead, shade the area where the beard grows using a soft pencil and then add small, flicking strokes in the darkest areas. This creates the illusion of hair density without making the drawing look cluttered.
Should I draw the eyelashes on a male face?
You should be very subtle when drawing eyelashes on men. Focus on thickening the upper eyelid line rather than drawing long, curved lashes. If you do draw them, keep them short and straight to avoid making the eyes look overly feminine.
How do I determine the width of the neck?
A good rule of thumb is to start the neck lines just inside the width of the jaw. For more muscular characters, the neck can be even wider, starting almost directly below the ears. Always observe how the neck muscles connect to the collarbone for a realistic finish.
Our Top Recommended Finds
- Staedtler Mars Lumograph Pencils: These pencils offer consistent grading and are perfect for creating the range of tones needed for facial shading.
- Kneaded Rubber Eraser: This tool is essential for lifting highlights off the nose and forehead without damaging the paper surface.
- Canson XL Series Sketchbook: The smooth texture of this paper is ideal for practicing construction lines and fine detail work.
Taking Your Portrait Skills Further
Mastering the male face is a significant milestone in any artist’s journey. Once you feel comfortable with these basic proportions, try drawing faces from different angles or with various expressions.
Study the anatomy of the neck and shoulders next to ensure your portraits look grounded and realistic. The more you practice these structural steps, the more natural your drawings will become over time.
Pick up your pencil right now and try sketching three quick head shapes using the sphere and jaw method. Consistent daily practice is the fastest way to turn these technical rules into artistic intuition.
& Painting
No rigid rules or pretension. Just practical guides, medium comparisons, and encouraging tips to help you enjoy the drawing & painting process.