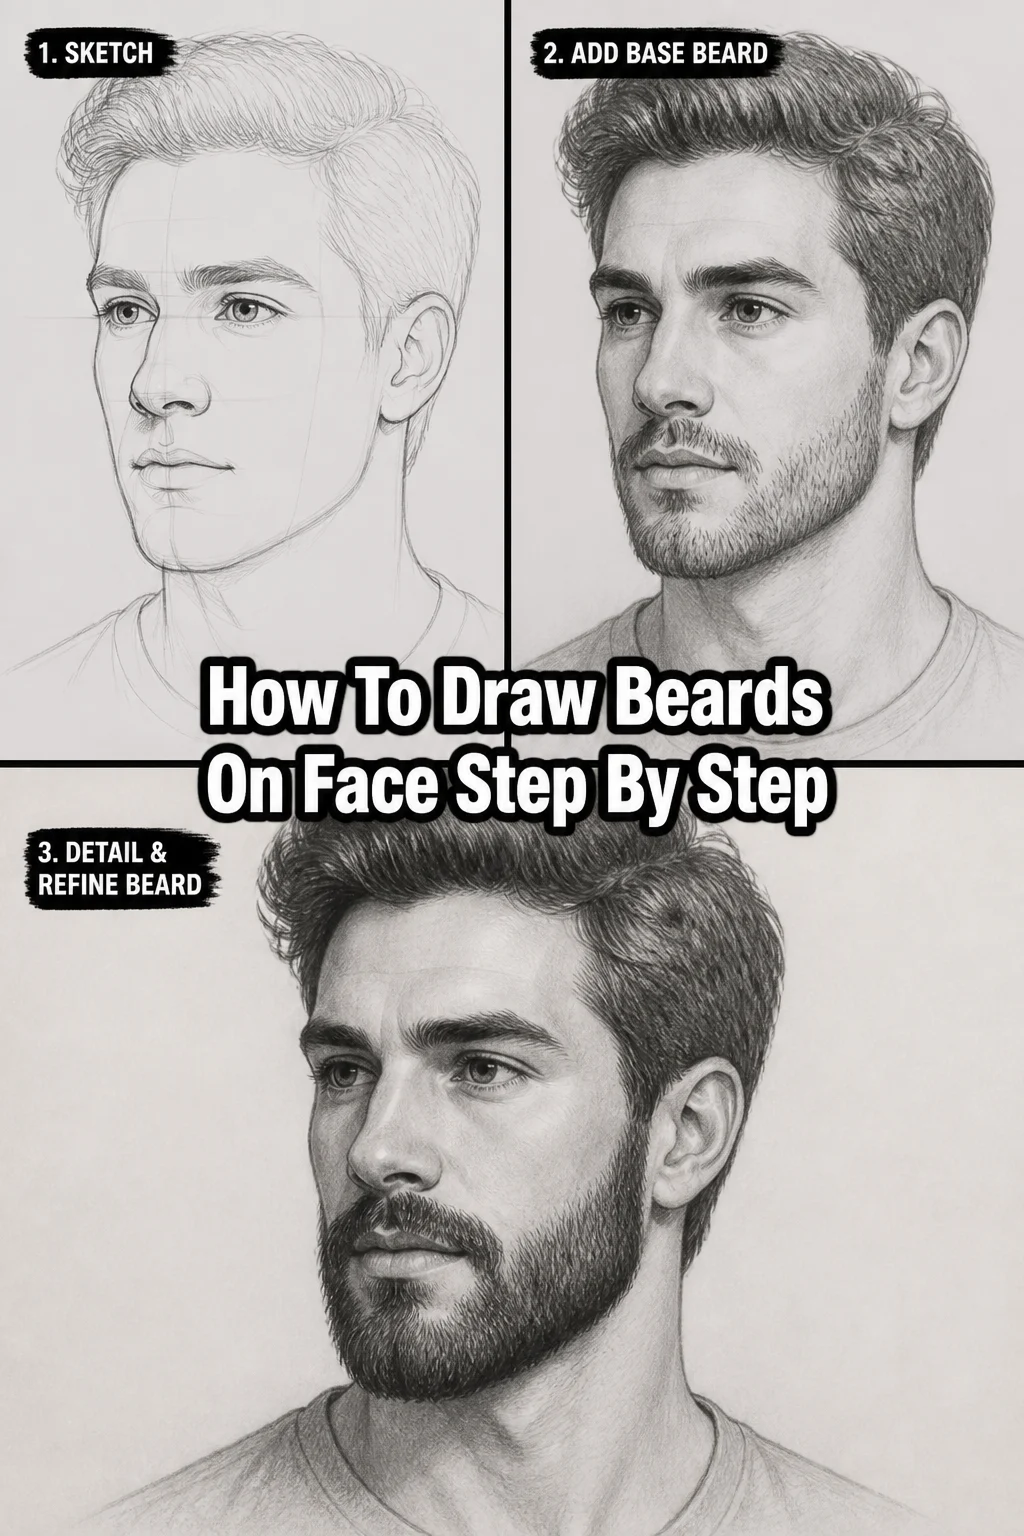
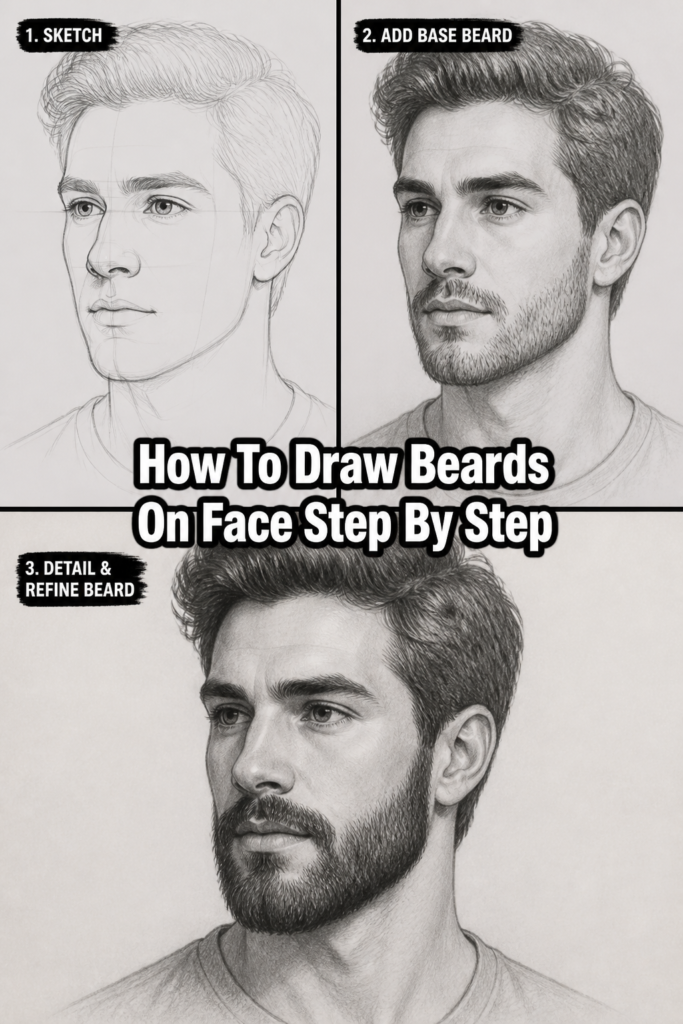
🧔 How To Draw Beards On Face Step By Step
Learning to draw a convincing beard can truly bring your character art to life. I remember struggling for ages to get the texture right, making my drawn faces look oddly flat. This guide shares the techniques I refined over years of practice.
I’ve spent countless hours sketching portraits, and nothing adds character quite like a well-rendered beard. Let’s make sure yours look fantastic every time.
Quick Overview
This guide will walk you through the process of drawing realistic beards, from basic shape to intricate details. You’ll learn how to approach different textures and styles, ensuring your facial hair enhances your character’s look.
- Time needed: 1-2 hours (initial learning and practice)
- Difficulty: Intermediate (assumes basic face drawing skills)
- What you’ll need: Pencils (HB, 2B, 4B, 6B), eraser (kneaded and stick), blending stump or tissue, drawing paper.
Step-by-Step Instructions
Step 1: Understand Face Anatomy and Beard Placement
Before anything else, you need a solid foundation. Start by lightly sketching the underlying face structure. This includes the jawline, chin, and cheekbones.
The beard will follow these contours. Consider how it wraps around the chin and extends along the jaw. This initial understanding prevents the beard from looking like an afterthought.
Think about where the hair naturally grows. It usually starts from the sideburns, extends down the cheeks, and covers the chin and neck area.
Pro Tip: Always draw the basic face first, even if it’s just a light sketch. This ensures your beard properly integrates with the head. You wouldn’t build a house without a foundation.
Step 2: Map Out the Basic Shape and Length
Now, lightly sketch the overall silhouette of the beard. This is about defining its unique style and length. Is it a short stubble, a neatly trimmed corporate beard, or a long, flowing Viking masterpiece?
Use light, loose lines to block out the general mass. Don’t worry about individual hairs yet. Focus on the outer edges and how the beard frames the face.
Consider how the beard connects to the hairline and sideburns. This connection is vital for a natural appearance.
Step 3: Define the Flow and Direction of Hair
Hair doesn’t grow in a single, uniform direction. It flows downwards, outwards, and sometimes curls. Observe the natural growth patterns.
Use directional lines within your basic shape to indicate how the hair generally moves. These are like guides for your future strokes.
For example, hair on the cheeks might grow downwards and slightly backwards, while hair under the chin might flow more directly downwards or even forward. Varying these directions adds realism.
Step 4: Layer Initial Hair Strands and Texture
Start adding the first layer of hair. Use your HB or 2B pencil for this. Begin with light, overlapping strokes that follow the directional lines you established.
Focus on creating groups of hair rather than individual strands. Think of the beard as many small clumps of hair flowing together.
Vary the pressure on your pencil. Some strokes can be slightly darker, others lighter, to suggest depth even at this early stage. This builds a foundational texture.
Step 5: Build Depth with Shading and Mid-Tones
This is where the beard starts to gain volume. Identify the areas that would be in shadow. These are typically under the chin, where the beard meets the neck, and deeper within the beard’s mass.
Use a darker pencil (like 4B) to add mid-tones and shadows. Apply more pressure in these areas, always following the hair’s direction.
Gradually build up these darker values. Don’t go too dark too quickly. Layering is key to achieving a smooth transition and realistic depth.
Pro Tip: Imagine a light source hitting the beard. The areas facing away from the light will be darker. This simple principle dramatically improves realism.
Step 6: Refine Texture and Add Individual Details
Now that you have your basic shape and shading, it’s time to refine the texture. Use sharper, slightly darker strokes to suggest individual hairs and flyaways.
Don’t draw every single hair. Instead, draw clusters of hairs and use subtle, broken lines to suggest the edges of hair clumps. This gives the impression of individual strands without overwhelming the drawing.
Add some stray hairs that break away from the main mass. These small details contribute significantly to a natural, less “painted-on” look.
Step 7: Add Highlights and Darkest Tones for Contrast
Use your darkest pencil (6B) to deepen the darkest shadows. These are the deepest crevices within the beard, or where the beard meets the face in the most shadowed areas.
For highlights, use your kneaded eraser. Gently dab or lift graphite from areas where the light would hit most intensely. This could be the top edge of the beard, or prominent areas on the cheek.
The contrast between your darkest darks and brightest lights makes the beard truly pop. It gives it a three-dimensional quality.
Step 8: Blend and Soften Edges (Selectively)
Blending can soften harsh lines and create smoother transitions, especially in the shadowed areas. Use a blending stump or tissue for this.
Blend lightly and selectively. You don’t want to blend away all your texture. Focus on areas where shadows transition, or where the beard meets the skin.
Avoid over-blending, which can make the beard look flat or muddy. The goal is to enhance, not erase, your hair strokes.
Step 9: Final Touches and Adjustments
Step back and look at your drawing. Are there any areas that need adjustment? Perhaps a shadow needs deepening, or a highlight needs brightening.
Use your stick eraser to clean up any stray marks around the edges of the beard. You can also use it to carve out thin, bright hairs within the beard, adding more detail.
Ensure the beard feels integrated with the face. Make any final adjustments to ensure it looks like a natural part of your character.
Common Mistakes to Avoid
Flat, Lifeless Texture
Many beginners draw beards with uniform, parallel lines. This creates a flat, unnatural look. Hair has volume and variation.
Instead, vary your stroke length, pressure, and direction. Overlap strokes and think in terms of clumps of hair rather than individual strands. This builds up a rich, organic texture.
Ignoring Underlying Anatomy
Drawing a beard as a separate, floating entity is a common pitfall. The beard must conform to the face beneath it.
Always sketch the facial structure first. This ensures the beard correctly wraps around the jaw, chin, and cheeks, making it feel like a natural extension of the face.
Uniform Hair Direction
Hair does not grow perfectly straight down or in one direction. It curves, overlaps, and changes direction as it grows across different parts of the face.
Observe real beards. Notice how hair on the sideburns might grow differently than hair under the chin. Incorporate these subtle shifts in direction for a more dynamic and realistic appearance.
Over-Rendering Every Single Hair
Trying to draw every individual hair can lead to a messy, overworked drawing. It also looks less realistic from a distance.
Focus on suggesting individual hairs within clumps. Use strategic, well-placed strokes to imply texture and detail, rather than literally drawing each strand. This saves time and looks more convincing.
Detaching Beard from Face
Sometimes, a drawn beard appears “glued on” rather than growing from the skin. This happens when there’s no subtle transition or proper shading where the beard meets the face.
Ensure you have a soft, natural blend where the beard begins on the cheeks and jawline. Use light strokes and subtle shading to show it emerging from the skin.
Troubleshooting
Beard Looks Glued On
If your beard appears to sit unnaturally on the face, the issue likely lies in the transition areas. You might have too harsh an edge where the beard meets the skin.
Soften the edges where the beard starts on the cheek and jawline. Use lighter strokes and subtle blending to create a gradual emergence of hair from the skin. Ensure your initial facial anatomy sketch was accurate.
Texture Appears Too Uniform or Messy
A uniform texture lacks realism, while a messy one suggests a lack of control. This often comes from inconsistent stroke application or unclear hair direction.
Review your directional lines from Step 3. Ensure your strokes follow these guides. For uniform textures, add more variation in stroke length, pressure, and slight curls. For messiness, try to group strands more deliberately and refine your edges.
Struggling with Different Beard Styles
Each beard style has unique characteristics. A short stubble requires a very different approach than a long, flowing beard.
Break down each style into its core elements. For stubble, focus on tiny dots and very short, sparse strokes. For longer beards, emphasize the flow, layering of hair clumps, and the interplay of light and shadow on the larger mass. Practice observing many reference photos.
Key Takeaways
- Always begin by sketching the underlying facial anatomy to ensure proper beard placement.
- Define the overall shape and length of the beard before adding any detailed hair.
- Vary the direction, length, and pressure of your pencil strokes to create realistic hair texture.
- Use layering and shading to build depth and volume within the beard.
- Employ strong contrast between highlights and shadows to make the beard appear three-dimensional.
- Focus on suggesting hair clumps and overall flow rather than drawing every individual strand.
Frequently Asked Questions
What’s the best pencil hardness for beards?
A range of pencils is ideal. Start with an HB or 2B for initial shapes and lighter layers. Use 4B and 6B for mid-tones, shadows, and adding darker details. A lighter pencil, like 2H, can be useful for very faint, fine hairs or initial guidelines.
How do I draw different beard styles?
The fundamental steps remain the same, but the emphasis shifts. For stubble, use tiny dots and very short, sparse strokes. For a thick, bushy beard, focus on layering clumps of hair and using strong light and shadow to show its volume. Always use reference photos for specific styles.
Should I draw every single hair?
No, drawing every single hair usually results in an overworked and less realistic drawing. Instead, focus on rendering hair in groups or clumps. Use a few well-placed, darker strokes to suggest individual strands, especially at the edges or where light hits.
How do I make a beard look soft or coarse?
For a soft beard, use smoother, more blended transitions between values. Keep your strokes slightly lighter and avoid very sharp, defined lines. For a coarse beard, use sharper, more distinct strokes. Emphasize the separation between hair clumps and use stronger contrasts.
Our Top Recommended Finds
- High-Quality Sketching Pencil Set: A good set with a range of hardness (HB to 6B or higher) provides the versatility needed for different tones and textures.
- Blending Stumps/Tortillons: These tools are essential for softening shadows and creating smooth transitions without losing too much texture.
- Kneaded Eraser: Perfect for lifting graphite to create highlights and cleaning up small areas without smudging your work.
Mastering the Art of Facial Hair
Drawing beards is a rewarding skill that adds immense character to your portraits. It’s about understanding form, texture, and light, just like any other element of a drawing.
Don’t be afraid to experiment with different styles and hair types. Each beard tells a story. Keep practicing these steps, and you’ll soon develop your own unique approach. Take out your pencils today and give your characters the facial hair they deserve!