🎨 How To Shade A Face Drawing Step By Step
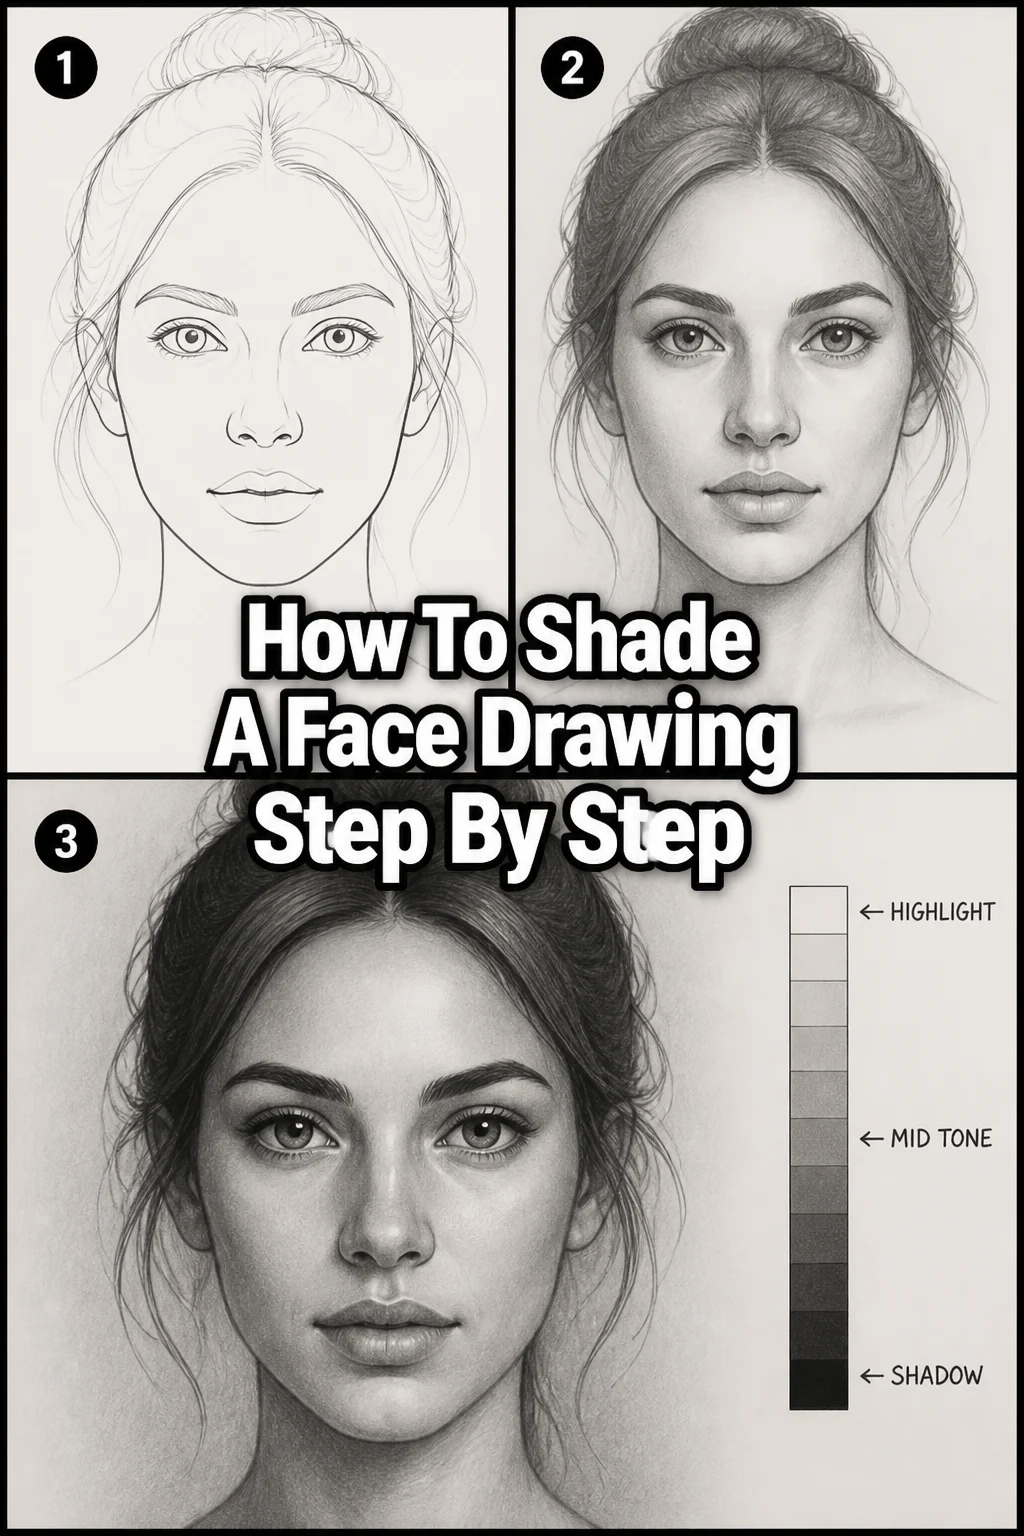
Learning to shade a face brings your drawings to life, transforming flat lines into compelling portraits. I remember my own early struggles, trying to make my faces look three-dimensional. This guide shares the practical techniques I’ve refined over years of practice. You’ll gain the confidence to add depth and realism to your artwork.
Quick Overview
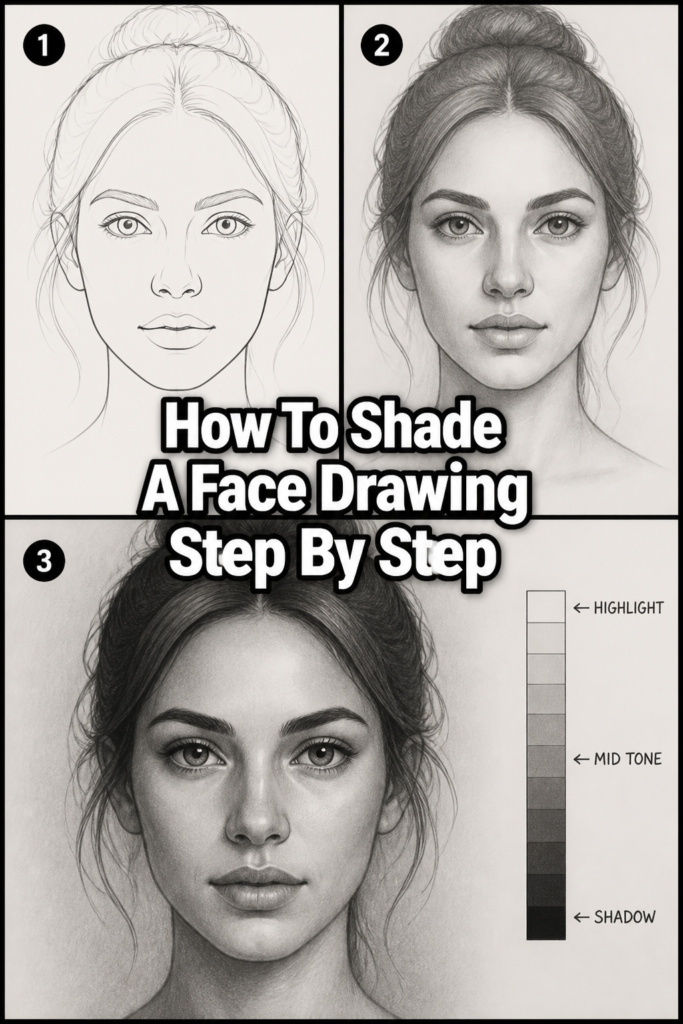
This guide will walk you through the essential steps to shade a face drawing effectively. You’ll learn to identify light sources, build values, and blend tones for a realistic finish. By the end, you’ll have a strong foundation for creating expressive, dimensional portraits.
- Time needed: 1-3 hours (depending on detail and practice)
- Difficulty: Beginner to Intermediate
- What you’ll need: Sketching pencils (HB, 2B, 4B, 6B), blending stump/tortillon, kneaded eraser, smooth drawing paper, reference photo.
Step-by-Step Instructions
Step 1: Gather Your Materials and Set Up
Before you begin, ensure you have all your tools readily available. A clear workspace helps you focus on the drawing process. Good quality materials make a significant difference in the final outcome.
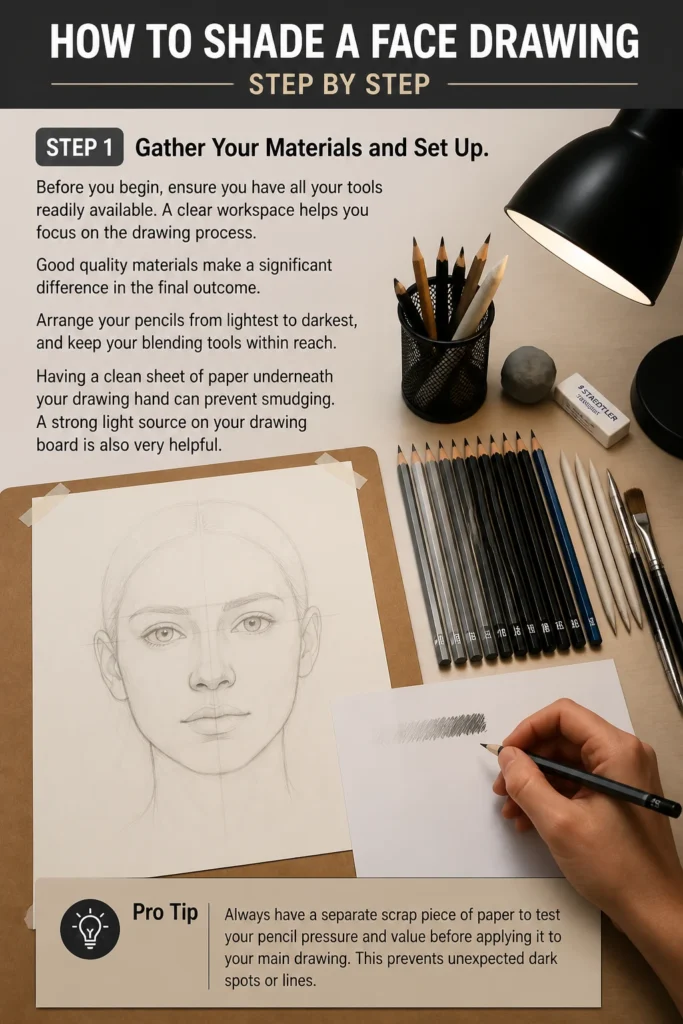
Arrange your pencils from lightest to darkest, and keep your blending tools within reach. Having a clean sheet of paper underneath your drawing hand can prevent smudging. A strong light source on your drawing board is also very helpful.
Pro Tip: Always have a separate scrap piece of paper to test your pencil pressure and value before applying it to your main drawing. This prevents unexpected dark spots or lines.
Step 2: Understand Your Light Source
The direction and intensity of light are the most crucial elements in shading. Light creates shadows, and shadows define form. Spend time analyzing your reference photo to pinpoint where the light originates.
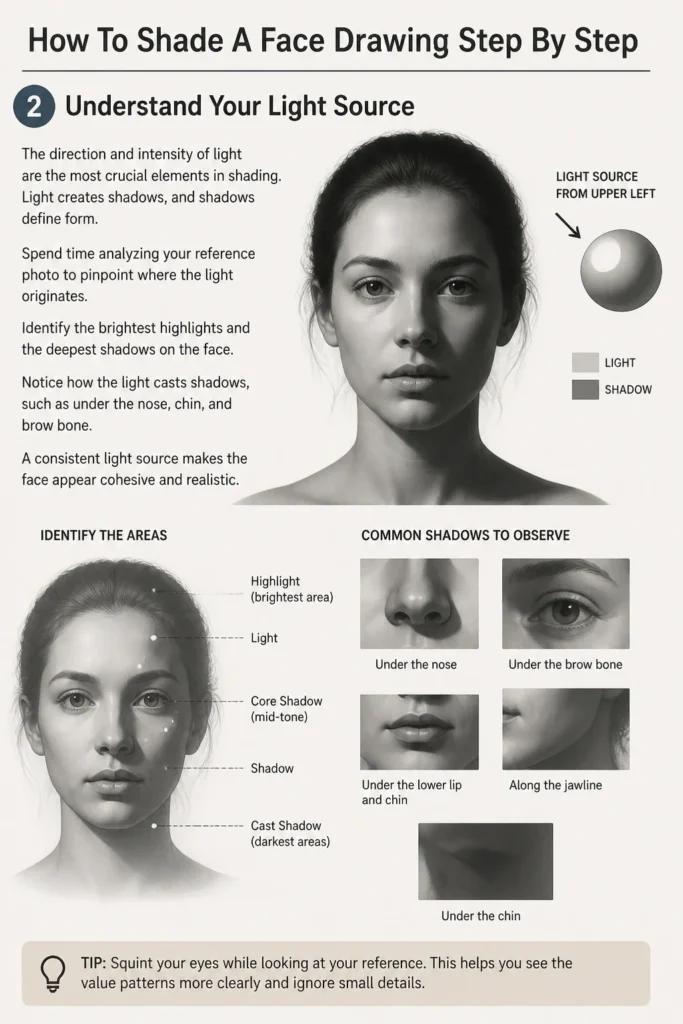
Identify the brightest highlights and the deepest shadows on the face. Notice how the light casts shadows, such as under the nose, chin, and brow bone. A consistent light source makes the face appear cohesive and realistic.
Step 3: Map the Basic Forms and Planes
Think of the face not as a flat surface, but as a collection of simple three-dimensional forms. The skull is an egg, the nose is a wedge, and the cheeks are planes. Light interacts differently with each of these forms.
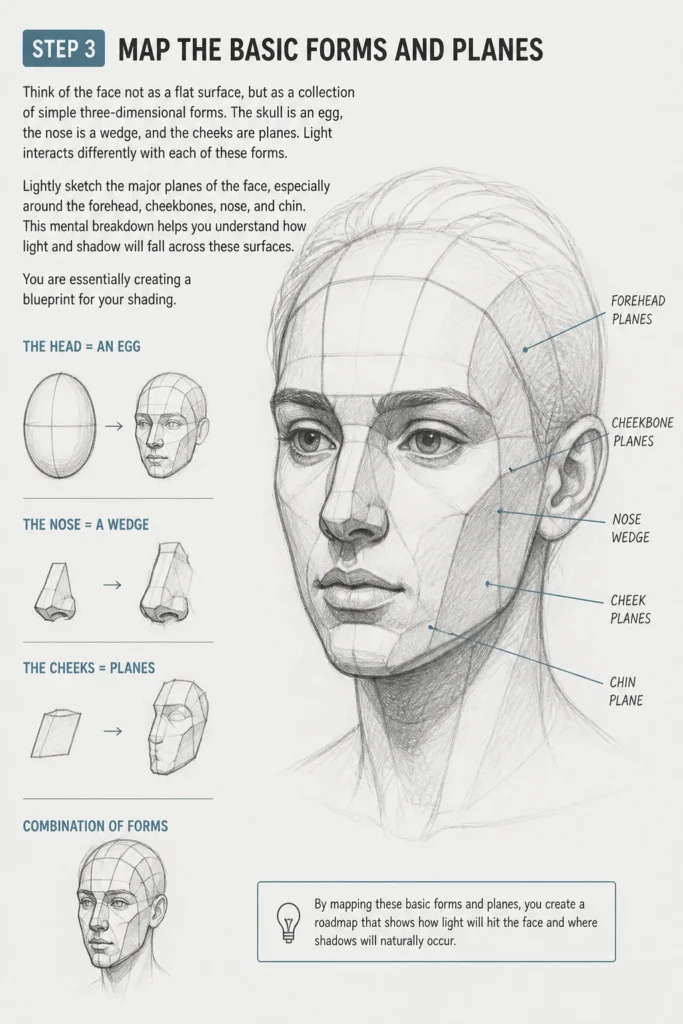
Lightly sketch the major planes of the face, especially around the forehead, cheekbones, nose, and chin. This mental breakdown helps you understand how light and shadow will fall across these surfaces. You are essentially creating a blueprint for your shading.
Step 4: Establish Core Shadows and Darkest Values
Begin by laying down the darkest values first, using your softer pencils (like 4B or 6B). These are the core shadows, the areas where light cannot reach directly. Look for the deepest parts of the eye sockets, under the lower lip, and the underside of the chin.
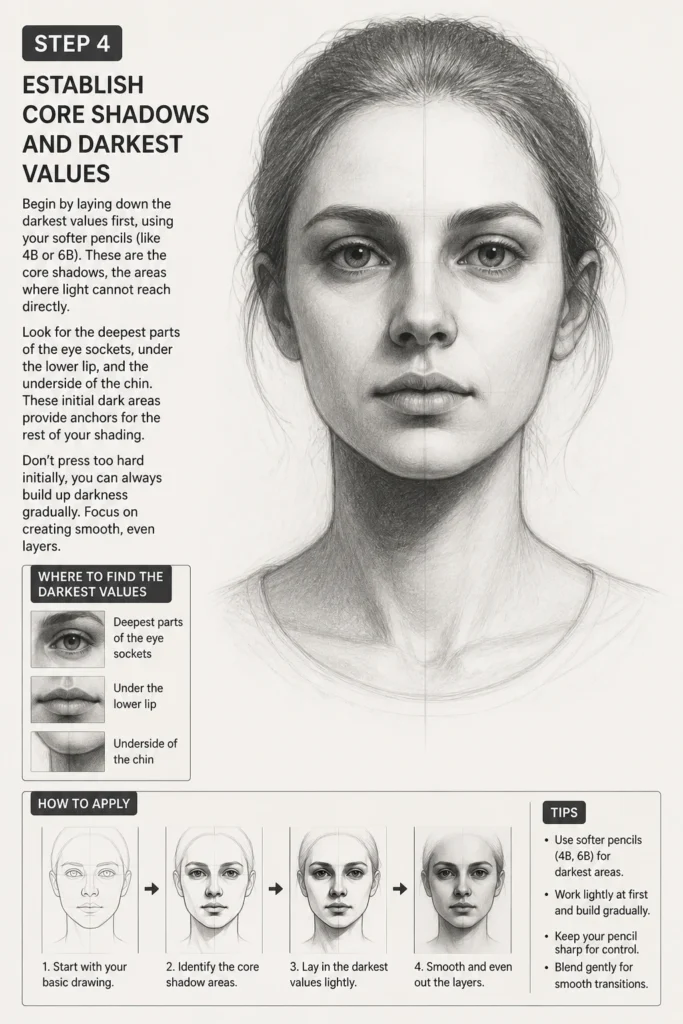
These initial dark areas provide anchors for the rest of your shading. Don’t press too hard initially; you can always build up darkness gradually. Focus on creating smooth, even layers.
Step 5: Build Up Mid-Tones and Form Shadows
Once your darkest values are in place, start building up the mid-tones using pencils like 2B and HB. These are the areas that receive some light but are not fully illuminated. Think about the gradual transition from light to dark.
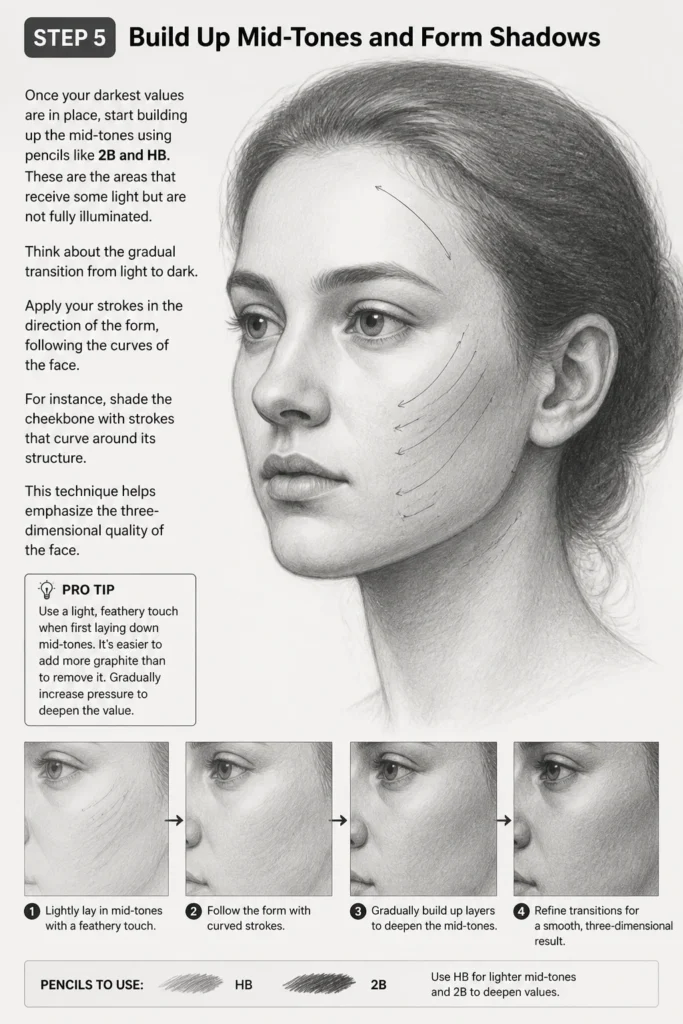
Apply your strokes in the direction of the form, following the curves of the face. For instance, shade the cheekbone with strokes that curve around its structure. This technique helps emphasize the three-dimensional quality of the face.
Pro Tip: Use a light, feathery touch when first laying down mid-tones. It’s easier to add more graphite than to remove it. Gradually increase pressure to deepen the value.
Step 6: Blend and Soften Transitions
Blending is essential for creating smooth, realistic skin tones. Use your blending stump or tortillon to gently smooth out your pencil strokes. Work in small circular motions or follow the direction of the form.
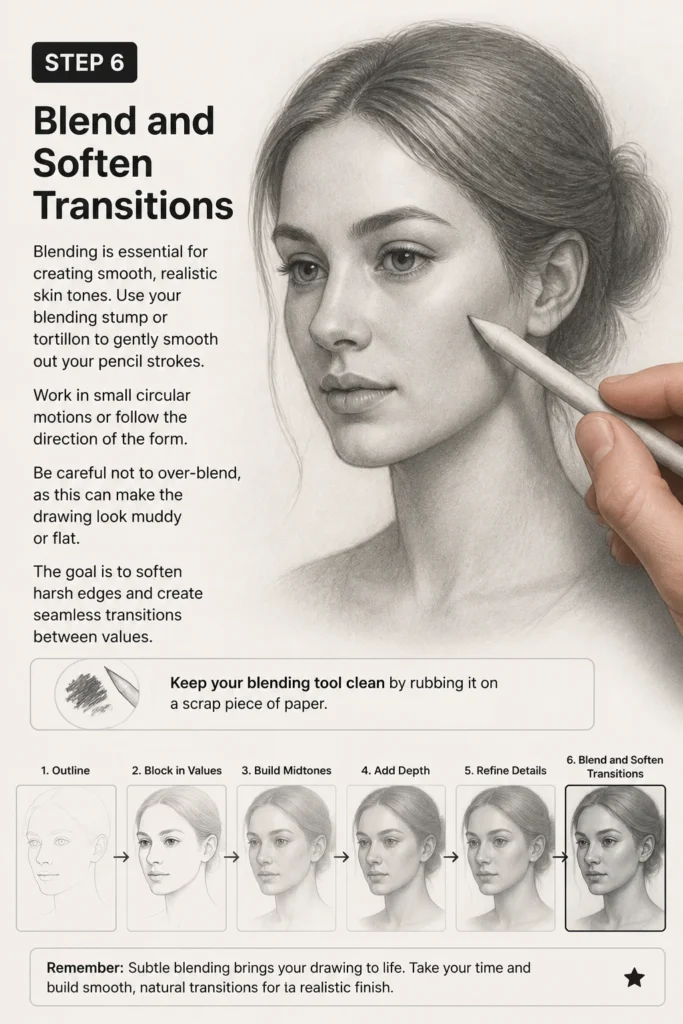
Be careful not to over-blend, as this can make the drawing look muddy or flat. The goal is to soften harsh edges and create seamless transitions between values. Keep your blending tool clean by rubbing it on a scrap piece of paper.
Step 7: Add Reflected Light and Highlights
Reflected light is subtle light bouncing back onto the shadowed areas from surrounding surfaces. This adds realism and prevents shadows from looking too flat or dead. Look for soft glows on the underside of the chin or neck.
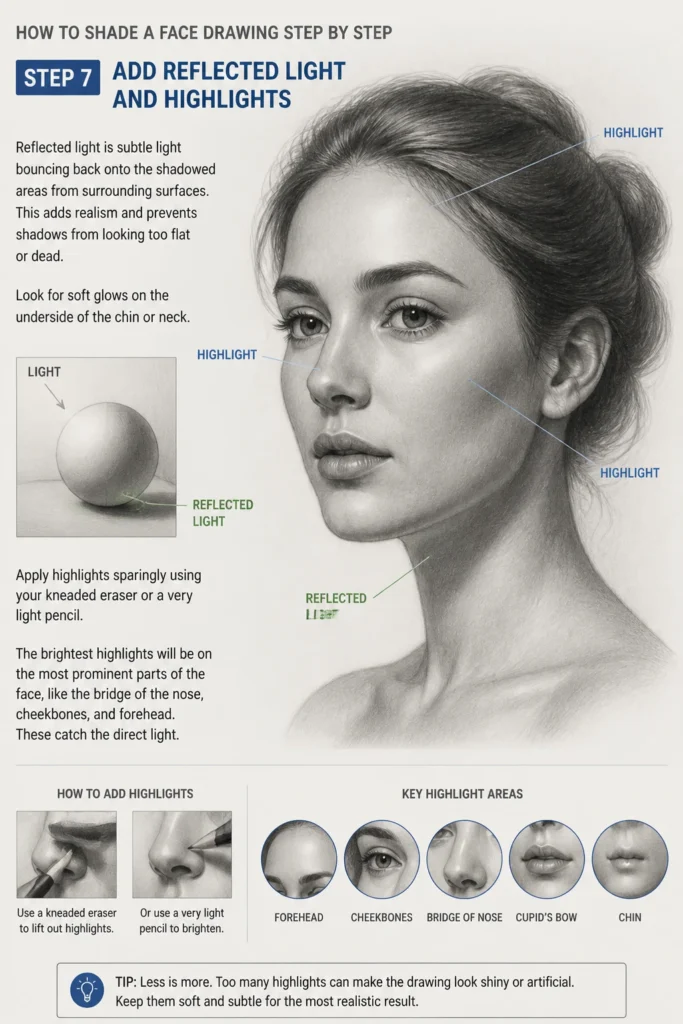
Apply highlights sparingly using your kneaded eraser or a very light pencil. The brightest highlights will be on the most prominent parts of the face, like the bridge of the nose, cheekbones, and forehead. These catch the direct light.
Step 8: Refine Details and Edges
Now is the time to go back and refine specific areas. Sharpen your pencils to add crisp details, such as the subtle lines around the eyes or the texture of the lips. Pay attention to the edges.
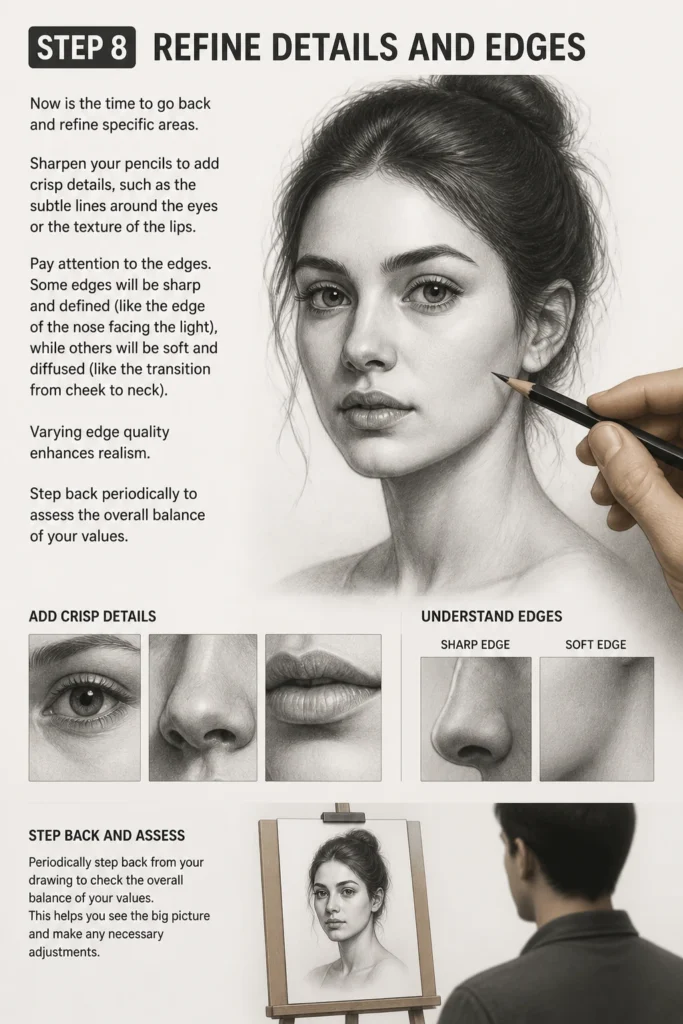
Some edges will be sharp and defined (like the edge of the nose facing the light), while others will be soft and diffused (like the transition from cheek to neck). Varying edge quality enhances realism. Step back periodically to assess the overall balance of your values.
Common Mistakes to Avoid
Shading Without a Clear Light Source
Many beginners start shading without first identifying where the light is coming from. This results in inconsistent shadows and highlights, making the face look flat and unrealistic. Always establish your light source at the very beginning of your shading process. Ensure every shadow and highlight aligns with that single light direction for a cohesive look.
Applying Too Much Pressure Too Soon
It’s tempting to press hard to get dark values quickly, but this makes it difficult to erase or lighten areas later. Hard pressure can also indent the paper, creating permanent lines. Begin with light layers and gradually build up your desired darkness, allowing for more control and flexibility.
Over-Blending or Under-Blending
Over-blending can remove all texture and make the drawing appear muddy and lifeless. Conversely, under-blending leaves harsh lines and choppy transitions, making the skin look rough. Aim for a balance: blend to soften transitions, but leave some subtle pencil marks to maintain texture and life.
Ignoring Reflected Light
Omitting reflected light makes shadows appear flat and heavy. Reflected light adds depth and dimension by showing subtle light bouncing back into the shadowed areas. Always look for these subtle glows in the darker regions to enhance realism and prevent areas from looking like black holes.
Troubleshooting
My Face Drawing Looks Flat
If your shaded face lacks depth, it often means you haven’t used a full range of values. Ensure you have distinct highlights, mid-tones, and true dark shadows. Revisit your light source and exaggerate the difference between the lit and shadowed areas. Push your darkest values further and ensure your brightest highlights pop.
My Blending Looks Muddy or Uneven
Muddy blending usually happens from over-blending or using a dirty blending tool. Clean your blending stump regularly by rubbing it on scrap paper or sanding it lightly. Focus on blending in small, controlled sections rather than trying to smooth a large area all at once. Build up your tones slowly before blending them.
I Can’t Get Smooth Transitions
Achieving smooth transitions requires patience and light pressure. Try using smaller, lighter strokes when laying down graphite, then blend very gently. You might also try building up layers with different pencil grades (e.g., HB for the lighter part of the transition, then 2B for the darker). Practice on a separate sheet to get a feel for the pressure needed.
Key Takeaways
- Always identify your light source before starting to shade.
- Break the face down into simple three-dimensional forms and planes.
- Establish your darkest values first to set the tone for the drawing.
- Build up mid-tones gradually, applying gentle pressure.
- Blend carefully to create smooth transitions, avoiding over-blending.
- Incorporate reflected light and crisp highlights for added realism and depth.
- Vary the quality of your edges – some sharp, some soft – to enhance dimension.
- Step back frequently to assess the overall balance of your values.
Frequently Asked Questions
What’s the best pencil for shading a face?
There isn’t one “best” pencil; a range is ideal. Start with an HB for light tones, move to 2B and 4B for mid-tones and core shadows, and use a 6B or 8B for your darkest accents. This variety allows for a full value scale.
How do I make my shading look smooth?
Smooth shading comes from using light, consistent pressure and building up layers gradually. Blend with a blending stump or tortillon using small, circular motions. Practice on scrap paper to refine your touch.
Should I shade the eyes first or last?
Many artists prefer to establish the general values of the entire face first, then move to details like the eyes. Shading the eyes too early can lead to them looking disconnected from the rest of the face. Integrate them into the overall value structure.
How do I choose a good reference photo for shading practice?
Look for reference photos with a clear, single light source that creates distinct highlights and shadows. Avoid overly flat lighting or images that are too dark to discern details. High-resolution images are always best for seeing subtle value changes.
Our Top Recommended Finds
- Derwent Graphic Drawing Pencils: A comprehensive set offering a wide range of graphite hardness for all your shading needs.
- Strathmore 400 Series Drawing Paper: Its smooth surface is excellent for blending and achieving subtle tonal variations without excessive tooth.
- Generals Paper Blending Stumps: Essential for smoothing out graphite, creating soft transitions, and reaching small areas.
Bring Your Portraits to Life
You now have a clear roadmap to transform your face drawings from flat outlines into dynamic, three-dimensional portraits. The journey of shading is one of observation, patience, and practice. Each stroke and blend contributes to the illusion of form and light.
Don’t be afraid to experiment with different pressures and blending techniques. Take what you’ve learned here and apply it to your next drawing session. The more you practice, the more intuitive the process will become, opening up a world of realistic and expressive art. Start shading today and see the incredible difference it makes!