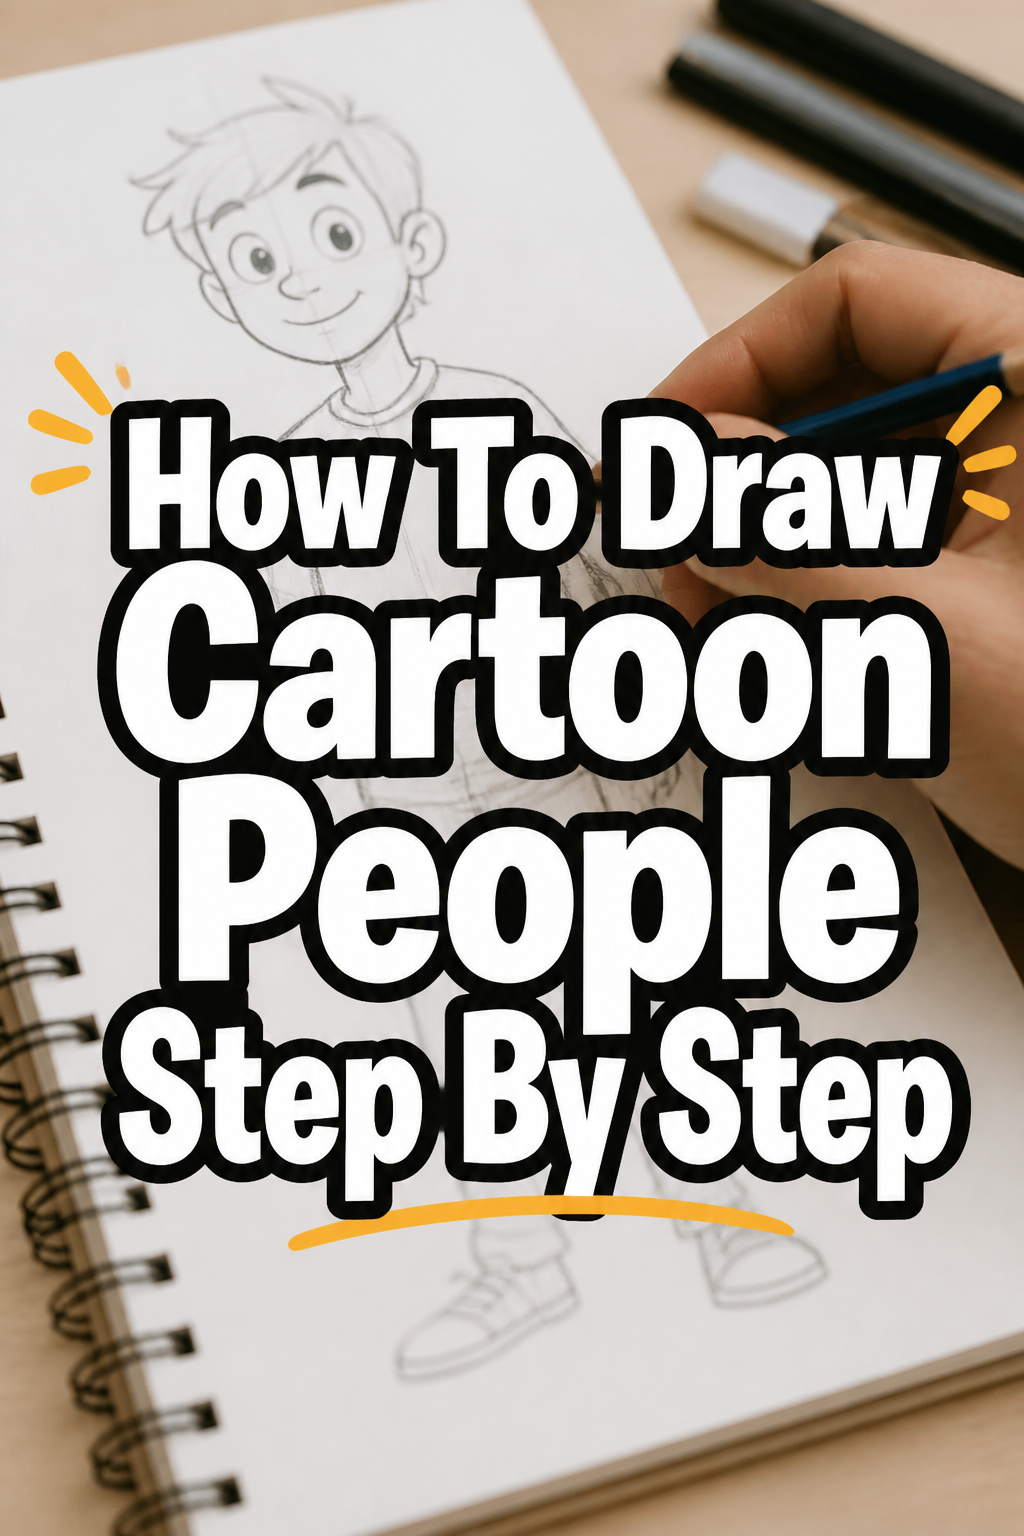
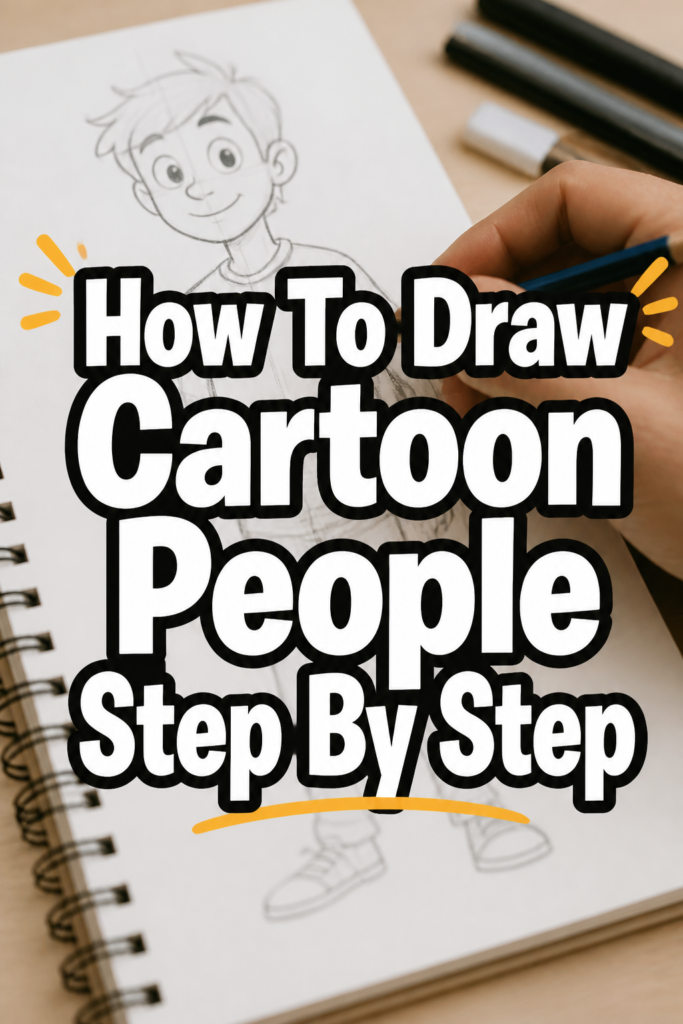
🎨 How To Draw Cartoon People Step By Step

& Painting
No rigid rules or pretension. Just practical guides, medium comparisons, and encouraging tips to help you enjoy the drawing & painting process.
Learning to draw cartoons can unlock a whole new way of seeing the world.
It’s a fantastic skill that anyone can develop with just a pencil and some practice.
I’ve spent years filling sketchbooks with characters, and I’m thrilled to share my easy-to-follow method with you today.
Quick Overview
This guide will walk you through creating your very own cartoon character from scratch. You’ll learn the fundamental shapes and techniques that professional animators and illustrators use. By the end, you’ll have a complete, expressive cartoon person ready for more adventures.
- Time needed: 1-2 hours for your first full character
- Difficulty: Beginner
- What you’ll need: Pencil (HB or 2B recommended), eraser, paper, optional fine-tip pen
Step-by-Step Instructions
Step 1: Gather Your Tools and Set Up
Before you begin any creative project, having the right setup makes a big difference. Clear your workspace and ensure you have comfortable lighting. This helps you focus entirely on your drawing.
Choose a comfortable drawing spot. A well-lit desk is ideal for seeing your lines clearly.
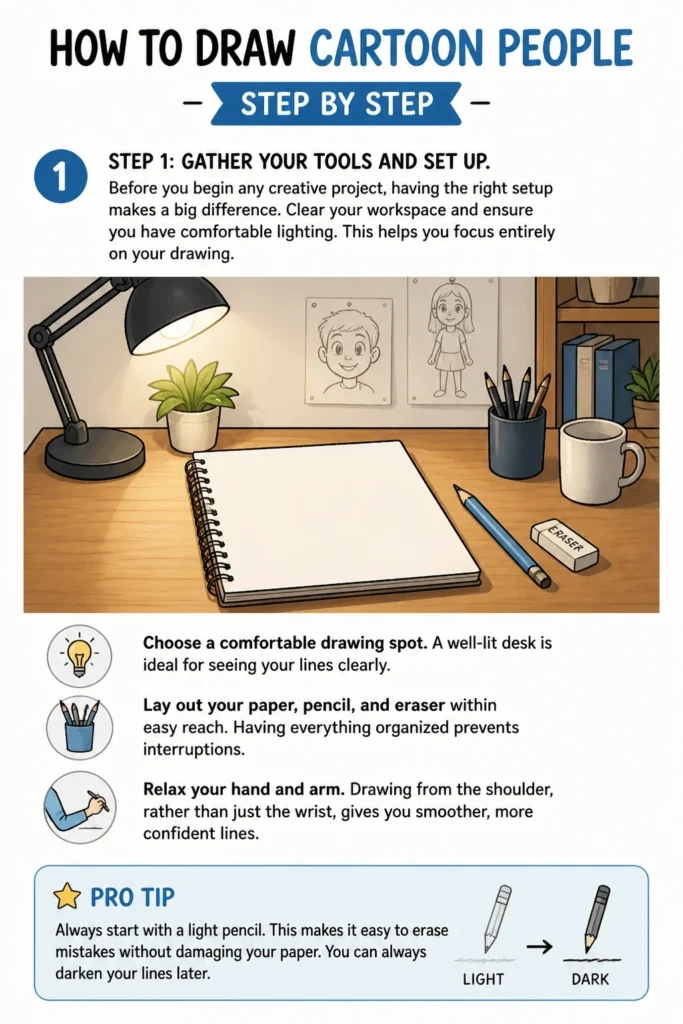
Lay out your paper, pencil, and eraser within easy reach. Having everything organized prevents interruptions.
Relax your hand and arm. Drawing from the shoulder, rather than just the wrist, gives you smoother, more confident lines.
Pro Tip: Always start with a light pencil. This makes it easy to erase mistakes without damaging your paper. You can always darken your lines later.
Step 2: Start with Basic Shapes: The Head
Every cartoon character begins with simple, geometric forms. These foundational shapes act as your blueprint, guiding the entire drawing process. The head is often the most expressive part, so we start there.
Sketch a large, slightly squashed oval for the main part of the head. Think of it like an egg lying on its side.
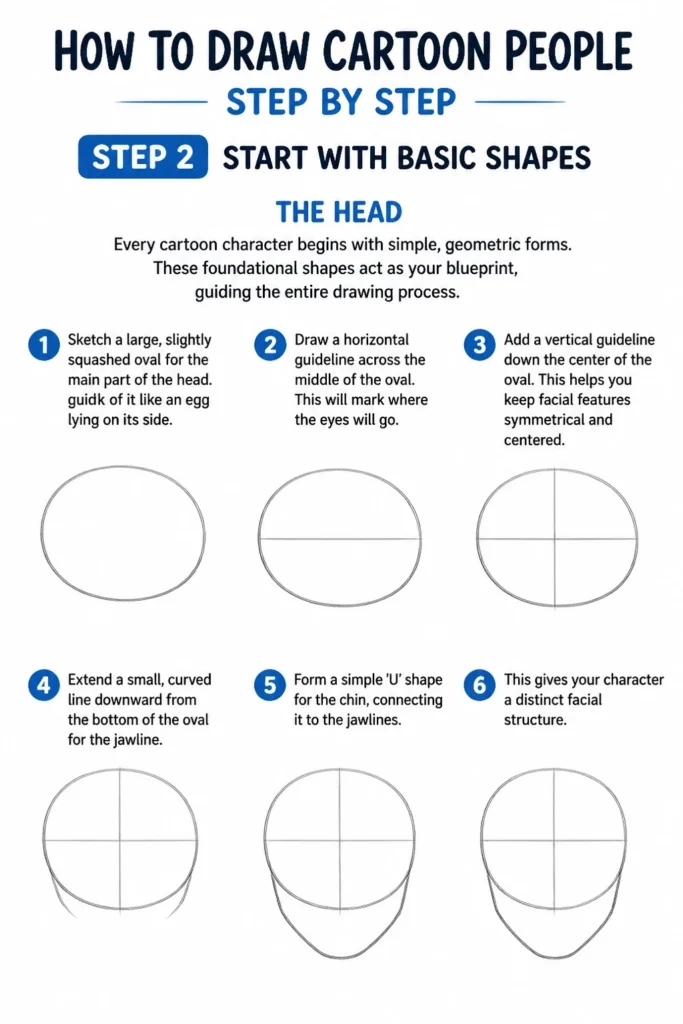
Draw a horizontal guideline across the middle of the oval. This will mark where the eyes will go.
Add a vertical guideline down the center of the oval. This helps you keep facial features symmetrical and centered.
Extend a small, curved line downward from the bottom of the oval for the jawline. This will connect to the chin.
Form a simple ‘U’ shape for the chin, connecting it to the jawlines. This gives your character a distinct facial structure.
Step 3: Sketch the Torso and Limbs
Once the head is in place, we build the rest of the body around it using more basic shapes. This method ensures your character has proper proportions and a natural pose. Keep your lines light and loose in this stage.
Draw a small circle or oval beneath the head for the neck. Connect it to the bottom of the head shape.
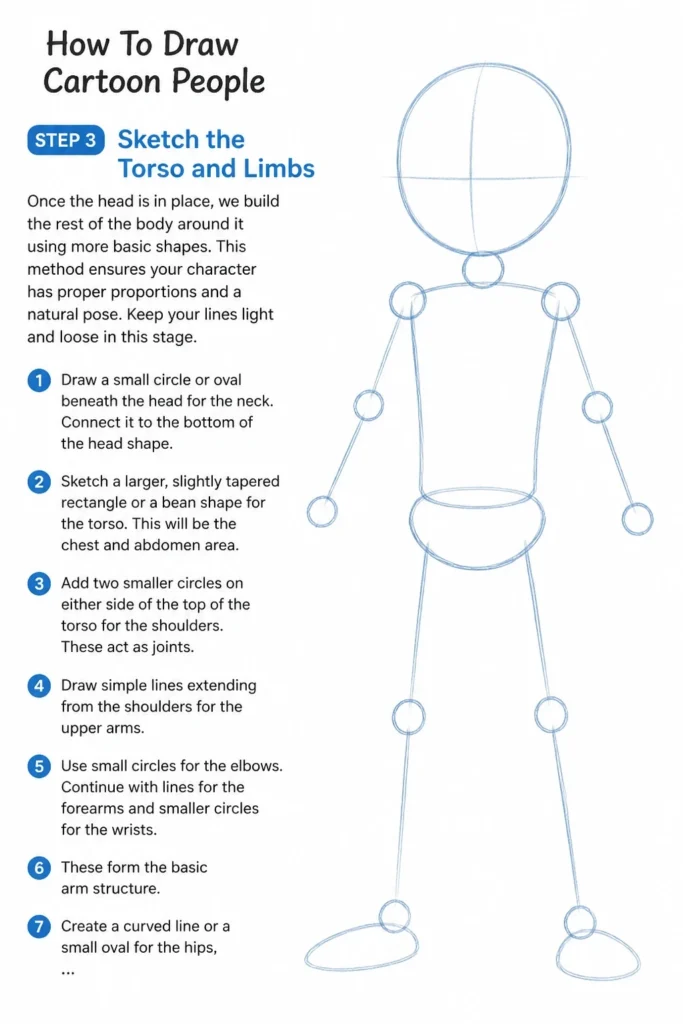
Sketch a larger, slightly tapered rectangle or a bean shape for the torso. This will be the chest and abdomen area.
Add two smaller circles on either side of the top of the torso for the shoulders. These act as joints.
Draw simple lines extending from the shoulders for the upper arms. Use small circles for the elbows.
Continue with lines for the forearms and smaller circles for the wrists. These form the basic arm structure.
Create a curved line or a small oval for the hips, connecting it to the bottom of the torso. This defines the character’s lower body.
Sketch lines for the upper legs, using circles for the knees. Then, add lines for the lower legs, with circles for the ankles.
Pro Tip: Think of your character as a flexible mannequin. Use simple stick figures and circles at joints to establish the pose before adding volume. This makes dynamic poses much easier.
Step 4: Add Facial Features and Hair
Now it’s time to bring your character’s personality to life. Facial features are crucial for conveying emotion and individuality. Hair also plays a big role in defining a character’s look.
Place two simple circles or ovals on the horizontal guideline for the eyes. Adjust their size and spacing for different expressions.
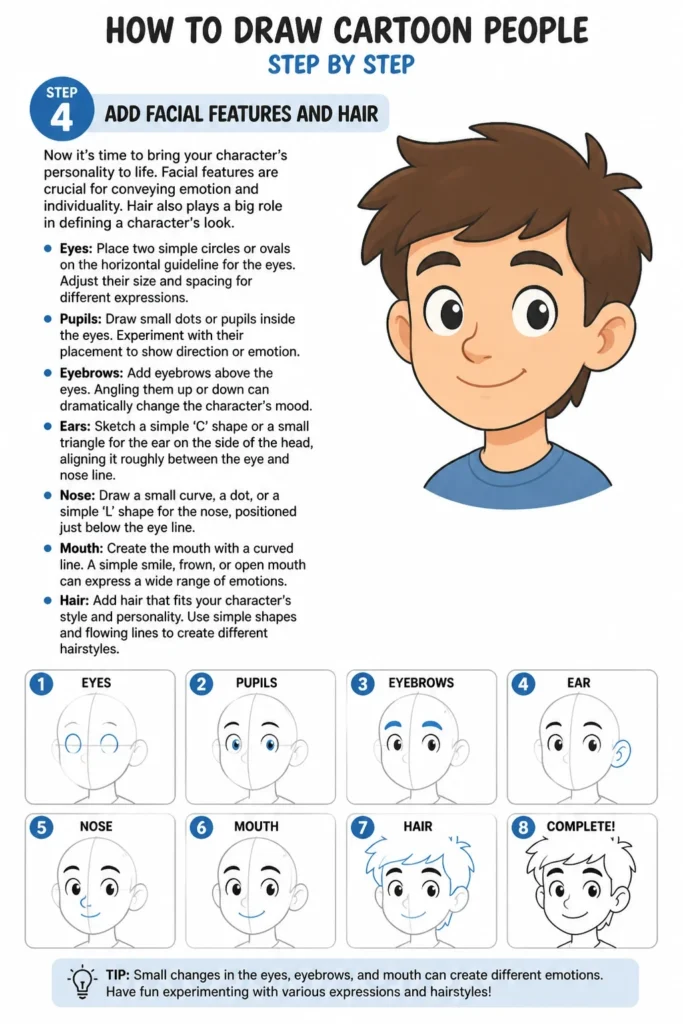
Draw small dots or pupils inside the eyes. Experiment with their placement to show direction or emotion.
Add eyebrows above the eyes. Angling them up or down can dramatically change the character’s mood.
Sketch a simple ‘C’ shape or a small triangle for the ear on the side of the head, aligning it roughly between the eye and nose line.
Draw a small curve, a dot, or a simple ‘L’ shape for the nose, positioned just below the eye line.
Create the mouth with a curved line. A simple arch can be a smile, while an inverted arch can show sadness.
Outline the basic shape of the hair. Think of it as a separate mass that sits on top of the head, rather than individual strands.
Add some simple lines within the hair shape to suggest texture or movement. Don’t overdo the details at this stage.
Step 5: Develop Hands and Feet
Hands and feet can be tricky, but by breaking them down into simpler forms, they become much more manageable. Cartoons often simplify these elements for clarity and expression.
Draw a mitten shape for the hand at the end of each wrist. This is a good starting point for cartoon hands.
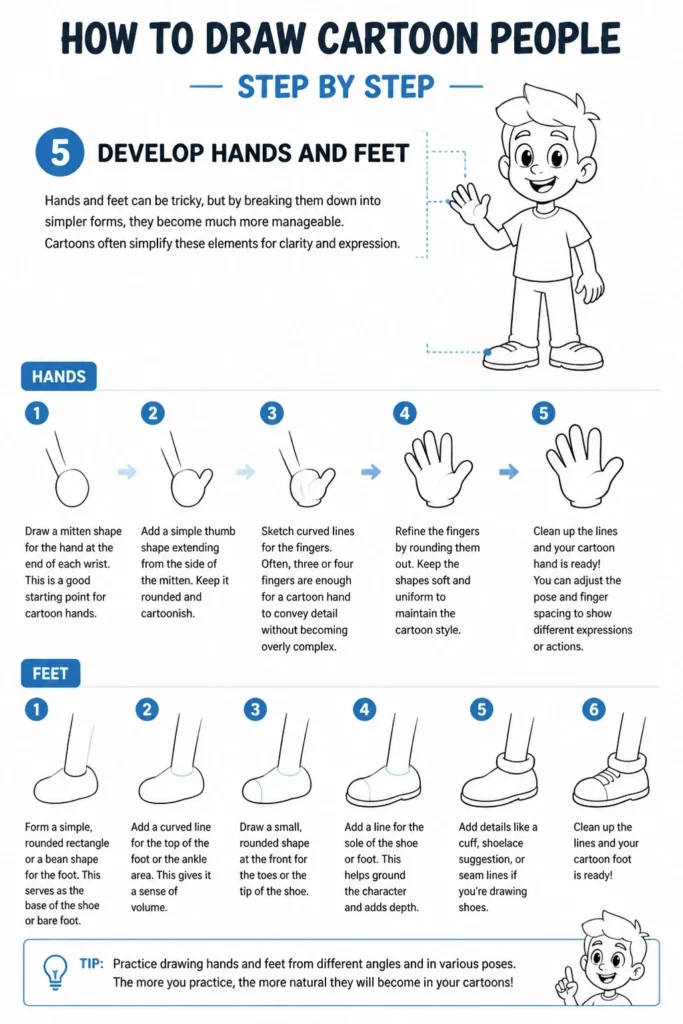
Add a simple thumb shape extending from the side of the mitten. Keep it rounded and cartoonish.
Sketch curved lines for the fingers. Often, three or four fingers are enough for a cartoon hand to convey detail without becoming overly complex.
Form a simple, rounded rectangle or a bean shape for the foot. This serves as the base of the shoe or bare foot.
Add a curved line for the top of the foot or the ankle area. This gives it a sense of volume.
Draw a small, rounded shape at the front for the toes or the tip of the shoe. Keep these elements simple and clear.
Pro Tip: Hands and feet are often simplified in cartoons. Don’t feel pressured to draw every joint or nail. Focus on conveying the overall shape and action.
Step 6: Define the Clothing and Details
Clothing helps define your character’s personality, occupation, or even their mood. Adding details makes your character feel more complete and unique. Think about how clothes drape and fold.
Outline the basic shape of your character’s clothing over the body form. Don’t draw clothes flat against the body; allow for some folds and wrinkles.
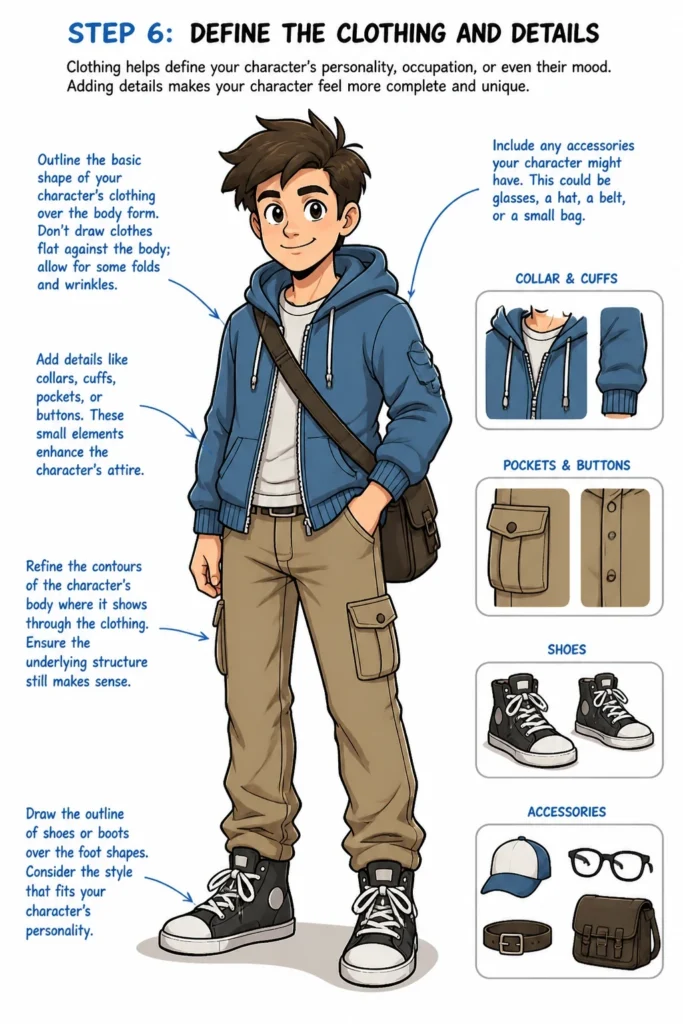
Add details like collars, cuffs, pockets, or buttons. These small elements enhance the character’s attire.
Draw the outline of shoes or boots over the foot shapes. Consider the style that fits your character’s personality.
Refine the contours of the character’s body where it shows through the clothing. Ensure the underlying structure still makes sense.
Include any accessories your character might have. This could be glasses, a hat, a belt, or a small bag.
Step 7: Refine and Ink Your Character
With all the elements in place, it’s time to clean up your drawing and make it permanent. This stage brings crispness and finality to your cartoon.
Lighten your initial sketch lines using a kneaded eraser. You want them barely visible, acting as a guide.
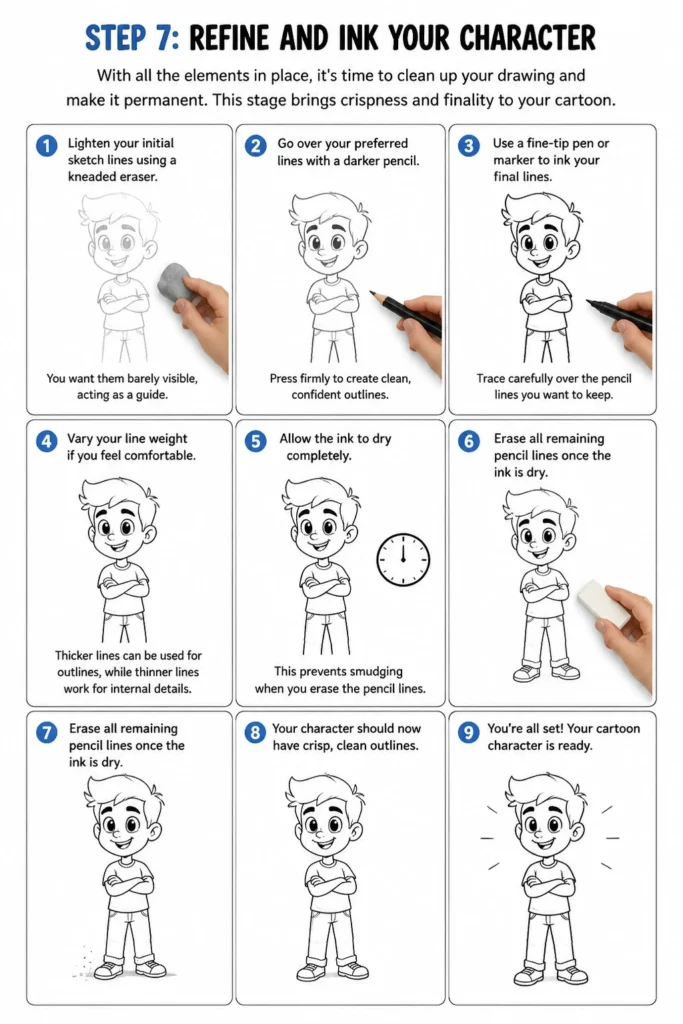
Go over your preferred lines with a darker pencil. Press firmly to create clean, confident outlines.
Use a fine-tip pen or marker to ink your final lines. Trace carefully over the pencil lines you want to keep.
Vary your line weight if you feel comfortable. Thicker lines can be used for outlines, while thinner lines work for internal details.
Allow the ink to dry completely. This prevents smudging when you erase the pencil lines.
Erase all remaining pencil lines once the ink is dry. Your character should now have crisp, clean outlines.
Step 8: Add Shading and Color (Optional)
Bringing your character to life with shading and color adds depth and vibrancy. This is where your cartoon truly pops off the page.
Choose a light source for your character. Decide where the light is coming from to determine shadow placement.
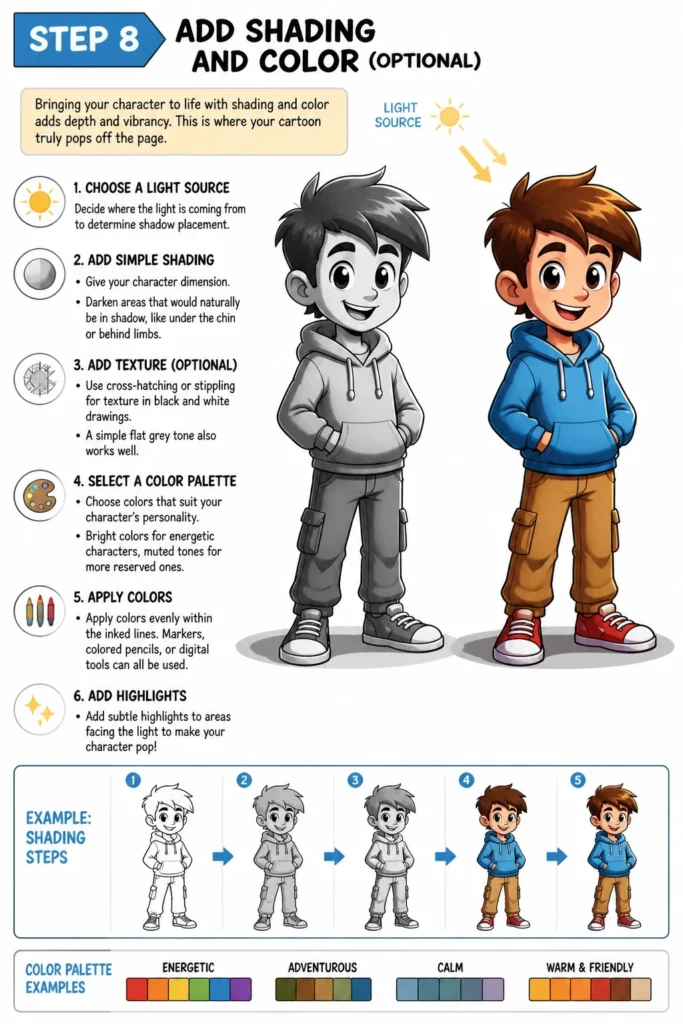
Add simple shading to give your character dimension. Darken areas that would naturally be in shadow, like under the chin or behind limbs.
Use cross-hatching or stippling for texture in black and white drawings. A simple flat grey tone also works well.
Select a color palette that suits your character’s personality. Bright colors for energetic characters, muted tones for more reserved ones.
Apply colors evenly within your inked lines. Markers, colored pencils, or digital tools can all be used.
Consider adding subtle highlights to areas facing the light source. This enhances the three-dimensional effect.
Common Mistakes to Avoid
Drawing Too Stiffly
Many beginners draw figures that look rigid, like mannequins. This happens when you focus too much on straight lines and perfect symmetry. Cartoon characters thrive on exaggeration and fluid movement. Instead, practice drawing with loose, flowing lines and use curved shapes to suggest action and life. Don’t be afraid to give your characters dynamic poses, even if they’re just standing.
Ignoring Basic Proportions
While cartoons allow for exaggeration, completely ignoring basic human proportions can make your character look odd or unbalanced. For example, if the head is too small for the body or limbs are disproportionately short, it can break the illusion. Always start by sketching out rough shapes and proportions before adding details. Compare the size of the head to the body, and the length of the arms to the legs.
Over-Detailing Too Early
It’s tempting to jump straight into drawing intricate eyes or detailed clothing. However, doing this before establishing the main form can lead to a messy, confusing drawing. You might realize the eye is in the wrong place after spending too much time on it. Always work from general shapes to specific details. Build the foundation first, then refine.
Pressing Too Hard
Starting with heavy, dark lines makes it incredibly difficult to erase mistakes without leaving marks or damaging the paper. This can discourage you when you need to make corrections. Always begin your sketches with very light pencil strokes. These light lines are easy to modify or erase, giving you the freedom to experiment and correct as you go. You can always darken the lines once you’re confident in your drawing.
Troubleshooting
My Characters Look Flat
If your cartoons lack depth, it’s often due to a lack of overlapping shapes or insufficient volume. Characters drawn straight-on without any pose can also appear flat. Try to imagine your character as a three-dimensional object. Overlap body parts slightly – an arm slightly in front of the torso, for instance. Also, consider adding simple shading to suggest a light source. Even a basic shadow under the chin can make a big difference.
Hands and Feet Are Difficult
Hands and feet are notoriously challenging for many artists, even experienced ones. The key in cartooning is simplification. Instead of trying to draw every bone and joint, break them down into basic shapes like mittens, ovals, and cylinders. Practice drawing them in various simple poses: a fist, an open hand, a foot pointing forward. Focus on the overall gesture rather than minute details. Remember, in cartoons, less is often more.
I Can’t Get the Expressions Right
Cartoon expressions rely heavily on exaggeration of a few key facial features. If your expressions aren’t landing, focus on the eyebrows and mouth. Slightly altering the angle of the eyebrows (up for surprise, down for anger) or the curve of the mouth (wide for joy, downturned for sadness) can dramatically change an expression. Practice drawing just eyes and mouths with different emotions. Experiment with how far apart the eyes are or how big the mouth opens.
Key Takeaways
- Always start with light, simple geometric shapes to build your character’s foundation.
- Break down complex body parts like hands and feet into easier, cartoon-friendly forms.
- Use guidelines for facial features to ensure symmetry and correct placement.
- Work from general shapes to specific details, avoiding over-detailing too early.
- Experiment with expressions by exaggerating key features like eyebrows and the mouth.
- Practice regularly and don’t be afraid to make mistakes; they are part of the learning process.
Frequently Asked Questions
Do I need special art supplies?
Not at all! You can start drawing cartoon people with just a regular pencil, an eraser, and any paper you have on hand. As you get more serious, you might consider a range of pencils (like HB, 2B), a kneaded eraser, and smoother paper, but they are not necessary for beginners.
How do I find my own cartoon style?
Finding your style comes with practice and experimentation. Start by mimicking artists you admire, but consciously try to add your own twist. Experiment with different eye shapes, body proportions, and ways of drawing hair. Over time, your unique preferences will naturally emerge and form your personal style.
Is it okay to trace?
Tracing can be a useful learning tool, especially for understanding proportions and how different parts connect. Use it sparingly to study specific elements, but don’t rely on it entirely. The goal is to eventually draw freehand, internalizing the shapes and structures you learn from tracing.
How often should I practice?
Consistency is more important than long, infrequent sessions. Aim for short, regular practice sessions, even just 15-30 minutes a few times a week. Daily sketching, even quick doodles, will build your muscle memory and observational skills much faster than drawing for hours once a month.
Our Top Recommended Finds
- Quality Sketchbook: A good sketchbook with smooth, durable paper makes drawing more enjoyable and keeps your progress organized.
- Pencil Set (HB, 2B, 4B): Having a few different pencil hardnesses allows you to sketch lightly and then refine with darker lines.
- Kneaded Eraser: This type of eraser is gentle on paper, doesn’t leave crumbs, and can lift pencil marks without smudging.
Your Cartooning Journey Starts Now!
You’ve just taken the first exciting steps into the world of cartoon drawing. Remember, every master artist started exactly where you are now. The most important thing is to keep practicing and to enjoy the process. Don’t worry about perfection; focus on progress and having fun.
Grab your pencil and paper right now. Try drawing another character, perhaps in a different pose or with a new expression. The more you draw, the more confident and skilled you’ll become. Who knows what amazing characters you’ll create next?
& Painting
No rigid rules or pretension. Just practical guides, medium comparisons, and encouraging tips to help you enjoy the drawing & painting process.