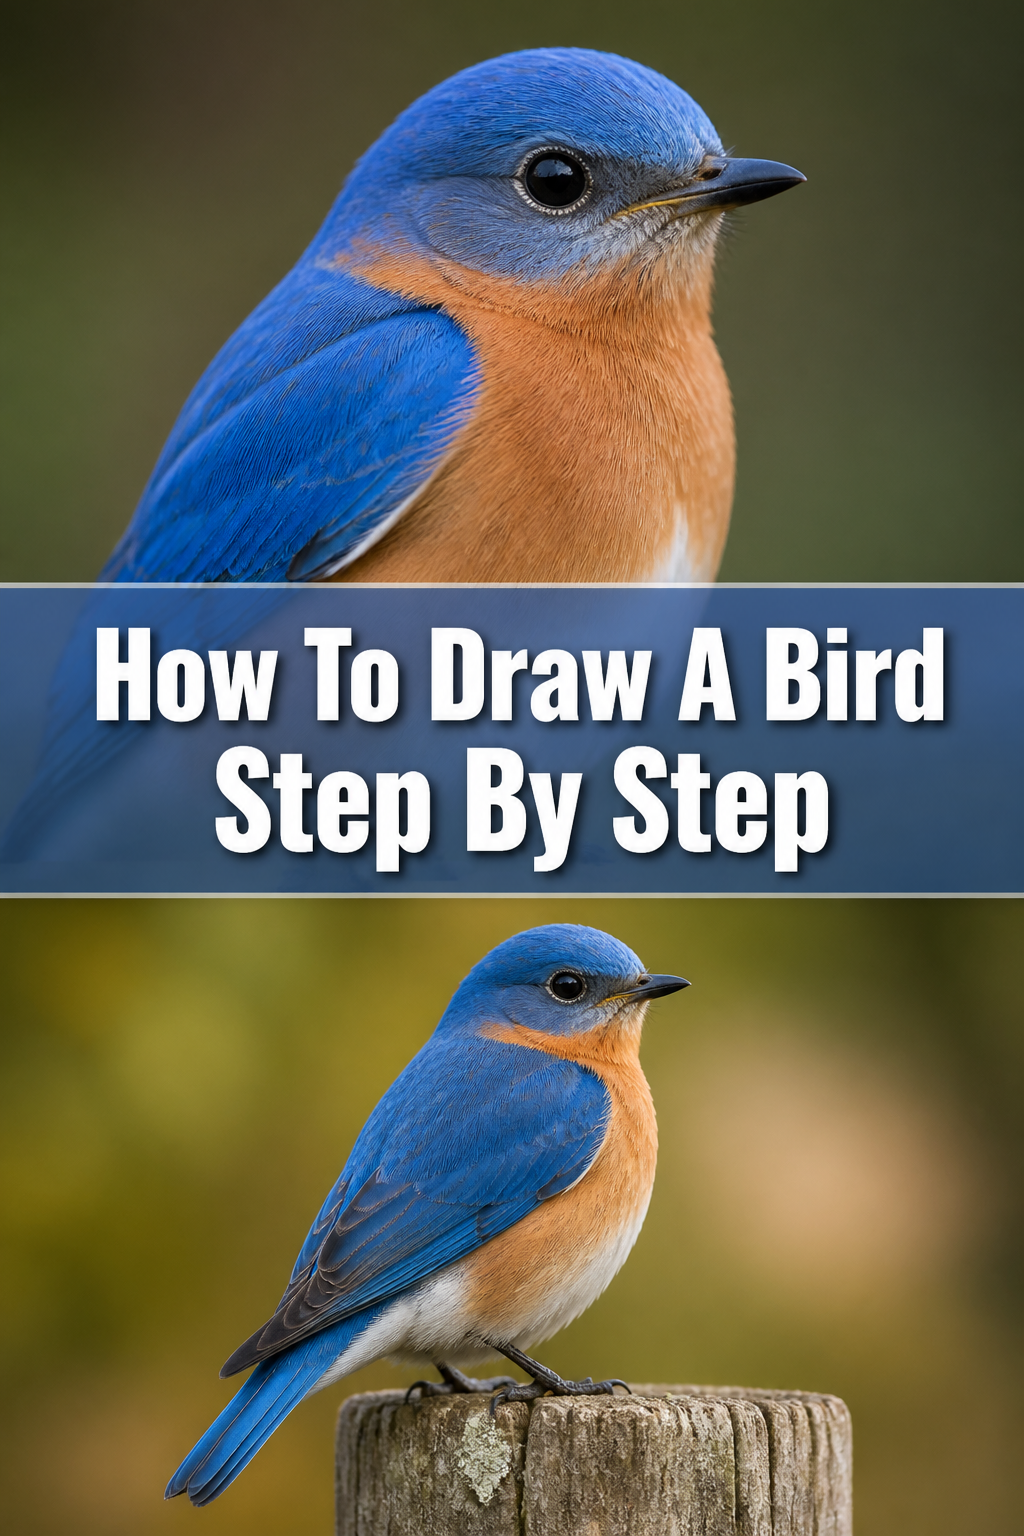
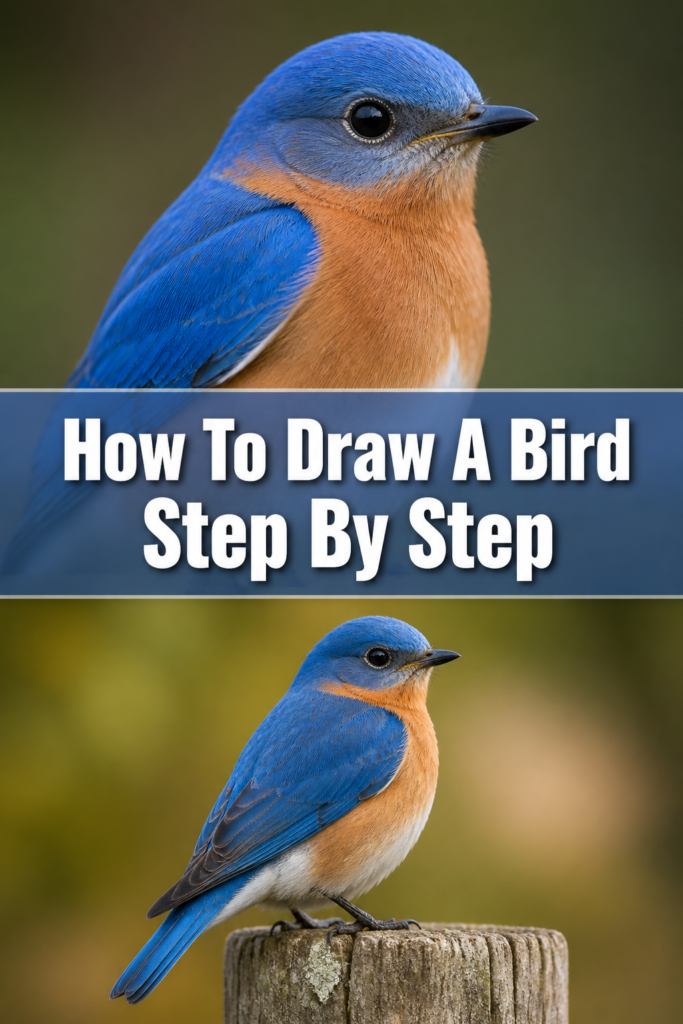
🐦 How To Draw A Bird Step By Step

& Painting
No rigid rules or pretension. Just practical guides, medium comparisons, and encouraging tips to help you enjoy the drawing & painting process.
Drawing a bird can seem daunting at first, with all those delicate feathers and intricate shapes.
But what if you could break it down into simple, manageable steps that build confidence with every line?
I’ve spent countless hours sketching nature, and this guide will share a straightforward method to help you create your own beautiful bird illustration.
Quick Overview
This guide will walk you through the process of drawing a charming bird, from initial shapes to final details.
You’ll learn to see the bird not as a complex creature, but as a series of simple forms you can easily replicate.
- Time needed: 45-75 minutes
- Difficulty: Beginner
- What you’ll need: Pencil (HB and 2B recommended), paper, eraser, optional blending stump or tissue
Step-by-Step Instructions
Step 1: Sketch Basic Shapes
Every great bird drawing begins with simple, foundational shapes. Think of the bird’s body as a combination of circles and ovals.
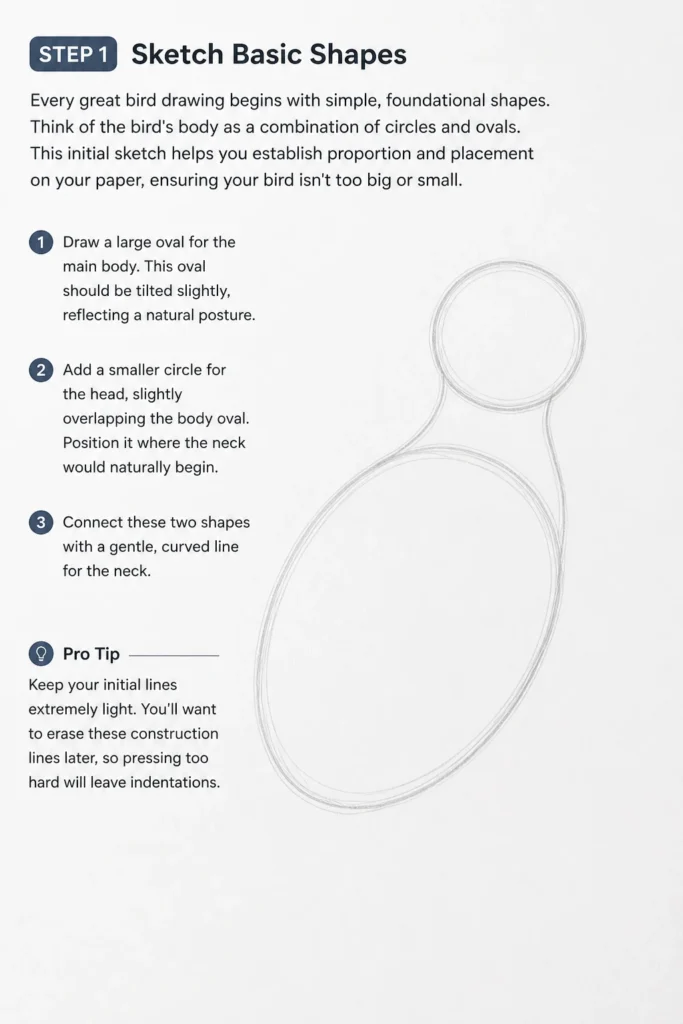
This initial sketch helps you establish proportion and placement on your paper, ensuring your bird isn’t too big or small.
- Draw a large oval for the main body. This oval should be tilted slightly, reflecting a natural posture.
- Add a smaller circle for the head, slightly overlapping the body oval. Position it where the neck would naturally begin.
- Connect these two shapes with a gentle, curved line for the neck. Keep all these lines very light.
Pro Tip: Keep your initial lines extremely light. You’ll want to erase these construction lines later, so pressing too hard will leave indentations.
Step 2: Define Body and Head Outline
Now that you have your basic shapes, it’s time to refine them into a more recognizable bird form. Think about the smooth transitions between body parts.
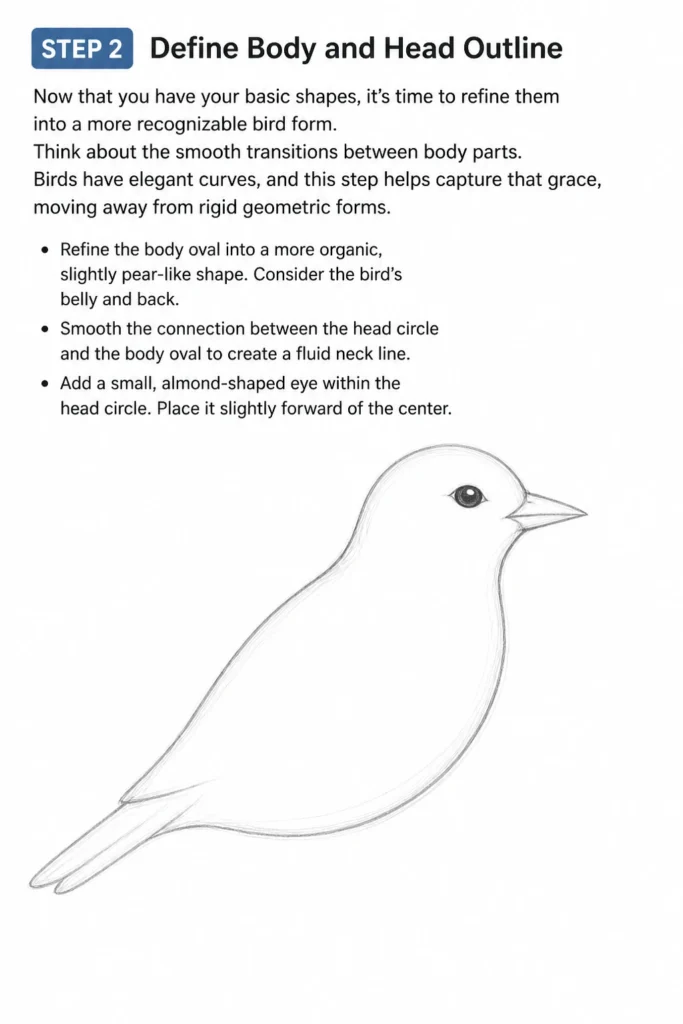
Birds have elegant curves, and this step helps capture that grace, moving away from rigid geometric forms.
- Refine the body oval into a more organic, slightly pear-like shape. Consider the bird’s belly and back.
- Smooth the connection between the head circle and the body oval to create a fluid neck line.
- Add a small, almond-shaped eye within the head circle. Place it slightly forward of the center.
Step 3: Add Beak and Tail
The beak and tail are crucial for giving your bird character and identifying its species, even if it’s a generic one.
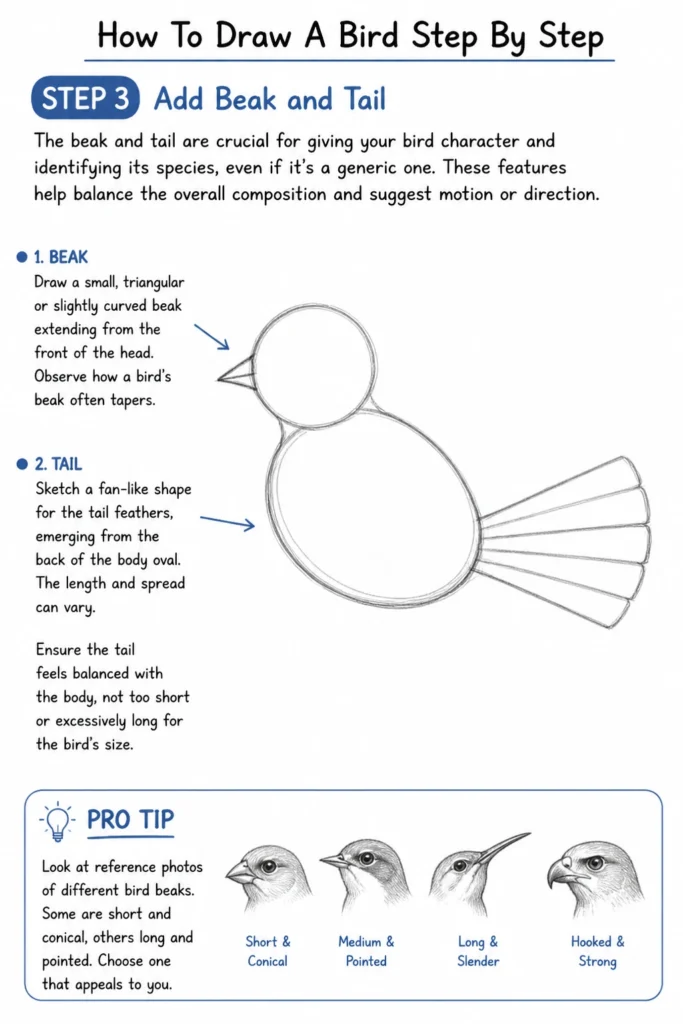
These features help balance the overall composition and suggest motion or direction.
- Draw a small, triangular or slightly curved beak extending from the front of the head. Observe how a bird’s beak often tapers.
- Sketch a fan-like shape for the tail feathers, emerging from the back of the body oval. The length and spread can vary.
- Ensure the tail feels balanced with the body, not too short or excessively long for the bird’s size.
Pro Tip: Look at reference photos of different bird beaks. Some are short and conical, others long and pointed. Choose one that appeals to you.
Step 4: Outline Wings and Legs
Wings and legs give your bird the ability to fly and perch, making it feel dynamic and alive.
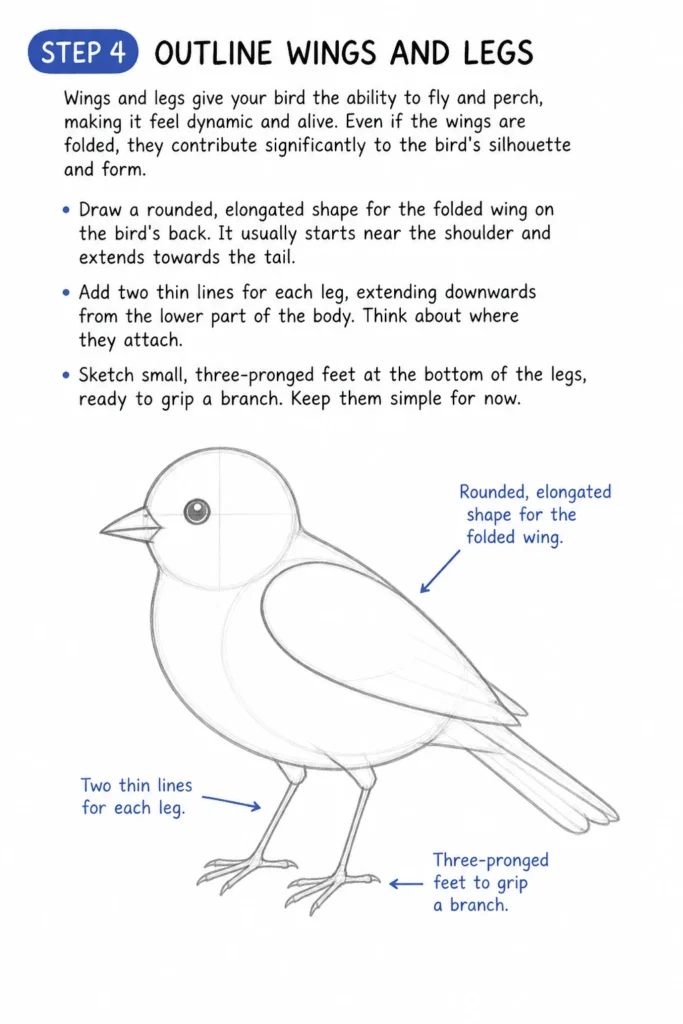
Even if the wings are folded, they contribute significantly to the bird’s silhouette and form.
- Draw a rounded, elongated shape for the folded wing on the bird’s back. It usually starts near the shoulder and extends towards the tail.
- Add two thin lines for each leg, extending downwards from the lower part of the body. Think about where they attach.
- Sketch small, three-pronged feet at the bottom of the legs, ready to grip a branch. Keep them simple for now.
Step 5: Erase Construction Lines and Refine Outline
This is where your bird truly starts to emerge from the initial sketch. Cleaning up the lines makes a big difference.
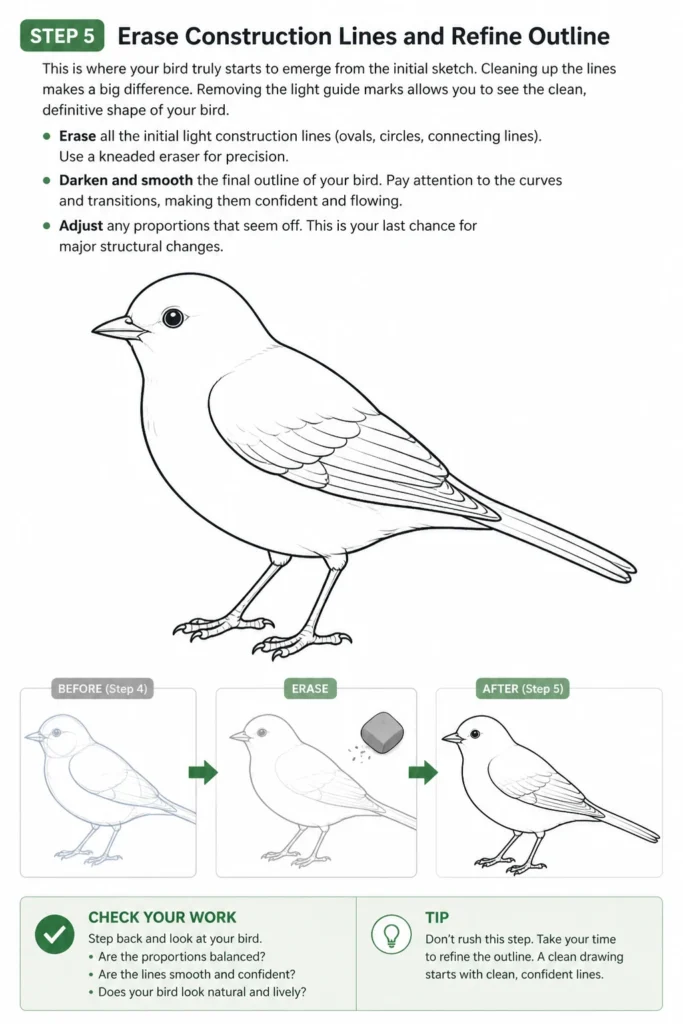
Removing the light guide marks allows you to see the clean, definitive shape of your bird.
- Gently erase all the initial light construction lines (ovals, circles, connecting lines). Use a kneaded eraser for precision.
- Darken and smooth the final outline of your bird. Pay attention to the curves and transitions, making them confident and flowing.
- Adjust any proportions that seem off. This is your last chance for major structural changes.
Step 6: Add Feather Details and Texture
Feathers are what make a bird a bird, adding texture and visual interest. You don’t need to draw every single feather.
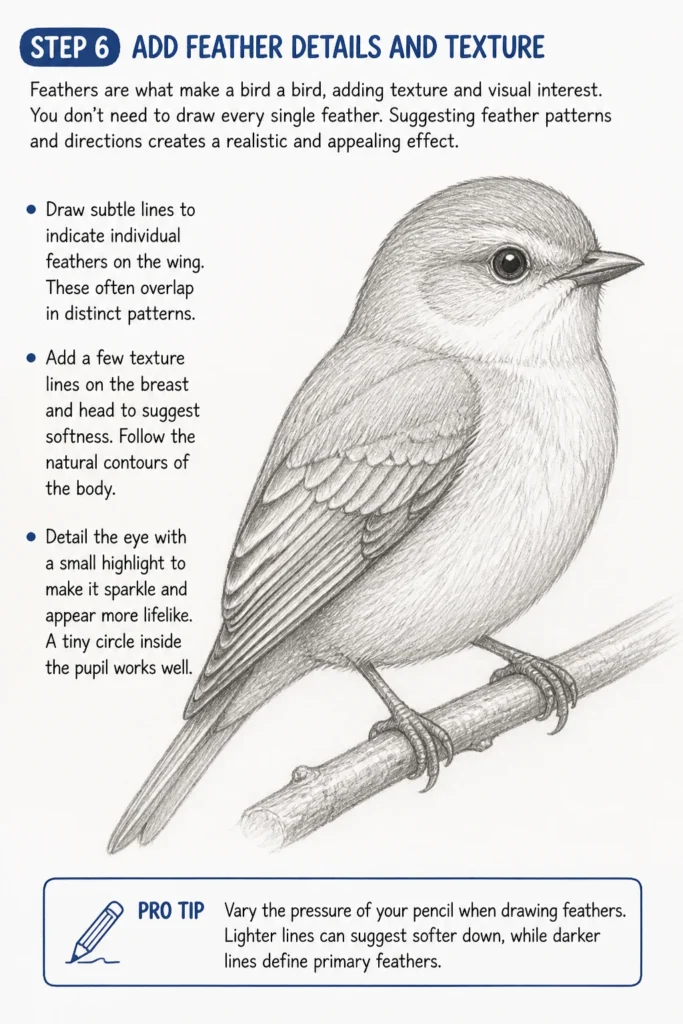
Suggesting feather patterns and directions creates a realistic and appealing effect.
- Draw subtle lines to indicate individual feathers on the wing. These often overlap in distinct patterns.
- Add a few texture lines on the breast and head to suggest softness. Follow the natural contours of the body.
- Detail the eye with a small highlight to make it sparkle and appear more lifelike. A tiny circle inside the pupil works well.
Pro Tip: Vary the pressure of your pencil when drawing feathers. Lighter lines can suggest softer down, while darker lines define primary feathers.
Step 7: Introduce Shading and Value
Shading gives your bird depth, dimension, and makes it look three-dimensional on the page.
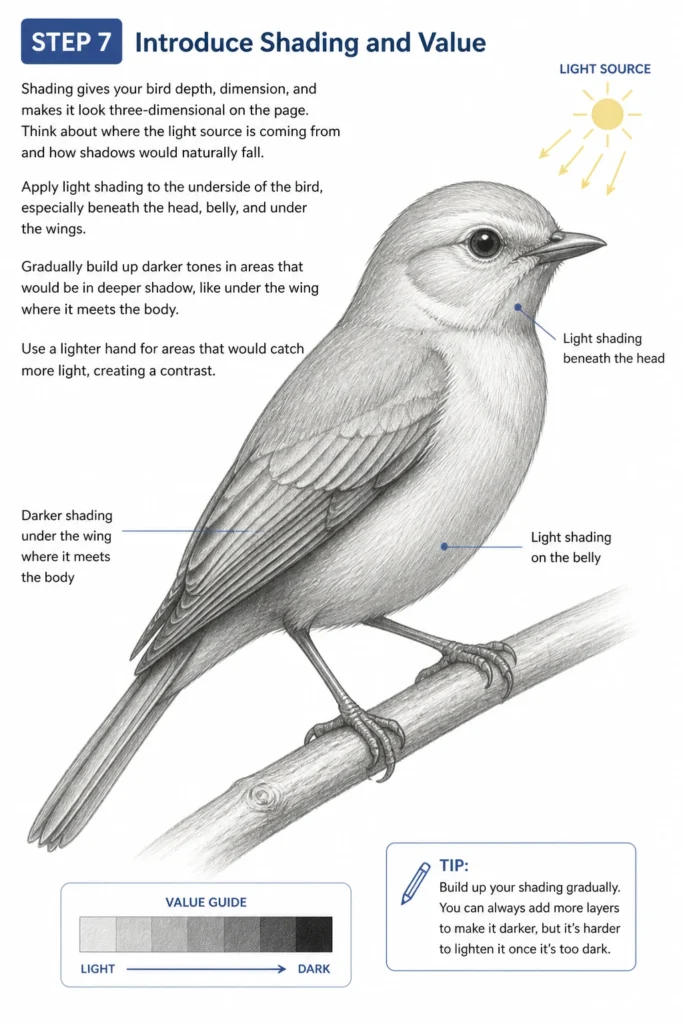
Think about where the light source is coming from and how shadows would naturally fall.
- Apply light shading to the underside of the bird, especially beneath the head, belly, and under the wings.
- Gradually build up darker tones in areas that would be in deeper shadow, like under the wing where it meets the body.
- Use a lighter hand for areas that would catch more light, creating a contrast.
Step 8: Final Touches and Blending
The final touches bring your bird to life, adding polish and refining the overall appearance.
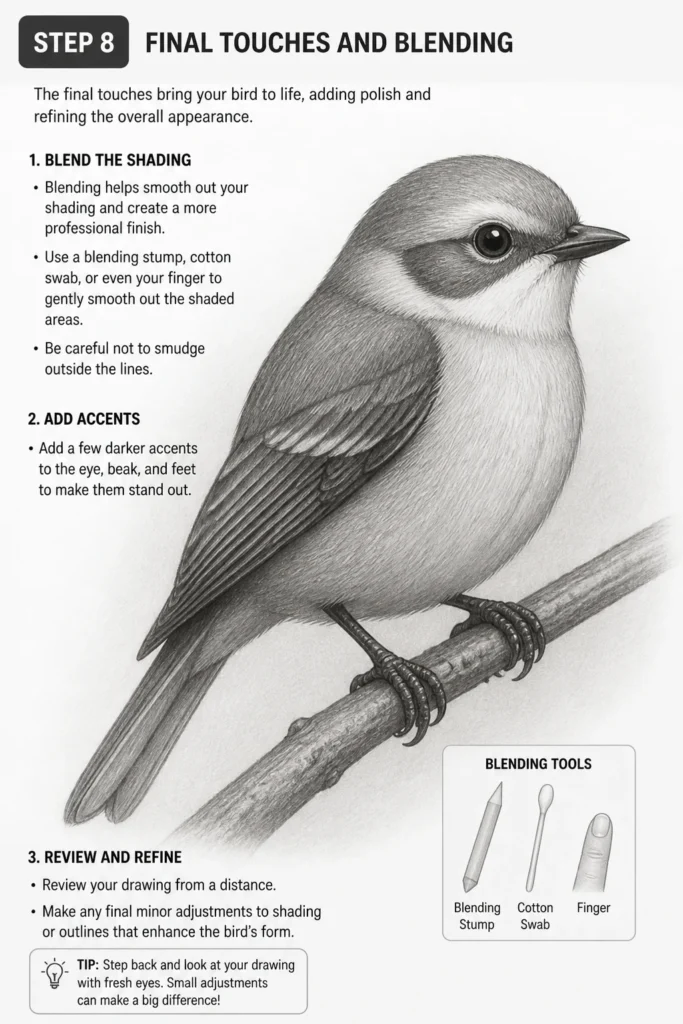
Blending helps smooth out your shading and create a more professional finish.
- Use a blending stump, cotton swab, or even your finger to gently smooth out the shaded areas. Be careful not to smudge outside the lines.
- Add a few darker accents to the eye, beak, and feet to make them stand out.
- Review your drawing from a distance. Make any final minor adjustments to shading or outlines that enhance the bird’s form.
Common Mistakes to Avoid
Ignoring Basic Shapes
Many beginners try to draw details before establishing the overall form. This often leads to disproportionate or awkwardly shaped birds.
Always start with simple ovals and circles to ensure your bird has a solid foundation before adding intricate features.
Pressing Too Hard Initially
Using heavy pressure for your initial sketch lines makes them difficult or impossible to erase completely. This can leave distracting marks on your final drawing.
Train yourself to sketch with a very light hand, gradually increasing pressure as you commit to your final lines.
Over-detailing Feathers
Trying to draw every single feather can make your bird look stiff and overworked, losing its natural softness. It also takes a lot of time.
Instead, focus on suggesting feather texture and patterns in key areas, letting the viewer’s eye fill in the rest.
Flat Shading
Applying uniform shading across the entire bird makes it appear flat and two-dimensional. It lacks depth and realism.
Vary your shading by identifying light and shadow areas. Gradual transitions from light to dark create a sense of volume and form.
Troubleshooting
My Bird Looks Stiff and Unnatural
This often happens when the initial construction lines are too rigid or straight. Birds have flowing, organic curves.
Go back to Step 1 and focus on creating slightly tilted ovals and gentle, sweeping curves for the neck and body connections. Practice drawing smooth, freehand curves.
The Proportions Are Off
If the head is too big or the tail too short, it usually means the initial basic shapes weren’t correctly sized or placed relative to each other.
Use your pencil as a measuring tool. Hold it up to your reference (or your drawing) to compare the size of the head to the body, or the length of the tail to the wing.
My Shading Looks Messy or Uneven
Inconsistent pencil strokes or applying too much pressure in one spot can lead to patchy shading. It’s a common challenge for beginners.
Practice different shading techniques on a separate piece of paper. Use consistent, light strokes in one direction, then layer more strokes at different angles to build up tone smoothly. A blending tool can also help.
Key Takeaways
- Always begin with light, simple geometric shapes to establish the bird’s basic form and proportions.
- Refine your outline gradually, moving from general shapes to specific details like the beak and eyes.
- Use a light touch when sketching and don’t be afraid to erase and adjust your lines.
- Suggest feather texture rather than drawing every single feather, focusing on natural flow.
- Incorporate shading to give your bird depth, making it appear three-dimensional and more realistic.
- Practice is essential; your drawing skills will improve significantly with consistent effort.
Frequently Asked Questions
What kind of pencil is best for drawing birds?
An HB pencil is great for initial sketching and lighter lines, while a 2B or 4B pencil works well for darker outlines, shading, and adding depth. A harder lead (like 2H) can be good for very light construction lines that are easy to erase.
How do I make the bird’s eye look realistic?
A realistic eye needs depth and a highlight. Draw a dark pupil, then a slightly lighter iris, and add a small, bright white dot for the highlight. This highlight gives the eye a wet, reflective quality and brings it to life.
Should I use a reference photo?
Absolutely! Using reference photos is highly recommended, especially when you’re starting out. They provide accurate information on bird anatomy, feather patterns, and poses. You can simplify what you see, but having a guide is invaluable.
How can I make my bird look like a specific species?
To draw a specific bird, pay close attention to its unique characteristics: beak shape, tail length, wing structure, and any distinct markings or feather patterns. Start with the general bird steps, then adapt them to the specific reference.
Our Top Recommended Finds
- Sketchbook with medium-weight paper: Provides a good surface for both sketching and shading, preventing bleed-through.
- Set of graphite pencils (HB, 2B, 4B, 6B): Offers a range of hardness for varied line weights and shading intensity.
- Kneaded eraser: Excellent for lifting graphite gently without smudging and for shaping into fine points for detail erasing.
Your Feathered Journey Begins Now
You’ve just taken the first steps on an exciting artistic journey. Drawing birds is a rewarding skill that connects you to the natural world.
Don’t stop here. Keep practicing, observing birds around you, and experimenting with different styles.
Perhaps your next drawing could be a bird in flight, or a detailed portrait of your favorite garden visitor.
& Painting
No rigid rules or pretension. Just practical guides, medium comparisons, and encouraging tips to help you enjoy the drawing & painting process.