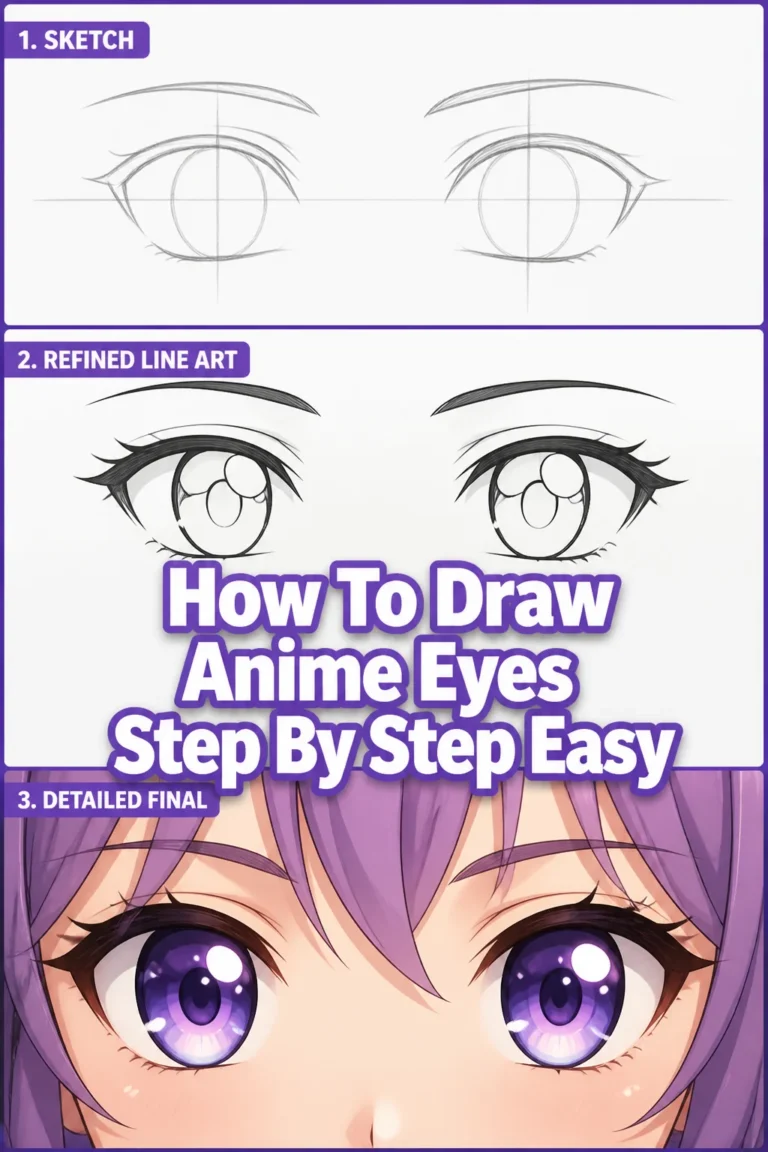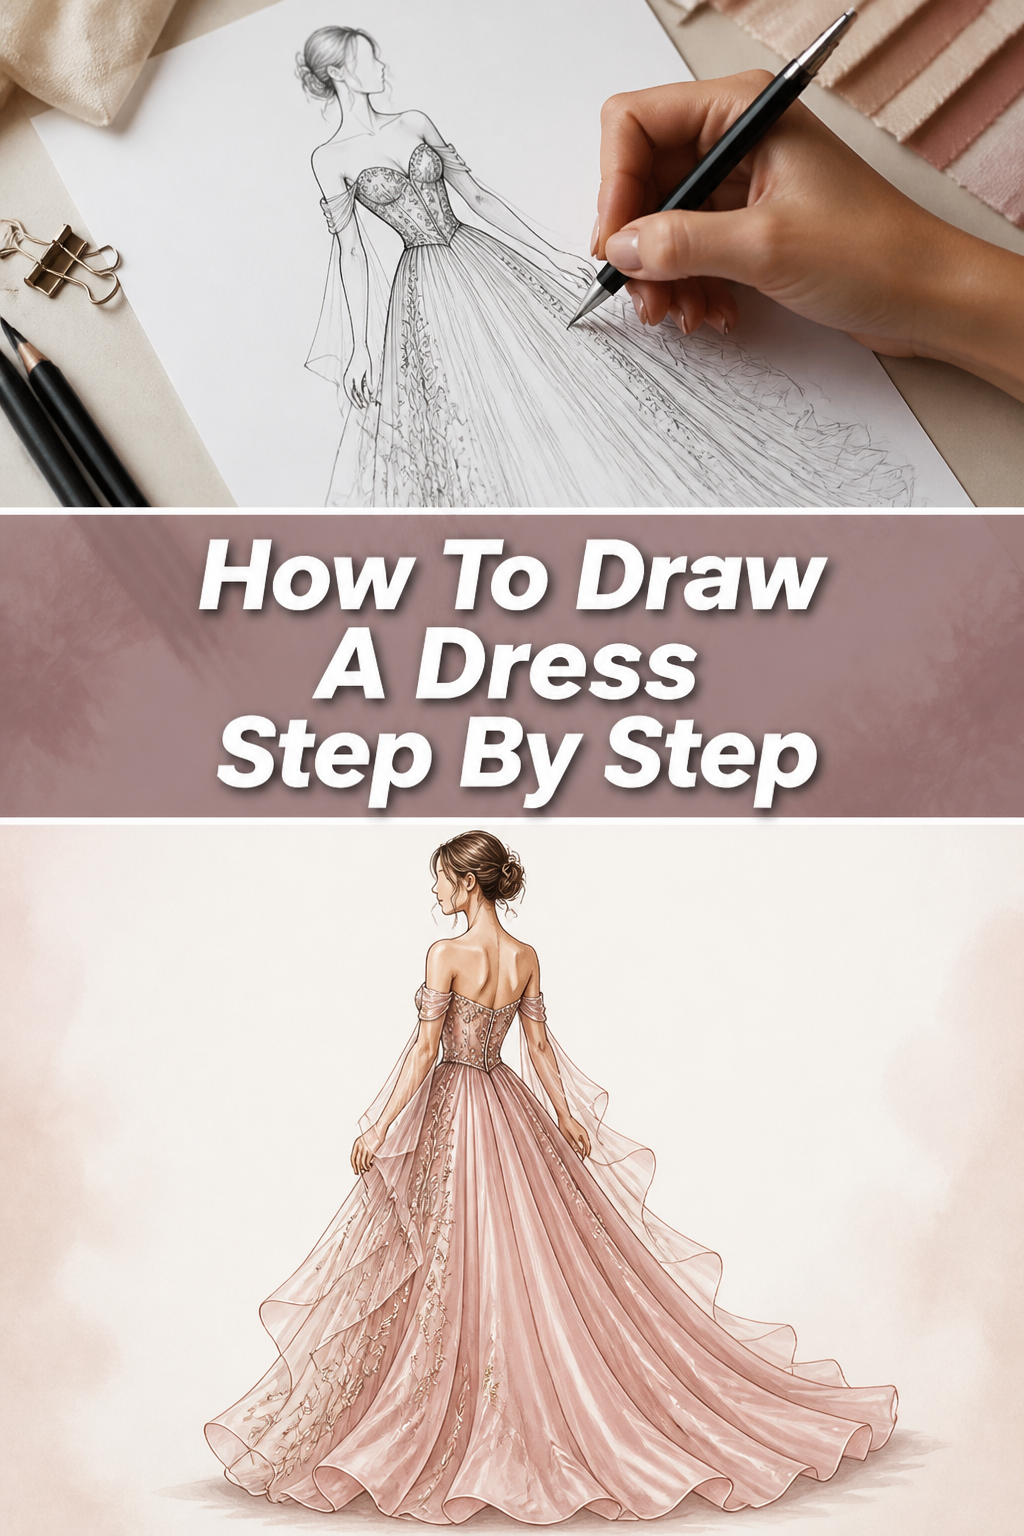
👗 How To Draw A Dress Step By Step

& Painting
No rigid rules or pretension. Just practical guides, medium comparisons, and encouraging tips to help you enjoy the drawing & painting process.
Learning to draw clothing can feel intimidating, especially when aiming for realistic flow and style.
I remember struggling with stiff, lifeless garments in my early sketches, but practice and understanding a few core principles made all the difference.
This guide breaks down the process into simple, manageable steps, helping you create beautiful, dynamic dresses with confidence.
Quick Overview
This guide will equip you with the foundational skills to sketch a dress, focusing on form, flow, and detail. You will learn to build from basic shapes to intricate designs.
- Time needed: 45-90 minutes (can be longer with detailed rendering)
- Difficulty: Beginner to Intermediate
- What you’ll need: Pencil (HB, 2B), eraser, paper, reference images (optional)
Step-by-Step Instructions
Step 1: Establish the Figure’s Pose and Form
Before drawing any clothing, you need a body to drape it on. Sketch a basic mannequin or stick figure to establish the pose.
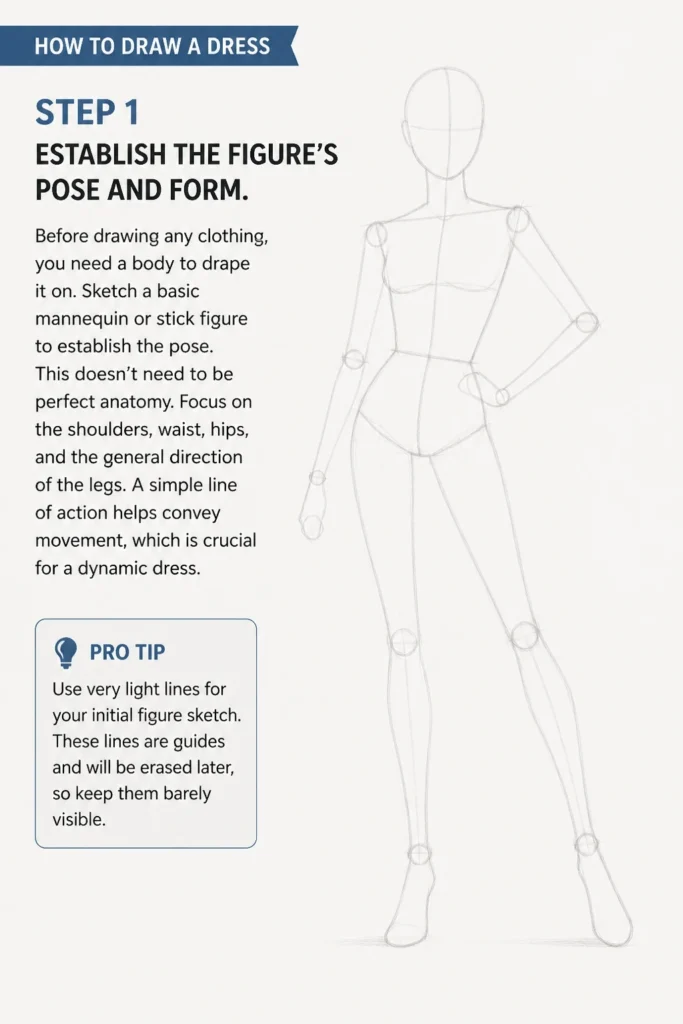
This doesn’t need to be perfect anatomy. Focus on the shoulders, waist, hips, and the general direction of the legs.
A simple line of action helps convey movement, which is crucial for a dynamic dress.
Pro Tip: Use very light lines for your initial figure sketch. These lines are guides and will be erased later, so keep them barely visible.
Step 2: Define the Dress Silhouette
Determine the overall shape of the dress. Is it an A-line, a sheath, a ball gown, or something else?
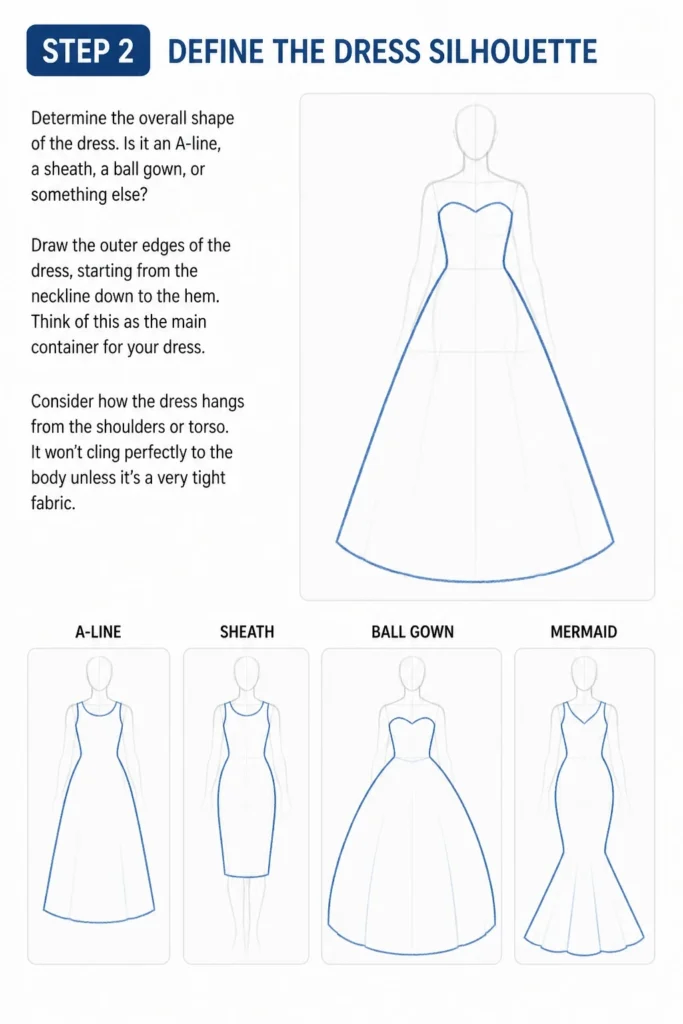
Draw the outer edges of the dress, starting from the neckline down to the hem. Think of this as the main “container” for your dress.
Consider how the dress hangs from the shoulders or torso. It won’t cling perfectly to the body unless it’s a very tight fabric.
Step 3: Sketch the Neckline and Sleeves
Outline the neckline. Common styles include round, V-neck, sweetheart, or strapless.
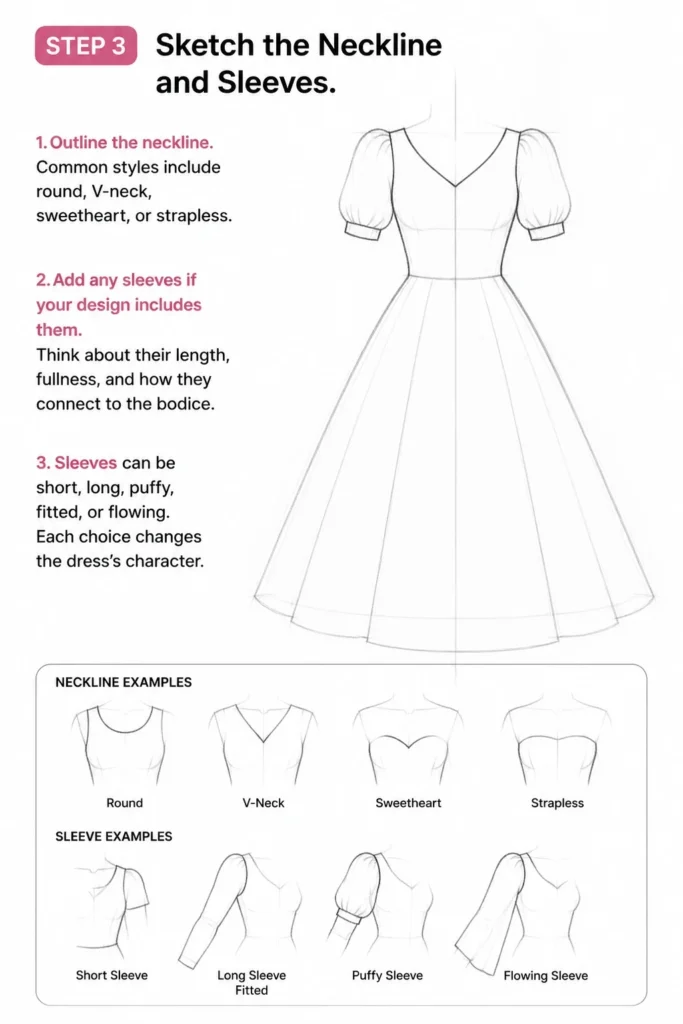
Add any sleeves if your design includes them. Think about their length, fullness, and how they connect to the bodice.
Sleeves can be short, long, puffy, fitted, or flowing. Each choice changes the dress’s character.
Step 4: Indicate the Bodice and Waistline
Draw the lines that define the bodice area. This includes any seams, darts, or design elements on the upper part of the dress.
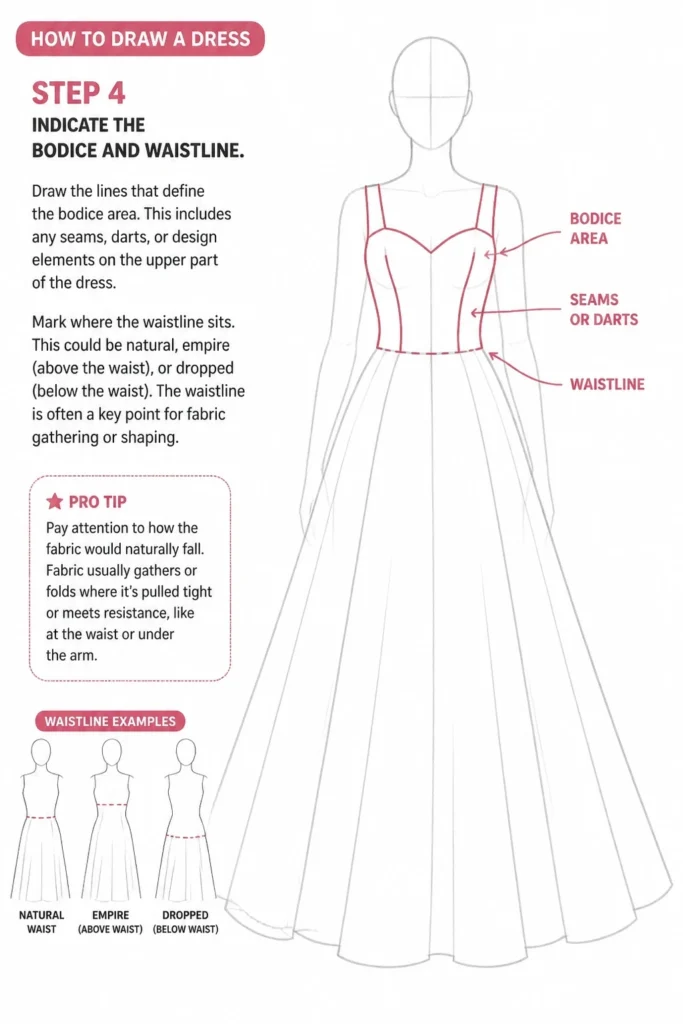
Mark where the waistline sits. This could be natural, empire (above the waist), or dropped (below the waist).
The waistline is often a key point for fabric gathering or shaping.
Pro Tip: Pay attention to how the fabric would naturally fall. Fabric usually gathers or folds where it’s pulled tight or meets resistance, like at the waist or under the arm.
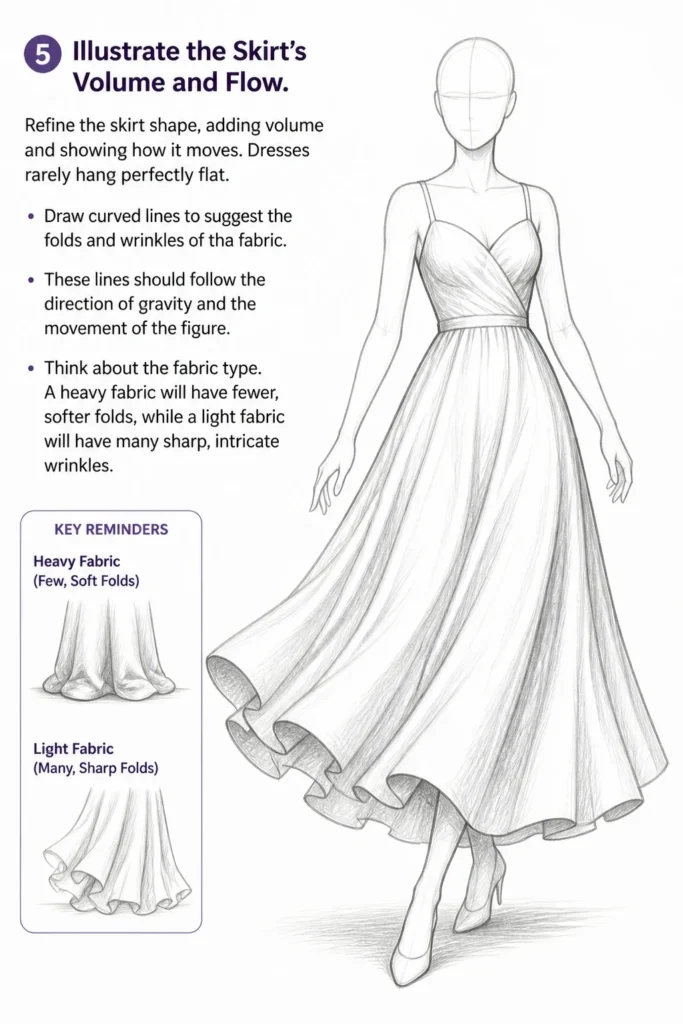
Step 5: Illustrate the Skirt’s Volume and Flow
Refine the skirt shape, adding volume and showing how it moves. Dresses rarely hang perfectly flat.
Draw curved lines to suggest the folds and wrinkles of the fabric. These lines should follow the direction of gravity and the movement of the figure.
Think about the fabric type. A heavy fabric will have fewer, softer folds, while a light fabric will have many sharp, intricate wrinkles.
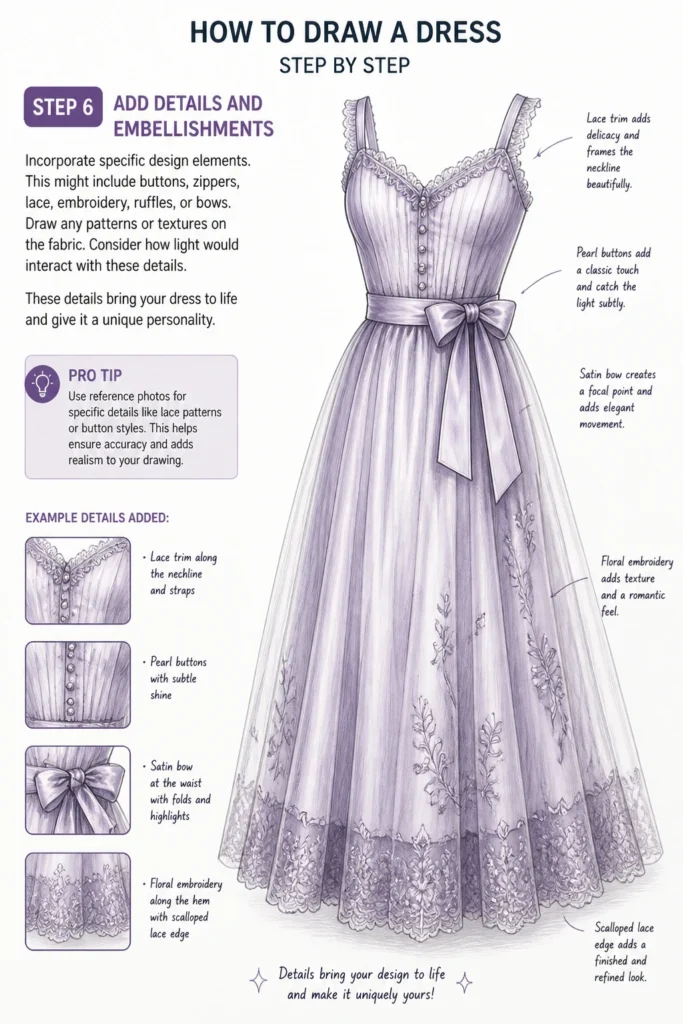
Step 6: Add Details and Embellishments
Incorporate specific design elements. This might include buttons, zippers, lace, embroidery, ruffles, or bows.
Draw any patterns or textures on the fabric. Consider how light would interact with these details.
These details bring your dress to life and give it a unique personality.
Pro Tip: Use reference photos for specific details like lace patterns or button styles. This helps ensure accuracy and adds realism to your drawing.
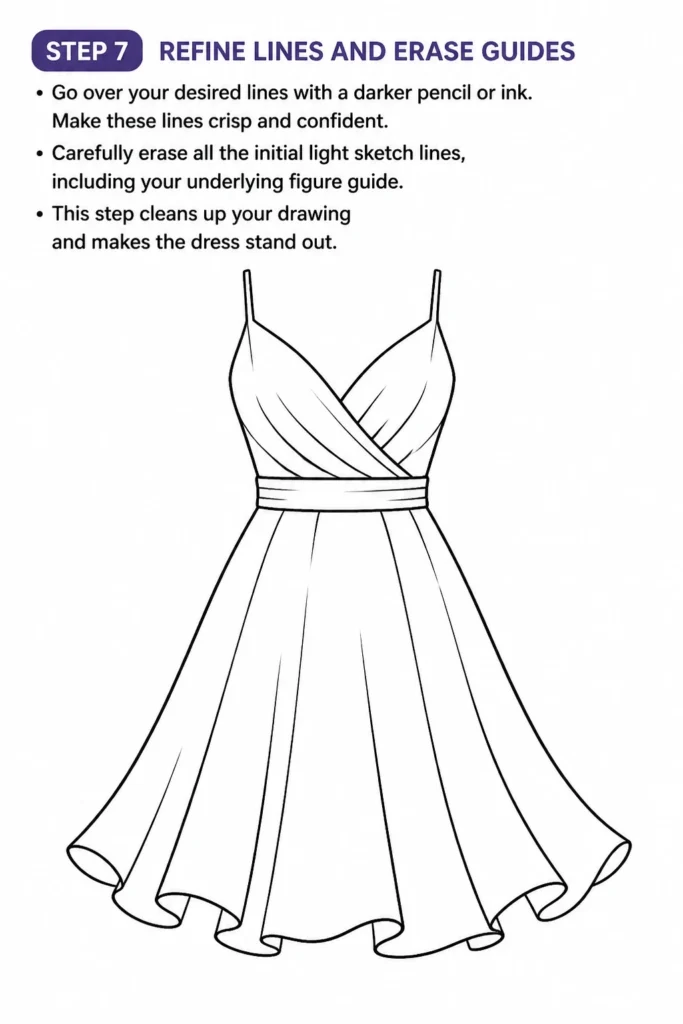
Step 7: Refine Lines and Erase Guides
Go over your desired lines with a darker pencil or ink. Make these lines crisp and confident.
Carefully erase all the initial light sketch lines, including your underlying figure guide.
This step cleans up your drawing and makes the dress stand out.
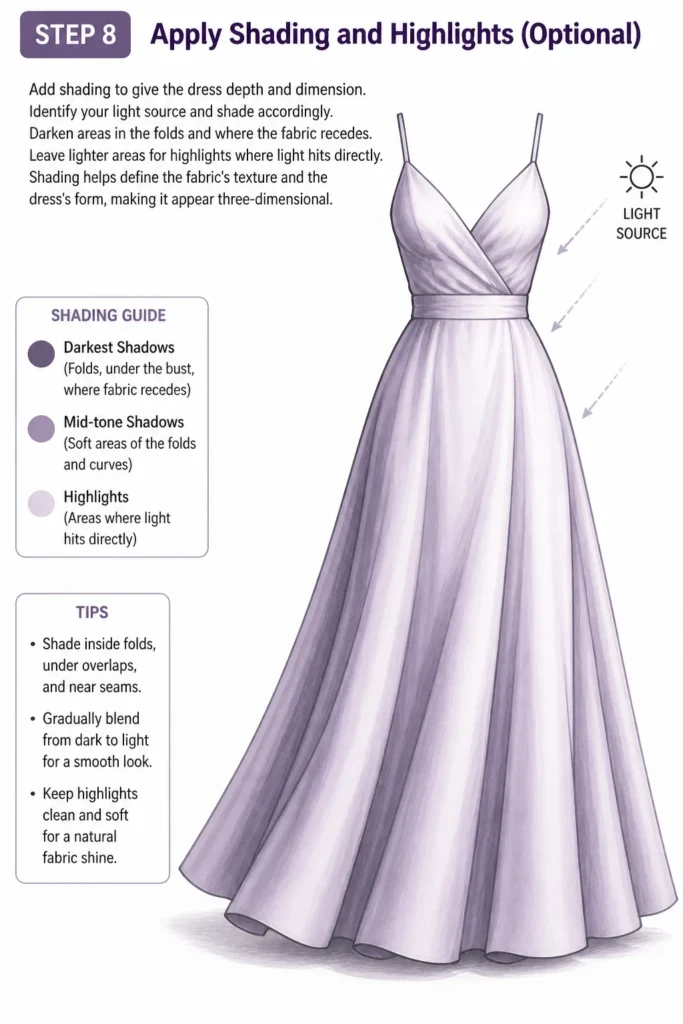
Step 8: Apply Shading and Highlights (Optional)
Add shading to give the dress depth and dimension. Identify your light source and shade accordingly.
Darken areas in the folds and where the fabric recedes. Leave lighter areas for highlights where light hits directly.
Shading helps define the fabric’s texture and the dress’s form, making it appear three-dimensional.
Common Mistakes to Avoid
Drawing a Flat Dress
Many beginners draw clothing as if it’s painted directly onto the body, ignoring volume. This results in a dress that looks two-dimensional and lacks life.
Remember that fabric has thickness and hangs in space. Always consider the space between the body and the fabric, allowing for natural folds and drapery.
Ignoring Gravity and Fabric Properties
Fabric always responds to gravity. Heavy fabrics drape differently than light, airy ones.
A common mistake is drawing folds that defy gravity or don’t make sense for the material. Always visualize how your chosen fabric would naturally fall and wrinkle.
Over-detailing Too Soon
Adding intricate patterns, lace, or embellishments before the basic form is solid can lead to a messy drawing. It’s like decorating a house before building the walls.
Focus on the silhouette and major folds first. Once the foundation is strong, then you can layer on the smaller, more intricate details.
Stiff, Symmetrical Folds
Real fabric folds are organic and varied, rarely perfectly symmetrical. Drawing identical, repetitive folds makes the dress look unnatural and stiff.
Vary the size, shape, and direction of your folds. Let them flow naturally around the body and respond to movement for a more dynamic look.
Troubleshooting
My Dress Looks Stiff and Lifeless
This often happens when you don’t consider the underlying figure’s movement or the fabric’s natural flow. Go back to your initial pose sketch.
Make sure the figure has a clear line of action. Then, redraw the dress, focusing on how the fabric would hang and wrinkle in response to that pose and gravity. Exaggerate curves slightly.
I Struggle with Realistic Folds
Folds are tricky and require observation. The best way to improve is to study real clothing.
Look at photos or even your own clothes. Observe where folds form (joints, tension points) and how they curve. Practice drawing different types of folds repeatedly, focusing on their direction and how they taper.
The Dress Doesn’t Look Three-Dimensional
Lack of dimension usually comes from insufficient shading or ignoring overlap. Shading is crucial for showing form.
Re-evaluate your light source and add darker values in areas that recede or are in shadow, like inside deep folds. Also, ensure parts of the dress overlap other parts, clearly indicating what is in front and what is behind.
Key Takeaways
- Always start with a light sketch of the figure’s pose to provide a foundation for the dress.
- Define the overall silhouette and major forms of the dress before adding any fine details.
- Understand how different fabrics drape and respond to gravity to create realistic folds.
- Add details and embellishments only after the main structure of the dress is established.
- Use shading and highlights to give your dress depth, volume, and a three-dimensional appearance.
- Practice observing real clothing and fabric to improve your understanding of how it behaves.
Frequently Asked Questions
How do I make my dress designs unique?
To make your designs unique, experiment with different necklines, sleeve styles, and skirt shapes. Combine elements from different eras or cultures. Don’t be afraid to add unusual details, patterns, or textures. Drawing inspiration from fashion magazines or historical clothing can spark new ideas.
What’s the best way to draw different fabric textures?
Drawing different fabric textures involves varying your line work and shading. For silk, use smooth, flowing lines and soft, gradual shading with strong highlights. For wool, use slightly rougher lines and a more textured shading technique. Lace requires delicate, intricate patterns. Practice observing textures in real life and try to mimic them with your pencil.
Should I draw the body completely before drawing the dress?
It’s beneficial to sketch a basic underlying figure or mannequin. This provides a clear framework for where the dress will sit on the body, ensuring proper proportions and realistic drape. You don’t need to draw every muscle, but enough to guide the clothing.
How can I draw a dress in motion?
Drawing a dress in motion starts with a dynamic figure pose. Exaggerate the line of action. Then, consider how the fabric would be affected by that movement – it would trail, flutter, or gather in certain areas. Use long, sweeping curves for the fabric folds to convey a sense of speed and fluidity.
Our Top Recommended Finds
- Good Quality Sketch Pencils (HB, 2B, 4B): Having a range of hardness allows for light initial sketches and darker, more defined lines for rendering.
- Kneaded Eraser: This type of eraser is excellent for lifting pencil lines gently without damaging the paper, perfect for cleaning up guide lines.
- Smooth Drawing Paper: Paper with a slight tooth holds pencil well but allows for smooth blending, which is ideal for fabric textures and shading.
Embrace Your Inner Fashion Illustrator
You now have the tools and steps to start sketching beautiful dresses. Drawing clothing is a skill that grows with consistent practice and keen observation.
Don’t be afraid to experiment with different styles and let your creativity flow. Every line you draw builds your confidence and skill.
Grab your pencil today and bring your unique fashion visions to life on paper.
Fearless Drawing
& Painting♡No rigid rules or pretension. Just practical guides, medium comparisons, and encouraging tips to help you enjoy the drawing & painting process.