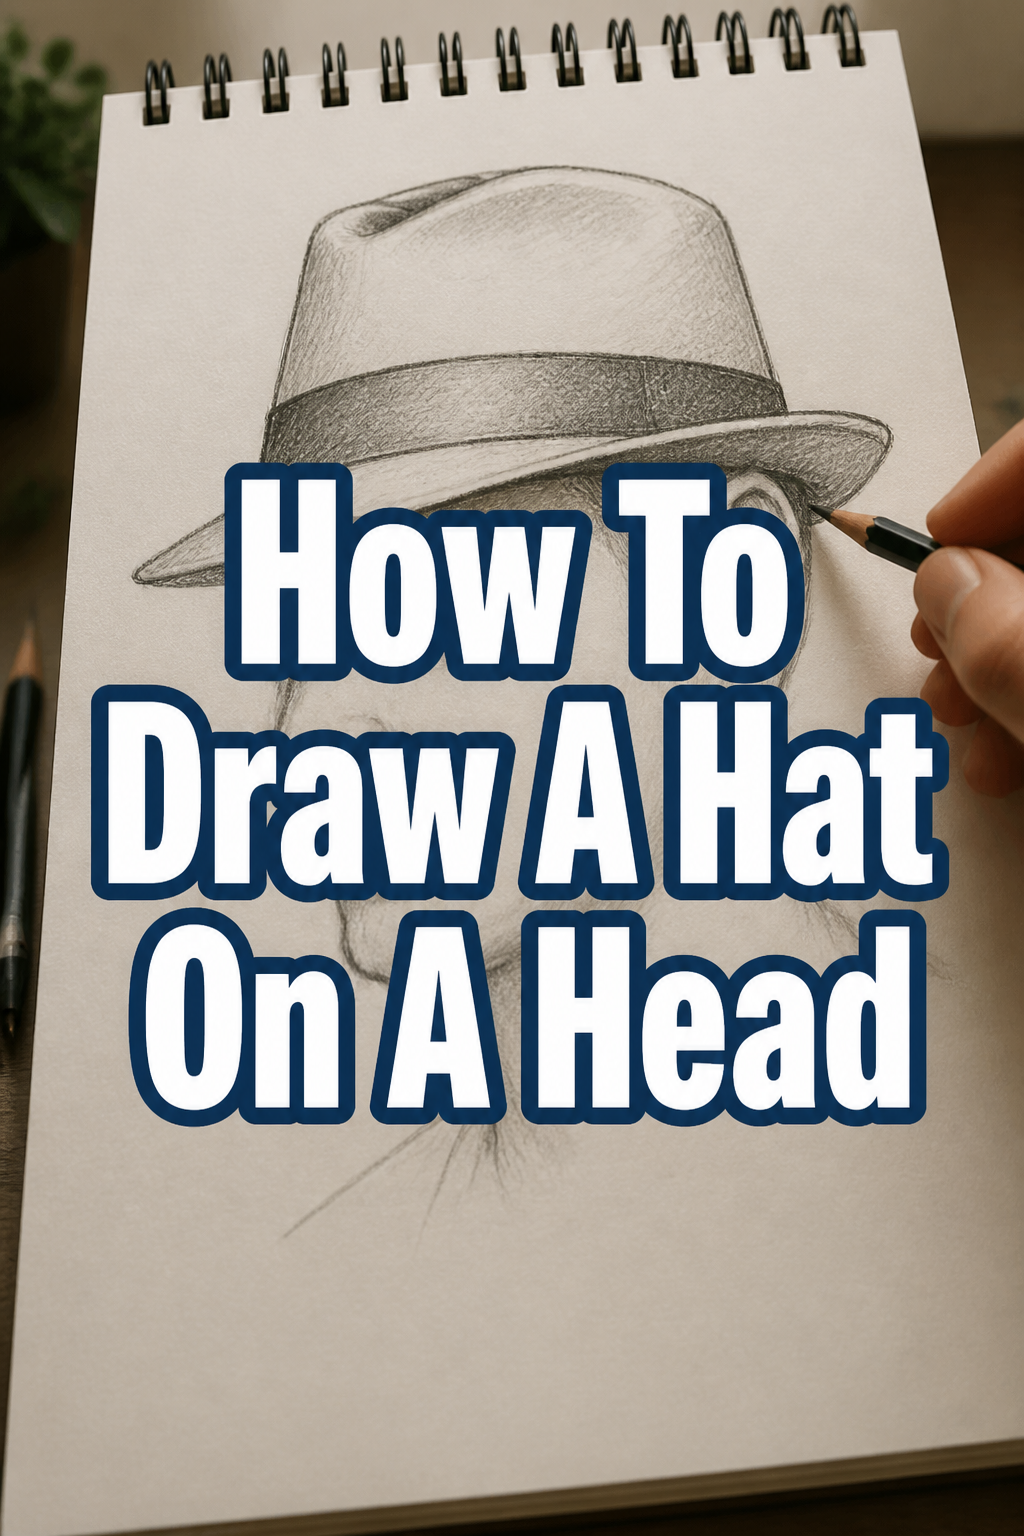
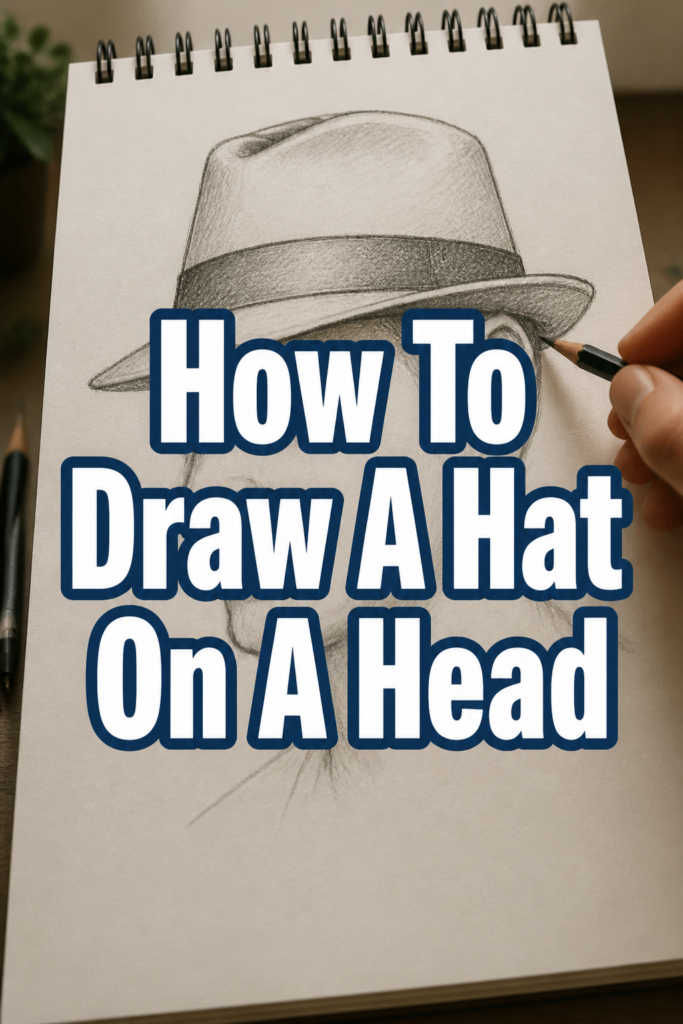
👒 How To Draw A Hat On A Head

& Painting
No rigid rules or pretension. Just practical guides, medium comparisons, and encouraging tips to help you enjoy the drawing & painting process.
Drawing hats on heads can feel like a tricky puzzle, especially getting the perspective right.
I remember struggling for years, making hats look like they were floating or squashing heads.
This guide distills what I learned through countless sketches, helping you achieve a natural, believable fit every time.
Quick Overview
You’re about to learn how to seamlessly integrate any hat onto a head, understanding the underlying structure that makes it look just right.
We’ll cover foundational principles and practical steps to build your confidence.
- Time needed: 30-60 minutes (for initial practice)
- Difficulty: Beginner to Intermediate
- What you’ll need: Pencil, paper, eraser, optional reference photos
Step-by-Step Instructions
Step 1: Understand the Head’s Form
Before adding a hat, you need a solid foundation. The head isn’t just a simple circle.
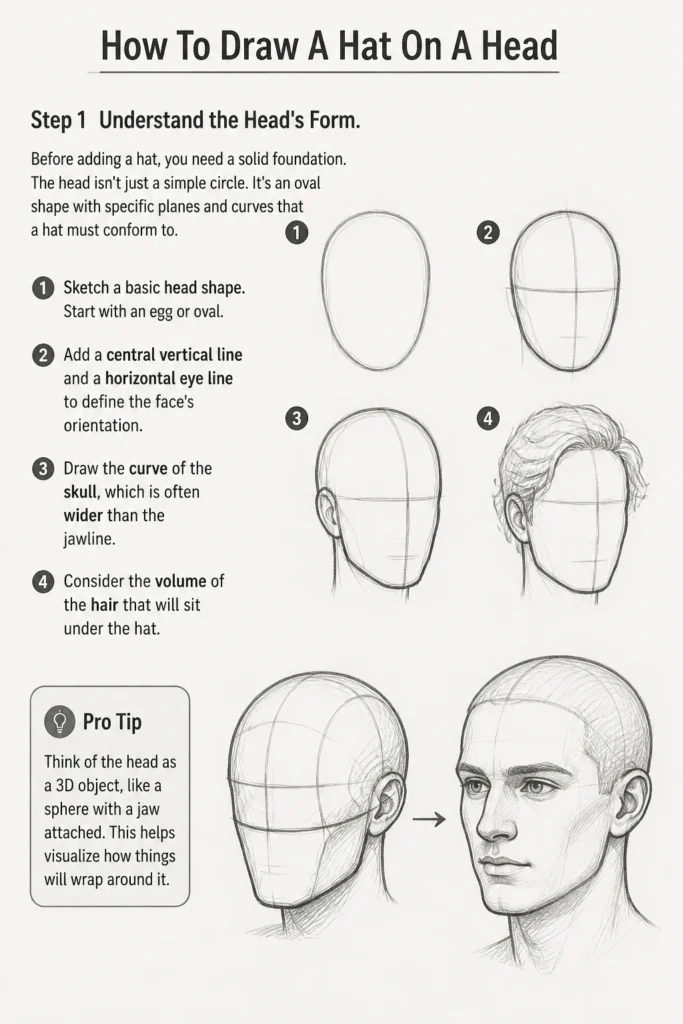
It’s an oval shape with specific planes and curves that a hat must conform to.
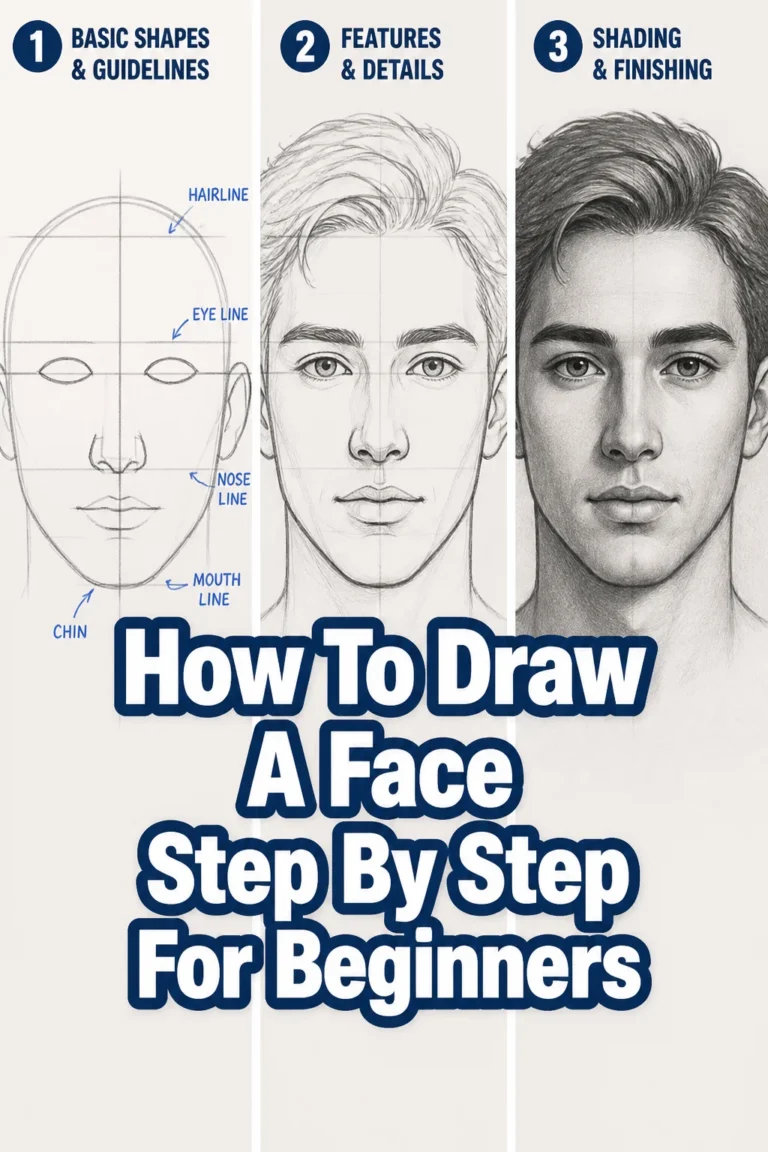
- Sketch a basic head shape. Start with an egg or oval.
- Add a central vertical line and a horizontal eye line to define the face’s orientation.
- Draw the curve of the skull, which is often wider than the jawline.
- Consider the volume of the hair that will sit under the hat.
Pro Tip: Think of the head as a 3D object, like a sphere with a jaw attached. This helps visualize how things will wrap around it.
Step 2: Define the Hat’s Base Line
Every hat has a part that sits on or around the head.
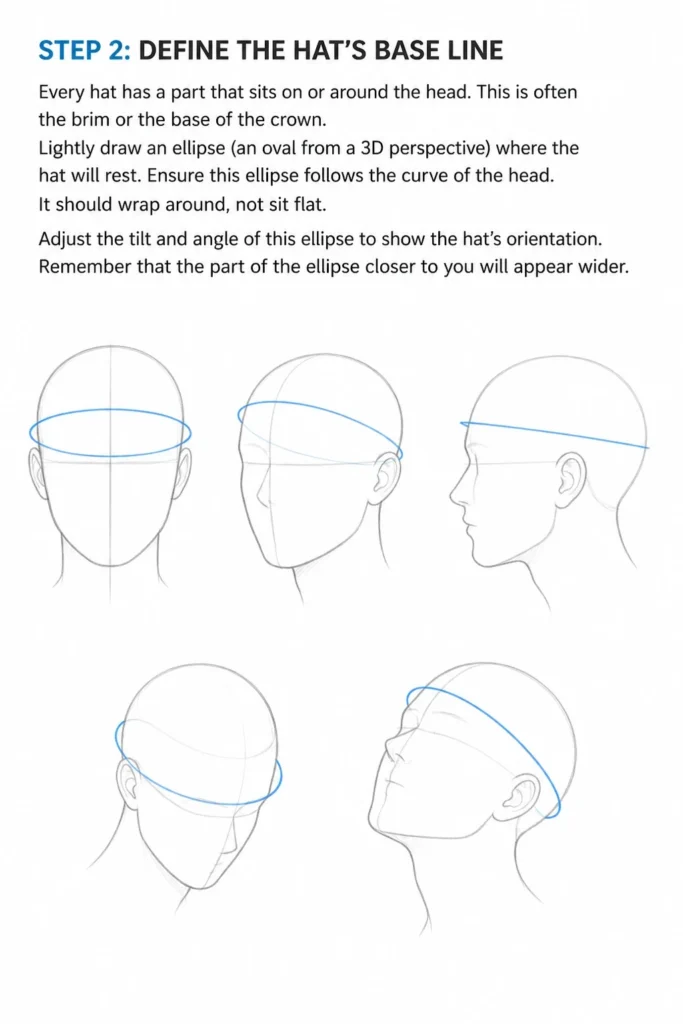
This is often the brim or the base of the crown.
- Lightly draw an ellipse (an oval from a 3D perspective) where the hat will rest.
- Ensure this ellipse follows the curve of the head. It should wrap around, not sit flat.
- Adjust the tilt and angle of this ellipse to show the hat’s orientation.
- Remember that the part of the ellipse closer to you will appear wider.
Step 3: Establish the Hat’s Volume (Crown)
Once the base is set, build up the main body of the hat.
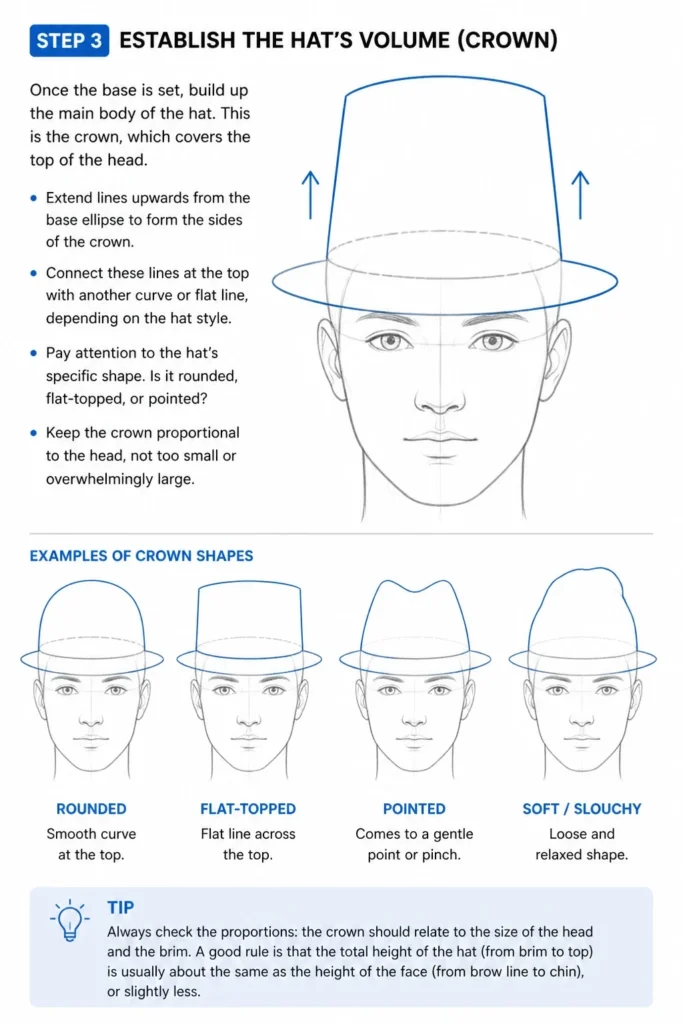
This is the crown, which covers the top of the head.
- Extend lines upwards from the base ellipse to form the sides of the crown.
- Connect these lines at the top with another curve or flat line, depending on the hat style.
- Pay attention to the hat’s specific shape. Is it rounded, flat-topped, or pointed?
- Keep the crown proportional to the head, not too small or overwhelmingly large.
Step 4: Add the Brim or Visor
Many hats feature a brim or a visor that extends outwards.
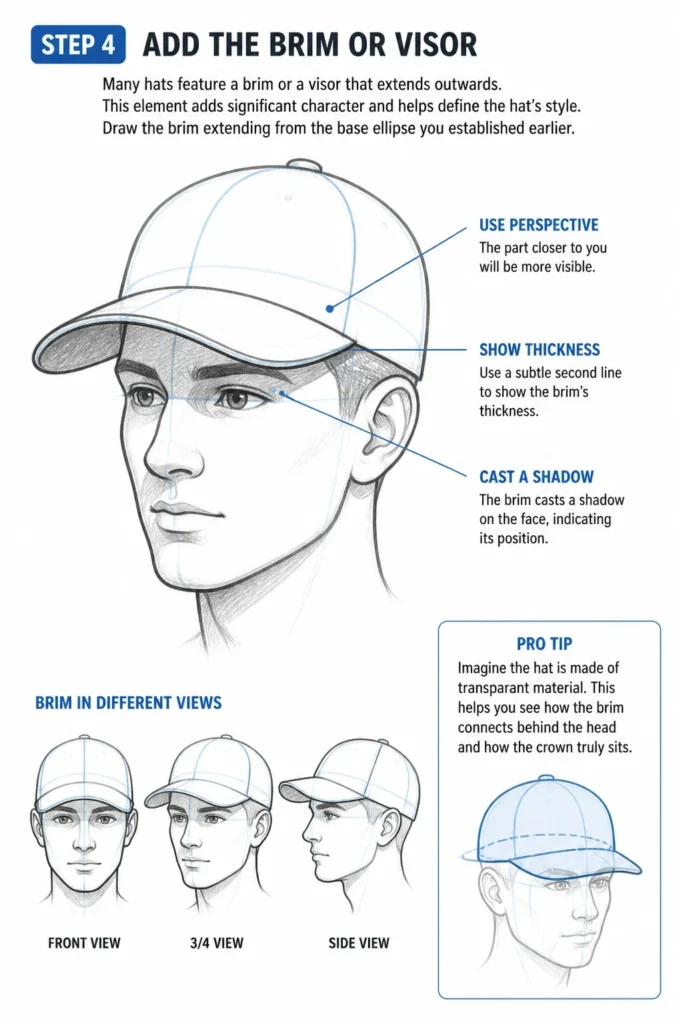
This element adds significant character and helps define the hat’s style.
- Draw the brim extending from the base ellipse you established earlier.
- Use perspective to make the brim believable. The part closer to you will be more visible.
- Show the thickness of the brim with a subtle second line.
- Consider how the brim casts a shadow on the face, indicating its position.
Pro Tip: Imagine the hat is made of transparent material. This helps you see how the brim connects behind the head and how the crown truly sits.
Step 5: Incorporate Head Details and Hair
The hat doesn’t exist in a vacuum; it interacts with the head and hair.
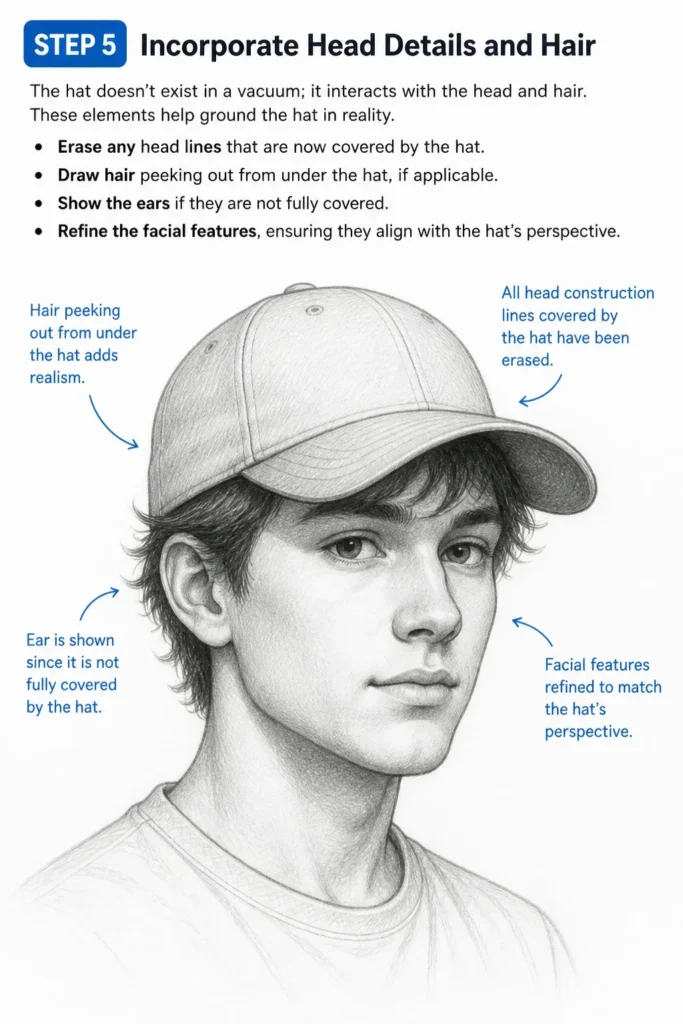
These elements help ground the hat in reality.
- Erase any head lines that are now covered by the hat.
- Draw hair peeking out from under the hat, if applicable.
- Show the ears if they are not fully covered.
- Refine the facial features, ensuring they align with the hat’s perspective.
Step 6: Add Details and Texture
Now is the time to bring your hat to life with specific features.
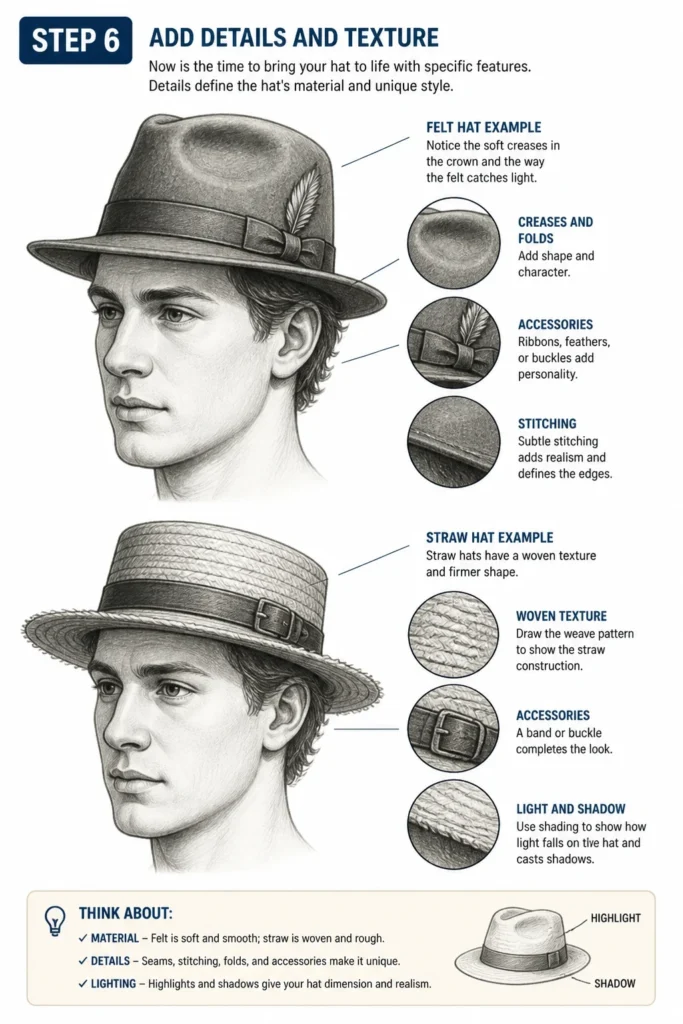
Details define the hat’s material and unique style.
- Draw stitching, seams, or folds in the fabric.
- Include any accessories like ribbons, buckles, or feathers.
- Think about the material. A felt hat will have different creases than a straw hat.
- Consider the lighting to add shadows and highlights, giving the hat dimension.
Step 7: Refine and Clean Up
The final stage involves reviewing your drawing and making adjustments.
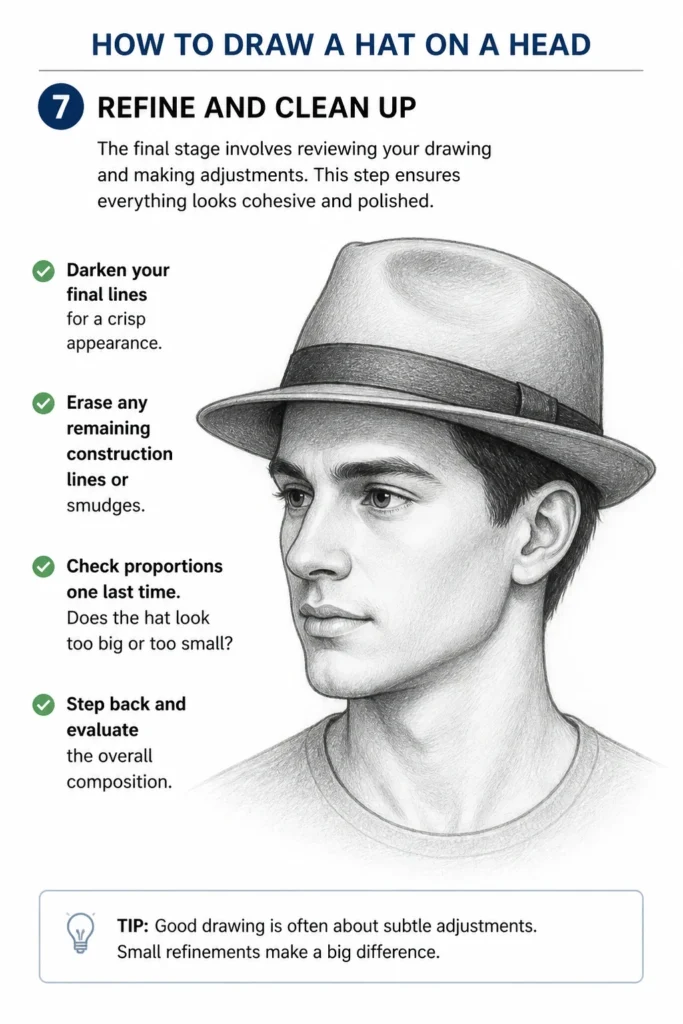
This step ensures everything looks cohesive and polished.
- Darken your final lines for a crisp appearance.
- Erase any remaining construction lines or smudges.
- Check proportions one last time. Does the hat look too big or too small?
- Step back and evaluate the overall composition.
Common Mistakes to Avoid
Ignoring Head Anatomy
Many beginners draw a hat as a separate object placed on top of a flat head. The head is a complex 3D form.
If you don’t consider the skull’s curve and volume, the hat will look like it’s floating or poorly fitted. Always start by understanding the head’s shape underneath.
Incorrect Perspective for the Brim
A common error is drawing the brim as a flat line or a perfect circle, regardless of the head’s angle. The brim is an ellipse in perspective.
Its curvature changes depending on whether you’re looking up at it, down at it, or straight on. Practice drawing ellipses from various angles.
Lack of Volume in the Crown
Sometimes, the crown of the hat appears flat or two-dimensional. This happens when you only draw the front and back lines without considering its depth.
Remember that the crown wraps around the head. Use curved lines to suggest its rounded form, even if only subtly.
Disregarding Hair and Ears
A hat doesn’t completely erase the head’s features. Hair often peeks out from under a hat, and ears might be partially or fully visible.
Ignoring these details makes the drawing look unnatural. Integrate them thoughtfully, showing how the hat interacts with them.
Troubleshooting
Hat Looks Like It’s Floating
This usually happens when the hat’s base doesn’t conform to the head’s curve. The ellipse you draw for the hat’s base might be too flat or too high.
Go back to Step 2. Draw a very light, full ellipse that truly wraps around the head’s form, even the part hidden by the head. Make sure the bottom edge of the hat is slightly below the actual skull line, indicating the head’s volume within it.
Hat Appears Too Stiff or Unnatural
If your hat looks rigid, you might be using too many straight lines or ignoring the fabric’s natural drape and folds. Hats, even stiff ones, have some give.
Introduce subtle curves and slight imperfections. Add a few light creases or folds where the hat might bend or where it meets the head. Think about the material and how it would behave.
Proportions Feel Off
Sometimes the hat looks too big for the head, or the head looks too small for the hat. This is a common issue with relative scaling.
Use a reference image for proportion. If drawing from imagination, periodically hold your drawing at arm’s length to check overall balance. Remember that the hat adds to the overall height and width of the head, but shouldn’t overpower it completely unless that’s your specific artistic choice.
Key Takeaways
- Always begin by understanding the head’s 3D form, not just a flat outline.
- Use ellipses to accurately represent the hat’s base and brim in perspective.
- Build the hat’s volume from the base upwards, considering its specific style.
- Integrate hair and ears to make the hat feel like a natural part of the head.
- Add specific details and texture to bring your hat to life.
- Practice observing hats on real people or in photos to understand how they sit.
Frequently Asked Questions
How do I make the hat look like it’s actually sitting on the head, not just hovering?
The key is the base ellipse. Ensure it curves around the head’s form. The part of the head under the hat should be erased, and hair can peek out. Adding subtle shadows where the hat meets the head also helps ground it visually.
What’s the best way to practice drawing different hat styles?
Start with simple shapes like a beanie or a baseball cap. Then, move to more complex ones like fedoras or cowboy hats. Use plenty of reference photos for each style. Break down complex hats into basic geometric forms first.
Should I draw the entire head first, then add the hat?
Yes, it’s highly recommended. Drawing the full head (even lightly) gives you the underlying structure. This ensures the hat fits correctly and maintains the head’s proportions. You can erase the covered parts later.
How do I show the hat’s material effectively?
Use varying line quality and shading. A straw hat might have cross-hatching to show weave. A felt hat could have softer shading and subtle creases. Practice drawing different textures to expand your visual vocabulary.
Our Top Recommended Finds
- Sketchbook with quality paper: Provides a smooth surface for your lines and prevents bleed-through.
- Set of graphite pencils (2B, 4B, 6B): Offers a range of hardness for light construction lines and darker details.
- Kneaded eraser: Excellent for lifting pencil marks gently without damaging the paper, perfect for refining.
Your Artistic Journey Awaits
You now have the tools and understanding to draw hats confidently on any head.
The real magic happens with practice and observation.
Grab your pencil, find some inspiring hat photos, and start sketching today!
& Painting
No rigid rules or pretension. Just practical guides, medium comparisons, and encouraging tips to help you enjoy the drawing & painting process.