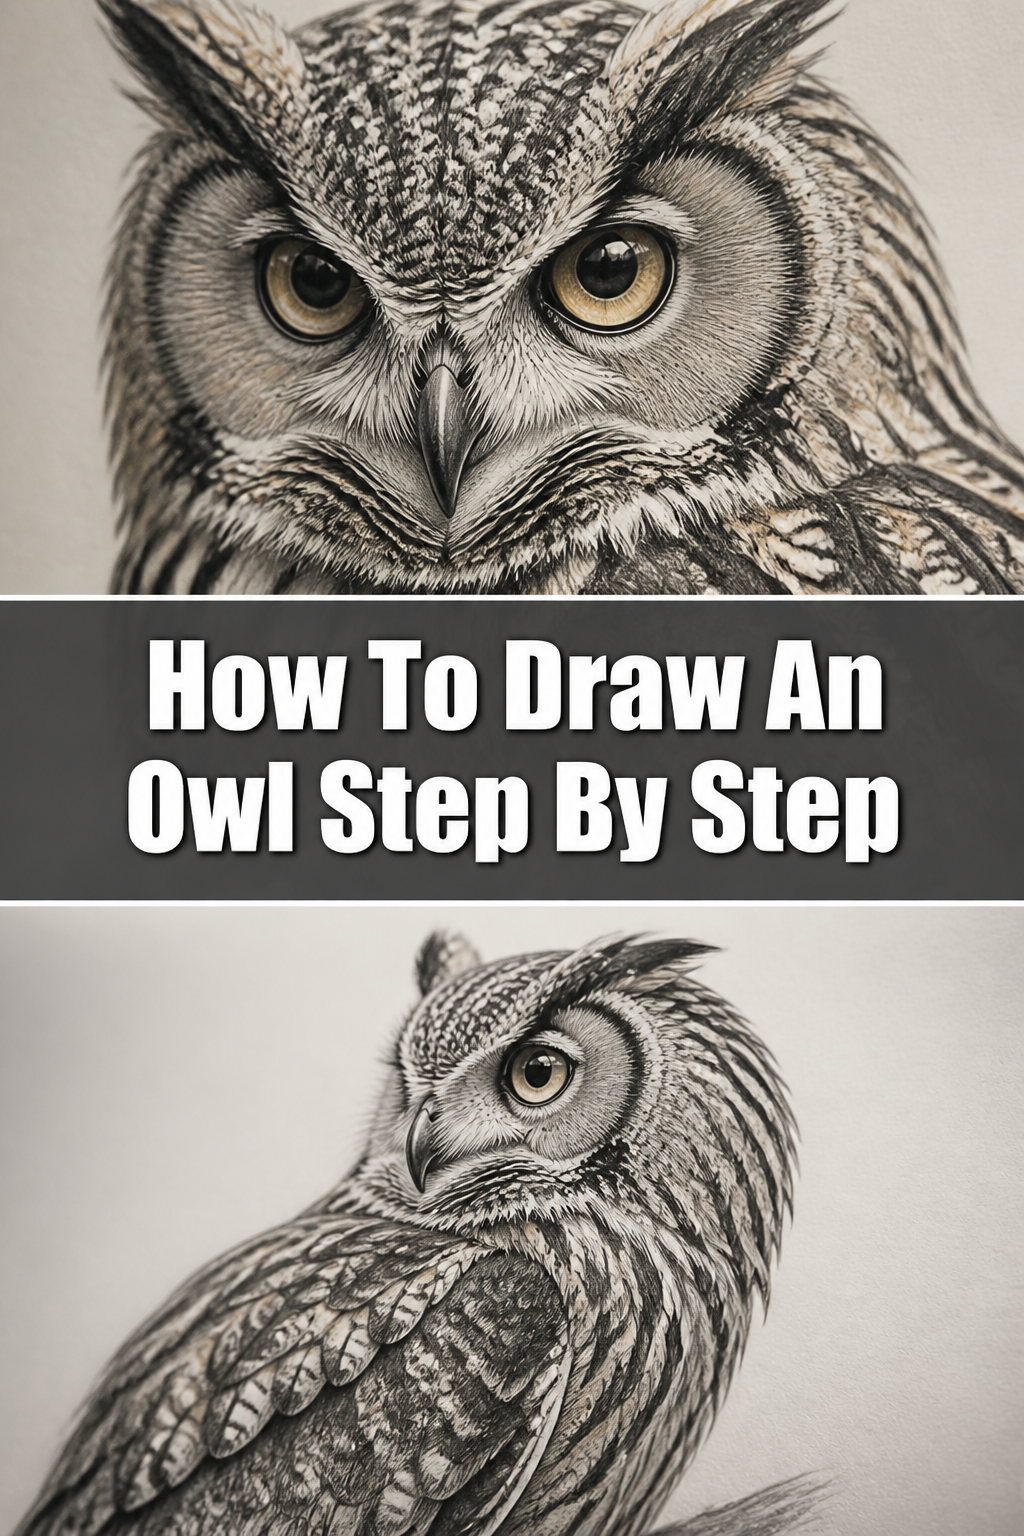
🦉 How To Draw An Owl Step By Step

& Painting
No rigid rules or pretension. Just practical guides, medium comparisons, and encouraging tips to help you enjoy the drawing & painting process.
Learning to draw can feel intimidating, but it doesn’t have to be.
I remember my own first attempts at drawing animals were wobbly, yet incredibly rewarding.
This guide will help you create a charming owl, building your confidence with each stroke.
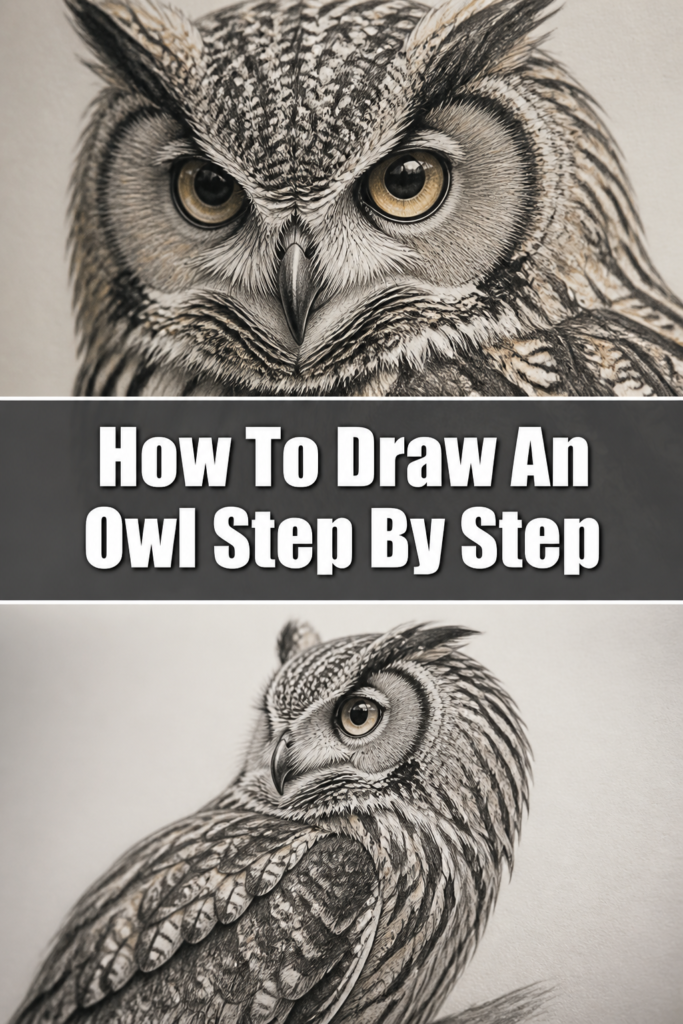
Quick Overview
You’re about to embark on a creative journey to sketch a beautiful owl.
This tutorial breaks down the process into manageable, easy-to-follow steps.
By the end, you’ll have a complete owl drawing and new skills in your artistic toolkit.
- Time needed: 45-60 minutes
- Difficulty: Beginner
- What you’ll need: Pencil (HB or 2B), eraser, drawing paper, a fine-tip pen (optional for inking)
Step-by-Step Instructions
Step 1: Sketch the Basic Shapes
Begin by lightly drawing two overlapping oval shapes on your paper.
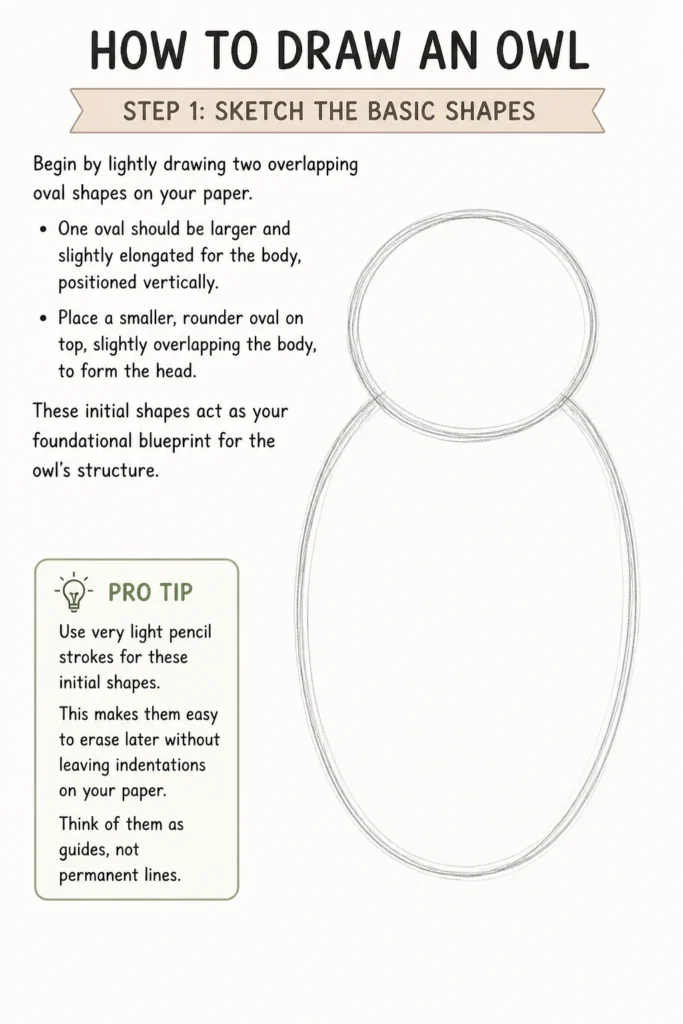
One oval should be larger and slightly elongated for the body, positioned vertically.
Place a smaller, rounder oval on top, slightly overlapping the body, to form the head.
These initial shapes act as your foundational blueprint for the owl’s structure.
Pro Tip: Use very light pencil strokes for these initial shapes. This makes them easy to erase later without leaving indentations on your paper. Think of them as guides, not permanent lines.
Step 2: Define the Head and Facial Disc
Refine the head shape by smoothing out the connection between the two ovals.
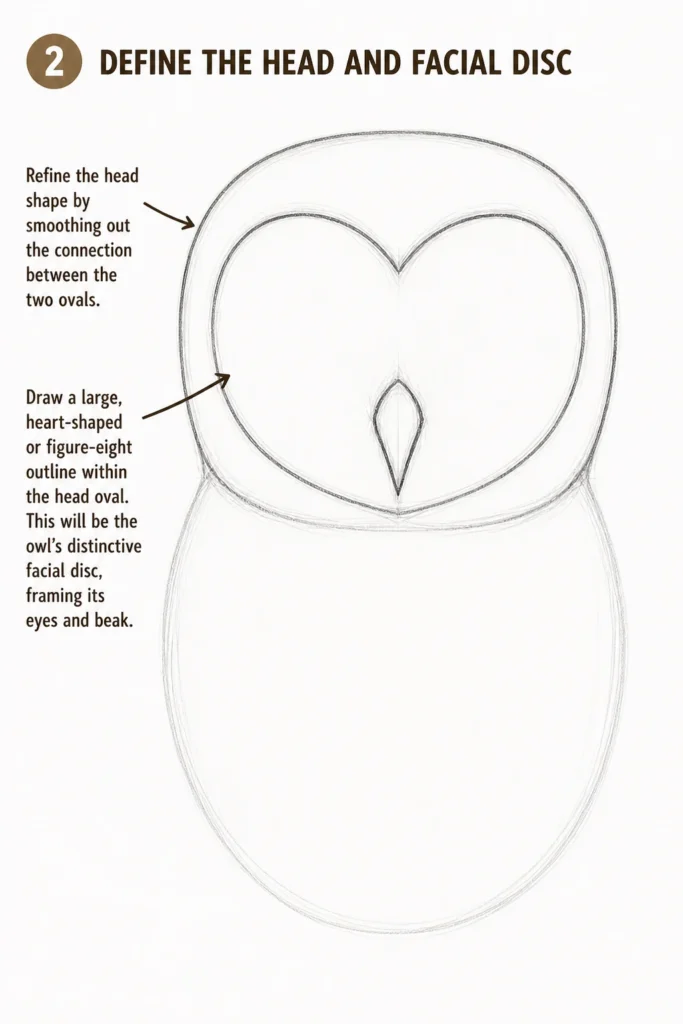
Consider the general silhouette of an owl’s head, which often has a slightly broader top.
Next, draw a large, heart-shaped or figure-eight outline within the head oval.
This will be the owl’s distinctive facial disc, framing its eyes and beak.
Step 3: Add the Eyes and Beak
Draw two large circles within the facial disc for the owl’s eyes.
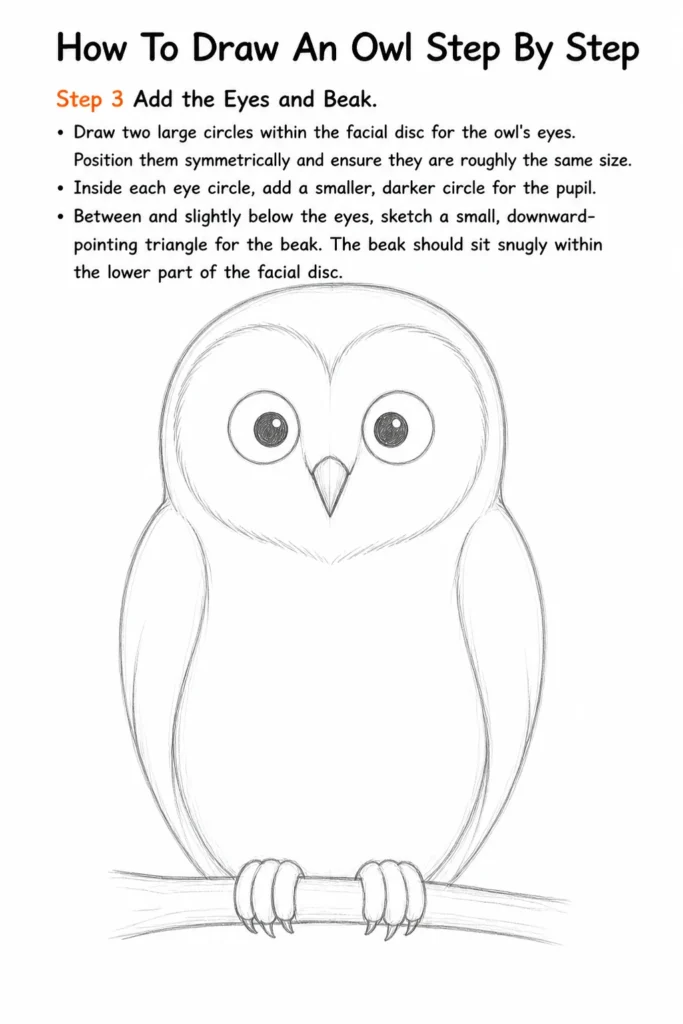
Position them symmetrically and ensure they are roughly the same size.
Inside each eye circle, add a smaller, darker circle for the pupil.
Between and slightly below the eyes, sketch a small, downward-pointing triangle for the beak.
The beak should sit snugly within the lower part of the facial disc.
Step 4: Outline the Body and Wings
Connect the head to the body with two gentle curves for the neck area.
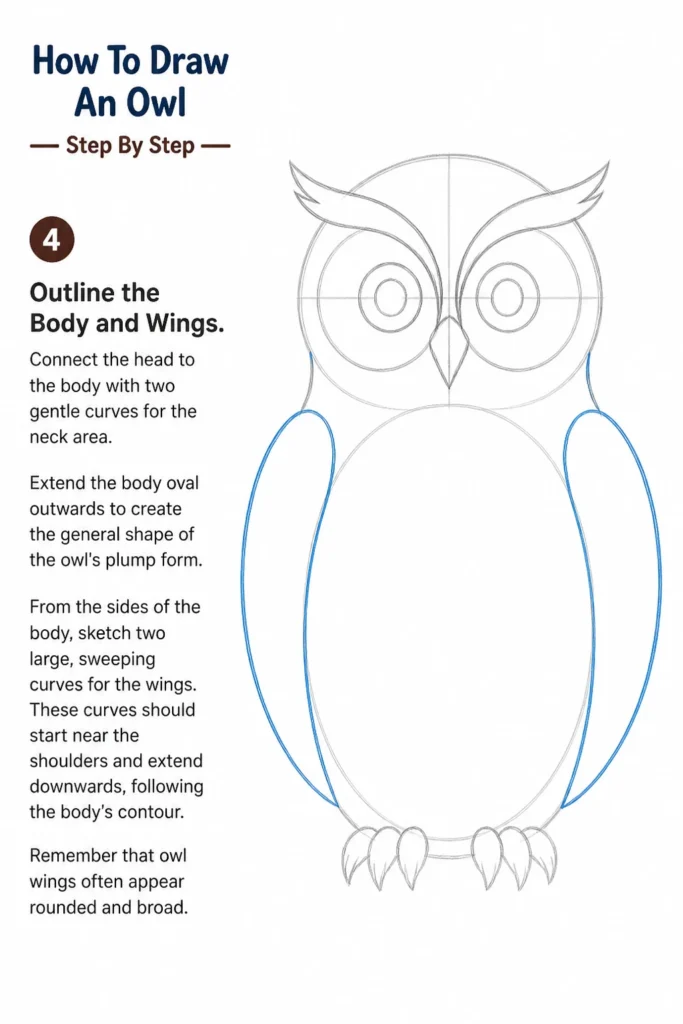
Extend the body oval outwards to create the general shape of the owl’s plump form.
From the sides of the body, sketch two large, sweeping curves for the wings.
These curves should start near the shoulders and extend downwards, following the body’s contour.
Remember that owl wings often appear rounded and broad.
Step 5: Draw the Talons and Branch
Sketch two sets of small, three-pronged shapes at the bottom of the body for the talons.
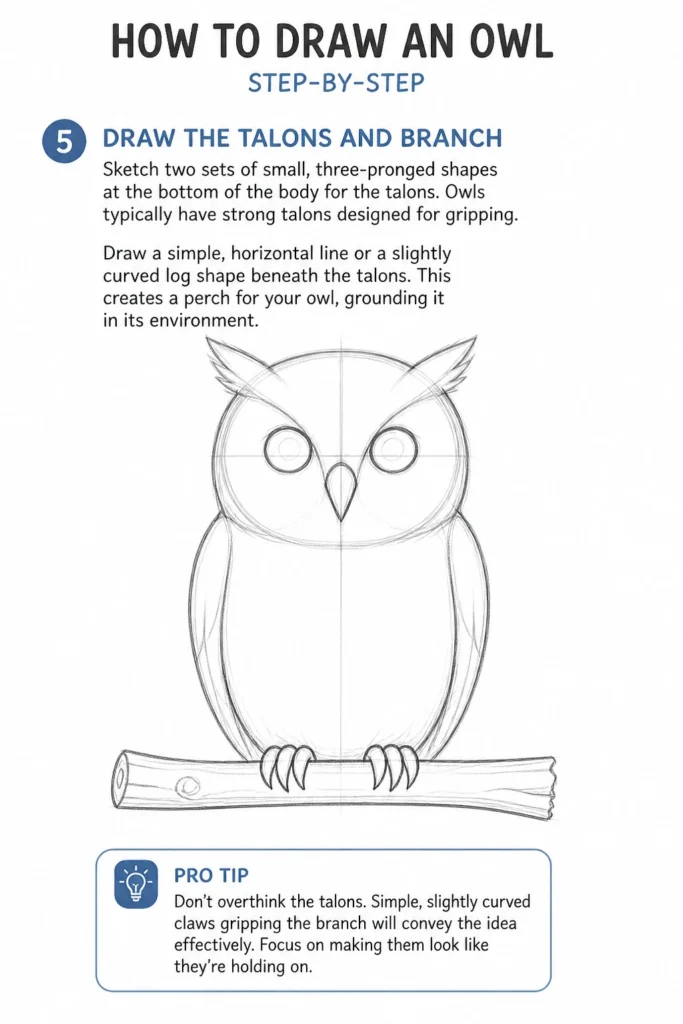
Owls typically have strong talons designed for gripping.
Draw a simple, horizontal line or a slightly curved log shape beneath the talons.
This creates a perch for your owl, grounding it in its environment.
Pro Tip: Don’t overthink the talons. Simple, slightly curved “claws” gripping the branch will convey the idea effectively. Focus on making them look like they’re holding on.
Step 6: Add Feather Details and Texture
Start adding texture to the owl’s body with short, overlapping strokes.
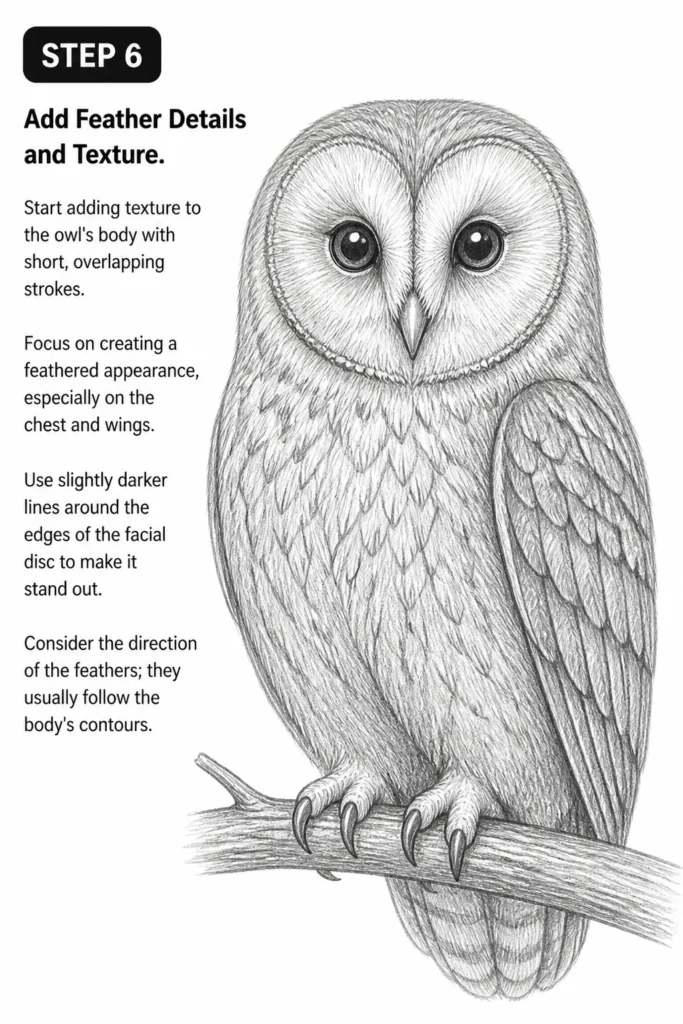
Focus on creating a feathered appearance, especially on the chest and wings.
Use slightly darker lines around the edges of the facial disc to make it stand out.
Consider the direction of the feathers; they usually follow the body’s contours.
Step 7: Clean Up and Refine
Erase all the initial light guide lines you drew in the first steps.
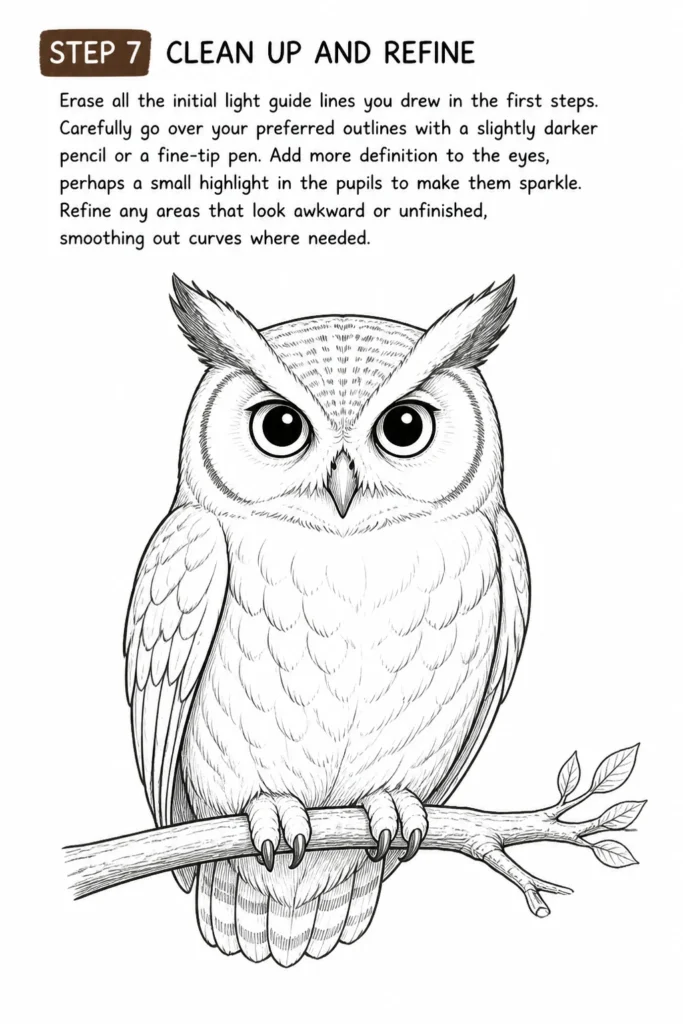
Carefully go over your preferred outlines with a slightly darker pencil or a fine-tip pen.
Add more definition to the eyes, perhaps a small highlight in the pupils to make them sparkle.
Refine any areas that look awkward or unfinished, smoothing out curves where needed.
Step 8: Introduce Shading and Depth
Apply light shading to give your owl drawing dimension and realism.
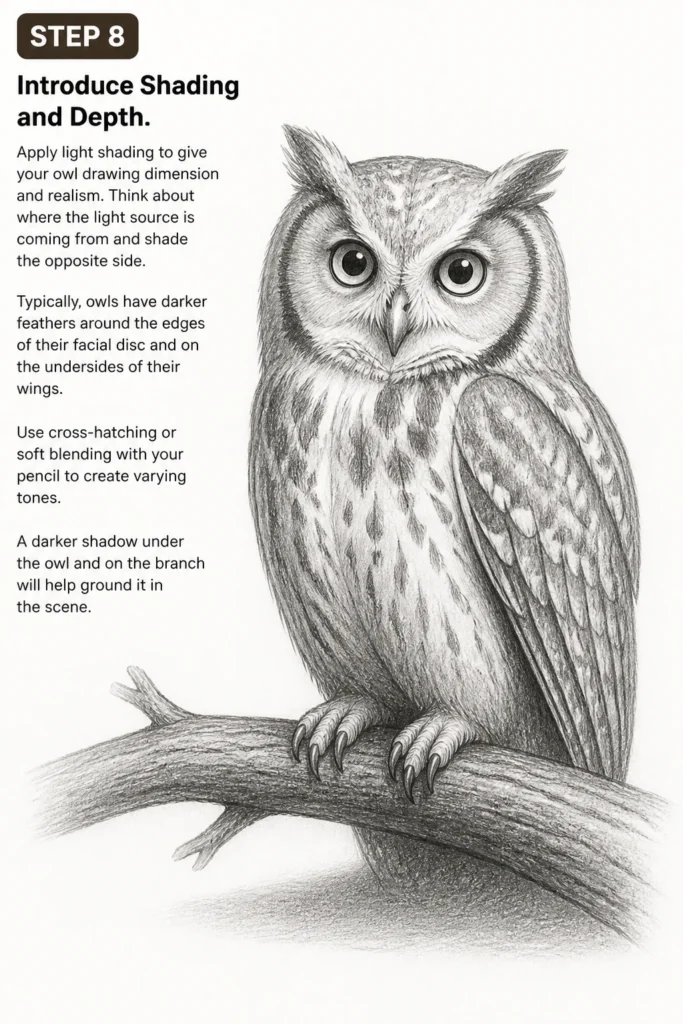
Think about where the light source is coming from and shade the opposite side.
Typically, owls have darker feathers around the edges of their facial disc and on the undersides of their wings.
Use cross-hatching or soft blending with your pencil to create varying tones.
A darker shadow under the owl and on the branch will help ground it in the scene.
Common Mistakes to Avoid
Making Lines Too Dark Too Soon
Many beginners press down too hard on their pencil from the start. This makes it difficult to erase mistakes cleanly, leaving unwanted lines or indentations on your paper. Always begin with very light, exploratory sketches.
Instead, build up your lines gradually. Start with feather-light strokes for your initial shapes and only darken them once you are confident in your drawing’s structure. This allows for easy adjustments and a cleaner final piece.
Ignoring Proportions
A common pitfall is making the head too big or too small for the body, or the eyes disproportionate to the head. This can make the owl look unbalanced or cartoonish, unless that’s your specific intention.
Take a moment to step back and observe your drawing frequently. Compare the sizes of different elements to each other. Use your pencil as a measuring tool by holding it up to your drawing to gauge relative sizes and distances.
Lack of Variety in Line Weight
Drawing everything with the same pencil pressure results in a flat, two-dimensional image. It lacks visual interest and doesn’t effectively communicate depth or form. Uniform lines can make a drawing appear lifeless.
Practice varying your line weight. Use lighter lines for areas that recede or are less important, and darker, bolder lines for contours, shadows, and features you want to emphasize. This adds dynamism and depth to your artwork.
Rushing the Details
It’s tempting to jump straight to adding intricate feather patterns or eye details. However, rushing this stage before the basic structure is solid can lead to misplaced features and a messy overall appearance. Details on a shaky foundation won’t look good.
Be patient and work through the steps systematically. Ensure your foundational shapes, proportions, and main outlines are correct before moving on to finer details. This methodical approach ensures a more polished and accurate final drawing.
Troubleshooting
My Owl Looks Flat and Lifeless
If your owl drawing lacks depth, it’s often due to insufficient shading or a lack of varied line weight. Flat drawings don’t convey the three-dimensional form of the subject.
Revisit your shading. Identify where light would hit your owl and where shadows would naturally fall. Use different pencil pressures to create a range of tones, from light grays to deep blacks. Also, experiment with darker lines for the outlines closest to the viewer and lighter lines for areas that recede.
The Eyes Don’t Look Right
Eyes are crucial for conveying character and life. If they seem off, they can make the entire drawing feel wrong. Common issues include incorrect placement, size, or a lack of expression.
Check the symmetry and spacing of the eyes within the facial disc. Ensure they are roughly the same size. Add a small white highlight in the pupil to give them a reflective quality, making them appear more alive. Consider the direction the owl is looking and adjust the pupils accordingly.
My Feathers Look Messy, Not Textured
Achieving realistic feather texture can be tricky. If your feather lines look chaotic rather than cohesive, you might be drawing individual feathers too distinctly or without considering their flow.
Instead of drawing every single feather, focus on suggesting texture. Use short, overlapping strokes that follow the general direction of the owl’s body and wings. Vary the length and darkness of these strokes to create a more natural, layered effect. Remember, suggestion is often more effective than explicit detail.
Key Takeaways
- Start Light, Build Up: Always begin with faint lines for basic shapes to allow for easy corrections.
- Proportions Matter: Regularly check the relative sizes of different parts of your owl to maintain balance.
- Embrace Guiding Shapes: Ovals and circles are your best friends for establishing the initial structure.
- Add Depth with Shading: Use varying tones and line weights to give your drawing a three-dimensional quality.
- Patience is Key: Don’t rush. Work through each step carefully to ensure a polished final result.
- Practice Makes Progress: The more you draw, the better you’ll become at observing and translating what you see onto paper.
Frequently Asked Questions
What kind of pencil is best for drawing owls?
For initial sketches and general drawing, an HB or 2B pencil is excellent. An HB offers a good balance between hardness and darkness, while a 2B is slightly softer and produces darker lines, great for shading. Having both allows for versatility in your drawing.
How do I make the owl look more realistic?
To enhance realism, focus on subtle details like feather texture, varied shading, and highlights in the eyes. Pay close attention to reference photos of real owls to understand their unique features and feather patterns. Adding a natural background, like a branch, also helps.
Can I draw this digitally?
Absolutely! The principles of sketching basic shapes, building details, and adding shading apply universally. Use layers in your digital art software for different stages (sketch, line art, color, shading) to make the process even more flexible and forgiving.
What if my drawing doesn’t look exactly like the example?
That’s perfectly normal and even encouraged! Every artist has a unique style. The goal of a step-by-step guide is to teach you the process and techniques, not to produce an identical copy. Embrace your own interpretation and enjoy the creative journey.
Our Top Recommended Finds
- Sketching Pencils Set: A good set with a range of H (hard) and B (soft) pencils allows for diverse line weights and shading.
- Kneaded Eraser: Unlike standard erasers, a kneaded eraser can lift graphite without damaging paper and can be molded for precise erasing.
- Smooth Drawing Paper: Paper with a slight tooth (texture) holds graphite well, but a smoother surface is excellent for detailed line work and blending.
Your Artistic Journey Continues Now
You’ve just completed a fantastic journey into drawing an owl, mastering essential techniques along the way.
This isn’t just about one drawing; it’s about building foundational skills that will serve you in all your future artistic endeavors.
Pick up your pencil again, right now, and try drawing another owl, or perhaps move on to a different animal.
Each stroke is a step forward in your creative growth, so keep exploring and enjoying the process.
& Painting
No rigid rules or pretension. Just practical guides, medium comparisons, and encouraging tips to help you enjoy the drawing & painting process.