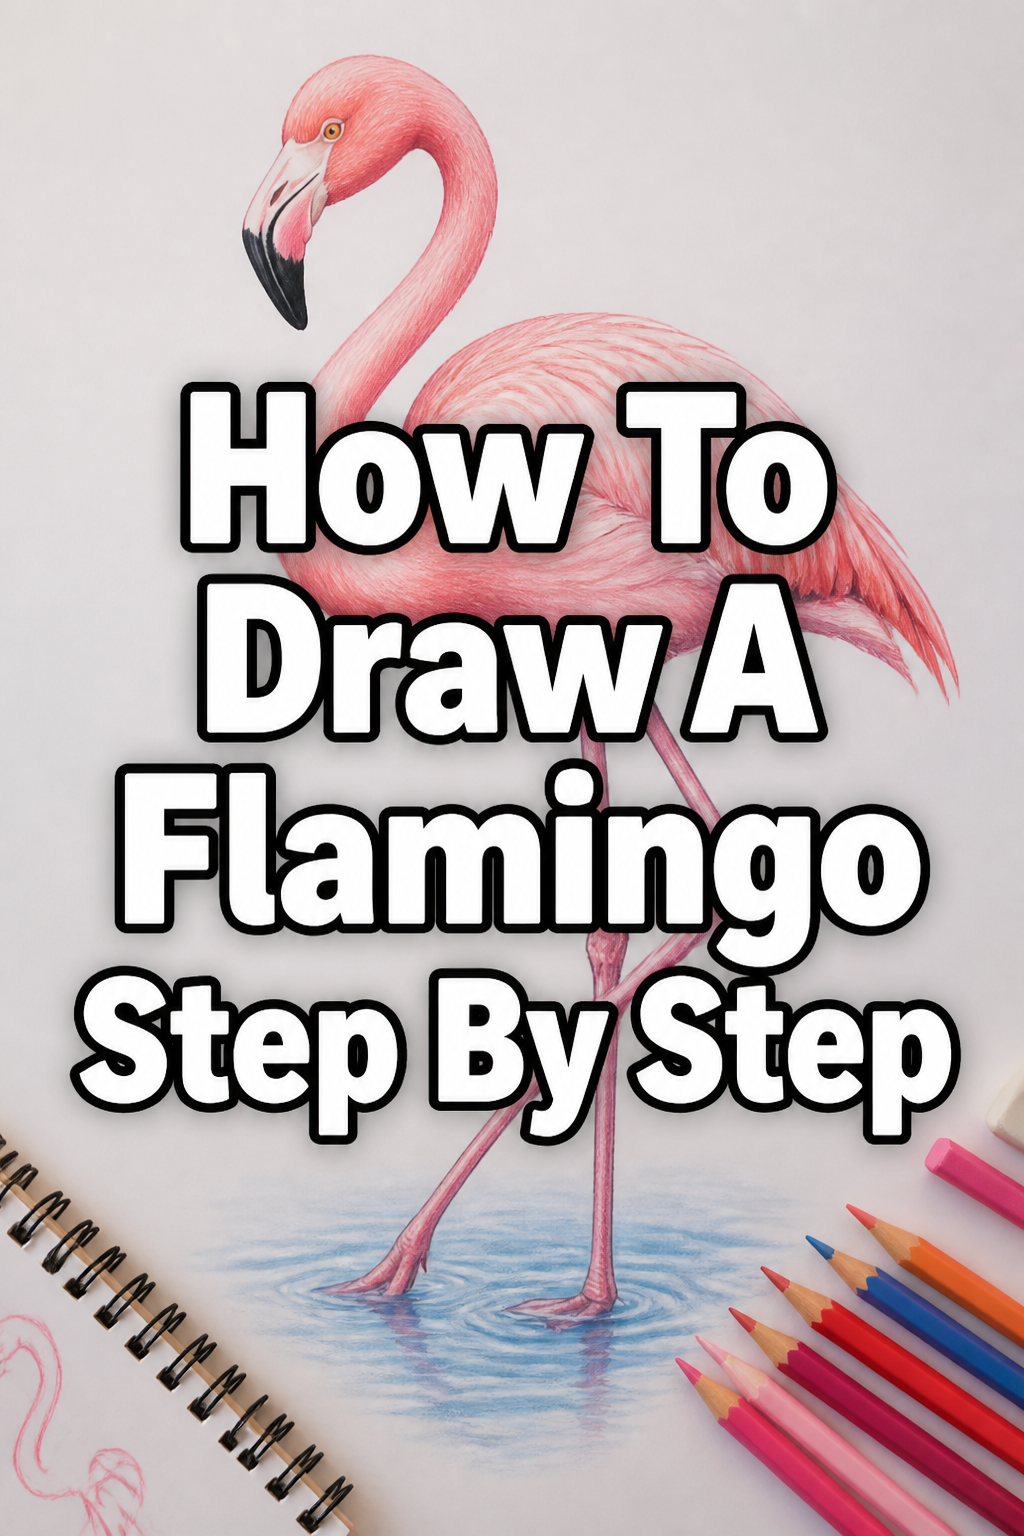
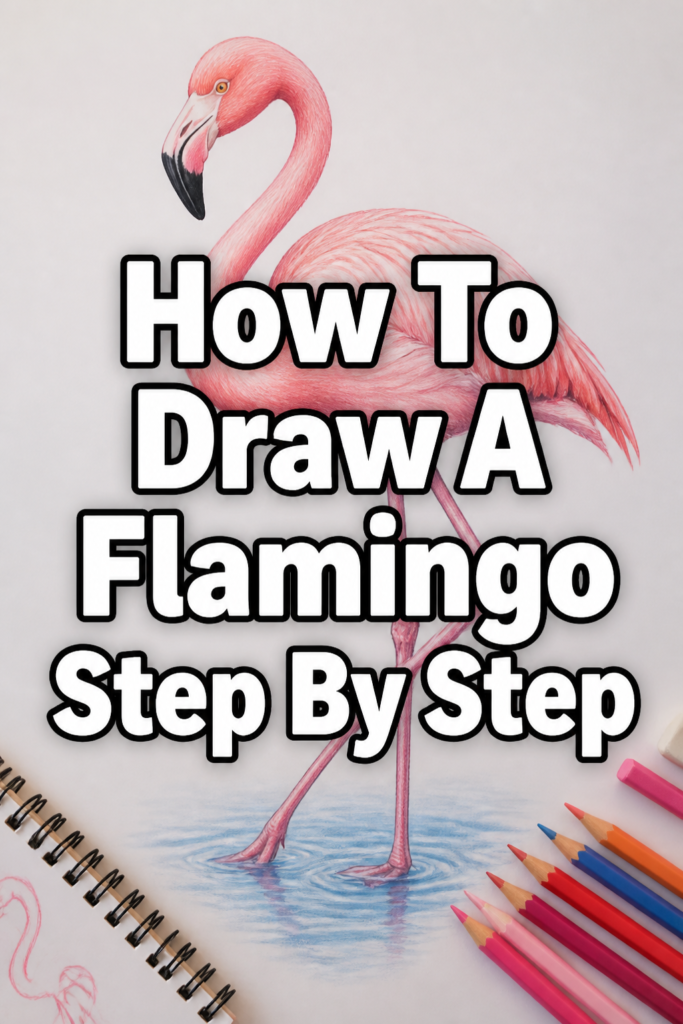
🦩 How To Draw A Flamingo Step By Step

& Painting
No rigid rules or pretension. Just practical guides, medium comparisons, and encouraging tips to help you enjoy the drawing & painting process.
Flamingos are truly captivating creatures, known for their vibrant pink feathers and graceful stance.
Learning to draw them can seem tricky at first, but with a structured approach, anyone can create a beautiful rendition.
I’ve personally found that breaking down complex subjects into simple shapes makes the entire process much more enjoyable and less intimidating.
Quick Overview
This guide will walk you through creating a charming flamingo drawing from scratch.
You’ll learn to build its unique form using basic geometric shapes, gradually adding details to bring it to life.
- Time needed: 30-60 minutes
- Difficulty: Beginner to Intermediate
- What you’ll need: Pencil, eraser, paper, optional colored pencils or markers
Step-by-Step Instructions
Step 1: Sketch the Basic Body Shapes
Begin by lightly sketching two overlapping ovals on your paper. These will form the main body of your flamingo.
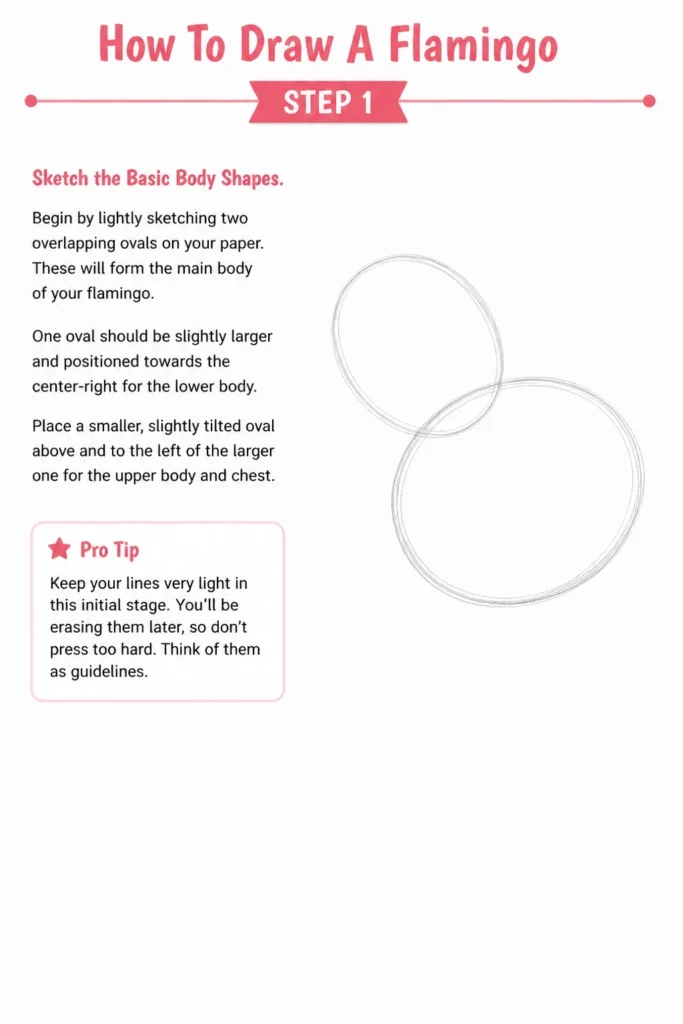
One oval should be slightly larger and positioned towards the center-right for the lower body.
Place a smaller, slightly tilted oval above and to the left of the larger one for the upper body and chest.
Pro Tip: Keep your lines very light in this initial stage. You’ll be erasing them later, so don’t press too hard. Think of them as guidelines.
Step 2: Connect the Neck and Head
Now, draw a long, elegant “S” curve extending upwards and to the left from the smaller body oval.
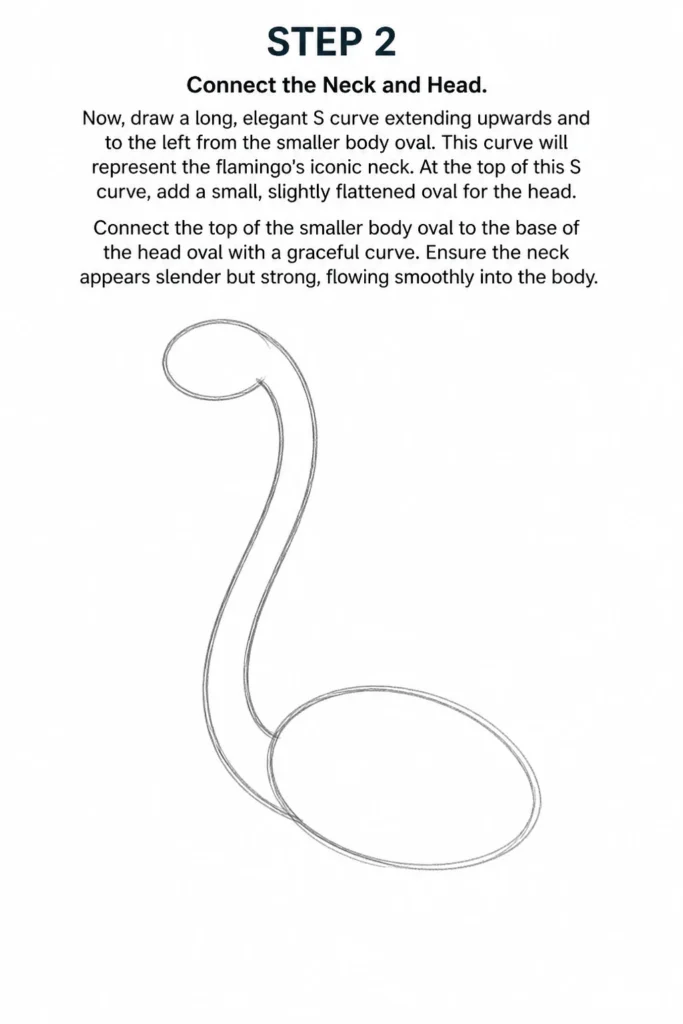
This curve will represent the flamingo’s iconic neck.
At the top of this “S” curve, add a small, slightly flattened oval for the head.
- Connect: The top of the smaller body oval to the base of the head oval with a graceful curve.
- Ensure: The neck appears slender but strong, flowing smoothly into the body.
Step 3: Define the Beak
Flamingos have a very distinctive, downward-curving beak.
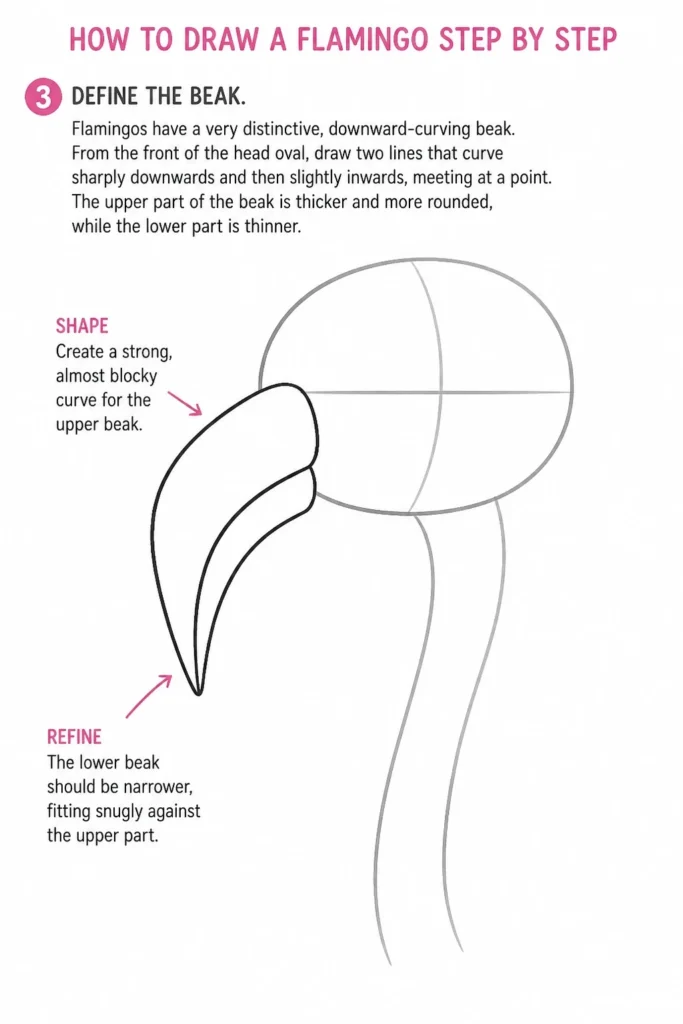
From the front of the head oval, draw two lines that curve sharply downwards and then slightly inwards, meeting at a point.
The upper part of the beak is thicker and more rounded, while the lower part is thinner.
- Shape: Create a strong, almost blocky curve for the upper beak.
- Refine: The lower beak should be narrower, fitting snugly against the upper part.
Step 4: Add the Legs and Feet
Flamingos are known for their long, slender legs. From the bottom of the larger body oval, draw two long, thin lines extending downwards.
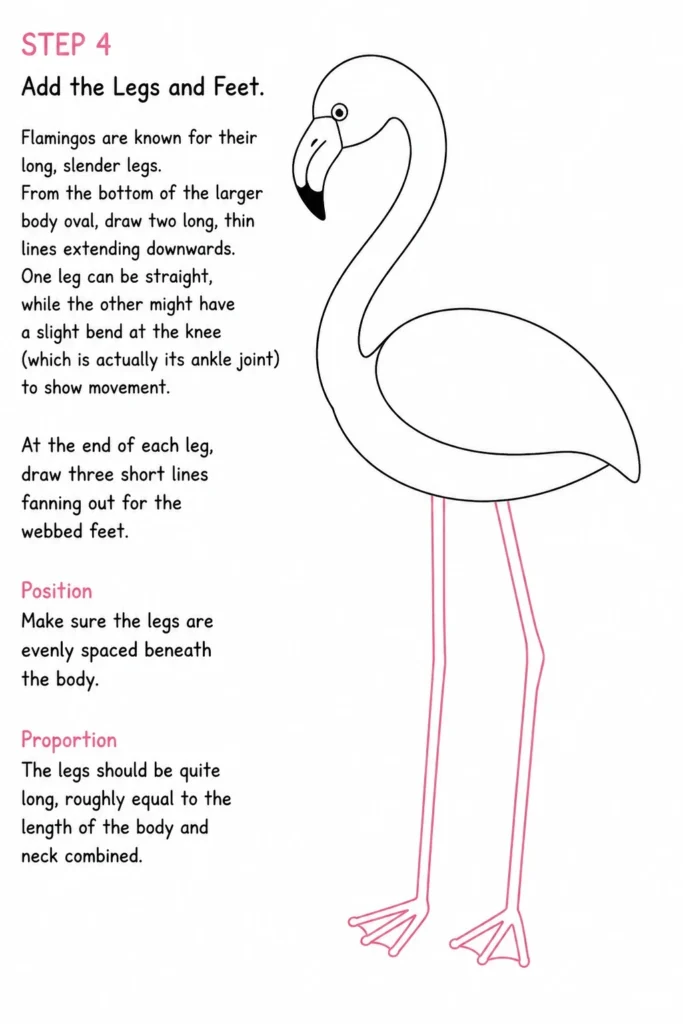
One leg can be straight, while the other might have a slight bend at the knee (which is actually its ankle joint) to show movement.
At the end of each leg, draw three short lines fanning out for the webbed feet.
- Position: Make sure the legs are evenly spaced beneath the body.
- Proportion: The legs should be quite long, roughly equal to the length of the body and neck combined.
Step 5: Outline the Body and Wings
Now it’s time to refine the overall shape of your flamingo.
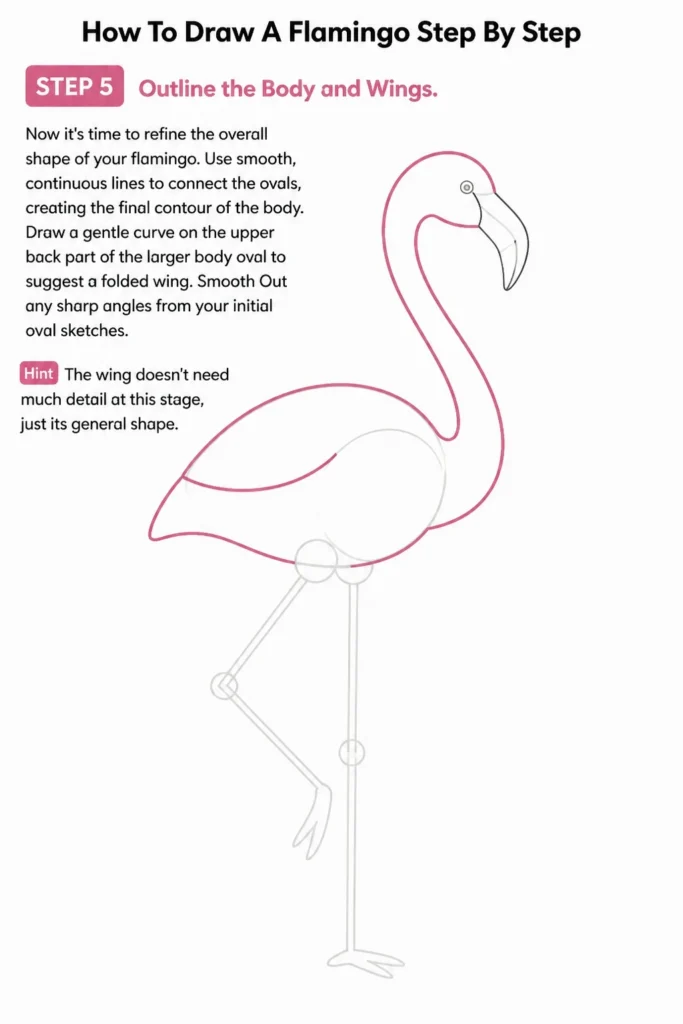
Use smooth, continuous lines to connect the ovals, creating the final contour of the body.
Draw a gentle curve on the upper back part of the larger body oval to suggest a folded wing.
- Smooth: Out any sharp angles from your initial oval sketches.
- Hint: The wing doesn’t need much detail at this stage, just its general shape.
Step 6: Erase Guidelines and Add Eye Detail
Carefully erase all the initial overlapping oval and “S” curve guidelines.
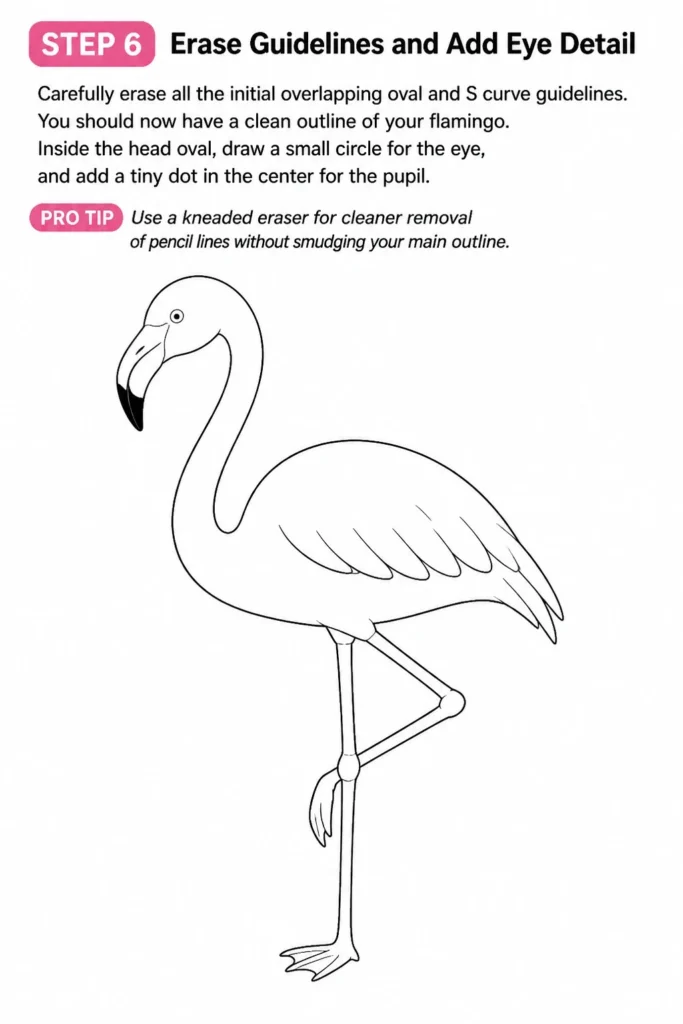
You should now have a clean outline of your flamingo.
Inside the head oval, draw a small circle for the eye, and add a tiny dot in the center for the pupil.
Pro Tip: Use a kneaded eraser for cleaner removal of pencil lines without smudging your main outline.
Step 7: Detail the Feathers and Beak
Add some texture to the wing by drawing a few curved, overlapping lines to suggest individual feathers.
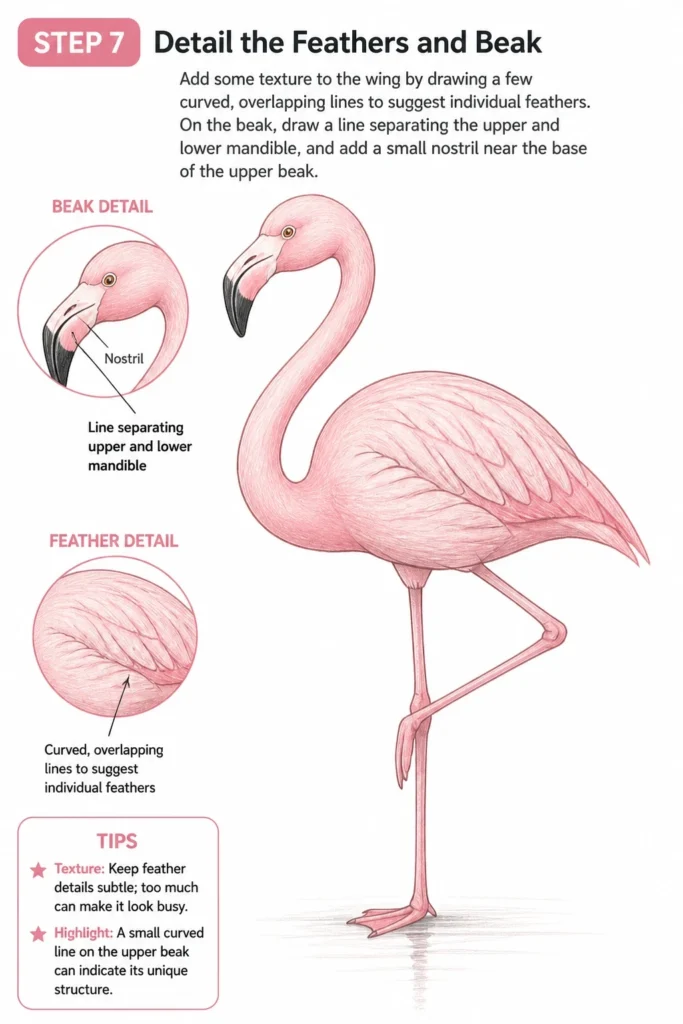
On the beak, draw a line separating the upper and lower mandible, and add a small nostril near the base of the upper beak.
- Texture: Keep feather details subtle; too much can make it look busy.
- Highlight: A small curved line on the upper beak can indicate its unique structure.
Step 8: Add Environmental Context (Optional)
To make your flamingo feel more grounded, add a simple waterline beneath its feet.
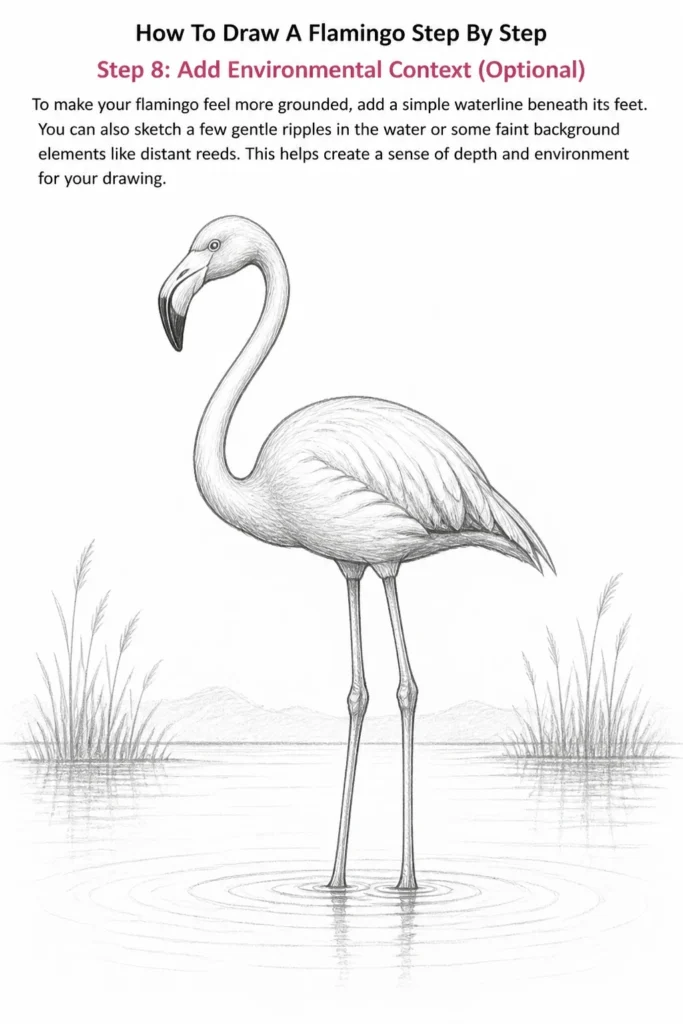
You can also sketch a few gentle ripples in the water or some faint background elements like distant reeds.
This helps create a sense of depth and environment for your drawing.
Step 9: Coloring Your Flamingo
If you’re adding color, start with a light pink or peach for the main body.
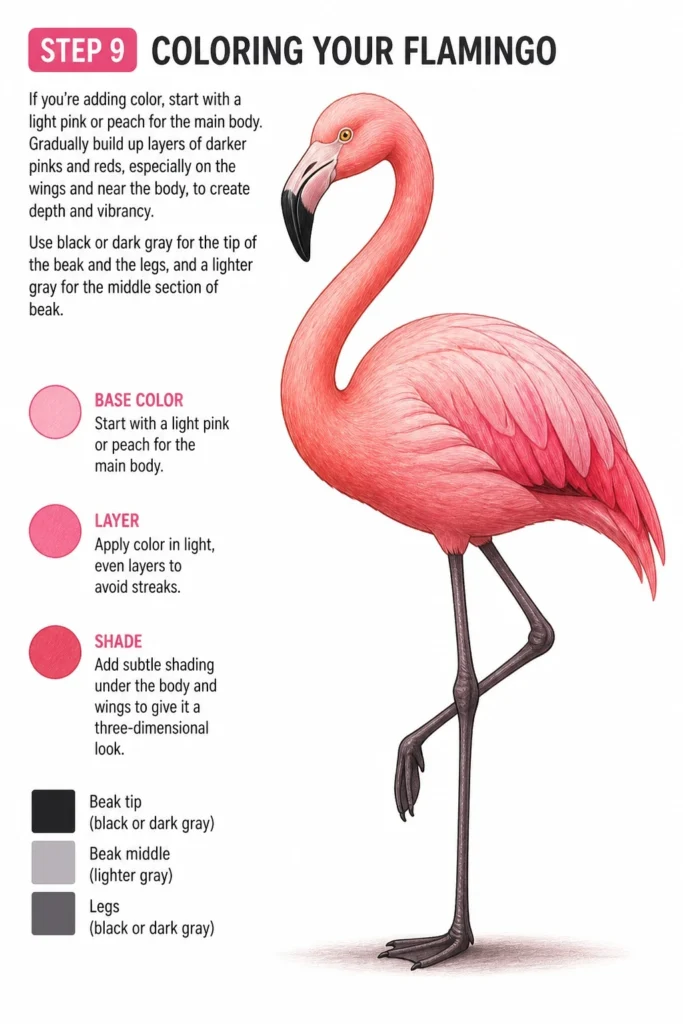
Gradually build up layers of darker pinks and reds, especially on the wings and near the body, to create depth and vibrancy.
Use black or dark gray for the tip of the beak and the legs, and a lighter gray for the middle section of the beak.
- Layer: Apply color in light, even layers to avoid streaks.
- Shade: Add subtle shading under the body and wings to give it a three-dimensional look.
Common Mistakes to Avoid
Stiff or Unnatural Neck Poses
A common pitfall is drawing the neck too straight or too rigid. Flamingos are renowned for their elegant, flexible necks.
If your flamingo looks like a stick figure, you’ve likely oversimplified the “S” curve.
Remember to give the neck a natural, flowing grace, allowing for slight variations in the curve to convey movement or a relaxed posture.
Incorrect Beak Proportion and Shape
The flamingo’s beak is its most defining feature, but it’s often drawn incorrectly.
Many artists make it too thin, too straight, or not curved enough.
Ensure the upper beak is significantly thicker and curves sharply downwards, with the lower beak fitting underneath like a scoop.
Disproportionate Legs
Flamingos have incredibly long legs. It’s easy to draw them too short in relation to the body and neck.
If the legs look stumpy, your flamingo will lose its characteristic elegance.
Aim for legs that are roughly as long as the entire body and neck combined, extending gracefully beneath the bird.
Over-detailing Feathers Too Soon
While feathers are crucial, adding too much detail too early can make your drawing look cluttered and messy.
Resist the urge to draw every single feather.
Focus on the overall shape and structure first, then add just a few suggestive lines on the wings to imply feather texture, especially when coloring.
Troubleshooting
My Flamingo Looks Too Flat/Lifeless
If your drawing lacks depth, you might be relying too heavily on outlines without considering volume.
Go back to thinking about the initial ovals for the body and head, imagining them as three-dimensional forms.
Adding subtle shading, even with just a pencil, under the body, along the neck, and on the underside of the wings can instantly create more dimension and make your flamingo pop.
The Beak Still Doesn’t Look Right
The flamingo beak is unique and takes practice. If it’s not quite there, try observing reference photos closely.
Pay attention to the sharp angle where the upper beak begins its downward curve and how the lower beak tucks in.
Often, the issue is making the upper beak too narrow or not emphasizing its distinct “hook” shape enough.
My Lines Are Too Scratchy/Unsure
Scratchy lines often come from being hesitant or trying to draw too quickly.
Practice drawing long, smooth curves and lines with your whole arm, rather than just your wrist.
Start with very light strokes, building up confidence before committing to a darker line, and remember that erasing is a normal part of the process.
Key Takeaways
- Always start with basic geometric shapes to establish proportion and placement.
- Emphasize the flamingo’s elegant “S” curve neck and unique downward-curving beak.
- Keep initial sketches light and loose, ready for refinement and erasing.
- Pay close attention to the long, slender proportions of the legs and overall body.
- Add subtle details like feathers and shading gradually to avoid a cluttered look.
- Practice and observation are essential for capturing the graceful essence of the flamingo.
Frequently Asked Questions
Can I use markers or paint for this?
Absolutely! This step-by-step guide focuses on the drawing process, which is foundational for any medium. Once your pencil outline is complete, you can confidently use markers, watercolors, acrylics, or digital tools to add color and finish your flamingo.
What if my flamingo looks a bit lopsided?
Don’t worry, that’s very common, especially when starting out. Review your initial ovals and the central axis of the body and neck. Often, small adjustments to these foundational shapes can correct overall symmetry. Remember, perfect symmetry isn’t always natural; a slight tilt can add character.
How do I make the feathers look more realistic?
For more realism, focus on feather groups rather than individual feathers. Use overlapping, curved lines to suggest layers on the wings and tail. Varying the pressure of your pencil or color can also create texture, with lighter strokes for softer down and firmer strokes for primary feathers.
Should I use reference photos?
Yes, absolutely! Even with a guide, using reference photos of real flamingos can greatly enhance your understanding of their anatomy, posture, and feather patterns. They help you capture the true essence and unique characteristics of the bird.
Our Top Recommended Finds
- Sketchbook with Quality Paper: A good sketchbook prevents bleed-through and holds up to erasing, making your drawing experience much smoother.
- Graphite Pencil Set (HB, 2B, 4B): Having a range of pencil hardness allows you to create light guidelines, medium outlines, and darker shading for more dynamic drawings.
- Kneaded Eraser: This type of eraser is fantastic for lifting pencil marks without damaging the paper or leaving smudges, perfect for refining your initial sketches.
Bring Your Flamingo to Life on Paper!
You’ve now learned the essential steps to draw a beautiful flamingo, from its foundational shapes to its vibrant details.
Each stroke you make builds confidence and skill, turning a blank page into a graceful avian portrait.
Don’t stop here; practice makes perfect, and every drawing is a step forward in your artistic journey.
Why not try drawing your flamingo in a different pose next, or perhaps add a flock of them in a scenic marsh?
Grab your tools and start creating your next masterpiece today!
& Painting
No rigid rules or pretension. Just practical guides, medium comparisons, and encouraging tips to help you enjoy the drawing & painting process.