🌸 How To Draw Flowers Step By Step Simple

& Painting
No rigid rules or pretension. Just practical guides, medium comparisons, and encouraging tips to help you enjoy the drawing & painting process.
Learning to draw can feel intimidating, especially when you admire the beauty of a delicate flower.
I remember feeling overwhelmed by all the intricate petals and curves when I first started.
But with a few simple steps, anyone can capture that beauty on paper, and this guide will show you exactly how.
Quick Overview
This guide will walk you through creating a lovely flower drawing, focusing on foundational techniques.
You’ll learn to break down complex shapes into manageable, easy-to-draw components.
- Time needed: Approximately 30-60 minutes, depending on your pace.
- Difficulty: Beginner
- What you’ll need: A pencil (HB or 2B recommended), an eraser, and a sheet of paper.
Step-by-Step Instructions
Step 1: Gather Your Tools and Relax
Set up your drawing space comfortably. Make sure you have good lighting and all your materials within reach.
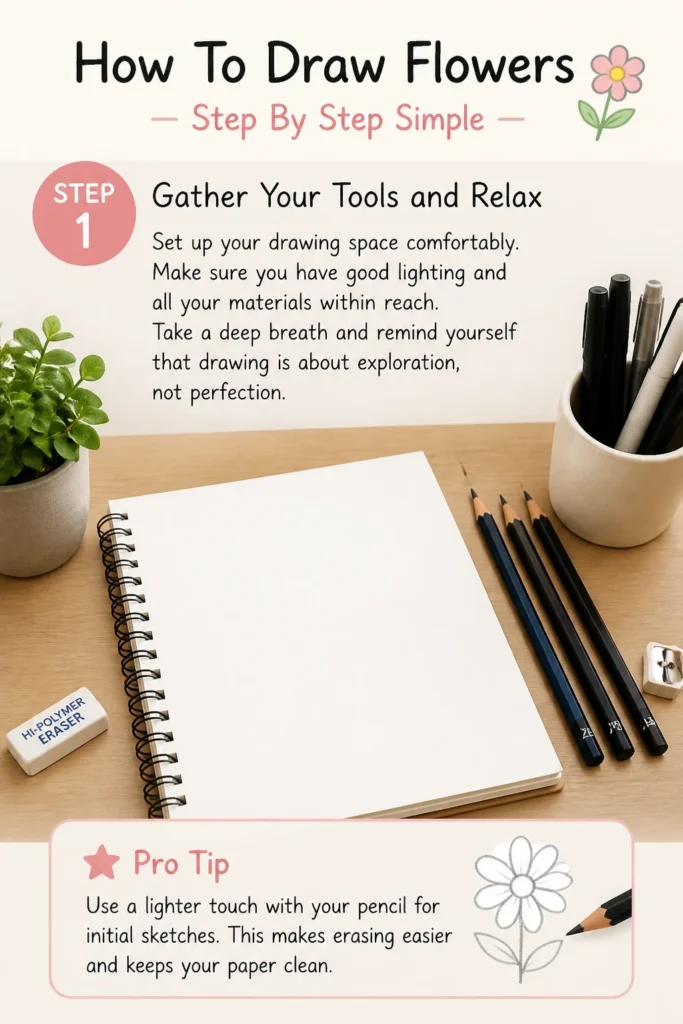
Take a deep breath and remind yourself that drawing is about exploration, not perfection.
Pro Tip: Use a lighter touch with your pencil for initial sketches. This makes erasing easier and keeps your paper clean.
Step 2: Start with a Central Shape for the Flower Head
Draw a light, simple circle in the middle of your paper. This circle will act as the basic guide for the flower’s center.
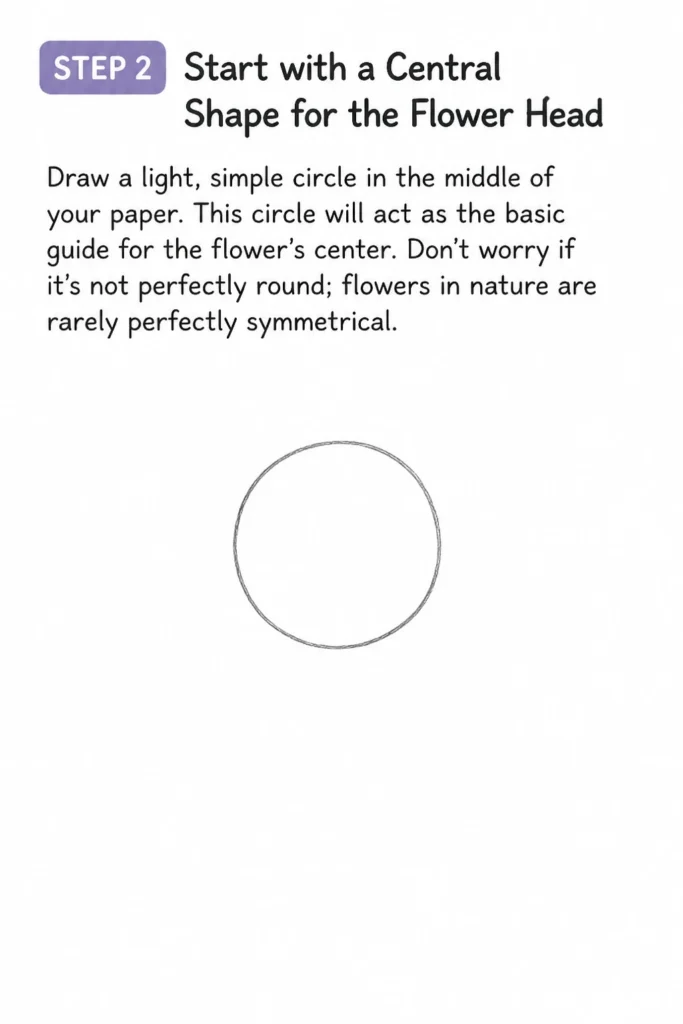
Don’t worry if it’s not perfectly round; flowers in nature are rarely perfectly symmetrical.
Step 3: Add the Stem and Initial Leaves
Sketch a gently curved line extending downwards from the bottom of your circle. This will be your flower’s stem.
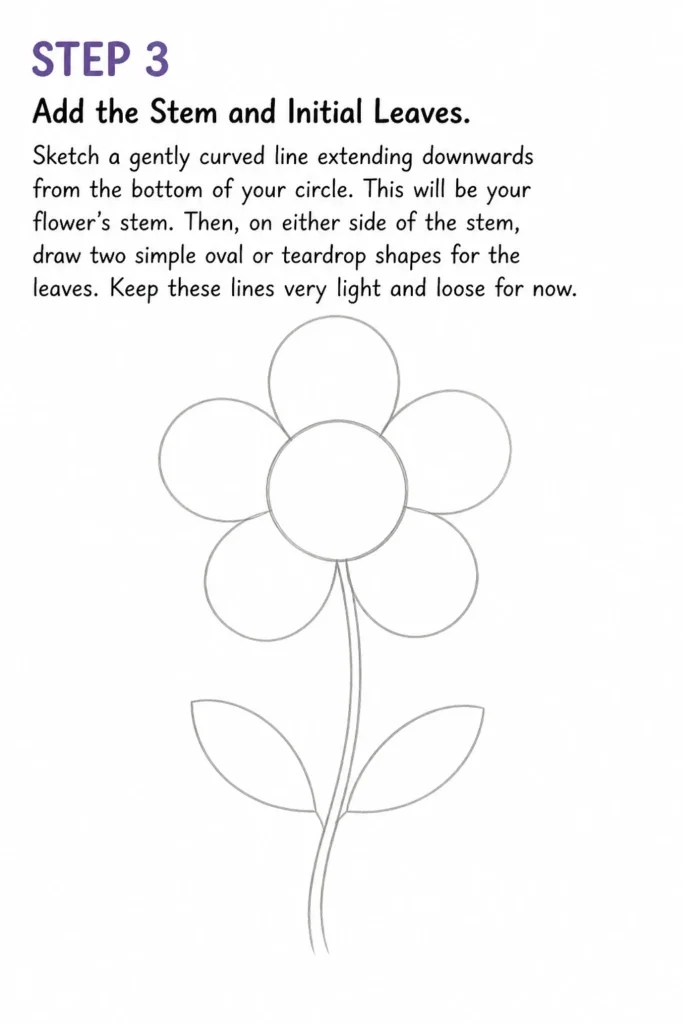
Then, on either side of the stem, draw two simple oval or teardrop shapes for the leaves.
Keep these lines very light and loose for now.
Step 4: Outline the Petal Placement
Draw a larger, looser circle or an oval around your initial central circle. This outer shape will define the overall size and spread of your flower’s petals.
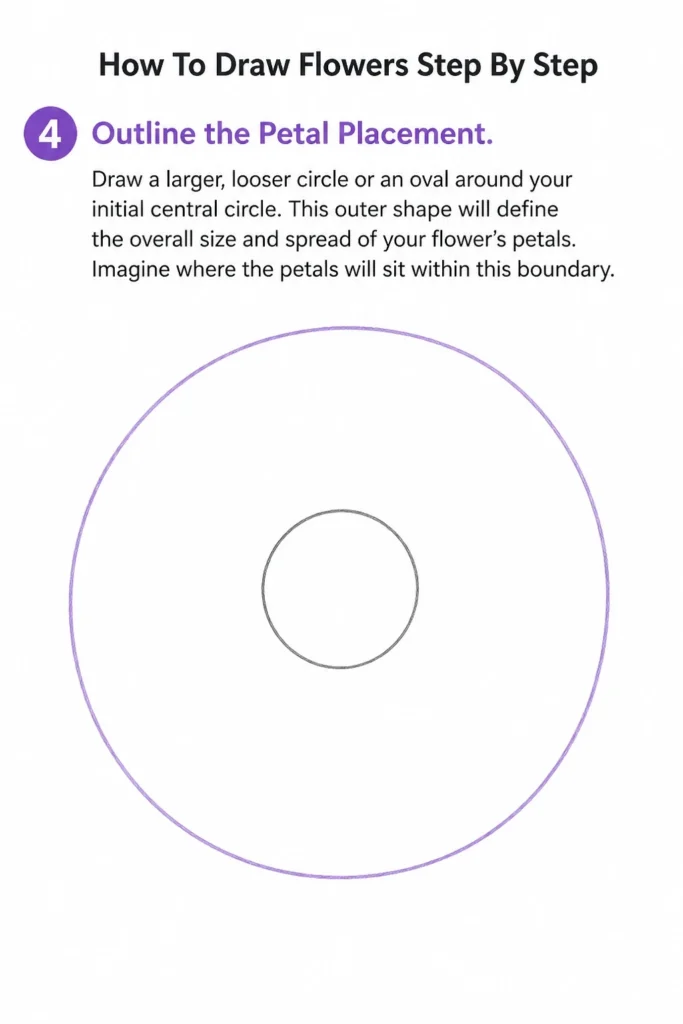
Imagine where the petals will sit within this boundary.
Step 5: Sketch the Basic Petal Shapes
Begin to draw simple, overlapping petal shapes within the outer guideline you just created.
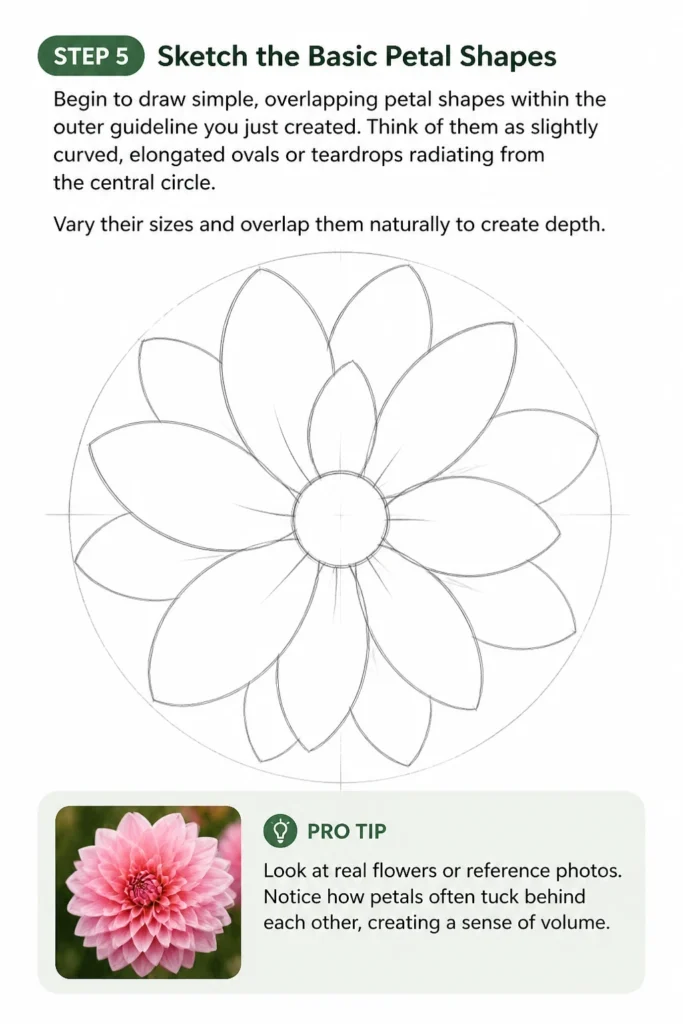
Think of them as slightly curved, elongated ovals or teardrops radiating from the central circle.
Vary their sizes and overlap them naturally to create depth.
Pro Tip: Look at real flowers or reference photos. Notice how petals often tuck behind each other, creating a sense of volume.
Step 6: Refine the Petal Details
Go over your initial petal sketches, making the lines a little firmer and more confident.
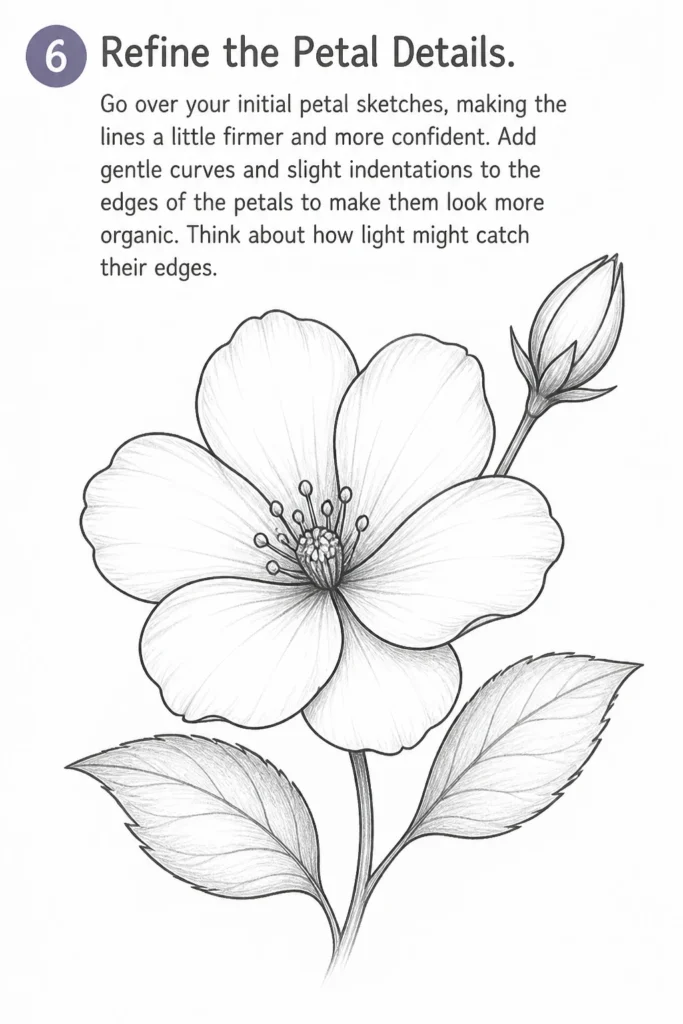
Add gentle curves and slight indentations to the edges of the petals to make them look more organic.
Think about how light might catch their edges.
Step 7: Draw the Flower’s Center Details
Add details inside your central circle. This could be a series of small dots for a daisy, a spiral for a sunflower, or tiny overlapping circles for a rose.
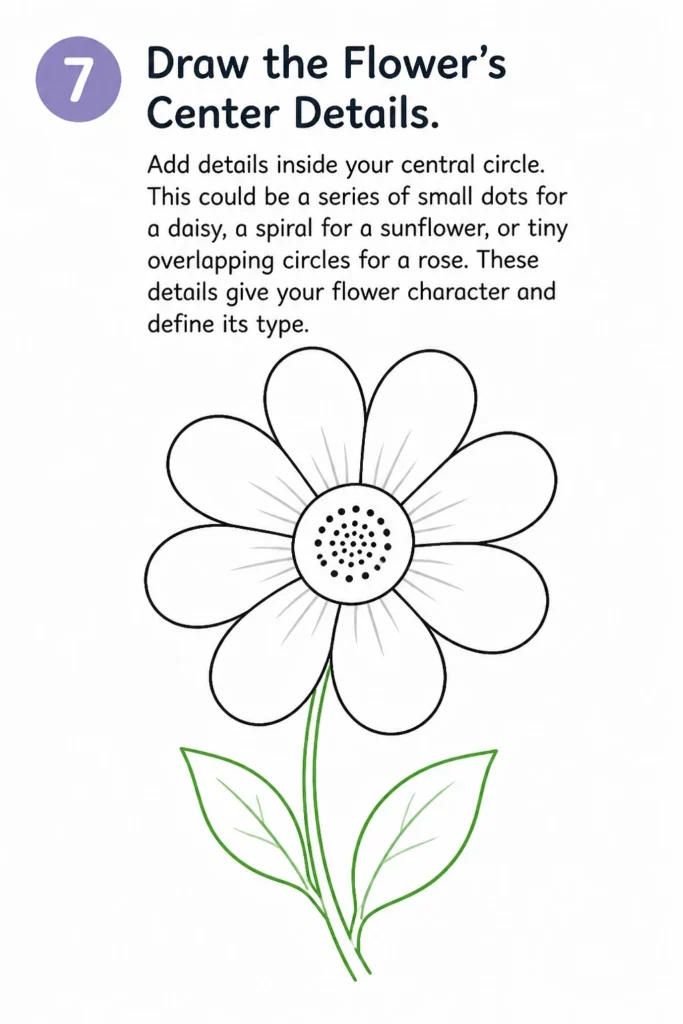
These details give your flower character and define its type.
Step 8: Detail the Leaves and Stem
Refine the shapes of your leaves, adding a central vein and a few smaller veins branching out.
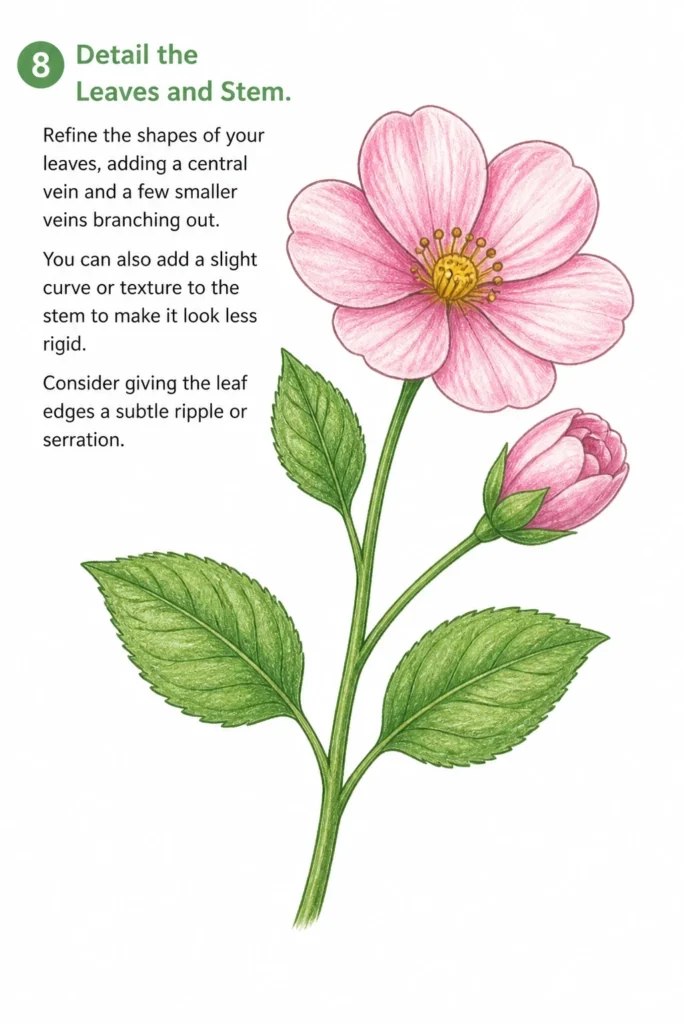
You can also add a slight curve or texture to the stem to make it look less rigid.
Consider giving the leaf edges a subtle ripple or serration.
Step 9: Erase Unnecessary Guidelines
Gently erase all the initial light circles and construction lines you drew in the early steps.
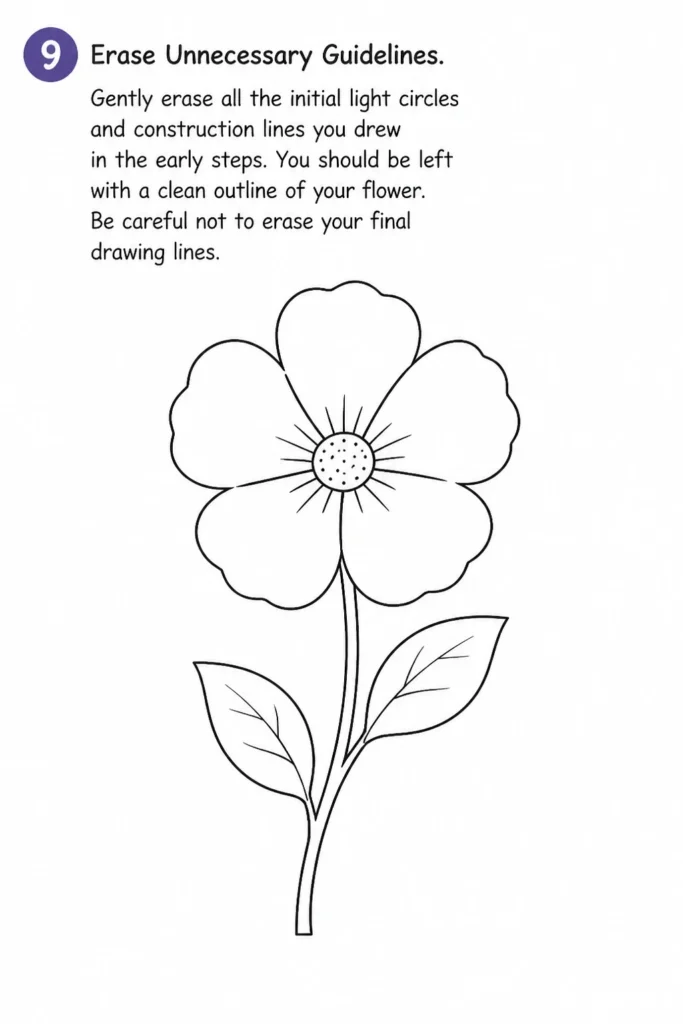
You should be left with a clean outline of your flower.
Be careful not to erase your final drawing lines.
Step 10: Add Finishing Touches and Shading (Optional)
Darken the important outlines of your flower to make them stand out.
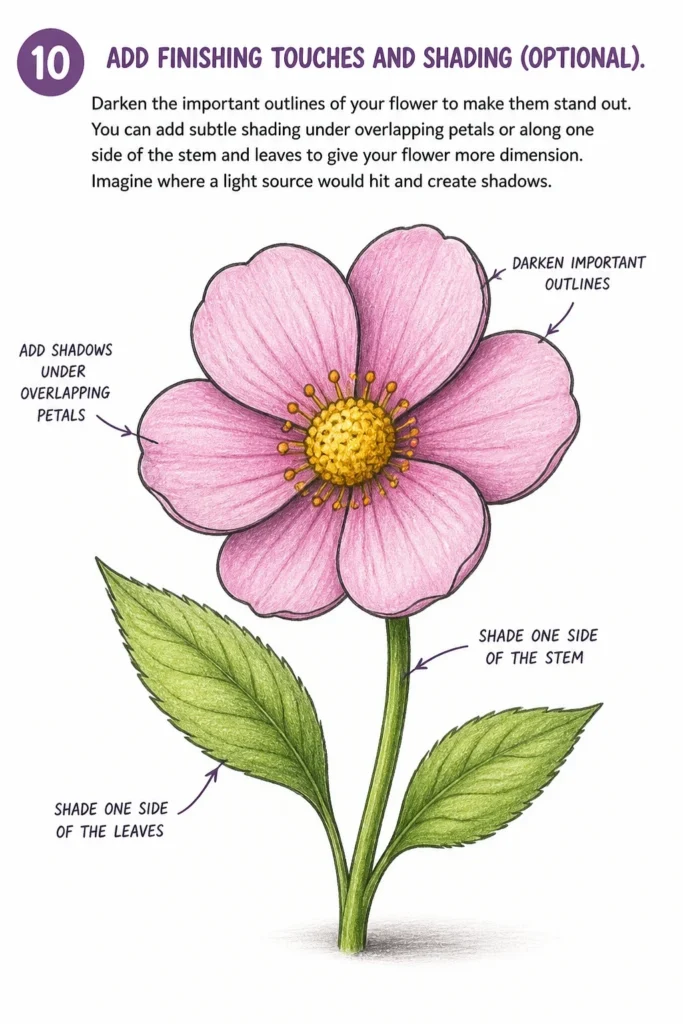
You can add subtle shading under overlapping petals or along one side of the stem and leaves to give your flower more dimension.
Imagine where a light source would hit and create shadows.
Common Mistakes to Avoid
Pressing Too Hard
Many beginners press down very firmly with their pencil from the start. This creates deep indentations on the paper that are impossible to erase.
These lines can make your drawing look messy and restrict your ability to refine shapes.
Instead, use a very light touch for your initial sketches. Think of it as “drawing with air” at first, gradually increasing pressure as you finalize your lines.
Over-Complicating Early On
It’s easy to get caught up in trying to draw every single tiny detail of a flower right away. This often leads to frustration and an overwhelming feeling.
Trying to perfect small details before the overall structure is correct will make your flower look disjointed.
Always start with the biggest, simplest shapes first. Build up complexity step by step, focusing on the general form before moving to fine details.
Obsessing Over Perfect Symmetry
Flowers in nature are organic and rarely perfectly symmetrical. Trying to make every petal identical can make your drawing look stiff and unnatural.
This pursuit of perfection can also slow down your drawing process and lead to self-criticism.
Embrace slight imperfections and variations in petal size, shape, and overlap. This will give your flower a more natural, lifelike appearance and make the process more enjoyable.
Ignoring Overlapping Petals
Drawing all petals as if they are flat and side-by-side can make your flower appear two-dimensional. This lack of depth makes the drawing less engaging.
A flower’s beauty often comes from the way its petals layer and interact with each other.
Always think about how petals overlap and tuck behind one another. This technique creates a sense of depth and volume, making your flower look more realistic and three-dimensional.
Troubleshooting
“My petals look stiff and unnatural.”
This often happens when you draw petals with straight lines or rigid, symmetrical curves. Natural petals have a delicate flow.
Try using long, sweeping, slightly S-shaped curves for your petal edges. Don’t be afraid to make them uneven or gently ripple.
Practice drawing individual petal shapes repeatedly until they feel more fluid and organic.
“My flower looks flat, without any depth.”
A lack of depth usually comes from not showing how petals overlap or from uniform line thickness. Everything appears to be on the same plane.
Focus on creating clear overlaps between petals. The petal in front should visually cover a portion of the one behind it.
You can also use slightly darker lines or subtle shading where petals tuck behind others to enhance this illusion of depth.
“I can’t get the proportions right; my flower looks lopsided.”
Proportion issues often stem from jumping straight into details before establishing the overall form. Without initial guides, elements can drift.
Always begin with very light, simple geometric shapes like circles and ovals to establish the flower’s overall size and the placement of its main components.
Use these guides to check your proportions before committing to any final lines, adjusting as needed until the balance feels right.
Key Takeaways
- Start with light, simple geometric shapes to build your flower’s foundation.
- Embrace imperfection; natural flowers are rarely perfectly symmetrical.
- Use overlapping petals to create a sense of depth and realism.
- Practice regularly, even short sessions help improve your skills.
- Don’t be afraid to erase and redraw; it’s part of the learning process.
- Observe real flowers closely to understand their unique structures and forms.
Frequently Asked Questions
What’s the best pencil to use for flower drawing?
For initial sketching, an HB or 2B pencil is ideal because it’s light and easy to erase. For darker lines and shading, you might move to a 4B or 6B pencil.
A good range of pencil hardness allows for versatility in your drawing.
How do I add color to my flower drawing?
Start with very light layers of your chosen color, building up intensity gradually. Use different shades of the same color to create highlights and shadows.
Colored pencils, watercolors, or markers all offer unique ways to bring your flower to life.
Can I draw different types of flowers with this method?
Absolutely! This step-by-step method provides a foundational approach. You can adapt the initial shapes and petal structures to draw daisies, roses, tulips, and many other flower varieties.
The core idea of starting with simple forms and building detail remains constant.
How often should I practice to see improvement?
Consistency is more important than long, infrequent sessions. Aim for short, regular practice sessions, even just 15-20 minutes a few times a week.
Regular practice helps build muscle memory and sharpens your observational skills over time.
Our Top Recommended Finds
- Sketchbook: Look for one with smooth, acid-free paper that can handle multiple erasures without tearing.
- Pencil Set: A basic set with a range of hardness (e.g., HB, 2B, 4B, 6B) will give you flexibility.
- Kneaded Eraser: These are excellent for lifting pencil marks gently without smudging or damaging the paper.
Your Blooming Artistic Journey Begins Now
You’ve taken the first wonderful steps toward drawing beautiful flowers.
This guide has provided the tools and techniques to get you started, focusing on simplicity and enjoyment.
Now, pick up your pencil and let your creativity blossom!
& Painting
No rigid rules or pretension. Just practical guides, medium comparisons, and encouraging tips to help you enjoy the drawing & painting process.