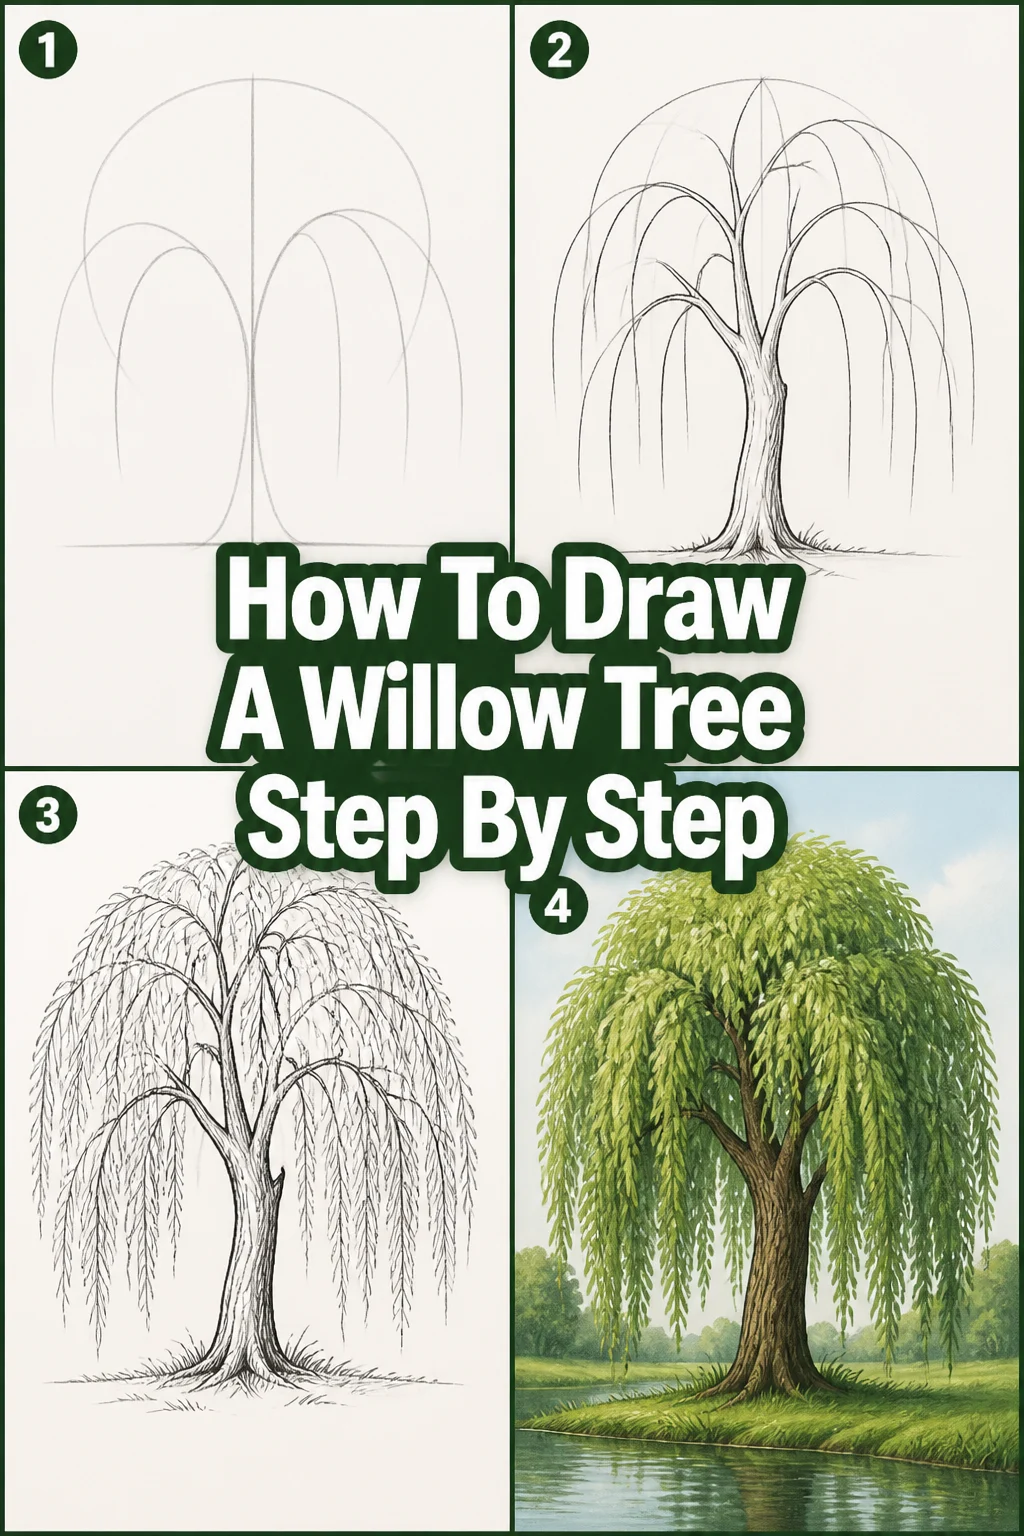
🌳 How To Draw A Willow Tree Step By Step
Have you ever admired the graceful, sweeping branches of a willow tree, wishing you could capture that serene beauty on paper?
I remember my first attempt, a rather stiff and unconvincing rendition that lacked the tree’s signature fluidity.
Through practice and understanding its unique structure, I discovered the secrets to drawing a willow that truly breathes life onto the page, and I’m excited to share those insights with you.
Quick Overview
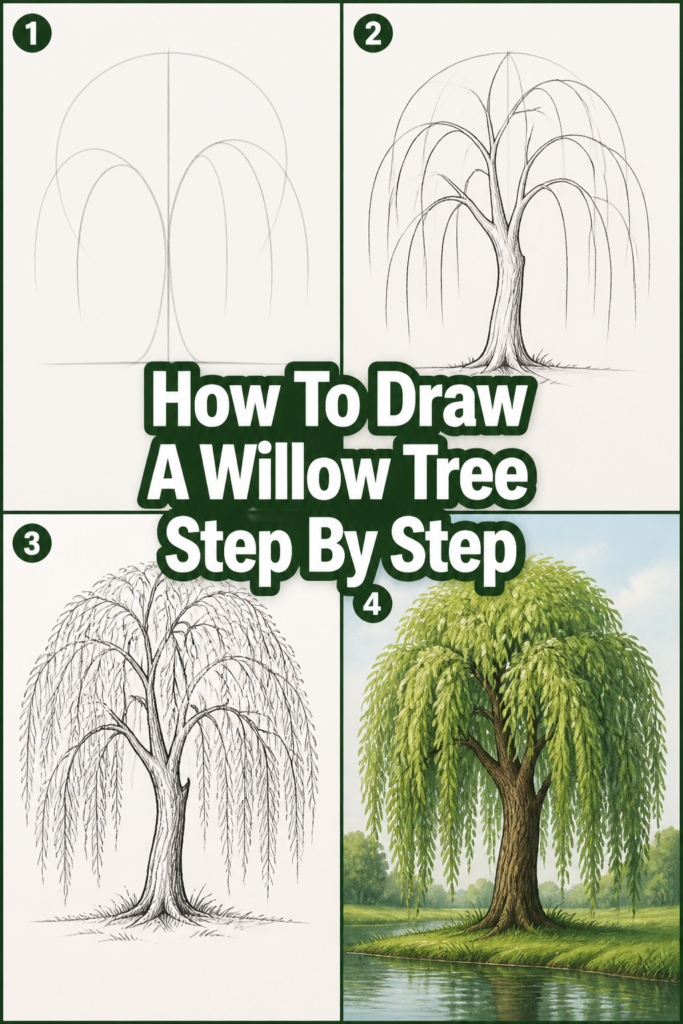
This guide will walk you through creating a stunning willow tree drawing, from its foundational structure to its delicate, weeping foliage.
You’ll learn to build depth, texture, and the characteristic elegance that makes this tree so beloved.
- Time needed: 60-90 minutes
- Difficulty: Intermediate
- What you’ll need: Drawing pencils (HB, 2B, 4B), an eraser (kneaded and regular), drawing paper, optional blending stump.
Step-by-Step Instructions
Step 1: Establish Your Ground and Basic Form
Begin by lightly sketching a horizontal line across your paper. This will serve as your ground line, anchoring your tree.
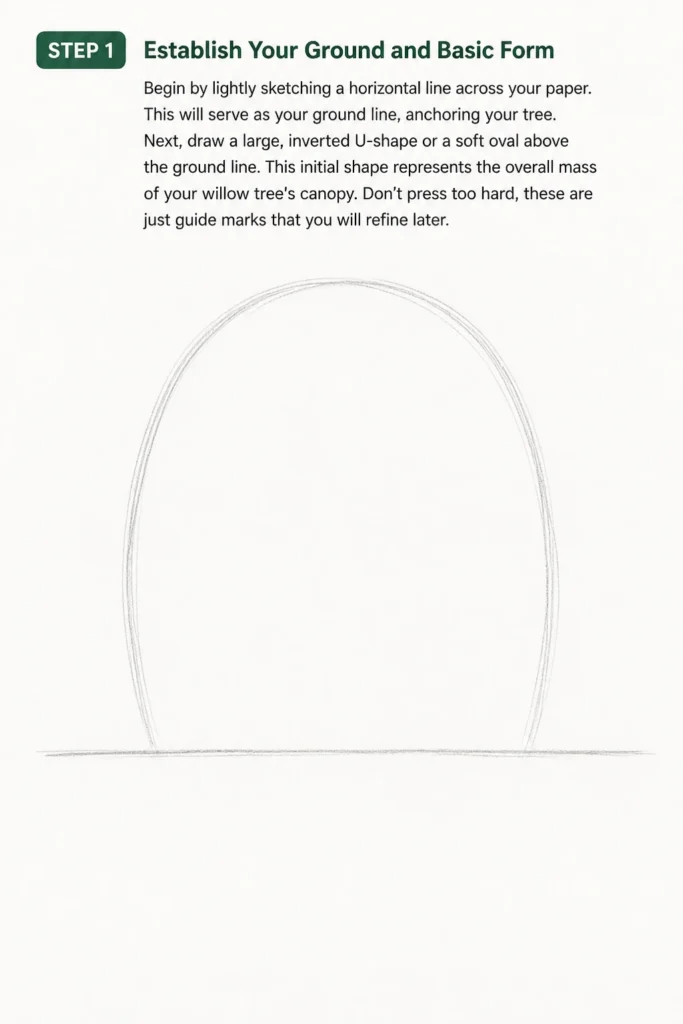
Next, draw a large, inverted U-shape or a soft oval above the ground line. This initial shape represents the overall mass of your willow tree’s canopy.
Don’t press too hard; these are just guide marks that you will refine later.
Step 2: Outline the Trunk and Primary Branches
From the center of your ground line, draw two slightly curved, parallel lines extending upwards into your canopy shape. These form the main trunk.
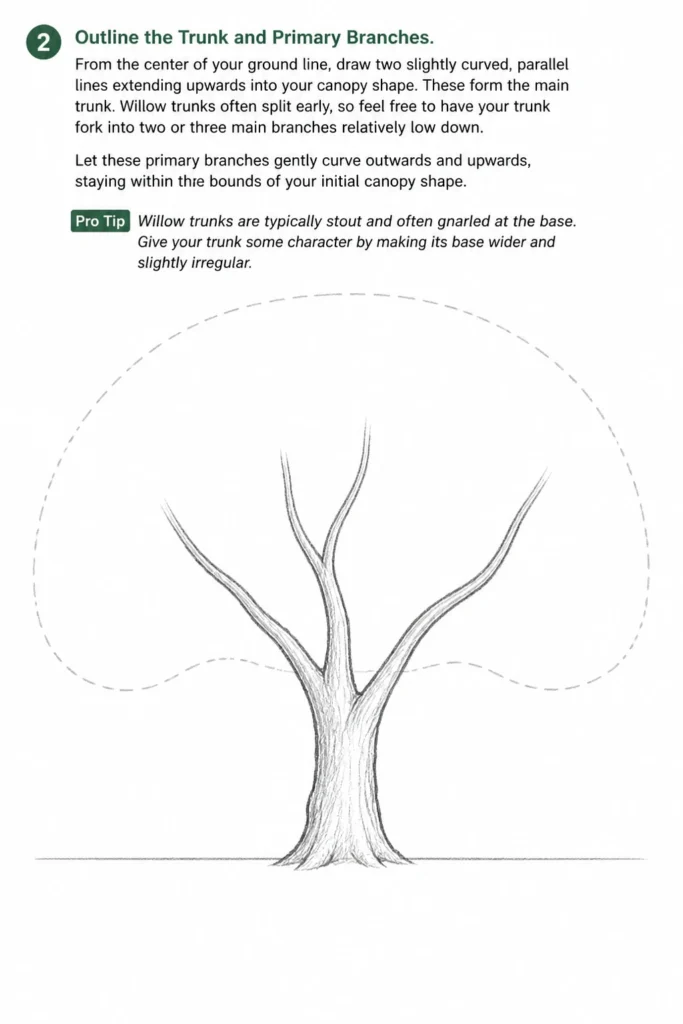
Willow trunks often split early, so feel free to have your trunk fork into two or three main branches relatively low down.
Let these primary branches gently curve outwards and upwards, staying within the bounds of your initial canopy shape.
Pro Tip: Willow trunks are typically stout and often gnarled at the base. Give your trunk some character by making its base wider and slightly irregular.
Step 3: Develop the Branching Structure
Now, extend secondary branches from your primary ones. These should begin to droop downwards, mimicking the willow’s weeping habit.
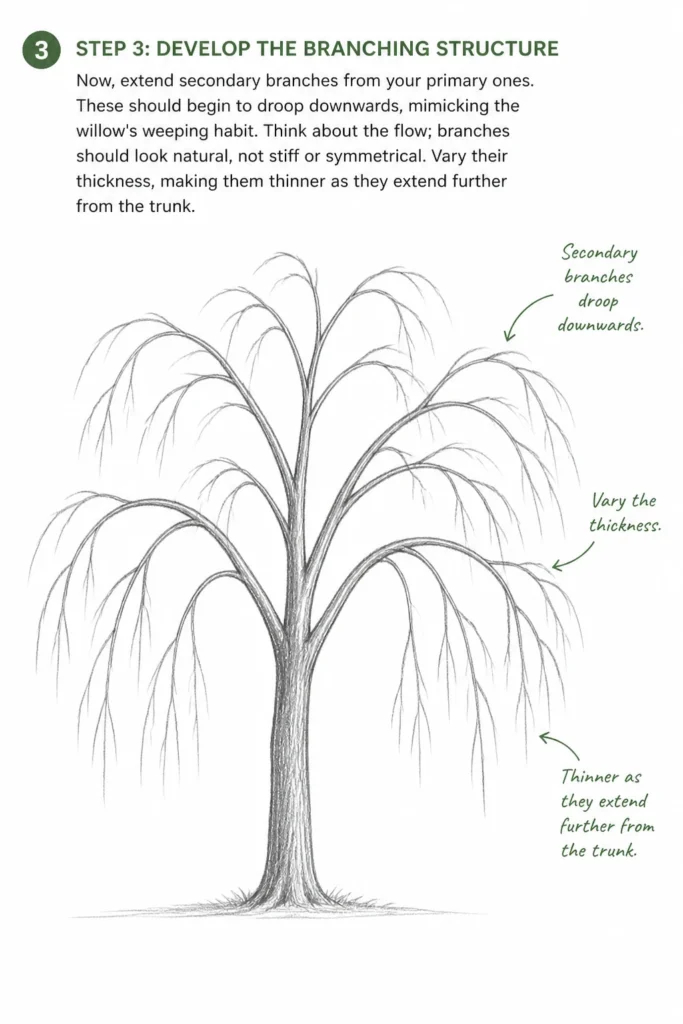
Think about the flow; branches should look natural, not stiff or symmetrical.
Vary their thickness, making them thinner as they extend further from the trunk.
Step 4: Create the Initial Foliage Mass
Instead of drawing individual leaves, focus on creating the overall shape of the foliage clumps.
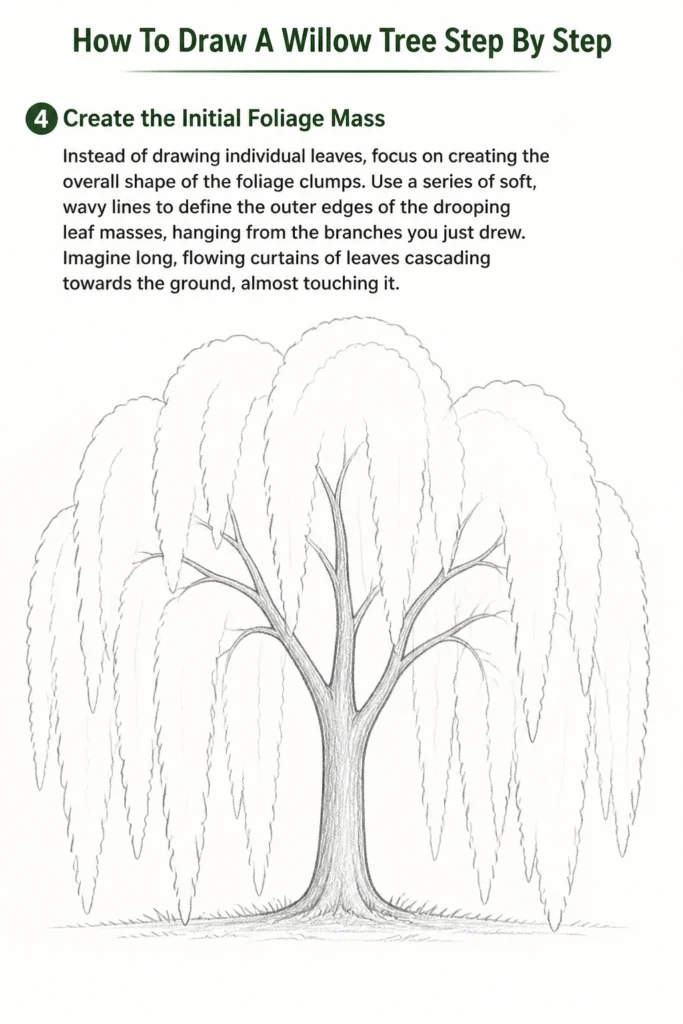
Use a series of soft, wavy lines to define the outer edges of the drooping leaf masses, hanging from the branches you just drew.
Imagine long, flowing curtains of leaves cascading towards the ground, almost touching it.
Step 5: Define Drooping Branches and Leaf Clusters
Within the foliage masses, begin to suggest the individual weeping branches and clusters of leaves.
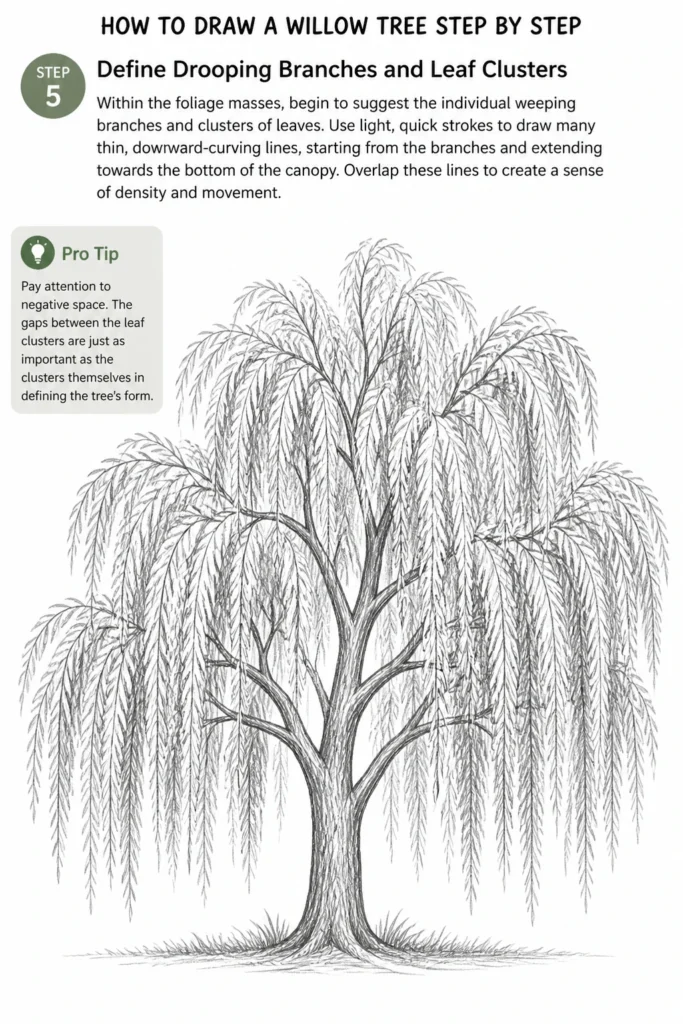
Use light, quick strokes to draw many thin, downward-curving lines, starting from the branches and extending towards the bottom of the canopy.
Overlap these lines to create a sense of density and movement.
Pro Tip: Pay attention to negative space. The gaps between the leaf clusters are just as important as the clusters themselves in defining the tree’s form.
Step 6: Add Texture to the Trunk and Branches
Switch to a darker pencil (like a 2B) and begin adding texture to the trunk and main branches.
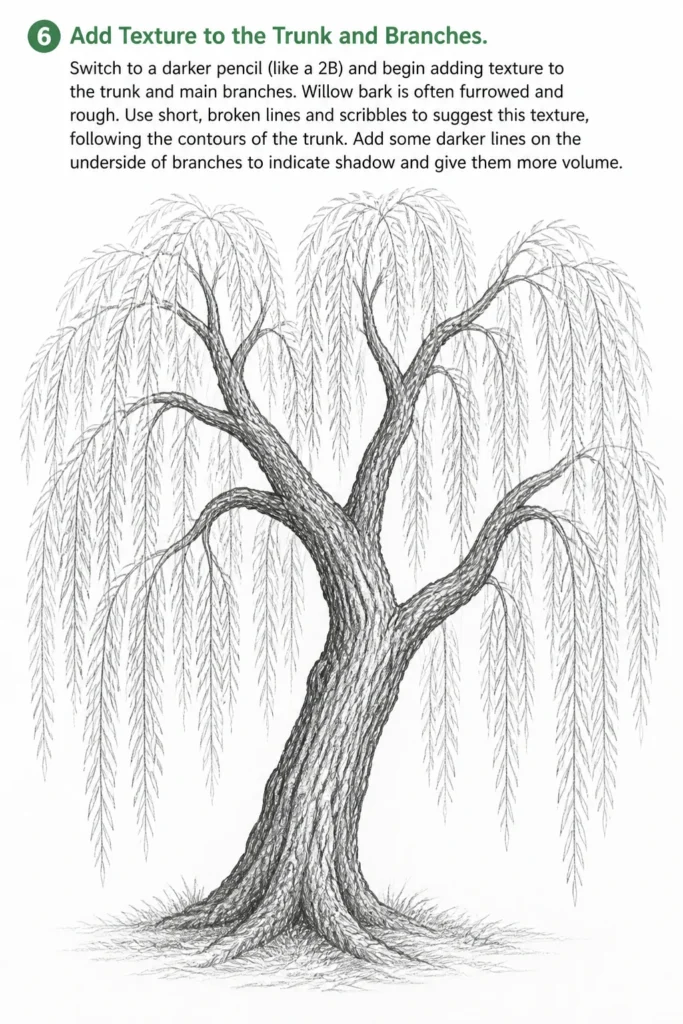
Willow bark is often furrowed and rough. Use short, broken lines and scribbles to suggest this texture, following the contours of the trunk.
Add some darker lines on the underside of branches to indicate shadow and give them more volume.
Step 7: Introduce Shading and Depth to the Foliage
This is where your willow tree truly comes alive. Using a softer pencil (e.g., 4B), start shading the foliage.
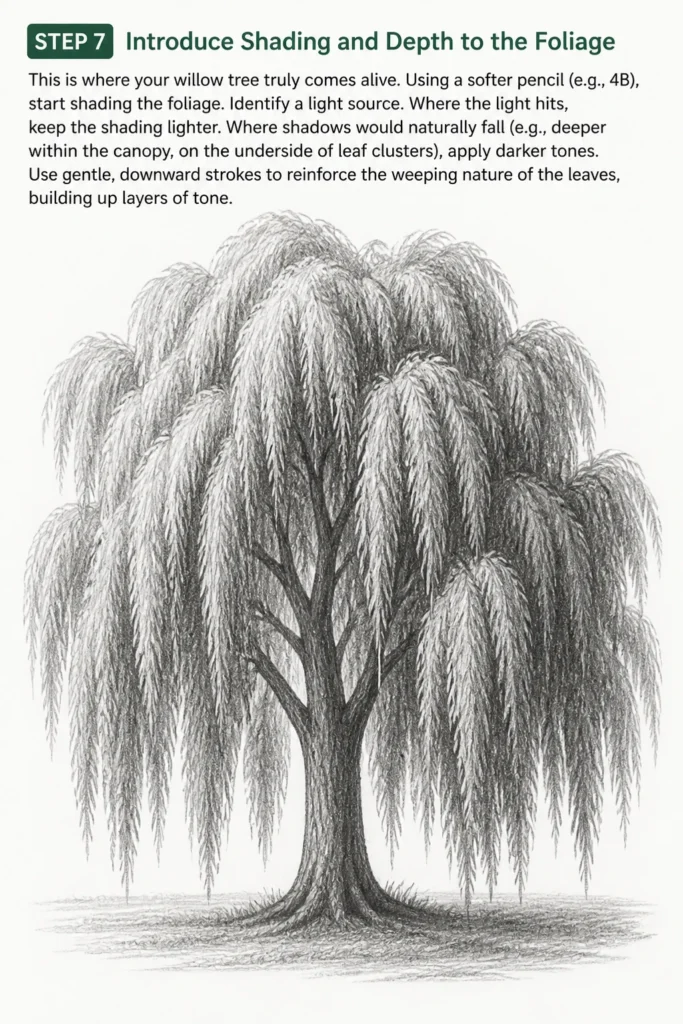
Identify a light source. Where the light hits, keep the shading lighter. Where shadows would naturally fall (e.g., deeper within the canopy, on the underside of leaf clusters), apply darker tones.
Use gentle, downward strokes to reinforce the weeping nature of the leaves, building up layers of tone.
Step 8: Refine Details and Add Final Touches
Step back and observe your drawing. Use your kneaded eraser to lift any stray lines or lighten areas that are too dark.
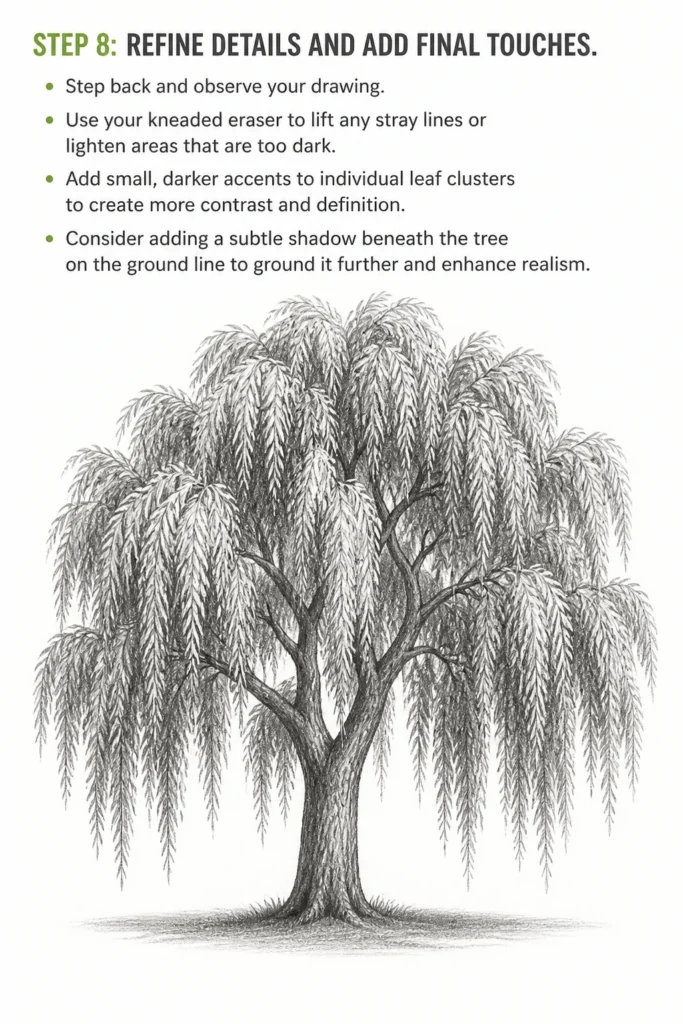
Add small, darker accents to individual leaf clusters to create more contrast and definition.
Consider adding a subtle shadow beneath the tree on the ground line to ground it further and enhance realism.
Common Mistakes to Avoid
Stiff, Upright Branches
A common pitfall is drawing branches that extend horizontally or even upwards, typical of many other tree species.
Willow trees are famous for their “weeping” habit. Ensure your branches, especially the secondary ones, clearly droop downwards, creating that characteristic cascade.
Think of them as long, elegant fingers reaching towards the earth.
Lack of Foliage Density
Sometimes artists draw too few leaves or make the foliage too transparent, which doesn’t convey the lushness of a willow.
Willow trees have dense canopies. Build up layers of leaf clusters and use varied shading to suggest depth and fullness, avoiding large, empty gaps within the canopy.
Remember, the goal is to create the impression of many leaves, not to draw every single one.
Symmetrical or Unnatural Shape
Trying to make your tree perfectly symmetrical can make it look artificial and unappealing.
Nature is imperfect and organic. Allow your willow tree to have an irregular, asymmetrical shape, with branches of varying lengths and curvatures.
Embrace the natural flow and variation that makes each tree unique.
Ignoring Trunk Texture
A smooth, featureless trunk can detract from the realism of your drawing.
Willow trunks are often textured, with interesting bark patterns and knots.
Spend time adding subtle lines and shading to suggest the roughness and character of the bark, particularly at the base and where main branches emerge.
Troubleshooting
My Willow Tree Looks Flat
If your drawing lacks dimension, it’s likely due to insufficient contrast and shading.
Go back to Step 7 and focus on deepening your shadows. Use a softer pencil (like a 4B or 6B) to create darker tones in areas where light wouldn’t reach, such as the underside of leaf clumps and deeper within the canopy.
Ensure you have a good range of values from very light to very dark to make your tree pop.
The Branches Don’t Look Like They’re “Weeping”
This issue often stems from not committing enough to the downward curve of the branches and foliage.
Review Step 5. Exaggerate the downward sweep of the secondary branches and the lines indicating leaf clusters. Imagine gravity pulling them strongly towards the ground.
Ensure the overall silhouette of the foliage is wider at the bottom than at the top, emphasizing the cascade.
The Foliage Looks Like a Solid Mass, Not Individual Leaves
While we don’t draw every leaf, the goal is to suggest movement and individual clusters.
Vary your stroke direction slightly within each cluster and allow for small gaps or breaks between larger leaf masses.
Use your eraser to lift tiny highlights in some areas, creating the illusion of individual leaves catching the light.
Key Takeaways
- Always start with light, foundational sketches to establish the overall form.
- Embrace the distinctive downward-sweeping nature of willow branches and foliage.
- Vary line thickness and texture to add realism to both branches and bark.
- Utilize a full range of shading values to create depth and dimension in your drawing.
- Don’t strive for perfect symmetry; natural forms are often irregular and organic.
- Practice suggests individual leaf clusters rather than drawing every single leaf.
Frequently Asked Questions
What’s the best pencil hardness for drawing willow leaves?
For the initial light sketches of foliage masses, an HB or 2B pencil is ideal. When adding texture and shading, a softer pencil like a 4B or 6B will allow you to achieve richer, darker tones and suggest the delicate nature of the leaves more effectively.
How can I make my willow tree look more dynamic?
To add dynamism, consider incorporating a subtle sense of wind. You can achieve this by having some of the weeping branches slightly sway in one direction, or by making the foliage appear slightly ruffled on one side. Also, varying the length and density of the drooping branches will add visual interest.
Should I draw the background before or after the tree?
Generally, it’s best to complete the main elements of your willow tree first. Once the tree is established, you can then add a background, ensuring that the background elements don’t overshadow or conflict with your primary subject. This approach allows you to adjust the background to complement the tree.
How do I make the tree look like it’s actually rooted in the ground?
Creating a subtle shadow where the trunk meets the ground line is crucial. This grounds the tree and creates a sense of weight. You can also add a few short, horizontal lines or subtle texture around the base to indicate turf or uneven ground, making it look less like the tree is floating.
Our Top Recommended Finds
- Staedtler Mars Lumograph Pencils (Assorted Set): These provide a fantastic range of graphite hardness, essential for capturing varied tones and textures in your willow tree.
- Kneaded Eraser: Invaluable for lifting graphite gently without smudging, perfect for creating highlights in foliage or correcting light errors.
- Strathmore 400 Series Drawing Paper: A good quality paper with a slight tooth will hold graphite beautifully, allowing for smooth blending and rich tonal values.
Your Canvas Awaits
You now possess the foundational knowledge and practical steps to bring a magnificent willow tree to life on your paper.
The beauty of drawing lies in the journey of creation, and each stroke you make adds to your unique artistic voice.
Don’t hesitate to revisit these steps, experiment with different techniques, and let your creativity flow freely onto the page today.