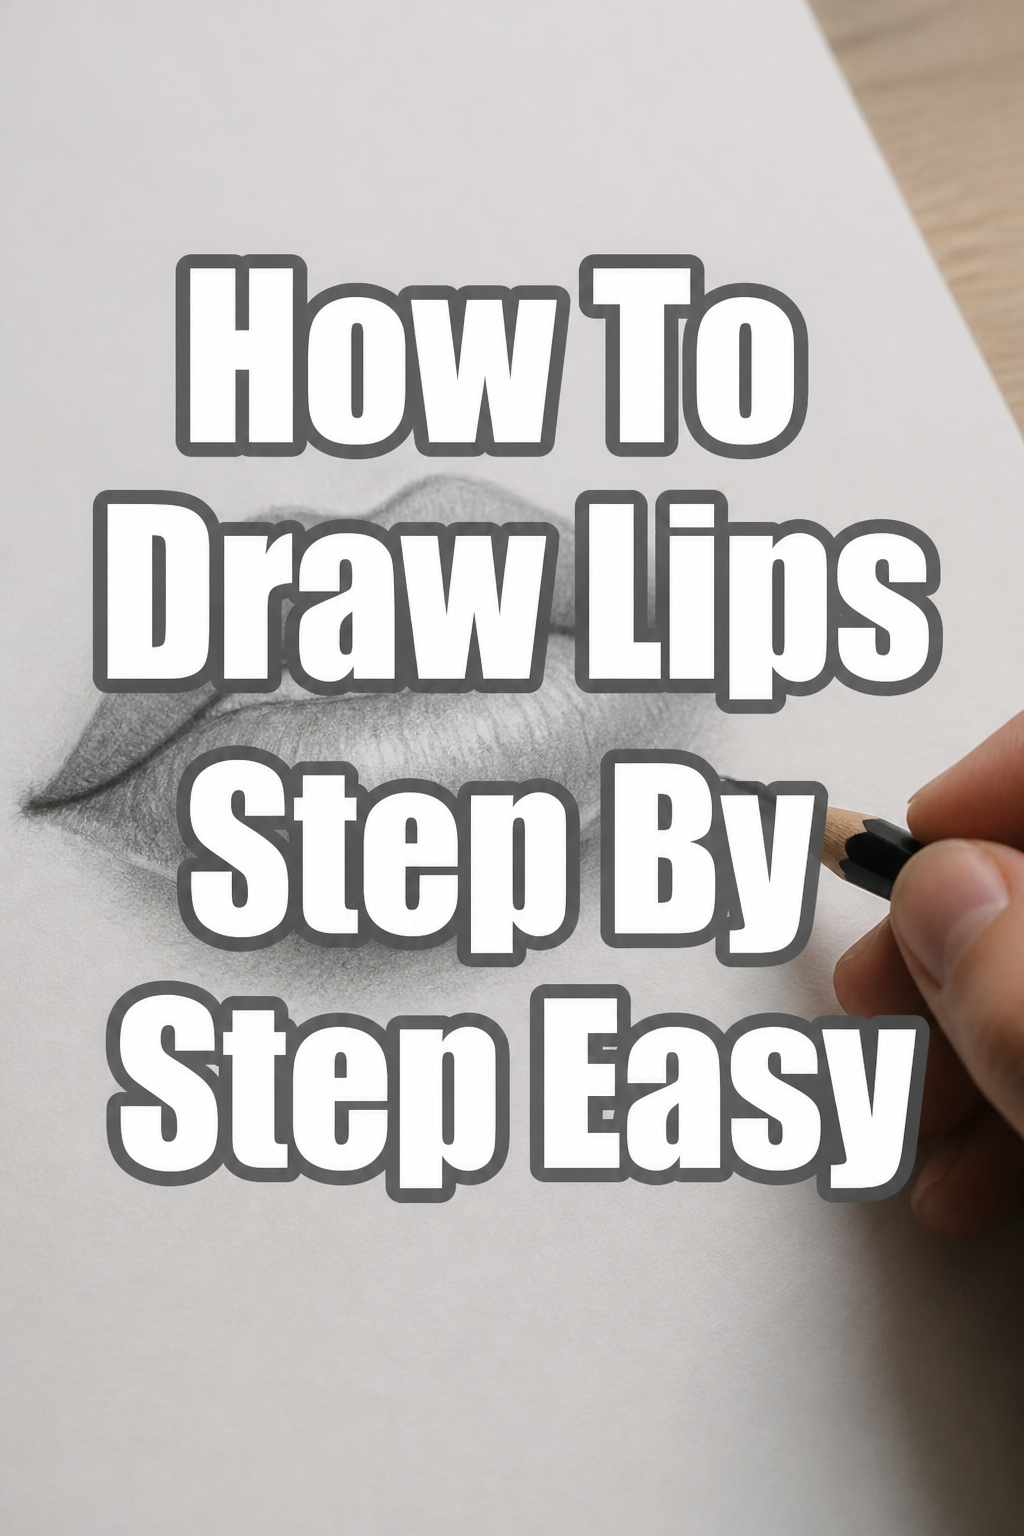
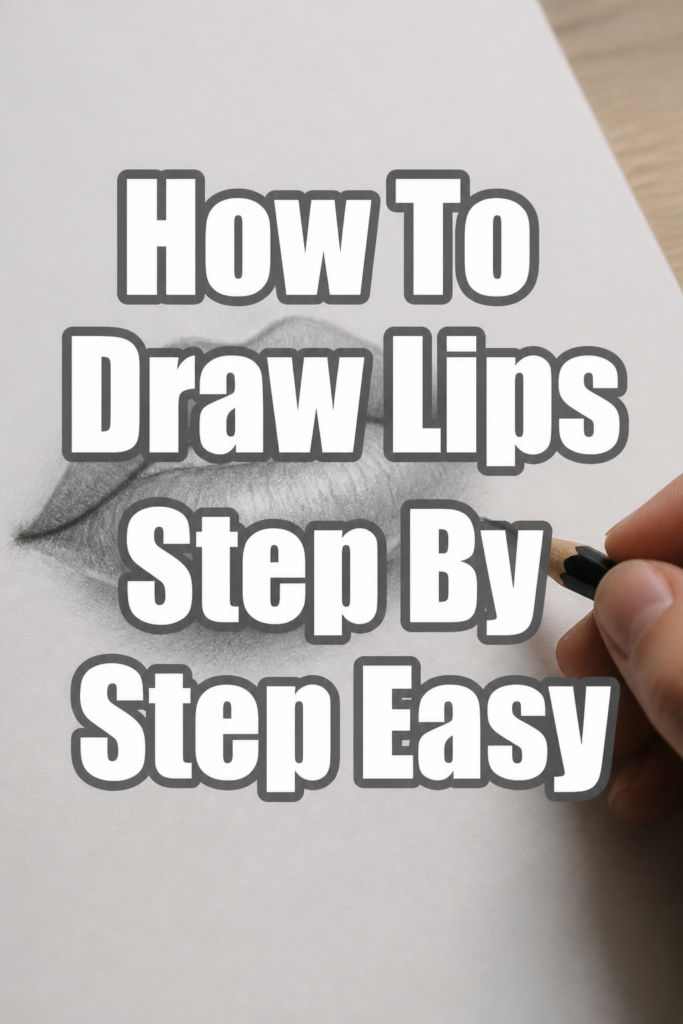
👄 How To Draw Lips Step By Step Easy

& Painting
No rigid rules or pretension. Just practical guides, medium comparisons, and encouraging tips to help you enjoy the drawing & painting process.
Learning to draw can feel intimidating, especially when tackling specific facial features like lips. I remember struggling with them for ages, trying to get that perfect curve and natural expression. This guide distills years of practice into simple, clear steps, making it easy for you to succeed.
You will soon be drawing beautiful, expressive lips with confidence. Trust me, it’s more straightforward than you think when broken down. Let’s begin your artistic journey together.
Quick Overview
This guide will walk you through creating realistic and expressive lip drawings from scratch. You’ll learn foundational techniques for sketching, shading, and adding detail. By the end, you’ll have a solid understanding of lip anatomy and how to translate it onto paper.
- Time needed: 45-75 minutes
- Difficulty: Beginner
- What you’ll need: Sketch pencil (HB, 2B), paper, eraser (kneaded and regular), optional blending stump
Step-by-Step Instructions
Step 1: Gather Your Tools and Prepare Your Workspace
Before you begin drawing, ensure you have all your materials ready. A comfortable, well-lit space makes a big difference. Clear your drawing surface to avoid distractions.
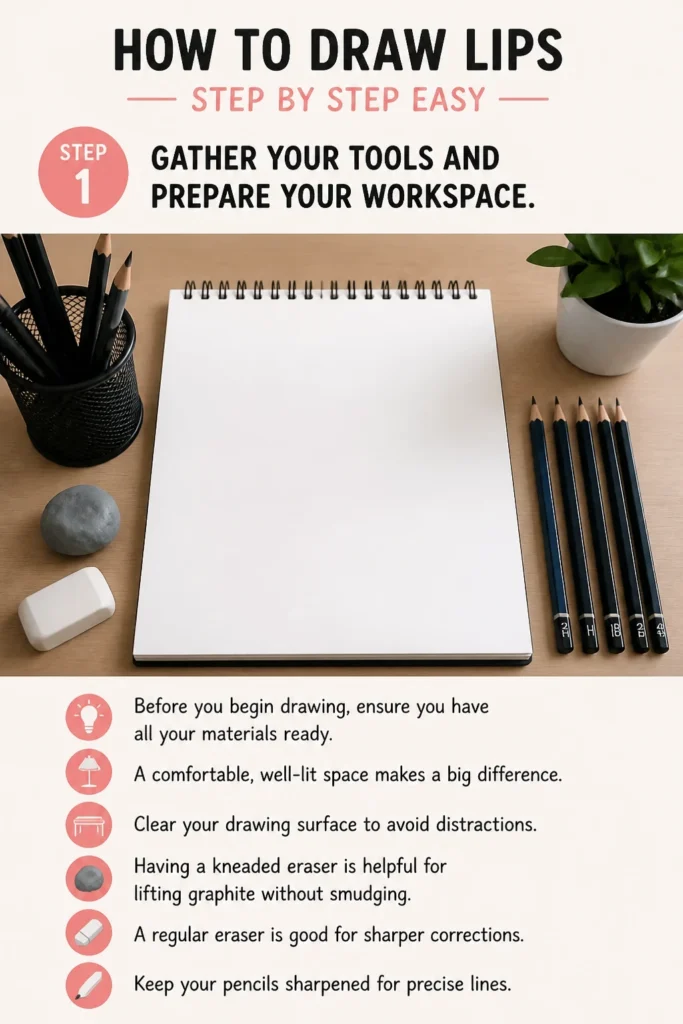
Having a kneaded eraser is helpful for lifting graphite without smudging. A regular eraser is good for sharper corrections. Keep your pencils sharpened for precise lines.
Step 2: Lightly Sketch the Basic Guideline
Start by drawing a horizontal line across your paper. This line will represent the center of the mouth where the lips meet. Keep this line very light, as it’s just a guide.
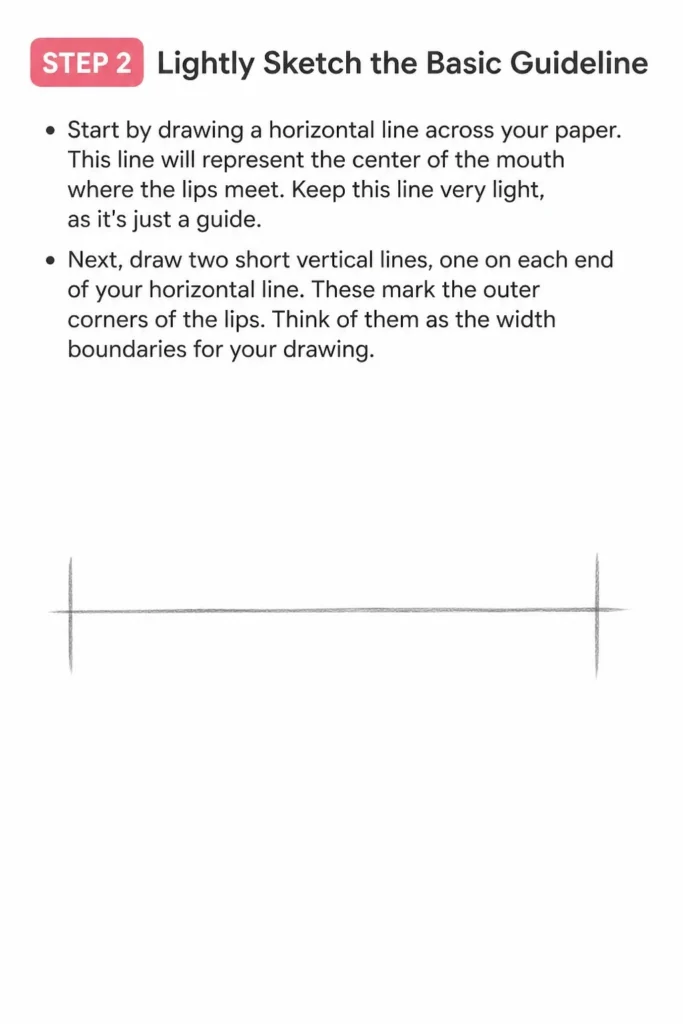
Next, draw two short vertical lines, one on each end of your horizontal line. These mark the outer corners of the lips. Think of them as the width boundaries for your drawing.
Step 3: Establish the Overall Shape and Volume
Now, draw a large, soft oval or an elongated ‘U’ shape for the entire mouth area. This shape should encompass both the upper and lower lips, extending slightly beyond your vertical corner lines. This initial form helps you gauge the overall volume and placement.
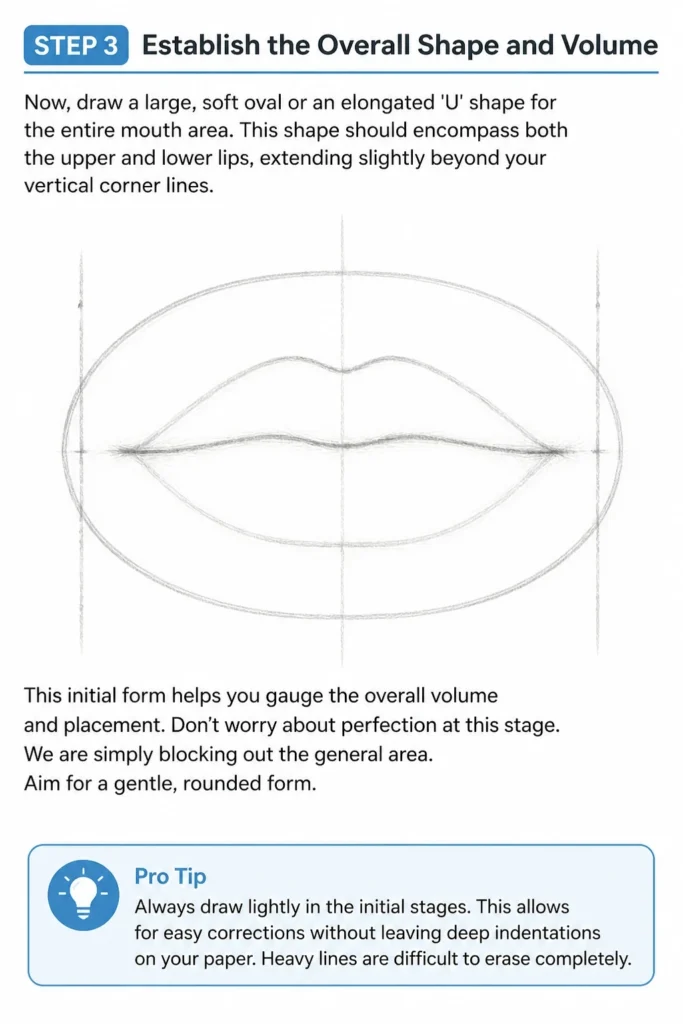
Don’t worry about perfection at this stage. We are simply blocking out the general area. Aim for a gentle, rounded form.
Pro Tip: Always draw lightly in the initial stages. This allows for easy corrections without leaving deep indentations on your paper. Heavy lines are difficult to erase completely.
Step 4: Define the Cupid’s Bow
Focus on the upper lip next. Lightly sketch the “Cupid’s Bow,” which is the distinct M-shape in the center of the upper lip. This is a crucial feature for giving lips character.
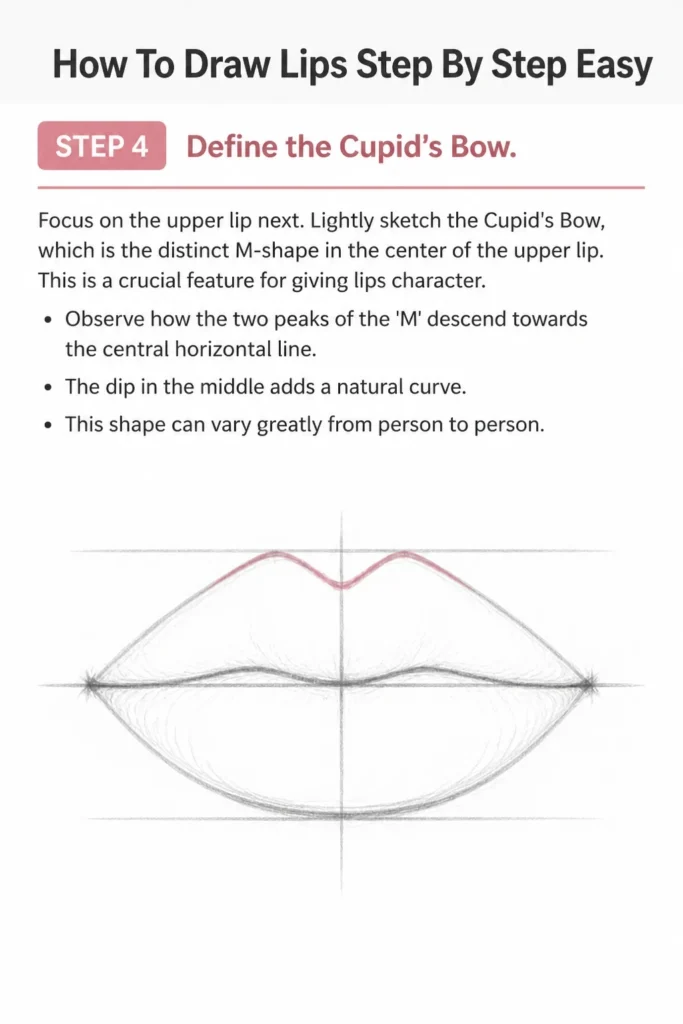
Observe how the two peaks of the ‘M’ descend towards the central horizontal line. The dip in the middle adds a natural curve. This shape can vary greatly from person to person.
Step 5: Outline the Upper Lip
Connect the peaks of your Cupid’s Bow to the outer corners you established earlier. Draw a soft, continuous curve that forms the top edge of the upper lip. Remember that the upper lip generally has a more defined curve than the lower.
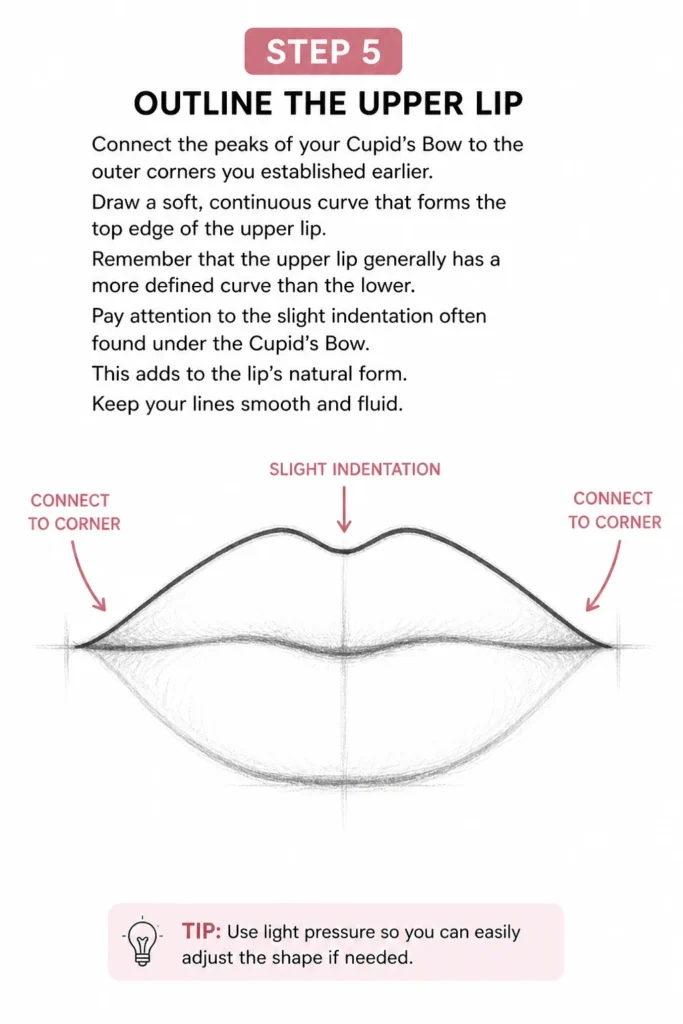
Pay attention to the slight indentation often found under the Cupid’s Bow. This adds to the lip’s natural form. Keep your lines smooth and fluid.
Step 6: Outline the Lower Lip
Move to the lower lip, drawing a smooth, gentle curve that connects the two outer corners. The lower lip is typically fuller and rounder than the upper lip. Its curve usually mirrors the curve of the upper lip’s underside.
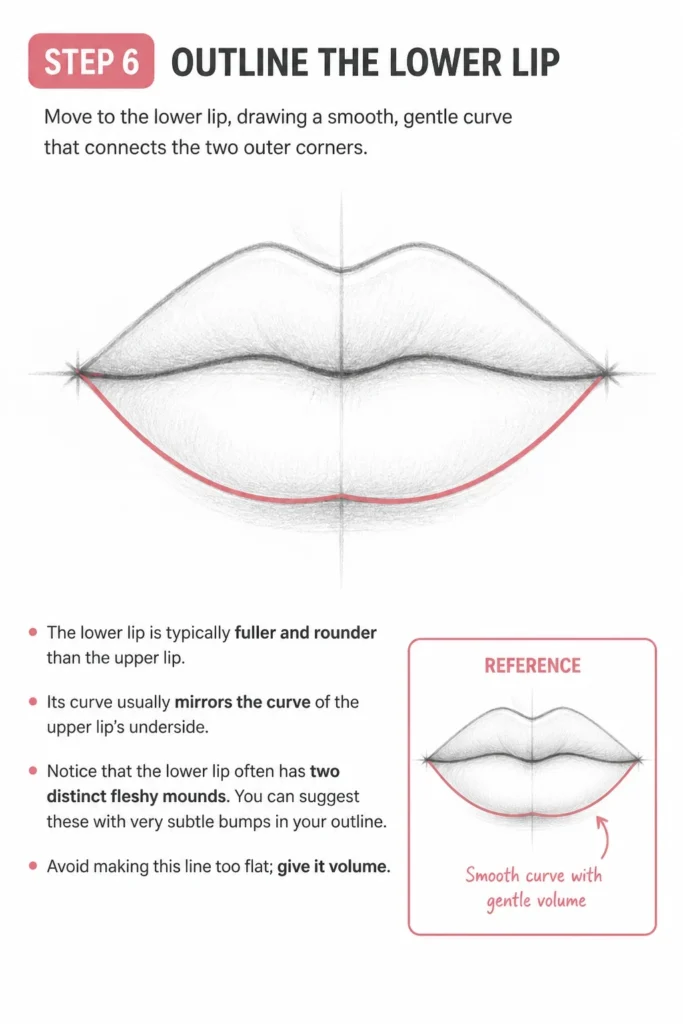
Notice that the lower lip often has two distinct fleshy mounds. You can suggest these with very subtle bumps in your outline. Avoid making this line too flat; give it volume.
Step 7: Refine the Mouth Opening
Go back to your initial central horizontal line. This line now becomes the actual mouth opening where the lips meet. Refine this line, giving it a slight curve that dips gently in the middle and rises towards the corners.
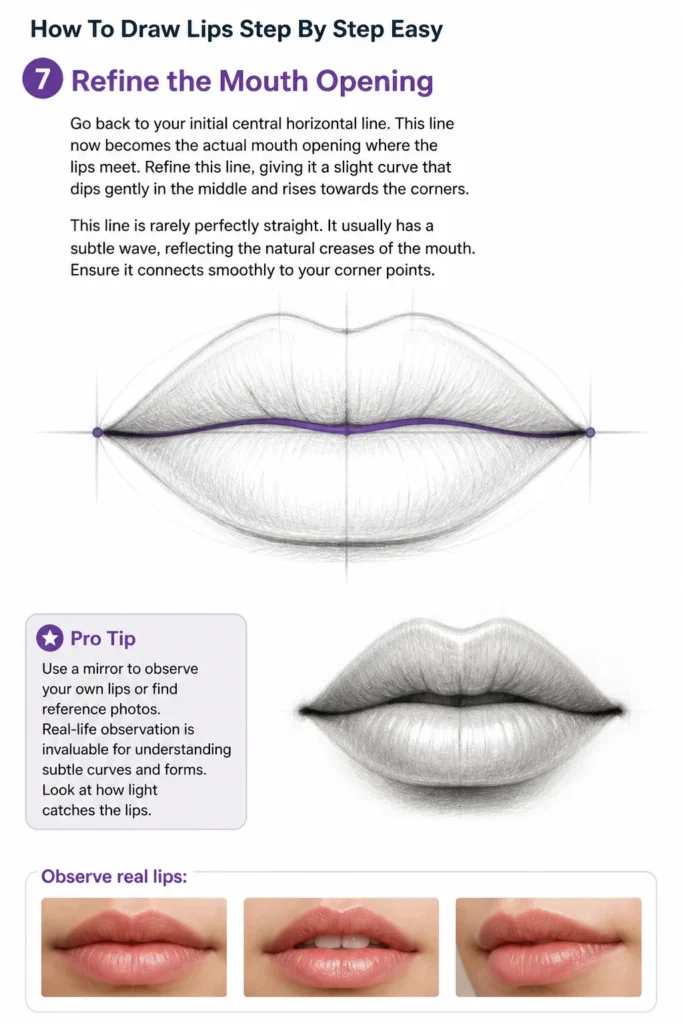
This line is rarely perfectly straight. It usually has a subtle wave, reflecting the natural creases of the mouth. Ensure it connects smoothly to your corner points.
Pro Tip: Use a mirror to observe your own lips or find reference photos. Real-life observation is invaluable for understanding subtle curves and forms. Look at how light catches the lips.
Step 8: Begin Basic Shading to Create Form
With your outlines in place, start adding very light shading to create dimension. Lips are not flat; they have volume. The upper lip often casts a slight shadow onto the lower lip.
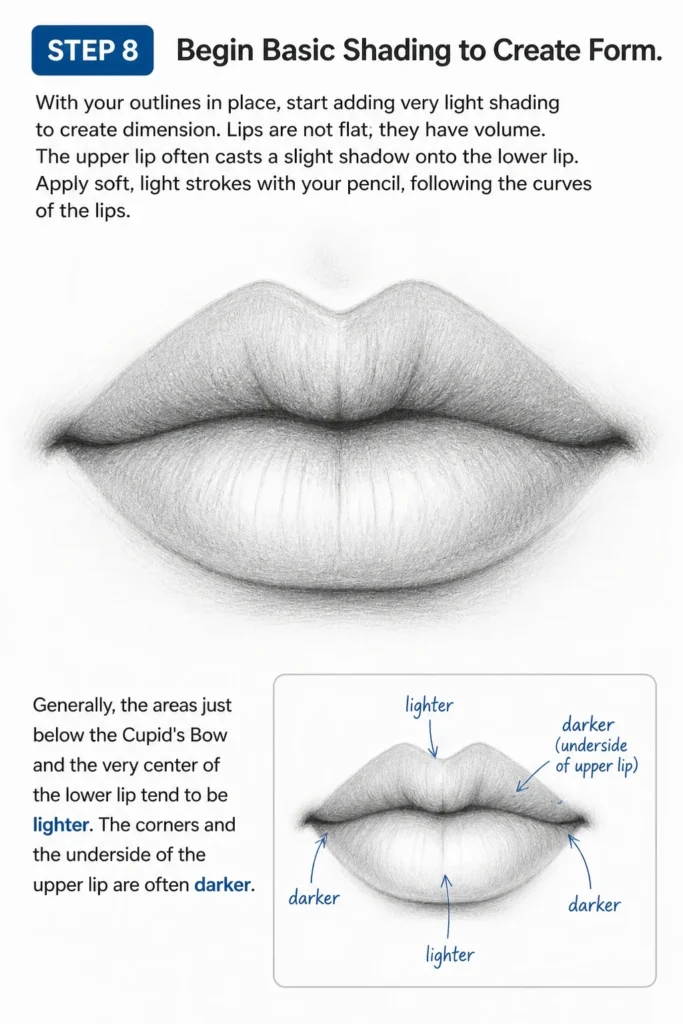
Apply soft, light strokes with your pencil, following the curves of the lips. Generally, the areas just below the Cupid’s Bow and the very center of the lower lip tend to be lighter. The corners and the underside of the upper lip are often darker.
Step 9: Build Up Tones and Blending
Gradually build up your shading, adding darker tones where shadows naturally fall. Use a 2B pencil for these deeper shadows. The corners of the mouth and the area where the lips meet are usually the darkest.
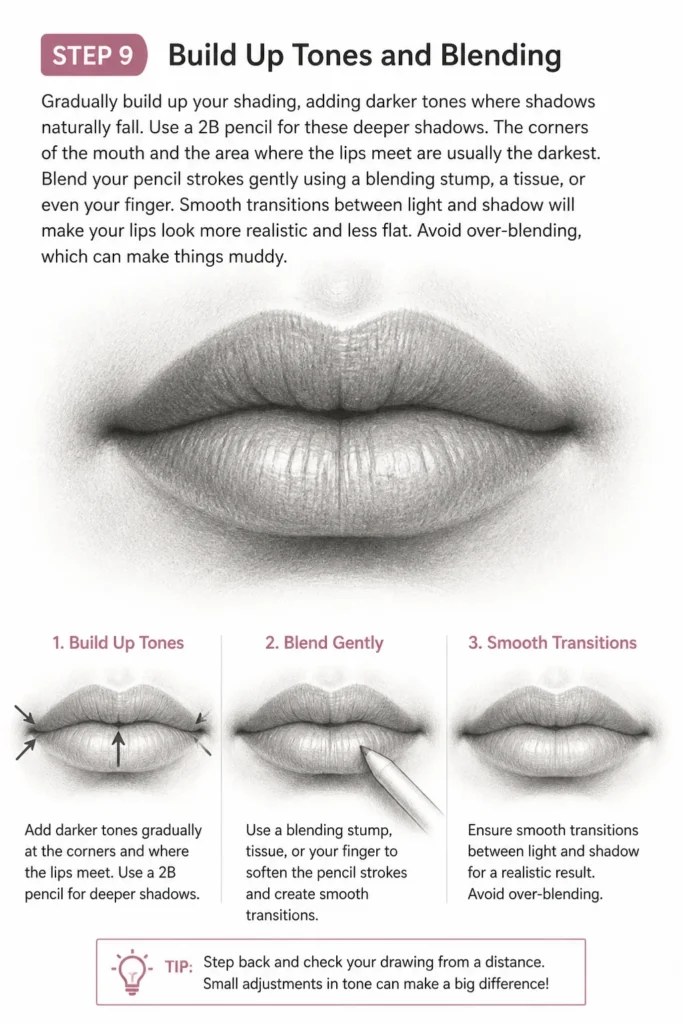
Blend your pencil strokes gently using a blending stump, a tissue, or even your finger. Smooth transitions between light and shadow will make your lips look more realistic and less flat. Avoid over-blending, which can make things muddy.
Step 10: Add Highlights and Subtle Texture
Now, use your kneaded eraser to gently lift graphite from the brightest areas. The most prominent highlight is usually on the center of the lower lip, where light reflects most directly. A smaller highlight might appear on the Cupid’s Bow.
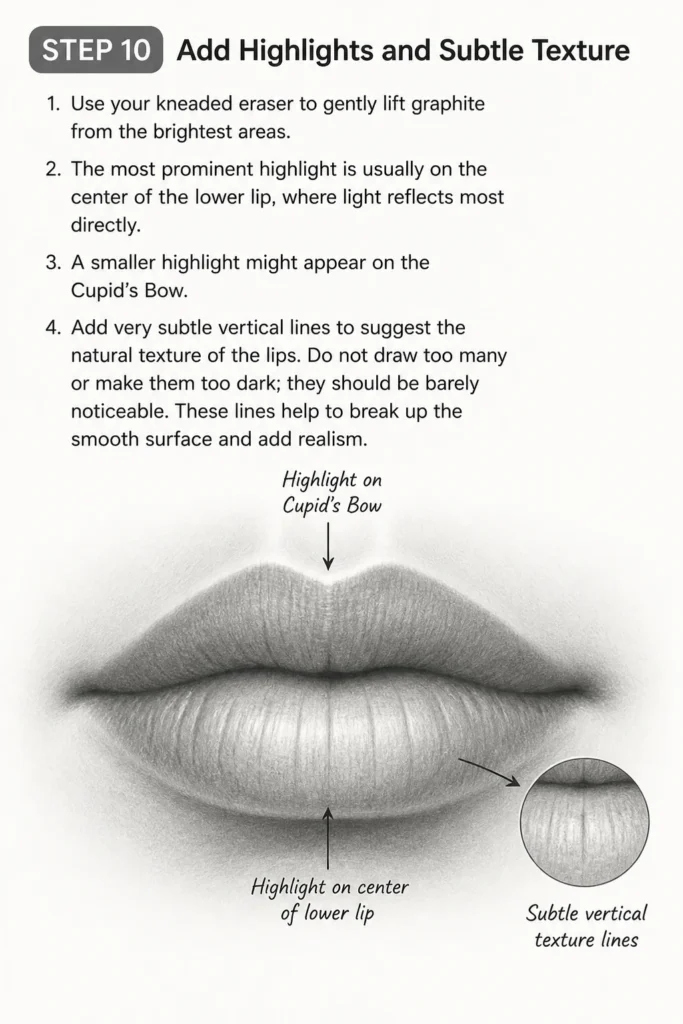
Finally, add very subtle vertical lines to suggest the natural texture of the lips. Do not draw too many or make them too dark; they should be barely noticeable. These lines help to break up the smooth surface and add realism.
Common Mistakes to Avoid
Making Lips Perfectly Symmetrical
Many beginners try to draw lips as mirror images of each other. However, in reality, no two sides of a face are perfectly symmetrical, and lips are no exception. This pursuit of perfection often leads to a stiff, unnatural look.
Instead, embrace slight imperfections and variations. Allow one side of the lip to be slightly fuller or have a different curve than the other. This subtle asymmetry makes your drawing feel more organic and lifelike.
Outlining Too Darkly
Using a heavy, dark outline around the entire lip can make your drawing look cartoonish and flat. Lips are soft and blend into the surrounding skin, not sharply cut out. A thick outline creates an artificial boundary.
Focus on using shading and changes in tone to define the edges of the lips. Only use darker lines where there’s a strong shadow or crease, like at the corners of the mouth or the deepest part of the mouth opening. Let the light and shadow do most of the work.
Ignoring Form and Volume
Drawing lips as flat shapes without considering their three-dimensional form is a common pitfall. Lips are fleshy and protrude from the face, meaning they have curves and planes that catch light and cast shadows. A flat drawing lacks realism.
Think of lips as two rounded forms or cylinders. Use your shading to wrap around these forms, creating the illusion of depth and volume. Understand where light hits and where shadows recede.
Overdoing Texture
While lips do have natural lines and creases, drawing too many or too prominent texture lines can make them look aged, dry, or even grotesque. Subtlety is key when adding details like these. An excess of detail can distract from the overall form.
Suggest texture with very light, broken lines that follow the lip’s curve. These should be sparse and blend into the shading. Let the highlights and the overall smooth blending convey most of the lip’s surface quality.
Troubleshooting
My Lips Look Flat and Lifeless
If your drawn lips appear two-dimensional, it’s likely due to insufficient shading and a lack of understanding of form. Flatness usually means you haven’t adequately represented the lip’s curves and protrusions. You need to think about how light interacts with a rounded surface.
To fix this, revisit your shading. Identify the lightest areas (highlights) and the darkest areas (deepest shadows), and create a smooth gradient between them. Remember the upper lip often casts a shadow on the lower lip. Use lighter pencil pressure for mid-tones and heavier for shadows, gradually building up the layers to create depth.
My Lines Are Too Stiff and Unnatural
Stiff lines often come from pressing too hard or trying to draw the entire lip outline in one continuous, rigid stroke. This can make the lips look rigid and uninviting. Natural lips have soft, flowing curves, not harsh, unyielding edges.
Practice drawing with a lighter hand and use multiple, overlapping short strokes to build up your lines. Think of your lines as “feeling” the curve rather than rigidly drawing it. Allow for slight variations and imperfections, as these contribute to a more organic look.
My Shading Looks Muddy or Uneven
Muddy shading typically results from over-blending, using a dirty blending tool, or not building up tones gradually. Uneven shading can also happen when you apply too much pressure in one spot or don’t blend smoothly. This often leaves a patchy appearance.
Ensure your blending tool is clean, or use a fresh piece of tissue. Build up your shading in light layers, gradually increasing pressure or switching to a softer pencil (like 2B or 4B) for darker areas. Blend in small, circular motions, ensuring smooth transitions between different tones. Clean your kneaded eraser frequently to avoid spreading graphite.
Key Takeaways
- Always begin with light, foundational sketch lines for easy correction.
- Embrace natural asymmetry; perfect symmetry often looks unnatural.
- Shading is crucial for creating the illusion of three-dimensional form and volume.
- Highlights bring lips to life, especially on the lower lip and Cupid’s Bow.
- Build up tones gradually, from light to dark, for smooth and realistic transitions.
- Practice regularly and observe real lips to improve your understanding of their structure.
Frequently Asked Questions
What pencil hardness should I use for drawing lips?
It’s best to use a range of pencils. Start with an HB or 2H for your initial light sketches and guidelines. For shading and darker areas, switch to softer pencils like 2B, 4B, or even 6B. Softer pencils create darker tones with less pressure, making blending easier.
How do I draw different lip expressions?
To draw different expressions, focus on the corners of the mouth and the mouth opening. A slight upward curve at the corners indicates a smile, while a downward curve suggests a frown. The tightness or relaxation of the mouth opening also conveys emotion. Observe how the surrounding facial muscles impact the lip shape.
Can I draw lips without a reference photo?
While you can certainly try drawing from imagination, using reference photos is highly recommended, especially when you’re learning. References help you understand anatomy, observe light and shadow patterns, and see the subtle nuances of different lip shapes. As you gain experience, you’ll be able to draw more confidently without them.
How do I make lips look shiny or glossy?
To create a shiny or glossy effect, focus on sharp, distinct highlights and smooth, high-contrast transitions. The brightest highlights should be very clean and almost white, often appearing as small, concentrated reflections. Ensure the surrounding areas have smooth gradients from dark to light to emphasize the reflective surface.
Our Top Recommended Finds
- Sketchbook with Smooth Paper: A good quality paper with a smooth surface (like Bristol or a decent drawing pad) allows for better blending and less toothy texture, making it easier to create soft, realistic skin tones.
- Assorted Pencil Set (HB, 2B, 4B, 6B): Having a range of graphite hardness lets you control your values from light outlines to deep shadows, essential for achieving dimension in your drawings.
- Blending Stumps or Tortillons: These paper tools are perfect for smoothing out graphite, creating seamless transitions, and preventing muddy-looking shading. They help achieve a professional, finished look.
Unleash Your Inner Artist
You’ve just taken a fantastic step in your drawing journey, mastering the art of drawing expressive lips. This skill is a cornerstone for creating compelling portraits and character designs. Remember, every stroke is a learning opportunity.
Why stop here? Consider applying these shading and form-building techniques to other facial features, like eyes or noses. Or, experiment with different lip shapes and expressions to broaden your artistic repertoire. Pick up your pencil again today and continue to create!
& Painting
No rigid rules or pretension. Just practical guides, medium comparisons, and encouraging tips to help you enjoy the drawing & painting process.