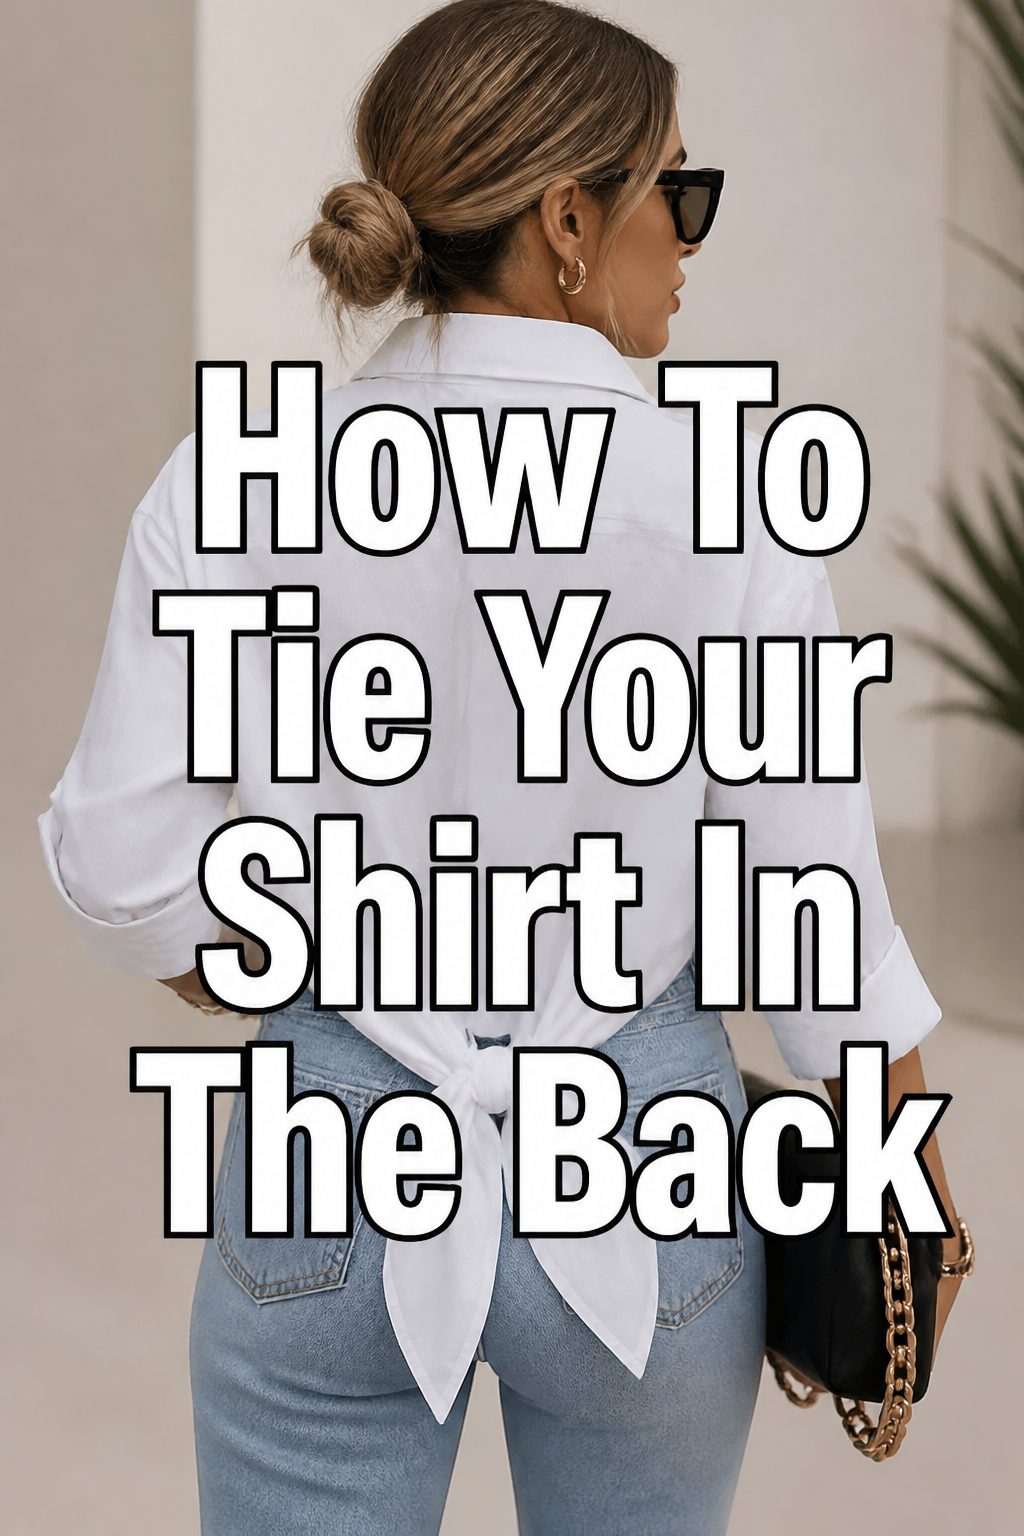
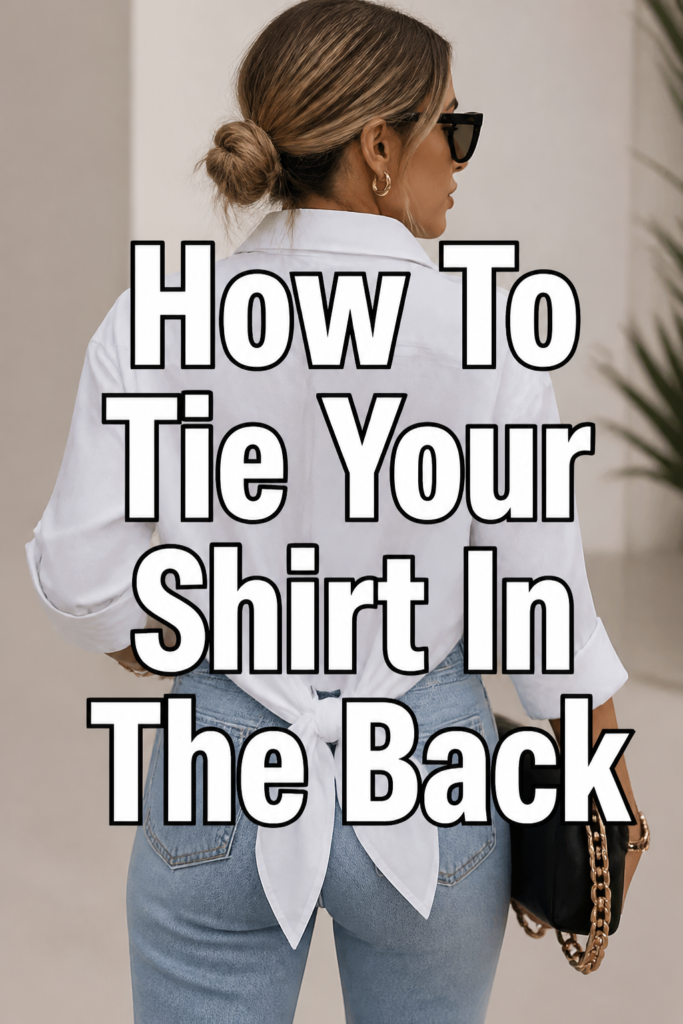
👕 How To Tie Your Shirt In The Back

& Painting
No rigid rules or pretension. Just practical guides, medium comparisons, and encouraging tips to help you enjoy the drawing & painting process.
Do you ever look at a loose-fitting shirt and wish it had a bit more shape?
I remember constantly struggling with oversized tees that felt shapeless and unflattering, until I discovered the magic of a simple back tie.
This trick is a game-changer for transforming your wardrobe without buying new clothes.
Quick Overview
This guide will walk you through the simple yet effective technique of tying your shirt in the back. You’ll learn how to cinch your waist, add definition, and give any relaxed top a stylish, fitted look.
- Time needed: 5-10 minutes (after initial practice)
- Difficulty: Beginner
- What you’ll need: A loose-fitting shirt (t-shirt, button-down, sweater), a mirror
Step-by-Step Instructions
Step 1: Choose Your Shirt Wisely
The foundation of a great back tie starts with the right garment. Not all shirts are created equal for this technique.
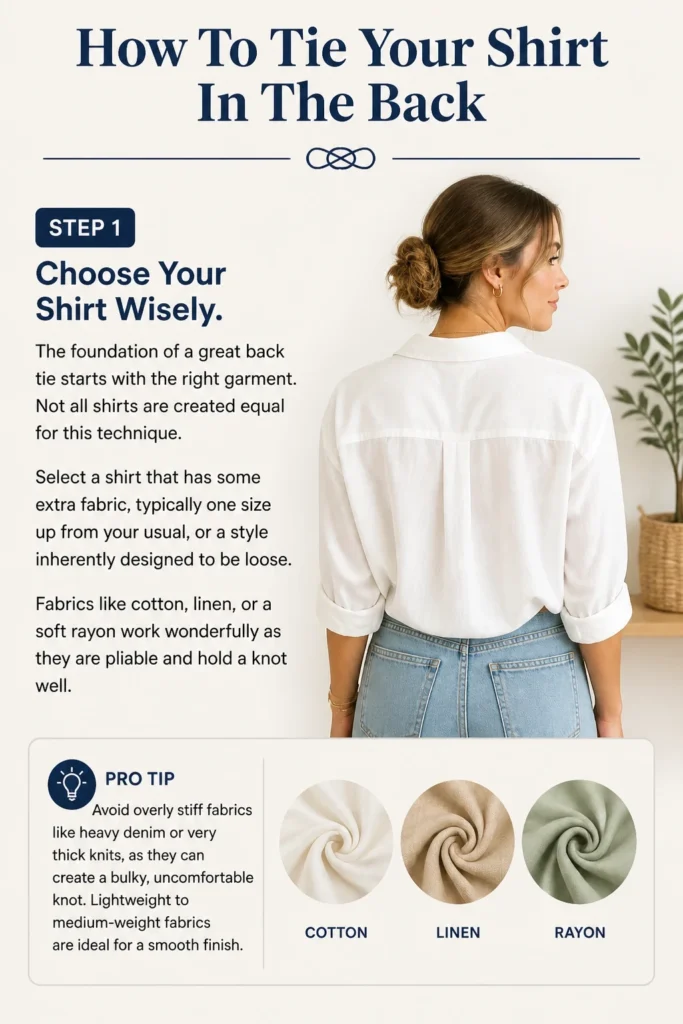
Select a shirt that has some extra fabric, typically one size up from your usual, or a style inherently designed to be loose.
Fabrics like cotton, linen, or a soft rayon work wonderfully as they are pliable and hold a knot well.
Pro Tip: Avoid overly stiff fabrics like heavy denim or very thick knits, as they can create a bulky, uncomfortable knot. Lightweight to medium-weight fabrics are ideal for a smooth finish.
Step 2: Put On Your Shirt and Assess
Wear the chosen shirt as you normally would. Stand in front of a full-length mirror to get a clear view of how it hangs.
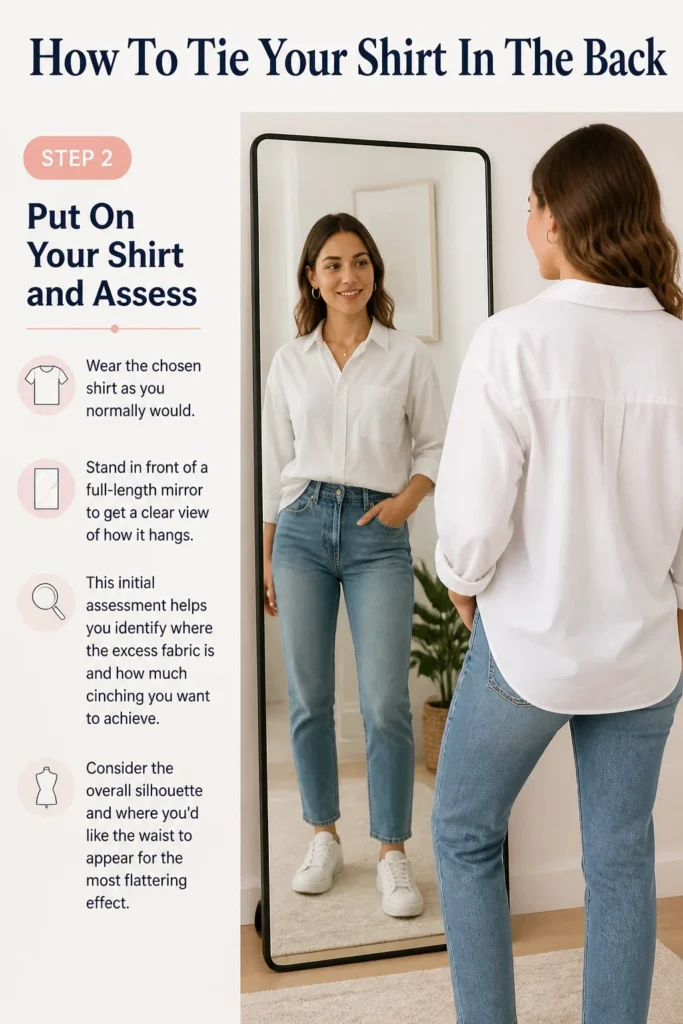
This initial assessment helps you identify where the excess fabric is and how much cinching you want to achieve.
Consider the overall silhouette and where you’d like the waist to appear for the most flattering effect.
Step 3: Gather the Excess Fabric
Now, it’s time to start creating the shape. Reach behind you with both hands, bringing them to the center of your lower back.
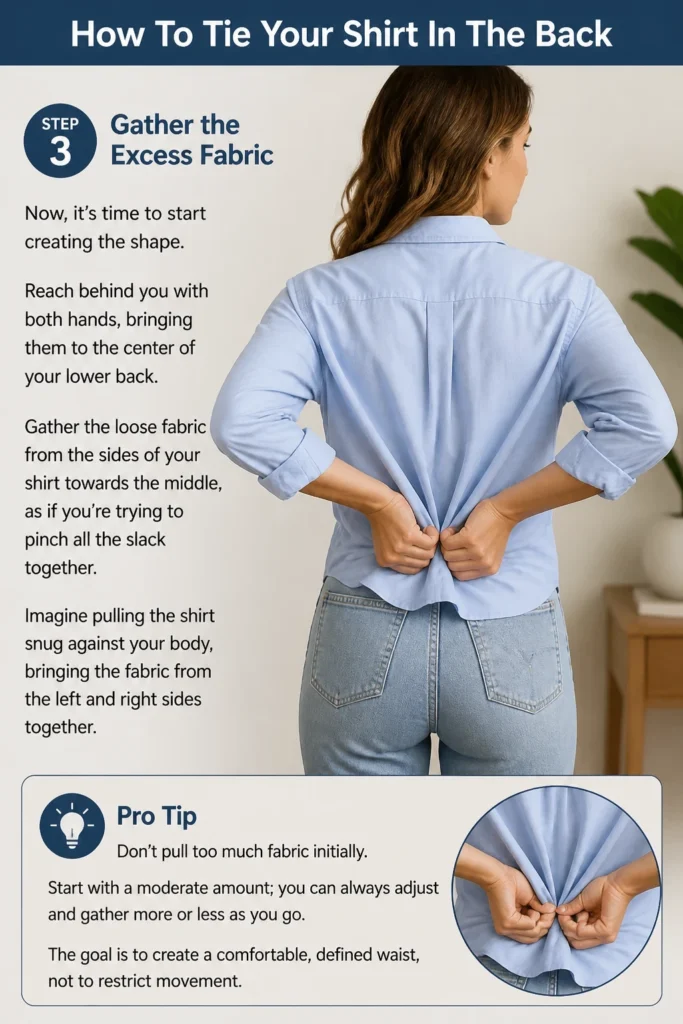
Gather the loose fabric from the sides of your shirt towards the middle, as if you’re trying to pinch all the slack together.
Imagine pulling the shirt snug against your body, bringing the fabric from the left and right sides together.
Pro Tip: Don’t pull too much fabric initially. Start with a moderate amount; you can always adjust and gather more or less as you go. The goal is to create a comfortable, defined waist, not to restrict movement.
Step 4: Twist and Form a “Tail”
Once you have a good handful of fabric gathered, begin to twist it downwards, creating a single, rope-like “tail.”
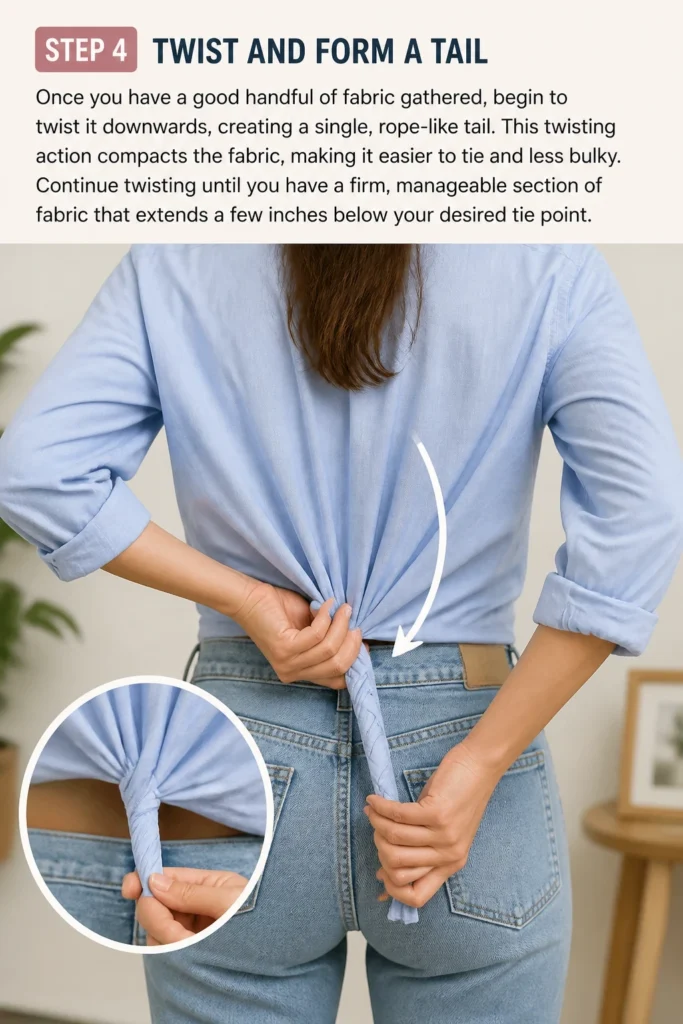
This twisting action compacts the fabric, making it easier to tie and less bulky.
Continue twisting until you have a firm, manageable section of fabric that extends a few inches below your desired tie point.
Step 5: Create the First Loop of the Knot
With your twisted fabric “tail” held firmly in one hand, bring it up and over itself to form a simple loop.
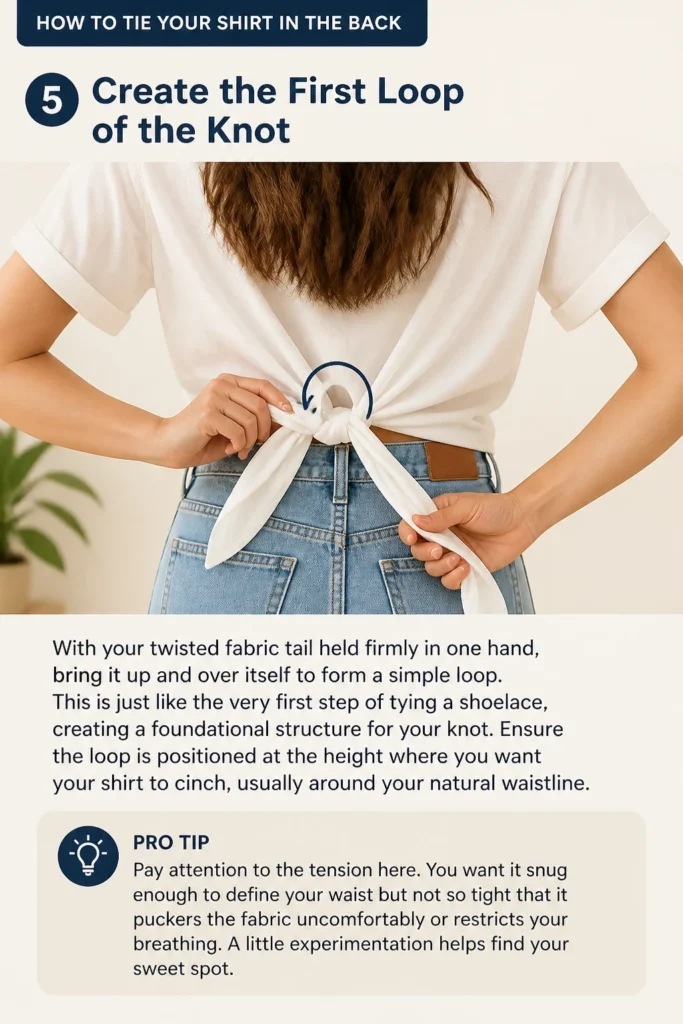
This is just like the very first step of tying a shoelace, creating a foundational structure for your knot.
Ensure the loop is positioned at the height where you want your shirt to cinch, usually around your natural waistline.
Pro Tip: Pay attention to the tension here. You want it snug enough to define your waist but not so tight that it puckers the fabric uncomfortably or restricts your breathing. A little experimentation helps find your sweet spot.
Step 6: Complete the Knot
Now, take the end of the twisted “tail” and thread it through the loop you just created.
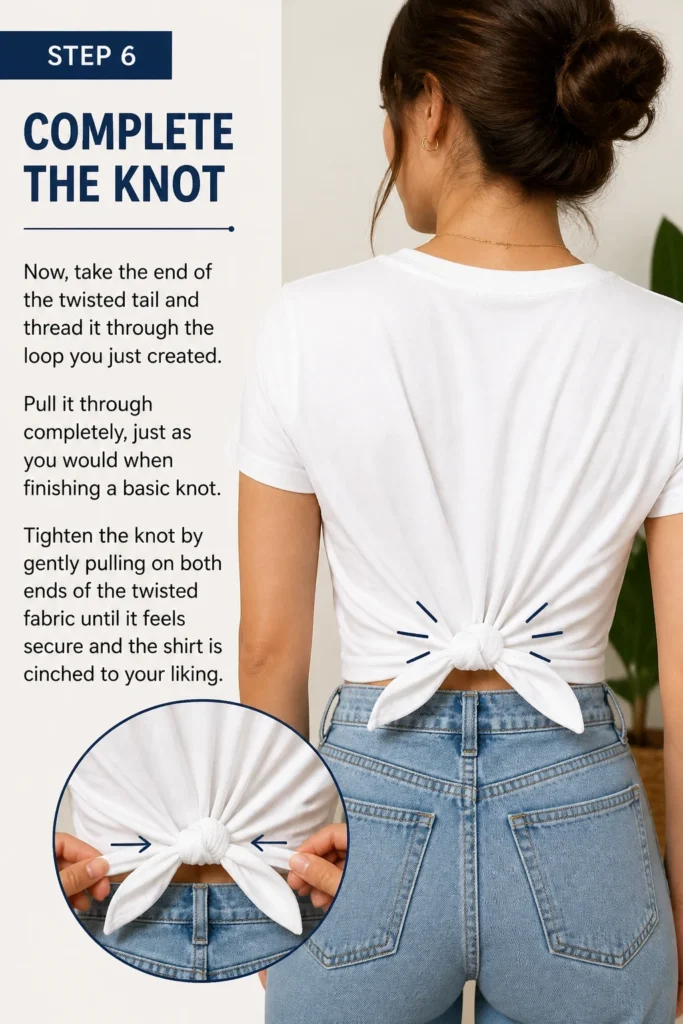
Pull it through completely, just as you would when finishing a basic knot.
Tighten the knot by gently pulling on both ends of the twisted fabric until it feels secure and the shirt is cinched to your liking.
Step 7: Tuck and Conceal the Knot
A well-tied back knot should be discreet. Once the knot is secure, tuck the remaining loose ends of the twisted fabric underneath the main body of the shirt.
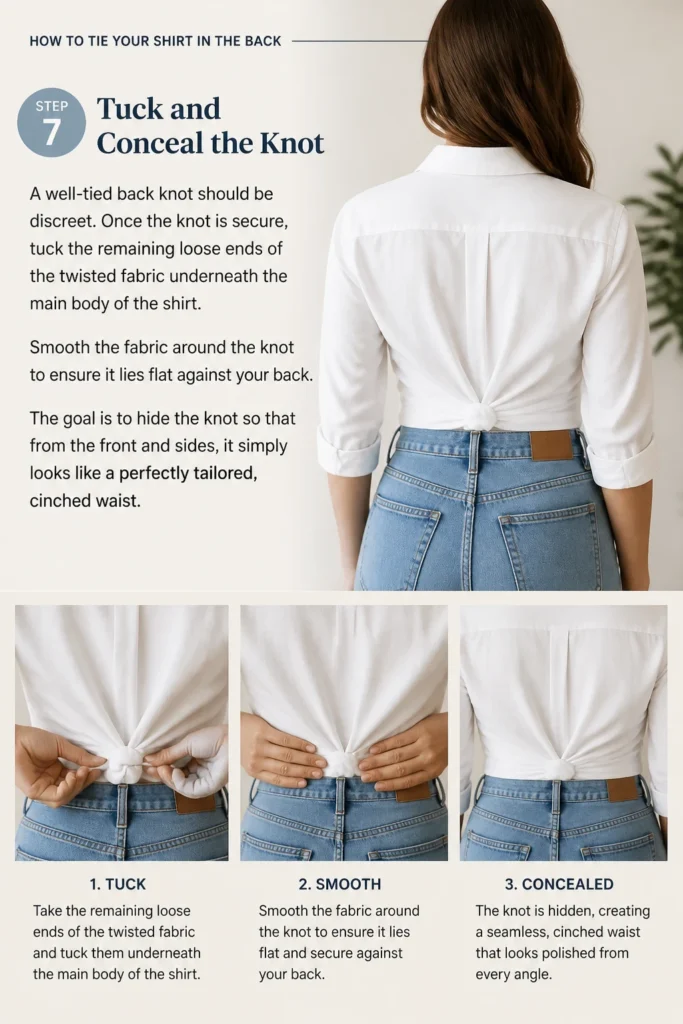
Smooth the fabric around the knot to ensure it lies flat against your back.
The goal is to hide the knot so that from the front and sides, it simply looks like a perfectly tailored, cinched waist.
Step 8: Adjust and Refine the Look
Finally, turn back to your mirror and make any necessary adjustments. Smooth out any wrinkles around the front and sides of the shirt.
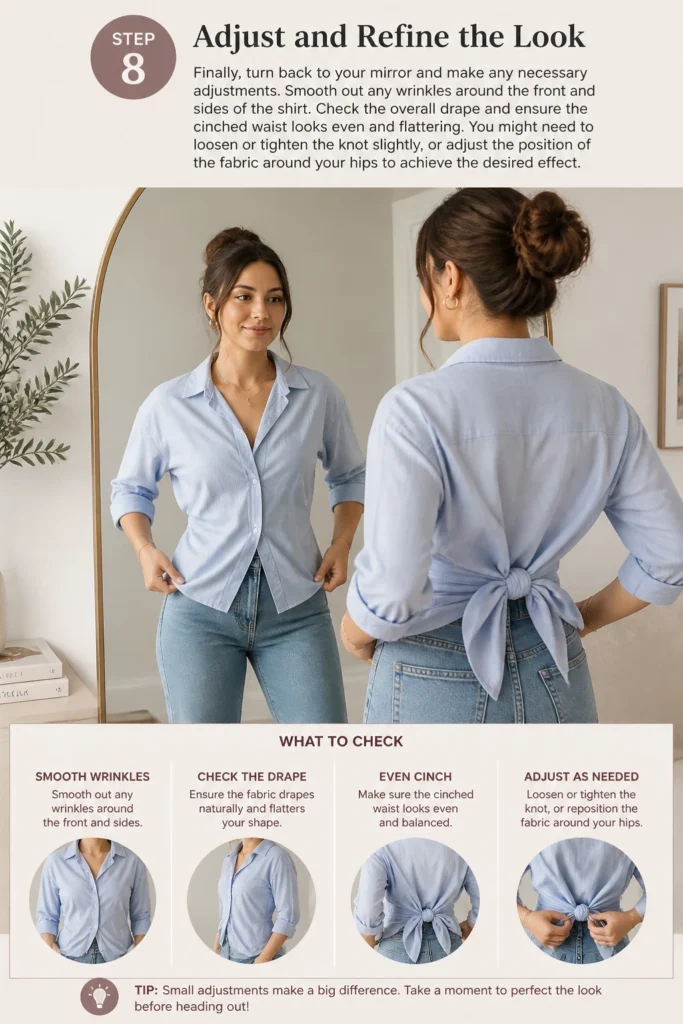
Check the overall drape and ensure the cinched waist looks even and flattering.
You might need to loosen or tighten the knot slightly, or adjust the position of the fabric around your hips to achieve the desired effect.
Common Mistakes to Avoid
Tying Too Tightly or Too Loosely
One frequent error is failing to find the right tension. Tying the knot too tightly can create uncomfortable pulling, distort the fabric, and make the shirt look strained.
It can also make the knot feel bulky and awkward against your back. Conversely, a knot that is too loose will quickly unravel or fail to provide the desired shaping, leaving your shirt looking saggy again.
Always aim for a snug but comfortable fit that defines your waist without causing discomfort or visible strain on the fabric.
Using the Wrong Fabric Type
Attempting this technique with unsuitable fabrics can lead to frustration. Very stiff materials, like thick canvas or rigid denim, will resist forming a neat knot and will likely create an uncomfortable lump.
Conversely, extremely slippery fabrics like silk or very fine satin might struggle to hold a knot securely, causing it to come undone throughout the day.
Opt for pliable, medium-weight fabrics such as cotton jersey, rayon, or linen blends for the best results and a lasting hold.
Improper Knot Placement
The placement of your knot significantly impacts the overall look. Tying it too high can make your torso appear shorter, while tying it too low might create a baggy, unflattering silhouette above the knot.
The ideal spot is usually around your natural waistline, where your body naturally tapers. This placement enhances your figure and creates a balanced proportion.
Experiment slightly with height to see what looks best with your specific shirt and body shape.
Forgetting to Conceal the Ends
Leaving the twisted ends of your fabric knot visible is a common oversight that can detract from an otherwise polished look. The goal of this technique is a subtle, tailored appearance, not a visible tie.
Failing to tuck the ends neatly under the main body of the shirt can make the outfit look unfinished or messy.
Always take a moment to smooth the fabric and ensure all loose ends are hidden, creating a clean line across your back.
Troubleshooting
The Knot Feels Bulky or Uncomfortable
If your knot feels like a lump against your back, you might have gathered too much fabric initially or twisted it too loosely. Try untying the knot and re-gathering less fabric, or twisting it more tightly to create a more compact “rope.” Sometimes, adjusting the position slightly higher or lower can also help it sit more comfortably against the natural curve of your back.
The Shirt Still Looks Baggy in Front
This often happens if you haven’t pulled enough fabric from the sides into your back knot. When gathering, ensure you’re pulling the fabric from under your arms and sides towards the center back. The more fabric you pull from the front and sides, the more cinched and tailored the front will appear. Don’t be afraid to pull a little more firmly to achieve the desired front drape.
The Knot Keeps Coming Undone
A knot that unravels points to either an unsuitable fabric or insufficient tightening. If your shirt is made of a very slippery material, it might struggle to hold a basic knot. For such fabrics, consider a double knot or a slightly more complex tie. Otherwise, ensure you are pulling the knot firmly enough during Step 6 to secure it, but without straining the fabric.
Key Takeaways
- Choose the Right Shirt: Opt for loose-fitting, pliable fabrics like cotton or rayon for the best results.
- Gather Thoughtfully: Pull fabric from the sides towards the center back, gauging how much cinching you desire.
- Twist Firmly: Create a compact, rope-like “tail” by twisting the gathered fabric downwards.
- Tie Securely: Form a simple knot at your natural waistline, ensuring it’s snug but comfortable.
- Conceal the Knot: Always tuck the loose ends underneath the shirt for a smooth, polished finish.
- Adjust and Refine: Use a mirror to fine-tune the drape and ensure a flattering silhouette from all angles.
Frequently Asked Questions
Can I tie any type of shirt in the back?
While you can attempt this with many shirts, it works best with loose-fitting tops that have some excess fabric. T-shirts, oversized button-downs, and relaxed sweaters are ideal. Fitted shirts or very short crop tops won’t have enough material to create a secure or flattering tie.
Will this work for all body types?
Absolutely! Tying your shirt in the back is a fantastic way to create a defined waist for any body type. It allows you to customize the fit, highlighting your natural curves or creating the illusion of a more hourglass shape. Experiment with knot placement to find what feels most flattering for you.
How do I prevent wrinkles from forming around the knot?
Wrinkles are natural with fabric manipulation. To minimize them, smooth the fabric thoroughly before and after tying. Opt for wrinkle-resistant fabrics if possible. After tying, gently pull and smooth the fabric around the knot, both inside and outside the shirt, to distribute the tension evenly and reduce harsh creases.
Can I wash my shirt with the knot still tied?
It’s generally not recommended to wash your shirt with the knot still tied. The knot can become tighter and harder to undo after washing and drying. It can also cause uneven stretching or wear on the fabric. Always untie your shirt before laundering to maintain its shape and extend its life.
Our Top Recommended Finds
- Full-Length Mirror: Essential for seeing the back of your outfit and making precise adjustments.
- Fabric Clips or Pins: Handy for temporarily holding excess fabric while you practice, or to test different cinch points.
- Steamer or Iron: To smooth out any wrinkles that might form during the tying process, ensuring a crisp finish.
Transform Your Style Today
You now possess a simple yet powerful technique to redefine your wardrobe. This humble back tie isn’t just about cinching fabric; it’s about unlocking new styling possibilities for shirts you already own.
Don’t let another day pass feeling shapeless in your favorite tops. Grab a loose shirt, head to your mirror, and give this technique a try.
Experiment with different shirts and knot placements to discover your signature look. You’ll be amazed at the fresh, polished styles you can create with minimal effort.
& Painting
No rigid rules or pretension. Just practical guides, medium comparisons, and encouraging tips to help you enjoy the drawing & painting process.