🦵 How To Draw Legs Female Step By Step Video

& Painting
No rigid rules or pretension. Just practical guides, medium comparisons, and encouraging tips to help you enjoy the drawing & painting process.
Drawing the human form can feel daunting, especially when trying to capture the subtle curves and strength of female legs. I remember my own struggles with proportions and musculature, often ending up with stiff, unnatural results. This guide will walk you through each crucial stage, helping you develop a confident approach to drawing dynamic and lifelike legs.
You’ll gain practical insights and actionable steps, transforming your understanding from basic shapes to refined anatomical forms. Trust me, with patience and these techniques, you’ll see a significant improvement in your artwork.
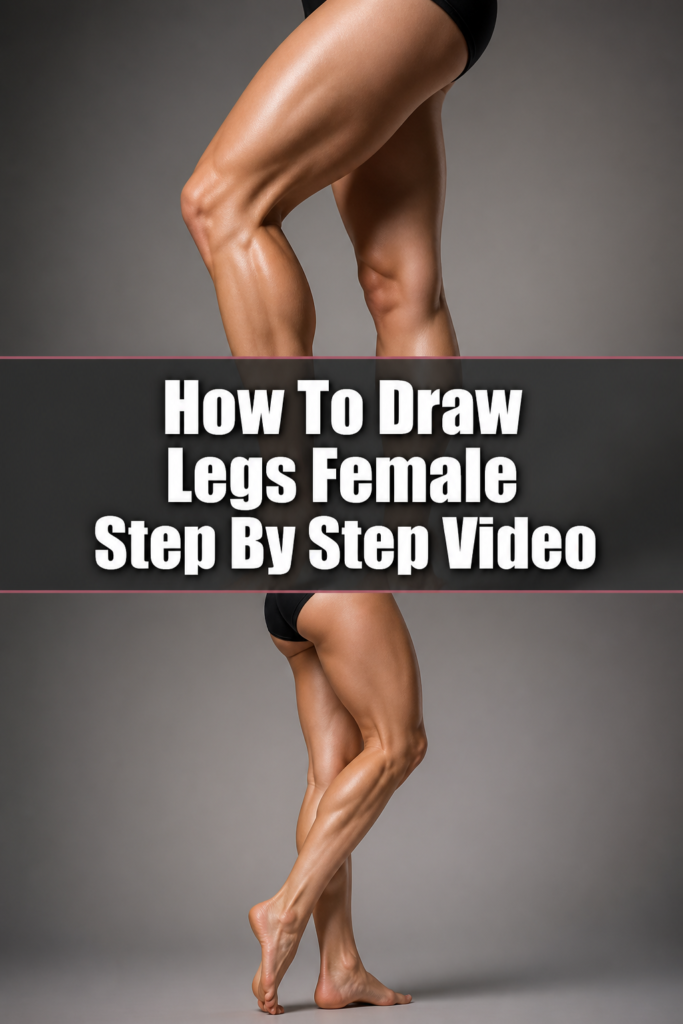
Quick Overview
This comprehensive guide will equip you with the knowledge to construct realistic and expressive female legs. You’ll move from initial gesture to detailed anatomical forms, ready to integrate them into your character art.
- Time needed: 1-2 hours (for a focused study session)
- Difficulty: Intermediate (builds on basic drawing skills)
- What you’ll need: Sketchbook, pencils (HB, 2B, 4B), kneaded eraser, reference images, optional: drawing tablet and software
Step-by-Step Instructions
Step 1: Gather Your References and Set Your Mindset
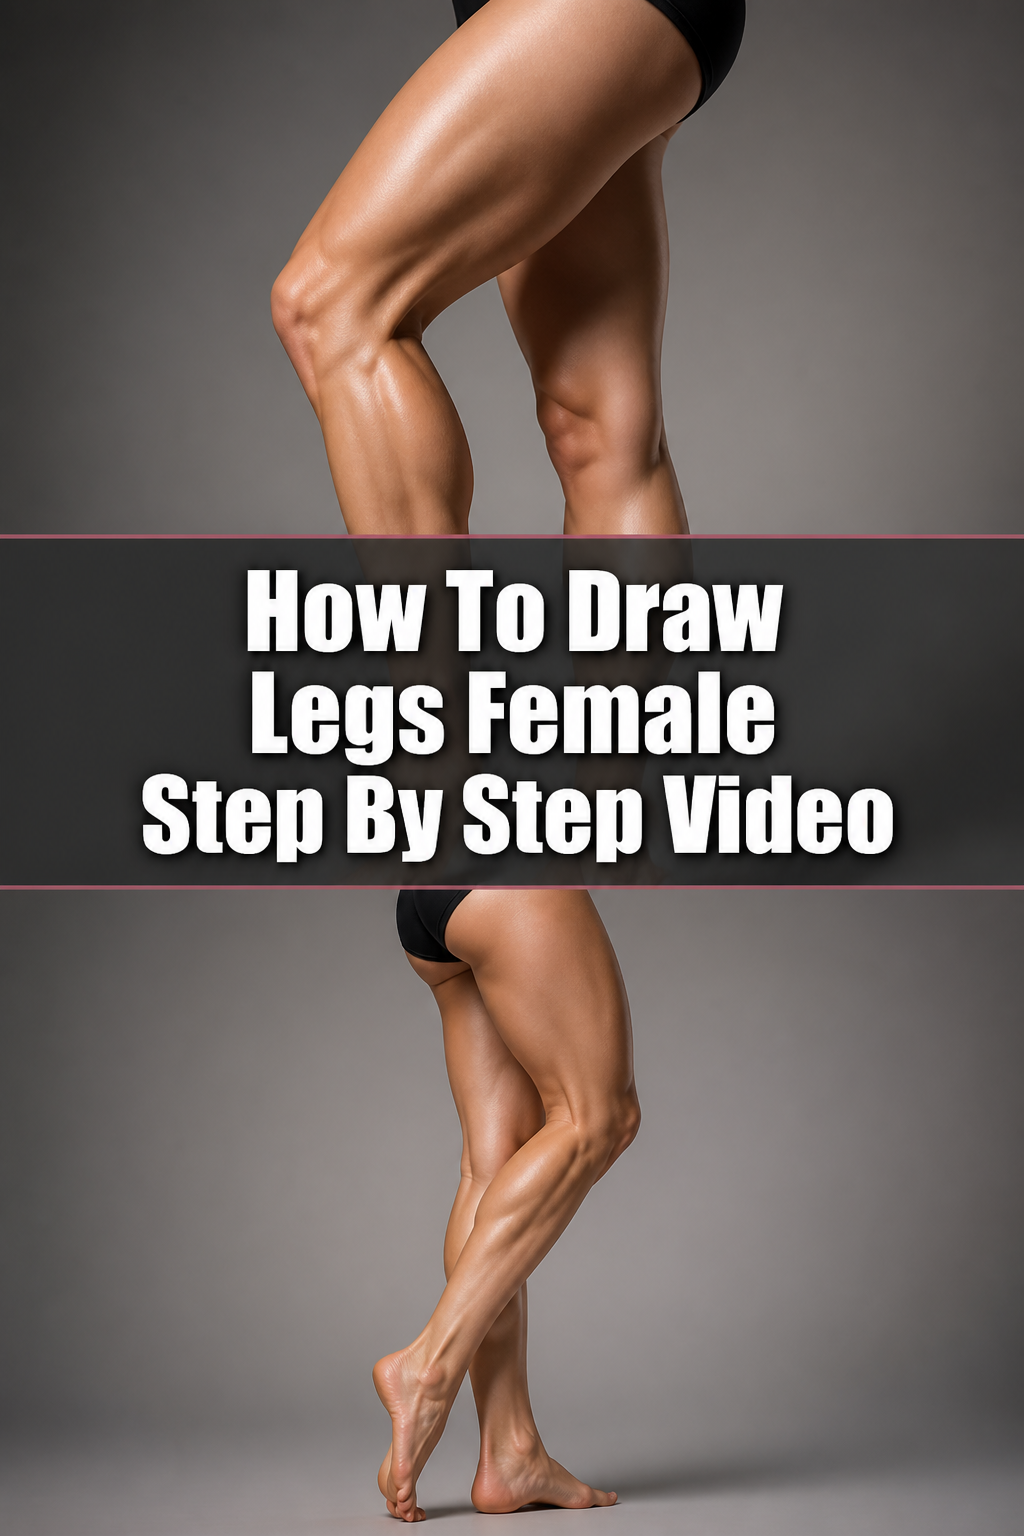
Before you even pick up your pencil, collecting quality reference material is crucial. Look for photos of female legs from various angles: front, side, back, and three-quarter views. Pay attention to how different poses affect the muscle definition and overall silhouette.
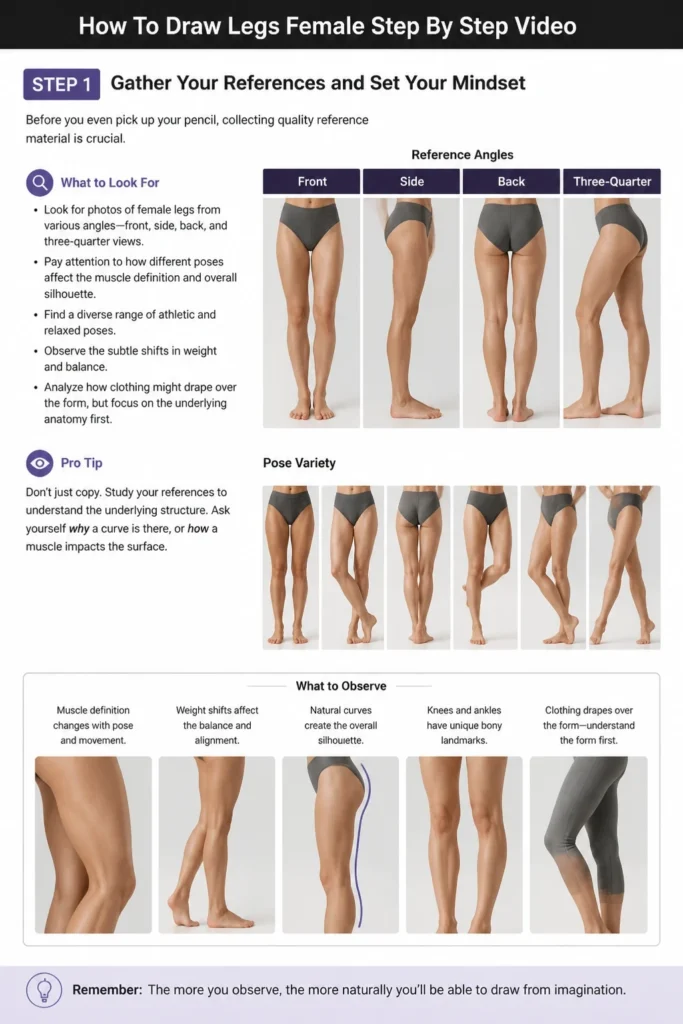
Find a diverse range of athletic and relaxed poses.
Observe the subtle shifts in weight and balance.
Analyze how clothing might drape over the form, but focus on the underlying anatomy first.
Pro Tip: Don’t just copy. Study your references to understand the underlying structure. Ask yourself why a curve is there, or how a muscle impacts the surface.
Step 2: Understand Basic Proportions and Gesture
Starting with simple shapes and lines is key to capturing dynamism. The female leg typically has a longer femur relative to the tibia compared to the male leg, and a more pronounced curve at the hip leading into the thigh. Think about the overall flow and energy of the leg.
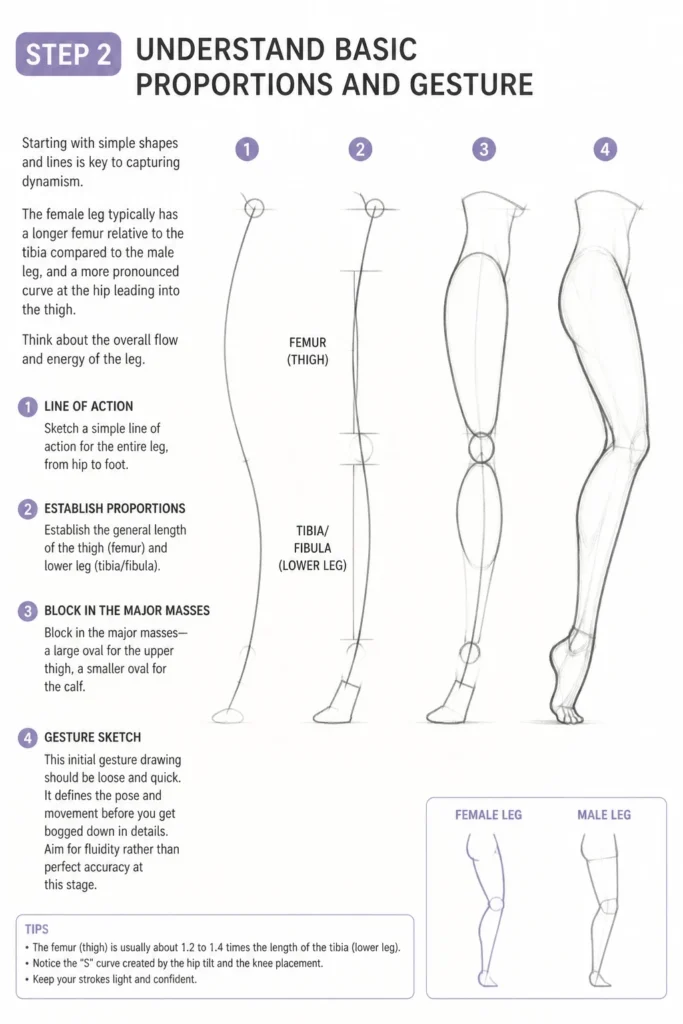
Sketch a simple line of action for the entire leg, from hip to foot.
Establish the general length of the thigh (femur) and lower leg (tibia/fibula).
Block in the major masses: a large oval for the upper thigh, a smaller oval for the calf.
This initial gesture drawing should be loose and quick. It defines the pose and movement before you get bogged down in details. Aim for fluidity rather than perfect accuracy at this stage.
Step 3: Lay Down the Skeleton and Core Shapes
Understanding the skeletal structure beneath the surface is fundamental. The pelvis, femur, tibia, and fibula are the primary bones influencing the leg’s form. Simplified bone shapes help to anchor your drawing.
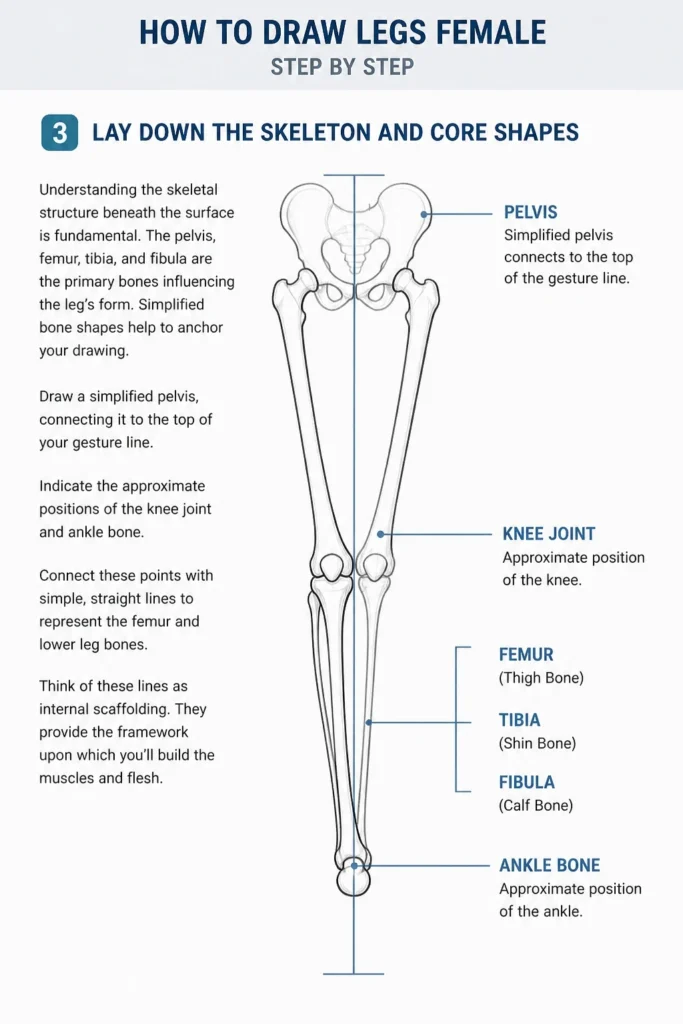
Draw a simplified pelvis, connecting it to the top of your gesture line.
Indicate the approximate positions of the knee joint and ankle bone.
Connect these points with simple, straight lines to represent the femur and lower leg bones.
Think of these lines as internal scaffolding. They provide the framework upon which you’ll build the muscles and flesh.
Step 4: Define Major Muscle Groups
The muscles give the legs their characteristic shape and volume. For female legs, focus on the elegant curves created by the quadriceps, hamstrings, and calf muscles. These are the primary forms you’ll sculpt.
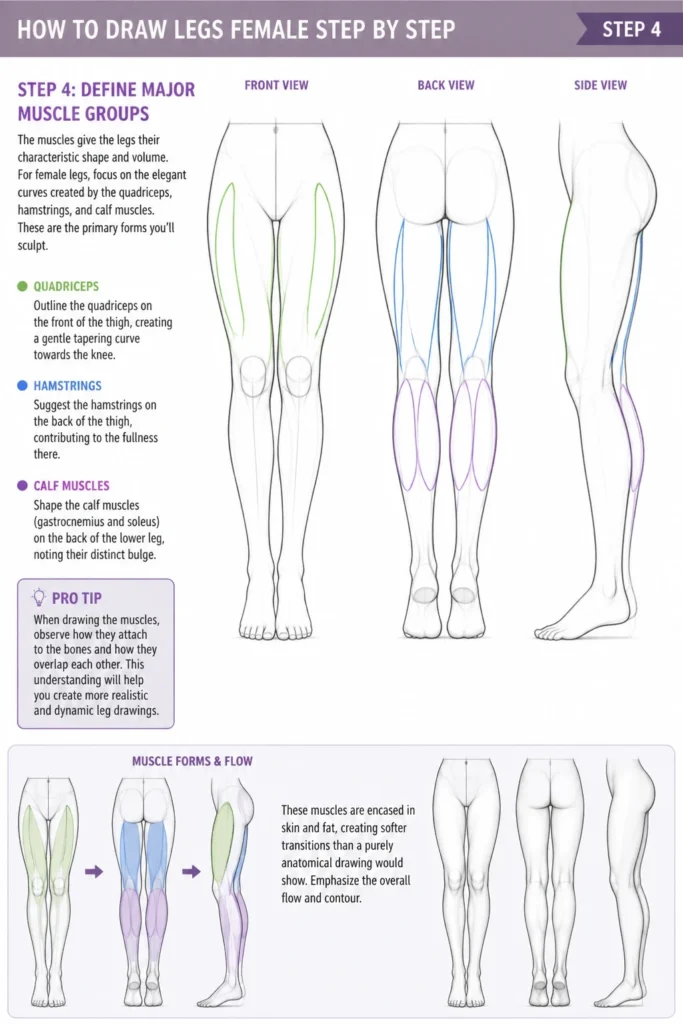
Outline the quadriceps on the front of the thigh, creating a gentle tapering curve towards the knee.
Suggest the hamstrings on the back of the thigh, contributing to the fullness there.
Shape the calf muscles (gastrocnemius and soleus) on the back of the lower leg, noting their distinct bulge.
Remember that these muscles are encased in skin and fat, creating softer transitions than a purely anatomical drawing would show. Emphasize the overall flow and contour.
Pro Tip: When drawing the muscles, observe how they attach to the bones and how they overlap each other. This understanding will make your forms feel more grounded and believable.
Step 5: Refine the Contours and Flow
Now, it’s time to smooth out your initial muscle blocks and create a cohesive silhouette. Pay close attention to the transitions between different muscle groups and the subtle indentations. The natural S-curve is often present in the female leg.
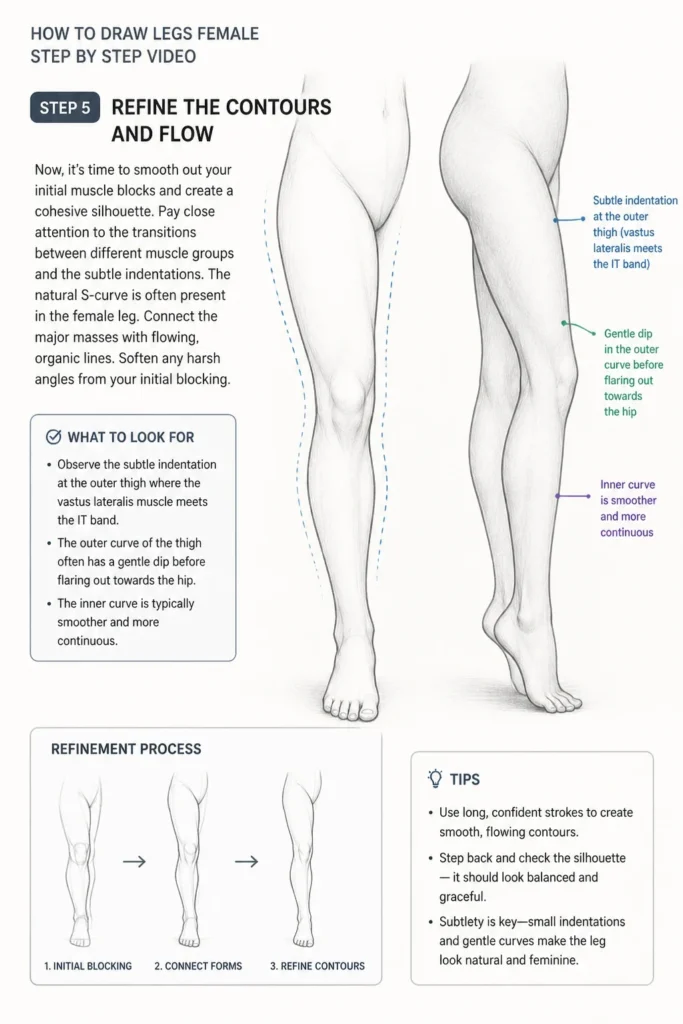
Connect the major masses with flowing, organic lines.
Soften any harsh angles from your initial blocking.
Observe the subtle indentation at the outer thigh where the vastus lateralis muscle meets the IT band.
The outer curve of the thigh often has a gentle dip before flaring out towards the hip. The inner curve is typically smoother and more continuous.
Step 6: Adding Details: Knees, Ankles, and Feet
These smaller elements are crucial for a convincing leg drawing. The knee joint, in particular, can be tricky due to its complex structure. Simplify it into recognizable forms.
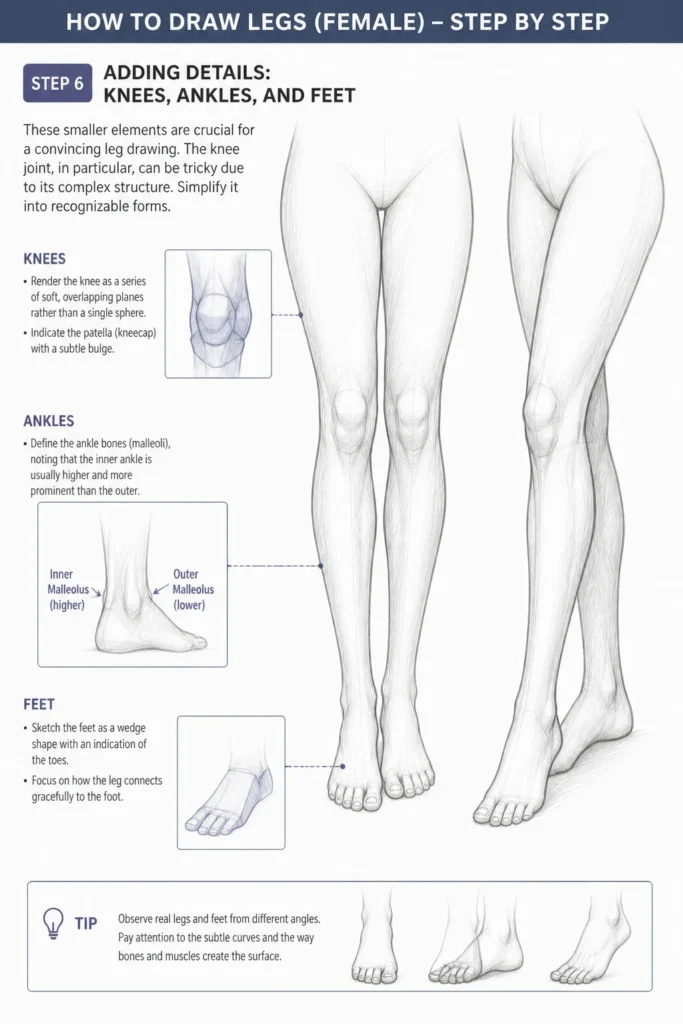
Render the knee as a series of soft, overlapping planes rather than a single sphere.
Indicate the patella (kneecap) with a subtle bulge.
Define the ankle bones (malleoli), noting that the inner ankle is usually higher and more prominent than the outer.
While feet deserve their own dedicated study, for now, sketch them as a wedge shape with an indication of the toes. Focus on how the leg connects gracefully to the foot.
Step 7: Shading for Form and Volume
Shading transforms your flat drawing into a three-dimensional form. Use light and shadow to define the planes and curves of the leg. This adds depth and realism.
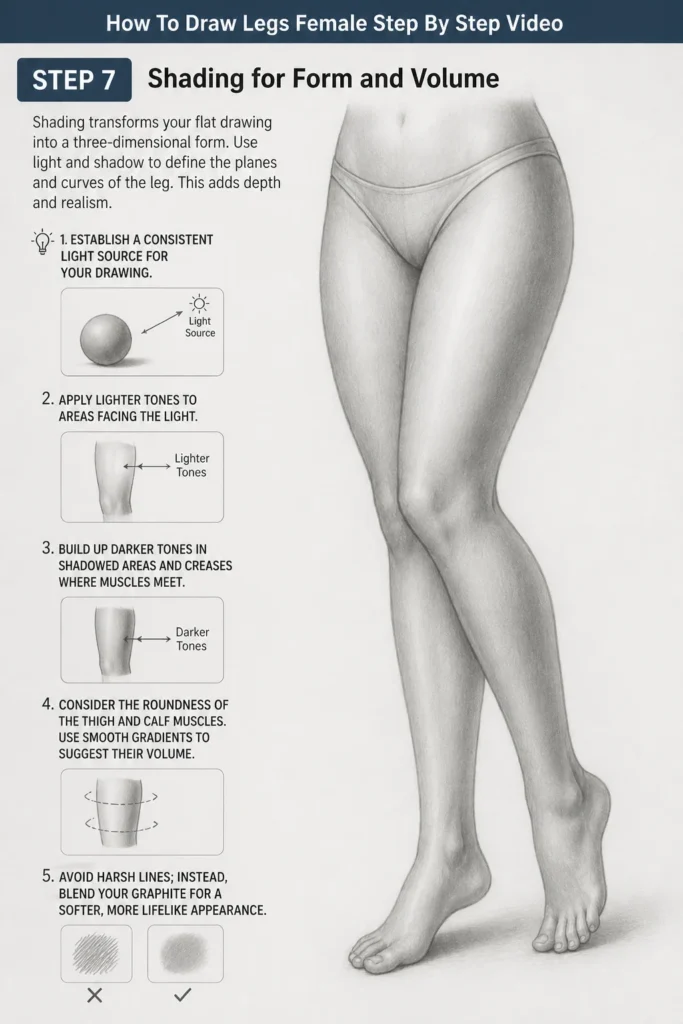
Establish a consistent light source for your drawing.
Apply lighter tones to areas facing the light.
Build up darker tones in shadowed areas and creases where muscles meet.
Consider the roundness of the thigh and calf muscles. Use smooth gradients to suggest their volume. Avoid harsh lines; instead, blend your graphite for a softer, more lifelike appearance.
Step 8: Practice and Observation
Drawing legs well isn’t a one-time achievement; it’s an ongoing process. Consistent practice and keen observation are your most powerful tools for improvement. Don’t be afraid to experiment with different poses and body types.
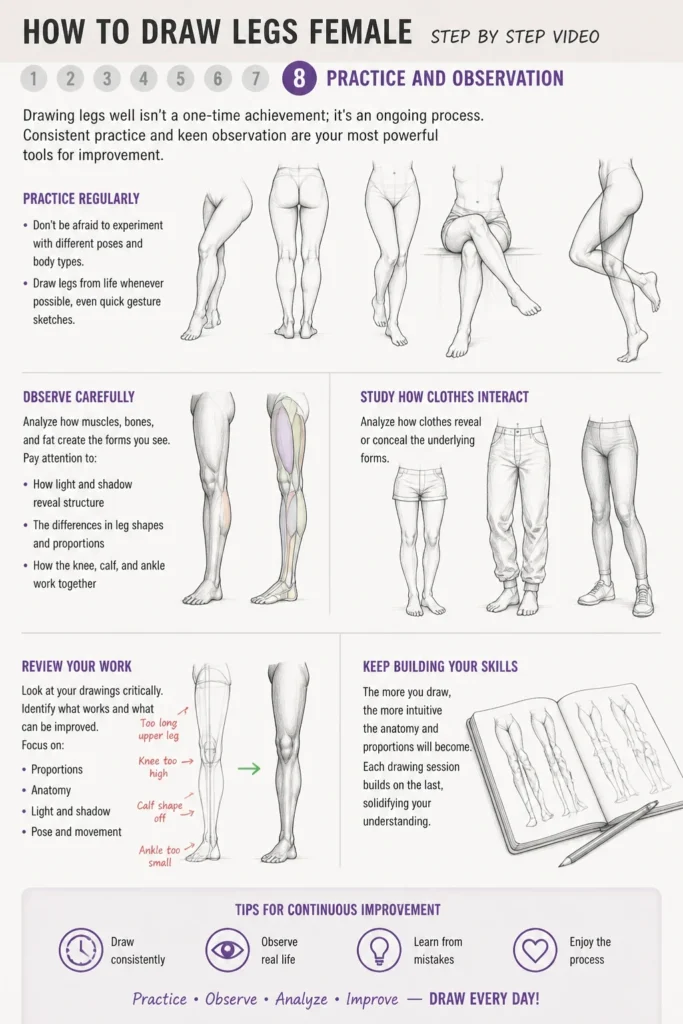
Draw legs from life whenever possible, even quick gesture sketches.
Analyze how clothes reveal or conceal the underlying forms.
Review your work critically, identifying areas for improvement.
The more you draw, the more intuitive the anatomy and proportions will become. Each drawing session builds on the last, solidifying your understanding.
Common Mistakes to Avoid
Ignoring Proportions
One of the most common pitfalls is drawing legs that are either too long, too short, or disproportionate between the thigh and lower leg. This instantly makes the figure look unnatural and unbalanced. Always start with a proportional skeleton or gesture sketch to establish the correct lengths relative to the torso and head.
Stiff or Blocky Forms
Beginners often draw legs as rigid, cylindrical tubes or angular blocks. This robs the drawing of its natural grace and fluidity. Remember that legs are made of muscles and soft tissue, creating subtle curves and organic flows. Focus on the S-curves and tapering forms rather than straight lines.
Misunderstanding the Knee Joint
The knee is a complex joint that many artists simplify incorrectly. Drawing it as a simple circle or a sharp angle can make the leg look awkward. Instead, visualize the knee as a collection of softer, overlapping forms with the patella (kneecap) as a distinct but integrated element. Pay attention to how the muscles flow into and around the knee.
Neglecting the Ankle and Foot Connection
Often, artists rush through the ankle and foot, treating them as an afterthought. A poorly drawn ankle can disrupt the entire leg’s flow. Ensure you understand the position of the ankle bones and how the calf muscles taper into the Achilles tendon. The connection to the foot should be seamless and anatomically sound.
Troubleshooting
My Legs Look Too Stiff
If your legs appear rigid, you likely started with too many straight lines or focused too much on individual muscles rather than the overall flow. Try beginning with a very loose, flowing gesture line for the entire leg. Exaggerate the natural curves and S-shapes. Think about the weight distribution and how the body shifts. Practice gesture drawing for just 30 seconds per pose to loosen up.
I Can’t Get the Proportions Right
Proportional errors are frustrating but fixable. Always measure. Use your pencil as a measuring tool against your reference or even within your own drawing. Compare the length of the thigh to the lower leg, and the width of the hips to the knees. Don’t be afraid to erase and redraw your initial skeletal framework until the main segments are correctly proportioned.
The Muscles Look Flat or Unrealistic
Flat muscles usually indicate a lack of understanding of volume and form. Instead of just outlining muscles, think about them as three-dimensional shapes. Imagine a light source and how it would create highlights and shadows on the curved surfaces of the quads, hamstrings, and calves. Use subtle shading and blending to give your muscles depth and roundness. Study anatomical diagrams to understand muscle origins and insertions.
Key Takeaways
- Start with Gesture: Always begin with loose lines to capture the movement and overall flow of the leg.
- Master Proportions: Understand the relative lengths of the thigh and lower leg to ensure a balanced figure.
- Simplify Anatomy: Break down complex muscle groups into simpler, manageable forms before adding detail.
- Focus on Curves: Emphasize the natural S-curves and organic transitions that give female legs their characteristic grace.
- Study Details: Pay attention to the subtle nuances of the knees, ankles, and feet for a convincing finish.
- Practice Shading: Use light and shadow effectively to give your drawings three-dimensional form and volume.
Frequently Asked Questions
How do female leg proportions differ from male leg proportions?
Female legs often exhibit a slightly longer femur relative to the tibia, contributing to a more elongated appearance. They typically have wider hips, which can create a more pronounced angle from the hip to the knee (the Q-angle). Muscle mass tends to be distributed differently, often emphasizing softer curves and less pronounced bulk compared to male legs.
What’s the best way to practice drawing legs without a live model?
High-quality photographic references are invaluable. Look for images from diverse angles and lighting conditions. You can also use 3D anatomy apps or models that allow you to rotate the figure and study different poses. Drawing from classical sculptures can also provide excellent practice for understanding form and anatomy.
Should I draw the bones first or the muscles?
It’s generally most effective to start with a simplified skeletal framework or a strong gesture line. This establishes the underlying structure and proportions. Once the “bones” are in place, you can then build the muscle masses around them, ensuring they are anatomically correct and well-supported. Think of it as building a house: foundation first, then walls.
How can I make my legs look more dynamic?
To add dynamism, focus on the line of action and counter-pose. Avoid perfectly straight or symmetrical legs. Introduce subtle bends, twists, and shifts in weight. Observe how muscles contract and stretch in various poses. Drawing from action photos or sports photography can be very helpful for capturing energetic forms.
Our Top Recommended Finds
- Anatomy for Artists Books: A good anatomical reference book, like “Anatomy for Sculptors” or “Figure Drawing for All It’s Worth,” is indispensable for understanding underlying structures.
- High-Quality Sketch Pencils: A set of varying lead hardness (HB, 2B, 4B, 6B) allows for a wide range of tones and line weights, essential for detailed rendering.
- Kneaded Eraser: This versatile eraser can lift graphite subtly without smudging, perfect for refining highlights and cleaning up lines without damaging the paper.
Embrace the Art of Leg Drawing
You’ve now got a solid foundation for drawing female legs with confidence and accuracy. Remember, every line you draw is a step towards mastery. Don’t let initial challenges deter you.
Keep practicing these steps, referring back to your references, and observing the world around you. Try applying these principles to different body types and poses. The journey of artistic improvement is continuous and rewarding. Go grab your sketchbook and start drawing those graceful forms today!
& Painting
No rigid rules or pretension. Just practical guides, medium comparisons, and encouraging tips to help you enjoy the drawing & painting process.