✍️ How To Draw Comic Book Style Step By Step

& Painting
No rigid rules or pretension. Just practical guides, medium comparisons, and encouraging tips to help you enjoy the drawing & painting process.
Ever dreamed of bringing your own heroes and villains to life on paper?
Drawing in a comic book style can seem daunting, but it’s a skill anyone can learn with the right approach.
I’ve spent countless hours sketching, inking, and refining my own comic characters, and I’m excited to share the practical steps that truly make a difference.
Quick Overview
This guide will walk you through the fundamental techniques to create dynamic comic book art.
You’ll learn how to construct characters, add detail, and ink your work for that classic comic feel.
- Time needed: 2-4 hours (for a basic character study)
- Difficulty: Beginner
- What you’ll need: Pencils, eraser, paper, inking pens, ruler
Step-by-Step Instructions
Step 1: Gather Your Materials
Before you begin, make sure you have everything ready. This prevents interruptions and keeps your creative flow going.
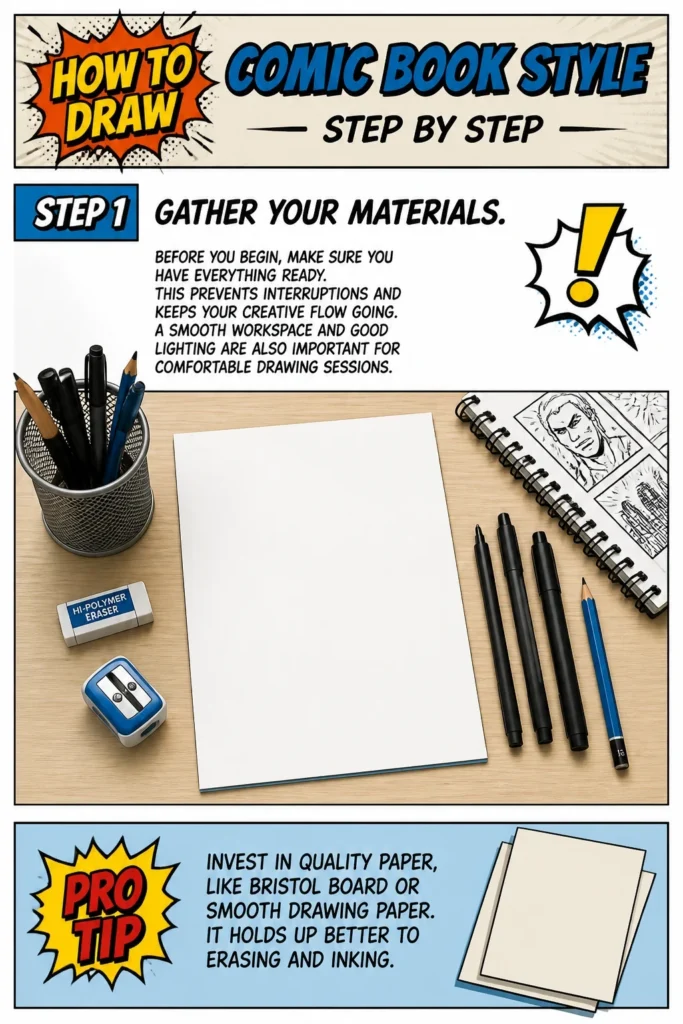
A smooth workspace and good lighting are also important for comfortable drawing sessions.
Pro Tip: Invest in quality paper, like Bristol board or smooth drawing paper. It holds up better to erasing and inking.
Step 2: Start with Basic Shapes and Stick Figures
Every great comic character begins with simple construction. Think of your character as a skeleton made of basic geometric forms.
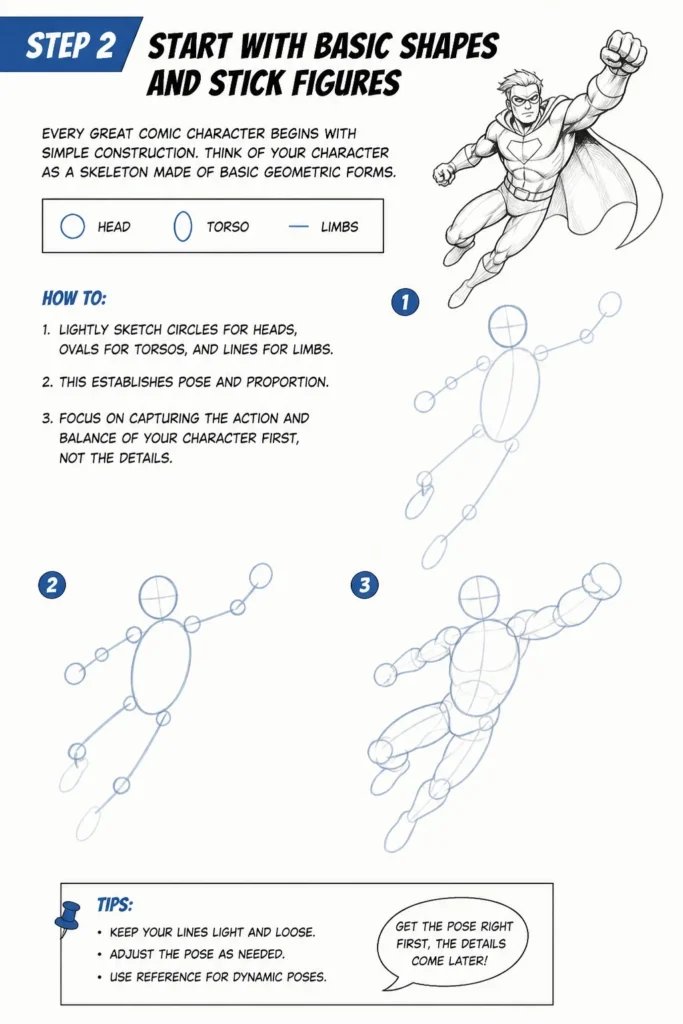
Lightly sketch circles for heads, ovals for torsos, and lines for limbs. This establishes pose and proportion.
Focus on capturing the action and balance of your character first, not the details.
Step 3: Build Form and Anatomy
Now, expand those basic shapes into three-dimensional forms. Turn circles into spheres, and ovals into cylinders for arms and legs.
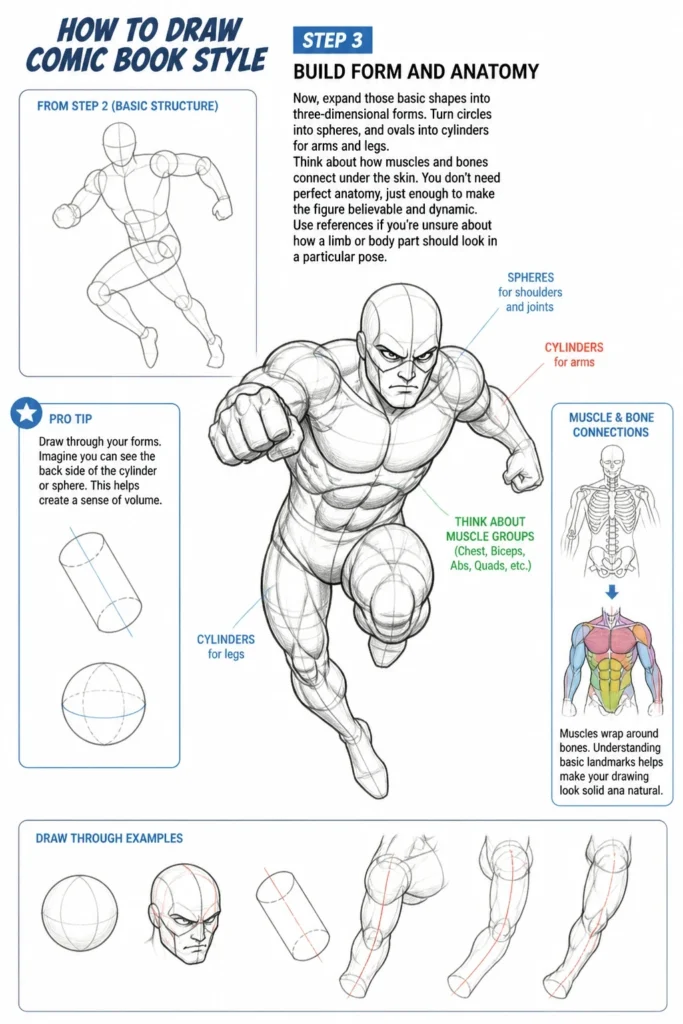
Think about how muscles and bones connect under the skin. You don’t need perfect anatomy, just enough to make the figure believable and dynamic.
Use references if you’re unsure about how a limb or body part should look in a particular pose.
Pro Tip: Draw through your forms. Imagine you can see the back side of the cylinder or sphere. This helps create a sense of volume.
Step 4: Add Character Details and Features
Once your figure has volume, start adding the specific features that define your character. This includes facial features, hair, and clothing.
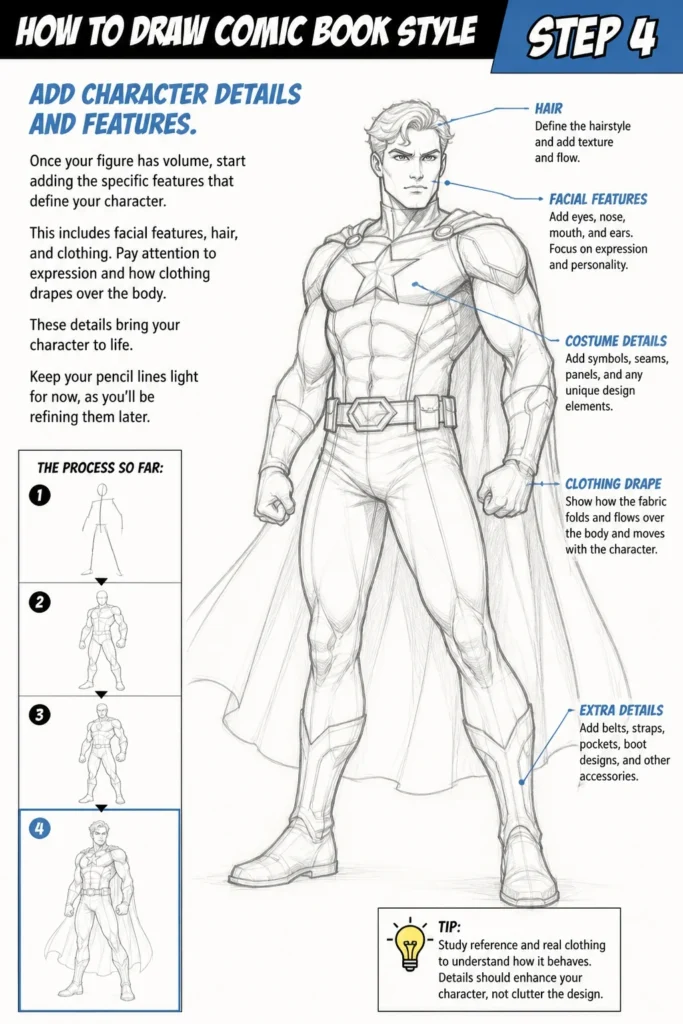
Pay attention to expression and how clothing drapes over the body. These details bring your character to life.
Keep your pencil lines light for now, as you’ll be refining them later.
Step 5: Refine and Clean Up Your Pencil Lines
This is where you sharpen your drawing. Go over your preferred lines with a slightly darker pencil, making them more defined.
Erase any unnecessary construction lines or stray marks. Your drawing should now look like a clean, detailed pencil sketch.
Make sure all proportions look correct and the pose feels natural.
Step 6: Ink Your Drawing
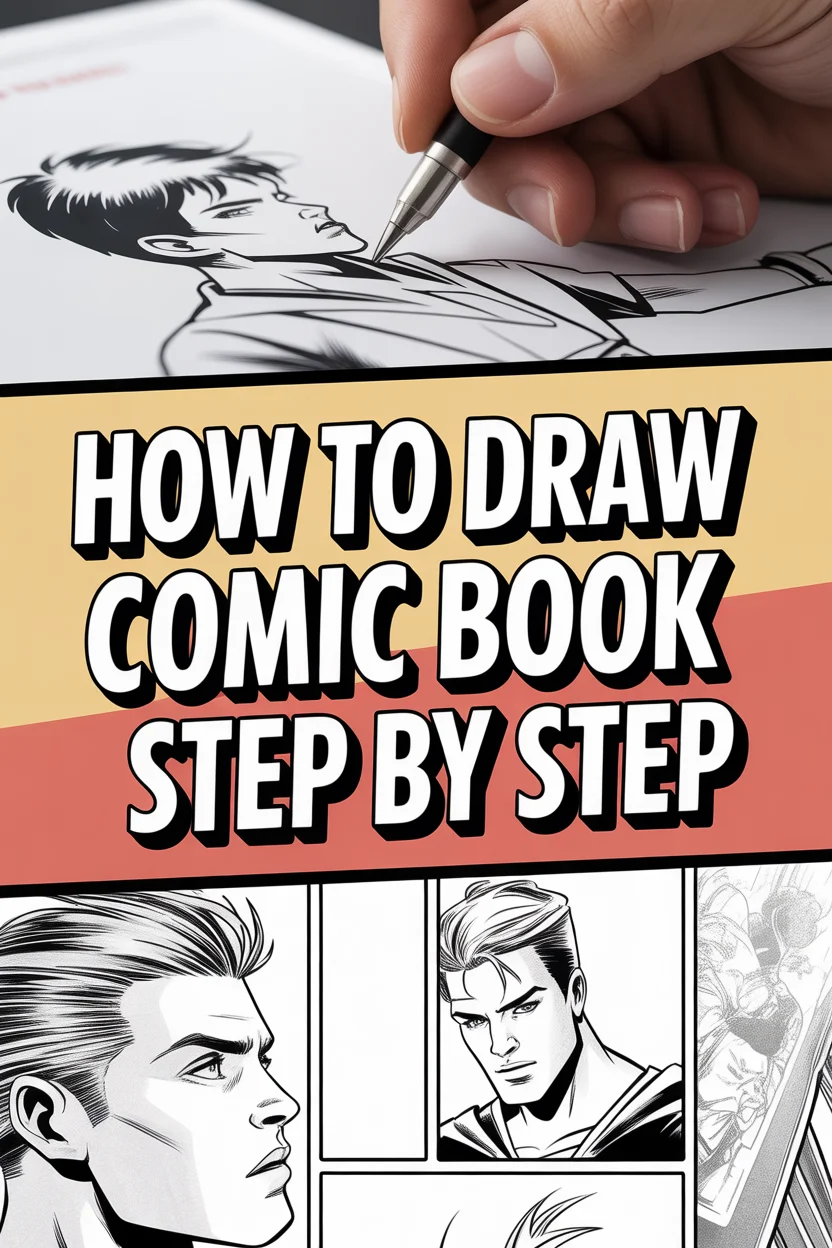
Inking is crucial for the comic book look. Use fine-liner pens or brush pens to trace over your refined pencil lines.
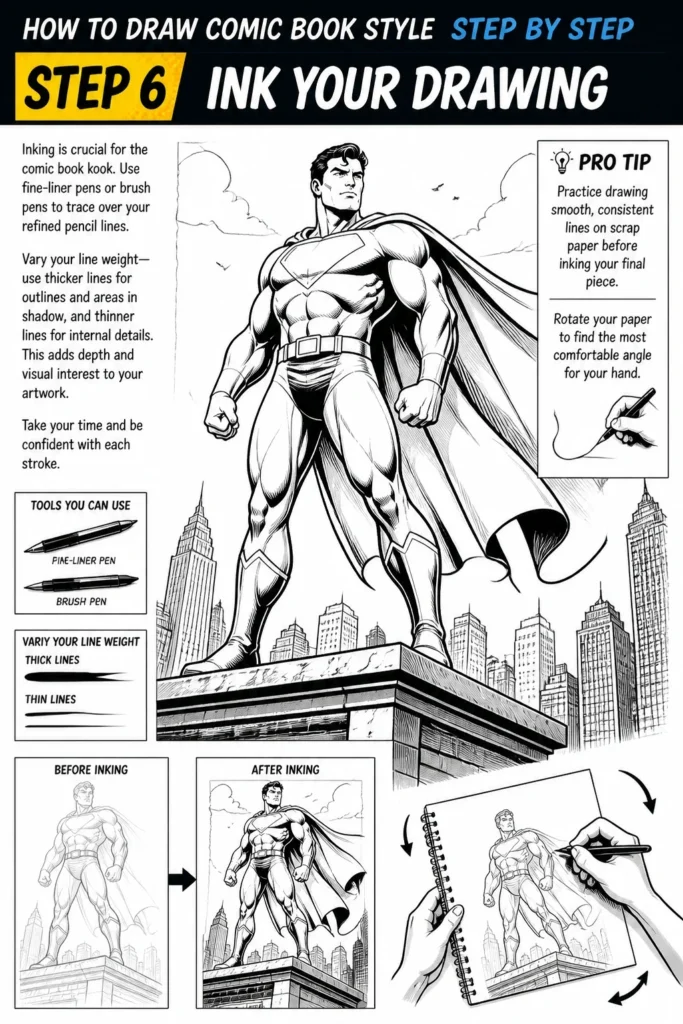
Vary your line weight: use thicker lines for outlines and areas in shadow, and thinner lines for internal details.
This adds depth and visual interest to your artwork. Take your time and be confident with each stroke.
Pro Tip: Practice drawing smooth, consistent lines on scrap paper before inking your final piece. Rotate your paper to find the most comfortable angle for your hand.
Step 7: Erase Pencil Marks and Add Spot Blacks
After your ink is completely dry, gently erase all remaining pencil lines. This reveals your clean, crisp inked artwork.
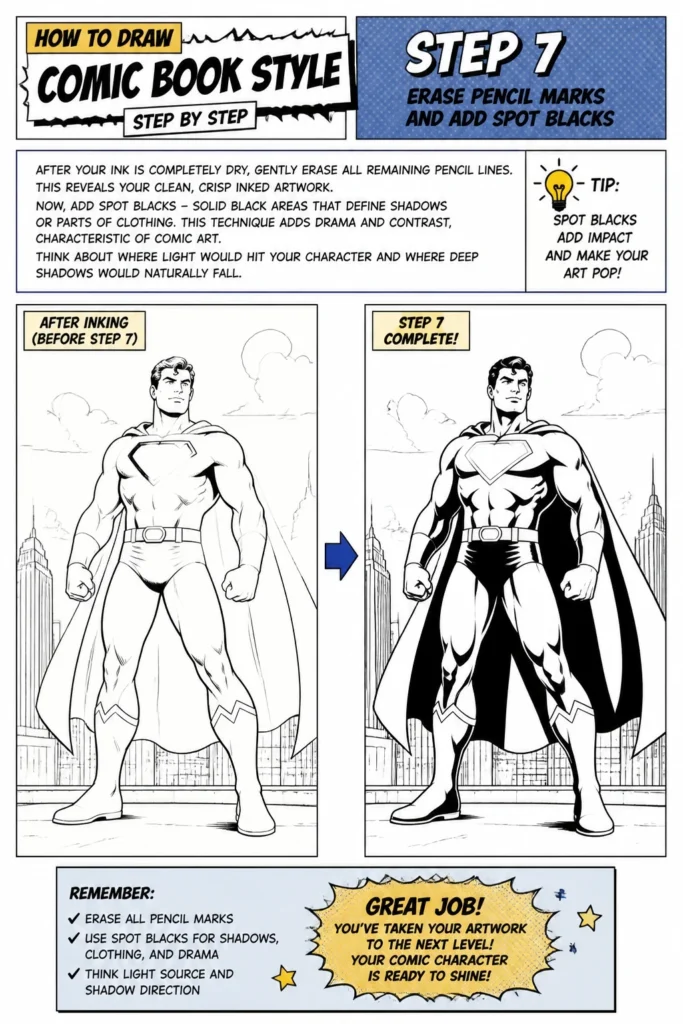
Now, add “spot blacks” – solid black areas that define shadows or parts of clothing. This technique adds drama and contrast, characteristic of comic art.
Think about where light would hit your character and where deep shadows would naturally fall.
Step 8: Incorporate Shading and Crosshatching
To add more depth, use shading techniques. Crosshatching involves drawing intersecting lines to create areas of tone.
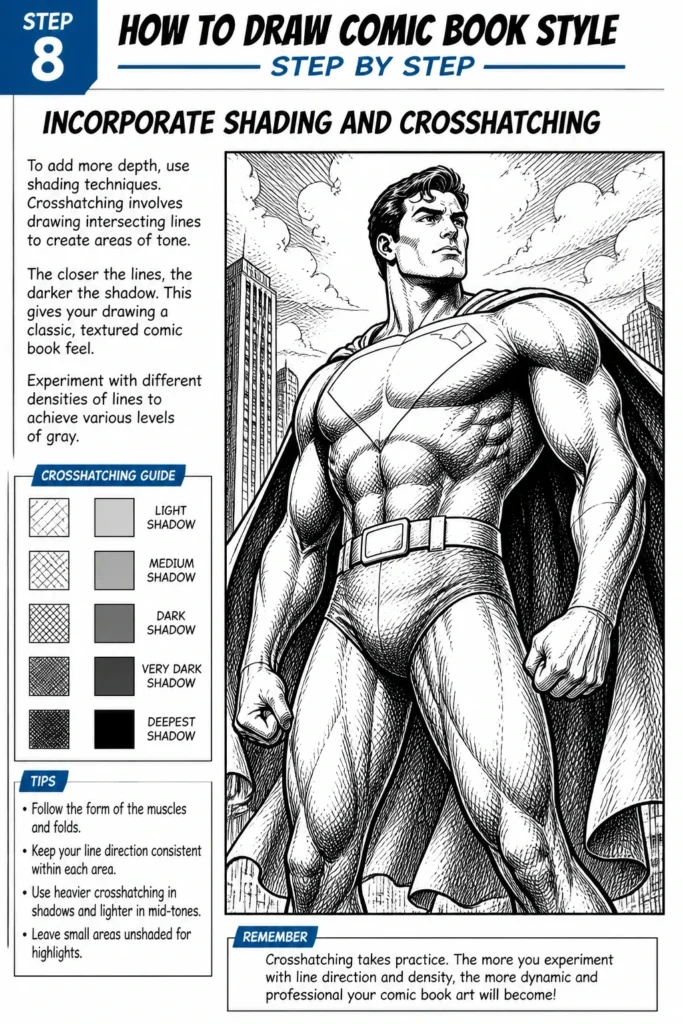
The closer the lines, the darker the shadow. This gives your drawing a classic, textured comic book feel.
Experiment with different densities of lines to achieve various levels of gray.
Step 9: Consider Backgrounds and Panel Layout
While optional for a single character, backgrounds place your character in a scene. Simple shapes or abstract lines can suggest an environment.
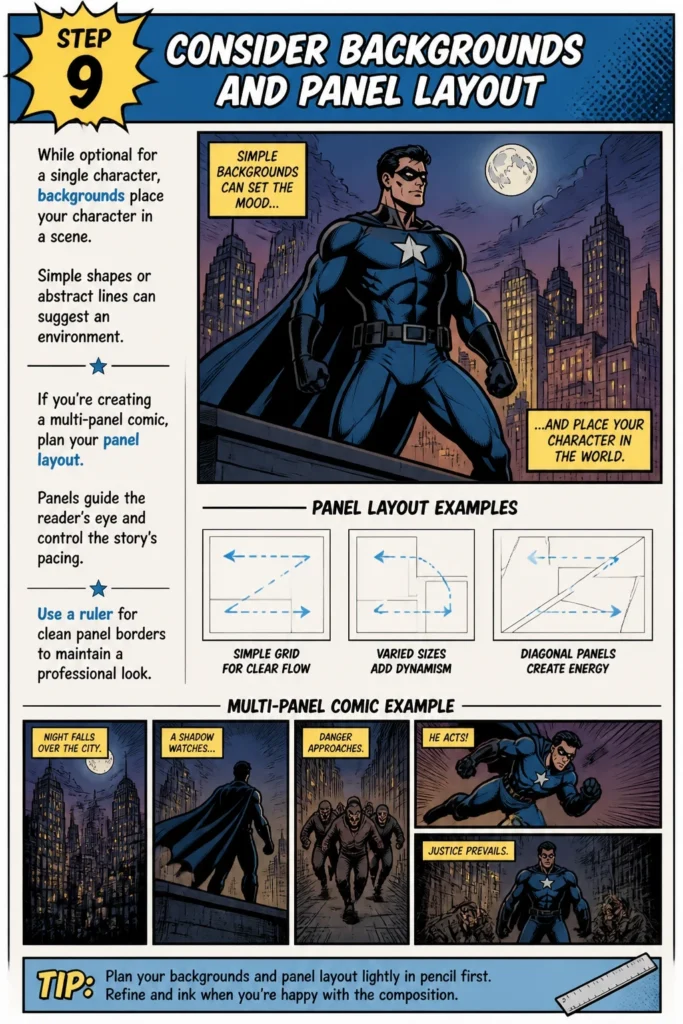
If you’re creating a multi-panel comic, plan your panel layout. Panels guide the reader’s eye and control the story’s pacing.
Use a ruler for clean panel borders to maintain a professional look.
Common Mistakes to Avoid
Skipping the Basics
Many aspiring artists jump straight to details without constructing the underlying figure. This often leads to stiff, disproportionate, or unbalanced characters.
Always begin with simple shapes and stick figures. Build your character from the ground up to ensure solid anatomy and dynamic poses.
Over-detailing Too Early
Adding intricate details like wrinkles, patterns, or intricate hair before the main forms are established can overwhelm your drawing. It makes it hard to correct foundational errors.
Focus on the big picture first. Refine the overall form and pose, then gradually introduce smaller details in later steps.
Fear of Inking
Hesitation during inking often results in wobbly, inconsistent lines. Inking requires confidence to achieve clean, impactful results.
Practice your strokes on scrap paper. Embrace the finality of ink; sometimes, “happy accidents” create unique character.
Ignoring Perspective
Even for a single character, understanding basic perspective helps create depth and realism. A character floating in space or looking flat lacks impact.
Think about where your character is in relation to the viewer. Use simple perspective lines to ground them, even if it’s just a subtle ground plane.
Troubleshooting
My Drawings Look Stiff and Lifeless
This often happens when you focus too much on drawing individual body parts rather than the overall flow of the pose. Your initial stick figure might be too rigid.
Go back to Step 2. Exaggerate the action line of your stick figure. Push the pose further than you think you need to. Use gesture drawing exercises to loosen up your hand and eye.
My Inked Lines Are Wobbly or Uneven
Wobbly lines are usually a sign of drawing too slowly or using your wrist instead of your arm. Uneven lines can also result from inconsistent pressure.
Practice drawing long, confident strokes. Try rotating your paper to find a comfortable angle for sweeping lines. Ensure your pens have good ink flow and aren’t running dry.
My Characters Don’t Feel Dynamic or Powerful
A lack of dynamism often comes from static poses or insufficient contrast. Comic art thrives on energy and visual impact.
Revisit Step 3 and 7. Exaggerate muscle forms and body language to convey emotion and action. Use strong spot blacks and varied line weights to create impactful shadows and highlights, enhancing the sense of power.
Key Takeaways
- Building characters from basic shapes provides a solid foundation for dynamic poses.
- Gradually adding details ensures your artwork remains proportionate and well-constructed.
- Confident inking with varied line weights is essential for that iconic comic book style.
- Embrace spot blacks and crosshatching to add depth, drama, and contrast to your drawings.
- Consistent practice and using references are key to improving your comic art skills over time.
Frequently Asked Questions
Do I need expensive tools to start drawing comic books?
Absolutely not. You can begin with a simple pencil, an eraser, and some regular paper. As you progress, you might want to upgrade to better quality pencils, inks, and paper, but the fundamentals remain the same regardless of your tools.
How often should I practice to see improvement?
Consistency is more important than duration. Even 15-30 minutes of focused practice each day can lead to significant improvement over time. Regular sketching builds muscle memory and sharpens your observational skills.
Can I draw comic book style digitally instead of traditionally?
Yes, many professional comic artists work entirely digitally. The principles of construction, anatomy, inking, and shading apply equally to digital tools. Programs like Clip Studio Paint or Photoshop offer powerful features for comic creation.
What about adding color to my comic drawings?
This guide focuses on black and white inking, which is a foundational skill. Once you master inking, you can explore digital coloring, markers, watercolors, or colored pencils. Understanding light and shadow from inking will greatly assist your coloring efforts.
Our Top Recommended Finds
- Sketchbook: Look for one with smooth, acid-free paper, like a Strathmore 400 Series. It handles pencils and ink well without bleeding.
- Pigma Micron Pens: A set of these archival-quality pens (various sizes like 0.2mm, 0.5mm, Brush) offers excellent, consistent black lines for inking.
- HB and 2B Graphite Pencils: An HB is great for initial light sketches, and a 2B provides a slightly darker, smoother line for refining your drawing before inking.
Unleash Your Inner Comic Artist
You now have a solid roadmap to begin your journey into comic book art. Each step builds on the last, helping you create dynamic, expressive characters.
The most important thing is to keep practicing and to enjoy the process of bringing your imagination to life.
Grab your tools, choose a character, and start sketching today!
& Painting
No rigid rules or pretension. Just practical guides, medium comparisons, and encouraging tips to help you enjoy the drawing & painting process.