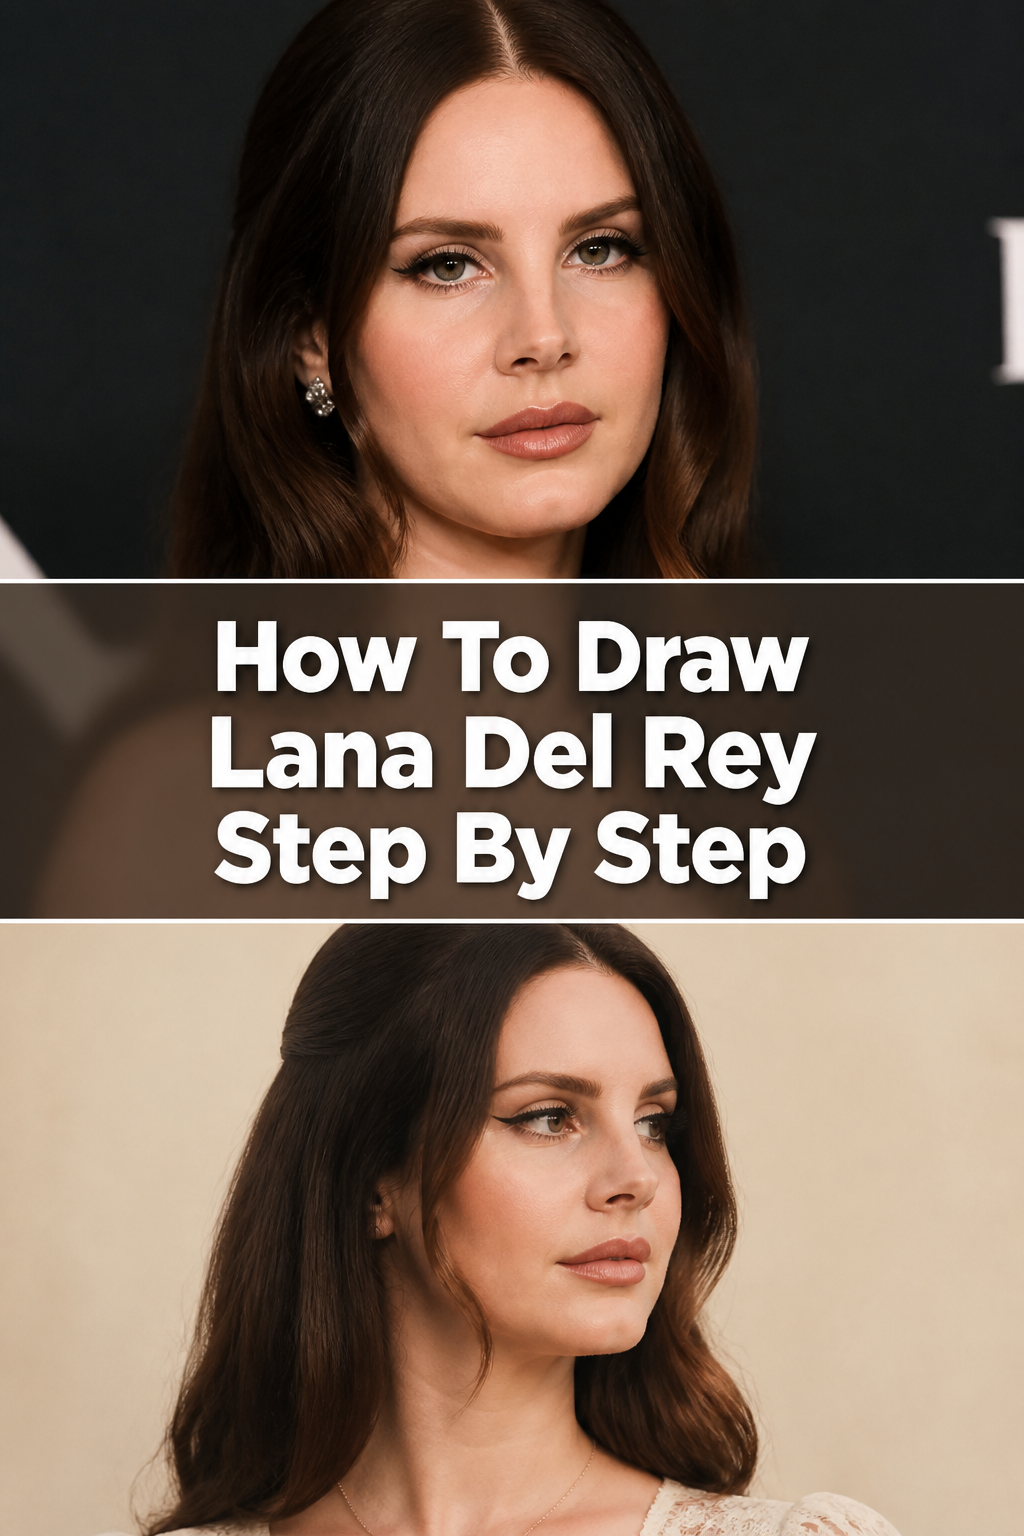
🎶 How To Draw Lana Del Rey Step By Step

& Painting
No rigid rules or pretension. Just practical guides, medium comparisons, and encouraging tips to help you enjoy the drawing & painting process.
I remember the first time I tried to capture Lana Del Rey’s unique aesthetic on paper. It felt like a true test of my portrait skills. This guide shares the techniques I’ve refined over many drawing sessions, making it approachable for everyone.
You’re about to learn how to translate her iconic look into a compelling drawing. Trust this process to guide your hand and eye.
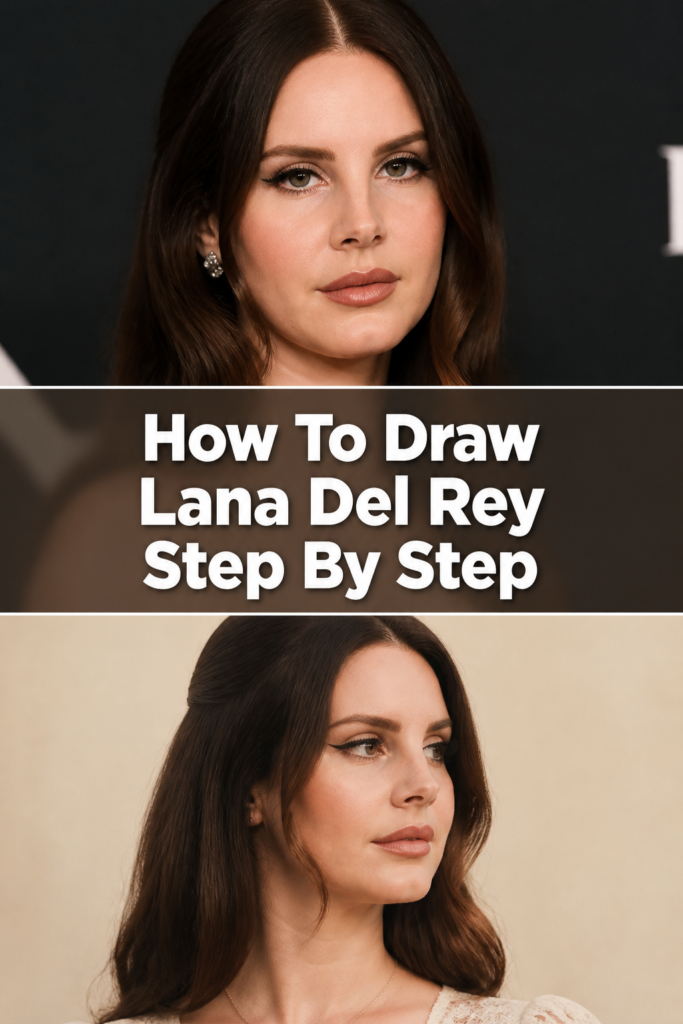
Quick Overview
This guide will walk you through creating a detailed portrait of Lana Del Rey. You’ll learn to capture her distinctive facial features and signature style. By the end, you’ll have a finished drawing you can be proud of.
- Time needed: 2-4 hours (depending on detail and experience)
- Difficulty: Intermediate
- What you’ll need: Sketching pencils (HB, 2B, 4B), eraser, blending stump or cotton swabs, drawing paper
Step-by-Step Instructions
Step 1: Lay Out the Basic Head Structure
Begin by lightly sketching an oval shape for the head. This initial form doesn’t need to be perfect, just a general guide. Think of it as the foundation for everything else.
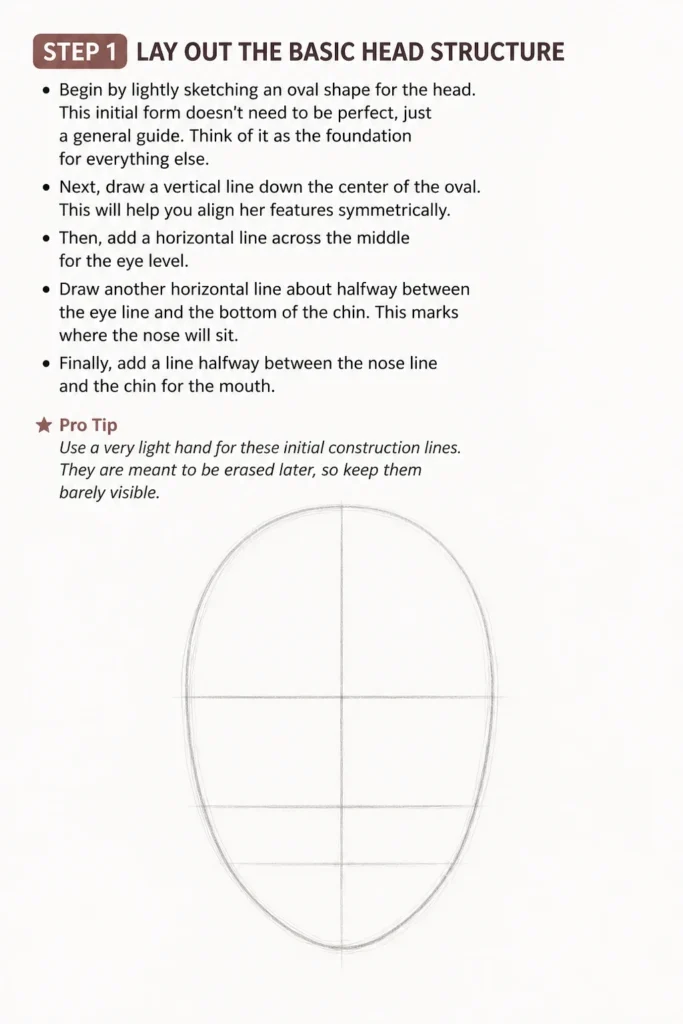
Next, draw a vertical line down the center of the oval. This will help you align her features symmetrically. Then, add a horizontal line across the middle for the eye level.
Draw another horizontal line about halfway between the eye line and the bottom of the chin. This marks where the nose will sit. Finally, add a line halfway between the nose line and the chin for the mouth.
Pro Tip: Use a very light hand for these initial construction lines. They are meant to be erased later, so keep them barely visible.
Step 2: Define the Jawline and Neck
Refine the oval into a more distinct head shape. Lana often has a soft yet defined jawline, so gently taper the sides of the oval inward towards the chin. Make the chin slightly rounded.
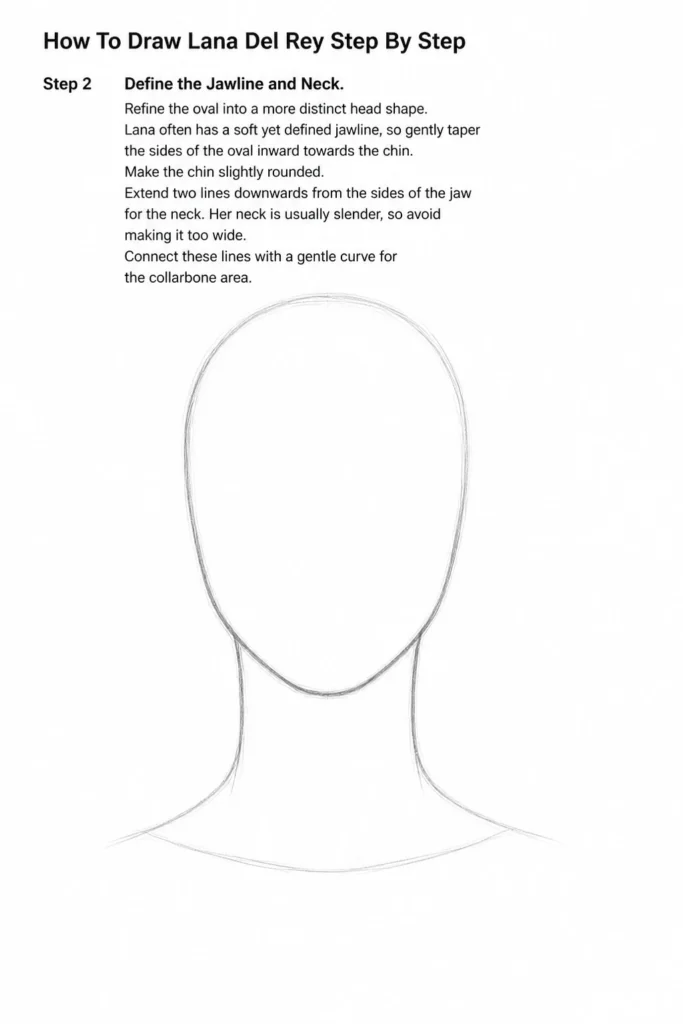
Extend two lines downwards from the sides of the jaw for the neck. Her neck is usually slender, so avoid making it too wide. Connect these lines with a gentle curve for the collarbone area.
Step 3: Position the Eyes and Eyebrows
Draw two almond shapes along the eye line, spaced appropriately. Lana’s eyes are often a key feature, so pay attention to their slightly downturned outer corners. Sketch in small circles for the irises and pupils.
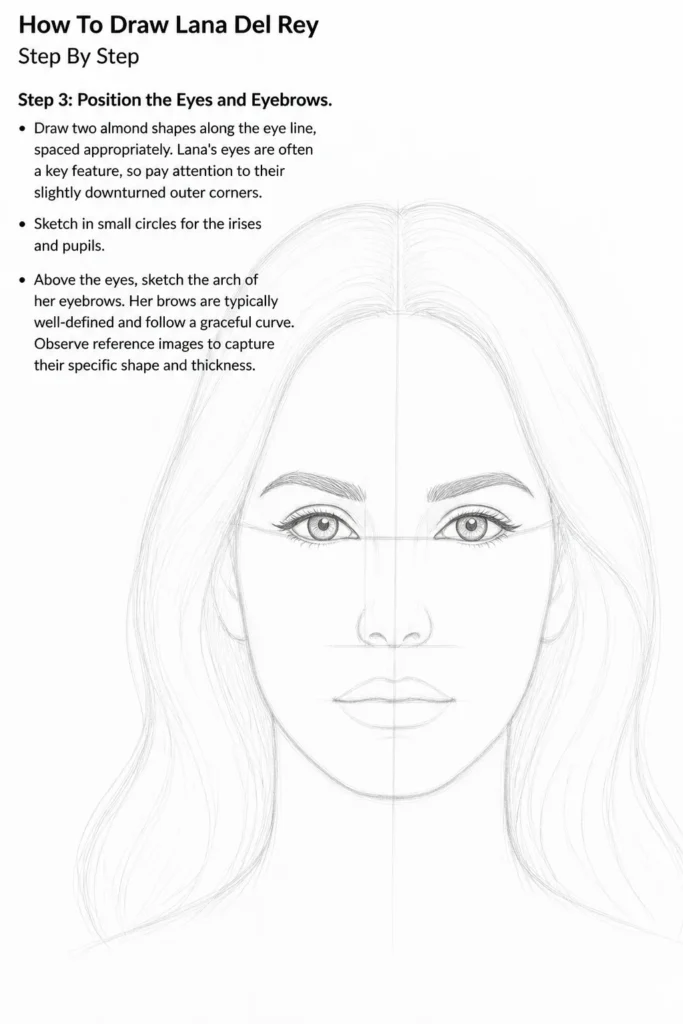
Above the eyes, sketch the arch of her eyebrows. Her brows are typically well-defined and follow a graceful curve. Observe reference images to capture their specific shape and thickness.
Step 4: Shape the Nose
Using the nose line as your guide, sketch the basic structure of her nose. Lana’s nose has a distinct, slightly upturned tip. Start with a simple bridge and then focus on the rounded tip and delicate nostrils.
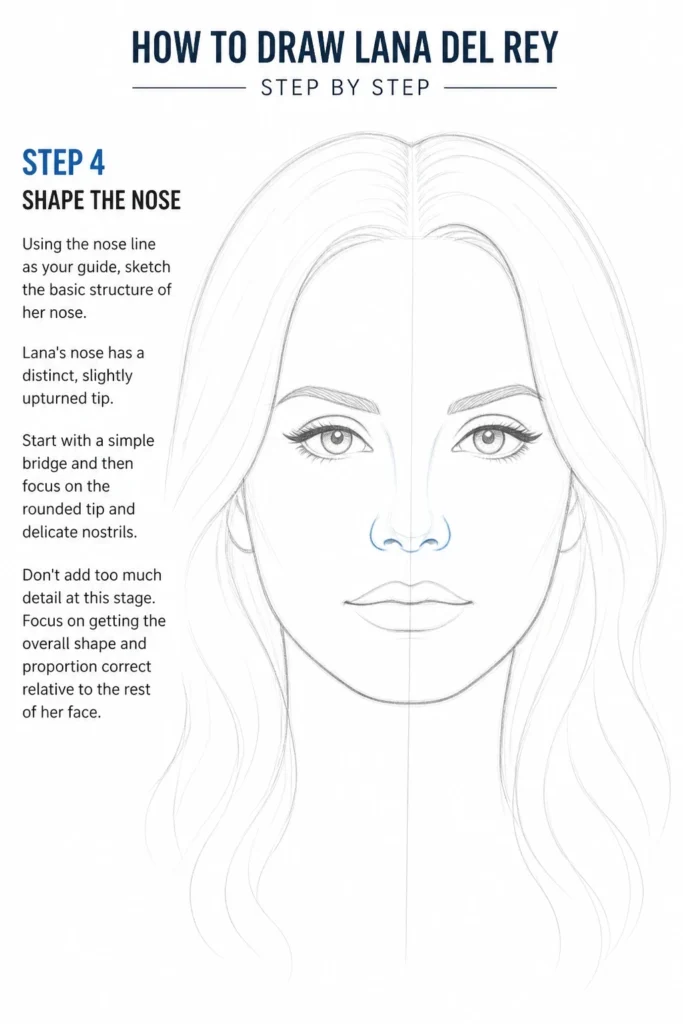
Don’t add too much detail at this stage. Focus on getting the overall shape and proportion correct relative to the rest of her face.
Step 5: Sketch the Lips
Position the lips on the mouth line you drew earlier. Lana’s lips are full and iconic. Begin by drawing the cupid’s bow on the upper lip, then shape the curve of the upper and lower lips.
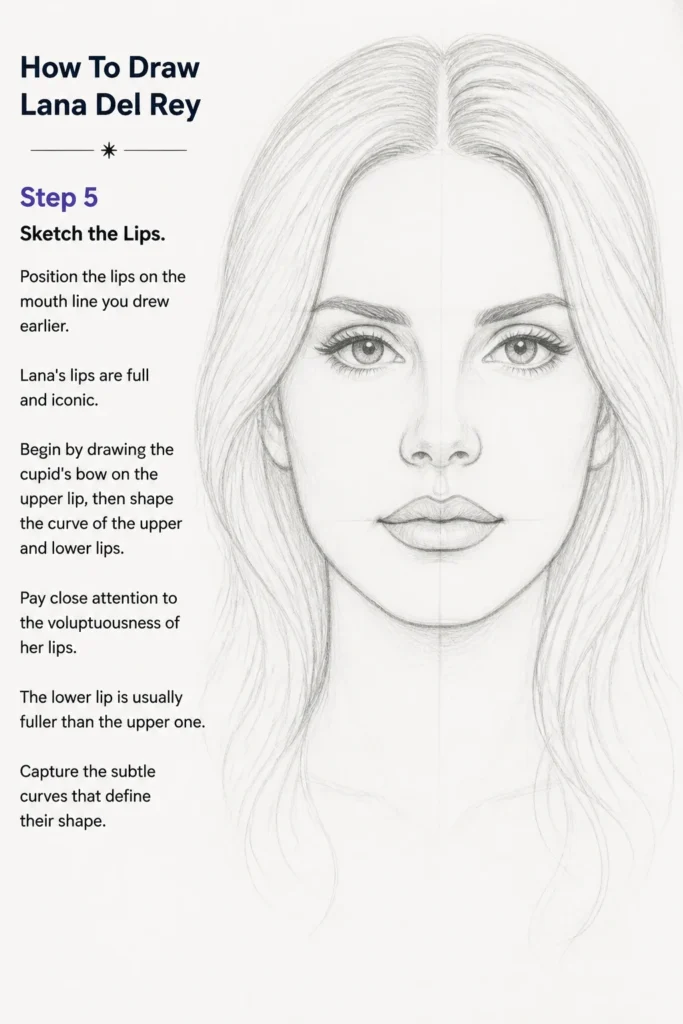
Pay close attention to the voluptuousness of her lips. The lower lip is usually fuller than the upper one. Capture the subtle curves that define their shape.
Step 6: Outline the Hair
Lana’s hair is a significant part of her persona. Start by sketching the general volume and hairline. Her hair often has a lot of body and can be styled in various ways, from flowing waves to more retro updos.
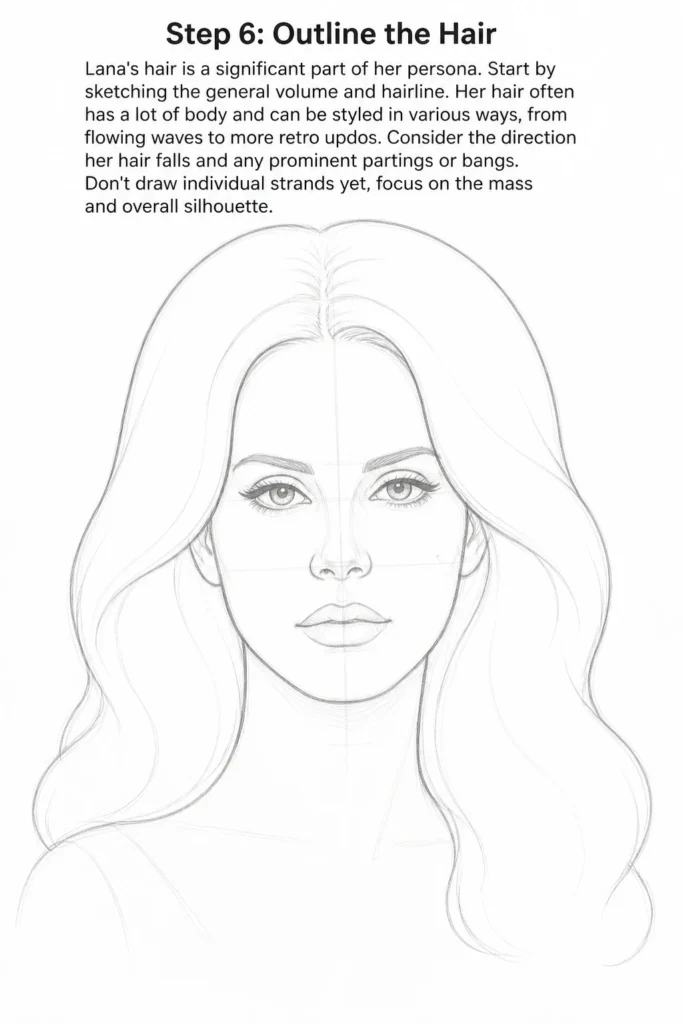
Consider the direction her hair falls and any prominent partings or bangs. Don’t draw individual strands yet; focus on the mass and overall silhouette.
Step 7: Add Basic Shading and Details
Begin to add light shading to give your drawing dimension. Use your HB pencil to indicate areas of shadow under the chin, around the nose, and in the eye sockets. This helps to make the features pop.
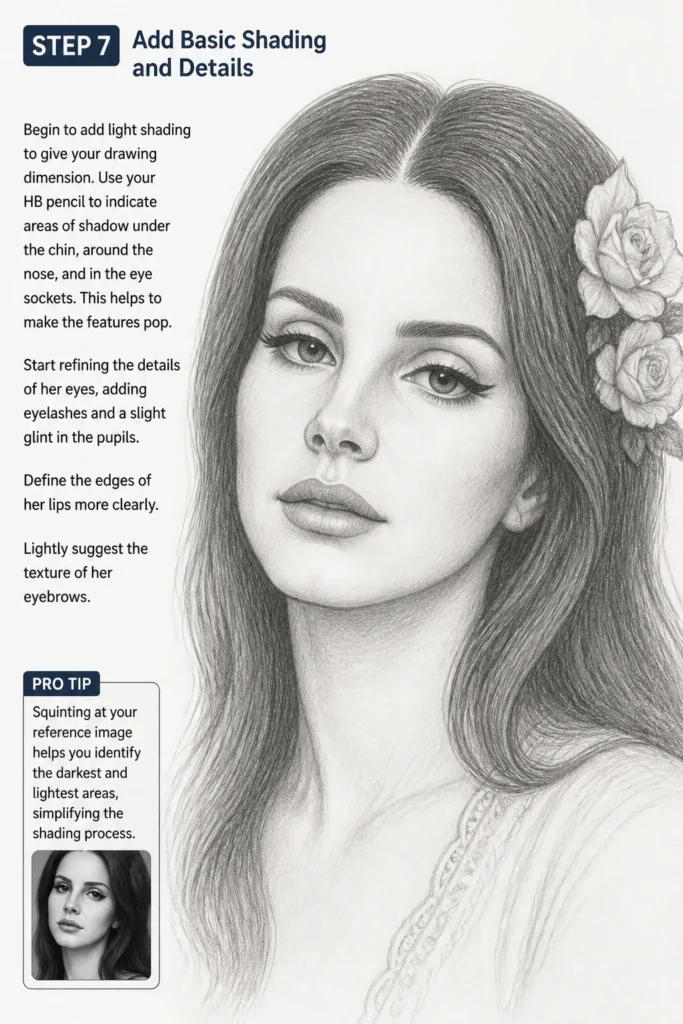
Start refining the details of her eyes, adding eyelashes and a slight glint in the pupils. Define the edges of her lips more clearly. Lightly suggest the texture of her eyebrows.
Pro Tip: Squinting at your reference image helps you identify the darkest and lightest areas, simplifying the shading process.
Step 8: Develop Hair Texture and Volume
Now, focus on the hair. Use longer, flowing strokes with your 2B pencil to suggest the movement and texture of her hair. Build up layers of strokes to create depth and volume.
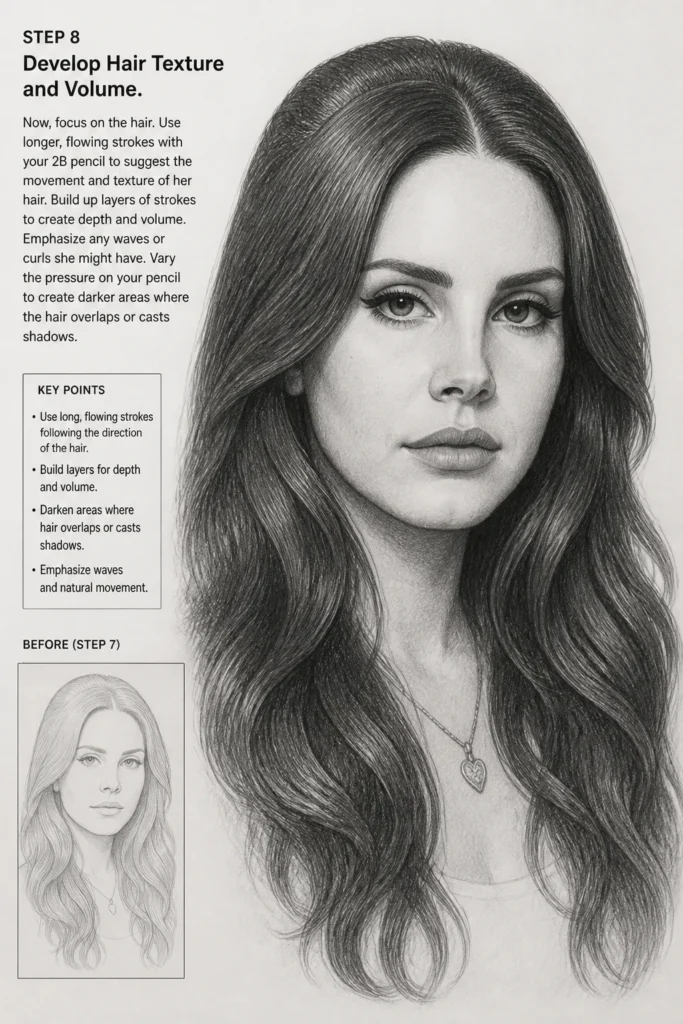
Emphasize any waves or curls she might have. Vary the pressure on your pencil to create darker areas where the hair overlaps or casts shadows.
Step 9: Refine Facial Features and Shadows
Go back to the face and deepen the shadows with your 2B or 4B pencil. Pay close attention to the subtle contours of her cheeks, forehead, and jawline. Use a blending stump or cotton swab to smooth out the graphite for a softer skin tone.
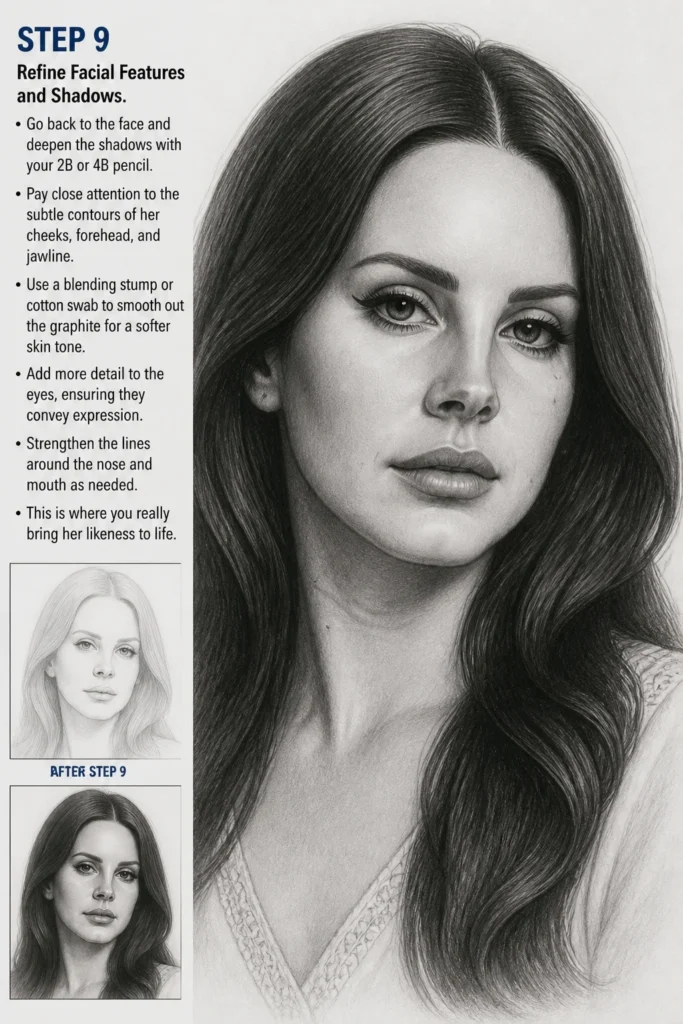
Add more detail to the eyes, ensuring they convey expression. Strengthen the lines around the nose and mouth as needed. This is where you really bring her likeness to life.
Step 10: Final Touches and Erasing
Review your entire drawing. Use your eraser to lift any stray lines or to brighten highlights on the nose, forehead, and lips. Add the final, darkest accents with your 4B pencil, such as the pupils, the darkest parts of the hair, or under the eyelashes.
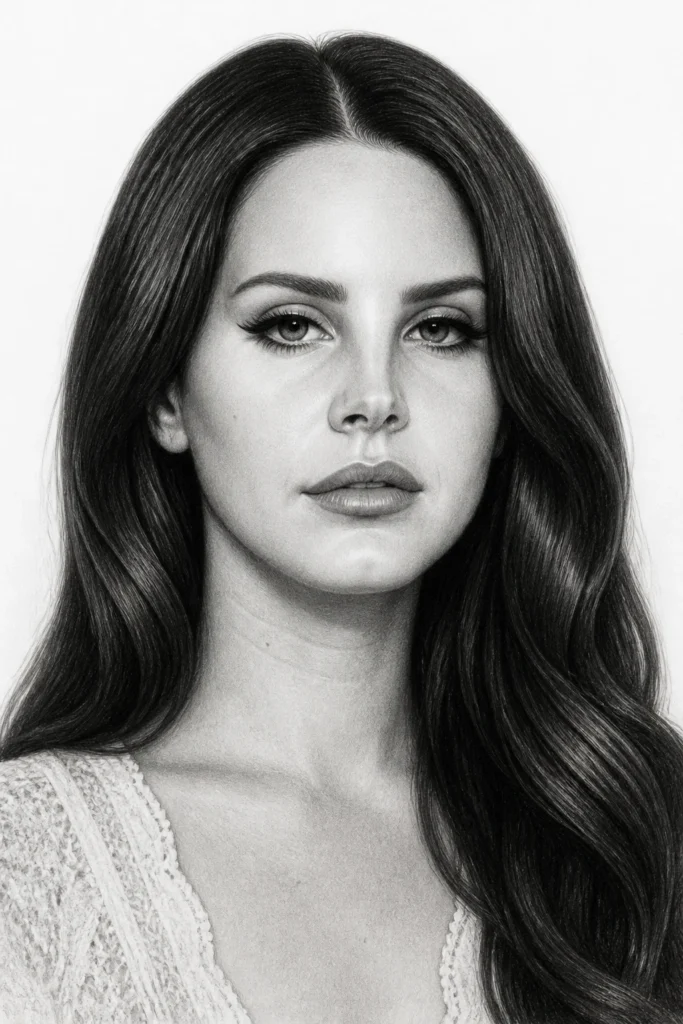
Check proportions one last time. Make sure all construction lines are completely erased. Step back and admire your finished Lana Del Rey portrait.
Common Mistakes to Avoid
Incorrect Proportions
Many beginners struggle with getting facial proportions right. Drawing features too large, too small, or incorrectly spaced can make the portrait look off. Always double-check your initial guidelines and use a ruler or pencil to measure distances on your reference photo and transfer them to your drawing. Constantly compare your drawing to the reference image.
Over-Shading Too Early
It’s tempting to jump straight to dark shadows, but this can make your drawing look muddy and flat. Start with light layers of graphite and gradually build up the darker tones. This approach allows for more control and makes corrections easier. Always work from light to dark, adding depth slowly.
Ignoring Reference Details
Lana Del Rey has very specific features that define her look. Failing to observe the nuances of her eye shape, lip fullness, or nose structure can result in a generic portrait. Take your time to really study your reference image, noting every subtle curve and angle. These small details are crucial for capturing a true likeness.
Lack of Contrast
A common issue in drawings is a lack of strong darks and bright lights. This results in a flat, uninteresting image. Ensure you are utilizing the full range of your pencils, from the lightest HB to the darkest 4B. Strong contrast creates depth and makes your drawing visually engaging.
Troubleshooting
My Drawing Looks Flat
If your portrait lacks depth, it’s likely due to insufficient contrast. Go back through your drawing and identify areas that should be much darker or brighter. Use a softer pencil (like 4B or 6B) to deepen shadows and a kneaded eraser to lift graphite for highlights. Build up layers of shading gradually.
The Face Doesn’t Look Like Her
This is usually a proportion issue. Carefully re-examine your initial construction lines and how you placed the features. Measure distances between eyes, nose, and mouth on your reference and compare them to your drawing. Sometimes, even a slight adjustment in the angle of an eyebrow or the curve of a lip can make a huge difference. Don’t be afraid to erase and redraw.
Hair Looks Like a Solid Mass
Hair needs texture and movement to look natural. If yours looks stiff, you might be drawing too many short, uniform lines or shading it too evenly. Use varying stroke lengths and pressures. Focus on depicting the overall flow and direction of the hair, then add lighter strokes for individual strands. Create darker areas where hair overlaps to show depth.
Key Takeaways
- Start with Structure: Always begin with basic geometric shapes and guidelines for accurate proportions.
- Layer Your Shading: Build up tones gradually from light to dark to create depth and avoid a muddy appearance.
- Observe Closely: Pay meticulous attention to Lana’s unique facial features and expressions from your reference.
- Embrace Contrast: Utilize the full range of light and dark values to make your drawing dynamic and realistic.
- Practice Patience: Drawing portraits takes time and careful observation; don’t rush the process.
- Don’t Fear Erasing: Mistakes are part of the learning process; use your eraser as a drawing tool.
Frequently Asked Questions
What kind of reference photo should I use?
Choose a high-resolution photo with clear lighting that shows Lana’s face distinctly. A frontal or slightly angled view is often easiest for beginners. Avoid blurry or very dark images, as they make it hard to discern details. Look for an image where her expression is characteristic of her.
How do I make the eyes look alive?
The key to lively eyes is capturing the catchlight – the small reflection of light in the pupil or iris. Make this area the brightest spot in the eye. Also, ensure the pupils are perfectly round and very dark. Adding subtle shadows around the eyelids and under the brow will give them depth.
My shading looks smudgy, how can I avoid that?
To prevent smudging, try to work from left to right if you’re right-handed (and vice-versa) to avoid dragging your hand across graphite. You can also place a clean sheet of paper under your drawing hand. Using a blending stump or cotton swab for blending instead of your finger also helps achieve smoother results without excess oil.
Can I draw her with different expressions?
Absolutely! Once you’re comfortable with her basic features, try different expressions. Pay close attention to how her eyebrows, the corners of her mouth, and the muscles around her eyes change. A slight shift in these areas can dramatically alter the expression and add personality to your drawing.
Our Top Recommended Finds
- Staedtler Mars Lumograph Pencils: A comprehensive set offers a wide range of hardness for all your sketching and shading needs.
- Kneaded Eraser: Essential for precise erasing and lifting graphite without damaging the paper.
- Blending Stumps (Tortillons): Perfect for smooth transitions and blending graphite for realistic skin tones.
Your Artistic Journey Starts Now
Drawing Lana Del Rey is more than just replicating a face; it’s about capturing an essence. Each stroke you make builds confidence and skill. This guide has provided a clear path, but the real magic happens when you pick up your pencil.
Consider trying other iconic figures next, or experiment with different lighting on Lana’s portrait. The world of portraiture is vast and rewarding. Don’t wait; start sketching today and watch your artistic abilities flourish.
& Painting
No rigid rules or pretension. Just practical guides, medium comparisons, and encouraging tips to help you enjoy the drawing & painting process.