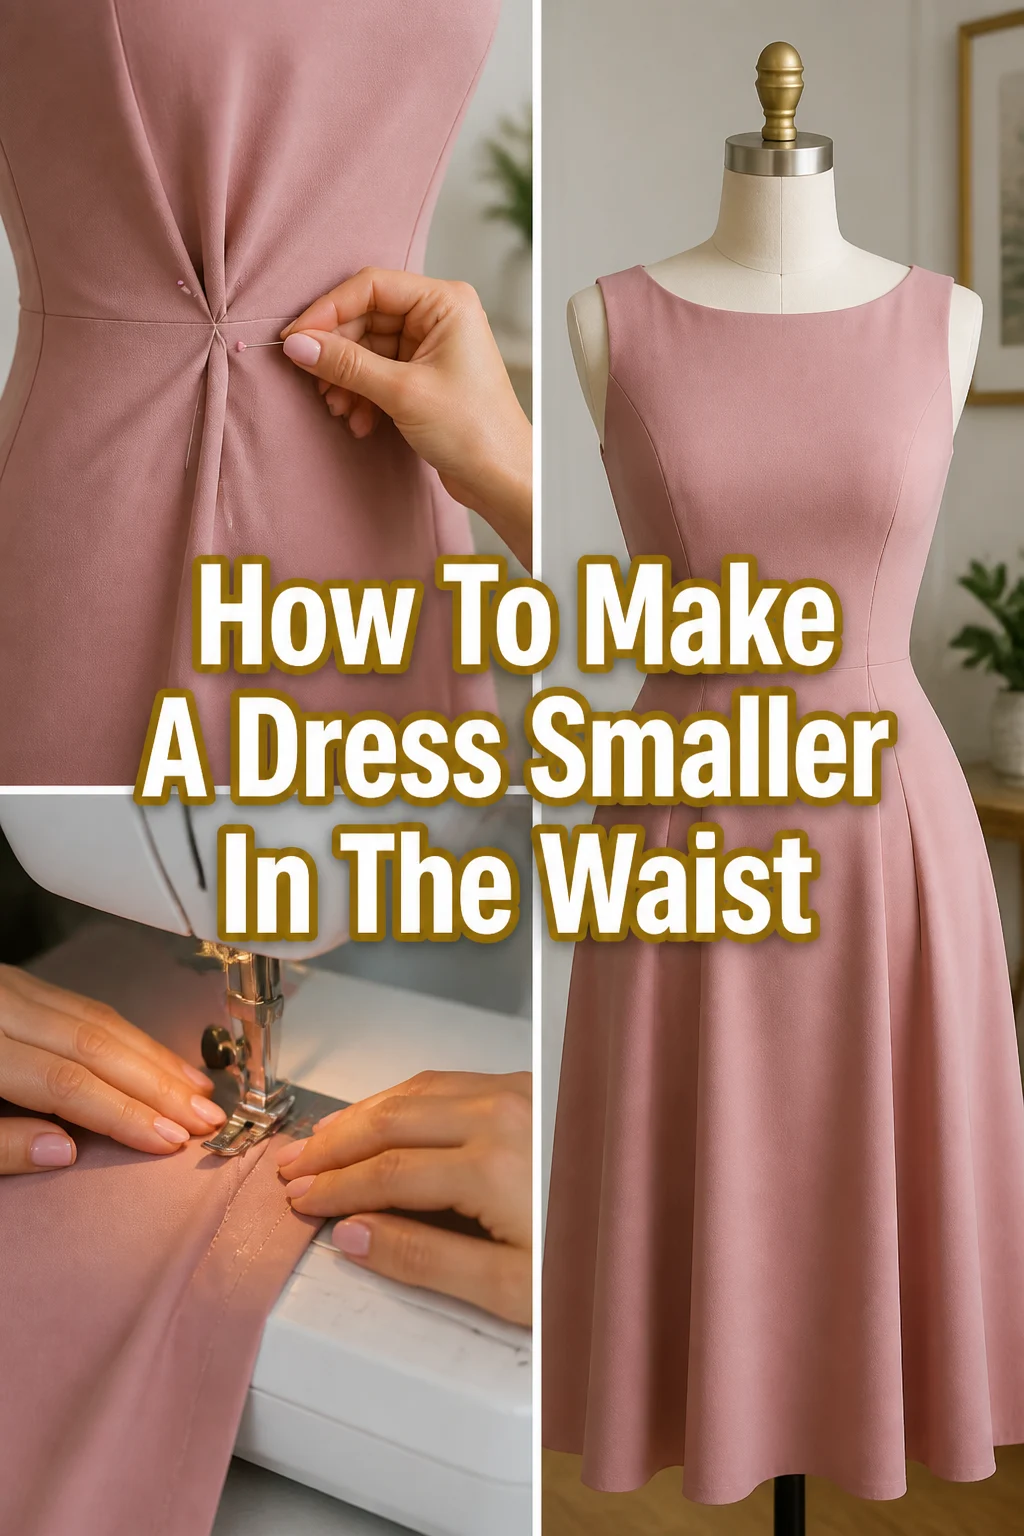
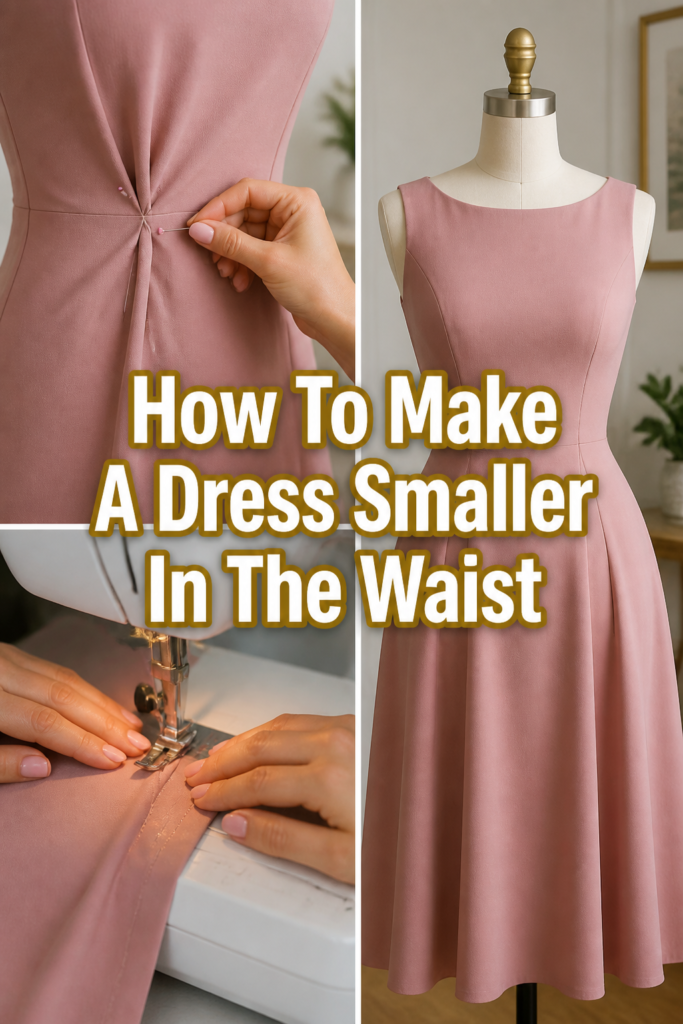
👗 How To Make A Dress Smaller In The Waist
Finding a dress that fits perfectly off the rack can feel like a rare miracle. Often, the waistline might be just a little too loose, making the garment feel less flattering than it could be. I’ve personally faced this many times, learning through trial and error how to achieve that ideal silhouette.
This guide comes from hands-on experience, providing you with the practical steps needed to tailor your dress for a custom fit. You don’t need to be a professional seamstress to make these adjustments. With a bit of patience and the right tools, you can transform an ill-fitting dress into a wardrobe favorite.
Quick Overview
This comprehensive guide will walk you through the process of taking in the waist of a dress, giving you a more defined and flattering fit. You’ll learn how to assess the garment, make precise adjustments, and finish your seams professionally.
- Time needed: 2-4 hours (depending on complexity and skill level)
- Difficulty: Intermediate
- What you’ll need: Sewing machine, matching thread, sharp fabric shears, seam ripper, measuring tape, tailor’s chalk or fabric marker, sewing pins, iron, pressing cloth.
Step-by-Step Instructions
Step 1: Gather Your Tools and Prepare Your Workspace
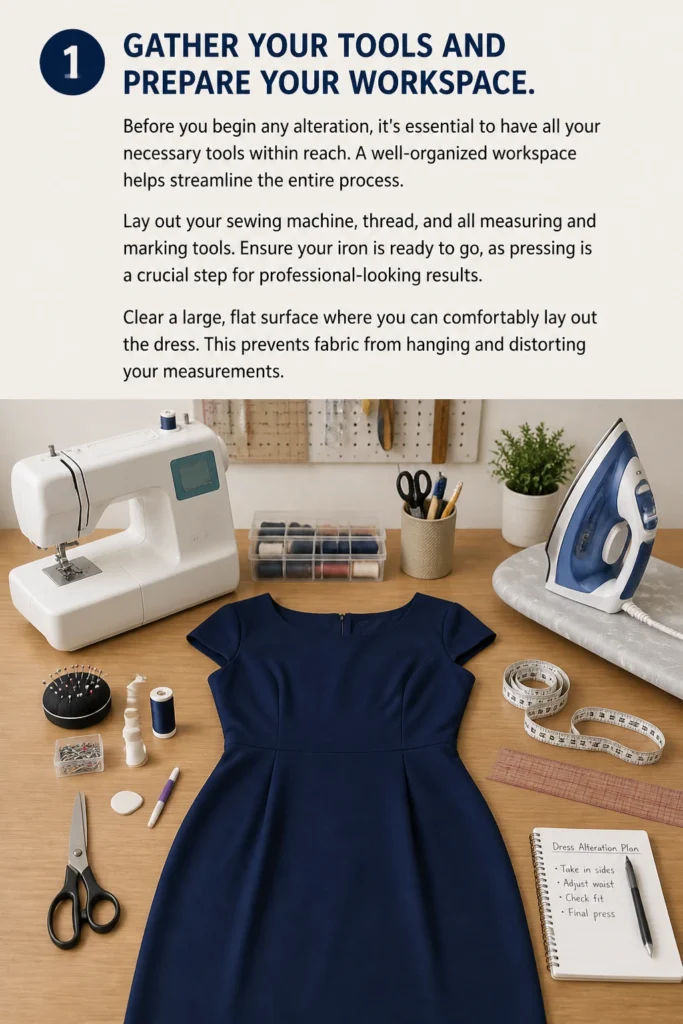
Before you begin any alteration, it’s essential to have all your necessary tools within reach. A well-organized workspace helps streamline the entire process. Lay out your sewing machine, thread, and all measuring and marking tools.
Ensure your iron is ready to go, as pressing is a crucial step for professional-looking results. Clear a large, flat surface where you can comfortably lay out the dress. This prevents fabric from hanging and distorting your measurements.
Step 2: Assess the Dress and Identify Adjustment Areas
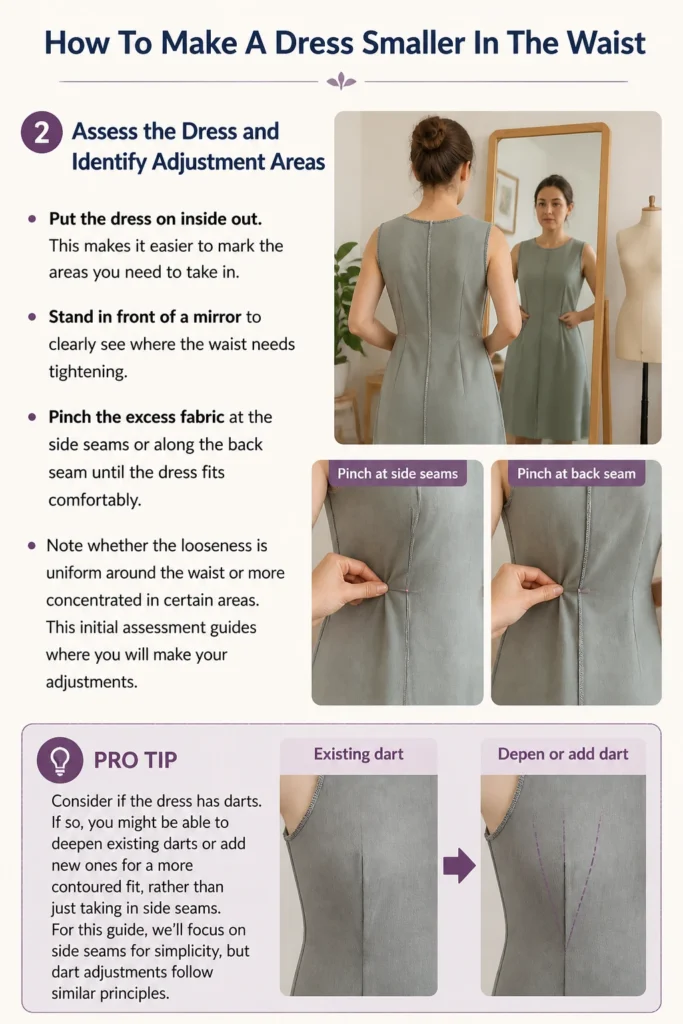
Put the dress on inside out. This makes it easier to mark the areas you need to take in. Stand in front of a mirror to clearly see where the waist needs tightening.
Pinch the excess fabric at the side seams or along the back seam until the dress fits comfortably. Note whether the looseness is uniform around the waist or more concentrated in certain areas. This initial assessment guides where you will make your adjustments.
Pro Tip: Consider if the dress has darts. If so, you might be able to deepen existing darts or add new ones for a more contoured fit, rather than just taking in side seams. For this guide, we’ll focus on side seams for simplicity, but dart adjustments follow similar principles.
Step 3: Mark the New Waistline and Pin
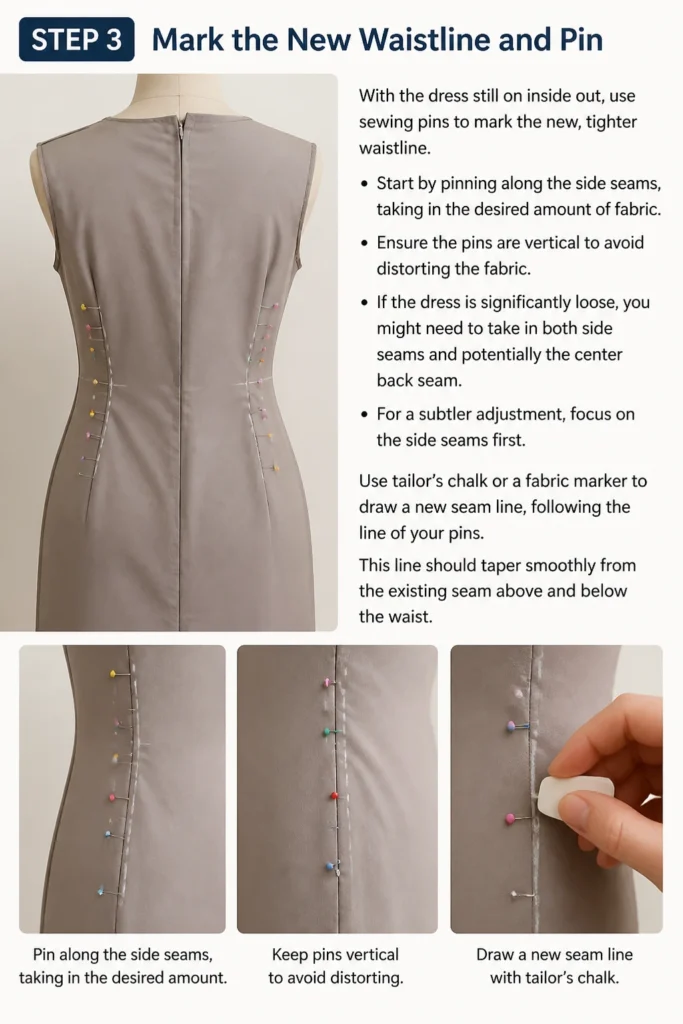
With the dress still on inside out, use sewing pins to mark the new, tighter waistline. Start by pinning along the side seams, taking in the desired amount of fabric. Ensure the pins are vertical to avoid distorting the fabric.
If the dress is significantly loose, you might need to take in both side seams and potentially the center back seam. For a subtler adjustment, focus on the side seams first. Use tailor’s chalk or a fabric marker to draw a new seam line, following the line of your pins. This line should taper smoothly from the existing seam above and below the waist.
Step 4: Baste the New Seams for a Test Fit
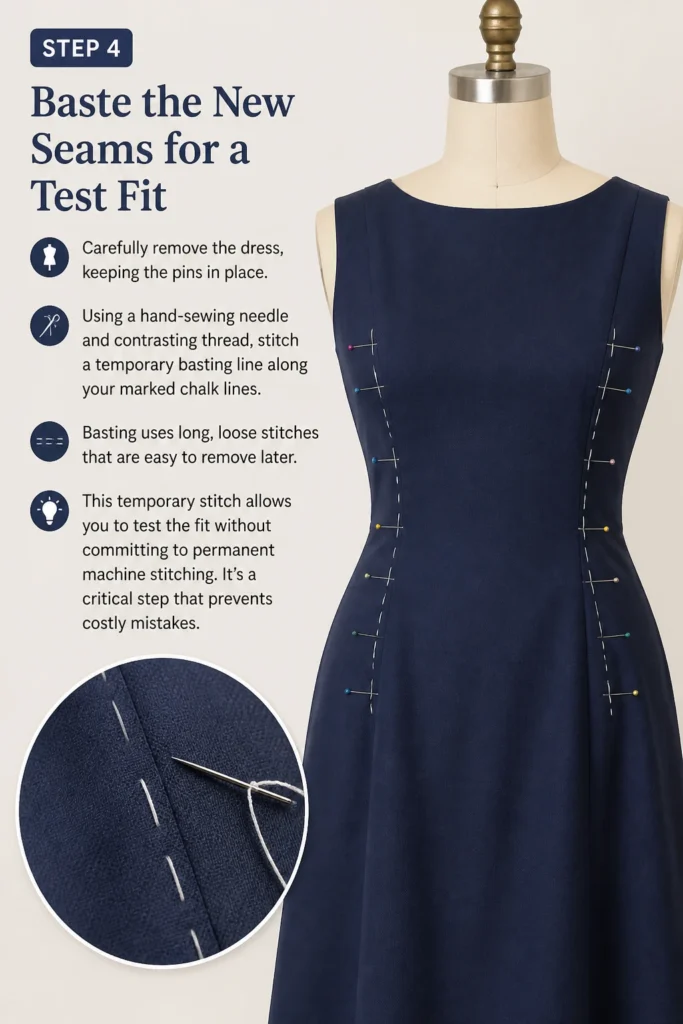
Carefully remove the dress, keeping the pins in place. Using a hand-sewing needle and contrasting thread, stitch a temporary basting line along your marked chalk lines. Basting uses long, loose stitches that are easy to remove later.
This temporary stitch allows you to test the fit without committing to permanent machine stitching. It’s a critical step that prevents costly mistakes.
Step 5: Test the Fit and Make Adjustments
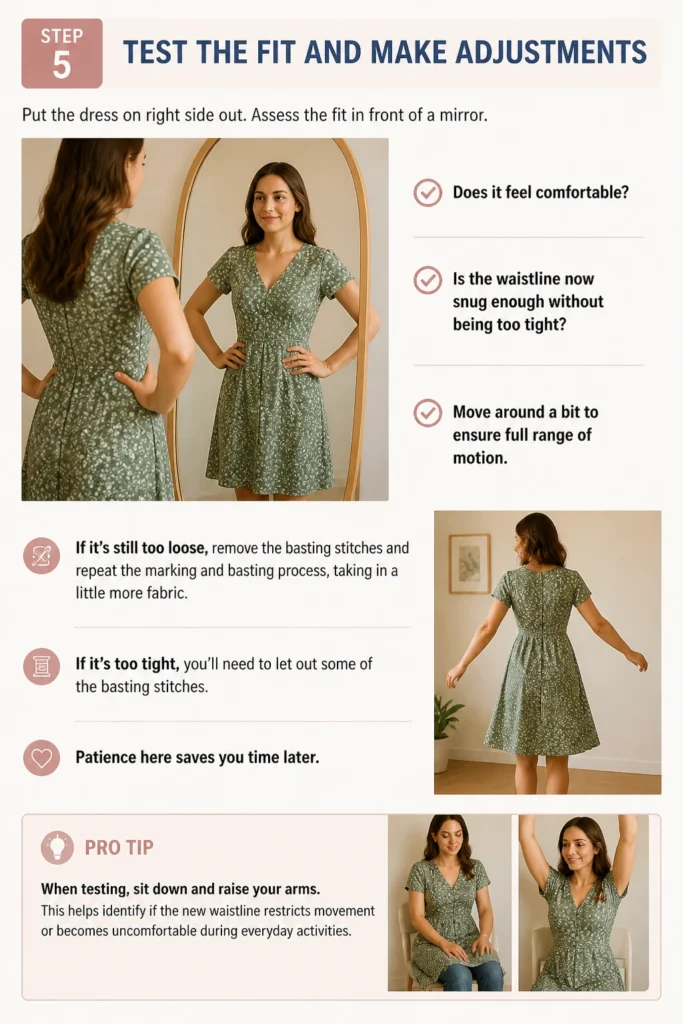
Put the dress on right side out. Assess the fit in front of a mirror. Does it feel comfortable? Is the waistline now snug enough without being too tight? Move around a bit to ensure full range of motion.
If it’s still too loose, remove the basting stitches and repeat the marking and basting process, taking in a little more fabric. If it’s too tight, you’ll need to let out some of the basting stitches. Patience here saves you time later.
Pro Tip: When testing, sit down and raise your arms. This helps identify if the new waistline restricts movement or becomes uncomfortable during everyday activities.
Step 6: Stitch the New Seams Permanently
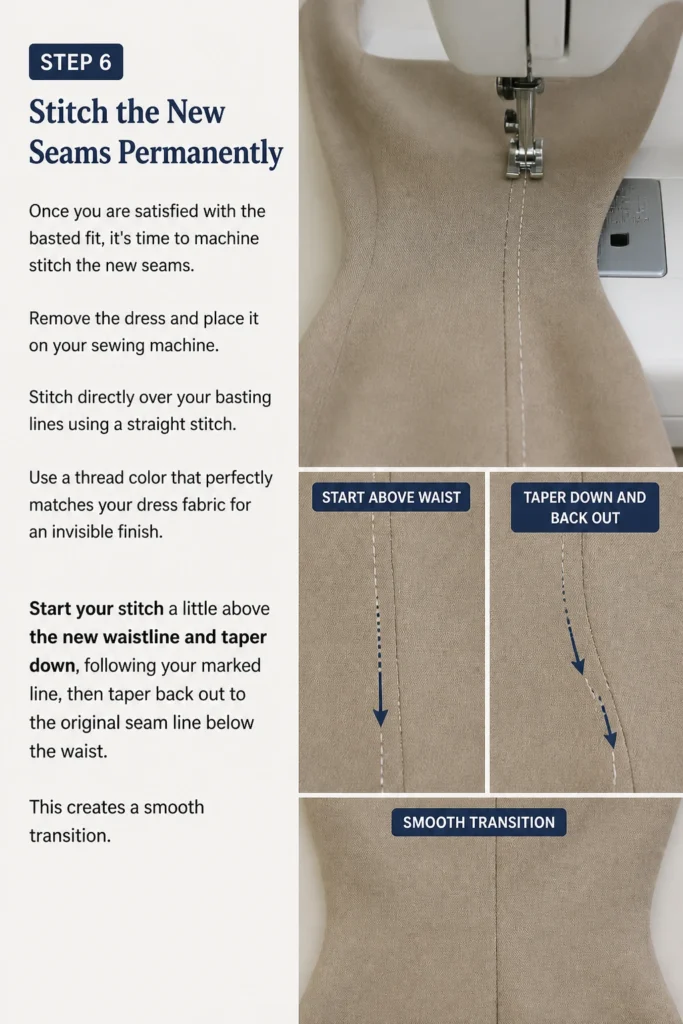
Once you are satisfied with the basted fit, it’s time to machine stitch the new seams. Remove the dress and place it on your sewing machine. Stitch directly over your basting lines using a straight stitch.
Use a thread color that perfectly matches your dress fabric for an invisible finish. Start your stitch a little above the new waistline and taper down, following your marked line, then taper back out to the original seam line below the waist. This creates a smooth transition.
Step 7: Trim and Finish the Seams
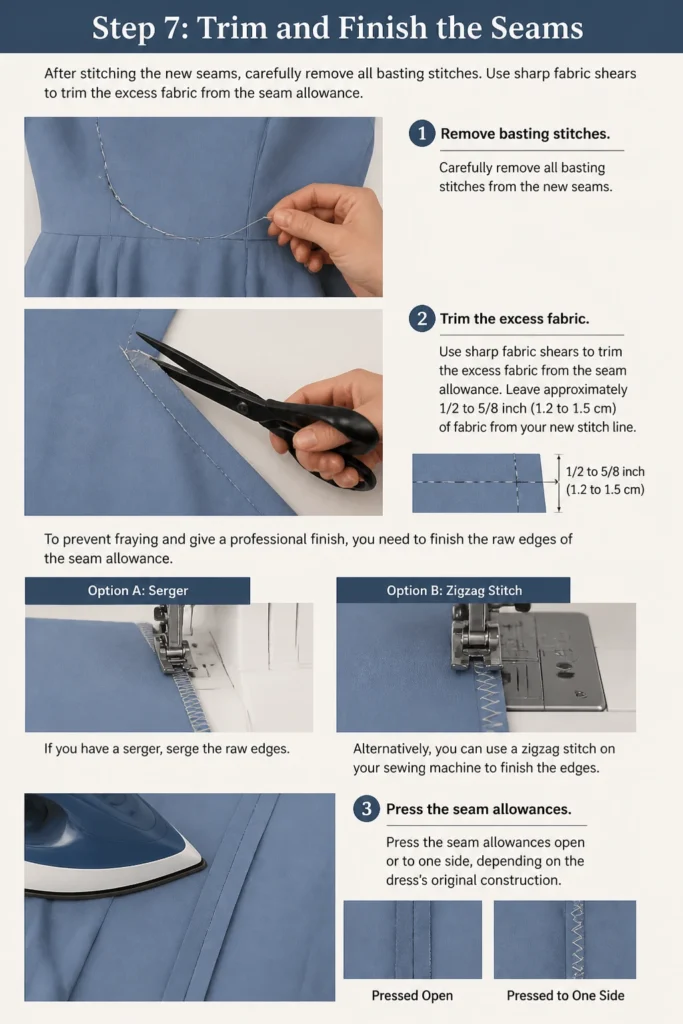
After stitching the new seams, carefully remove all basting stitches. Use sharp fabric shears to trim the excess fabric from the seam allowance. Leave approximately 1/2 to 5/8 inch (1.2 to 1.5 cm) of fabric from your new stitch line.
To prevent fraying and give a professional finish, you need to finish the raw edges of the seam allowance. If you have a serger, serge the raw edges. Alternatively, you can use a zigzag stitch on your sewing machine to finish the edges. Press the seam allowances open or to one side, depending on the dress’s original construction.
Step 8: Press and Admire Your Work
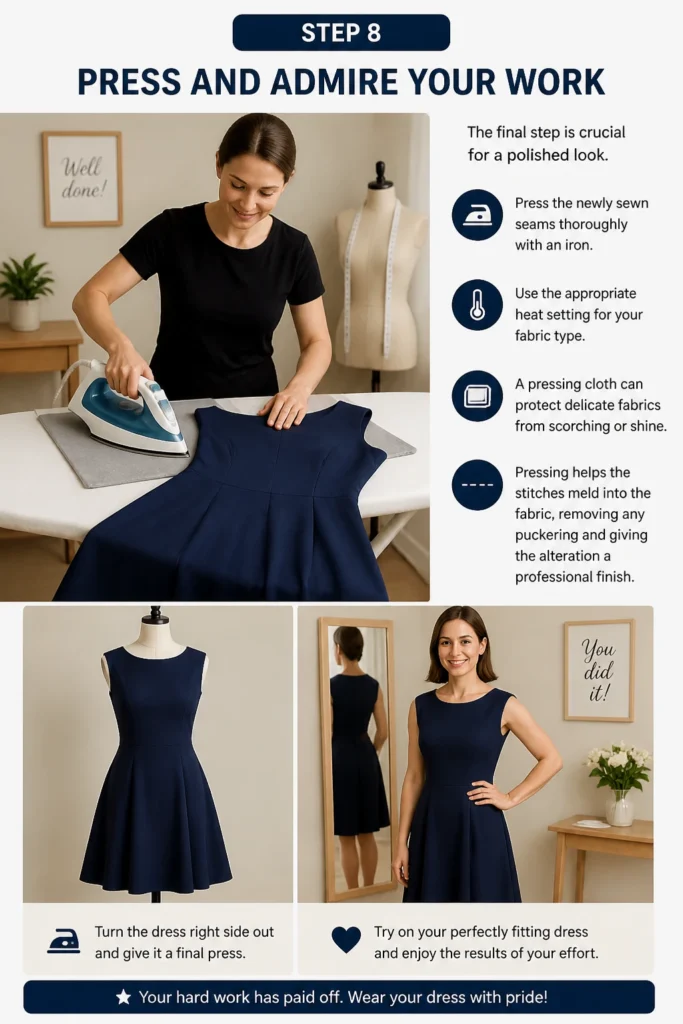
The final step is crucial for a polished look. Press the newly sewn seams thoroughly with an iron. Use the appropriate heat setting for your fabric type. A pressing cloth can protect delicate fabrics from scorching or shine.
Pressing helps the stitches meld into the fabric, removing any puckering and giving the alteration a professional finish. Turn the dress right side out and give it a final press. Try on your perfectly fitting dress and enjoy the results of your effort.
Common Mistakes to Avoid
Cutting Before Testing
One of the biggest mistakes is to cut away the excess fabric immediately after marking and before testing the fit. Fabric cannot be un-cut, making this an irreversible error. Always baste your new seams first.
Test the fit thoroughly with basting stitches. This allows you to easily adjust if the dress is still too loose or, more importantly, too tight. Only trim the excess fabric once you are completely satisfied with the fit.
Ignoring Seam Allowances
When taking in a dress, it’s easy to focus solely on the stitch line. However, neglecting to consider the seam allowance can lead to issues. If you trim too close to your new stitch line, you won’t have enough fabric to finish the seam properly, making it prone to fraying.
Always leave a sufficient seam allowance (typically 1/2 to 5/8 inch) after trimming. This provides stability and allows for proper finishing techniques like serging or zigzag stitching, ensuring the longevity of your alteration.
Not Pressing Seams
Many home sewers skip the pressing step, thinking it’s less important than the stitching itself. This is a missed opportunity for a truly professional finish. Unpressed seams can look bulky, puckered, or simply unfinished.
Pressing flattens the seams, blends the stitches into the fabric, and gives the garment a crisp, tailored appearance. It makes a significant difference in the final look and feel of your altered dress. Press as you go, and give a final press at the end.
Rushing the Process
Attempting to rush through the steps, especially measuring, marking, and testing, often leads to mistakes. Sewing alterations require precision and patience. Skimping on these crucial early steps can mean having to redo the work.
Take your time with each stage. Double-check your measurements, make sure your chalk lines are accurate, and thoroughly test the fit. A methodical approach ensures a better outcome and a more enjoyable experience.
Troubleshooting
Dress Still Too Loose
If you’ve completed your alteration and the dress still feels too loose in the waist, don’t despair. This is a common issue, especially for first-time alterers. It simply means you can take it in a bit more.
Carefully unpick your stitches in the waist area you want to adjust further. Put the dress back on inside out, re-pin the excess fabric, and mark a new, slightly deeper seam line. Re-baste, test, and then re-stitch. It’s an iterative process.
Seams Look Puckered
Puckered seams can be frustrating and make an alteration look less professional. This often happens due to incorrect tension on your sewing machine, or if you’re pulling the fabric while stitching. It can also occur if you’re sewing a delicate fabric without proper stabilization.
Check your machine’s tension settings; a balanced tension is key. Avoid stretching the fabric as you sew. For very fine or stretchy fabrics, consider using a walking foot or placing tissue paper under the fabric to help it feed evenly through the machine.
Zipper/Closure Issues
If your dress has a zipper or other closure at the side or back where you’re taking in the waist, you might encounter issues. Taking in too much at the zipper can make it buckle or difficult to close. This is a more advanced alteration.
For significant adjustments near a zipper, you might need to unpick part of the zipper installation, take in the fabric, and then re-install the zipper. If the adjustment is minor, ensure your new seam line tapers smoothly to meet the existing zipper seam without creating bulk or tension. Sometimes, adding darts instead of side seam alterations is better when a zipper is present.
Key Takeaways
- Always try on the dress inside out for accurate marking.
- Use pins and tailor’s chalk to mark your new seam lines clearly.
- Basting is a crucial temporary stitch for testing the fit before permanent sewing.
- Never cut fabric before you are completely satisfied with the basted fit.
- Trim seam allowances to 1/2 to 5/8 inch and finish raw edges to prevent fraying.
- Pressing seams regularly and at the end ensures a professional and polished look.
- Patience and attention to detail are key to successful alterations.
Frequently Asked Questions
Can I do this without a sewing machine?
While a sewing machine makes the process much faster and stronger, it is possible to take in a dress waist by hand. You would use a strong backstitch for your permanent seam. This will be more time-consuming and may not be as durable as a machine stitch, but it is achievable.
What if my dress has a lining?
If your dress has a lining, you will need to alter the lining separately, mirroring the adjustments made to the outer fabric. Typically, you would unpick the lining from the outer fabric at the waist, make your alterations to both layers, and then re-attach the lining. Ensure the lining is slightly looser than the outer fabric to prevent pulling.
How much can I realistically take in?
You can generally take in a dress by a significant amount, often several inches, especially if the original garment is quite loose. However, be mindful of the dress’s original design and any existing seams or details. Dramatic alterations might change the drape or style of the dress. Always aim for a natural-looking taper.
What’s the difference between taking in the sides and adding darts?
Taking in the sides reduces the overall circumference of the garment evenly around the waist. Adding darts creates a more sculpted, contoured fit by removing fabric in specific wedge-shaped sections, usually at the bust, waist, or hips. Darts are excellent for creating shape on a less structured garment, while side seam alterations are good for simply reducing overall size.
Our Top Recommended Finds
- Quality Seam Ripper: A sharp, ergonomic seam ripper is invaluable for corrections and removing basting stitches without damaging fabric. Look for one with a comfortable grip.
- Sharp Fabric Shears: Invest in a pair of shears dedicated solely to fabric. Sharp blades make clean cuts, which are essential for precise alterations and preventing fraying.
- Tailor’s Chalk Wheel: A chalk wheel creates fine, precise lines that are easy to see and brush away. This is far superior to traditional block chalk for detailed marking.
Your Tailored Journey Begins Now
Taking the time to alter a dress to fit your unique shape is a rewarding experience. It’s more than just sewing; it’s about reclaiming your wardrobe and making clothes truly your own. Imagine the confidence of wearing a dress that feels custom-made, perfectly accentuating your figure.
Don’t let a slightly loose waist keep you from loving a beautiful dress. Take these steps, practice patience, and soon you’ll have a garment that feels like it was designed just for you. Your journey into personalized fashion is just a few stitches away.