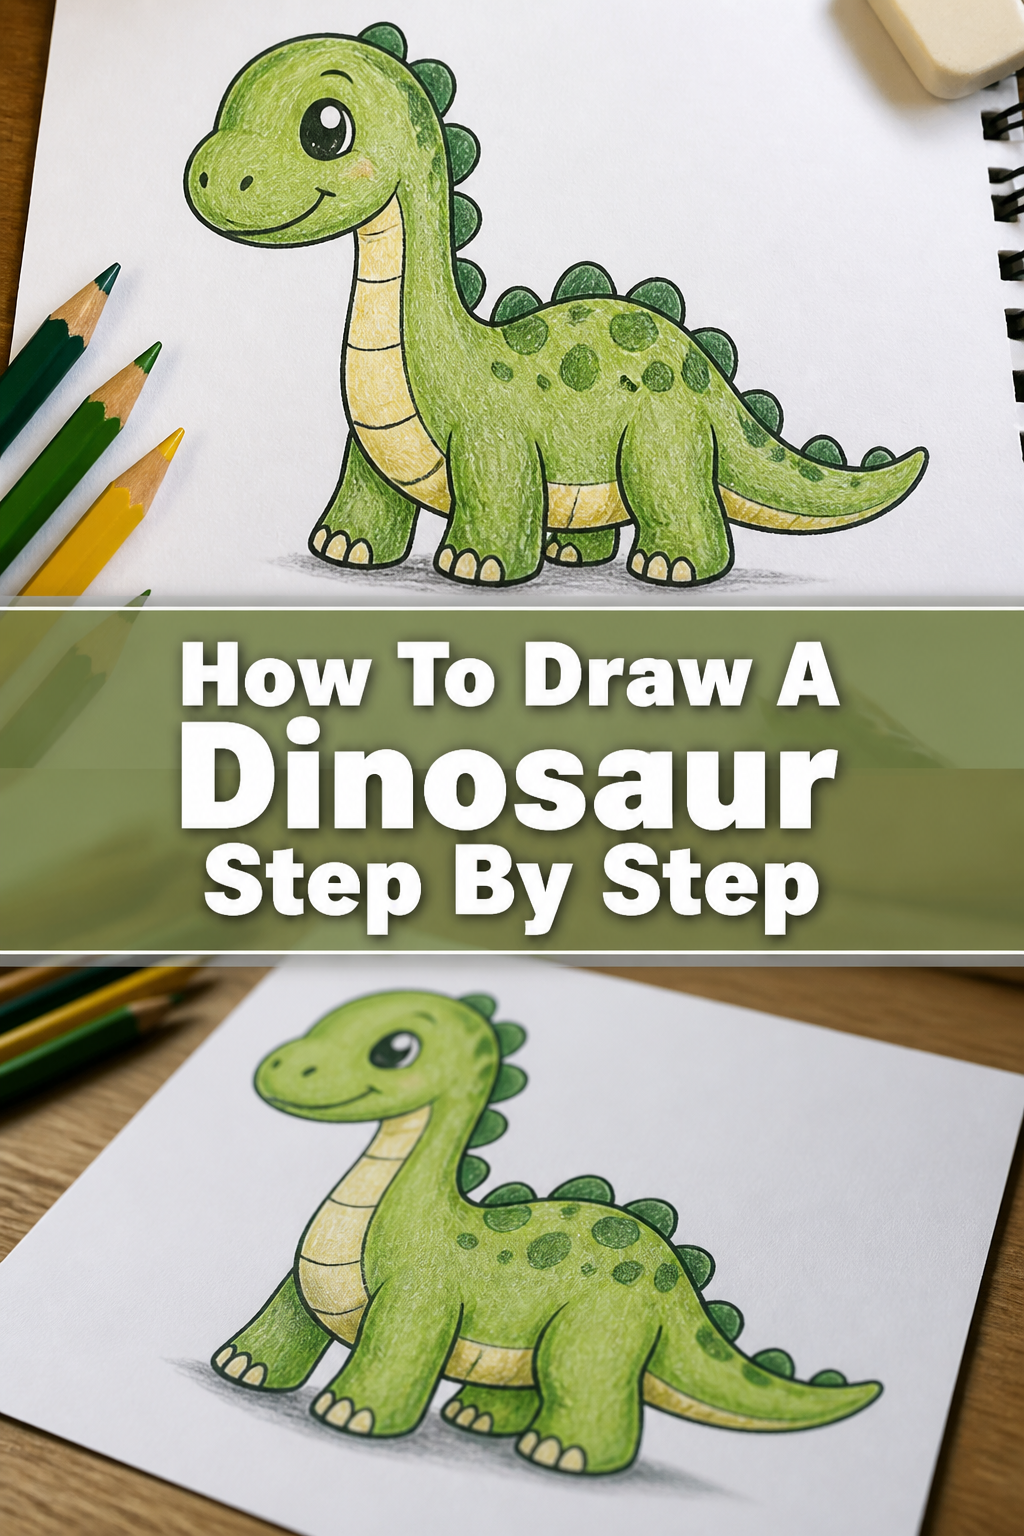
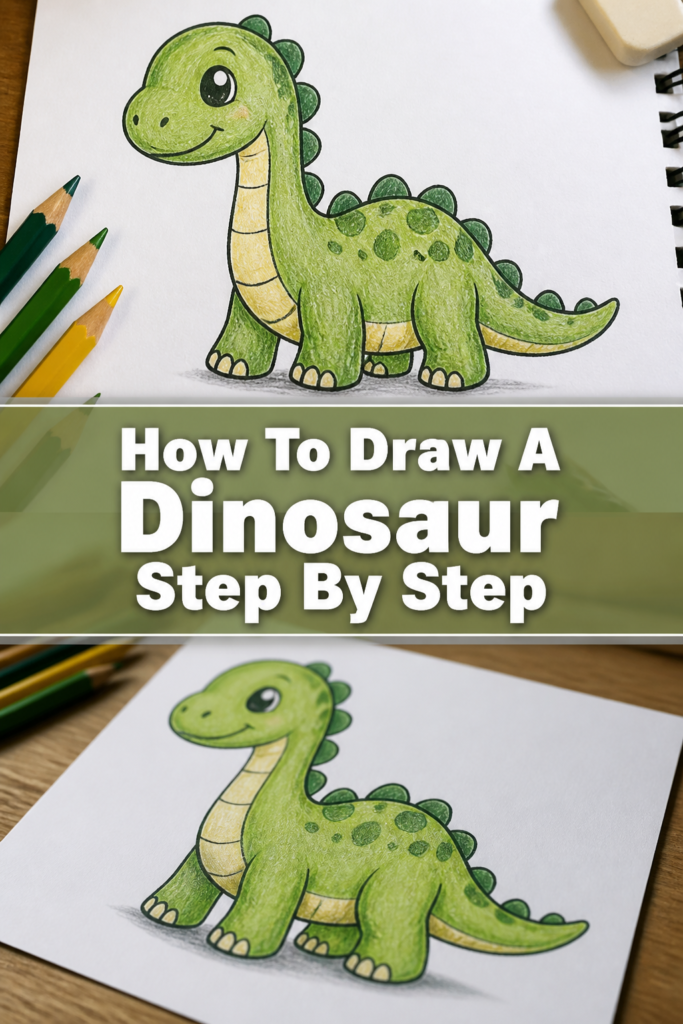
🦖 How To Draw A Dinosaur Step By Step

& Painting
No rigid rules or pretension. Just practical guides, medium comparisons, and encouraging tips to help you enjoy the drawing & painting process.
There’s a special thrill that comes with bringing a mighty dinosaur to life on paper.
I remember spending countless hours as a child sketching these magnificent creatures, fueled by imagination and a love for the prehistoric world.
This guide will share the practical techniques I’ve refined over years of drawing, helping you create your very own dinosaur masterpiece.
Quick Overview
In this guide, you’ll learn to draw a powerful Tyrannosaurus Rex from scratch, building up its form with simple shapes and adding realistic details. You’ll gain confidence in your artistic abilities and create a dynamic prehistoric scene.
- Time needed: 60-90 minutes
- Difficulty: Beginner
- What you’ll need: Pencil (HB or 2B recommended), Eraser, Paper, Optional: Fine-tip pen for inking, Colored pencils
Step-by-Step Instructions
Step 1: Lay Down the Basic Shapes for the Body
Every great dinosaur drawing begins with fundamental forms. Think of these as the skeleton of your drawing, guiding the overall proportions and pose.
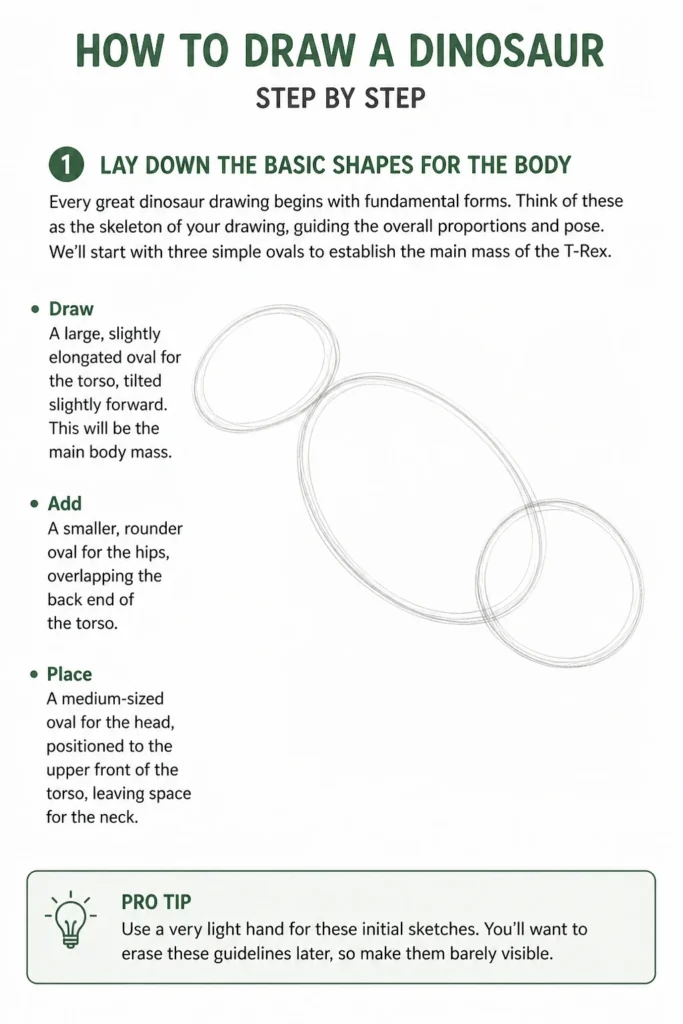
We’ll start with three simple ovals to establish the main mass of the T-Rex.
- Draw: A large, slightly elongated oval for the torso, tilted slightly forward. This will be the main body mass.
- Add: A smaller, rounder oval for the hips, overlapping the back end of the torso.
- Place: A medium-sized oval for the head, positioned to the upper front of the torso, leaving space for the neck.
These initial shapes don’t need to be perfect. Focus on their relative sizes and positions, envisioning the dinosaur’s general posture.
Pro Tip: Use a very light hand for these initial sketches. You’ll want to erase these guidelines later, so make them barely visible. This allows for easy adjustments without leaving heavy indentations on your paper.
Step 2: Connect the Body Parts and Define the Neck and Tail
Now that the core body sections are in place, we’ll connect them smoothly and begin to give our T-Rex its iconic silhouette.
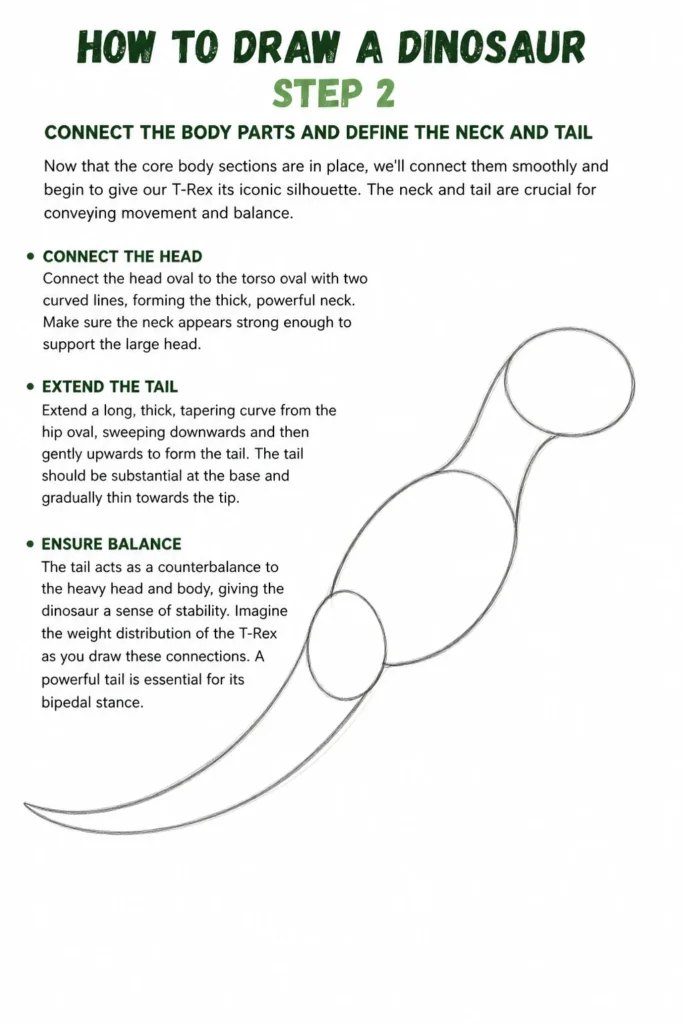
The neck and tail are crucial for conveying movement and balance.
- Connect: The head oval to the torso oval with two curved lines, forming the thick, powerful neck. Make sure the neck appears strong enough to support the large head.
- Extend: A long, thick, tapering curve from the hip oval, sweeping downwards and then gently upwards to form the tail. The tail should be substantial at the base and gradually thin towards the tip.
- Ensure: The tail acts as a counterbalance to the heavy head and body, giving the dinosaur a sense of stability.
Imagine the weight distribution of the T-Rex as you draw these connections. A powerful tail is essential for its bipedal stance.
Step 3: Sketch the Limbs – Powerful Legs and Tiny Arms
The legs are what propel our dinosaur, while the arms, though small, are a distinctive feature of the T-Rex.
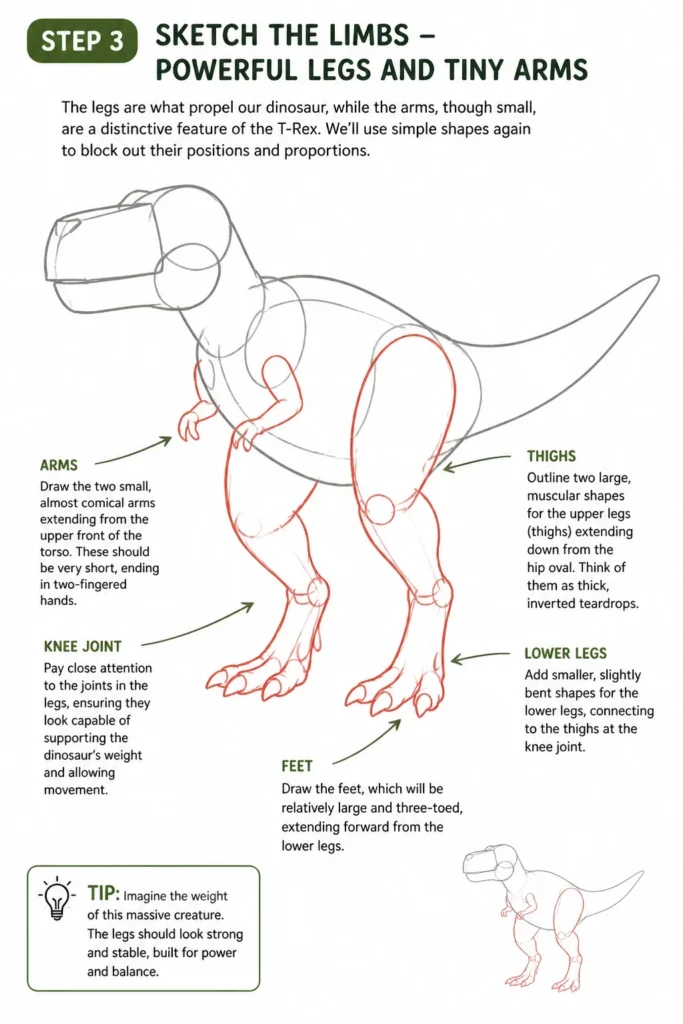
We’ll use simple shapes again to block out their positions and proportions.
- Outline: Two large, muscular shapes for the upper legs (thighs) extending down from the hip oval. Think of them as thick, inverted teardrops.
- Add: Smaller, slightly bent shapes for the lower legs, connecting to the thighs at the knee joint.
- Draw: The feet, which will be relatively large and three-toed, extending forward from the lower legs.
- Illustrate: The two small, almost comical arms extending from the upper front of the torso. These should be very short, ending in two-fingered hands.
Pay close attention to the joints in the legs, ensuring they look capable of supporting the dinosaur’s weight and allowing for powerful strides.
Pro Tip: Look at reference images of dinosaur skeletons or musculature to understand how the legs bend and connect. This will make your drawing more anatomically convincing. Even for tiny arms, consider their structure.
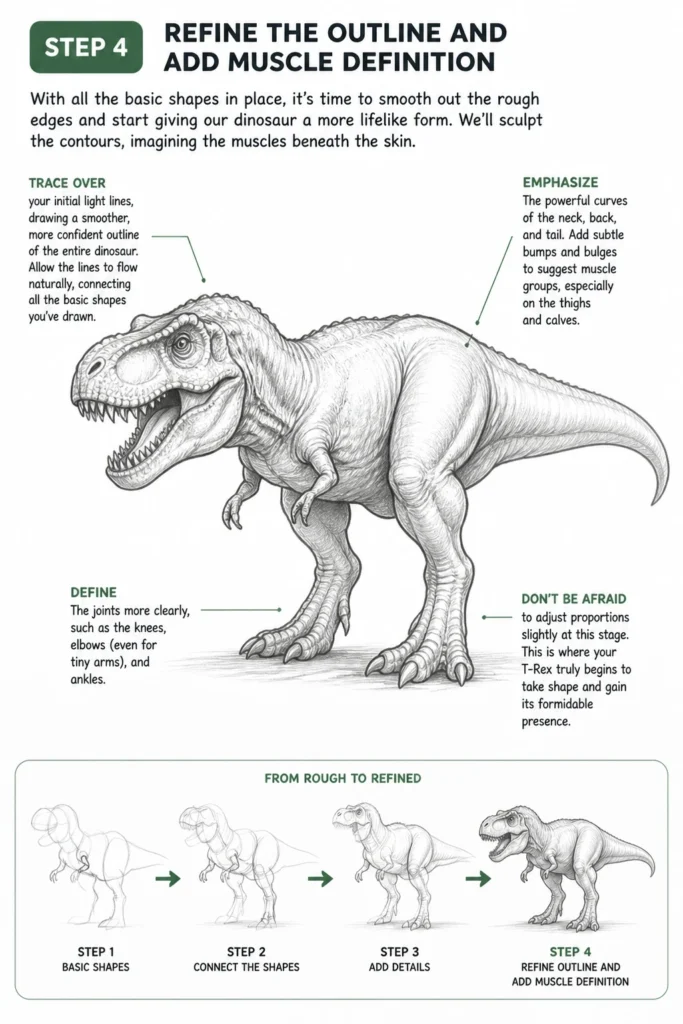
Step 4: Refine the Outline and Add Muscle Definition
With all the basic shapes in place, it’s time to smooth out the rough edges and start giving our dinosaur a more lifelike form.
We’ll sculpt the contours, imagining the muscles beneath the skin.
- Trace: Over your initial light lines, drawing a smoother, more confident outline of the entire dinosaur. Allow the lines to flow naturally, connecting all the basic shapes you’ve drawn.
- Emphasize: The powerful curves of the neck, back, and tail. Add subtle bumps and bulges to suggest muscle groups, especially on the thighs and calves.
- Define: The joints more clearly, such as the knees, elbows (even for tiny arms), and ankles.
Don’t be afraid to adjust proportions slightly at this stage. This is where your T-Rex truly begins to take shape and gain its formidable presence.
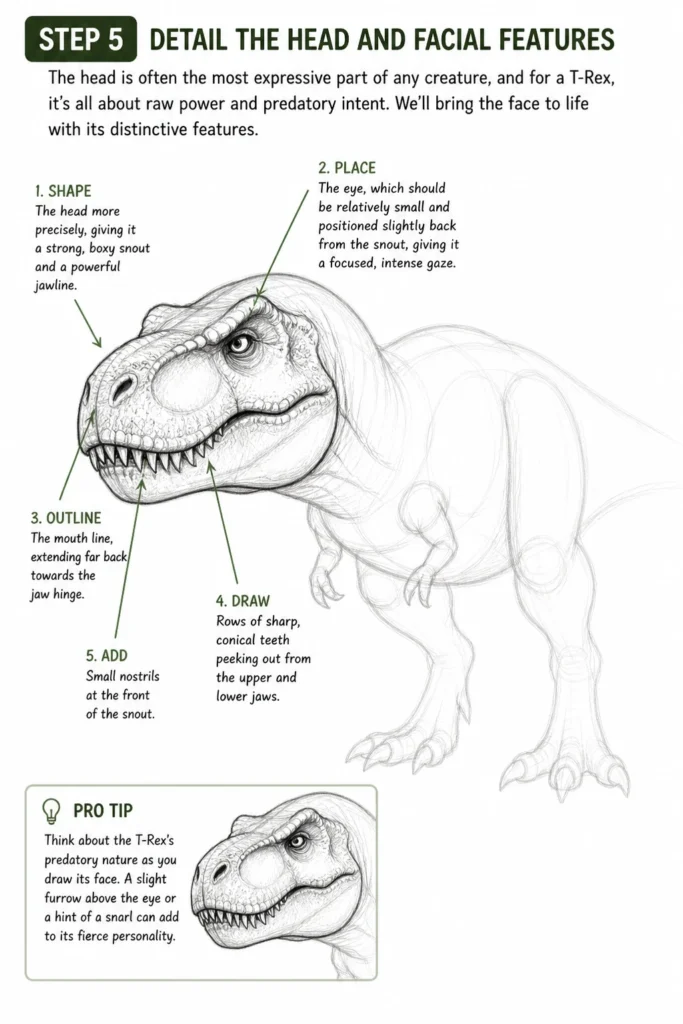
Step 5: Detail the Head and Facial Features
The head is often the most expressive part of any creature, and for a T-Rex, it’s all about raw power and predatory intent.
We’ll bring the face to life with its distinctive features.
- Shape: The head more precisely, giving it a strong, boxy snout and a powerful jawline.
- Place: The eye, which should be relatively small and positioned slightly back from the snout, giving it a focused, intense gaze.
- Outline: The mouth line, extending far back towards the jaw hinge.
- Draw: Rows of sharp, conical teeth peeking out from the upper and lower jaws.
- Add: Small nostrils at the front of the snout.
Think about the T-Rex’s predatory nature as you draw its face. A slight furrow above the eye or a hint of a snarl can add to its fierce personality.
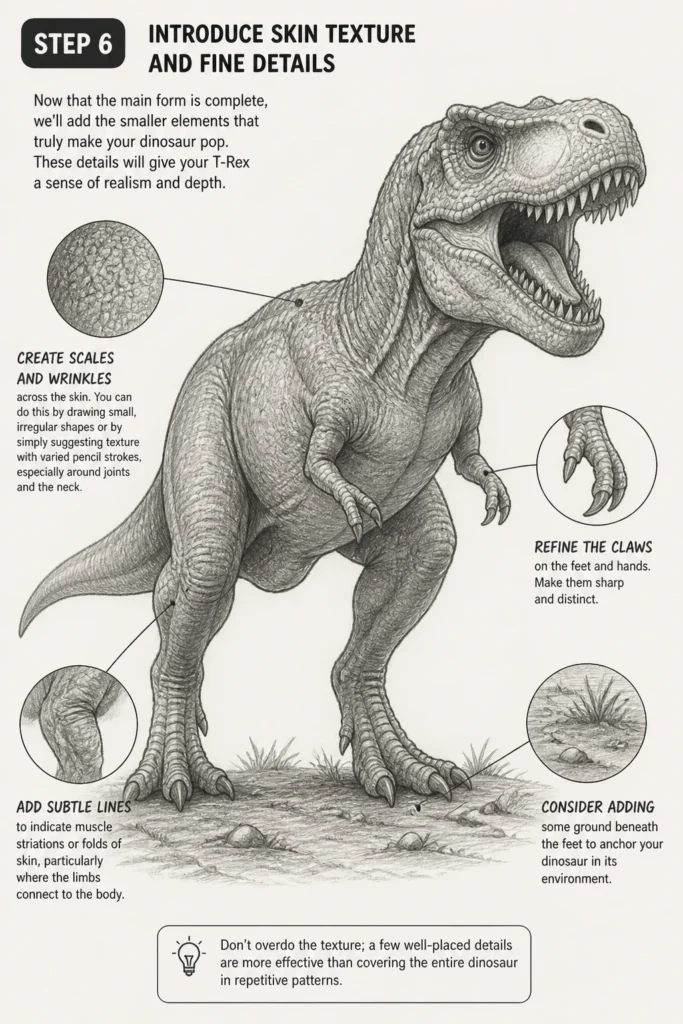
Step 6: Introduce Skin Texture and Fine Details
Now that the main form is complete, we’ll add the smaller elements that truly make your dinosaur pop.
These details will give your T-Rex a sense of realism and depth.
- Create: Scales and wrinkles across the skin. You can do this by drawing small, irregular shapes or by simply suggesting texture with varied pencil strokes, especially around joints and the neck.
- Refine: The claws on the feet and hands. Make them sharp and distinct.
- Add: Subtle lines to indicate muscle striations or folds of skin, particularly where the limbs connect to the body.
- Consider: Adding some ground beneath the feet to anchor your dinosaur in its environment.
Don’t overdo the texture; a few well-placed details are more effective than covering the entire dinosaur in repetitive patterns.
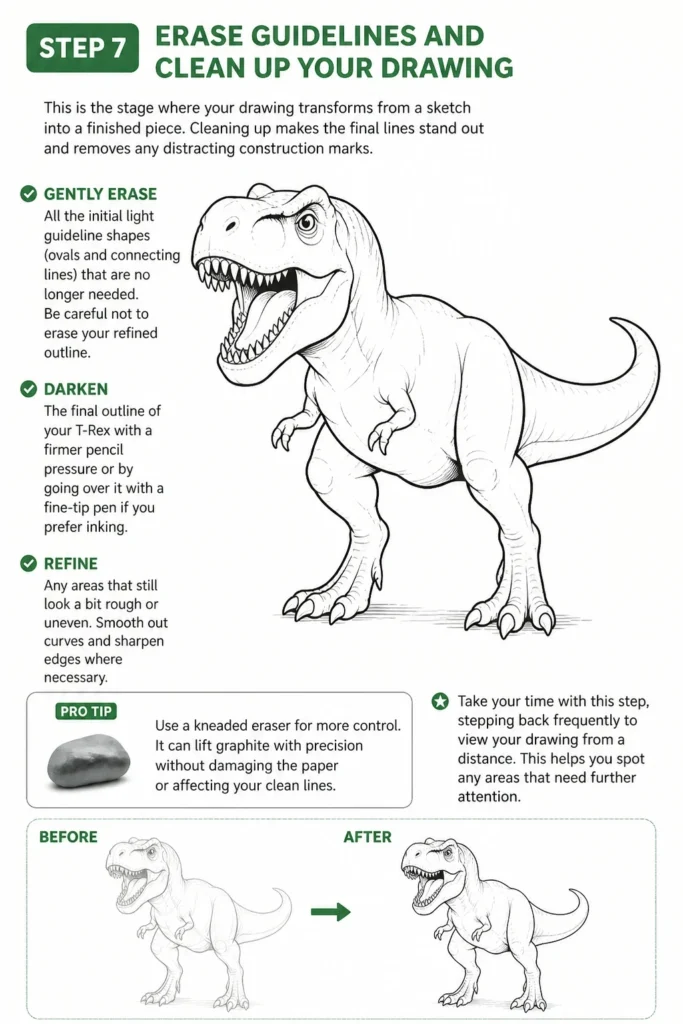
Step 7: Erase Guidelines and Clean Up Your Drawing
This is the stage where your drawing transforms from a sketch into a finished piece.
Cleaning up makes the final lines stand out and removes any distracting construction marks.
- Gently Erase: All the initial light guideline shapes (ovals and connecting lines) that are no longer needed. Be careful not to erase your refined outline.
- Darken: The final outline of your T-Rex with a firmer pencil pressure or by going over it with a fine-tip pen if you prefer inking.
- Refine: Any areas that still look a bit rough or uneven. Smooth out curves and sharpen edges where necessary.
Take your time with this step, stepping back frequently to view your drawing from a distance. This helps you spot any areas that need further attention.
Pro Tip: Use a kneaded eraser for more control. It can lift graphite without smudging and can be shaped to fit into small areas. For bolder lines, a sharper pencil (like a 4B or 6B) will give you darker, more impactful results.
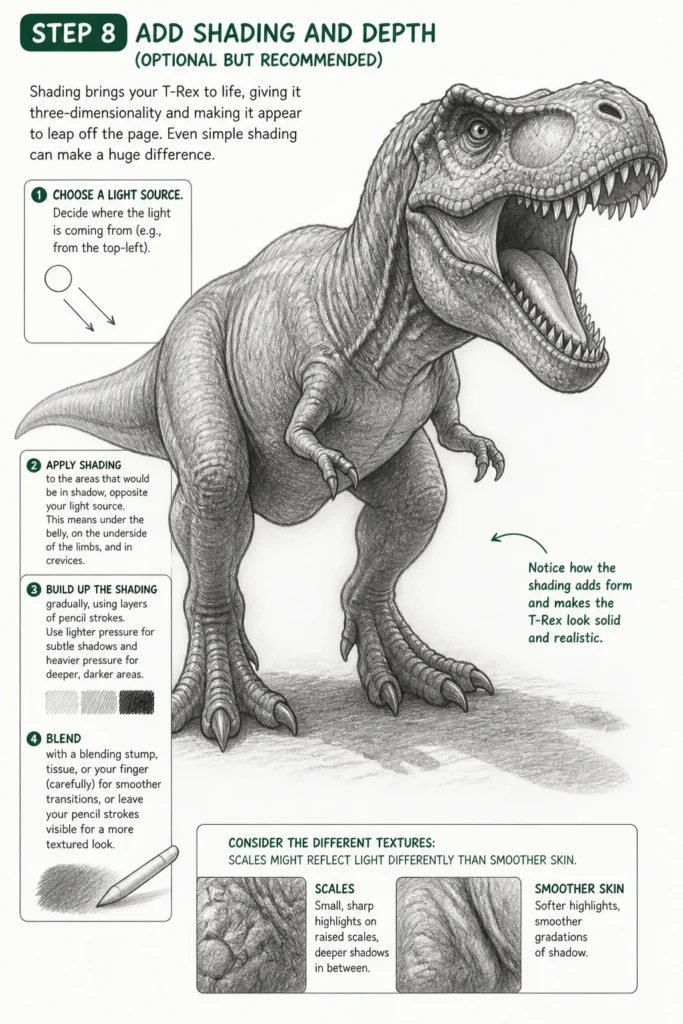
Step 8: Add Shading and Depth (Optional but Recommended)
Shading brings your T-Rex to life, giving it three-dimensionality and making it appear to leap off the page.
Even simple shading can make a huge difference.
- Choose: A light source. Decide where the light is coming from (e.g., from the top-left).
- Apply: Shading to the areas that would be in shadow, opposite your light source. This means under the belly, on the underside of the limbs, and in crevices.
- Build: Up the shading gradually, using layers of pencil strokes. Use lighter pressure for subtle shadows and heavier pressure for deeper, darker areas.
- Blend: With a blending stump, tissue, or your finger (carefully) for smoother transitions, or leave your pencil strokes visible for a more textured look.
Consider the different textures; scales might reflect light differently than smoother skin. A little shading can make your T-Rex truly fearsome.
Common Mistakes to Avoid
Ignoring Basic Proportions
A common pitfall is rushing into details without establishing the fundamental shapes and sizes of your dinosaur’s body parts. This often leads to a head that’s too big or too small, legs that are too short, or a tail that looks out of balance.
Always start with light, simple forms to block out the overall structure. Constantly compare the size of one part to another. This foundational step ensures your T-Rex looks believable and powerful, not awkward or distorted.
Drawing Stiff, Lifeless Poses
Many beginners draw dinosaurs in a very rigid, static stance, almost like a museum display. Real animals, even prehistoric ones, have dynamic poses that convey movement, power, or alertness.
Introduce curves and angles into your initial shapes. Think about the “line of action” that runs through the dinosaur’s body. A slight tilt of the head, a bend in the tail, or one leg slightly forward can dramatically bring your drawing to life.
Over-detailing Too Soon
It’s tempting to jump straight to drawing individual scales, teeth, or eye details. However, focusing on small elements before the overall form is solid can ruin the entire drawing.
Resist the urge to add fine details until you are completely satisfied with the dinosaur’s silhouette, proportions, and muscle structure. Building from big to small ensures that your details enhance, rather than distract from, the main subject.
Troubleshooting
My Dinosaur Looks Flat and Two-Dimensional
If your drawing lacks depth, it’s likely missing the illusion of form and volume. This often happens when lines are drawn without considering how light would interact with a three-dimensional object.
Revisit Step 8 on shading. Identify a clear light source and add shadows to the areas that would naturally recede, like the underside of the belly, the inner thighs, and the side of the head opposite the light. Overlapping forms (e.g., one leg slightly in front of the other) also create depth.
The Proportions Seem Off, But I Can’t Pinpoint Why
It’s incredibly frustrating when something just “doesn’t look right.” Often, this is a subtle proportion issue that’s hard to spot when you’re too close to the drawing.
Try flipping your drawing upside down or viewing it in a mirror. This tricks your brain into seeing the image with fresh eyes, making anomalies in proportion much more apparent. You can also trace your main shapes onto a new piece of paper and compare them to a reference image.
My Lines Look Messy and Uncertain
Wobbly or uncertain lines are common when you’re hesitant about what to draw next. This often results in “hairy” lines made up of many small, tentative strokes.
Practice drawing long, confident strokes, even if they’re not perfect initially. Use your whole arm, not just your wrist, for smoother curves. Remember, initial lines should be light; you can always darken and refine them once you’re sure of their placement.
Key Takeaways
- Always start with basic, light geometric shapes to establish the dinosaur’s overall form.
- Pay close attention to the balance and flow of the body, especially the tail’s role as a counterbalance.
- Refine your outlines gradually, building from rough sketches to smooth, confident lines.
- Focus on the head and facial features to convey the dinosaur’s personality and power.
- Use light and shadow (shading) to give your dinosaur a realistic, three-dimensional appearance.
- Practice observation by looking at real-world references for anatomy and muscle structure.
Frequently Asked Questions
What’s the best type of pencil to start with?
An HB pencil is a great all-rounder for initial sketching because it’s not too dark and erases cleanly. For darker lines and shading, a set of drawing pencils ranging from 2B to 6B will give you more options for contrast and depth in your artwork.
Should I use a reference image?
Absolutely! Using reference images of dinosaur skeletons, reconstructions, or even modern animals with similar body structures (like birds or reptiles) is incredibly helpful. It helps you understand anatomy, proportion, and how muscles attach, making your drawings more accurate and believable.
How do I make my dinosaur look more realistic?
Realism comes from a combination of accurate proportions, dynamic posing, and thoughtful detail work. Focus on subtle muscle bulges, skin folds around joints, and varied textures. Understanding how light falls on a form and applying consistent shading will also dramatically increase realism.
Can I use these steps to draw other dinosaurs?
Yes, the fundamental principles of starting with basic shapes, connecting them, refining outlines, and adding details apply to nearly all dinosaur species. You’ll just need to adjust the specific shapes and proportions to match your chosen dinosaur, like a long-necked Brachiosaurus or a frilled Triceratops.
Our Top Recommended Finds
- Sketchbook with Quality Paper: A good sketchbook (acid-free, 90-100gsm) provides a smooth surface that holds graphite well and withstands erasing, making your drawing experience much more enjoyable.
- Drawing Pencil Set: A set that includes pencils from HB to 6B allows for a wide range of values, from light construction lines to deep, rich shadows, giving your art more depth.
- Kneaded Eraser: Unlike traditional erasers, a kneaded eraser can be molded into various shapes to lift graphite precisely without smudging or damaging the paper, perfect for subtle corrections.
Unleash Your Inner Paleontologist Artist
You’ve just created a magnificent T-Rex, learning the core techniques of observation, construction, and refinement. This journey into prehistoric art is only just beginning.
Now that you’ve mastered the king of dinosaurs, why not explore others? Try drawing a speedy Velociraptor or a majestic Triceratops, applying these very same principles.
Grab your pencil, find a fresh sheet of paper, and continue to bring the ancient world back to life today!
Fearless Drawing
& Painting♡No rigid rules or pretension. Just practical guides, medium comparisons, and encouraging tips to help you enjoy the drawing & painting process.