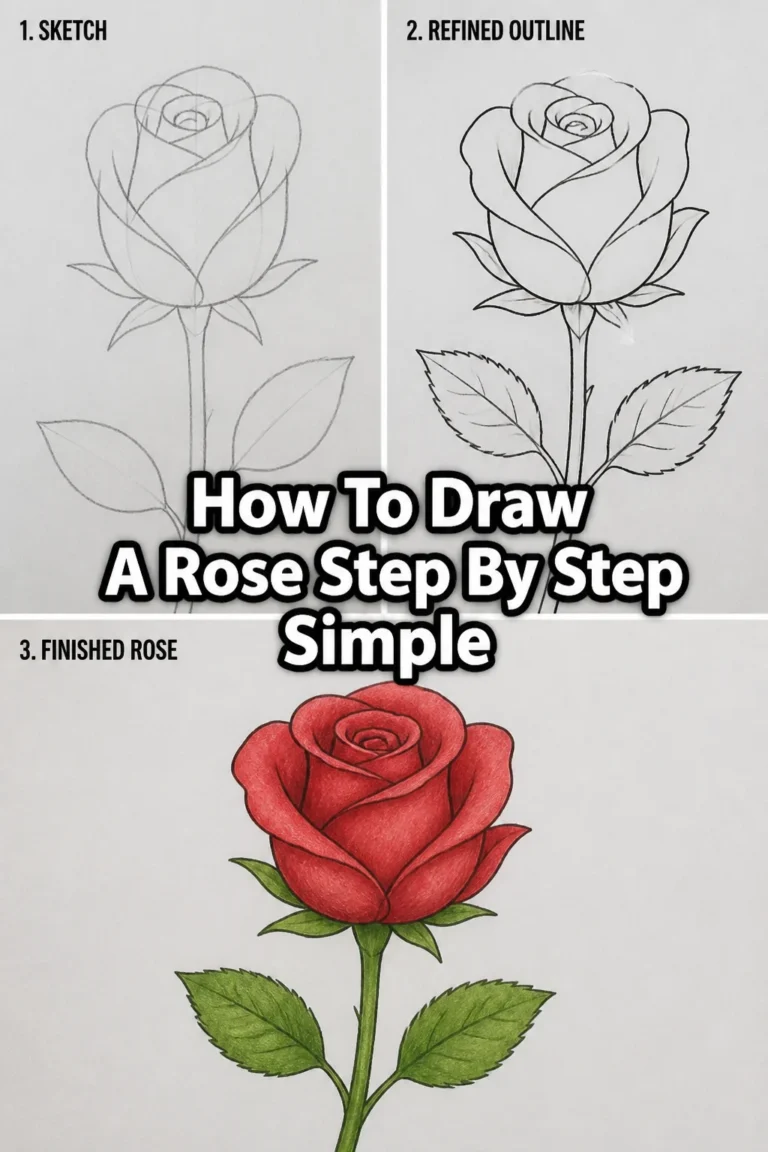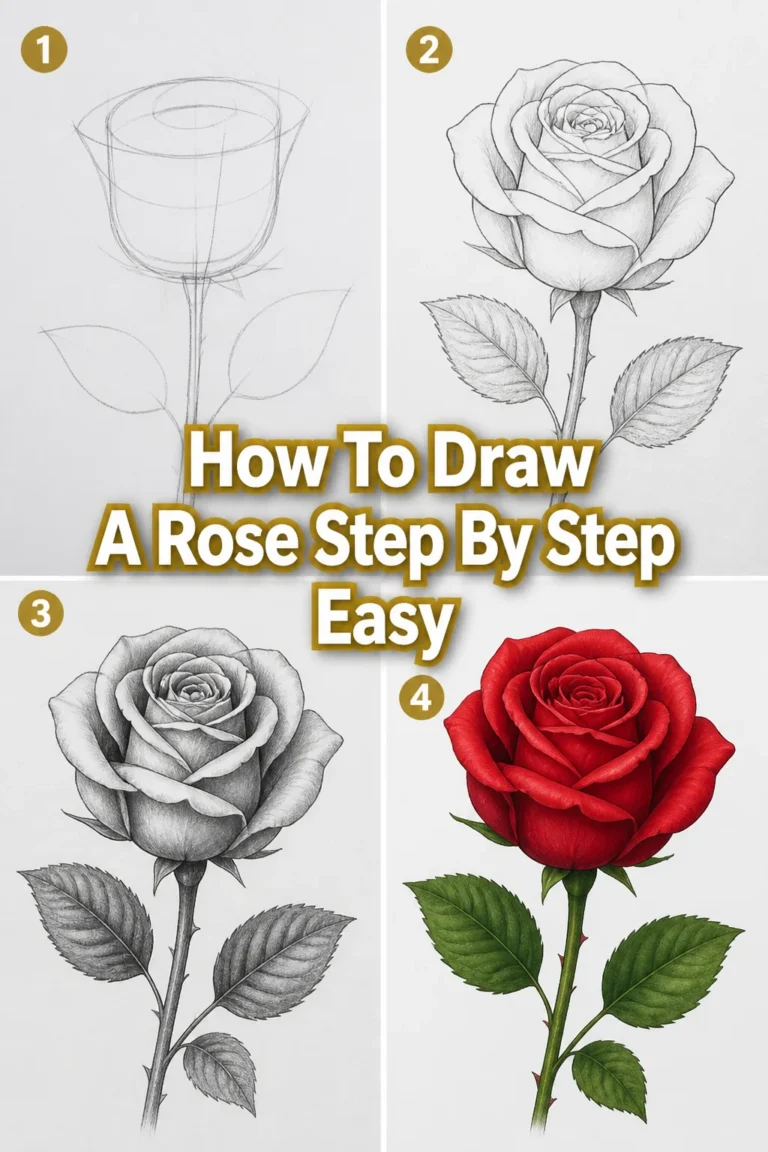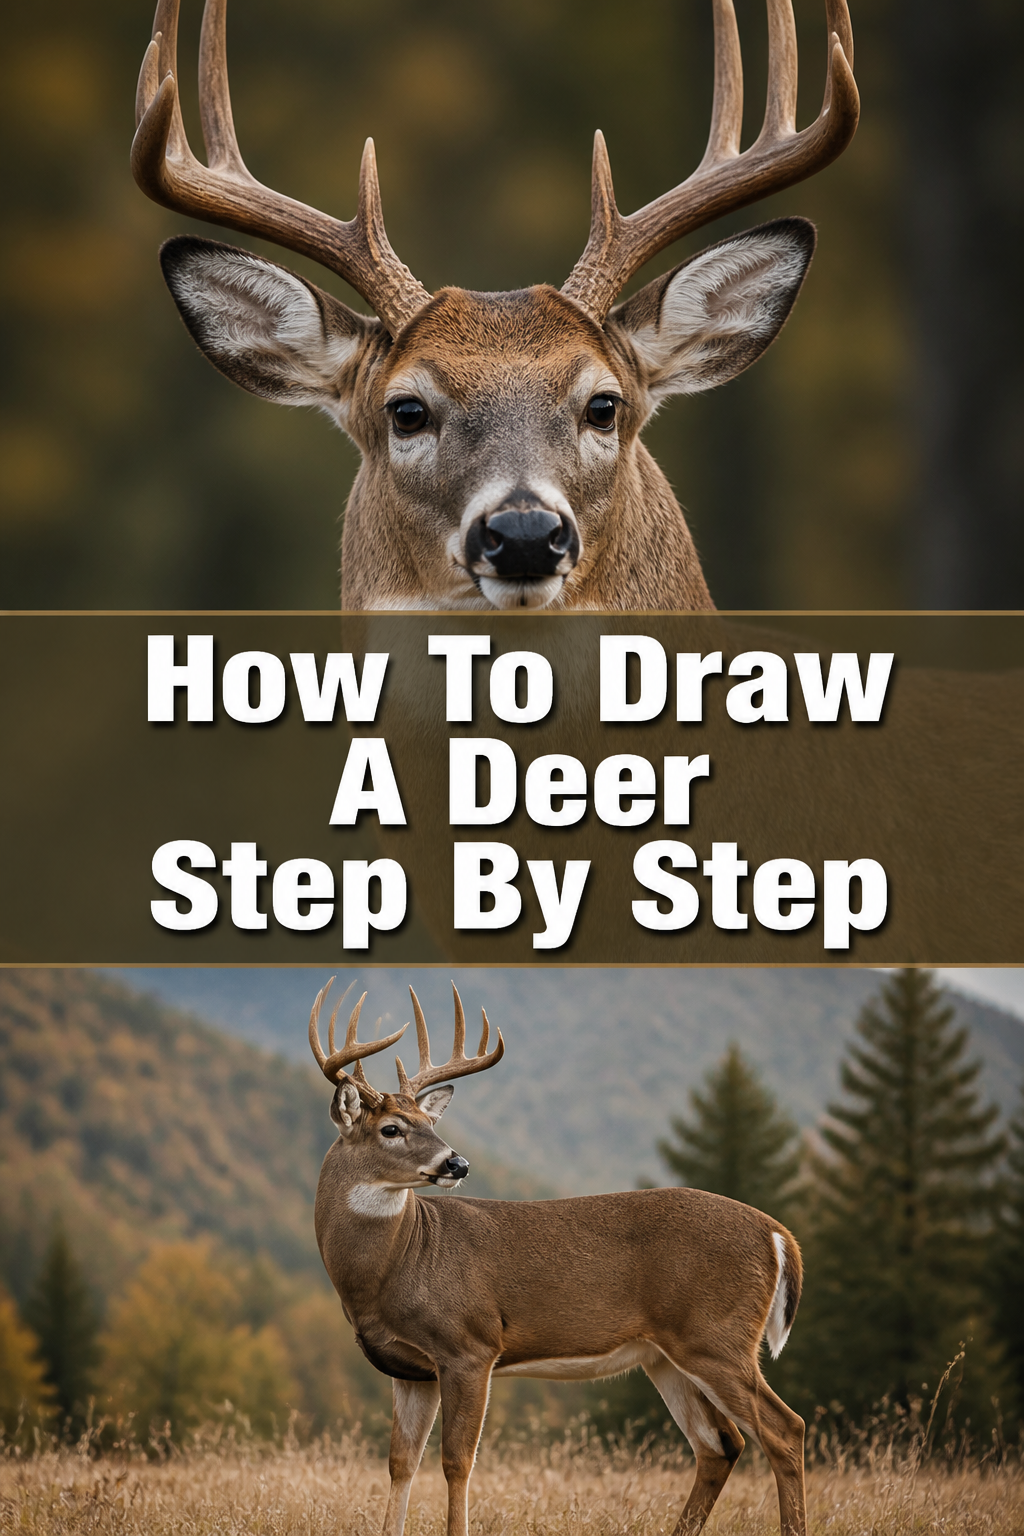
🦌 How To Draw A Deer Step By Step

& Painting
No rigid rules or pretension. Just practical guides, medium comparisons, and encouraging tips to help you enjoy the drawing & painting process.
Learning to draw can feel daunting, but breaking it down makes all the difference.
I remember my first attempts at sketching wildlife; they were a mess of lines and confusion.
This guide shares the techniques I learned over time, helping you create a beautiful deer drawing with confidence.
Quick Overview
You’re about to embark on a creative journey, transforming simple shapes into a graceful deer.
By the end, you’ll have a complete drawing and a deeper understanding of animal anatomy.
- Time needed: 45-90 minutes (depending on detail)
- Difficulty: Beginner to Intermediate
- What you’ll need: Pencil, eraser, paper, optional blending tool or colored pencils
Step-by-Step Instructions
Step 1: Lay Down the Basic Shapes for the Body
Begin by sketching two oval shapes for the deer’s main body.
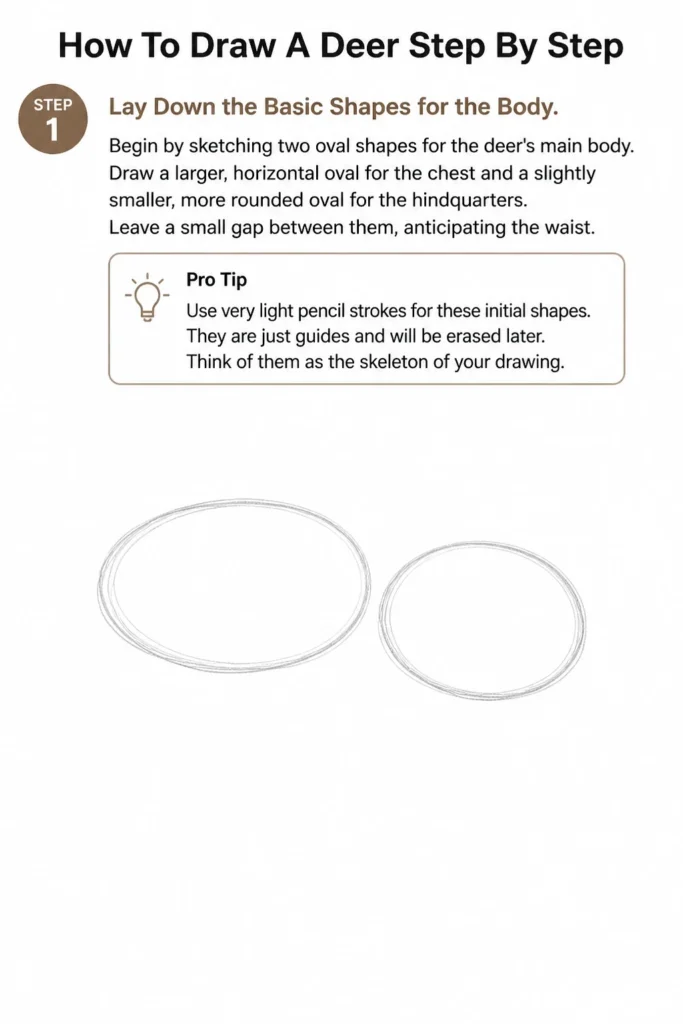
Draw a larger, horizontal oval for the chest and a slightly smaller, more rounded oval for the hindquarters.
Leave a small gap between them, anticipating the waist.
Pro Tip: Use very light pencil strokes for these initial shapes. They are just guides and will be erased later. Think of them as the skeleton of your drawing.
Step 2: Connect the Body and Add the Neck
Connect the two ovals with gentle, curving lines to form the deer’s back and belly.
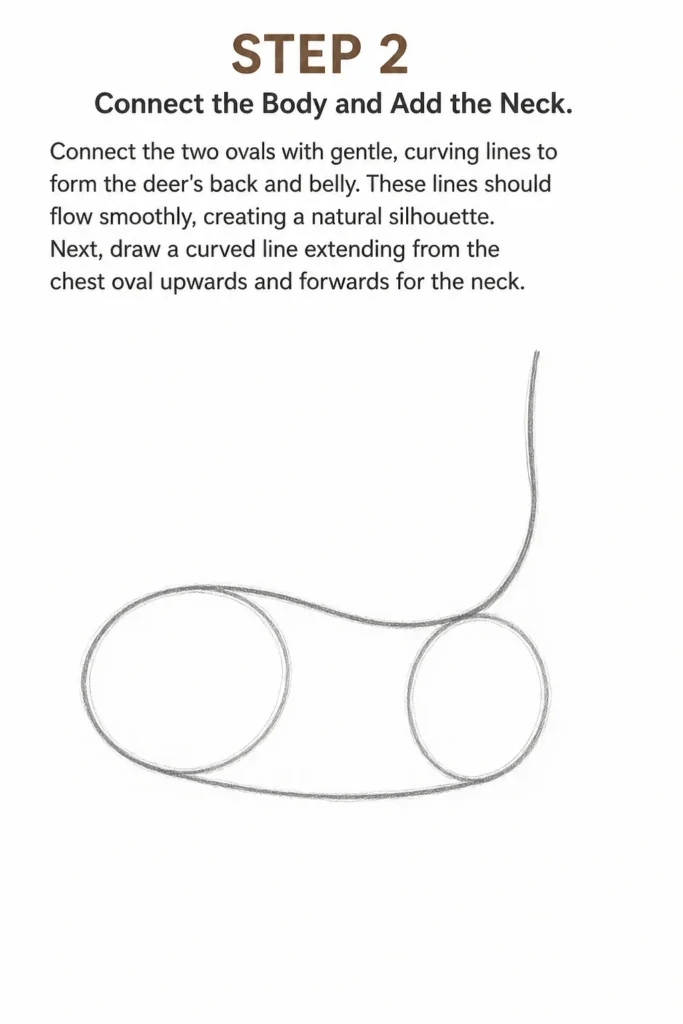
These lines should flow smoothly, creating a natural silhouette.
Next, draw a curved line extending from the chest oval upwards and forwards for the neck.
Step 3: Position the Head and Muzzle
Sketch another, smaller oval or egg shape at the end of the neck for the deer’s head.
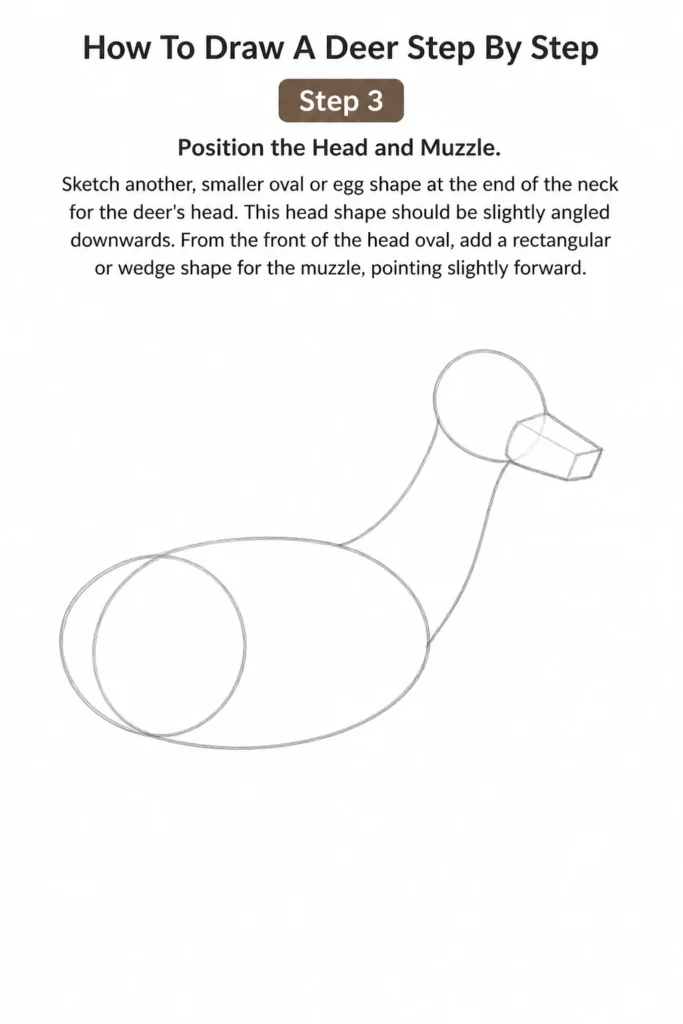
This head shape should be slightly angled downwards.
From the front of the head oval, add a rectangular or wedge shape for the muzzle, pointing slightly forward.
Step 4: Draw the Legs
Establish the leg positions with simple stick lines connecting to the body ovals.
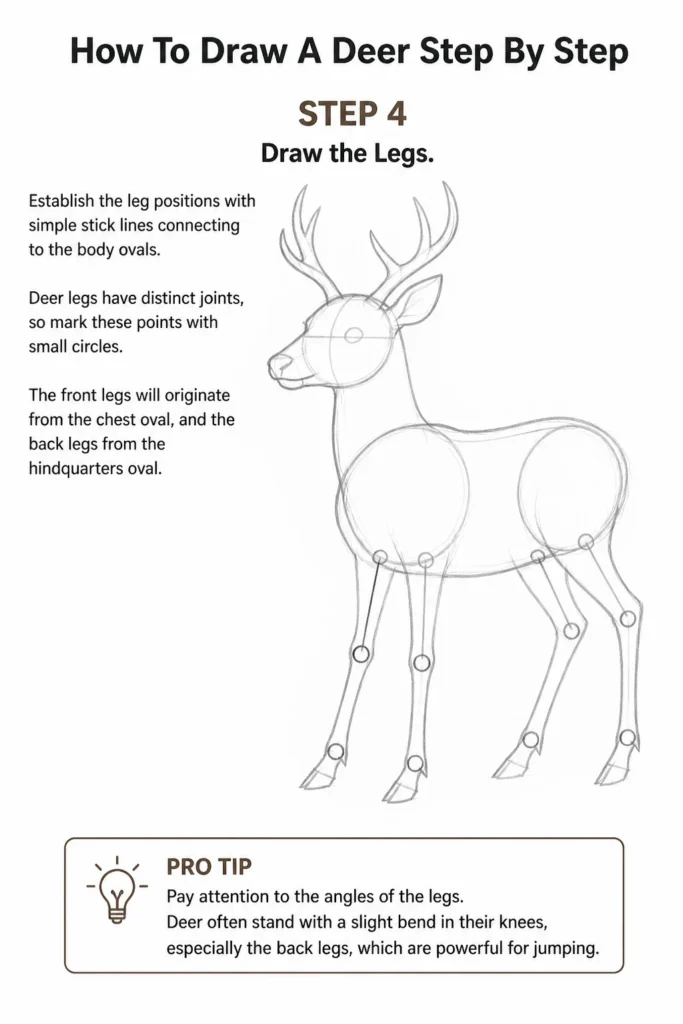
Deer legs have distinct joints, so mark these points with small circles.
The front legs will originate from the chest oval, and the back legs from the hindquarters oval.
Pro Tip: Pay attention to the angles of the legs. Deer often stand with a slight bend in their knees, especially the back legs, which are powerful for jumping.
Step 5: Refine the Leg Shapes
Flesh out the stick legs by drawing parallel lines around them to create thickness.
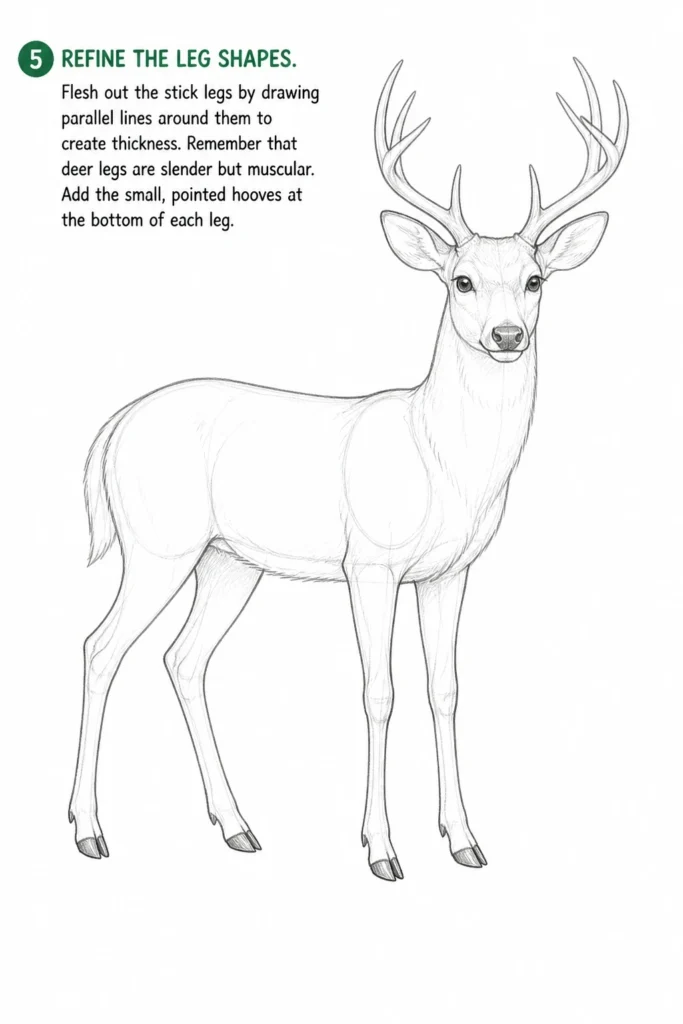
Remember that deer legs are slender but muscular.
Add the small, pointed hooves at the bottom of each leg.
Step 6: Add Facial Features and Ears
Place the eyes, nose, and mouth on the head and muzzle.
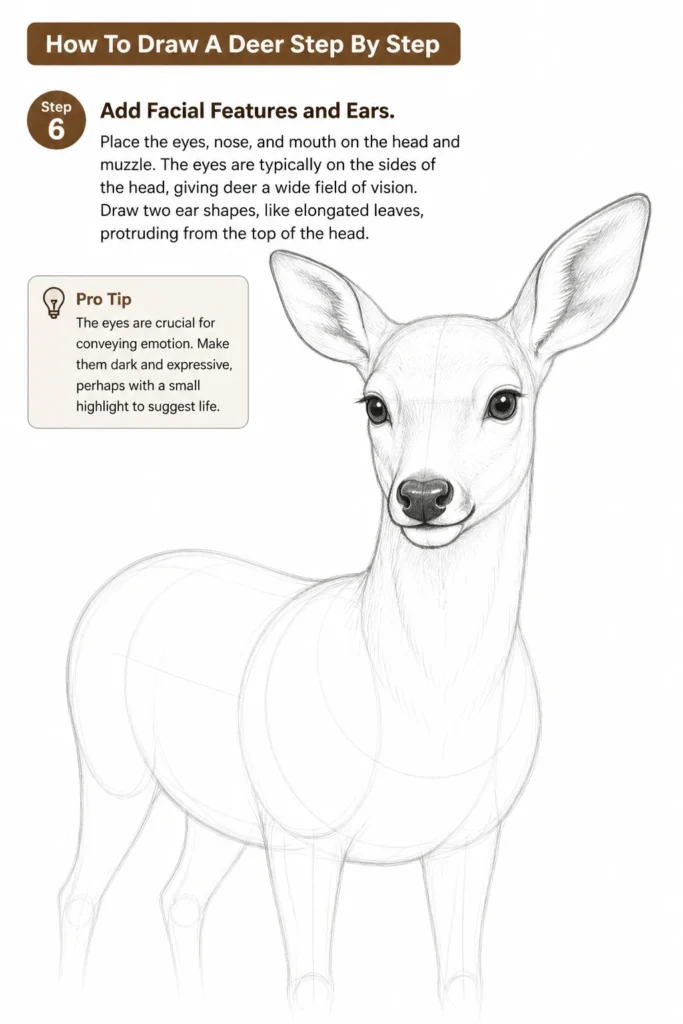
The eyes are typically on the sides of the head, giving deer a wide field of vision.
Draw two ear shapes, like elongated leaves, protruding from the top of the head.
Pro Tip: The eyes are crucial for conveying emotion. Make them dark and expressive, perhaps with a small highlight to suggest life.
Step 7: Sketch the Tail and Antlers (Optional)
Draw a small, fluffy tail at the rear of the hindquarters, typically pointing downwards or slightly up.
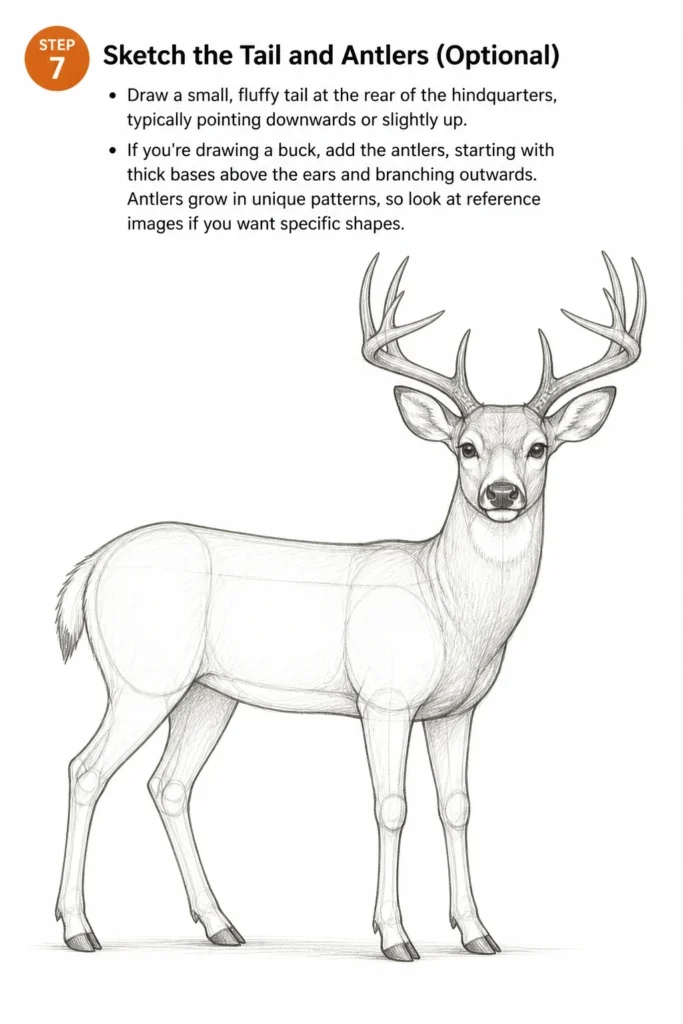
If you’re drawing a buck, add the antlers, starting with thick bases above the ears and branching outwards.
Antlers grow in unique patterns, so look at reference images if you want specific shapes.
Step 8: Connect and Refine the Outline
Connect all the basic shapes with smoother, more confident lines.
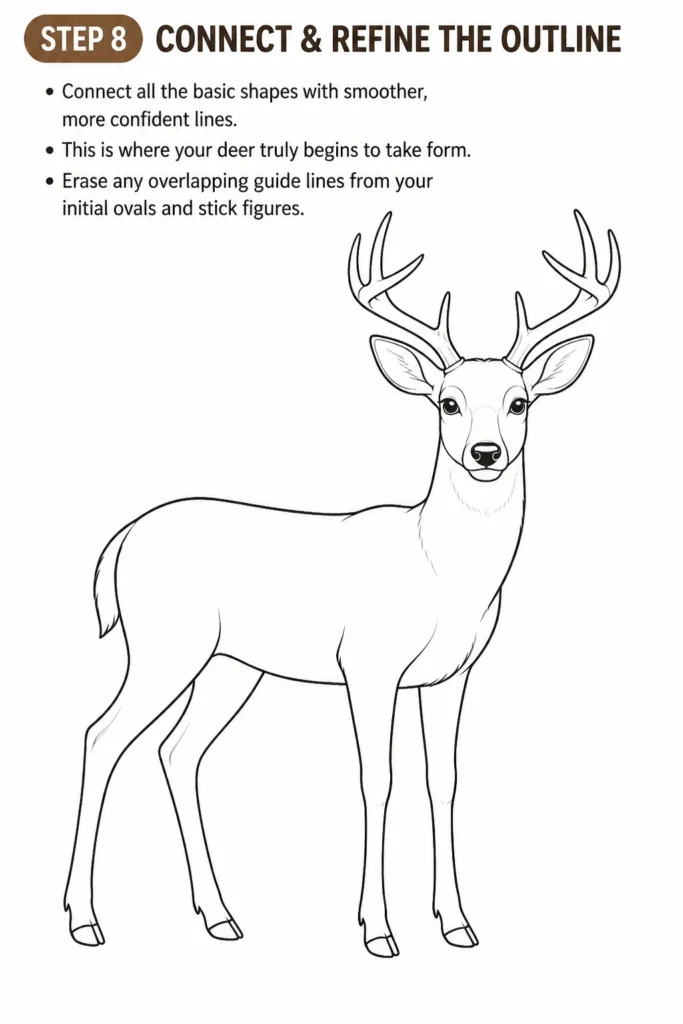
This is where your deer truly begins to take form.
Erase any overlapping guide lines from your initial ovals and stick figures.
Step 9: Add Details and Texture
Introduce details like fur texture with short, directional strokes.
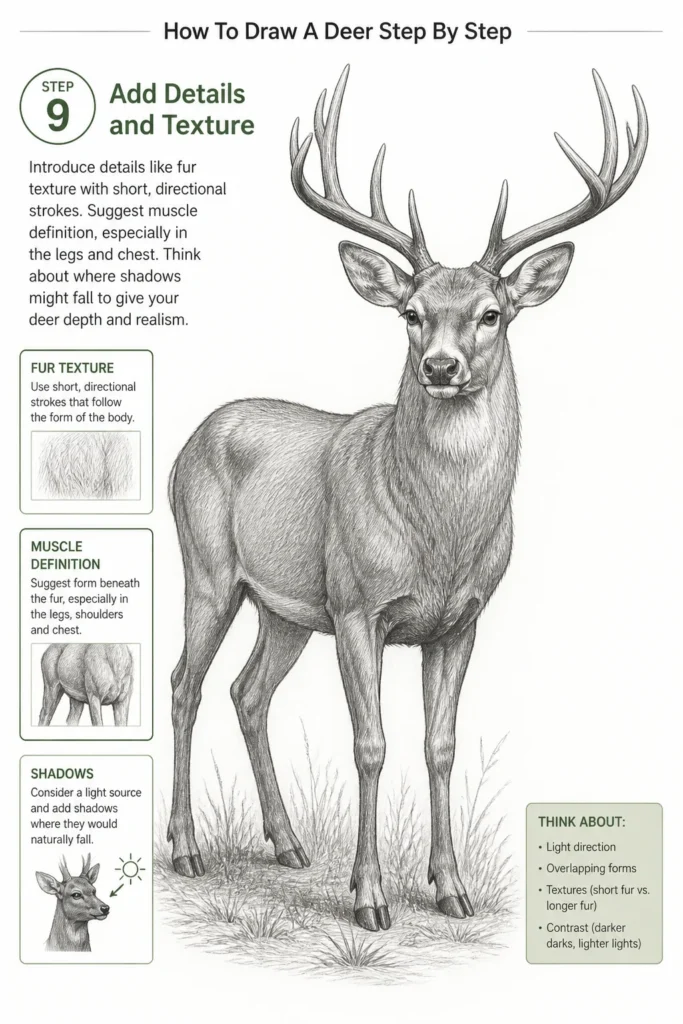
Suggest muscle definition, especially in the legs and chest.
Think about where shadows might fall to give your deer depth and realism.
Step 10: Shading and Finishing Touches
Apply shading to give your deer a three-dimensional look.
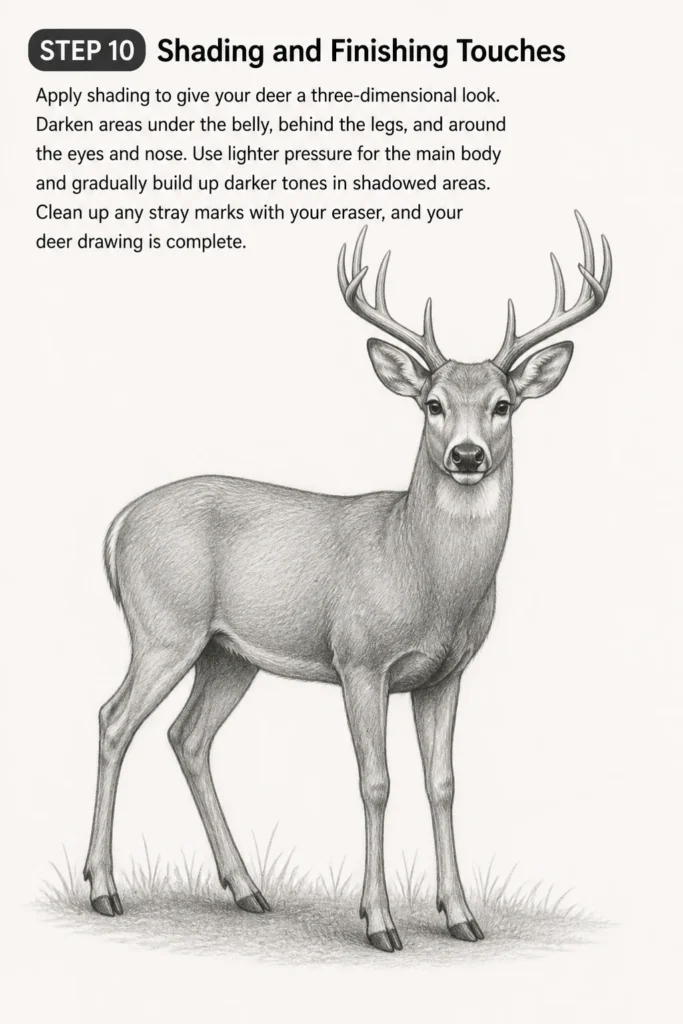
Darken areas under the belly, behind the legs, and around the eyes and nose.
Use lighter pressure for the main body and gradually build up darker tones in shadowed areas.
Clean up any stray marks with your eraser, and your deer drawing is complete.
Common Mistakes to Avoid
Disproportionate Body Parts
One common pitfall is making the head too large or the legs too short.
This throws off the entire balance and realism of the deer.
Always start with your basic shapes to establish accurate proportions before adding details.
Stiff, Unnatural Poses
Drawing a deer that looks like a cardboard cutout is another frequent issue.
Animals have fluid movements and natural curves.
Focus on dynamic lines and slight bends in the joints, rather than straight, rigid lines, to capture a lifelike pose.
Ignoring Anatomy
Skipping the underlying skeletal and muscular structure makes a drawing look flat.
Even if you don’t draw every bone, understanding where joints and muscle groups lie helps immensely.
Briefly studying deer anatomy will significantly enhance your drawing.
Over-Relying on Outlines
While outlines define the form, too much emphasis on them can make your drawing look cartoonish.
Use shading and texture to define edges and volumes.
This approach creates a softer, more realistic appearance, allowing light and shadow to do the work.
Troubleshooting
My Deer Looks Flat
If your drawing lacks depth, it might be due to insufficient shading.
Go back and identify areas where shadows would naturally fall, such as under the belly, behind the legs, and on the undersides of the antlers.
Layer your shading, starting light and gradually building up darker tones to create contrast and dimension.
The Legs Look Uneven or Awkward
Legs are tricky. If they seem off, check their length and joint placement relative to the body.
Ensure the joints (knees, hocks) are aligned correctly and that the legs taper realistically towards the hooves.
Use light construction lines to compare leg lengths and angles before committing to darker lines.
The Head Doesn’t Look Like a Deer
The head shape and facial features are critical for recognition. If it looks off, examine the placement of the eyes, nose, and ears.
Deer have relatively long muzzles and eyes set somewhat to the sides of the head.
Compare your drawing to reference photos and adjust the proportions of these key features.
Key Takeaways
- Always start with basic geometric shapes to establish proportion and form.
- Use light pencil strokes for initial construction lines, making them easy to erase.
- Focus on capturing the natural curves and fluid motion of the deer’s body.
- Pay close attention to anatomy, especially the joints and muscle groups in the legs.
- Shading and texture are essential for adding depth, realism, and a three-dimensional feel.
- Practice regularly and don’t be afraid to use reference images to guide your work.
Frequently Asked Questions
What kind of pencil should I use for drawing a deer?
A good starting point is an HB pencil for initial sketches, as it’s not too dark and easily erasable.
For shading and darker details, you might want to use a 2B or 4B pencil, which provides richer, softer blacks.
Experiment to find what feels best for your style.
How do I make the fur look realistic?
To create realistic fur, use short, overlapping strokes that follow the direction of the fur growth.
Vary the pressure on your pencil to create different textures and depths.
Don’t draw every single hair; instead, suggest areas of fur with clusters of strokes and varying tones.
Should I use reference photos when drawing animals?
Absolutely, using reference photos is highly recommended, especially when you’re starting out.
They help you understand accurate anatomy, proportions, poses, and lighting.
Even experienced artists rely on references to capture realism and detail in their work.
How can I draw different types of deer?
While the basic structure remains similar, different deer species have distinct features.
A whitetail deer has a broad, bushy tail; a mule deer has larger ears.
Focus on these unique characteristics and subtle variations in body shape, antler size, and coloration.
Our Top Recommended Finds
- Sketchbook with Quality Paper: A good sketchbook minimizes bleed-through and holds graphite well, enhancing your drawing experience.
- Set of Graphite Pencils: A variety of lead hardness (HB, 2B, 4B, 6B) allows for a full range of tones, from light sketches to deep shadows.
- Kneaded Eraser: This versatile eraser lifts graphite without smudging and can be molded into fine points for precise highlights.
Your Next Artistic Adventure Awaits
You’ve just completed a rewarding journey, transforming a blank page into a graceful deer.
Each stroke you made built confidence and refined your artistic eye.
Now, take what you’ve learned and apply it to other wildlife or even different poses for your deer.
Keep practicing, keep exploring, and let your creativity continue to grow.
& Painting
No rigid rules or pretension. Just practical guides, medium comparisons, and encouraging tips to help you enjoy the drawing & painting process.