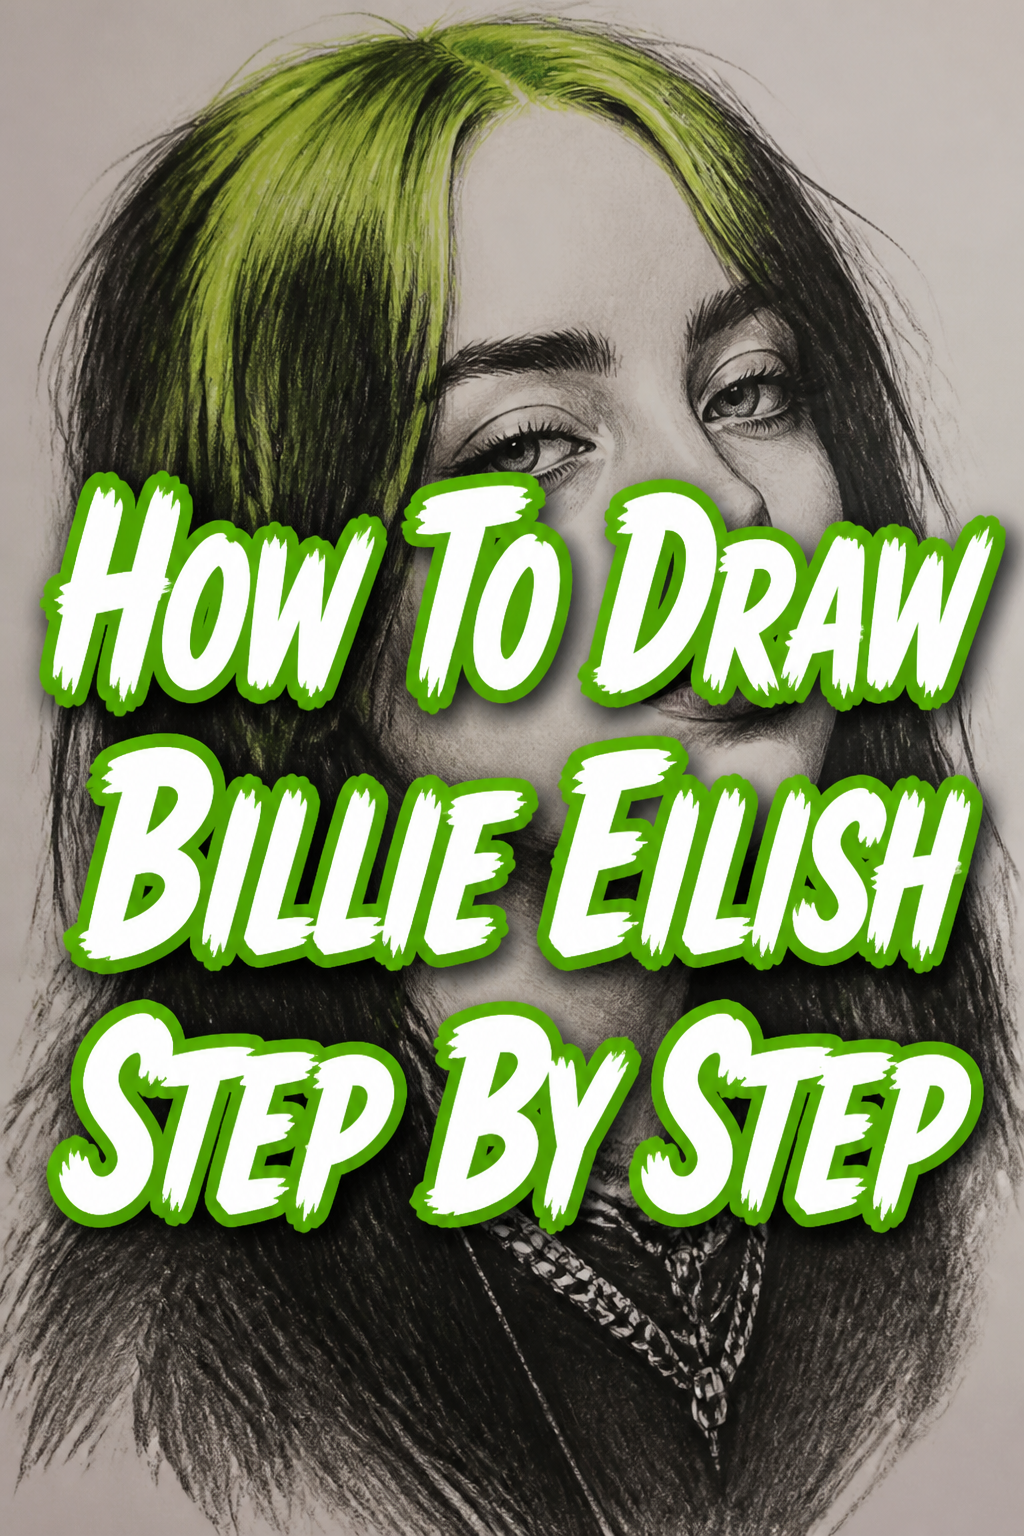
⭐ How To Draw Billie Eilish Step By Step

& Painting
No rigid rules or pretension. Just practical guides, medium comparisons, and encouraging tips to help you enjoy the drawing & painting process.
The first time I tried to capture Billie Eilish’s unique vibe on paper, it felt like a real challenge. Her distinctive features and expressive gaze are truly captivating. This guide distills years of sketching experience into a clear, actionable path for you to follow.
You’ll discover how to break down her complex features into manageable steps, making the process enjoyable and rewarding. By the end, you’ll have a drawing that truly captures her iconic look.
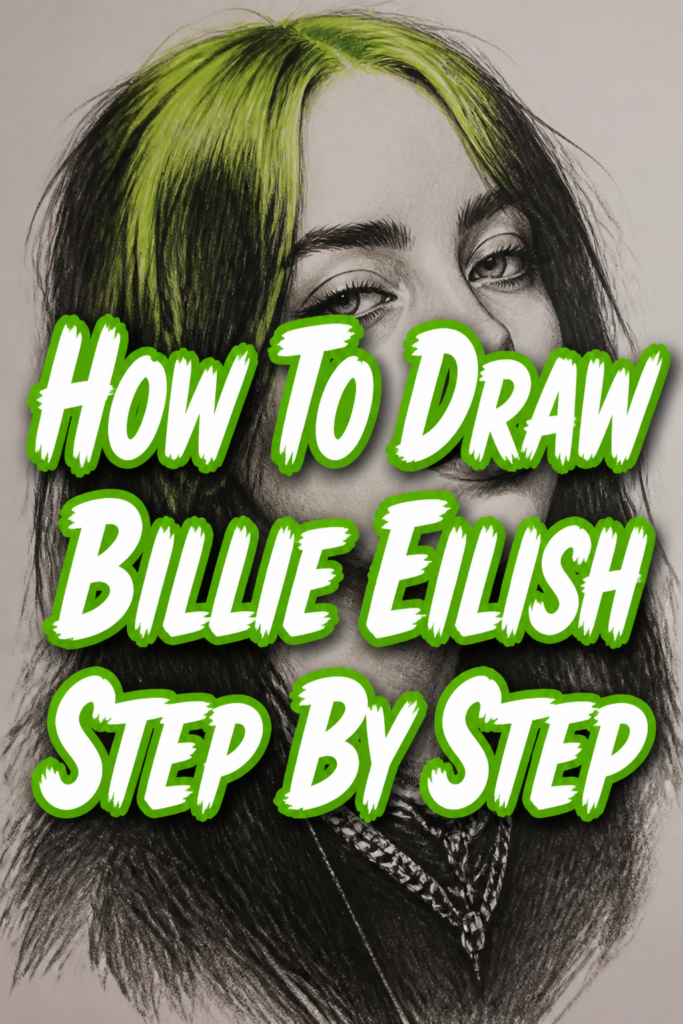
Quick Overview
This guide will walk you through creating a compelling portrait of Billie Eilish, focusing on her key characteristics. You’ll learn to build a likeness from basic shapes to intricate details.
- Time needed: 1-2 hours (depending on detail and experience)
- Difficulty: Intermediate
- What you’ll need: Sketching pencils (HB, 2B, 4B, 6B), a kneaded eraser, a regular eraser, good quality drawing paper, and a clear reference photo of Billie Eilish.
Step-by-Step Instructions
Step 1: Gather Your References and Prepare Your Workspace
Before you even touch your pencil to paper, preparation is key. Find several high-resolution reference photos of Billie Eilish that you love. Look for images with clear lighting and a pose that inspires you.
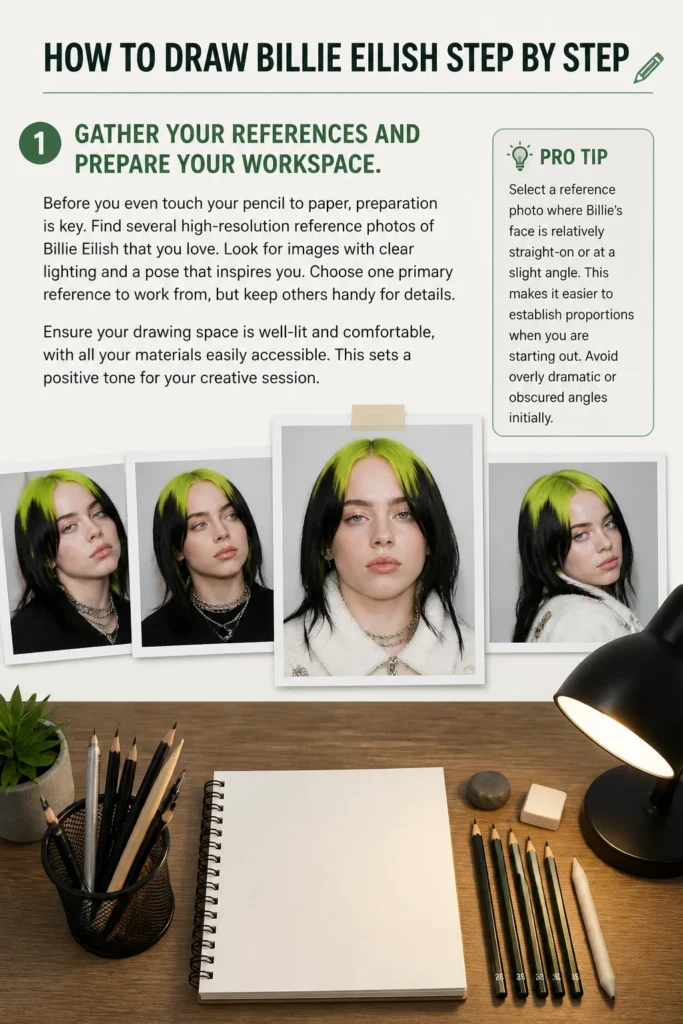
Choose one primary reference to work from, but keep others handy for details. Ensure your drawing space is well-lit and comfortable, with all your materials easily accessible. This sets a positive tone for your creative session.
Pro Tip: Select a reference photo where Billie’s face is relatively straight-on or at a slight angle. This makes it easier to establish proportions when you are starting out. Avoid overly dramatic or obscured angles initially.
Step 2: Sketch the Basic Head Shape and Guidelines
Begin by lightly sketching the fundamental shape of her head. Think of it as an egg or an oval, slightly wider at the top. Don’t press hard; these are just construction lines.
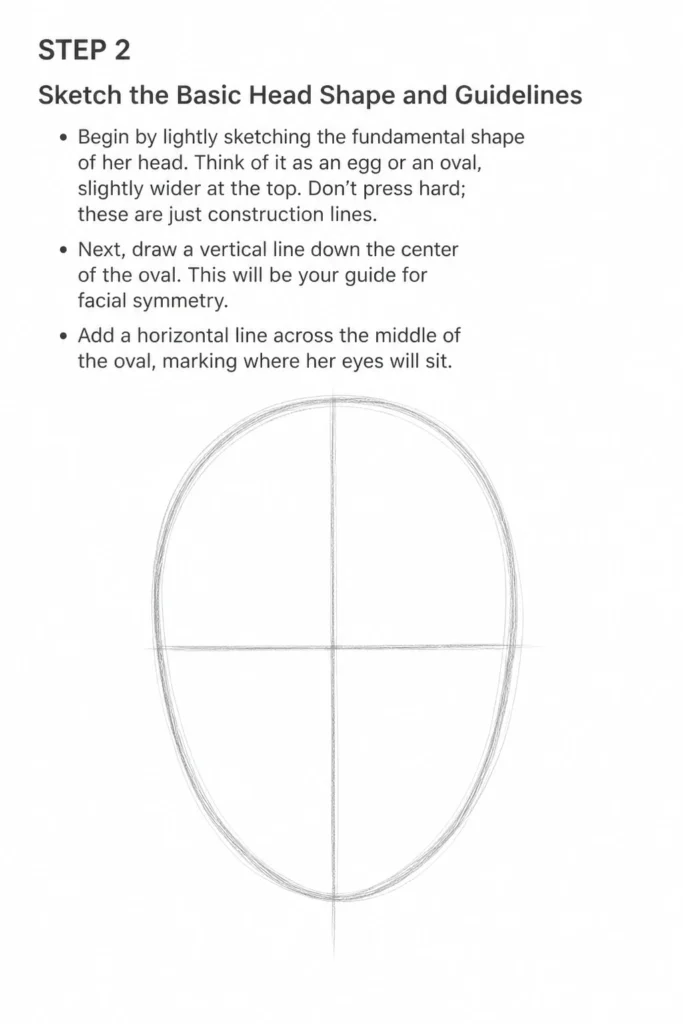
Next, draw a vertical line down the center of the oval. This will be your guide for facial symmetry. Add a horizontal line across the middle of the oval, marking where her eyes will sit.
Step 3: Map Out Key Facial Feature Placement
Now, let’s refine those initial guidelines to place her features. Draw another horizontal line roughly halfway between the eye line and the chin for the base of her nose. Add a third horizontal line halfway between the nose line and the chin for her mouth.
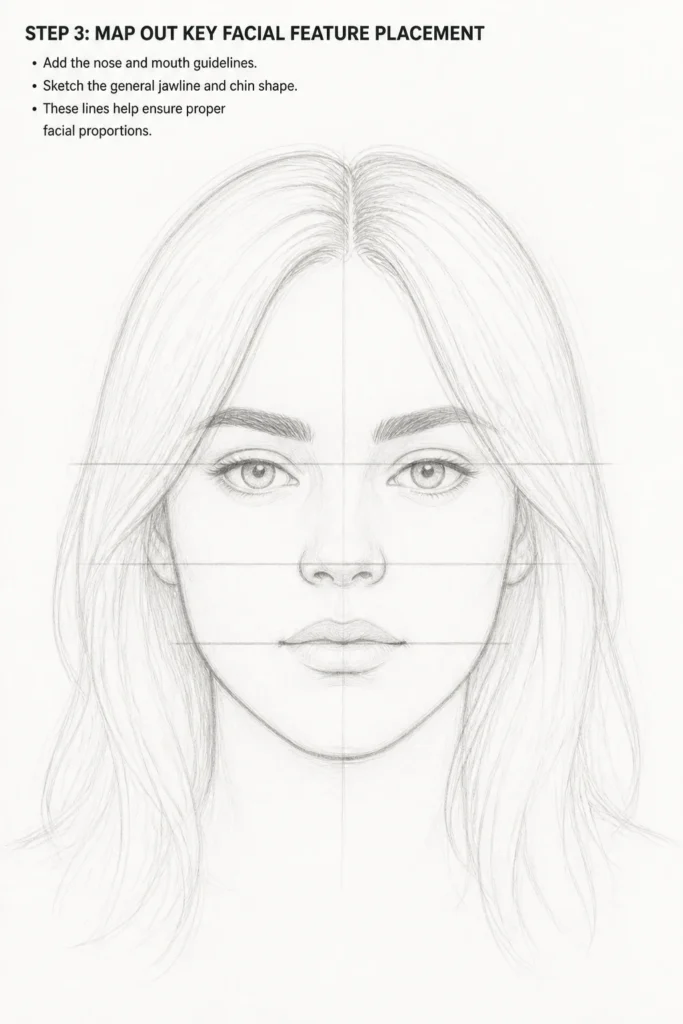
These three lines (eyes, nose, mouth) are crucial for establishing correct proportions. Lightly sketch the general shape of her jawline and chin, observing how it tapers from the wider top of her head. Her jawline is often quite defined but still soft.
Step 4: Refine the Eyes and Brows
Billie Eilish’s eyes are incredibly expressive and a key part of her likeness. Begin by sketching the almond shape of her eyes along the eye line. Pay close attention to the angle of her inner and outer corners.
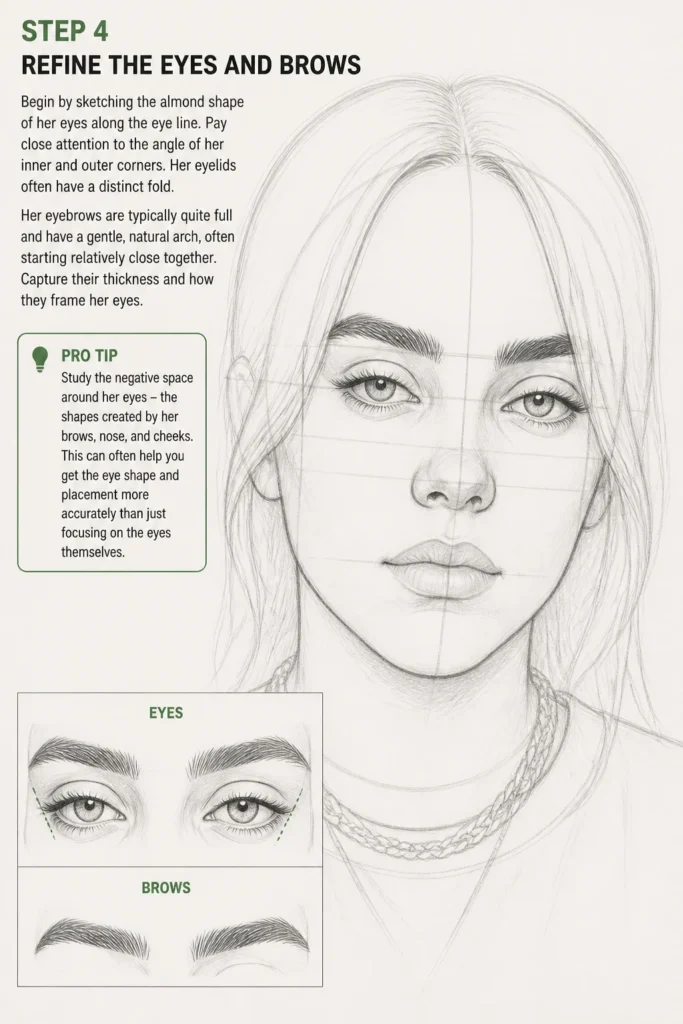
Her eyelids often have a distinct fold. Her eyebrows are typically quite full and have a gentle, natural arch, often starting relatively close together. Capture their thickness and how they frame her eyes.
Pro Tip: Study the negative space around her eyes – the shapes created by her brows, nose, and cheeks. This can often help you get the eye shape and placement more accurately than just focusing on the eyes themselves.
Step 5: Shape the Nose and Mouth
Move down to the nose, using your nose guideline. Sketch the bridge of her nose, noting its width and how it connects to her brow area. Her nose often has a slightly rounded tip and defined nostrils.
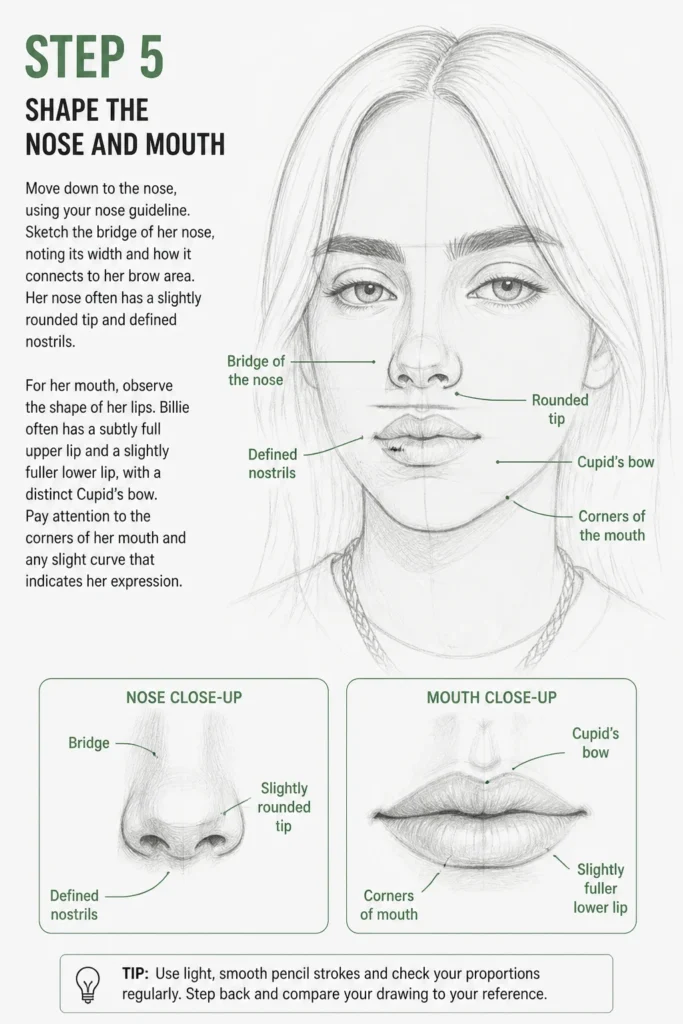
For her mouth, observe the shape of her lips. Billie often has a subtly full upper lip and a slightly fuller lower lip, with a distinct Cupid’s bow. Pay attention to the corners of her mouth and any slight curve that indicates her expression.
Step 6: Outline Hair and Accessories
Billie’s hair is a significant part of her style, whether it’s flowing, in braids, or under a hat. Lightly sketch the overall mass of her hair, noting its volume and how it frames her face. Don’t draw individual strands yet; focus on the general shape.
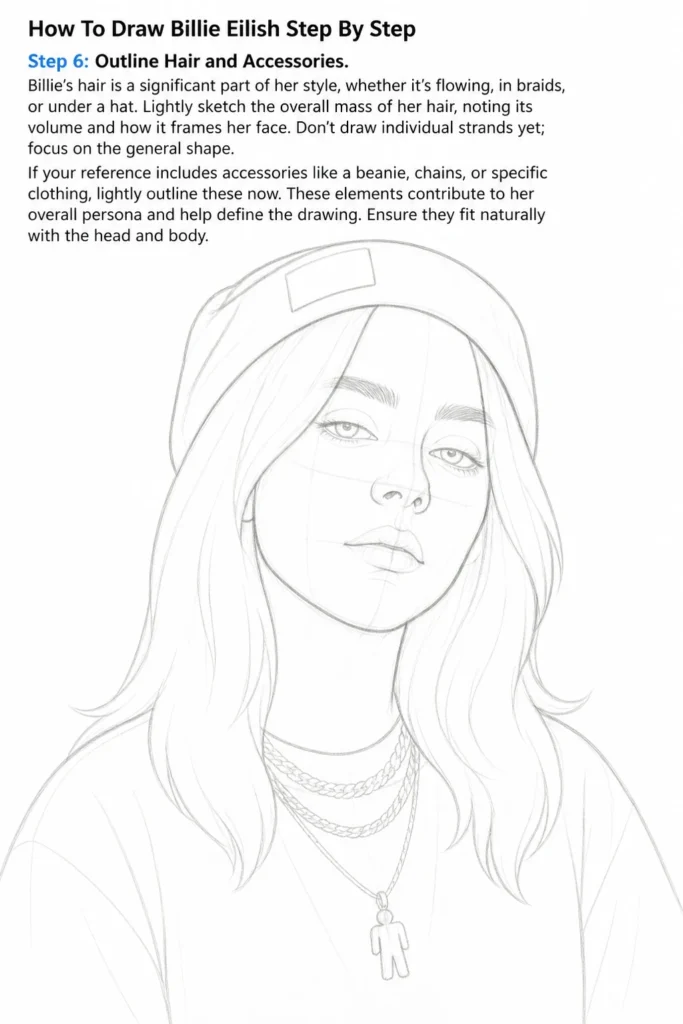
If your reference includes accessories like a beanie, chains, or specific clothing, lightly outline these now. These elements contribute to her overall persona and help define the drawing. Ensure they fit naturally with the head and body.
Step 7: Add Initial Shading and Form
With your outline complete, it’s time to introduce dimension. Identify your light source in the reference photo. This will tell you where the shadows and highlights fall.
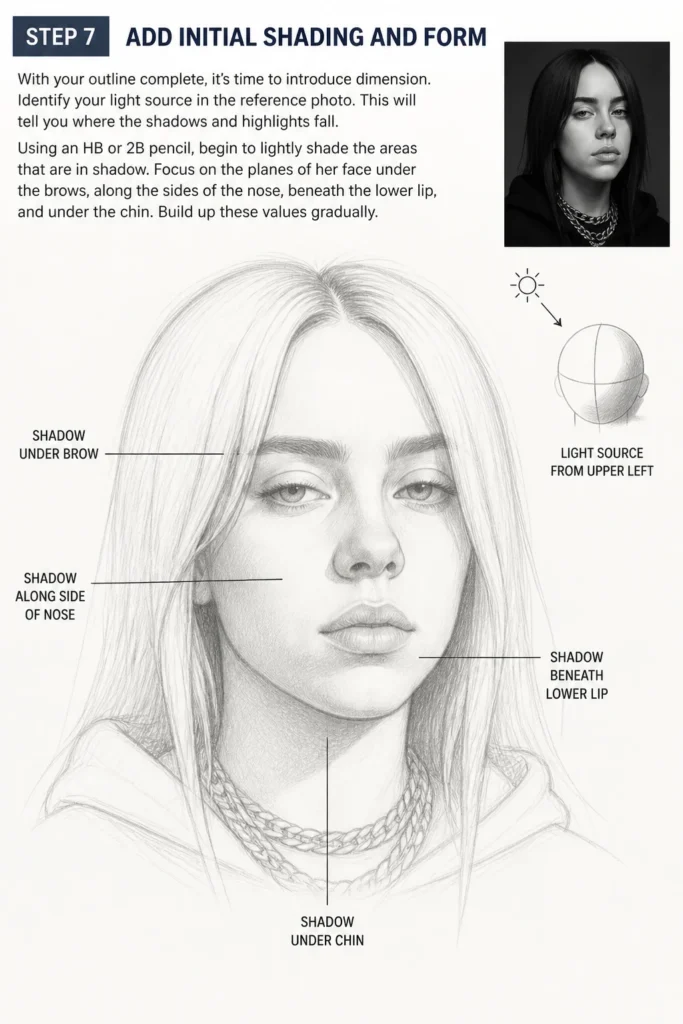
Using an HB or 2B pencil, begin to lightly shade the areas that are in shadow. Focus on the planes of her face: under the brows, along the sides of the nose, beneath the lower lip, and under the chin. Build up these values gradually.
Step 8: Deepen Details and Texture
Now, switch to softer pencils (4B, 6B) to deepen your shadows and add texture. Work on the eyes first, adding depth to the pupils and irises, and darkening the upper lash line. Render the hair by sketching in the direction of growth, building up layers for texture.
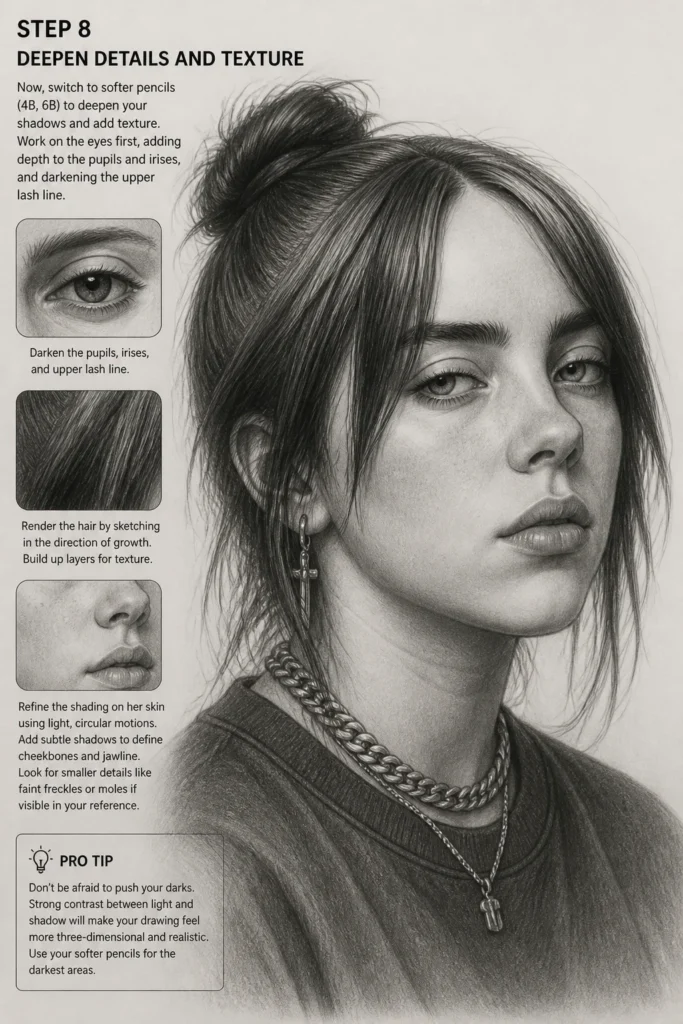
Refine the shading on her skin, using light, circular motions for a smooth effect. Add subtle shadows to define the cheekbones and jawline. Look for smaller details like faint freckles or moles if visible in your reference.
Pro Tip: Don’t be afraid to push your darks. Strong contrast between light and shadow will make your drawing feel more three-dimensional and realistic. Use your softer pencils for the darkest areas.
Step 9: Final Touches and Cleanup
Step back and evaluate your drawing from a distance. Look for any areas that seem “off” or need adjustment. Use your kneaded eraser to lift highlights in areas like the bridge of the nose, the inner corners of the eyes, and the lips.
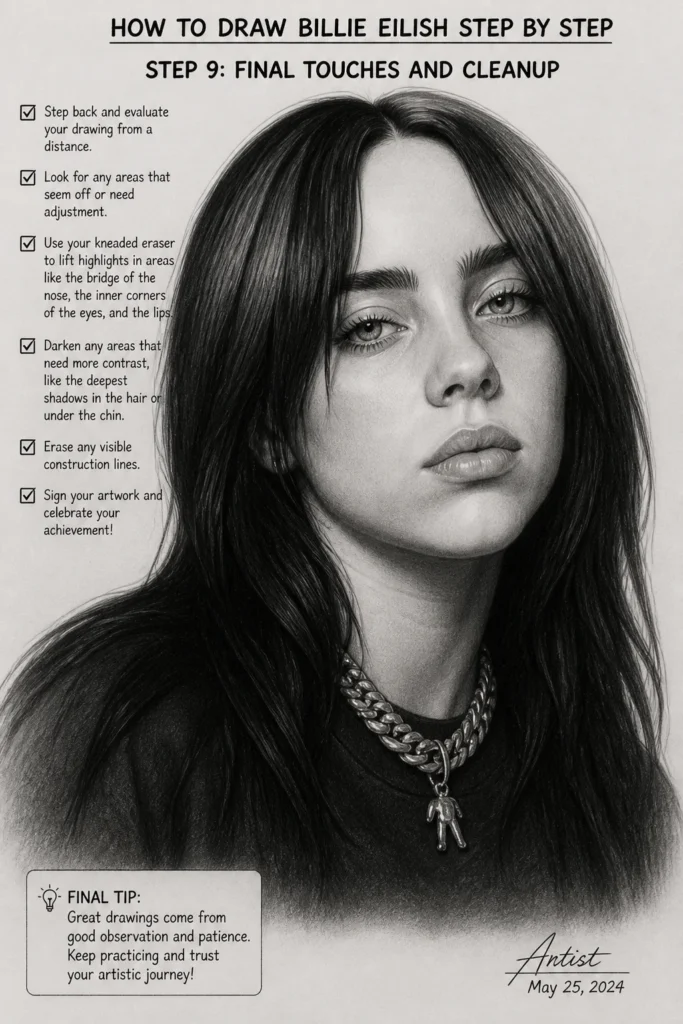
Darken any areas that need more contrast, like the deepest shadows in the hair or under the chin. Erase any visible construction lines. Sign your artwork and celebrate your achievement!
Common Mistakes to Avoid
Incorrect Proportions
Many beginners struggle with getting the facial features in the right place. If the eyes are too high or the nose too low, the likeness will be lost. Always rely on your initial guidelines and constantly compare distances and angles to your reference photo. Take your time measuring.
Flat Shading
A common pitfall is to shade everything with the same value, resulting in a flat, two-dimensional drawing. Remember that faces have curves and planes, creating a wide range of light and shadow. Build up your shading in layers, from light to dark, to create depth and form.
Ignoring the Reference Photo
It’s tempting to draw what you think Billie Eilish looks like, rather than what’s actually in the photo. This leads to generic features instead of her specific ones. Continuously refer back to your photo for every detail, no matter how small. Your reference is your best friend.
Rushing the Process
Drawing a portrait takes patience and observation. Rushing through the initial sketching or shading phases often leads to mistakes that are hard to correct later. Allow yourself ample time for each step. Enjoy the journey of creation.
Troubleshooting
My Drawing Looks “Off” or Not Like Her
This is a very common issue, often related to proportions or specific feature shapes. Go back to your reference photo and carefully re-measure the distances between her features. Are the eyes the right width apart? Is the nose the correct length? Use a ruler or your pencil to compare angles and distances directly from your reference to your drawing. Sometimes, just a millimeter off can change the likeness.
My Shading is Muddy or Uneven
Muddy shading usually happens when you press too hard too early or don’t blend smoothly. Try using lighter pressure with your pencils and build up layers gradually. For smoother transitions, use light, circular strokes or small, overlapping lines. A kneaded eraser can also help lift excess graphite and create cleaner transitions. Ensure your pencils are sharp for precise control.
I Can’t Get the Hair to Look Realistic
Realistic hair isn’t about drawing every single strand. It’s about capturing the overall flow, volume, and the way light hits it. Start by defining the major masses of hair and the direction it falls. Then, use varying pressure and pencil strokes to create texture, focusing on highlights and shadows within the hair. Don’t make every strand the same; vary your lines to mimic natural hair movement.
Key Takeaways
- Always start with basic shapes and construction lines to establish correct proportions.
- Billie Eilish’s eyes and eyebrows are crucial for capturing her unique likeness.
- Build up your shading gradually, from light to dark, to create depth and dimension.
- Use a clear reference photo consistently throughout the entire drawing process.
- Patience and careful observation are more important than speed when drawing portraits.
- Don’t be afraid to push your darks and use a kneaded eraser for highlights.
Frequently Asked Questions
What pencil hardness should I use for which part?
Start with an HB or 2H for your initial light sketches and guidelines. Use 2B for mid-tones and general shading. Move to 4B and 6B for deeper shadows, rich darks in the eyes, and defining hair strands. An HB is also great for fine details.
How do I make the hair look natural and not stiff?
Focus on the overall flow and direction of the hair first. Use long, sweeping strokes for the main masses, following the curve of her head. Then, add texture by layering shorter, varied lines in the direction of hair growth. Don’t draw every strand; instead, imply texture through highlights and shadows.
How can I capture Billie’s specific “mood” or expression?
The “mood” comes primarily from the eyes and the slight curve of the mouth. Pay close attention to the angle of her eyelids, the size of her pupils, and any subtle tension in her lips. These small details convey emotion. Practice observing these nuances in your reference.
Can I use digital tools for this guide?
Absolutely! The principles of construction, proportion, shading, and observation remain the same whether you’re using traditional pencils or a digital drawing tablet. Just adapt the tools (layers for guidelines, different brushes for pencil hardness) to your digital workflow.
Our Top Recommended Finds
- Quality Sketchbook: A good sketchbook with smooth, medium-weight paper makes a huge difference. It allows for better blending and holds graphite well.
- Artist’s Pencil Set: A comprehensive set ranging from 2H to 6B or 8B provides all the tools you need for light sketching to deep, rich shadows. Look for sets with good quality graphite.
- Kneaded Eraser: Essential for lifting highlights, cleaning up smudges, and gently removing graphite without damaging the paper. It’s a versatile tool for any artist.
Unleash Your Inner Portrait Artist
Drawing a portrait, especially of someone as iconic as Billie Eilish, is a fantastic way to hone your artistic skills. You’ve now got a clear roadmap, from the initial sketch to those crucial finishing touches. Each line you draw, each shadow you blend, brings you closer to mastering the art of portraiture.
Don’t stop here. Keep practicing, keep observing, and consider trying another portrait or exploring different expressions. Your artistic journey is just beginning, and every drawing makes you a better artist. Grab your pencils and start creating your masterpiece today!
& Painting
No rigid rules or pretension. Just practical guides, medium comparisons, and encouraging tips to help you enjoy the drawing & painting process.