📸 How To Take Pictures Of Yourself At Home

& Painting
No rigid rules or pretension. Just practical guides, medium comparisons, and encouraging tips to help you enjoy the drawing & painting process.
Taking great photos of yourself doesn’t require a professional studio or a personal photographer.
I’ve spent countless hours experimenting with angles, lighting, and props right here in my living room, turning everyday spaces into personal photo zones.
This guide will share all the practical lessons I’ve learned, helping you capture stunning self-portraits with ease and confidence.
Quick Overview
You’re about to learn how to transform your home into a versatile photo studio. By the end, you’ll have a clear process for taking beautiful, professional-looking pictures of yourself.
- Time needed: 1-2 hours (initial setup & first shoot)
- Difficulty: Beginner to Intermediate
- What you’ll need: Smartphone or camera, a tripod (or stable surface), natural light, and a remote shutter or self-timer.
Step-by-Step Instructions
Step 1: Define Your Vision and Mood
Before you even pick up your camera, think about the story you want your photo to tell. What emotion or message are you trying to convey?
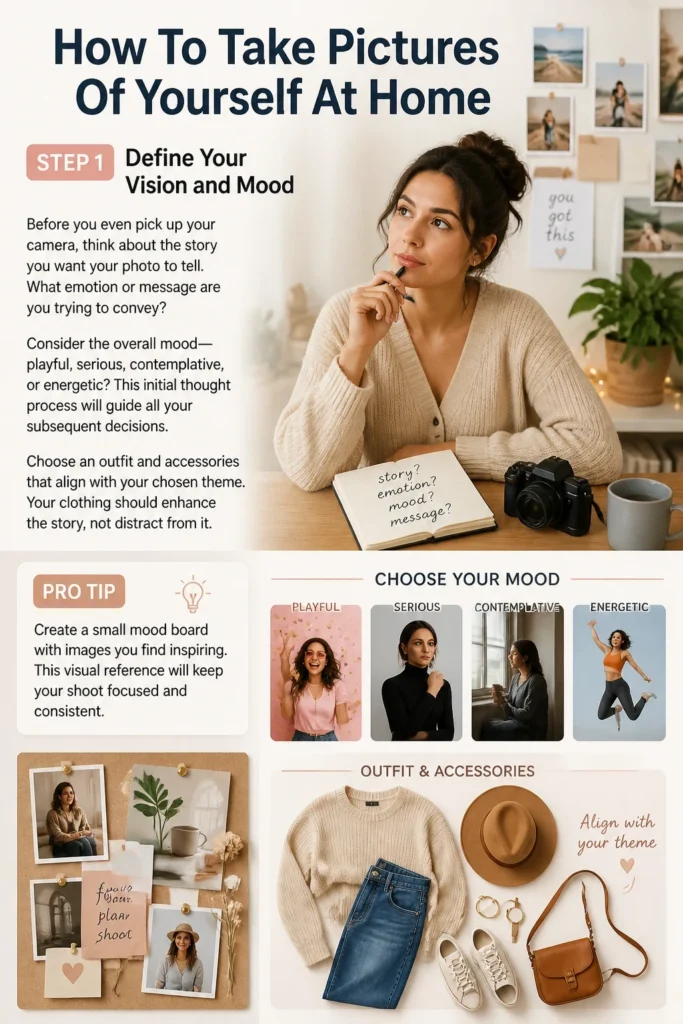
Consider the overall mood: playful, serious, contemplative, or energetic? This initial thought process will guide all your subsequent decisions.
Choose an outfit and accessories that align with your chosen theme. Your clothing should enhance the story, not distract from it.
Pro Tip: Create a small mood board with images you find inspiring. This visual reference will keep your shoot focused and consistent.
Step 2: Harness the Power of Natural Light
Good lighting is the single most important factor in photography. Natural light, especially from a window, is your best friend for home self-portraits.
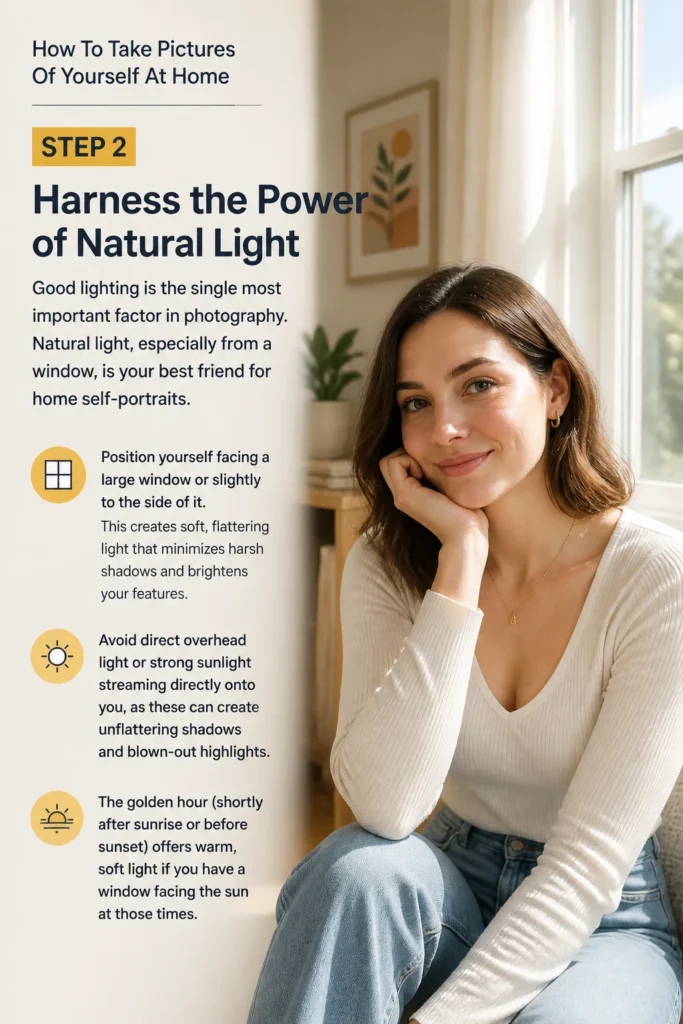
Position yourself facing a large window or slightly to the side of it. This creates soft, flattering light that minimizes harsh shadows and brightens your features.
Avoid direct overhead light or strong sunlight streaming directly onto you, as these can create unflattering shadows and blown-out highlights.
The “golden hour” (shortly after sunrise or before sunset) offers warm, soft light if you have a window facing the sun at those times.
Step 3: Set Up Your Camera and Tripod
A stable camera is crucial for sharp, well-composed photos. Use a tripod, even a small desktop one, to hold your phone or camera steady.
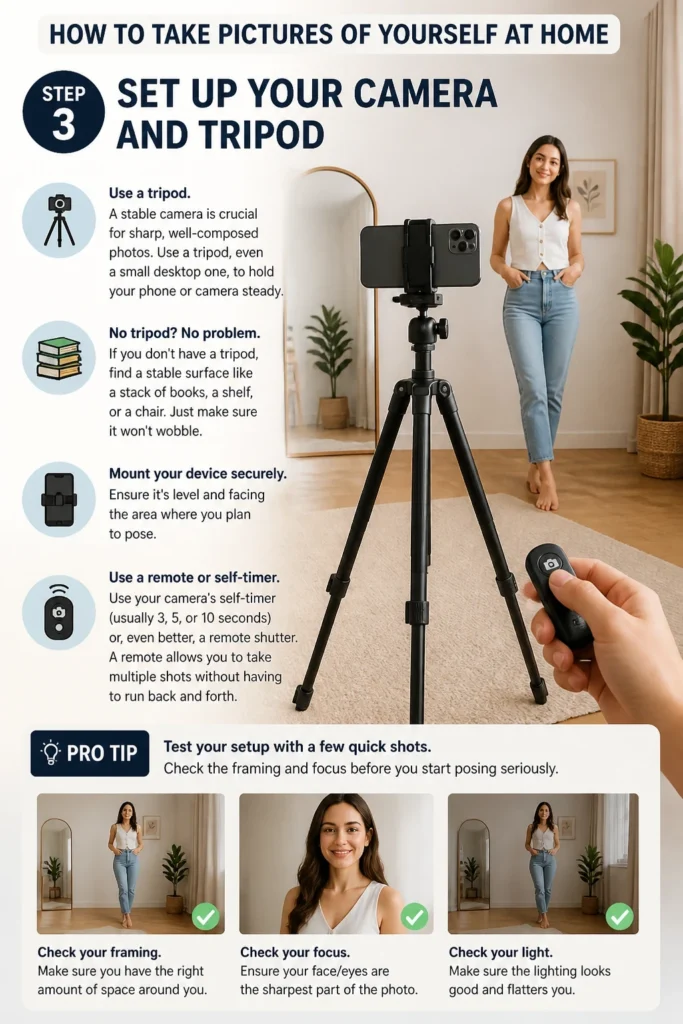
If you don’t have a tripod, find a stable surface like a stack of books, a shelf, or a chair. Just make sure it won’t wobble.
Mount your device securely. Ensure it’s level and facing the area where you plan to pose.
Use your camera’s self-timer (usually 3, 5, or 10 seconds) or, even better, a remote shutter. A remote allows you to take multiple shots without having to run back and forth.
Pro Tip: Test your setup with a few quick shots. Check the framing and focus before you start posing seriously.
Step 4: Choose and Prepare Your Background
Your background is just as important as your subject. A cluttered or distracting background can ruin an otherwise great photo.
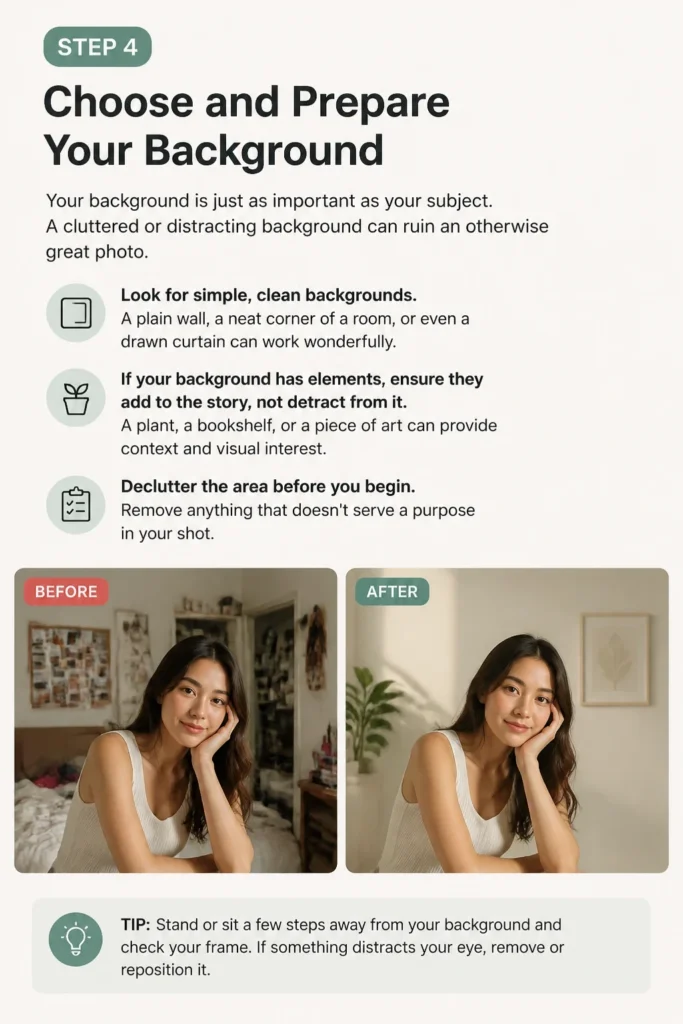
Look for simple, clean backgrounds. A plain wall, a neat corner of a room, or even a drawn curtain can work wonderfully.
If your background has elements, ensure they add to the story, not detract from it. A plant, a bookshelf, or a piece of art can provide context and visual interest.
Declutter the area before you begin. Remove anything that doesn’t serve a purpose in your shot.
Step 5: Master Your Composition
Composition refers to how elements are arranged within your frame. It guides the viewer’s eye and adds visual appeal.
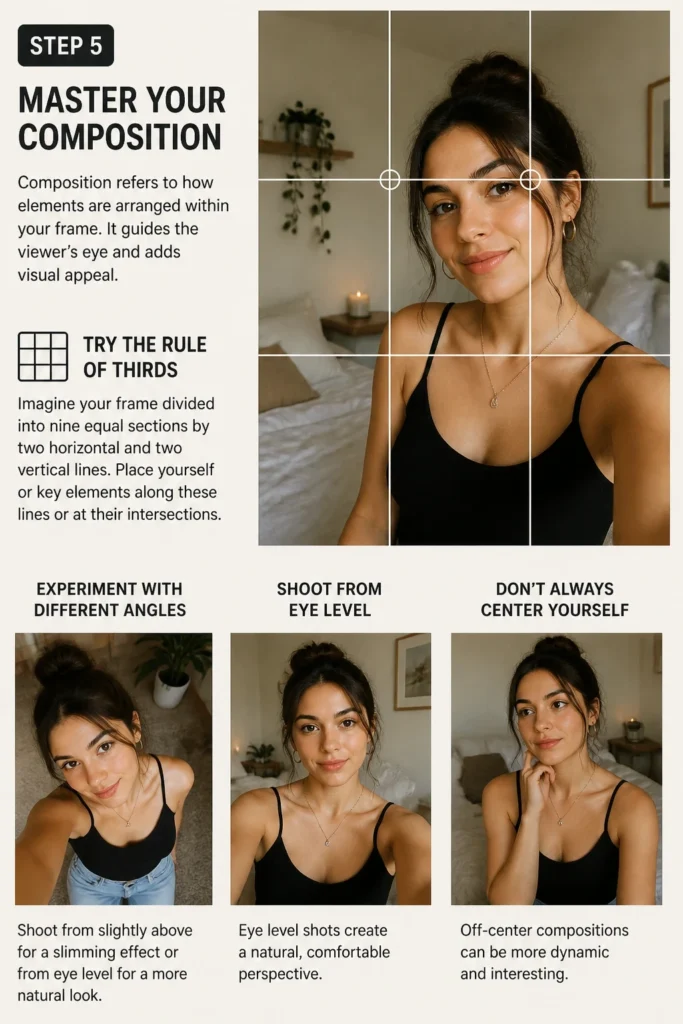
Try the “rule of thirds”: imagine your frame divided into nine equal sections by two horizontal and two vertical lines. Place yourself or key elements along these lines or at their intersections.
Experiment with different angles. Shoot from slightly above for a slimming effect or from eye level for a more natural look.
Don’t always center yourself. Off-center compositions can be more dynamic and interesting.
Step 6: Experiment with Poses and Expressions
This is where you bring your vision to life. Don’t be afraid to move and try different things.
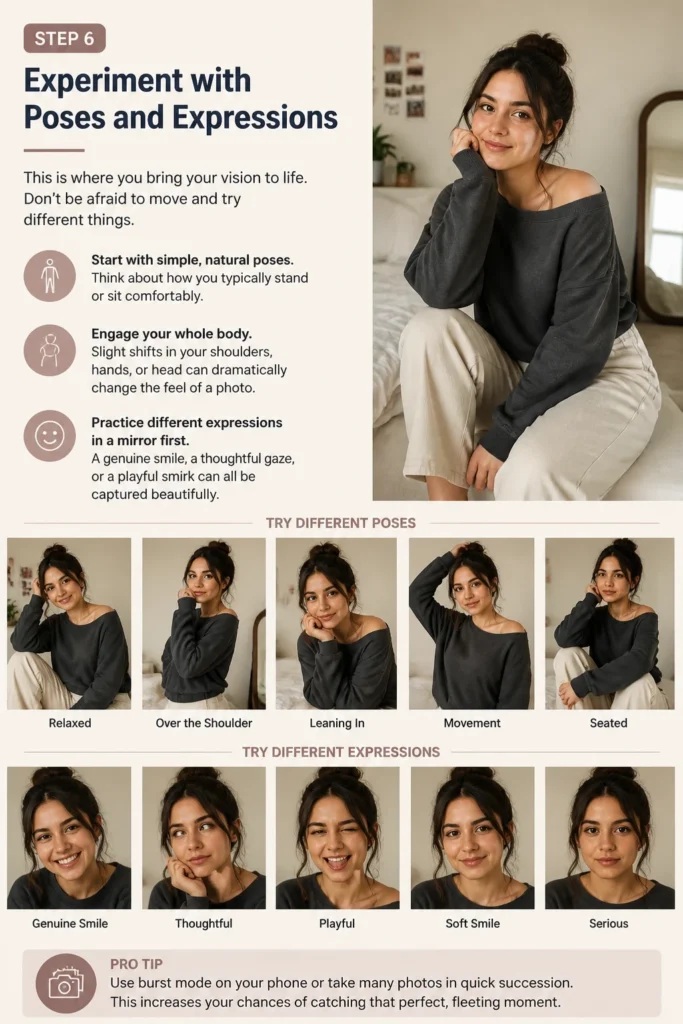
Start with simple, natural poses. Think about how you typically stand or sit comfortably. Then, make small adjustments.
Engage your whole body. Slight shifts in your shoulders, hands, or head can dramatically change the feel of a photo.
Practice different expressions in a mirror first. A genuine smile, a thoughtful gaze, or a playful smirk can all be captured beautifully.
Pro Tip: Use burst mode on your phone or take many photos in quick succession. This increases your chances of catching that perfect, fleeting moment.
Step 7: Focus and Take the Shot
Before pressing the shutter, ensure your camera is focused on your face or eyes. Most smartphones allow you to tap on the screen to set the focus point.
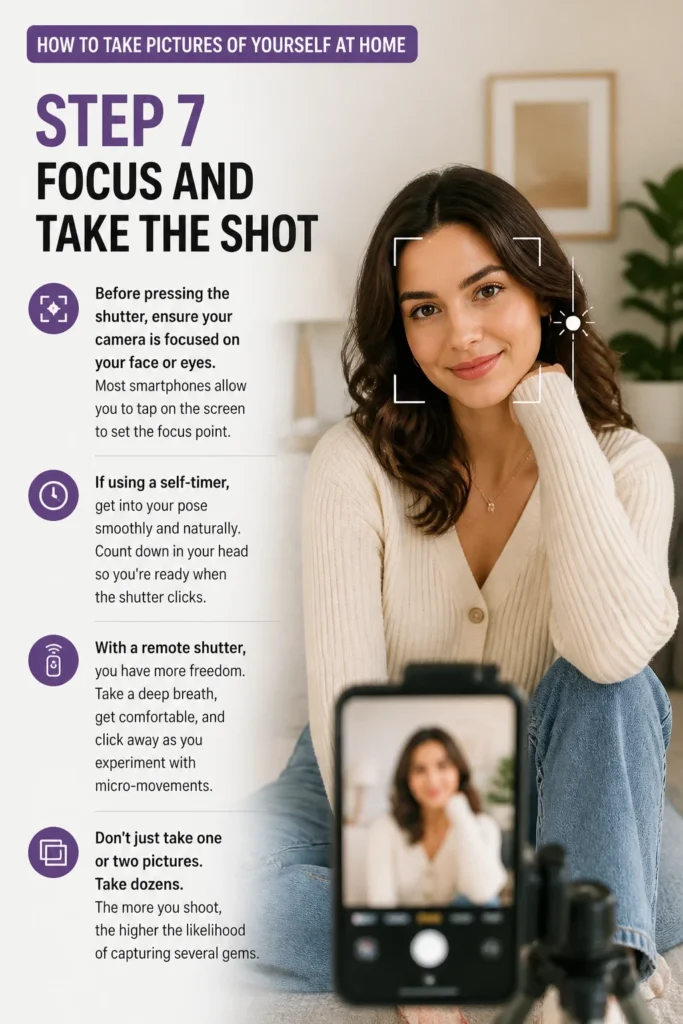
If using a self-timer, get into your pose smoothly and naturally. Count down in your head so you’re ready when the shutter clicks.
With a remote shutter, you have more freedom. Take a deep breath, get comfortable, and click away as you experiment with micro-movements.
Don’t just take one or two pictures. Take dozens. The more you shoot, the higher the likelihood of capturing several gems.
Step 8: Edit and Refine Your Photos
Editing is the final step where you enhance your best shots. You don’t need expensive software; your phone’s built-in editor or free apps like Snapseed or Lightroom Mobile work wonders.
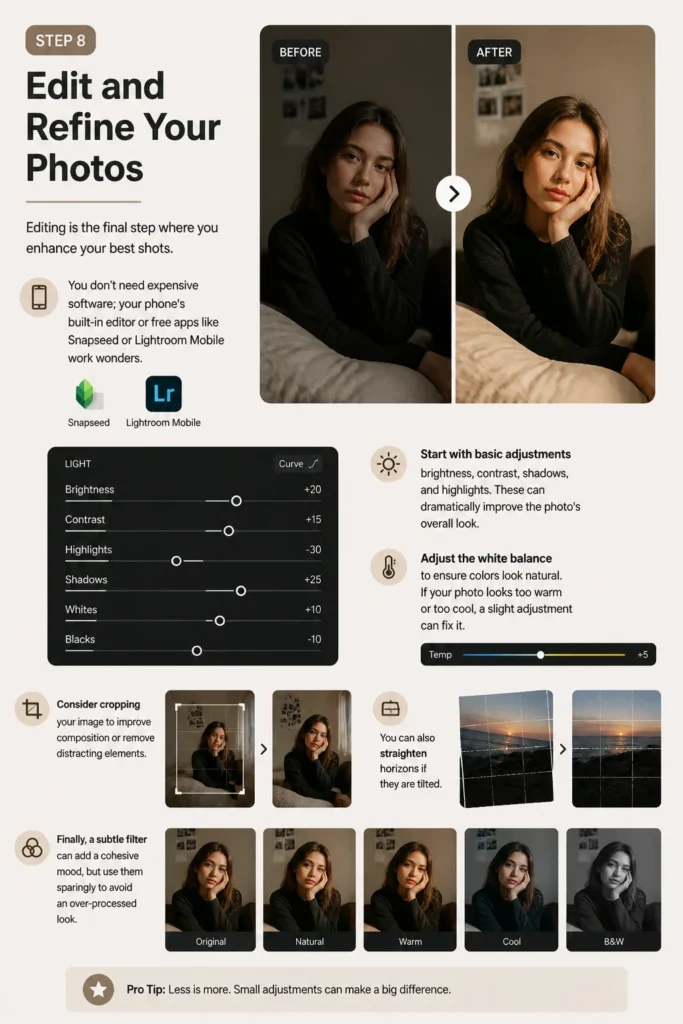
Start with basic adjustments: brightness, contrast, shadows, and highlights. These can dramatically improve the photo’s overall look.
Adjust the white balance to ensure colors look natural. If your photo looks too warm or too cool, a slight adjustment can fix it.
Consider cropping your image to improve composition or remove distracting elements. You can also straighten horizons if they are tilted.
Finally, a subtle filter can add a cohesive mood, but use them sparingly to avoid an over-processed look.
Common Mistakes to Avoid
Poor Lighting
Many people try to take photos in dimly lit rooms or with harsh overhead lights. This results in grainy, unflattering images with heavy shadows.
Always prioritize natural window light. Position yourself so the light hits your face evenly. If natural light isn’t enough, consider a soft lamp or ring light positioned strategically.
Cluttered Backgrounds
A messy bed, a pile of clothes, or a busy bookshelf can steal attention from you, the subject. The viewer’s eye will wander, and the photo will lose its impact.
Take a moment to tidy your space or choose a plain, uncluttered wall. Simplicity often works best for self-portraits, allowing you to be the focal point.
Awkward or Stiff Poses
Feeling self-conscious can lead to stiff shoulders, forced smiles, or unnatural body language. This translates into photos that look uncomfortable and unauthentic.
Relax, breathe, and move. Play some music that puts you in a good mood. Experiment with small, fluid movements. Think about how you naturally interact with your environment.
Ignoring Focus and Sharpness
Nothing ruins a good photo faster than being out of focus. Blurry images, especially when your face isn’t sharp, are often discarded.
Always tap your screen to focus on your eyes or face before using the self-timer or remote. If using a camera, ensure autofocus is set correctly or use manual focus if you’re comfortable.
Troubleshooting
My Photos Are Too Dark or Too Bright
This is usually a lighting issue or incorrect exposure settings. If photos are too dark, you might be backlit (light source behind you) or your room is too dim.
Solution: Move closer to a window, turn to face the light source, or open curtains wider. On your phone, tap the screen to focus, then slide your finger up or down to adjust brightness before shooting. If too bright, you might have too much direct sunlight; try moving slightly away from the window or using a sheer curtain to diffuse the light.
My Pictures Are Blurry
Blurriness can come from camera shake, incorrect focus, or movement during the shot.
Solution: Always use a tripod or a very stable surface. Ensure you tap to focus on your face before taking the picture. If using a self-timer, try to hold still for the final second of the countdown. If you’re moving, consider a faster shutter speed if your camera allows, or take multiple shots in burst mode.
I Feel Unnatural or Awkward Posing
It’s common to feel a bit self-conscious at first. This often shows in stiff poses and forced expressions.
Solution: Don’t overthink it. Put on some music that makes you feel good. Start by simply standing or sitting comfortably. Experiment with small movements: shift your weight, turn your head slightly, try different hand placements. Look away from the camera sometimes. The more you practice, the more natural you’ll become.
Key Takeaways
- Prioritize good natural light from a window for flattering results.
- Always use a stable setup, like a tripod, to avoid blurry photos.
- Compose your shots carefully, paying attention to the background and the rule of thirds.
- Experiment freely with poses, expressions, and angles to find what works best for you.
- Take many photos and use a self-timer or remote shutter for convenience.
- Refine your best images with basic editing to enhance their appeal.
Frequently Asked Questions
What’s the best time of day to take photos at home?
The best time is usually when natural light is soft and abundant, often mid-morning or late afternoon. Avoid harsh midday sun directly through a window unless it’s diffused by sheer curtains. Experiment with your specific windows to find your home’s “sweet spot” for light.
How can I pose more naturally?
Forget about “perfect” poses. Instead, focus on comfort and slight movement. Play music, look away from the camera, try interacting with a prop like a cup or book, or simply shift your weight. Authenticity comes from relaxation, so try to enjoy the process.
What if I don’t have a tripod?
No tripod? No problem! Stack books, use a sturdy chair, or place your phone on a shelf or windowsill. Just ensure your camera is stable, level, and won’t fall. You might need to get creative with your height adjustments.
Should I use my phone’s front or back camera?
Always use your phone’s back camera if possible. It has a higher resolution and better image quality than the front-facing camera. Use the self-timer or a remote shutter, and do test shots to check your framing.
Our Top Recommended Finds
- Smartphone Tripod with Remote: Essential for stability and hands-free shooting, often comes with a Bluetooth remote.
- Small Ring Light: Great for adding fill light, especially if natural light is insufficient, providing soft, even illumination.
- Sheer Curtains: Excellent for diffusing harsh sunlight, creating a soft, dreamy light source even on bright days.
Step Into Your Spotlight
You now have all the tools and knowledge to start capturing amazing photos of yourself right at home.
The most important thing is to have fun with it. Don’t be afraid to experiment, make mistakes, and discover your unique style.
Every photo you take is a chance to express yourself and build your confidence. So, grab your camera, find your light, and start creating something beautiful today!
& Painting
No rigid rules or pretension. Just practical guides, medium comparisons, and encouraging tips to help you enjoy the drawing & painting process.