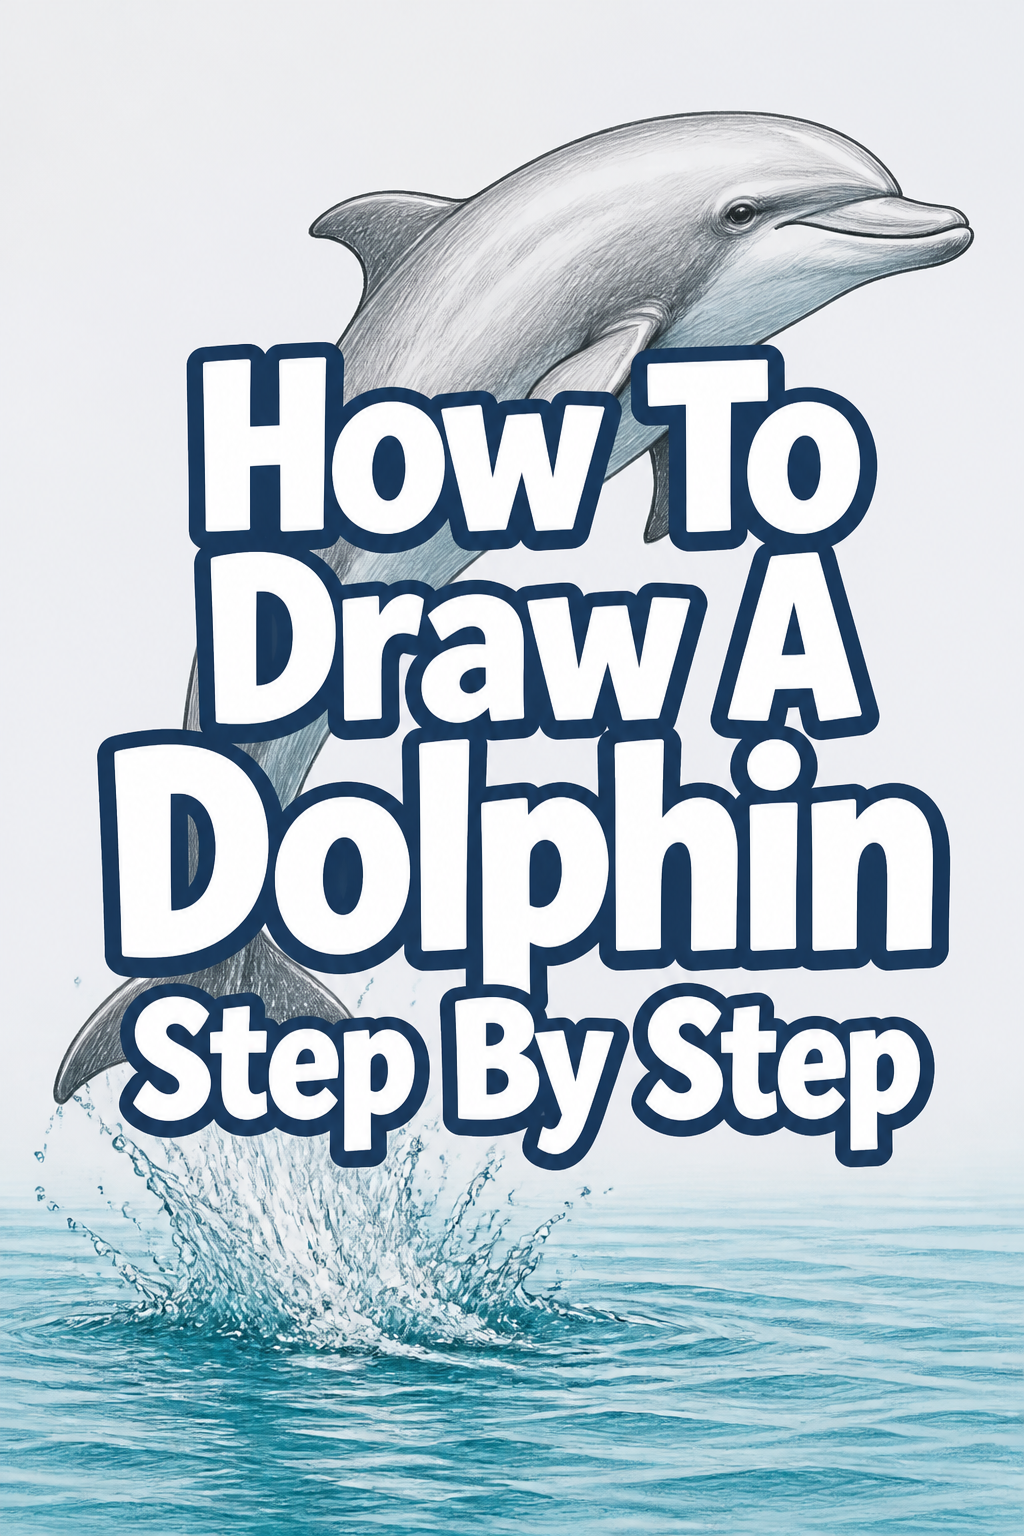
🐬 How To Draw A Dolphin Step By Step

& Painting
No rigid rules or pretension. Just practical guides, medium comparisons, and encouraging tips to help you enjoy the drawing & painting process.
Drawing a dolphin might seem like a complex task at first glance.
I remember my own early attempts, often ending up with something more fish-like than fluid.
This guide will walk you through creating a graceful dolphin, drawing on years of sketching experience to simplify the process for you.
Quick Overview
You’re about to create a beautiful dolphin drawing from scratch. We’ll build it up using simple shapes and refine details gradually.
- Time needed: 30-60 minutes (depending on detail)
- Difficulty: Beginner to Intermediate
- What you’ll need: Pencil, eraser, paper, (optional) fine-liner, colored pencils/markers
Step-by-Step Instructions
Step 1: Lay Down the Basic Shapes for the Body
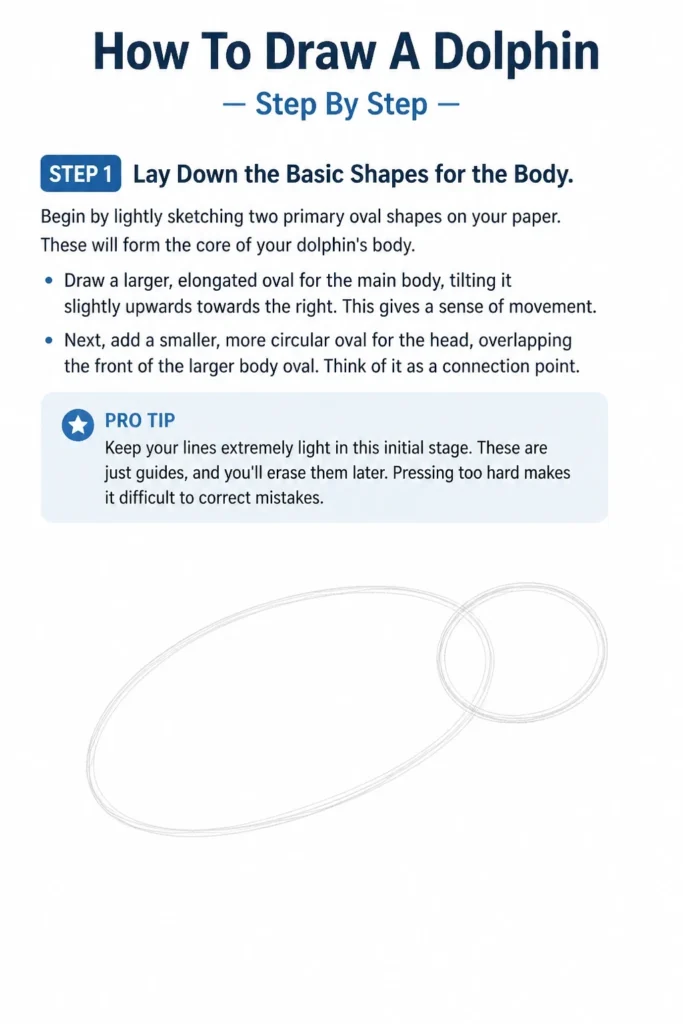
Begin by lightly sketching two primary oval shapes on your paper. These will form the core of your dolphin’s body.
Draw a larger, elongated oval for the main body, tilting it slightly upwards towards the right. This gives a sense of movement.
Next, add a smaller, more circular oval for the head, overlapping the front of the larger body oval. Think of it as a connection point.
Pro Tip: Keep your lines extremely light in this initial stage. These are just guides, and you’ll erase them later. Pressing too hard makes it difficult to correct mistakes.
Step 2: Connect the Head and Body
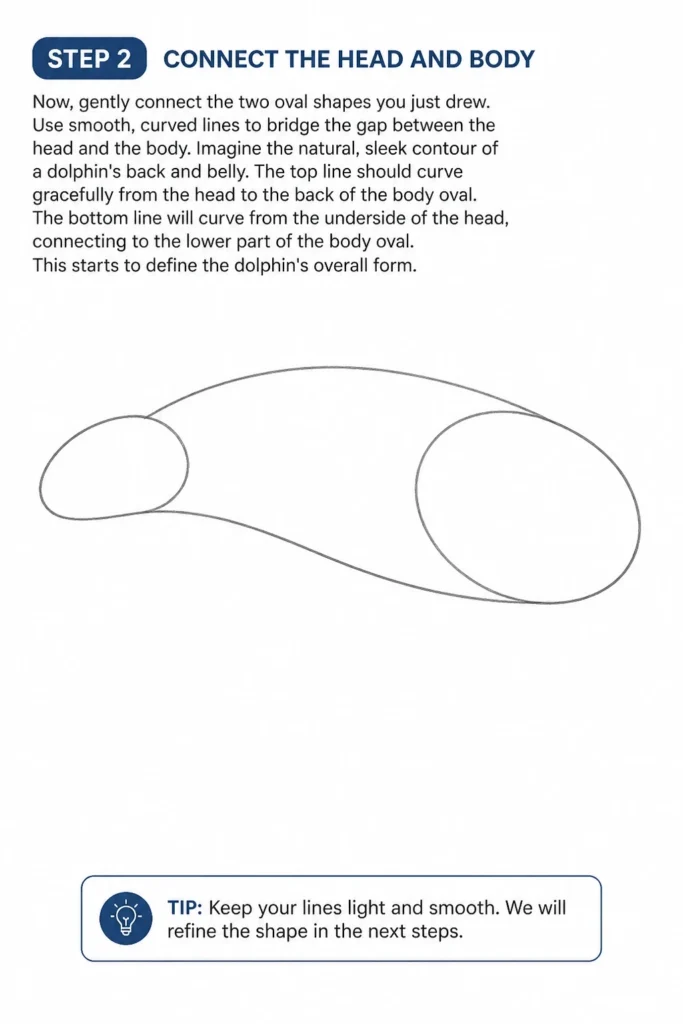
Now, gently connect the two oval shapes you just drew. Use smooth, curved lines to bridge the gap between the head and the body.
Imagine the natural, sleek contour of a dolphin’s back and belly. The top line should curve gracefully from the head to the back of the body oval.
The bottom line will curve from the underside of the head, connecting to the lower part of the body oval. This starts to define the dolphin’s overall form.
Step 3: Sketch the Snout and Tail Fluke Base
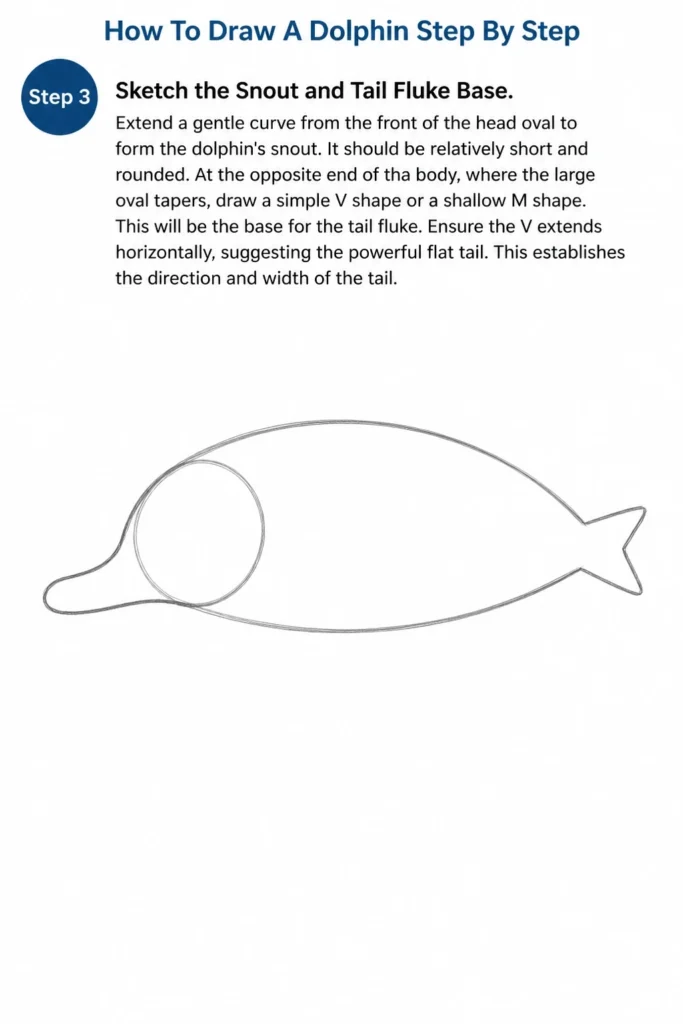
Extend a gentle curve from the front of the head oval to form the dolphin’s snout. It should be relatively short and rounded.
At the opposite end of the body, where the large oval tapers, draw a simple “V” shape or a shallow “M” shape. This will be the base for the tail fluke.
Ensure the “V” extends horizontally, suggesting the powerful flat tail. This establishes the direction and width of the tail.
Step 4: Add the Fins (Dorsal and Pectoral)
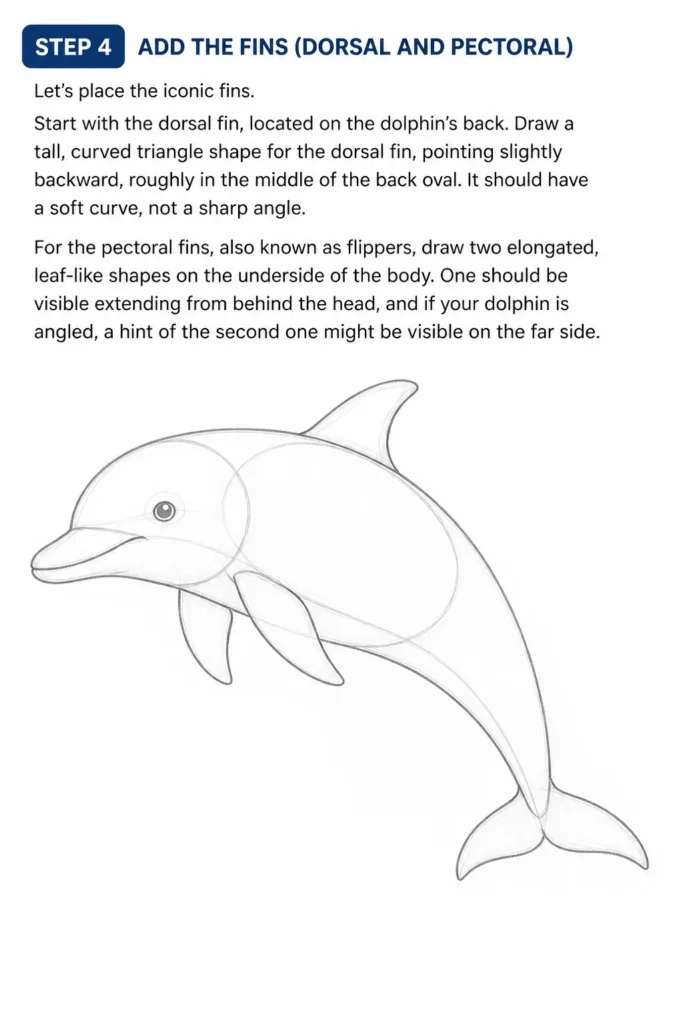
Let’s place the iconic fins. Start with the dorsal fin, located on the dolphin’s back.
Draw a tall, curved triangle shape for the dorsal fin, pointing slightly backward, roughly in the middle of the back oval. It should have a soft curve, not a sharp angle.
For the pectoral fins, also known as flippers, draw two elongated, leaf-like shapes on the underside of the body. One should be visible extending from behind the head, and if your dolphin is angled, a hint of the second one might be visible on the far side.
Step 5: Refine the Outline and Smooth Curves
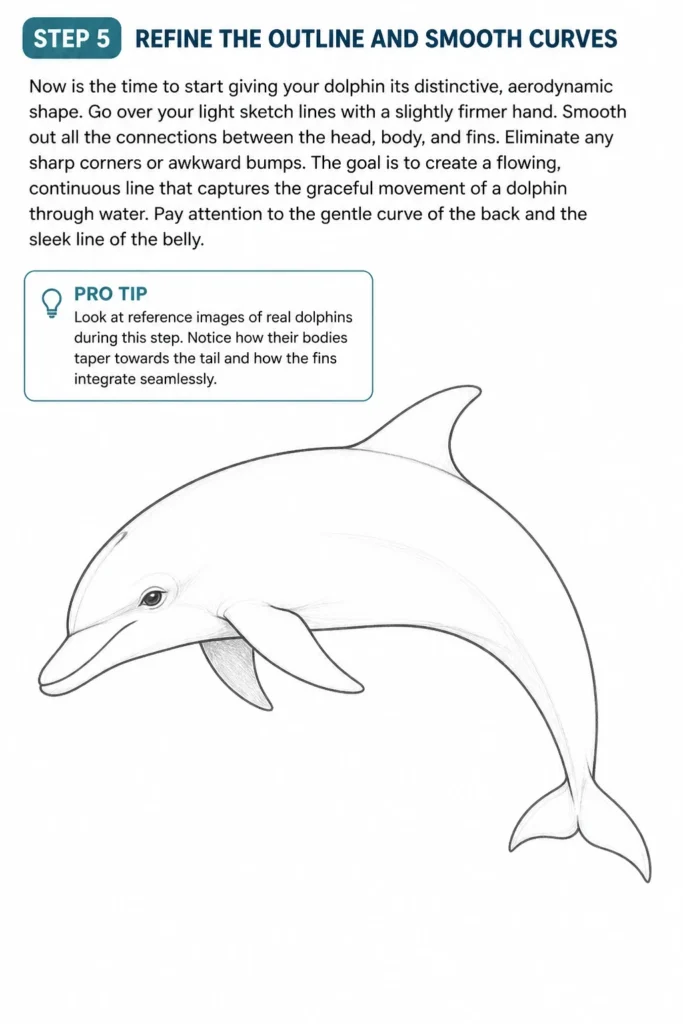
Now is the time to start giving your dolphin its distinctive, aerodynamic shape. Go over your light sketch lines with a slightly firmer hand.
Smooth out all the connections between the head, body, and fins. Eliminate any sharp corners or awkward bumps.
The goal is to create a flowing, continuous line that captures the graceful movement of a dolphin through water. Pay attention to the gentle curve of the back and the sleek line of the belly.
Pro Tip: Look at reference images of real dolphins during this step. Notice how their bodies taper towards the tail and how the fins integrate seamlessly.
Step 6: Detail the Eye and Blowhole
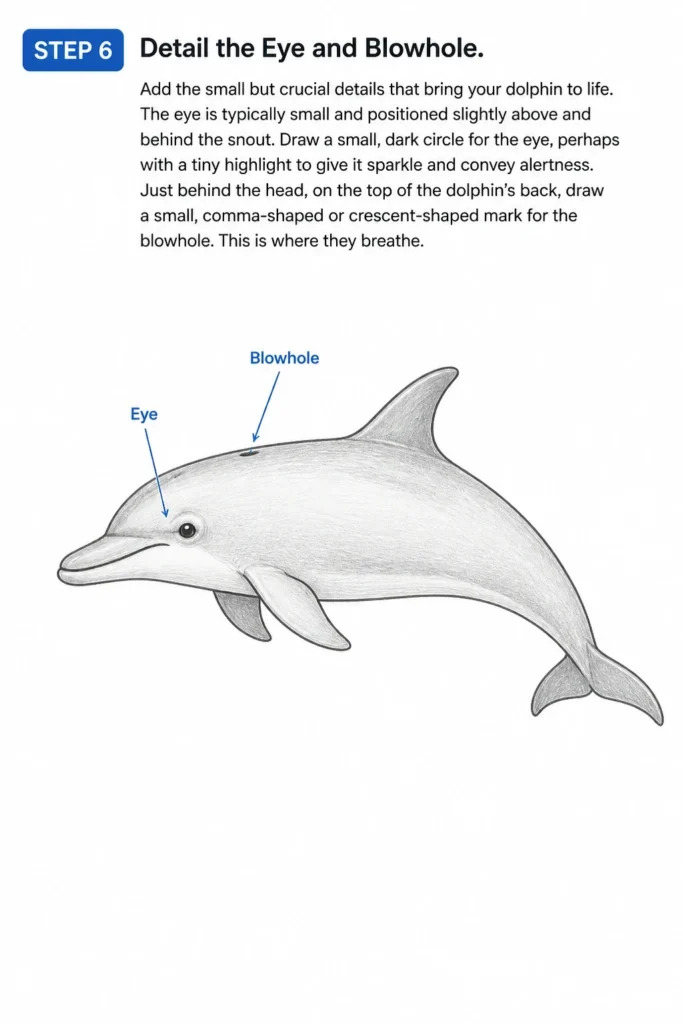
Add the small but crucial details that bring your dolphin to life. The eye is typically small and positioned slightly above and behind the snout.
Draw a small, dark circle for the eye, perhaps with a tiny highlight to give it sparkle. It should convey alertness.
Just behind the head, on the top of the dolphin’s back, draw a small, comma-shaped or crescent-shaped mark for the blowhole. This is where they breathe.
Step 7: Erase Construction Lines and Clean Up
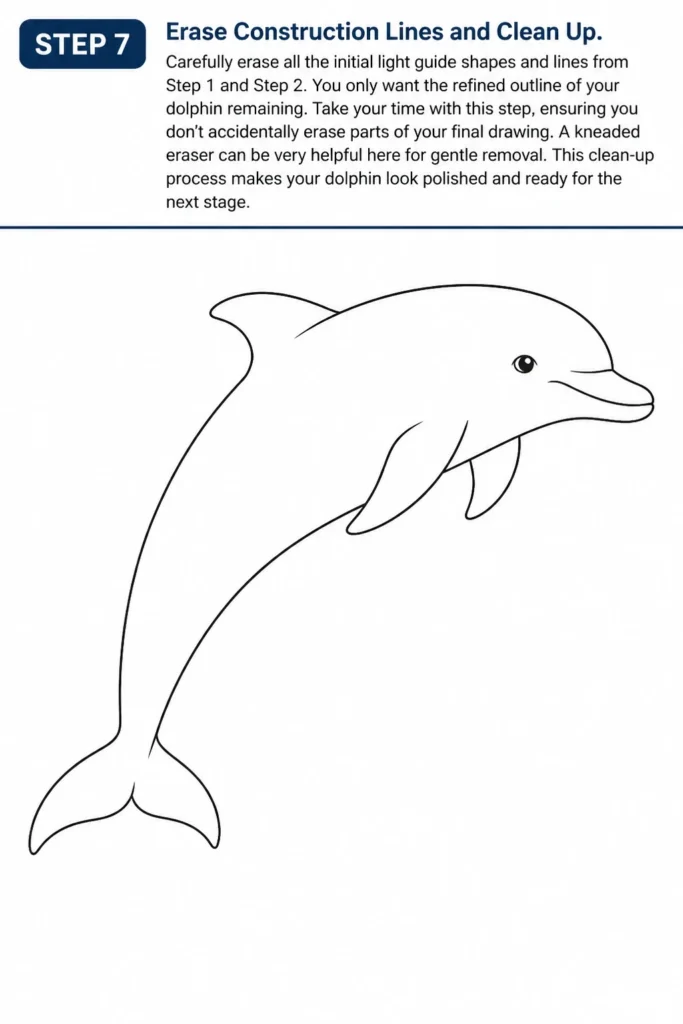
Carefully erase all the initial light guide shapes and lines from Step 1 and Step 2. You only want the refined outline of your dolphin remaining.
Take your time with this step, ensuring you don’t accidentally erase parts of your final drawing. A kneaded eraser can be very helpful here for gentle removal.
This clean-up process makes your dolphin look polished and ready for the next stage.
Step 8: Add Shading and Texture (Optional)
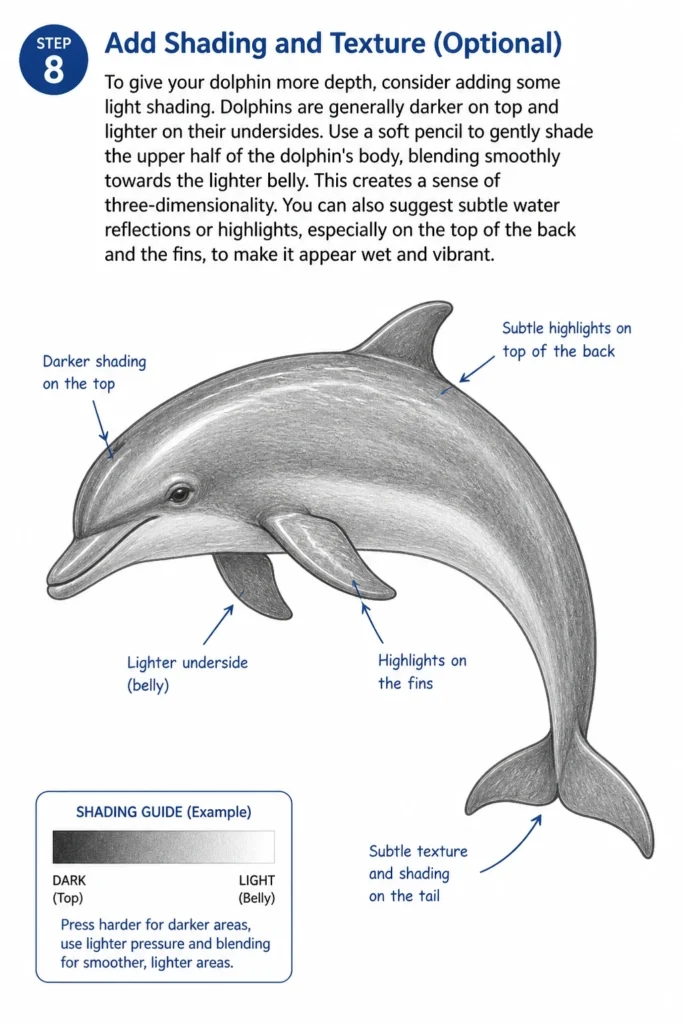
To give your dolphin more depth, consider adding some light shading. Dolphins are generally darker on top and lighter on their undersides.
Use a soft pencil to gently shade the upper half of the dolphin’s body, blending smoothly towards the lighter belly. This creates a sense of three-dimensionality.
You can also suggest subtle water reflections or highlights, especially on the top of the back and the fins, to make it appear wet and vibrant.
Common Mistakes to Avoid
Making the Body Too Stiff or Angular
A common pitfall is drawing the dolphin with straight lines or sharp corners. Dolphins are incredibly sleek and curvilinear creatures. Their bodies are designed for fluid motion through water. Always prioritize smooth, continuous curves over straight or angular segments. Think of graceful arcs rather than rigid shapes.
Incorrect Fin Placement or Proportions
Sometimes, artists place the dorsal fin too far forward or backward, or make the pectoral fins too large or too small. The dorsal fin is typically around the middle of the back, and pectoral fins are relatively small compared to the body. Referencing real dolphin anatomy helps ensure your fins are in the correct position and size for a believable look.
Drawing the Snout Too Long or Pointy
Dolphins have a distinct, relatively short, and often rounded snout, not a long, pointed nose like some fish. An overly long or sharp snout can make your dolphin look more like an alligator or a different marine creature. Keep the snout compact and gently rounded to maintain that characteristic dolphin profile.
Ignoring the Sense of Movement
A static, flat-looking dolphin loses much of its charm. Dolphins are always in motion, even when resting. Try to incorporate a subtle curve or twist in the body from the beginning, perhaps by tilting the initial ovals. This adds dynamism and makes your drawing feel alive, as if the dolphin is gliding through water.
Troubleshooting
My Dolphin Looks Flat and Lifeless
If your drawing lacks dimension, it’s likely due to a lack of varying line weight or shading. Try going over your main outlines with a slightly darker pencil to make them stand out. Introduce subtle shading, making the top of the dolphin darker than the belly. This contrast creates an illusion of form and depth, making it pop off the page.
I Can’t Get the Curves Right; They Look Jagged
This is a common issue for beginners. Practice drawing long, sweeping curves with your whole arm, not just your wrist. Start with very light lines and don’t be afraid to draw multiple overlapping curves until you find the perfect one. Then, commit to that line with a slightly firmer stroke and erase the others. Patience and light pressure are key.
The Fins Don’t Look Natural
Fins can be tricky. Often, they look unnatural because they are too symmetrical or too stiff. Remember that fins have a slight curve and taper to them. The dorsal fin usually curves backward, and the pectoral fins are often slightly pointed but rounded. Observe reference photos closely to understand their organic shapes and how they attach to the body.
Key Takeaways
- Start with light, basic oval shapes to establish the dolphin’s core structure.
- Connect these initial shapes with smooth, flowing curves to capture the dolphin’s sleek form.
- Pay attention to the natural proportions and placement of the fins, snout, and tail fluke.
- Refine your lines gradually, erasing construction marks to reveal the final outline.
- Add small details like the eye and blowhole to bring your dolphin to life.
- Use subtle shading to create depth and a sense of three-dimensionality.
Frequently Asked Questions
What kind of pencil should I use for drawing a dolphin?
A standard HB pencil is excellent for initial sketching and general drawing. For lighter lines, you can use a 2H or 4H pencil, and for darker lines and shading, a 2B or 4B pencil works well. Having a range allows for more dynamic shading.
How can I make my dolphin look like it’s swimming?
To convey movement, incorporate a slight curve or arch into the dolphin’s body from the very first step. Imagine it arcing through the water. You can also add subtle lines around the tail fluke or fins to suggest motion trails, or draw it leaping out of the water.
Should I draw the dolphin’s blowhole?
Yes, including the blowhole is a great detail that adds to the anatomical correctness and realism of your dolphin. It’s a small, comma-shaped opening on the top of its head, just behind the eyes. It doesn’t need to be prominent, but its presence is important.
How do I make the dolphin look realistic?
Realism comes from accurate proportions, smooth curves, and effective shading. Observe real dolphin photographs to understand their anatomy, muscle structure, and how light interacts with their skin. Subtle variations in line weight and blending shades of grey can significantly enhance realism.
Our Top Recommended Finds
- Sketchbook with Quality Paper: A good sketchbook prevents bleed-through and holds pencil marks well, making your art look its best.
- Set of Graphite Pencils (HB, 2B, 4B): This range allows you to create light construction lines, detailed outlines, and rich shading for depth.
- Kneaded Eraser: Perfect for gently lifting pencil marks without damaging the paper, essential for cleaning up guide lines.
Your Next Artistic Dive
You’ve just created a beautiful dolphin, capturing its elegance and grace. This skill opens up a world of possibilities for drawing other marine life or even fantastical creatures.
Why not try drawing your dolphin in a dynamic pose, perhaps leaping from the water or swimming with a companion? Experiment with different shading techniques or even add a vibrant underwater background. The ocean is full of inspiration. Take your new skills and create something truly amazing today.
& Painting
No rigid rules or pretension. Just practical guides, medium comparisons, and encouraging tips to help you enjoy the drawing & painting process.