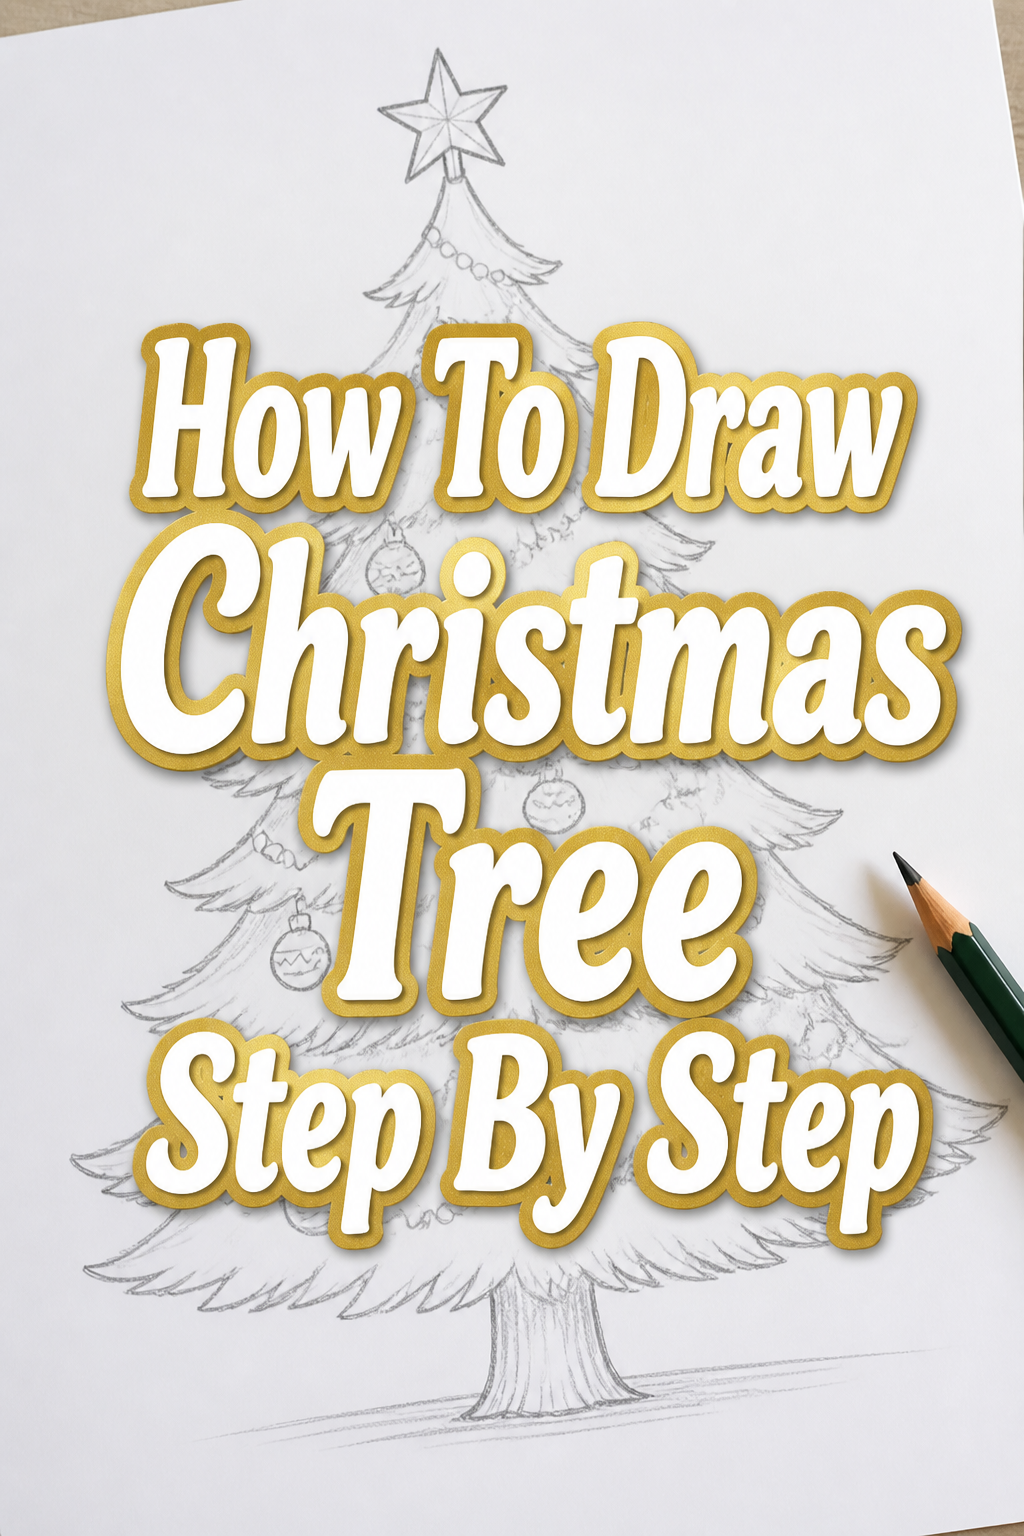
🎄 How To Draw Christmas Tree Step By Step

& Painting
No rigid rules or pretension. Just practical guides, medium comparisons, and encouraging tips to help you enjoy the drawing & painting process.
There’s a special magic in creating something with your own hands.
I remember my first attempt at drawing a Christmas tree, a wonky but beloved creation.
This guide shares the simple techniques I’ve refined over the years to help you draw one too, no matter your skill level.
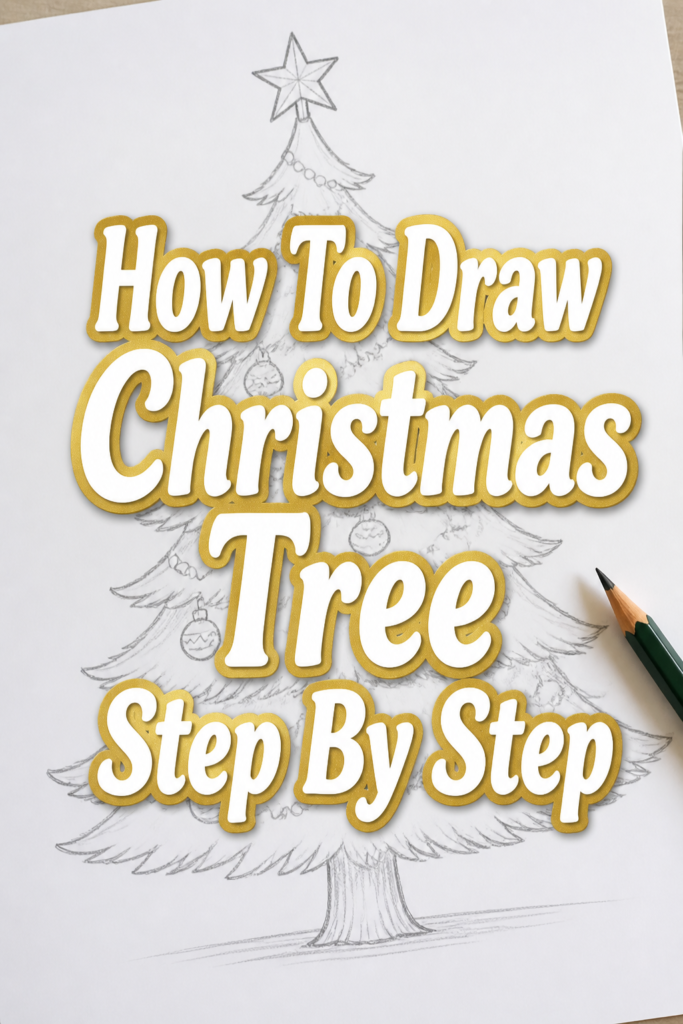
Quick Overview
You’re about to embark on a fun, creative journey.
By the end of this guide, you’ll have a charming hand-drawn Christmas tree ready for your personal touch.
- Time needed: 20-45 minutes (depending on detail)
- Difficulty: Beginner
- What you’ll need: Pencil, eraser, paper, optional coloring supplies
Step-by-Step Instructions
Step 1: Sketch the Basic Guide Lines
Every great drawing begins with a solid foundation.
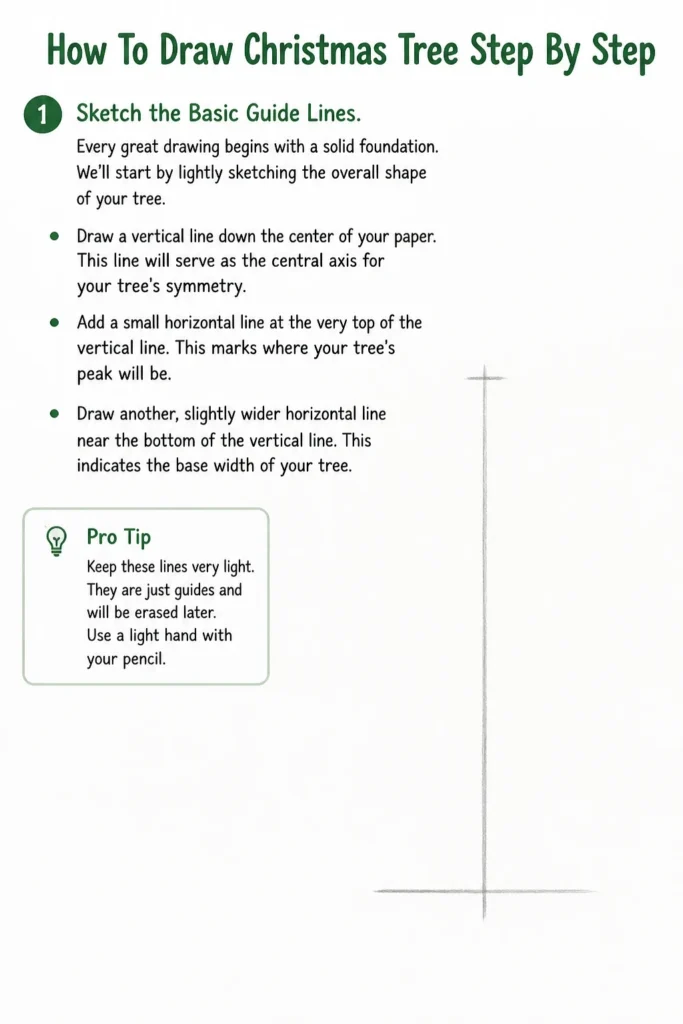
We’ll start by lightly sketching the overall shape of your tree.
Draw a vertical line down the center of your paper.
This line will serve as the central axis for your tree’s symmetry.
Add a small horizontal line at the very top of the vertical line.
This marks where your tree’s peak will be.
Draw another, slightly wider horizontal line near the bottom of the vertical line.
This indicates the base width of your tree.
Pro Tip: Keep these lines very light. They are just guides and will be erased later. Use a light hand with your pencil.
Step 2: Outline the Cone Shape
Now, let’s give our tree its classic conical form.
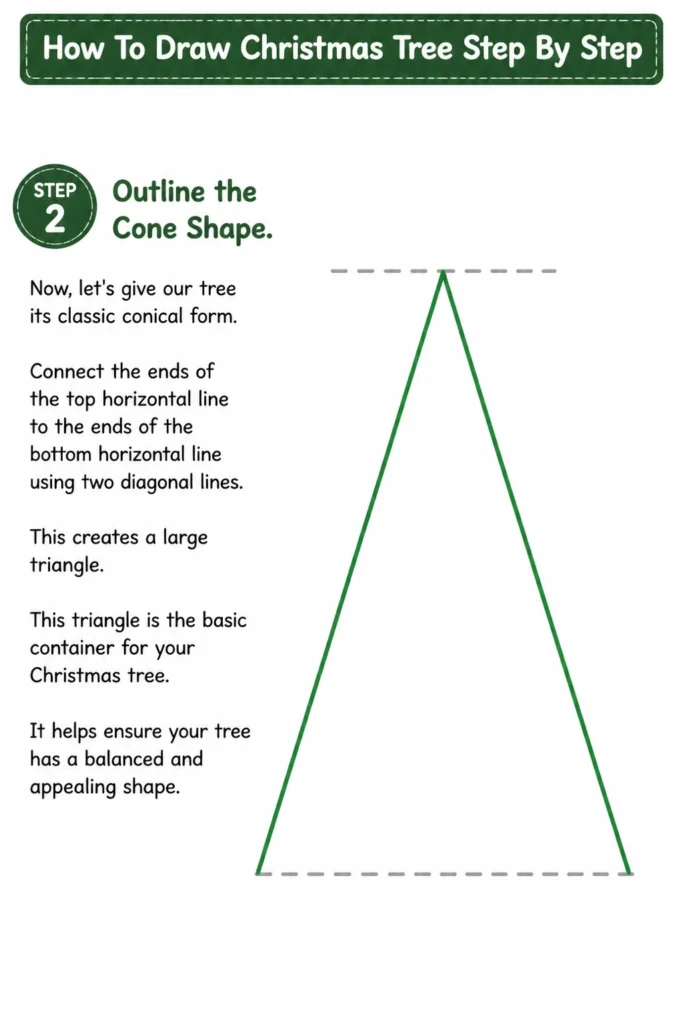
Connect the ends of the top horizontal line to the ends of the bottom horizontal line using two diagonal lines.
This creates a large triangle.
This triangle is the basic container for your Christmas tree.
It helps ensure your tree has a balanced and appealing shape.
Step 3: Define the Tree’s Layers
Christmas trees aren’t perfectly smooth triangles; they have distinct tiers of branches.
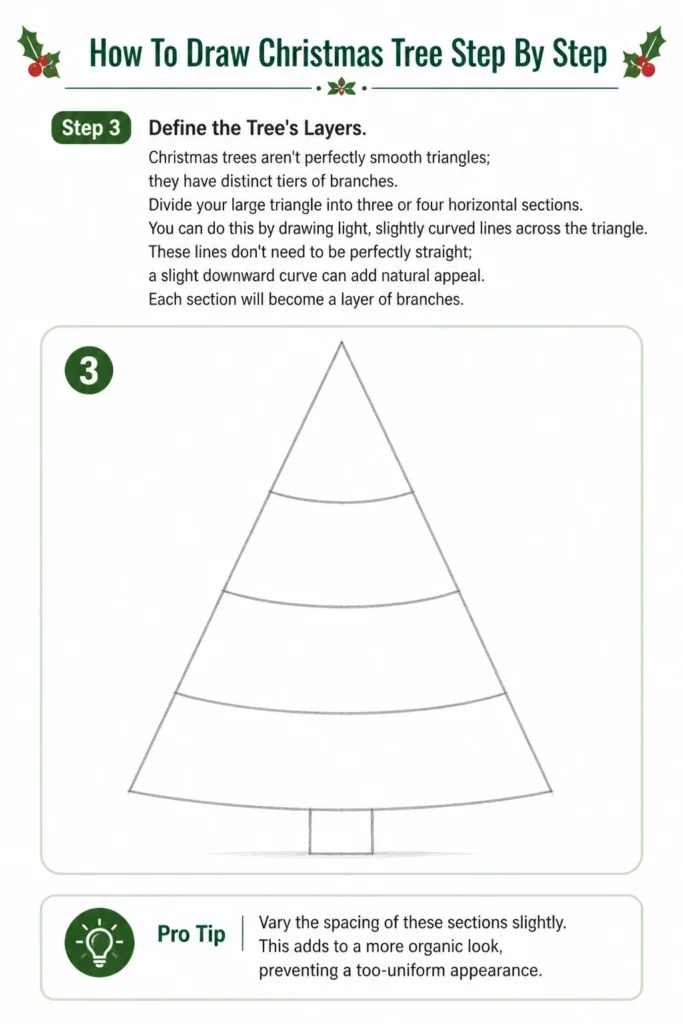
Divide your large triangle into three or four horizontal sections.
You can do this by drawing light, slightly curved lines across the triangle.
These lines don’t need to be perfectly straight; a slight downward curve can add natural appeal.
Each section will become a layer of branches.
Pro Tip: Vary the spacing of these sections slightly. This adds to a more organic look, preventing a too-uniform appearance.
Step 4: Sketch the Branch Outlines
Now, let’s give the tree its iconic jagged edges.
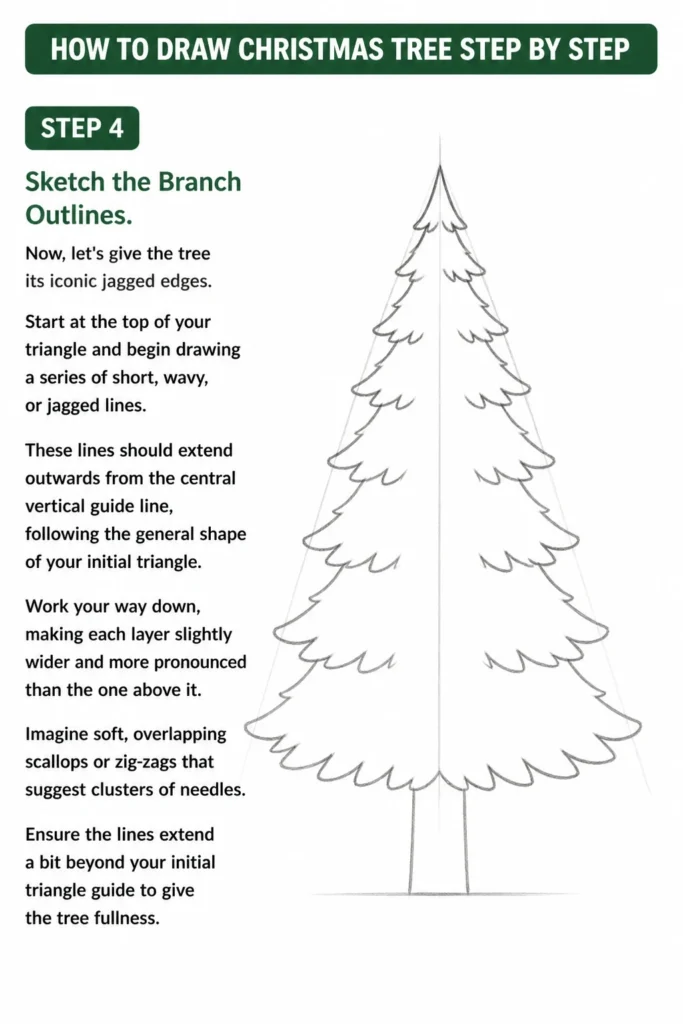
Start at the top of your triangle and begin drawing a series of short, wavy, or jagged lines.
These lines should extend outwards from the central vertical guide line, following the general shape of your initial triangle.
Work your way down, making each layer slightly wider and more pronounced than the one above it.
Imagine soft, overlapping scallops or zig-zags that suggest clusters of needles.
Ensure the lines extend a bit beyond your initial triangle guide to give the tree fullness.
Step 5: Add the Tree Trunk
No tree is complete without its sturdy base.
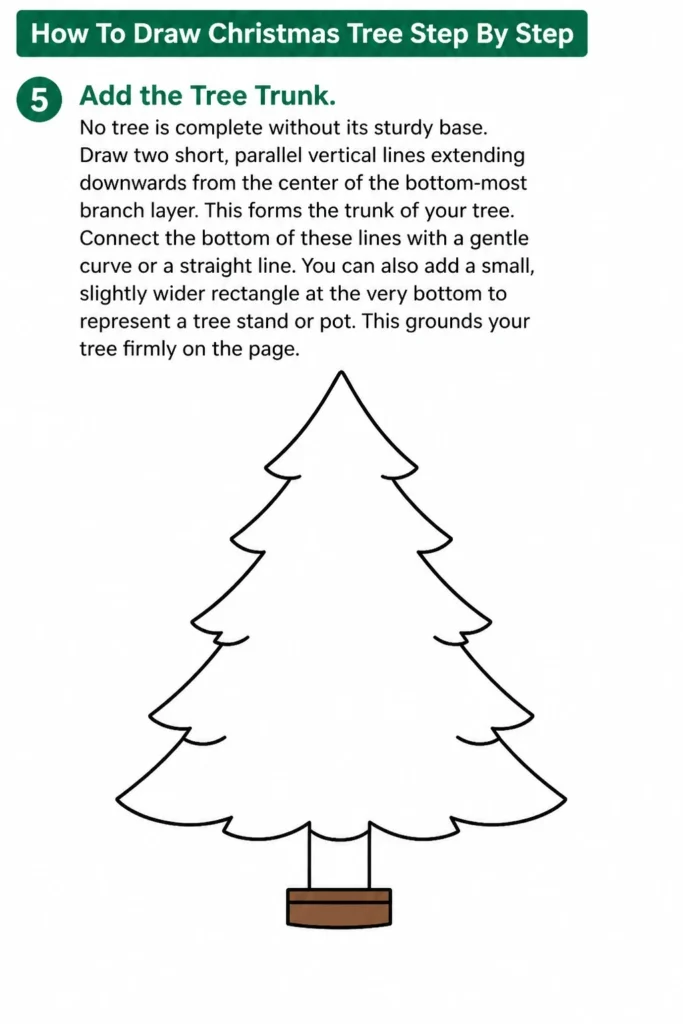
Draw two short, parallel vertical lines extending downwards from the center of the bottom-most branch layer.
This forms the trunk of your tree.
Connect the bottom of these lines with a gentle curve or a straight line.
You can also add a small, slightly wider rectangle at the very bottom to represent a tree stand or pot.
This grounds your tree firmly on the page.
Step 6: Refine and Erase Guide Lines
It’s time to make your tree look clean and finished.
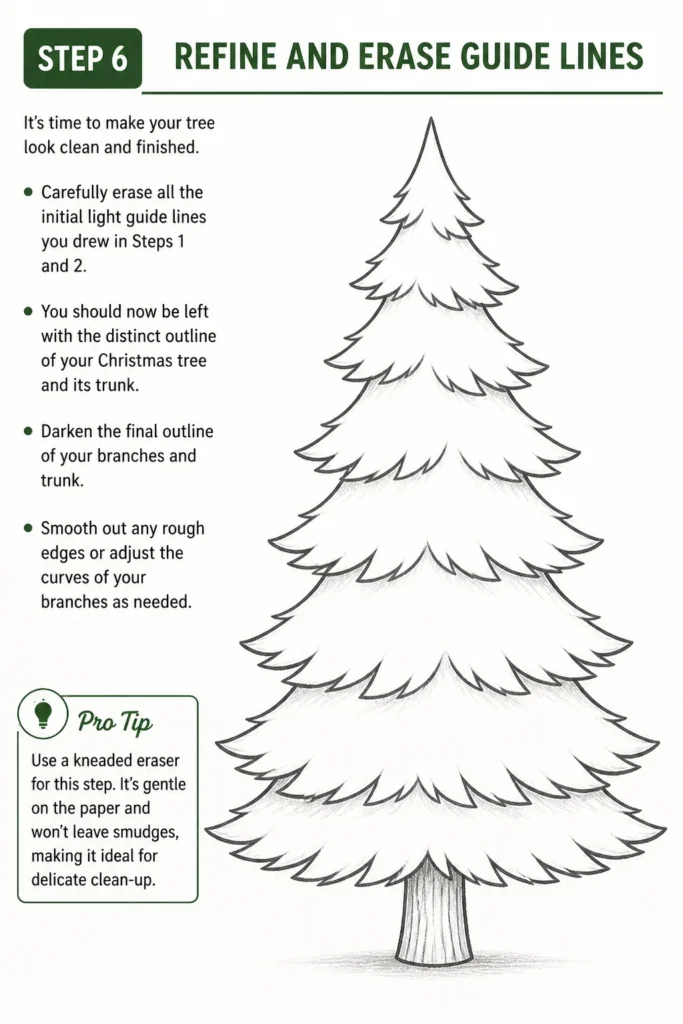
Carefully erase all the initial light guide lines you drew in Steps 1 and 2.
You should now be left with the distinct outline of your Christmas tree and its trunk.
Darken the final outline of your branches and trunk.
Smooth out any rough edges or adjust the curves of your branches as needed.
Pro Tip: Use a kneaded eraser for this step. It’s gentle on the paper and won’t leave smudges, making it ideal for delicate clean-up.
Step 7: Add Details and Ornaments
This is where your tree truly comes to life with festive cheer.
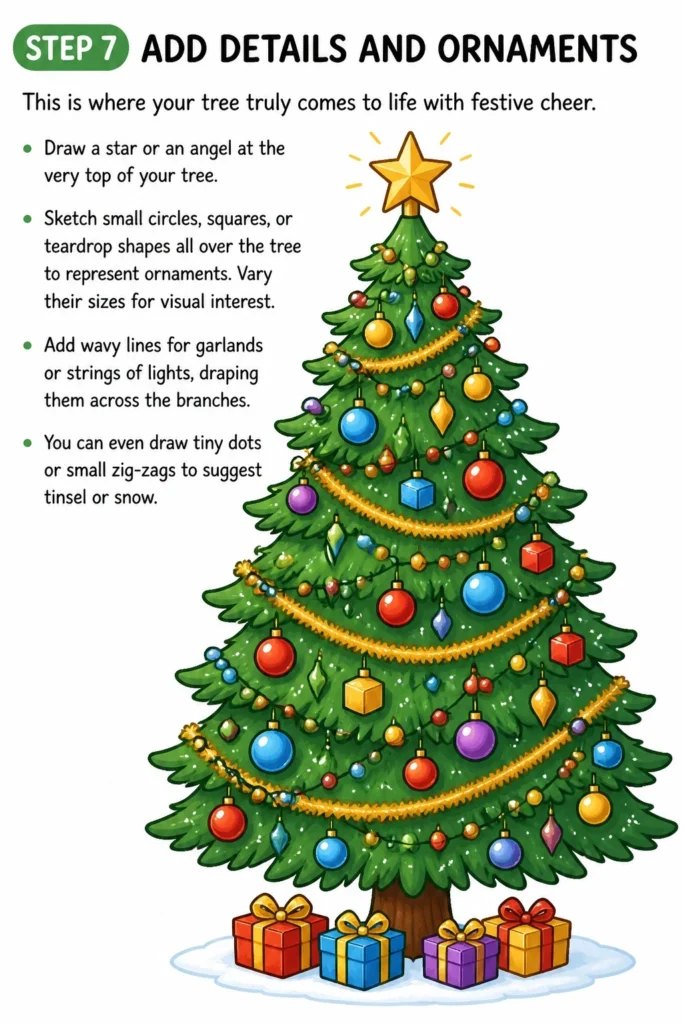
Draw a star or an angel at the very top of your tree.
Sketch small circles, squares, or teardrop shapes all over the tree to represent ornaments.
Vary their sizes for visual interest.
Add wavy lines for garlands or strings of lights, draping them across the branches.
You can even draw tiny dots or small zig-zags to suggest tinsel or snow.
Step 8: Shade or Color Your Tree
Bring depth and vibrancy to your drawing.
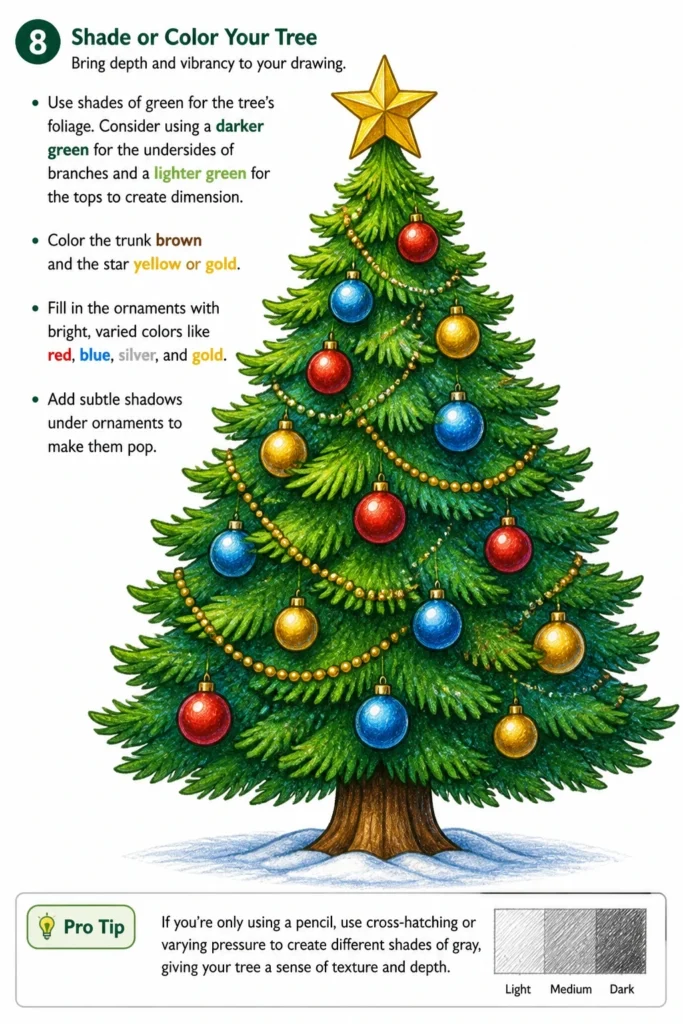
Use shades of green for the tree’s foliage.
Consider using a darker green for the undersides of branches and a lighter green for the tops to create dimension.
Color the trunk brown and the star yellow or gold.
Fill in the ornaments with bright, varied colors like red, blue, silver, and gold.
Add subtle shadows under ornaments to make them pop.
Pro Tip: If you’re only using a pencil, use cross-hatching or varying pressure to create different shades of gray, giving your tree a sense of texture and depth.
Common Mistakes to Avoid
Making the Tree Too Symmetrical
A perfectly symmetrical tree can look stiff and unnatural.
Real trees have unique branch structures and slight imperfections.
Allow your branches to have varying lengths and angles for a more organic feel.
Drawing Flat Branches
If your branches look like flat cut-outs, the tree loses its dimension.
Think of branches as having volume, with tops and undersides.
Use slight curves and overlapping lines to suggest depth and fullness.
Overcrowding Details
While ornaments are fun, too many can make your tree look cluttered and overwhelming.
Less is often more when it comes to decorative elements.
Strategically place a few well-drawn ornaments rather than filling every space.
Forgetting the Base or Ground
A floating tree can look unfinished and out of place.
Always include a trunk and either a tree stand, a pot, or a simple ground line beneath your tree.
This anchors your drawing and completes the scene.
Troubleshooting
My Tree Looks Lopsided
This is a common issue, especially when free-handing.
Go back to your initial guide lines from Step 1 and 2.
Lightly re-draw the central vertical line and the large triangle to re-establish balance, then adjust your branch outlines.
Branches Don’t Look Natural
If your branches appear stiff or too uniform, try varying your lines.
Instead of perfect zig-zags, use more organic, slightly wavy, or scalloped shapes.
Remember that branches often overlap and are not all the same length.
Details Are Difficult to Draw
Small details like ornaments can be tricky if your main tree shape isn’t solid.
Focus on getting the tree outline right first, then simplify the details.
Start with basic shapes like circles and only add intricate designs once you feel comfortable.
Key Takeaways
- Start with light guide lines to establish overall shape and symmetry.
- Break the tree into layers to build natural-looking branches.
- Use a mix of jagged and wavy lines for organic foliage texture.
- Don’t forget the trunk and a base to ground your tree.
- Erase guide lines carefully for a clean, professional finish.
- Add details and color to bring your Christmas tree to life.
Frequently Asked Questions
What kind of pencil should I use?
A standard HB pencil is perfect for sketching and outlining.
For lighter guide lines, you can use a 2H pencil, and for darker outlines, a 2B or 4B can add richness.
How can I make my tree look 3D?
To add dimension, think about light and shadow.
Areas that are deeper within the tree or on the underside of branches should be darker.
You can achieve this with heavier pencil pressure or darker shades of green.
Can I use markers or paint instead of pencils?
Absolutely! Once you have your pencil outline perfected, you can use any medium you prefer.
Markers provide vibrant, flat colors, while paints can offer more blending and texture opportunities.
What if my tree doesn’t look perfect?
That’s perfectly fine! Art is about expression and enjoyment, not perfection.
Every drawing is a learning experience, and the unique quirks of your hand-drawn tree make it special.
Our Top Recommended Finds
- Sketchbook with Quality Paper: A good sketchbook prevents bleed-through and holds pencil marks well, making your drawing experience more enjoyable.
- Pencil Set (HB, 2B, 4B): Having a range of pencil hardness allows for greater control over line weight and shading, adding depth to your artwork.
- Kneaded Eraser: This soft, pliable eraser lifts graphite without smudging or damaging the paper, essential for clean-up and highlights.
Your Creative Journey Continues!
You’ve just created a beautiful Christmas tree, a testament to your growing artistic skills.
Feel proud of what you’ve accomplished and the festive spirit you’ve captured.
Why stop here? Try drawing a snowy landscape around your tree, or add a cozy fireplace scene.
Keep practicing, keep experimenting, and let your imagination sparkle this holiday season!
& Painting
No rigid rules or pretension. Just practical guides, medium comparisons, and encouraging tips to help you enjoy the drawing & painting process.