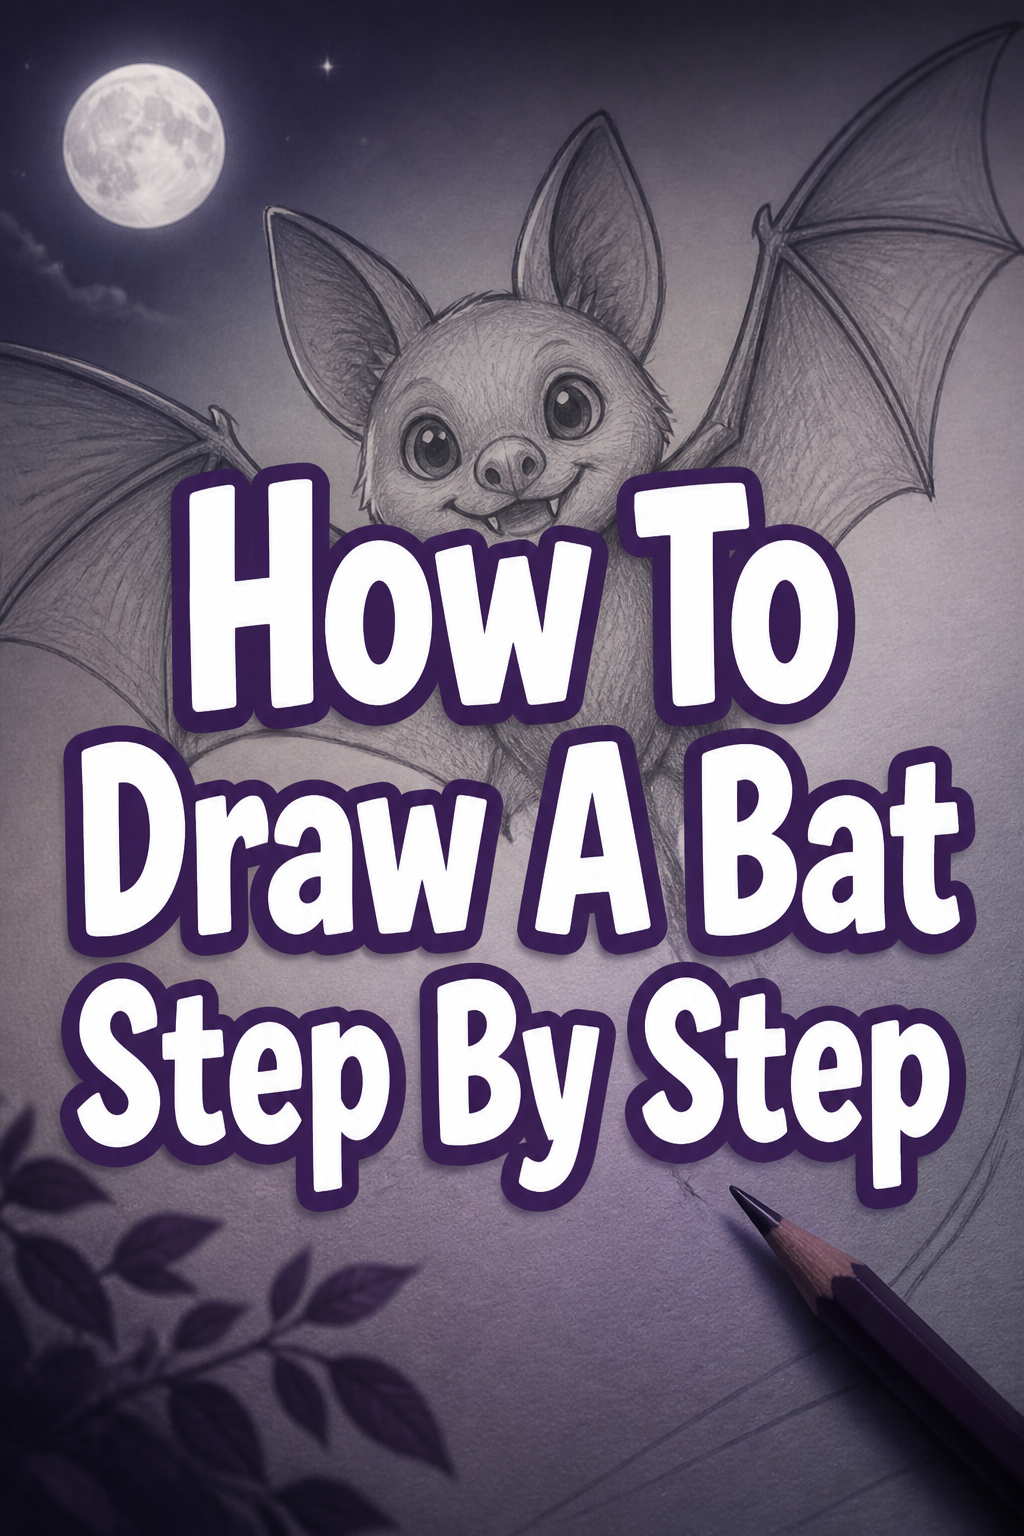
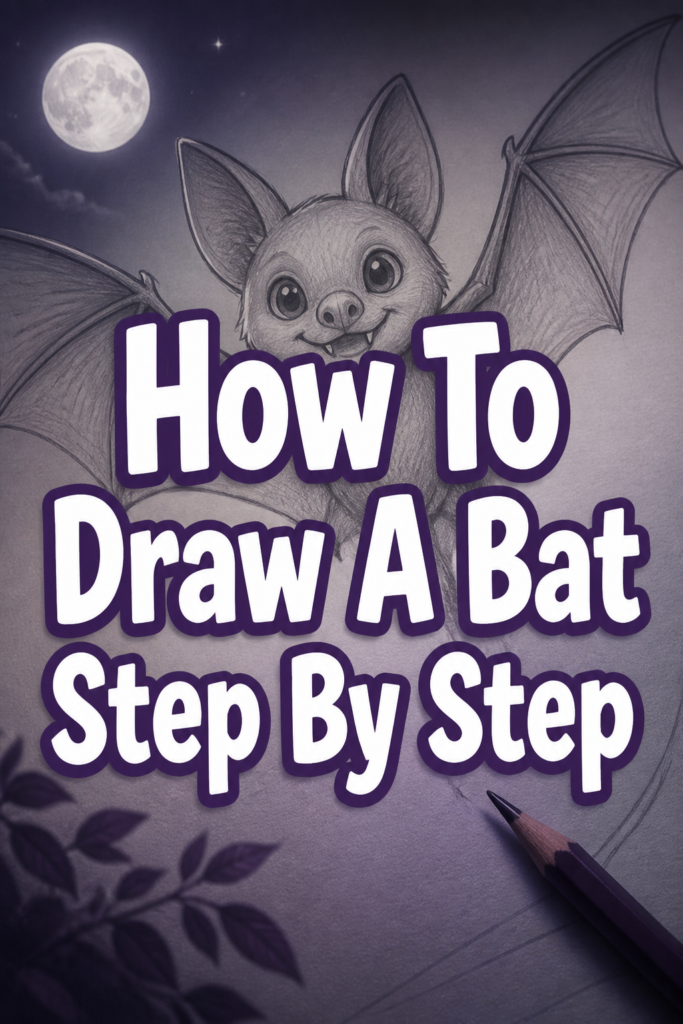
🦇 How To Draw A Bat Step By Step

& Painting
No rigid rules or pretension. Just practical guides, medium comparisons, and encouraging tips to help you enjoy the drawing & painting process.
There’s a special kind of satisfaction that comes from bringing a creature to life on paper.
I still remember the first time I managed to capture the unique shape of a bat’s wings, feeling a real sense of accomplishment.
This guide shares practical techniques and insights I’ve gathered over many sketching sessions, making it easier for you to create your own fantastic bat drawings.
Quick Overview
You’re about to embark on a creative journey, learning to draw a captivating bat from basic shapes to finished details.
This process breaks down complex forms into manageable steps, perfect for artists of all levels.
- Time needed: 45-75 minutes
- Difficulty: Beginner to Intermediate
- What you’ll need: Pencil (HB, 2B), eraser (kneaded and vinyl), drawing paper, optional: fine-tip black pen, colored pencils or markers
Step-by-Step Instructions
Step 1: Lay Down the Basic Body Shapes
Begin by lightly sketching two primary shapes for the bat’s body. Draw a medium-sized oval for the main body, angled slightly to suggest movement.
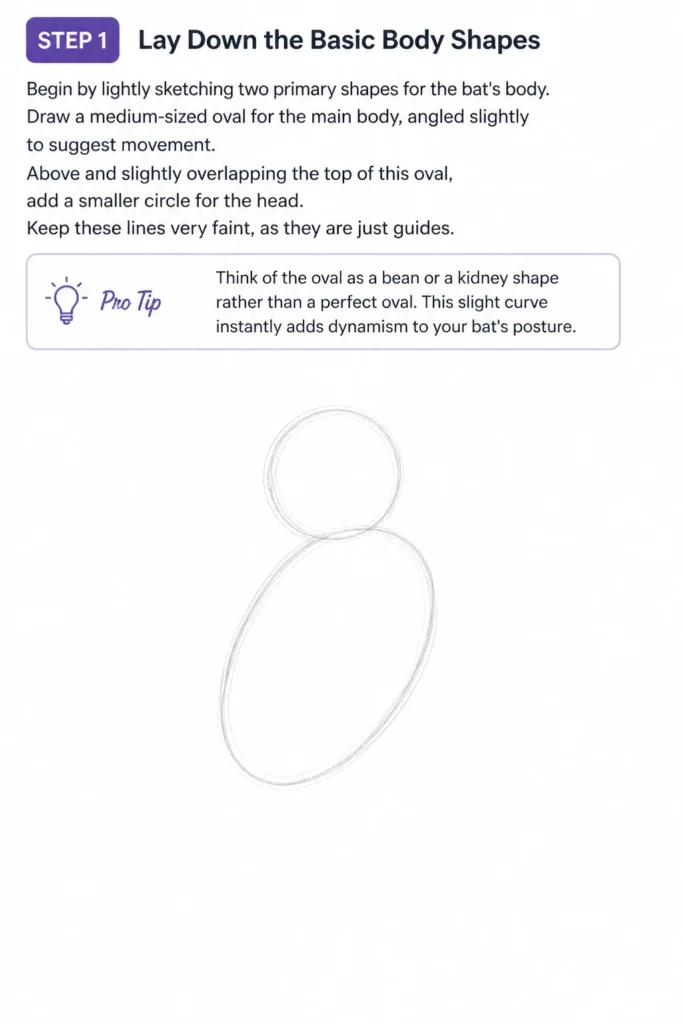
Above and slightly overlapping the top of this oval, add a smaller circle for the head. Keep these lines very faint, as they are just guides.
Pro Tip: Think of the oval as a bean or a kidney shape rather than a perfect oval. This slight curve instantly adds dynamism to your bat’s posture.
Step 2: Connect the Head and Refine the Torso
Connect the head circle to the body oval with two gentle, curved lines to form the neck and shoulders. Avoid making the neck too thin; bats have fairly robust shoulders where their wings attach.
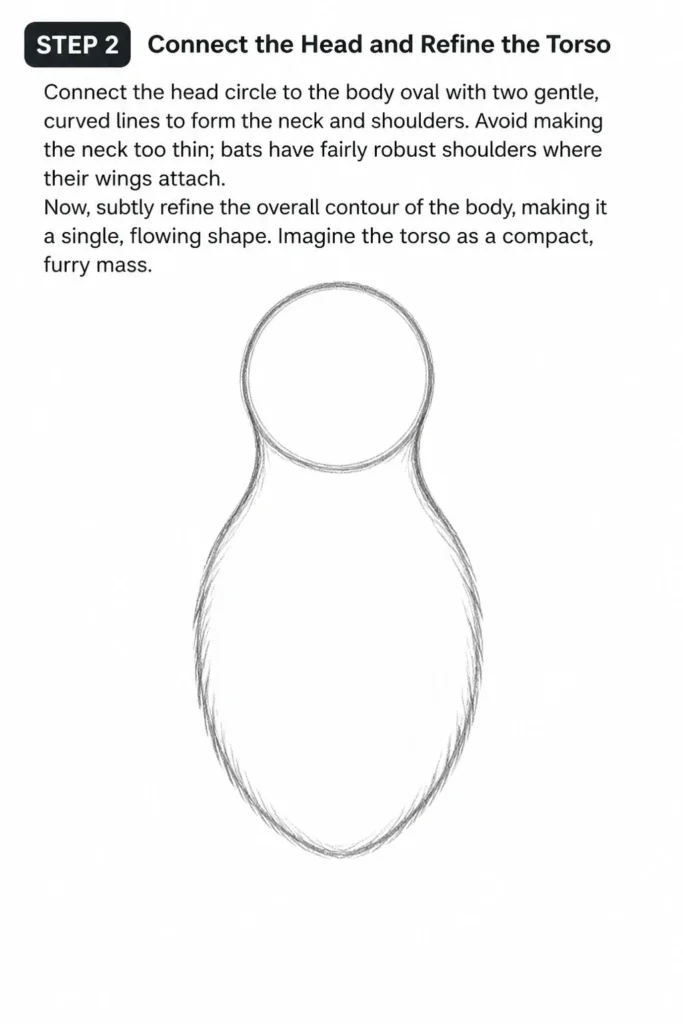
Now, subtly refine the overall contour of the body, making it a single, flowing shape. Imagine the torso as a compact, furry mass.
Step 3: Establish the Wing Framework
Draw the primary lines for the bat’s wings. From the top sides of the body, extend two long, curved lines outwards and slightly downwards.
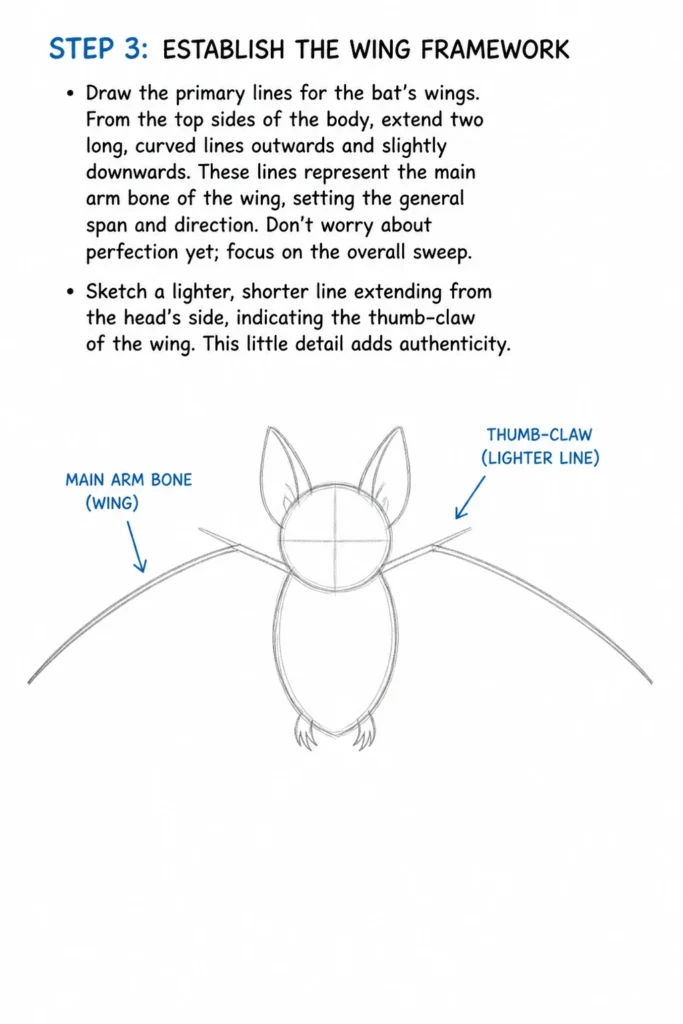
These lines represent the main “arm” bone of the wing, setting the general span and direction. Don’t worry about perfection yet; focus on the overall sweep.
Sketch a lighter, shorter line extending from the head’s side, indicating the thumb-claw of the wing. This little detail adds authenticity.
Step 4: Construct the Wing Structure and Membrane
Add the distinct “finger” bones of the bat’s wings. From the main arm line you drew, extend three to four curved lines that fan out towards the bottom and outer edges of the wing.
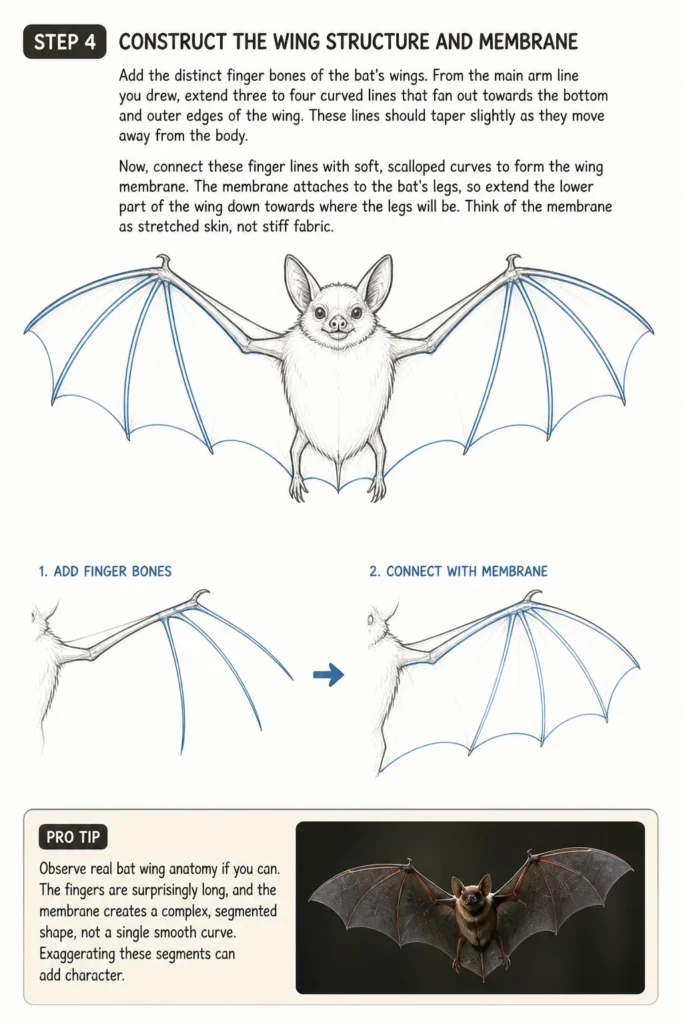
These lines should taper slightly as they move away from the body. Now, connect these “finger” lines with soft, scalloped curves to form the wing membrane.
The membrane attaches to the bat’s legs, so extend the lower part of the wing down towards where the legs will be. Think of the membrane as stretched skin, not stiff fabric.
Pro Tip: Observe real bat wing anatomy if you can. The “fingers” are surprisingly long, and the membrane creates a complex, segmented shape, not a single smooth curve. Exaggerating these segments can add character.
Step 5: Sketch the Legs and Feet
Place the bat’s small, sturdy legs. These typically emerge from the lower part of the body, where the wing membrane attaches.
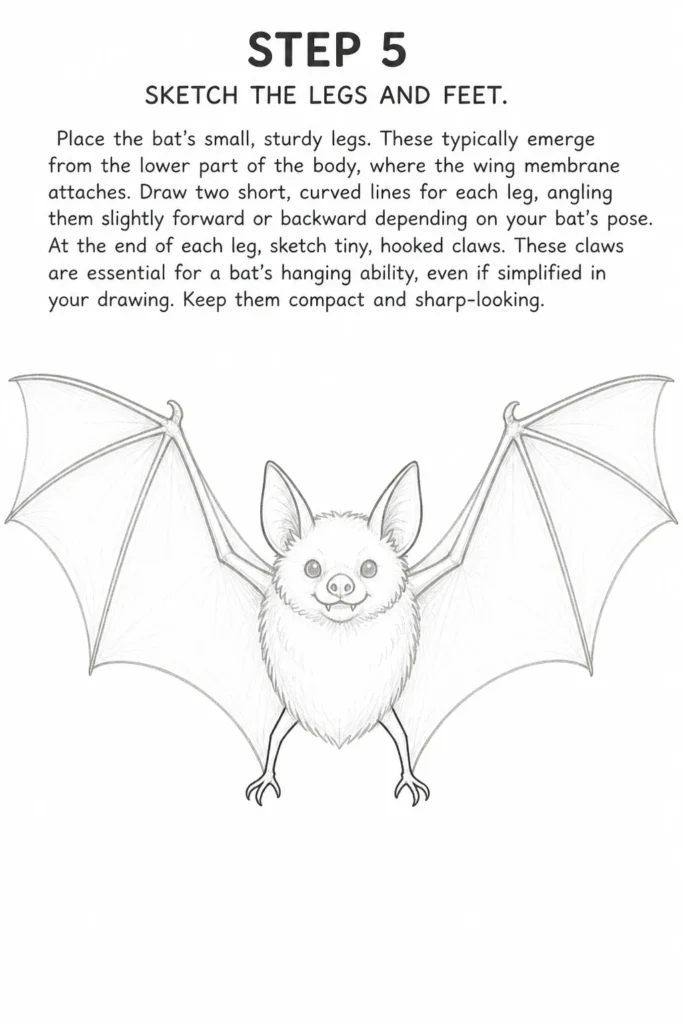
Draw two short, curved lines for each leg, angling them slightly forward or backward depending on your bat’s pose. At the end of each leg, sketch tiny, hooked claws.
These claws are essential for a bat’s hanging ability, even if simplified in your drawing. Keep them compact and sharp-looking.
Step 6: Define the Facial Features and Ears
Give your bat personality by adding its face. Start with the ears; bats often have large, prominent ears that can be pointed or rounded.
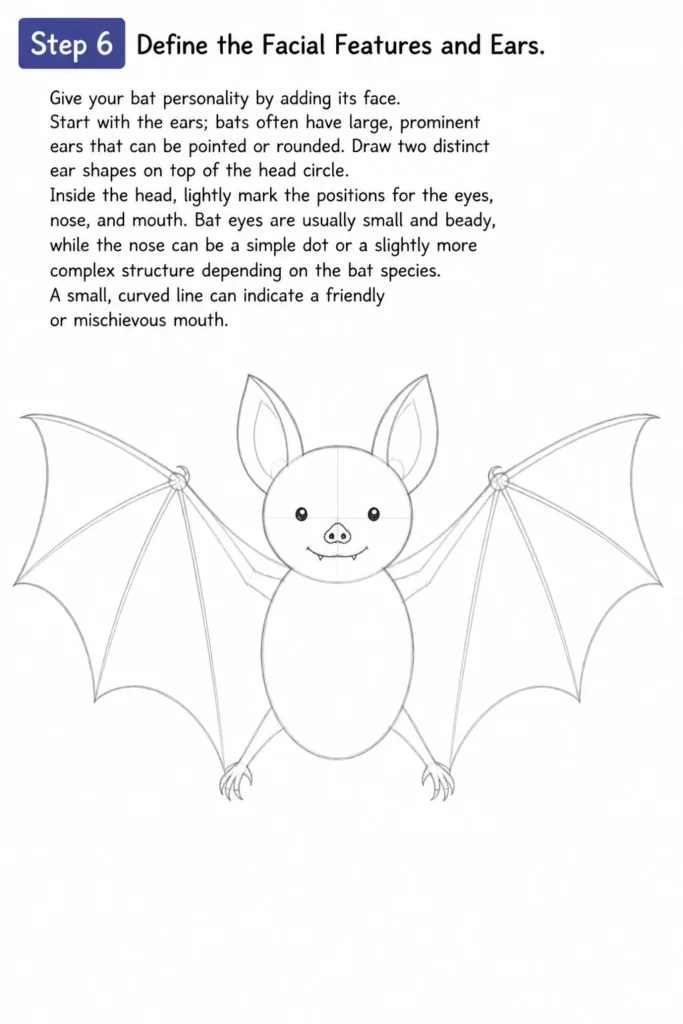
Draw two distinct ear shapes on top of the head circle. Inside the head, lightly mark the positions for the eyes, nose, and mouth.
Bat eyes are usually small and beady, while the nose can be a simple dot or a slightly more complex structure depending on the bat species. A small, curved line can indicate a friendly or mischievous mouth.
Step 7: Refine Outlines and Erase Guide Lines
Go over your preferred lines with a slightly firmer hand or a darker pencil (like a 2B) to establish the final outline of your bat.
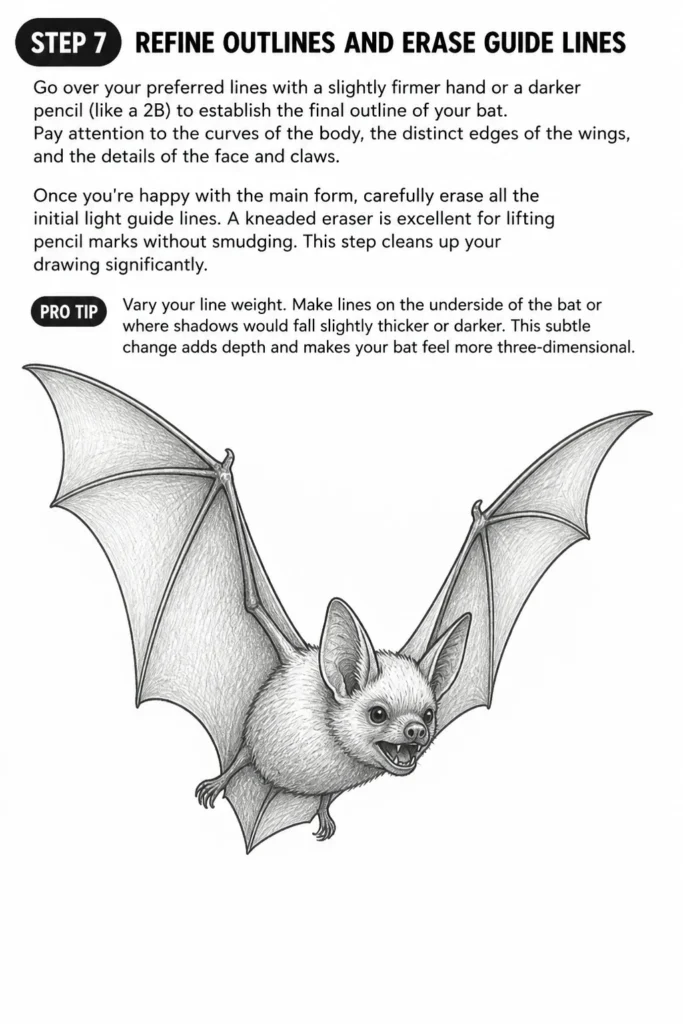
Pay attention to the curves of the body, the distinct edges of the wings, and the details of the face and claws. Once you’re happy with the main form, carefully erase all the initial light guide lines.
A kneaded eraser is excellent for lifting pencil marks without smudging. This step cleans up your drawing significantly.
Pro Tip: Vary your line weight. Make lines on the underside of the bat or where shadows would fall slightly thicker or darker. This subtle change adds depth and makes your bat feel more three-dimensional.
Step 8: Add Texture and Shading
Introduce texture and basic shading to bring your bat to life. Use short, directional strokes to suggest fur on the body, head, and legs.
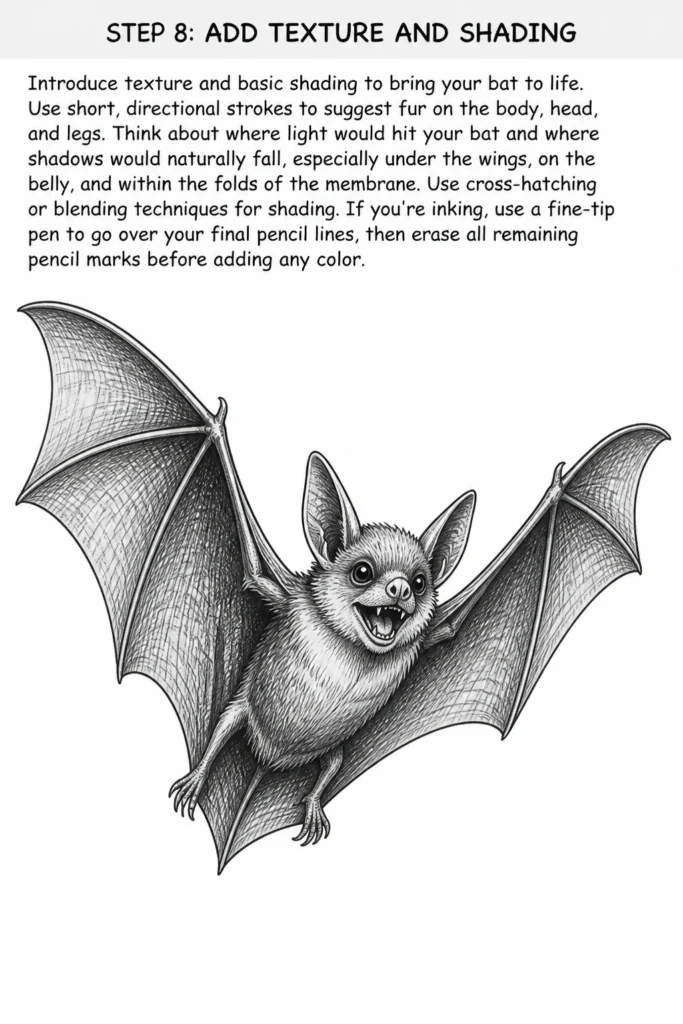
Think about where light would hit your bat and where shadows would naturally fall, especially under the wings, on the belly, and within the folds of the membrane.
Use cross-hatching or blending techniques for shading. If you’re inking, use a fine-tip pen to go over your final pencil lines, then erase all remaining pencil marks before adding any color.
Common Mistakes to Avoid
Disproportionate Wings
Many beginners draw bat wings either too small or too large relative to the body. Small wings make the bat look like it can’t fly, while overly large ones can make it appear clumsy.
Always ensure the wing span is generous, typically two to three times the length of the body, and that the “arm” and “finger” bones are in proportion to the bat’s torso. Sketching lightly helps you adjust these proportions early on.
Stiff or Symmetrical Poses
Drawing a bat perfectly symmetrical or in a rigid, flat pose can make it appear lifeless. Bats are incredibly agile creatures, even when hanging.
Introduce curves, slight angles, and dynamic postures from the very first sketch. Imagine your bat in motion, even if it’s just a subtle lean or a slight bend in the wing, to give it energy.
Ignoring Basic Anatomy
Even if you’re drawing a cartoon bat, a fundamental understanding of its skeletal structure, especially the wings, is crucial. The wings aren’t just fabric; they have bones (modified fingers) that support the membrane.
Skipping these underlying structures makes wings look flat and unrealistic. Focus on how the membrane stretches between these “finger” bones and attaches to the body and legs.
Overcomplicating Details Too Soon
Rushing to add fur texture, intricate facial details, or complex shading before the basic form and proportions are established is a common pitfall. This often leads to needing to redraw large sections.
Always work from general shapes to specific details. Solidify the overall silhouette and main structures first, then gradually layer on the finer elements. This approach saves time and frustration.
Troubleshooting
My Bat Looks Flat or Lifeless
If your bat lacks dimension, try incorporating more dynamic curves and angles in your initial sketches. Avoid drawing everything on a single flat plane.
Introduce overlapping elements, such as one wing slightly in front of the other, or a leg partially hidden by the body. Also, vary your line weight; thicker lines in shadowed areas can add significant depth.
The Wings Don’t Look Right
Wing issues often stem from not understanding the underlying structure. Revisit Step 4 and focus on the “finger” bones. Ensure they fan out convincingly from the arm and that the membrane forms natural, flowing curves between them.
Practice drawing just the wing structure separately a few times. Pay attention to how the membrane stretches and attaches to the body and legs, rather than just floating in space.
The Head or Body Seems Out of Proportion
This is usually a problem with the initial basic shapes. Go back to Step 1 and critically assess the size relationship between your head circle and body oval. Is the head too small or too large for the body you’ve drawn?
Use a measuring technique: compare the head height to the body height using your pencil. Adjust these foundational shapes until they feel balanced before moving on to details.
Key Takeaways
- Start Simple: Always begin with basic geometric shapes to establish the bat’s core form and pose.
- Master the Wings: Pay close attention to the unique skeletal structure of bat wings; this is key to a believable drawing.
- Embrace Light Sketching: Keep your initial lines very faint so you can easily adjust proportions and shapes without leaving heavy eraser marks.
- Vary Line Weight: Use different pressure or pencil hardness to create varied line weights, adding depth and visual interest.
- Practice Proportions: Regularly check your bat’s proportions against real-life references or your mental image to ensure a balanced look.
- Add Character: Small details like ear shape, eye expression, and fur texture can transform a generic bat into a creature with personality.
Frequently Asked Questions
What kind of bat should I draw?
You can draw any type of bat! This guide focuses on a general, stylized bat. For more realism, research specific species like fruit bats (often larger, dog-like faces) or microbats (smaller, varied ear and nose shapes). Each species offers unique features to explore.
How can I make my bat drawing look more dynamic?
To add dynamism, experiment with different poses. Instead of a flat profile, try drawing your bat mid-flight, hanging upside down, or with one wing slightly bent. Introduce movement by angling the body and wings, and use overlapping elements to create a sense of depth and action.
What’s the best way to add fur texture without overdoing it?
For fur, use short, quick strokes that follow the contour of the bat’s body. Avoid drawing individual hairs. Instead, create clusters of strokes to suggest patches of fur. Vary the length and direction of these strokes, and use lighter pressure for highlights and heavier pressure for shadowed areas.
Can I use different art mediums for this guide?
Absolutely! While this guide focuses on pencil, the principles apply to any medium. Once you have a solid pencil sketch, you can ink it with pens, paint it with watercolors or acrylics, or even transition to digital art programs. The foundational steps remain the same.
Our Top Recommended Finds
- Staedtler Mars Lumograph Pencil Set: A fantastic range of graphite pencils (HB to 8B) for sketching, shading, and detailing.
- Faber-Castell Kneaded Eraser: Perfect for lifting graphite without damaging the paper or smudging your delicate lines.
- Sakura Pigma Micron Fine-Tip Pens: Excellent for inking your final lines, offering waterproof, archival ink in various tip sizes.
Unleash Your Inner Bat Artist!
You’ve now walked through the steps of drawing a bat, from initial shapes to final details.
The real magic happens when you pick up your pencil and start creating.
Don’t be afraid to experiment with different poses, expressions, and even species of bats.
Perhaps your next artistic adventure could be adding a spooky moonlit background or a tiny, curious mouse friend. Grab your pencil now and bring another bat to life!
& Painting
No rigid rules or pretension. Just practical guides, medium comparisons, and encouraging tips to help you enjoy the drawing & painting process.