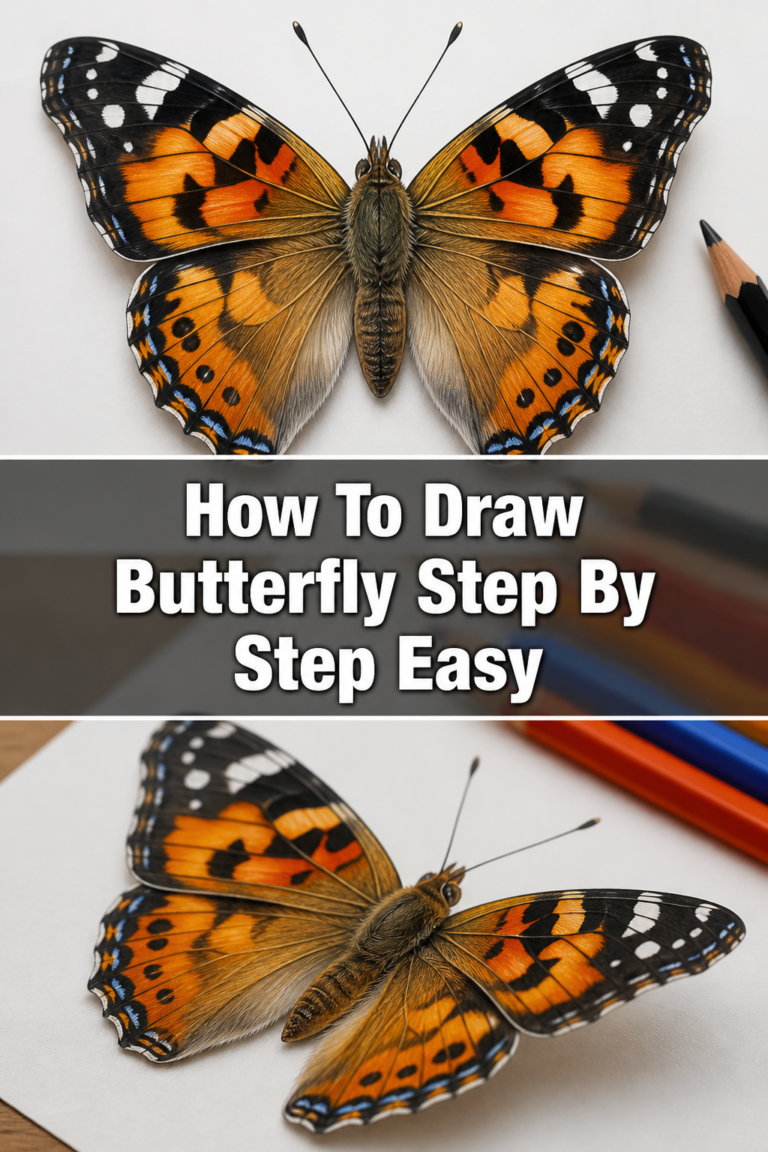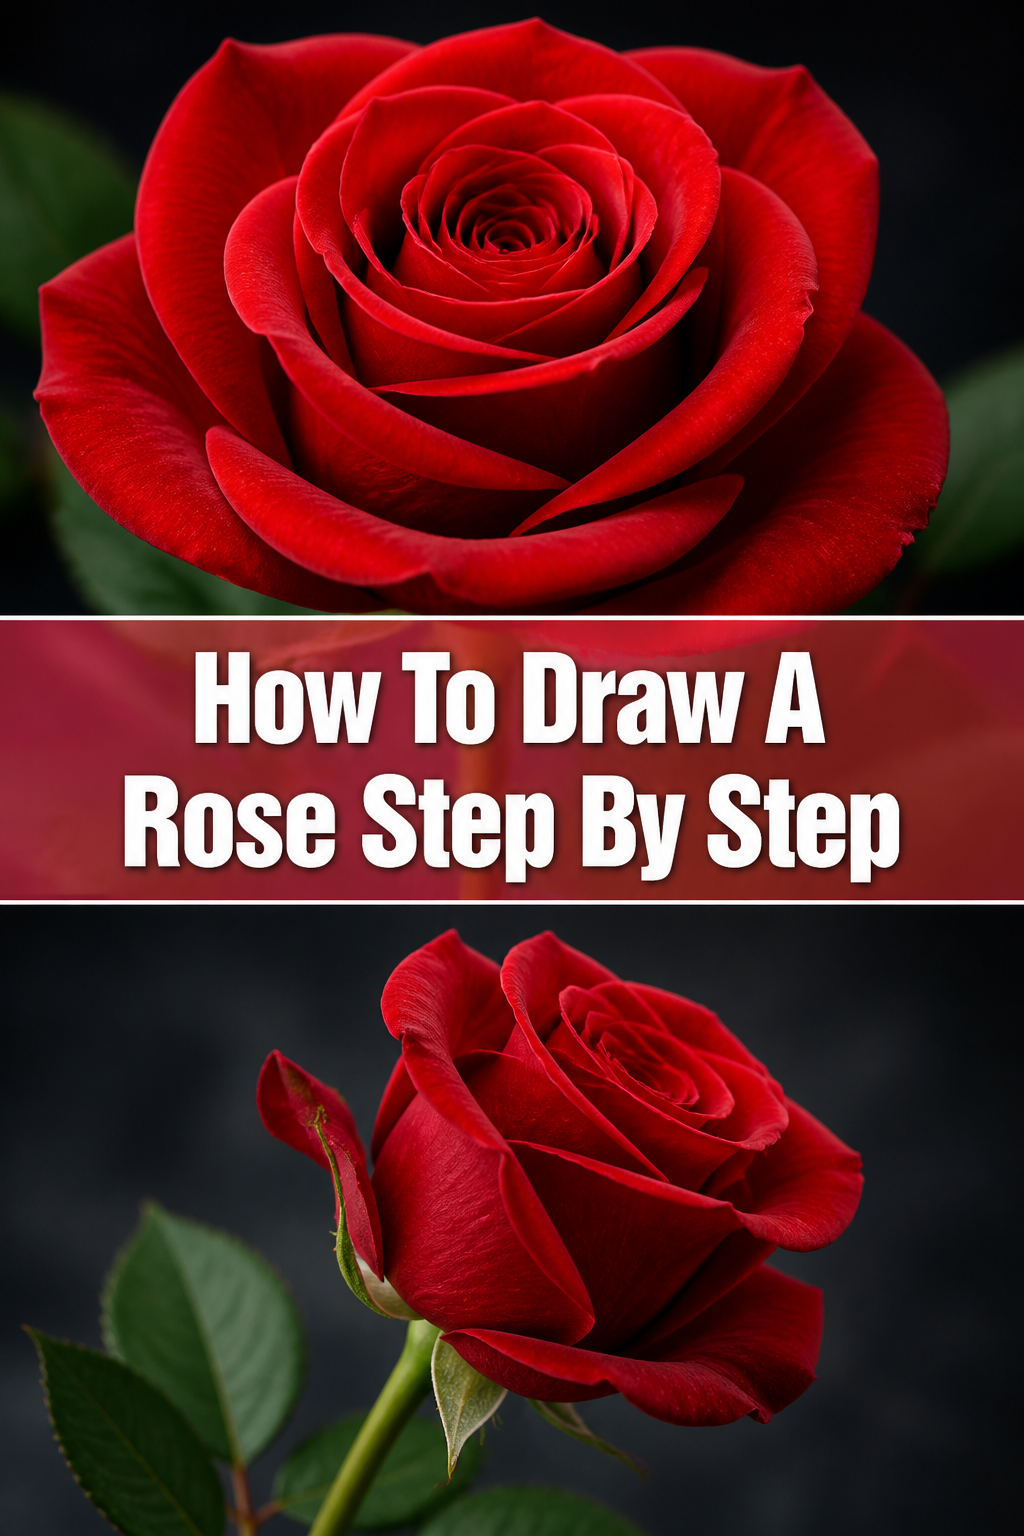
🌹 How To Draw A Rose Step By Step

& Painting
No rigid rules or pretension. Just practical guides, medium comparisons, and encouraging tips to help you enjoy the drawing & painting process.
Drawing a rose can feel like a daunting task, especially with all its intricate petals.
I remember my first attempts looked more like a crumpled cabbage than a beautiful bloom.
But with the right approach, you can create a stunning rose, and this guide will show you exactly how.
Quick Overview
This guide will walk you through the process of drawing a classic rose, from its initial form to delicate shading.
You’ll learn to build up the petals layer by layer, creating depth and realism.
- Time needed: 45-75 minutes
- Difficulty: Beginner to Intermediate
- What you’ll need: Pencil (HB, 2B, 4B recommended), paper, eraser, blending stump (optional)
Step-by-Step Instructions
Step 1: Sketch the Central Bud
Begin by lightly drawing a small, irregular oval or egg shape in the center of your paper. This will serve as the innermost part of your rose, the tightly wound bud.
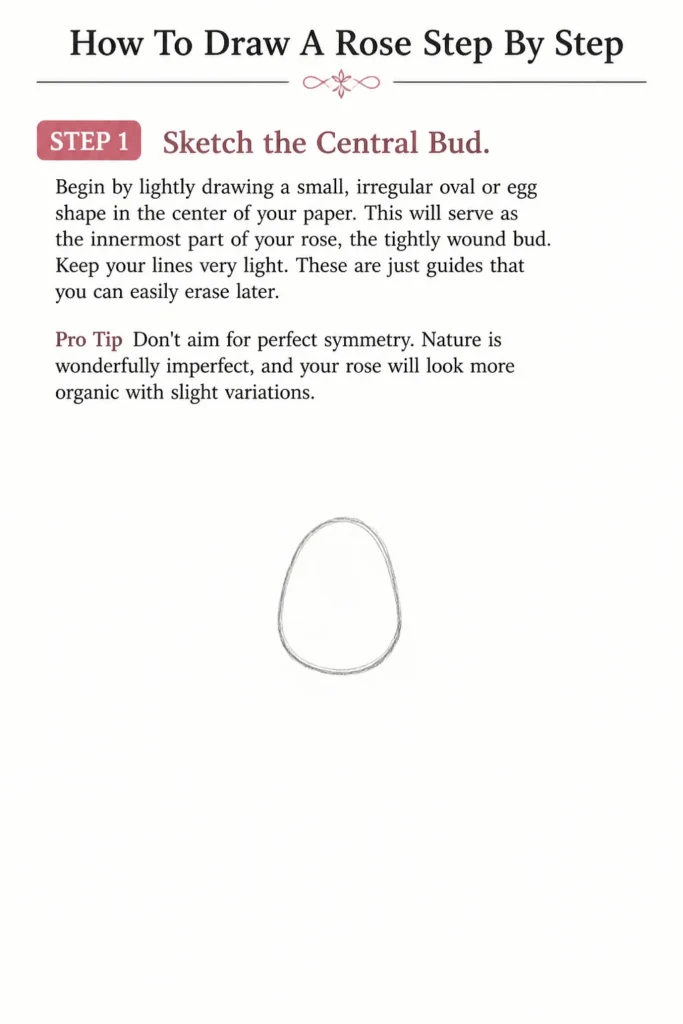
Keep your lines very light. These are just guides that you can easily erase later.
Pro Tip: Don’t aim for perfect symmetry. Nature is wonderfully imperfect, and your rose will look more organic with slight variations.
Step 2: Add the First Layer of Petals
Draw a small, curved line extending from the top of your central oval, curving slightly downwards and inwards. This forms the very first visible petal.
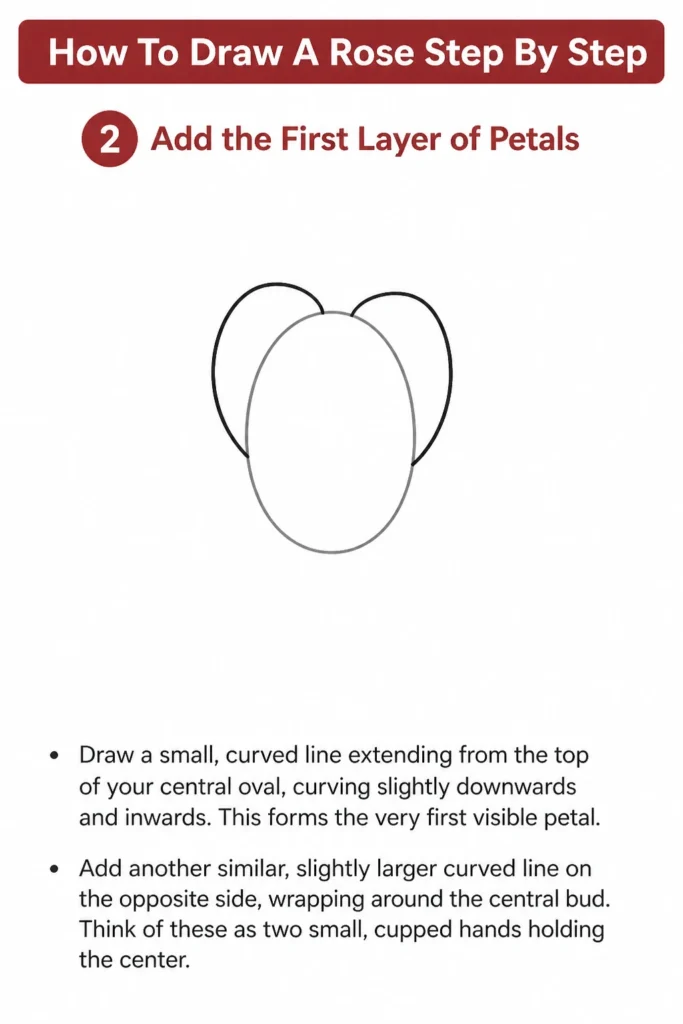
Add another similar, slightly larger curved line on the opposite side, wrapping around the central bud. Think of these as two small, cupped hands holding the center.
Step 3: Develop the Inner Petal Swirl
Create a “U” or “C” shape that hugs the bottom of the central bud. This connects the first two petals and forms the base of the inner swirl.
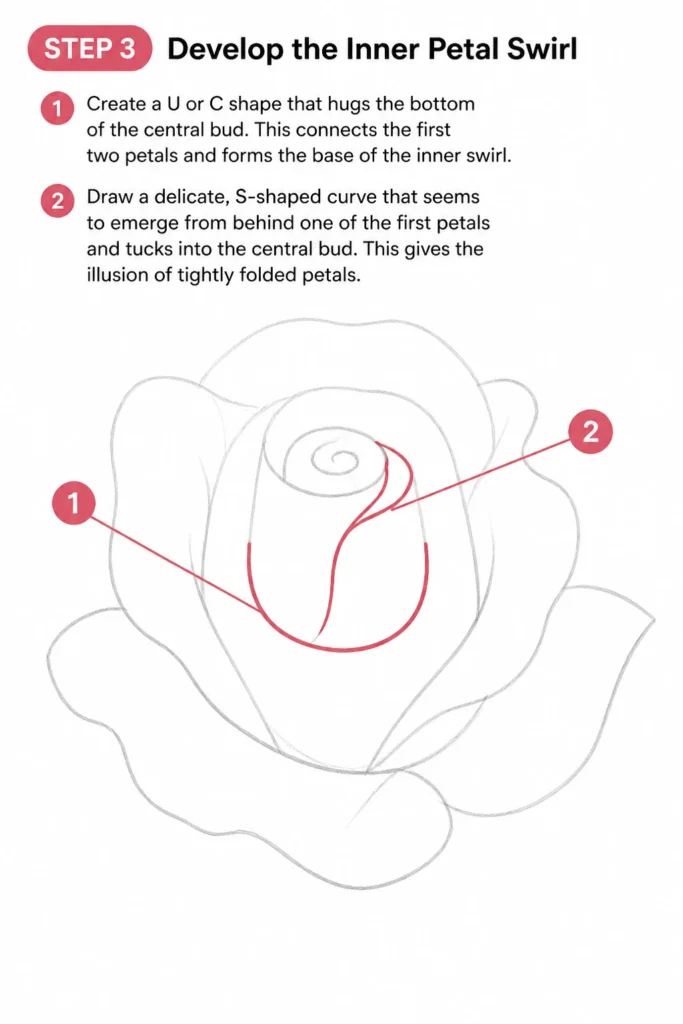
Draw a delicate, S-shaped curve that seems to emerge from behind one of the first petals and tucks into the central bud. This gives the illusion of tightly folded petals.
Step 4: Expand with More Petal Layers
Sketch a larger, more open petal curving around the shapes you’ve already made. This petal should start higher up and curve gracefully outwards, then inwards to meet another point.
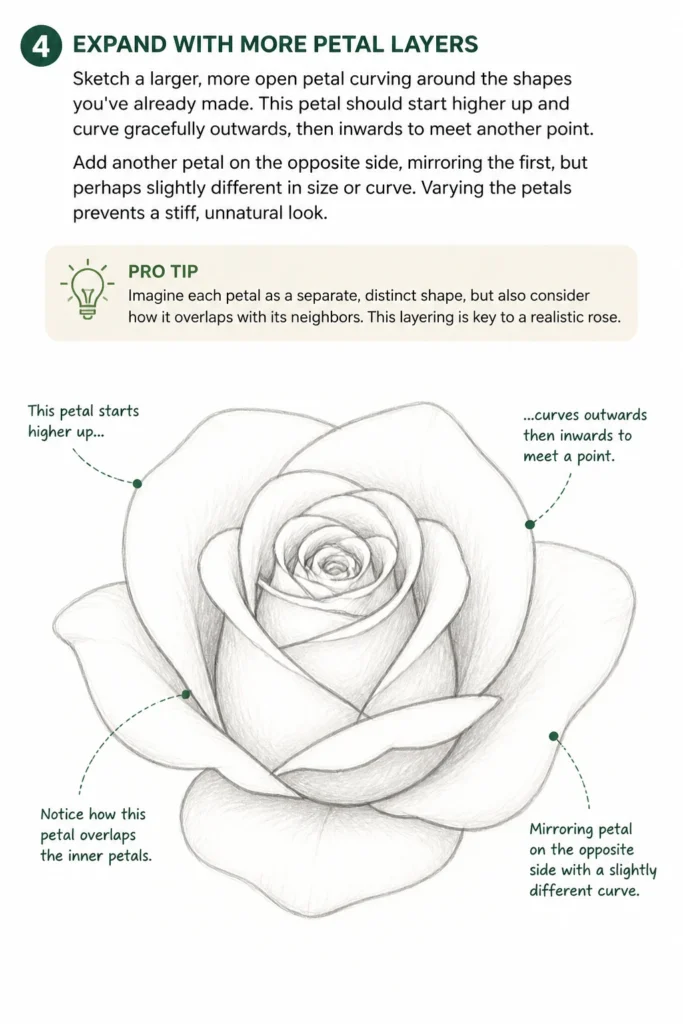
Add another petal on the opposite side, mirroring the first, but perhaps slightly different in size or curve. Varying the petals prevents a stiff, unnatural look.
Pro Tip: Imagine each petal as a separate, distinct shape, but also consider how it overlaps with its neighbors. This layering is key to a realistic rose.
Step 5: Define the Outer Petals
Draw even wider, more open petals around the previous layers. These petals will often have a more pronounced curve and may appear slightly crinkled or ruffled at their edges.
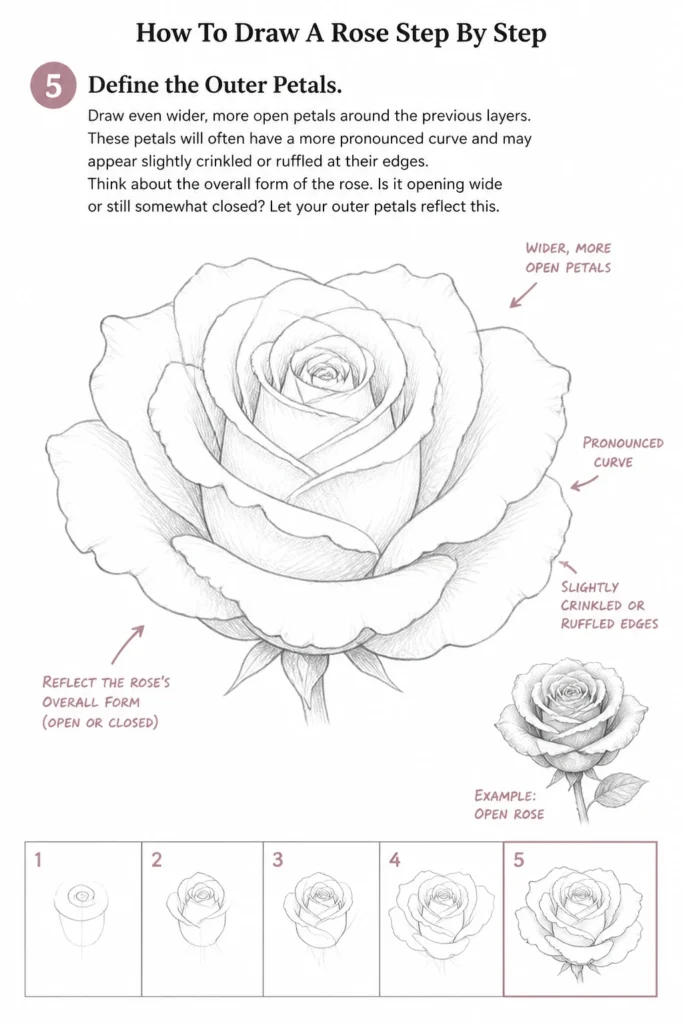
Think about the overall form of the rose. Is it opening wide or still somewhat closed? Let your outer petals reflect this.
Step 6: Add Sepals and Stem
Extend two or three pointed, leaf-like shapes from the very bottom of your rose form. These are the sepals, which cup the flower bud.
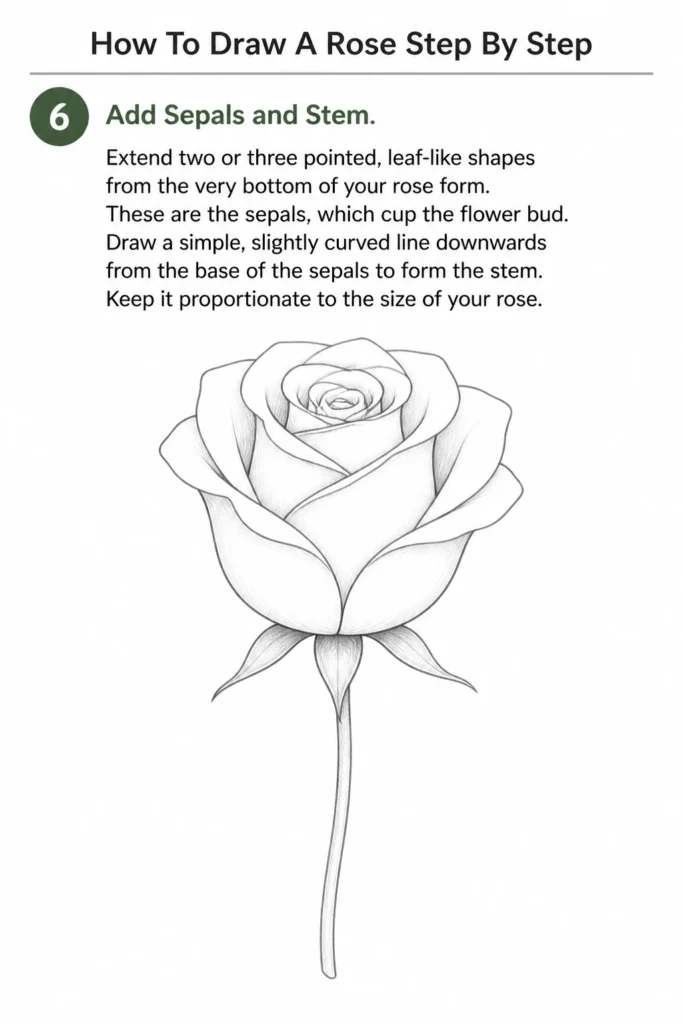
Draw a simple, slightly curved line downwards from the base of the sepals to form the stem. Keep it proportionate to the size of your rose.
Step 7: Refine Lines and Add Detail
Gently erase any unnecessary guide lines that are still visible. Your rose outline should now be clear.
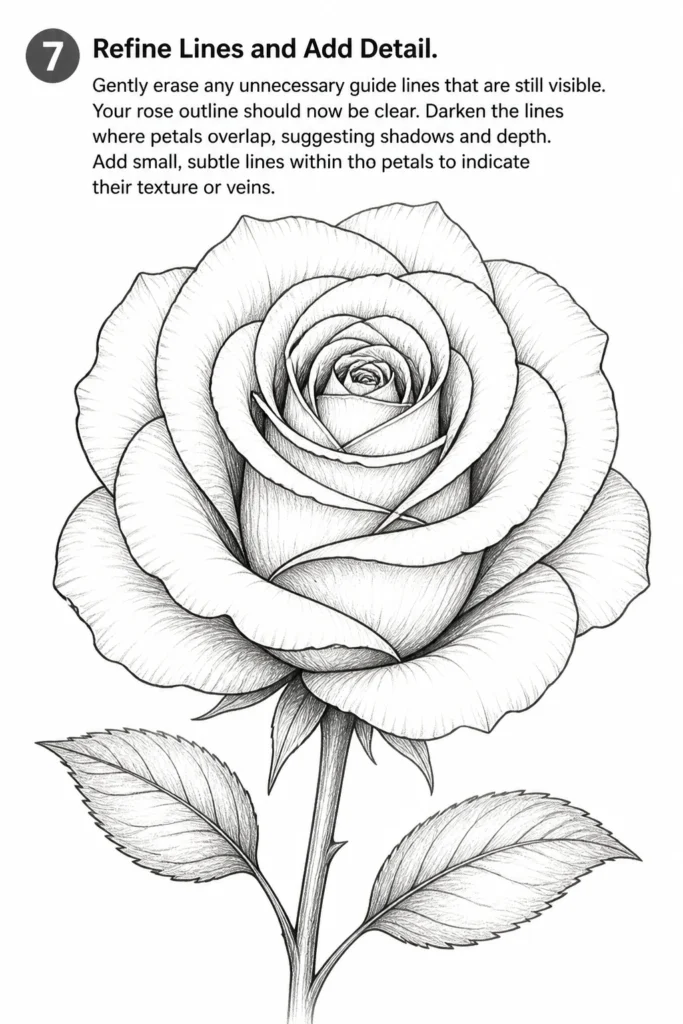
Darken the lines where petals overlap, suggesting shadows and depth. Add small, subtle lines within the petals to indicate their texture or veins.
Step 8: Introduce Shading
Identify your light source. This will help you determine where shadows fall.
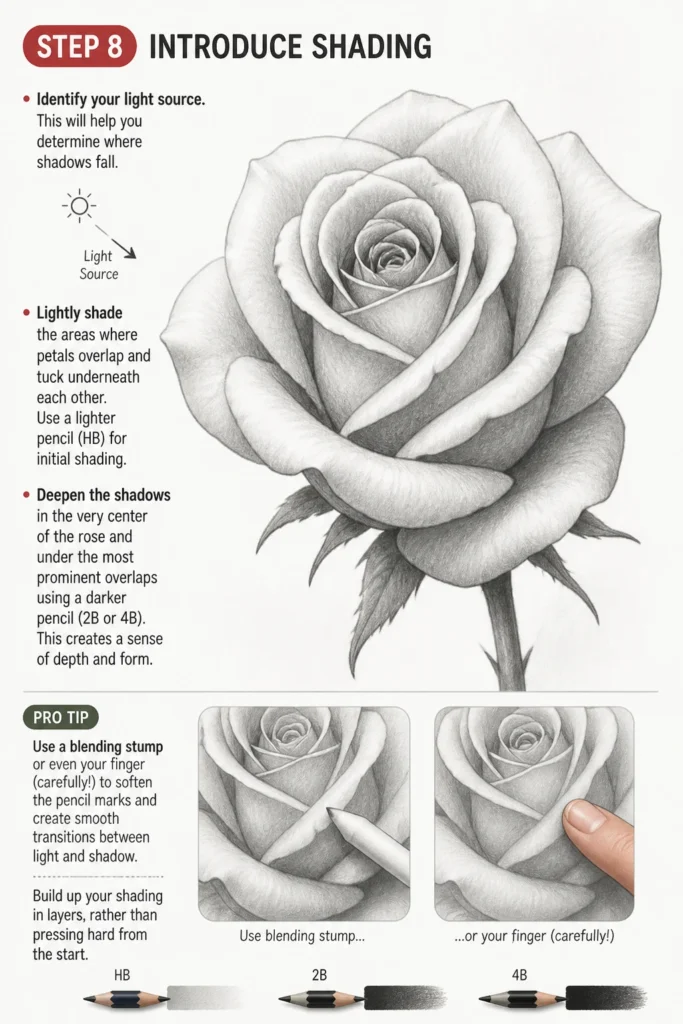
Lightly shade the areas where petals overlap and tuck underneath each other. Use a lighter pencil (HB) for initial shading.
Deepen the shadows in the very center of the rose and under the most prominent overlaps using a darker pencil (2B or 4B). This creates a sense of depth and form.
Pro Tip: Use a blending stump or even your finger (carefully!) to soften the pencil marks and create smooth transitions between light and shadow. Build up your shading in layers, rather than pressing hard from the start.
Step 9: Final Touches
Add any final small details, like tiny thorns on the stem or subtle creases in the petals.
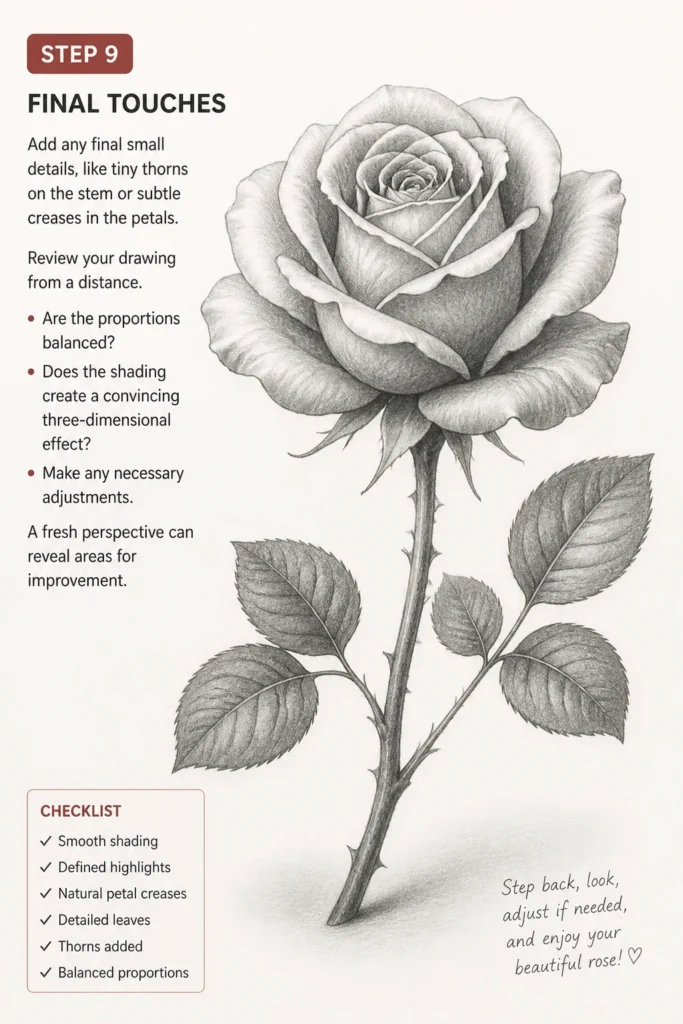
Review your drawing from a distance. Are the proportions balanced? Does the shading create a convincing three-dimensional effect?
Make any necessary adjustments. A fresh perspective can reveal areas for improvement.
Common Mistakes to Avoid
Making Petals Too Symmetrical
New artists often try to make every petal perfectly uniform in size and shape. This results in a stiff, unnatural-looking flower.
Roses in nature are beautifully chaotic. Vary the size, curve, and overlap of your petals to give your drawing a more organic and realistic feel.
Over-Pressing with Your Pencil
Starting your drawing with heavy, dark lines makes it difficult to correct mistakes or refine shapes later. These lines can also indent the paper, making them impossible to fully erase.
Always begin with very light, feathery strokes for your initial sketch. Gradually darken and define your lines as you become more confident in your shape.
Ignoring Overlap and Depth
A common pitfall is drawing petals as if they are all on the same flat plane. This makes the rose appear flat and two-dimensional.
Focus on how each petal folds over or tucks under another. Use darker lines and shading in these overlapping areas to create a convincing sense of depth and volume.
Troubleshooting
My Rose Looks Flat
If your rose lacks dimension, it’s likely due to insufficient shading or a lack of attention to petal overlap. The key to a three-dimensional look is understanding light and shadow.
Revisit your shading. Deepen the shadows in the folds and where petals meet the central bud. Think about which petals are closer to you and which are further back, and adjust your line weight accordingly.
The Petals Don’t Look Realistic
This often happens when petals are drawn too geometrically or without enough natural curve. Petals are soft and sometimes slightly wrinkled, not perfectly smooth arcs.
Observe real roses or high-quality reference photos. Pay attention to the subtle undulations and delicate ruffles along the edges of the petals. Practice drawing individual petal shapes before combining them into a full rose.
I Can’t Get the Center Right
The tightly wound center of a rose can be tricky. It’s a complex swirl of small, overlapping petals that can easily become a confusing mess.
Break the center down into simpler shapes. Start with the initial oval and then add small, curved “C” or “S” shapes that appear to spiral outwards. Don’t try to draw every tiny petal; suggest the swirl with a few well-placed lines and shadows.
Key Takeaways
- Start Light: Always begin with very light sketch lines to allow for easy corrections.
- Layer Petals: Build your rose by adding petals in layers, working from the center outwards.
- Embrace Imperfection: Natural roses are not symmetrical; vary your petal shapes and sizes.
- Focus on Overlap: Use darker lines and shading where petals overlap to create depth.
- Shade for Form: Understand your light source to apply shading that gives your rose a three-dimensional appearance.
- Practice Patience: Drawing takes time and practice. Don’t get discouraged if your first attempt isn’t perfect.
Frequently Asked Questions
What kind of pencil is best for drawing roses?
A range of graphite pencils is ideal. An HB pencil is great for initial sketching, while 2B and 4B pencils allow you to create darker lines and deeper shadows, adding more contrast and realism to your rose.
Should I use an eraser often?
Absolutely! An eraser is just as important as your pencil. Use it to lighten guide lines, correct mistakes, and even to lift highlights in your shading. Don’t be afraid to make adjustments as you go.
How can I make my rose look more unique?
Experiment with different stages of bloom – a tightly closed bud, a partially open flower, or a fully bloomed rose. You can also vary the angle, add dew drops, or include leaves and thorns to give your drawing character.
Is it okay to trace a rose first?
Tracing can be a useful learning tool, especially for understanding proportions and petal placement. However, try to move beyond tracing to freehand drawing as soon as possible. The goal is to develop your observation and drawing skills independently.
Our Top Recommended Finds
- Sketchbook with Smooth Paper: A good quality sketchbook prevents pencil marks from bleeding and allows for smooth blending.
- Set of Graphite Pencils: A basic set with varying hardness (e.g., HB, 2B, 4B, 6B) gives you versatility for sketching and shading.
- Kneaded Eraser: This type of eraser is excellent for lifting graphite gently without damaging the paper, and it can be molded into fine points for precise erasing.
Your Creative Journey Blooms
You’ve just taken a significant step in your artistic journey by learning to draw a rose.
Each line you drew, each shade you applied, brought a beautiful flower to life on your page.
Now, why not try drawing a rose from a different angle, or perhaps adding a delicate dewdrop to a petal?
Keep practicing, keep observing, and let your creativity blossom!
& Painting
No rigid rules or pretension. Just practical guides, medium comparisons, and encouraging tips to help you enjoy the drawing & painting process.