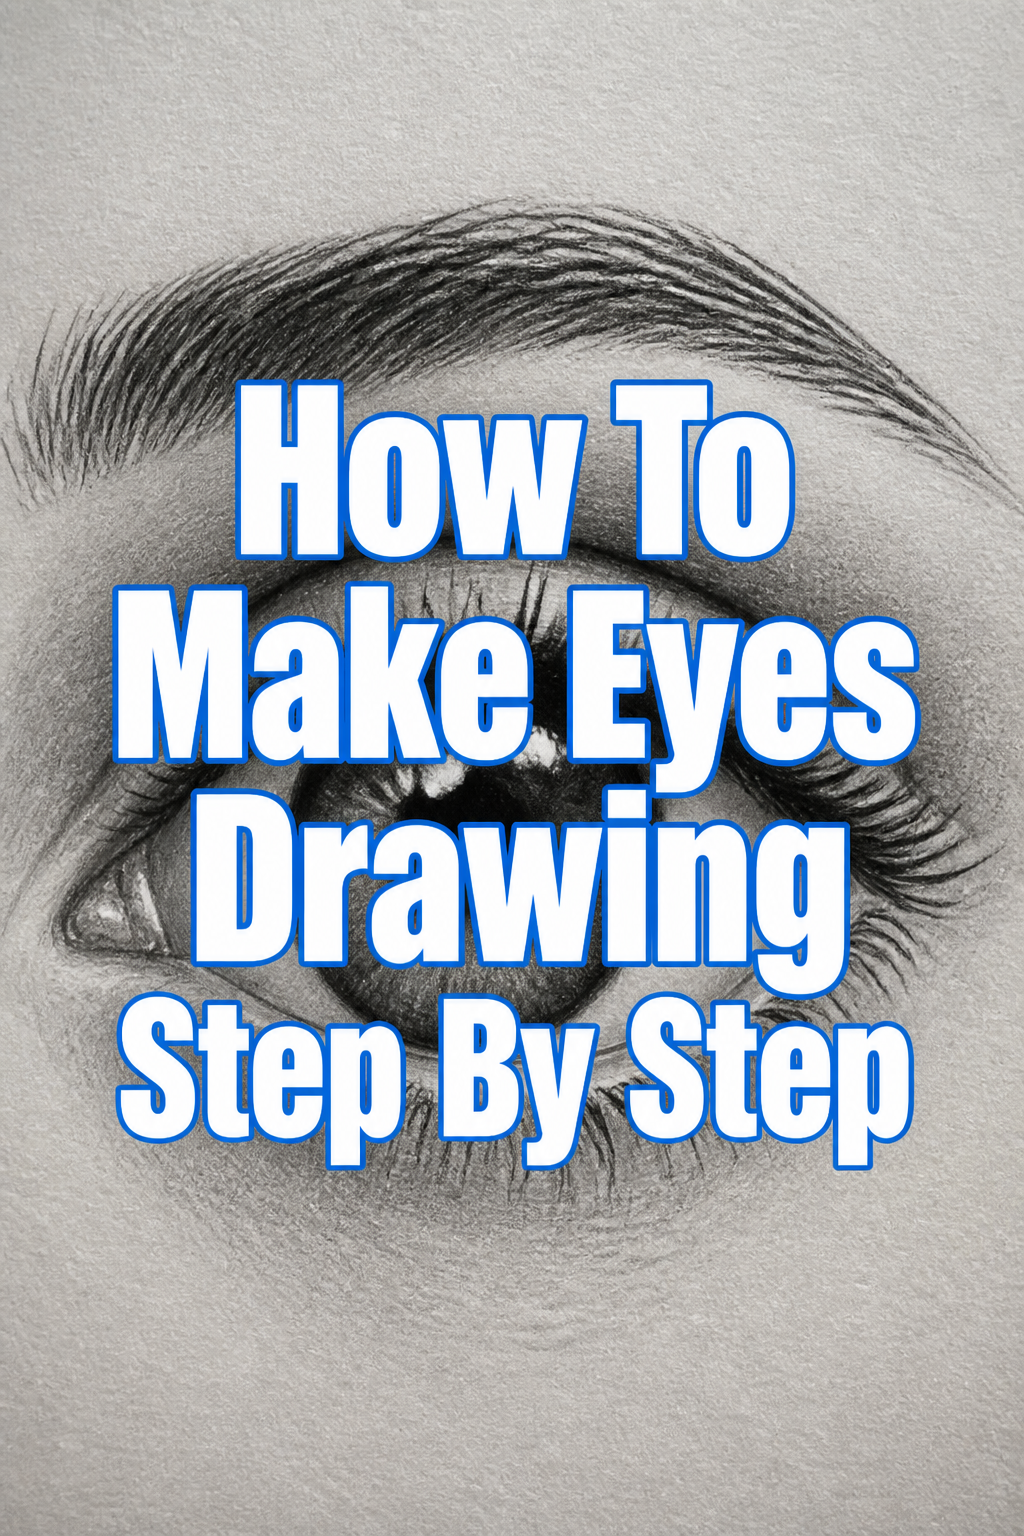
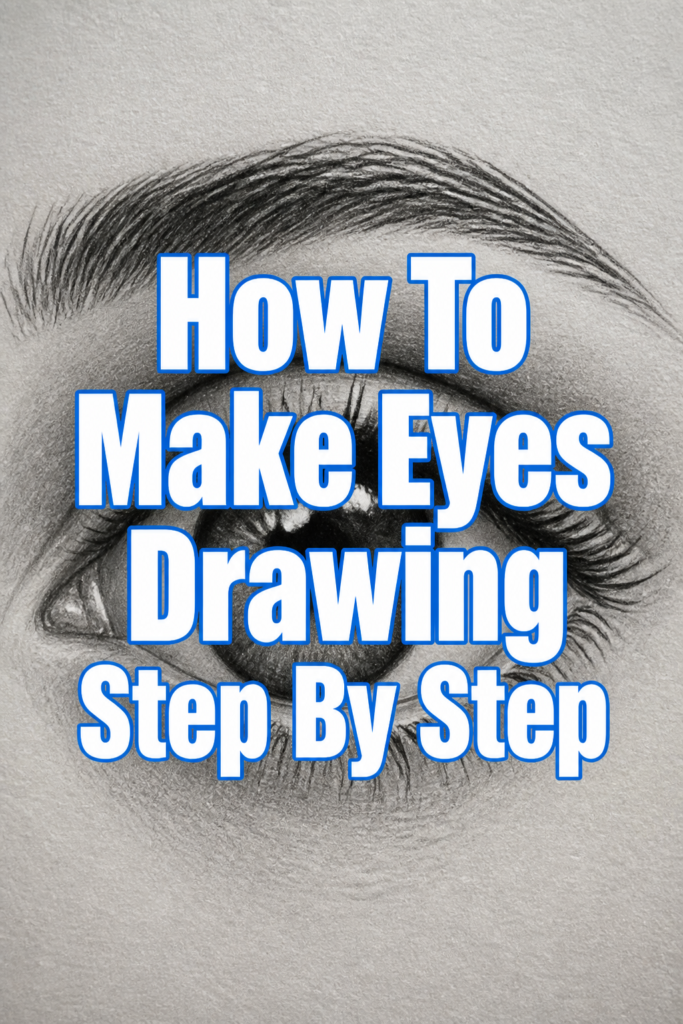
👁️ How To Make Eyes Drawing Step By Step

& Painting
No rigid rules or pretension. Just practical guides, medium comparisons, and encouraging tips to help you enjoy the drawing & painting process.
Learning to draw expressive eyes transformed my artwork.
It’s a skill that breathes life into any character or portrait.
This guide distills years of practice into actionable steps you can follow today.
Quick Overview
You’re about to learn how to draw realistic, expressive eyes from scratch.
We will cover everything from basic shapes to intricate details like highlights and lashes.
- Time needed: 45-90 minutes
- Difficulty: Beginner
- What you’ll need: Pencils (HB, 2B, 4B, 6B), kneaded eraser, blending stump or cotton swab, smooth drawing paper.
Step-by-Step Instructions
Step 1: Map Out the Basic Shape
Begin by lightly sketching the overall almond shape of the eye.
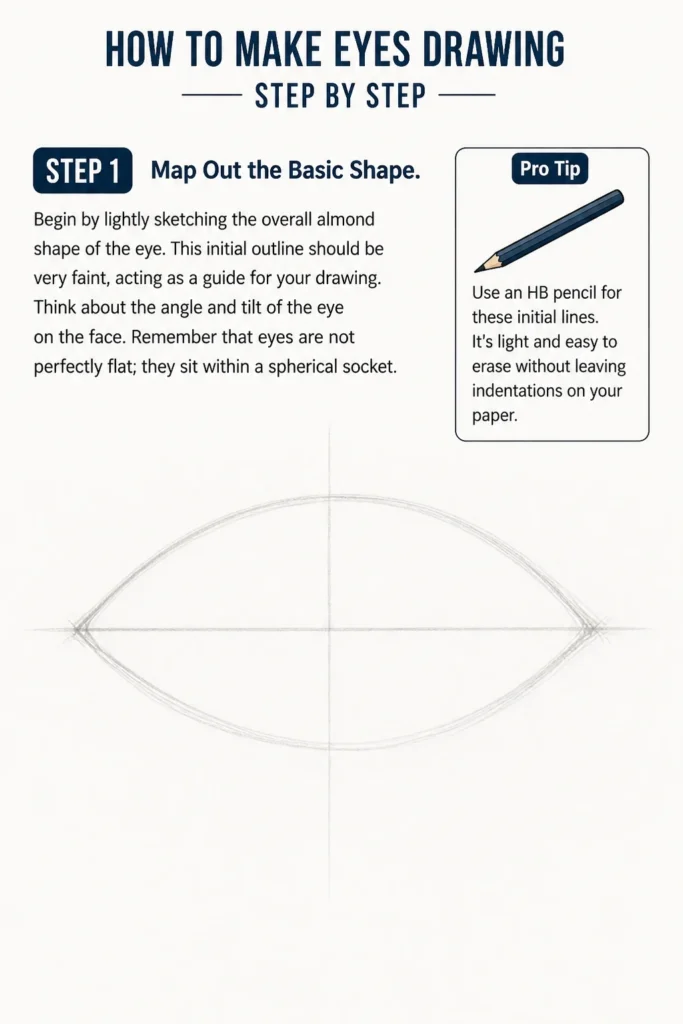
This initial outline should be very faint, acting as a guide for your drawing.
Think about the angle and tilt of the eye on the face.
Remember that eyes are not perfectly flat; they sit within a spherical socket.
Pro Tip: Use an HB pencil for these initial lines. It’s light and easy to erase without leaving indentations on your paper.
Step 2: Define the Eyelids and Tear Duct
Add the upper and lower eyelids, giving them a slight curve.
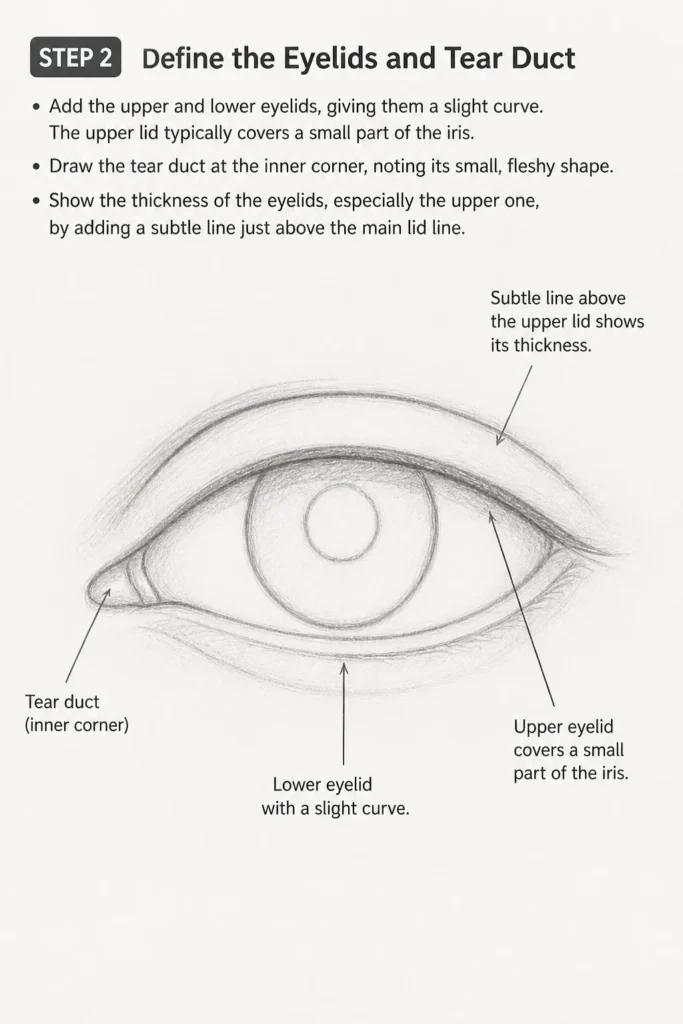
The upper lid typically covers a small part of the iris.
Draw the tear duct at the inner corner, noting its small, fleshy shape.
Show the thickness of the eyelids, especially the upper one, by adding a subtle line just above the main lid line.
Step 3: Draw the Iris and Pupil
Sketch a perfect circle for the iris within your eye outline.
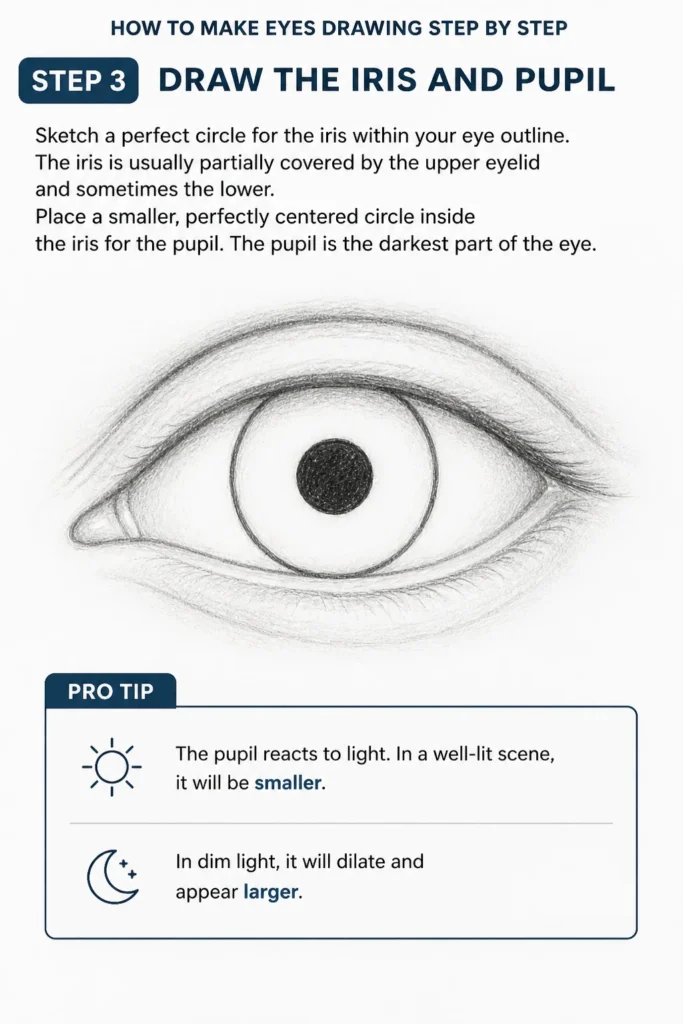
The iris is usually partially covered by the upper eyelid and sometimes the lower.
Place a smaller, perfectly centered circle inside the iris for the pupil.
The pupil is the darkest part of the eye.
Pro Tip: The pupil reacts to light. In a well-lit scene, it will be smaller. In dim light, it will dilate and appear larger.
Step 4: Establish Key Shading and Form
Start applying light values to the sclera, the white part of the eye.
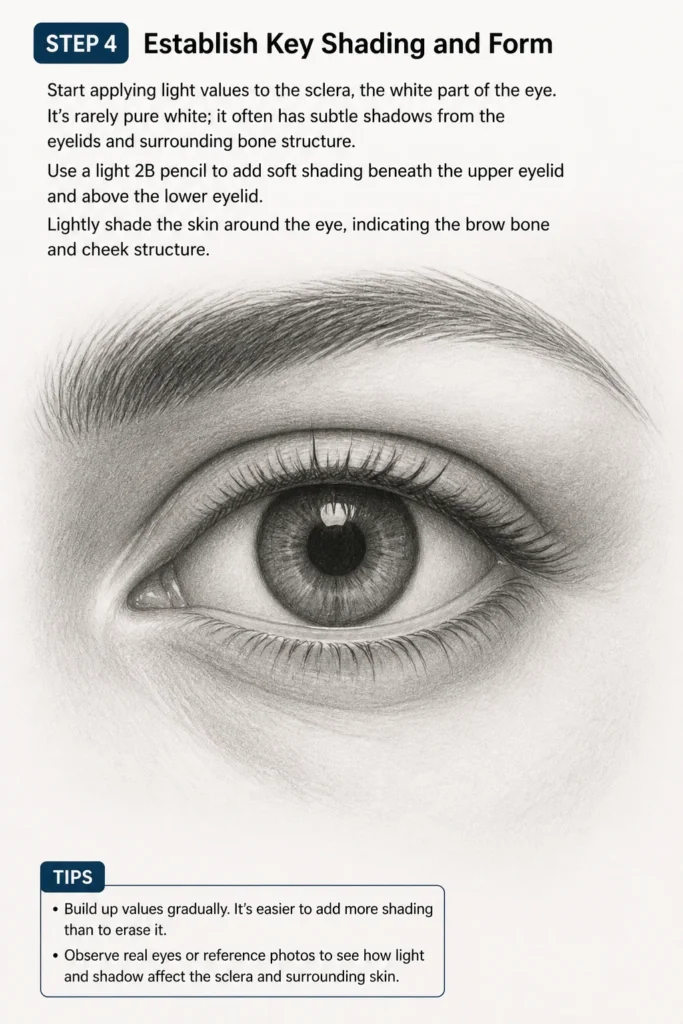
It’s rarely pure white; it often has subtle shadows from the eyelids and surrounding bone structure.
Use a light 2B pencil to add soft shading beneath the upper eyelid and above the lower eyelid.
Lightly shade the skin around the eye, indicating the brow bone and cheek structure.
Step 5: Add Depth to the Iris
Darken the pupil significantly with a 6B pencil, making it the deepest black.
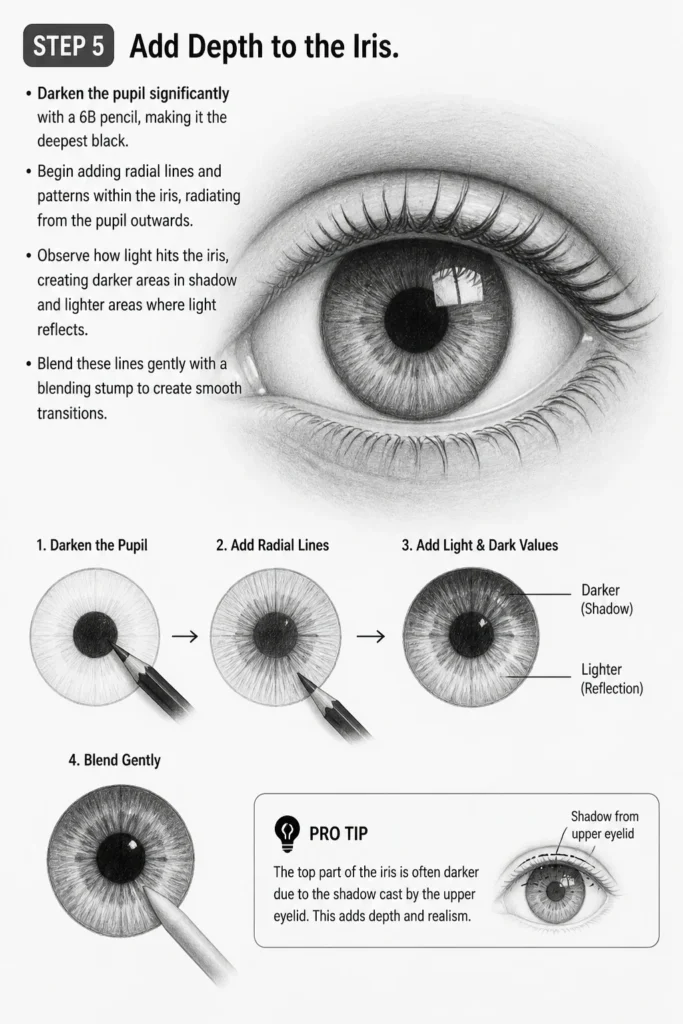
Begin adding radial lines and patterns within the iris, radiating from the pupil outwards.
Observe how light hits the iris, creating darker areas in shadow and lighter areas where light reflects.
Blend these lines gently with a blending stump to create smooth transitions.
Pro Tip: The top part of the iris is often darker due to the shadow cast by the upper eyelid. This adds depth and realism.
Step 6: Render the Eyelashes
Draw individual lash hairs, remembering they grow in specific directions.
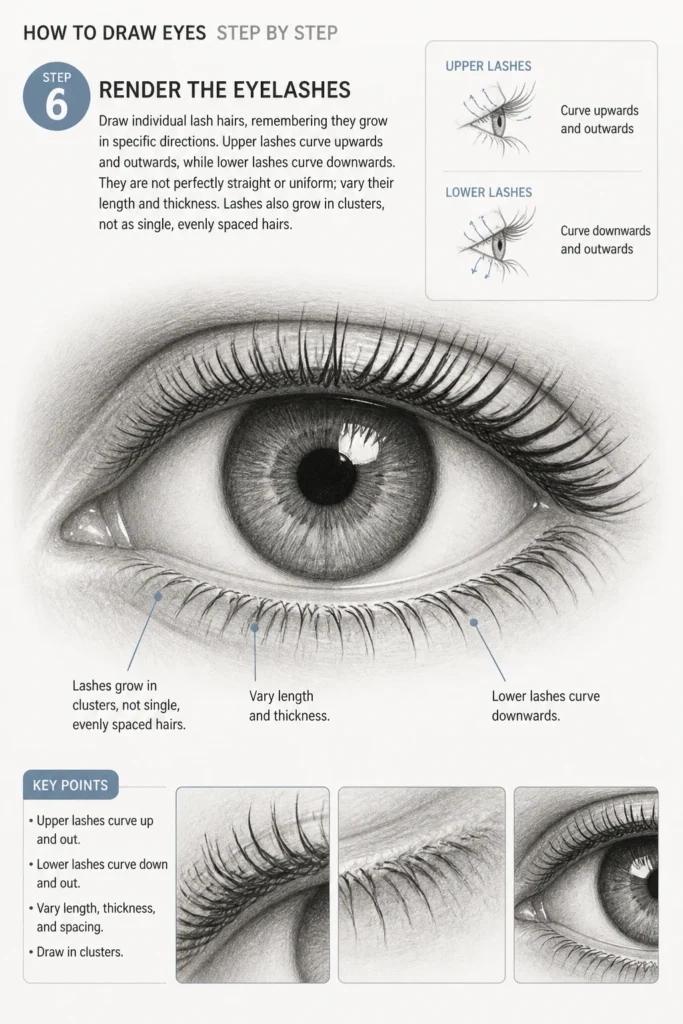
Upper lashes curve upwards and outwards, while lower lashes curve downwards.
They are not perfectly straight or uniform; vary their length and thickness.
Lashes also grow in clusters, not as single, evenly spaced hairs.
Step 7: Introduce Highlights and Reflections
Use your kneaded eraser to lift small, bright spots on the iris and pupil.
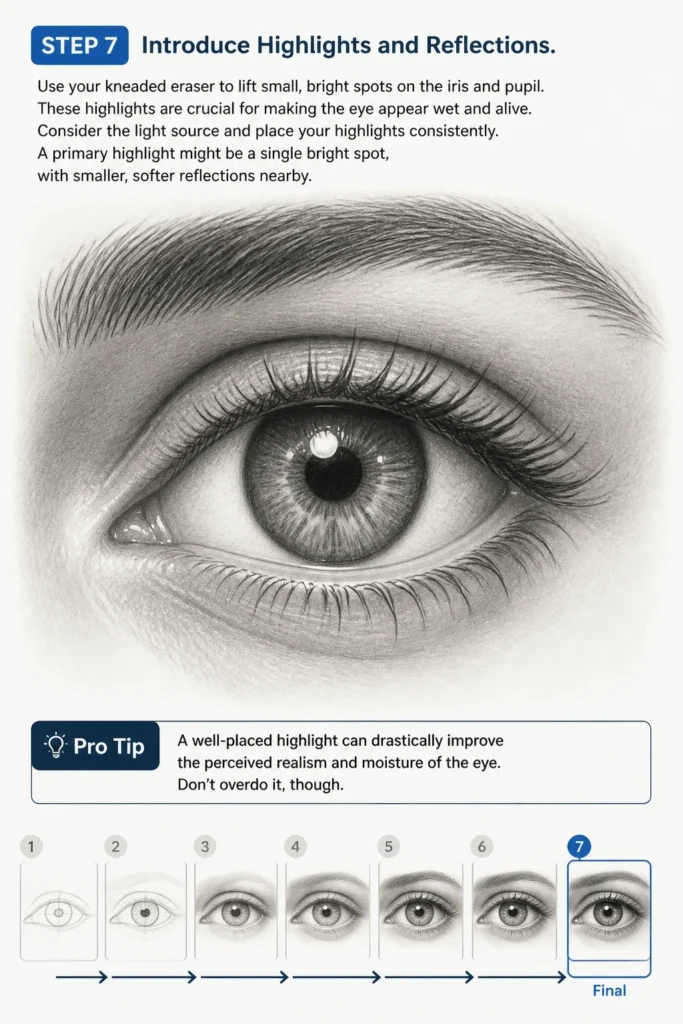
These highlights are crucial for making the eye appear wet and alive.
Consider the light source and place your highlights consistently.
A primary highlight might be a single bright spot, with smaller, softer reflections nearby.
Pro Tip: A well-placed highlight can drastically improve the perceived realism and moisture of the eye. Don’t overdo it, though.
Step 8: Refine and Blend
Step back and assess your drawing as a whole.
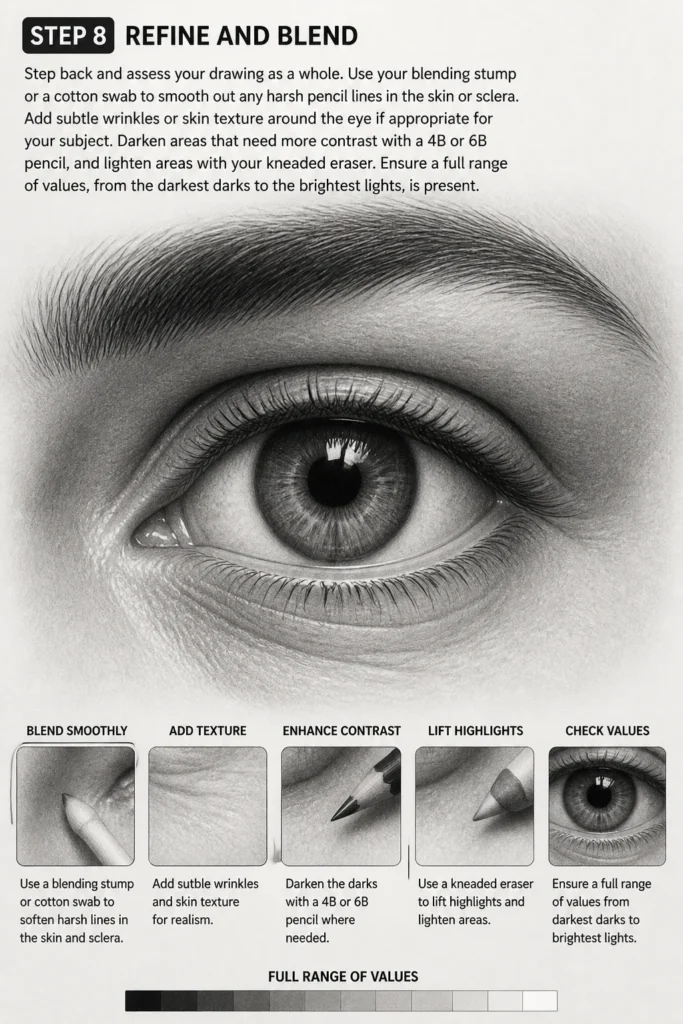
Use your blending stump or a cotton swab to smooth out any harsh pencil lines in the skin or sclera.
Add subtle wrinkles or skin texture around the eye if appropriate for your subject.
Darken areas that need more contrast with a 4B or 6B pencil, and lighten areas with your kneaded eraser.
Ensure a full range of values, from the darkest darks to the brightest lights, is present.
Common Mistakes to Avoid
Drawing Symmetrical Eyes
Many beginners try to make both eyes perfect mirror images. Real faces are rarely perfectly symmetrical.
Slight variations in eye shape, tilt, or even lid thickness add to realism and character.
Focus on drawing each eye individually, observing its unique characteristics, even if subtle.
Ignoring the Eyelids’ Thickness
Often, artists draw the eyelids as thin lines directly on the eyeball. Eyelids have actual thickness.
Adding that subtle second line above the upper lid and below the lower lid creates a three-dimensional effect.
This small detail significantly contributes to the eye’s form and how it sits in the socket.
Over-Darkening the Whites of the Eyes
The sclera, or “white” of the eye, is almost never pure white in a drawing.
It’s always in shadow to some degree from the eyelids and surrounding bone structure.
Leaving it stark white makes the eye look flat and detached from the face.
Apply soft, subtle shading, especially at the corners and beneath the upper lid.
Lashes Looking Like Spider Legs
Drawing eyelashes as uniform, evenly spaced, stiff lines makes them look unnatural.
Lashes grow in varying lengths, thicknesses, and directions, often clumped together.
Practice drawing individual hairs that curve naturally, overlapping each other for a more organic look.
Troubleshooting
My Eyes Look Flat
If your eyes lack depth, you might be missing a full range of values.
Ensure you have very dark shadows (like the pupil and under the upper lid) and bright highlights.
Also, check that you’ve indicated the spherical form of the eyeball and the surrounding bone structure with subtle shading.
The Gaze Feels Lifeless
A lifeless gaze often comes from a lack of clear highlights or a poorly defined pupil.
Make sure your highlights are sharp and well-placed, reflecting a clear light source.
The pupil should be the darkest point, giving the eye its focal power.
Also, ensure the iris has some texture and variation, not just a flat color.
Shading Looks Muddy
Muddy shading occurs when you press too hard too early or don’t blend smoothly.
Start with very light layers and gradually build up your values.
Use a blending stump or cotton swab for smooth transitions, and a kneaded eraser to lift excess graphite.
Avoid rubbing aggressively, which can damage the paper’s tooth.
Key Takeaways
- Always start with light, basic shapes before adding detail.
- Observation is paramount; study real eyes to understand their complex forms.
- Shading creates the illusion of depth and makes the eye appear three-dimensional.
- Highlights are essential for conveying moisture and bringing the eye to life.
- Practice regularly to improve your control and understanding of forms.
- Don’t be afraid to make mistakes; they are part of the learning process.
Frequently Asked Questions
What pencil hardness should I use?
Start with an HB for initial sketches and light shading. Move to 2B and 4B for mid-tones and darker areas. Use a 6B or even 8B for the darkest blacks, such as the pupil and deep shadows.
How do I make the eyes look expressive?
Expression comes from subtle changes in the eyelids, eyebrows, and the surrounding muscles. Slight narrowing or widening, and the angle of the brows, convey different emotions. Practice drawing eyes in various emotional states.
Should I draw both eyes at once?
It’s often helpful to work on both eyes simultaneously to maintain consistency in their size, placement, and overall expression. This prevents one eye from looking completely different from the other.
How important is the eyebrow?
The eyebrow is incredibly important for conveying expression and framing the eye. It works in conjunction with the eyelids to show emotion and provides a crucial structural element to the face.
Our Top Recommended Finds
- Derwent Graphic Drawing Pencils: A good quality set offers a wide range of hardness for all your shading needs.
- Faber-Castell Kneaded Eraser: Essential for lifting highlights, correcting mistakes, and subtly blending without smudging.
- Strathmore Smooth Bristol Paper: Its smooth surface is perfect for detailed pencil work and blending, ensuring crisp lines and soft transitions.
Bringing Your Creations to Life
You’ve taken the crucial first steps in drawing captivating eyes.
Remember, every artist starts with basic shapes and builds from there.
Continue to observe the world around you, paying close attention to light and shadow.
Now, take your pencils and paper, and apply what you’ve learned to your next portrait or character.
Practice different eye shapes and expressions, and watch your skills grow.
& Painting
No rigid rules or pretension. Just practical guides, medium comparisons, and encouraging tips to help you enjoy the drawing & painting process.