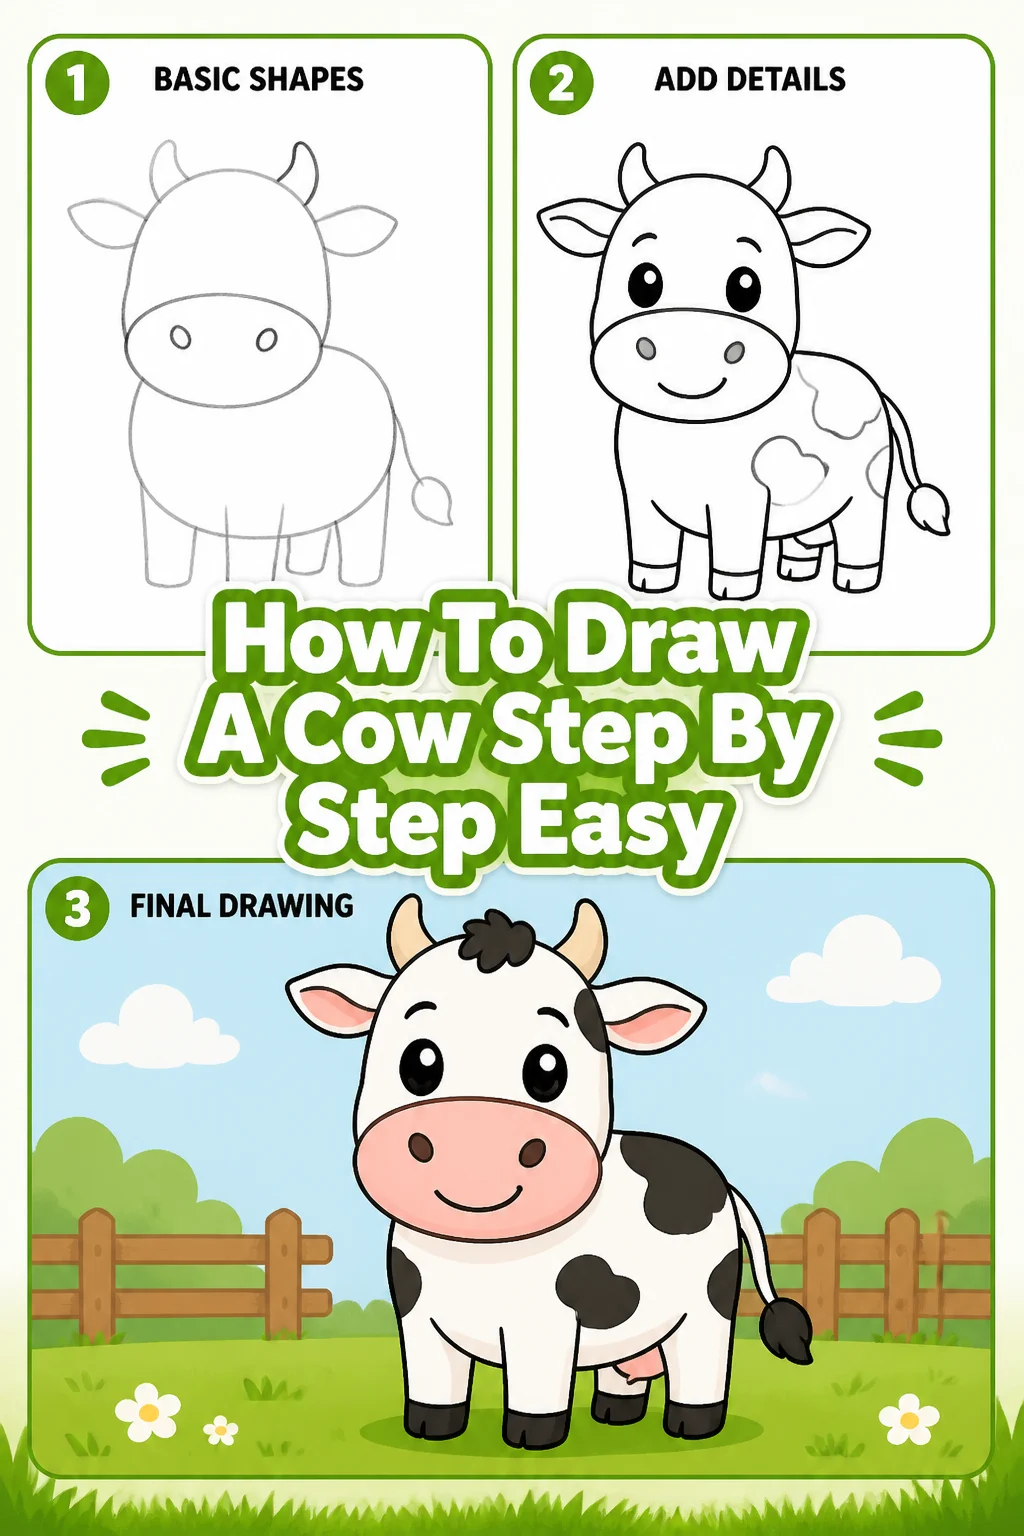
🐄 How To Draw A Cow Step By Step Easy
Drawing can feel intimidating, but it’s truly about breaking things down into simple shapes. I remember my first attempts at drawing animals felt stiff and unnatural. Yet, with a few foundational steps, anyone can bring a charming cow to life on paper.
This guide shares the same easy process I’ve used to help countless beginners feel confident in their drawing skills. You’ll soon discover the joy of creating your own bovine masterpiece, no matter your current artistic level.
Quick Overview
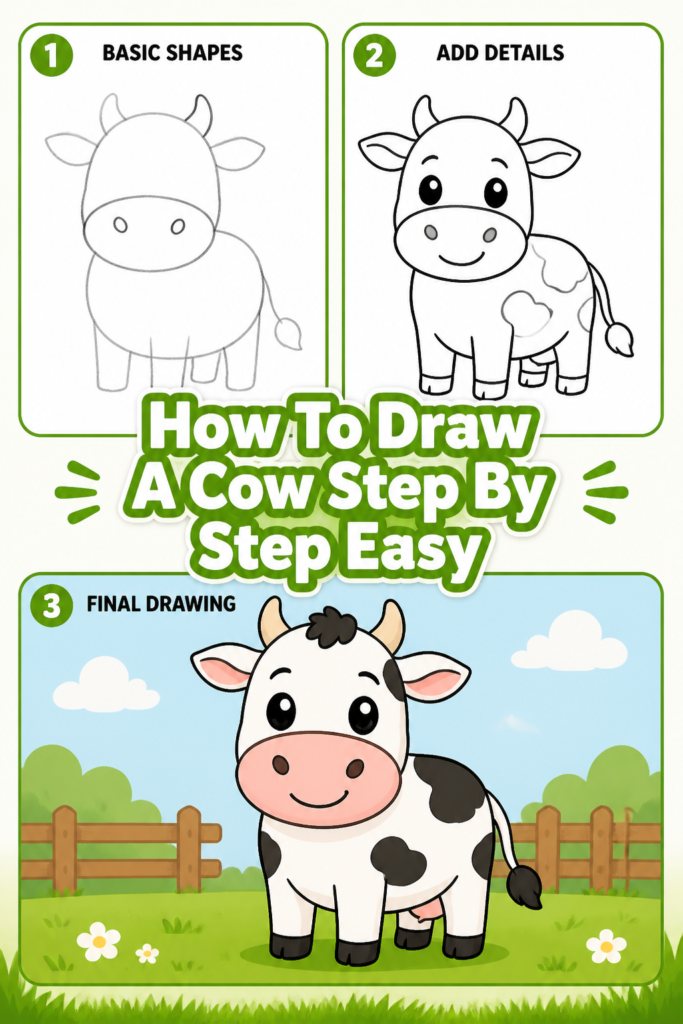
This guide will walk you through creating a friendly, cartoon-style cow from scratch. You’ll learn to use basic shapes as a foundation, gradually adding details to bring your drawing to life. By the end, you’ll have a complete cow drawing and a boost in your artistic confidence.
- Time needed: 30-60 minutes (depending on detail and pace)
- Difficulty: Beginner
- What you’ll need: Pencil, eraser, paper, (optional) colored pencils or markers
Step-by-Step Instructions
Step 1: Sketch the Basic Body Shapes
Begin by lightly drawing two overlapping ovals for the cow’s main body. Make one oval larger for the rear and a slightly smaller, more elongated oval for the front chest area.
These ovals should connect gently in the middle, forming the basic mass of your cow’s torso. Keep your lines very light at this stage, as they are just guides.
Pro Tip: Use a light hand with your pencil. These initial lines are meant to be erased later, so don’t press too hard. Think of them as whispers on the page.
Step 2: Add the Head and Neck Guides
Draw a medium-sized circle above and slightly to the left of the front body oval for the head. This circle doesn’t need to be perfectly round, just a general guide.
Connect the head circle to the front body oval with two curved lines to form the neck. Cows have relatively thick necks, so ensure these lines create a substantial connection.
Step 3: Outline the Muzzle and Ears
Sketch a smaller, slightly flattened oval or a rounded rectangle at the bottom front of the head circle for the muzzle. This will be the snout area.
Add two leaf-like or rounded triangular shapes on either side of the top of the head circle for the ears. Position them slightly outwards, giving the cow a friendly appearance.
Pro Tip: Observing real cows, even from pictures, helps immensely. Notice the proportions of their heads and how the muzzle sits.
Step 4: Draw the Legs and Hooves
Extend four simple, roughly rectangular or cylindrical shapes downwards from the body ovals for the legs. Think of these as stick figures for now, ensuring they are evenly spaced.
Add small, rounded rectangles or slightly flared shapes at the bottom of each leg for the hooves. Make sure the hooves face slightly forward.
Remember that cow legs have joints; try to slightly bend the “cylinders” at the knee and ankle areas to give them a more natural look. Don’t make them perfectly straight, as this can make your cow look stiff.
Step 5: Refine the Outline and Add Facial Features
Go over your light guide lines with a slightly darker hand, smoothing out the curves of the body, head, and legs. Erase any overlapping guide lines that are no longer needed, especially where the ovals meet.
Draw two small circles for the eyes, placing them towards the upper part of the head, above the muzzle. Add two tiny circles or ovals on the muzzle for the nostrils.
Sketch a gently curved line below the nostrils for the mouth. This line can be a simple smile or a relaxed curve.
Pro Tip: Give your cow personality through its eyes! Placing them slightly closer together can make it look cute, while wider placement can give a calm expression.
Step 6: Include Tail, Horns, and Udder (Optional)
Draw a long, thin, gently curved line extending from the rear of the body for the tail. Add a tuft of hair at the end of the tail, making it look bushy.
For horns, draw two curved, pointed shapes emerging from the top of the head, between the ears. These can be short and stout or long and elegant, depending on your preference for the cow’s breed.
If drawing a female cow (a dairy cow), you can add a rounded, slightly bulbous shape beneath the rear body for the udder. Include four small teats hanging from it.
Step 7: Add Details and Spots
Draw patches or spots on your cow’s body. These can be irregular, organic shapes scattered across its back, sides, and even its face.
Think about the typical black and white Holstein patterns, or create your own unique markings. Add small lines inside the ears for texture and definition.
Refine any other small details, such as wrinkles around the eyes or subtle muscle definition on the legs, if you feel confident.
Step 8: Erase Remaining Guidelines and Finalize
Carefully erase any faint pencil lines from your initial sketches that are still visible. Your cow’s outline should now be clean and crisp.
Go over your final lines one last time with a slightly firmer pressure to make them stand out. You can also use a darker pencil or a fine-tip marker for this step.
At this point, your cow drawing is complete! You can leave it as a line drawing or move on to coloring.
Step 9: Color Your Cow (Optional)
Choose your desired colors for your cow. Common choices include black and white, brown and white, or solid brown.
Fill in the spots first, then the main body, ensuring you stay within the lines. Use pink or light brown for the muzzle and inner ears.
Consider adding some light shading to give your cow more depth. For instance, slightly darken the undersides of the body and legs.
Common Mistakes to Avoid
Making Legs Too Stiff or Straight
A common pitfall is drawing legs as perfectly straight, rigid lines. This makes the cow look unnatural and like it’s made of cardboard.
Remember that animals have joints. Try to show a subtle bend at the knees and hocks, even in a simplified drawing. Observing how a cow stands in real life or in pictures will greatly help.
Incorrect Proportions for the Head and Body
Sometimes, beginners might draw a head that is too small or too large in relation to the body. This can throw off the entire balance of the drawing.
Use your initial guide shapes to establish a good ratio. The head circle should generally be about 1/4 to 1/5 the size of the main body mass. Trust your eye and adjust early on.
Flat Features on the Face
Drawing eyes, nostrils, and the mouth as simple flat shapes can make the cow’s face lack dimension and expression. The muzzle especially needs to feel like it extends forward.
Try to give a slight curve or volume to these features. Think of the eyes as spheres and the muzzle as a rounded block. Even subtle shading can help features pop out.
Rushing the Initial Sketch
Skipping the light guideline phase and jumping straight to dark, definitive lines often leads to frustration. It’s harder to correct mistakes when lines are dark and permanent.
Always start with very light, exploratory lines. Build up your drawing gradually, refining shapes and erasing as you go. Patience in the initial stages saves a lot of rework later.
Troubleshooting
My Cow Looks Lopsided or Unbalanced
If your cow appears tilted or one side seems heavier than the other, it often comes down to the initial body ovals. They might not be aligned properly.
Go back to Step 1 and redraw your ovals very lightly, focusing on symmetry and balance. Imagine a central line running through the cow’s body and ensure features are roughly equidistant from it.
The Legs Look Unnatural or Don’t Seem to Support the Body
This issue usually stems from not accounting for the cow’s weight or the angles of the legs. The legs might be too thin, too short, or positioned incorrectly.
Ensure the legs are thick enough to support the body, and that they originate from the correct points on the body ovals. Observe how a cow’s legs angle slightly outwards from the body. Adding a slight bend at the joints also improves naturalness.
My Drawing Doesn’t Quite Look Like a Cow
If your final drawing is missing that distinct bovine quality, it might be due to a lack of key features or incorrect proportions of those features. The muzzle, ears, and overall body shape are crucial.
Review the specific features: is the muzzle wide enough? Are the ears positioned correctly and shaped like a cow’s? Does the body have that characteristic robust, somewhat rectangular shape? Sometimes, exaggerating a cow’s unique features, like its broad snout or large ears, can help.
Key Takeaways
- Always start with light, basic shapes as your foundation.
- Break down complex forms into simpler components like ovals and circles.
- Pay attention to proportions early on to ensure a balanced drawing.
- Don’t be afraid to erase and refine your lines as you go.
- Adding subtle bends to legs creates a more natural and less stiff appearance.
- Details like spots, a tail tuft, and a gentle expression bring your cow to life.
- Practice is key; every drawing is a step towards improvement.
Frequently Asked Questions
Can I draw different breeds of cows using this method?
Absolutely! This method provides a basic framework. You can adapt it by changing horn shapes, ear sizes, body proportions (e.g., a beefier build for a Texas Longhorn versus a slender dairy cow), and, of course, the color patterns.
What if I make a mistake or my lines aren’t perfect?
Mistakes are part of the learning process! Don’t be discouraged. Use your eraser freely and think of each “mistake” as an opportunity to learn and adjust. Drawing is about progress, not perfection.
How can I make my cow drawing look more three-dimensional?
To add depth, focus on shading. Identify a light source and then subtly darken the areas opposite to it, such as the underside of the belly, the inner parts of the legs, and the shadows cast by the head. Overlapping shapes also create a sense of depth.
What are the best colors to use for a cow?
For a classic cow, black and white (like a Holstein) or various shades of brown and white (like a Hereford or Guernsey) are popular. You can also use cream, tan, or even reddish-brown. Don’t forget pink for the muzzle and udder, and a touch of gray for hooves.
Our Top Recommended Finds
- Sketchbook with medium-weight paper: A good quality sketchbook prevents bleed-through and holds up well to erasing.
- Set of drawing pencils (HB, 2B, 4B): Different lead hardness allows for lighter sketches and darker, bolder lines.
- Kneaded eraser: This type of eraser is excellent for lifting pencil marks without damaging the paper, perfect for subtle corrections.
Unleash Your Inner Artist
You’ve just created your very own cow drawing, and that’s a fantastic achievement! Every stroke you made built confidence and refined your artistic eye. This journey of drawing isn’t just about the finished piece; it’s about enjoying the process and seeing what you can create.
Why stop here? Try drawing another cow, perhaps from a different angle or with a unique expression. You could also explore drawing other farm animals like pigs or chickens, applying the same basic shape principles. Grab your pencil and paper right now and keep that creative energy flowing!