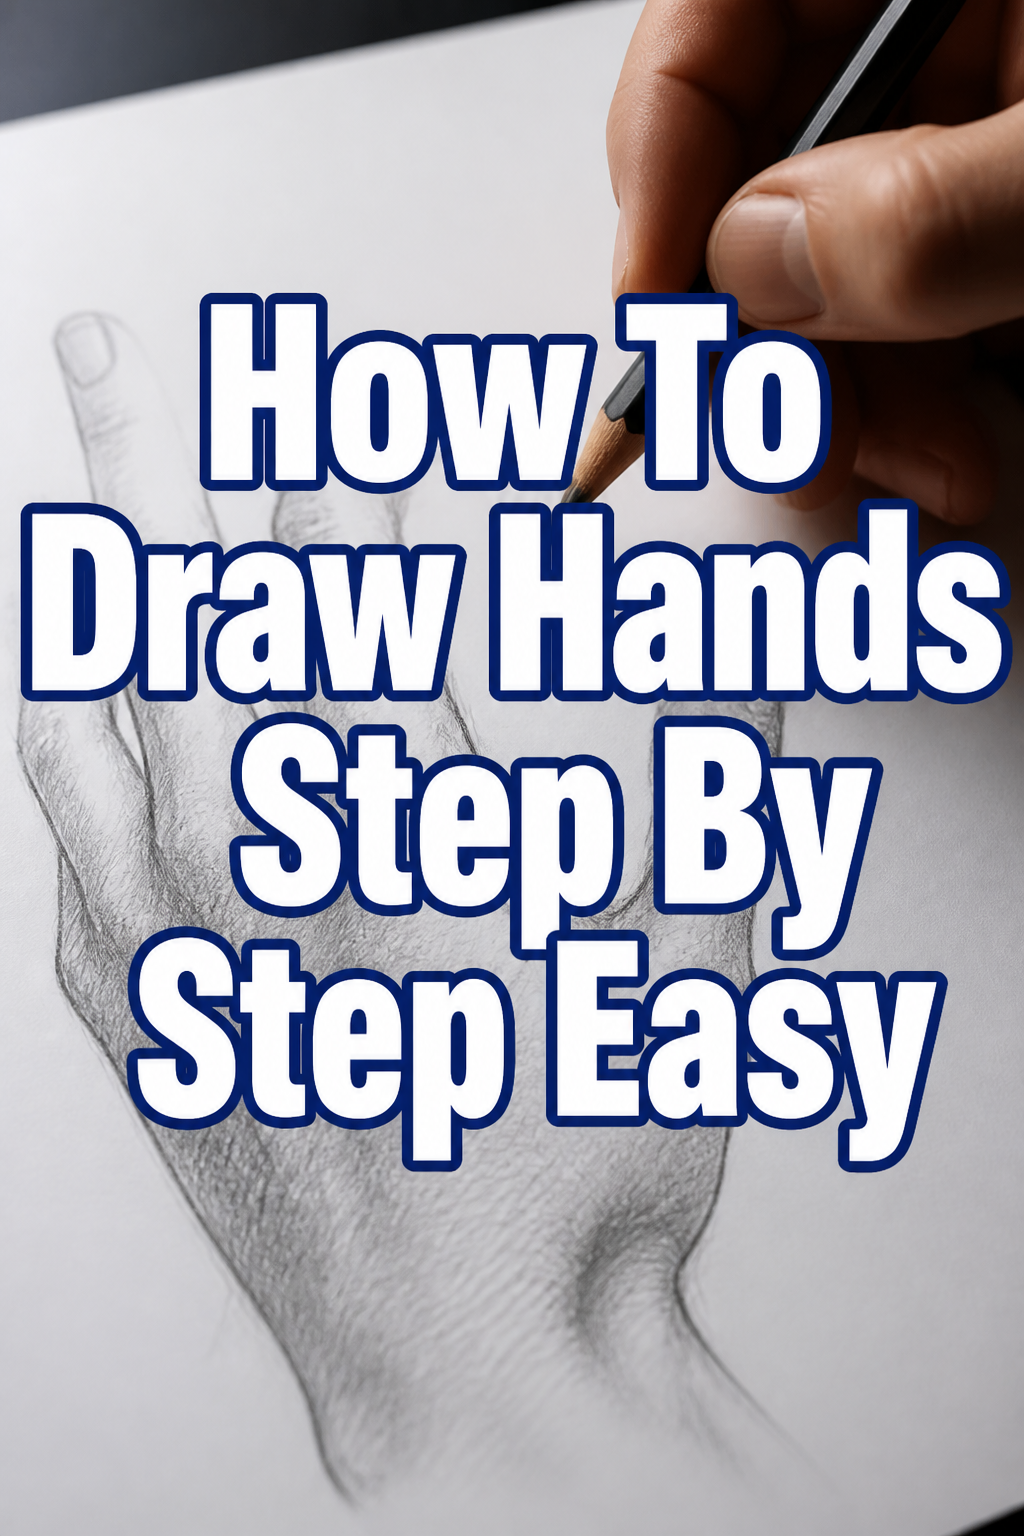
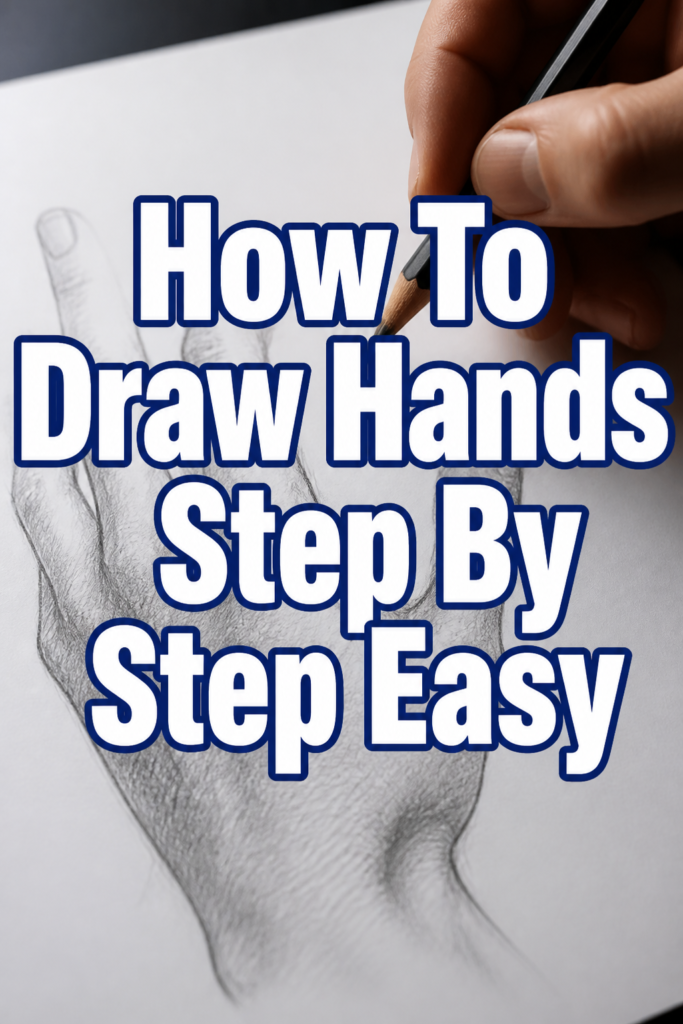
👋 How To Draw Hands Step By Step Easy

& Painting
No rigid rules or pretension. Just practical guides, medium comparisons, and encouraging tips to help you enjoy the drawing & painting process.
Drawing hands often feels like a secret artist handshake, notoriously difficult to master. For years, I avoided drawing them myself, always hiding them in pockets or behind backs. But I discovered a simple truth: breaking them down into basic shapes makes all the difference.
This guide will demystify the process for you. You’ll learn to see hands not as complex structures, but as manageable, interconnected forms. Soon, you’ll be drawing expressive, natural-looking hands with confidence.
Quick Overview
Learning to draw hands can be incredibly rewarding, opening up a world of expressive possibilities in your art. This guide will take you through the fundamental steps to build a hand from simple shapes, making the process approachable and fun. You’ll gain the foundational skills to tackle various hand poses.
- Time needed: 45-90 minutes for initial practice, ongoing for mastery
- Difficulty: Beginner
- What you’ll need: Pencil, eraser, paper, reference photos (optional)
Step-by-Step Instructions
Step 1: Block Out the Palm
Start by drawing a simple, flat shape for the palm. Think of it as a slightly tapered rectangle or a rounded trapezoid. This establishes the hand’s core size and general direction.
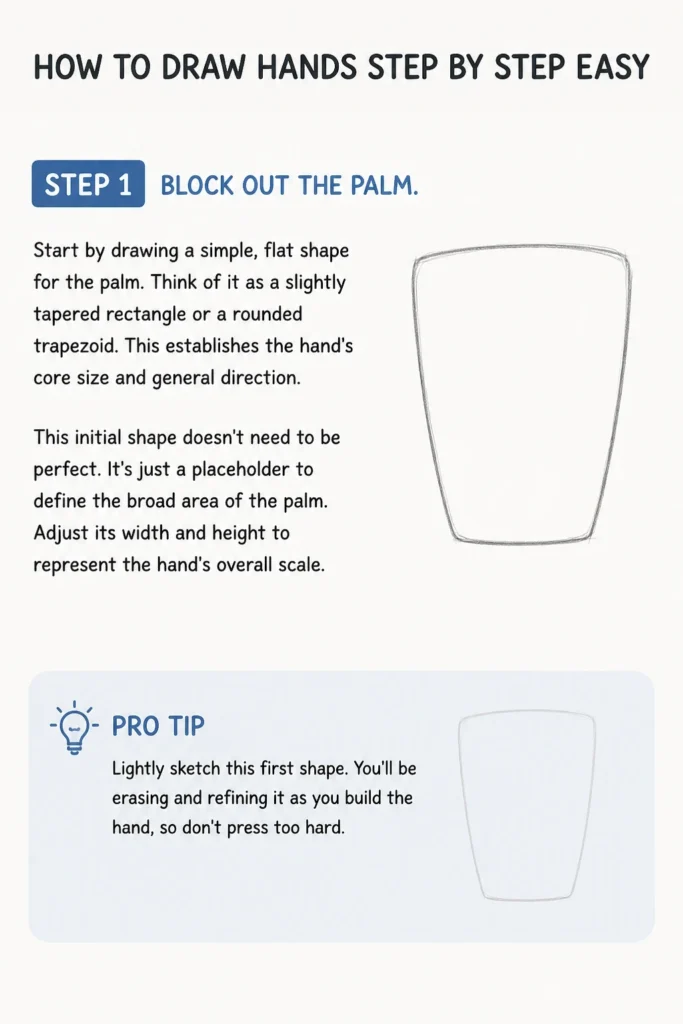
This initial shape doesn’t need to be perfect. It’s just a placeholder to define the broad area of the palm. Adjust its width and height to represent the hand’s overall scale.
Pro Tip: Lightly sketch this first shape. You’ll be erasing and refining it as you build the hand, so don’t press too hard.
Step 2: Add the Thumb Block
Next, draw a separate block for the thumb. This shape usually emerges from the side of the palm, near the wrist. It’s often like a rounded trapezoid or a thick, curved wedge.
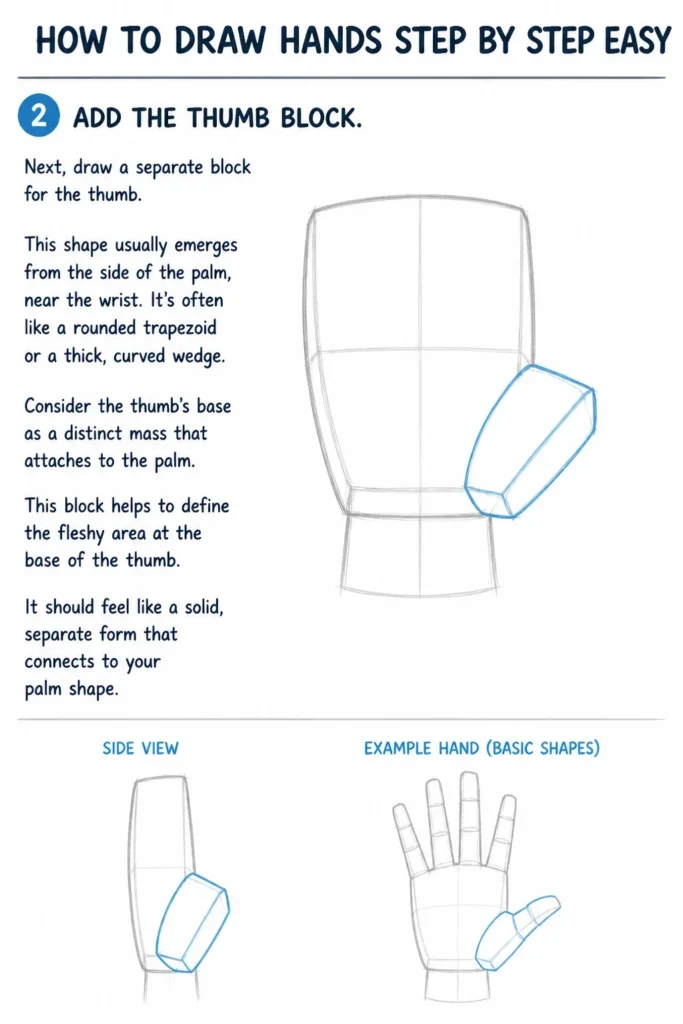
Consider the thumb’s base as a distinct mass that attaches to the palm. This block helps to define the fleshy area at the base of the thumb. It should feel like a solid, separate form that connects to your palm shape.
Step 3: Map Out the Finger Bases
Now, draw four small circles or ovals along the top edge of your palm block. These represent the knuckles where the fingers attach. Space them out according to the natural spread of fingers.
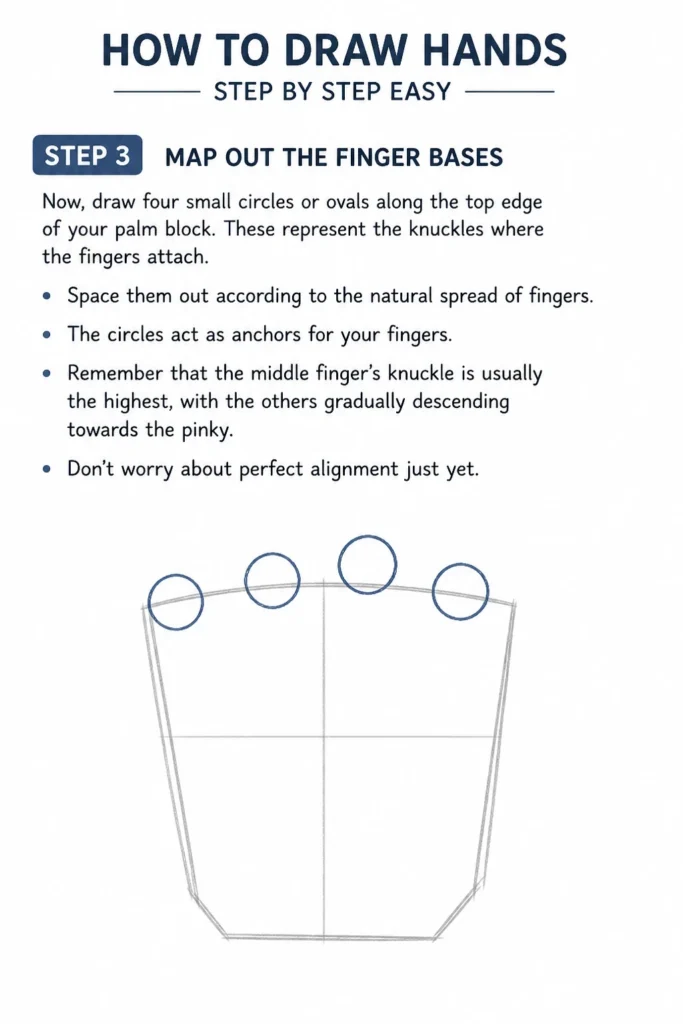
The circles act as anchors for your fingers. Remember that the middle finger’s knuckle is usually the highest, with the others gradually descending towards the pinky. Don’t worry about perfect alignment just yet.
Step 4: Sketch the Finger Segments
From each knuckle circle, extend three simple segments for each finger. Think of these segments as small, rounded rectangles or cylinders. The first segment is the longest, followed by two shorter ones.
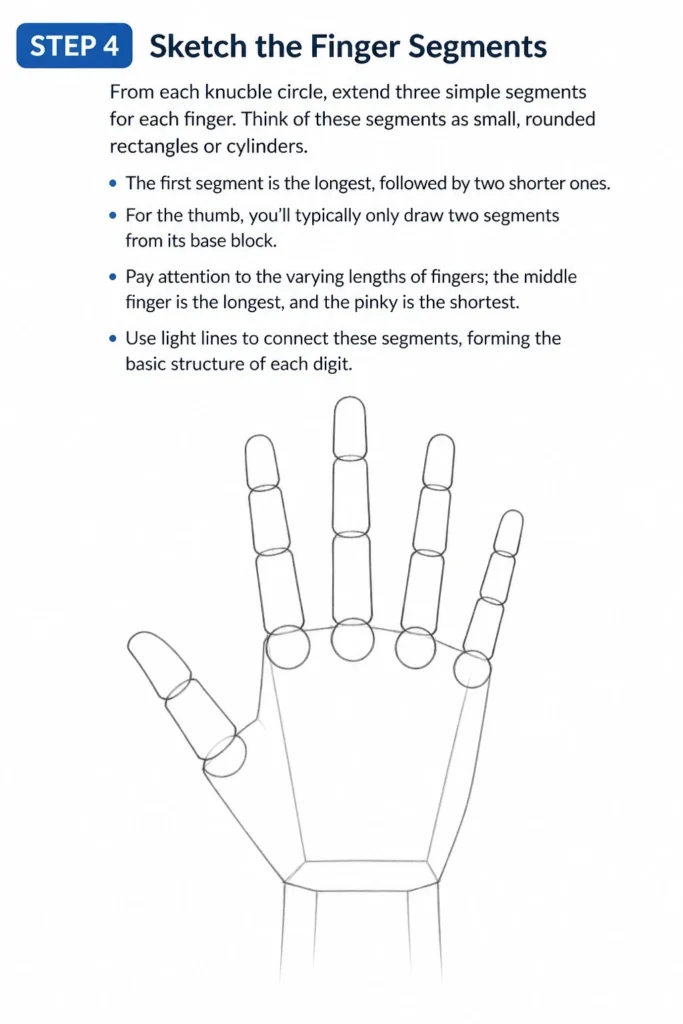
For the thumb, you’ll typically only draw two segments from its base block. Pay attention to the varying lengths of fingers; the middle finger is the longest, and the pinky is the shortest. Use light lines to connect these segments, forming the basic structure of each digit.
Step 5: Connect the Forms and Define the Outline
Now, begin to connect all these basic shapes with smoother, more organic lines. Blend the palm block into the thumb block and the finger segments. Start to refine the overall contour of the hand.
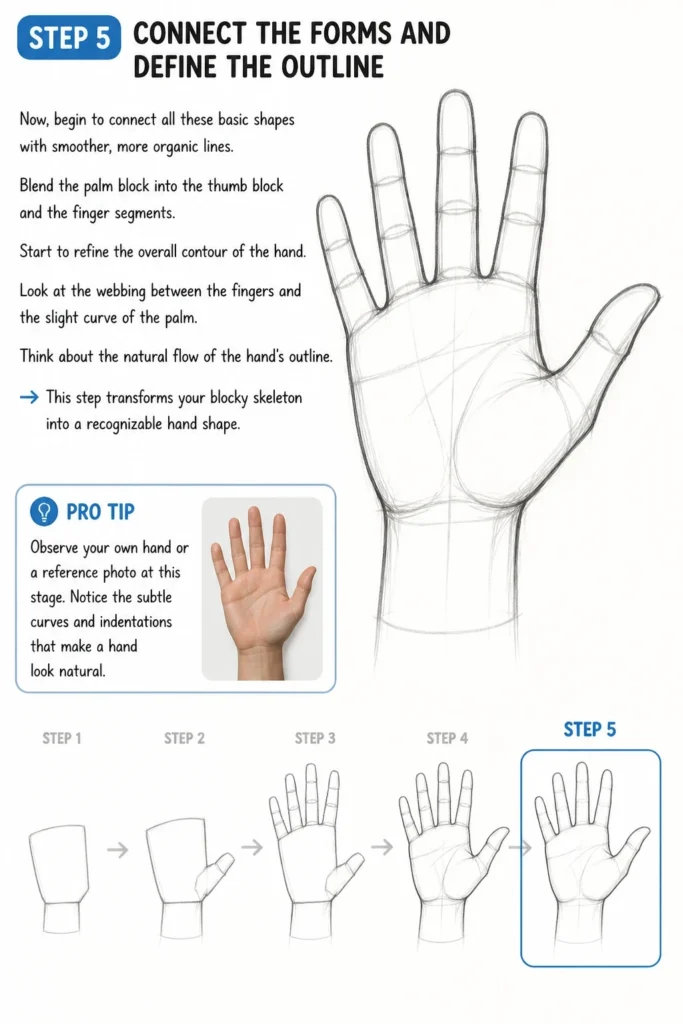
Look at the webbing between the fingers and the slight curve of the palm. Think about the natural flow of the hand’s outline. This step transforms your blocky skeleton into a recognizable hand shape.
Pro Tip: Observe your own hand or a reference photo at this stage. Notice the subtle curves and indentations that make a hand look natural.
Step 6: Refine the Finger Joints and Tapering
Go back over your finger segments and refine the joints. Add a slight bulge at each knuckle, making them feel more like bones beneath the skin. Taper the fingers slightly towards the fingertips.
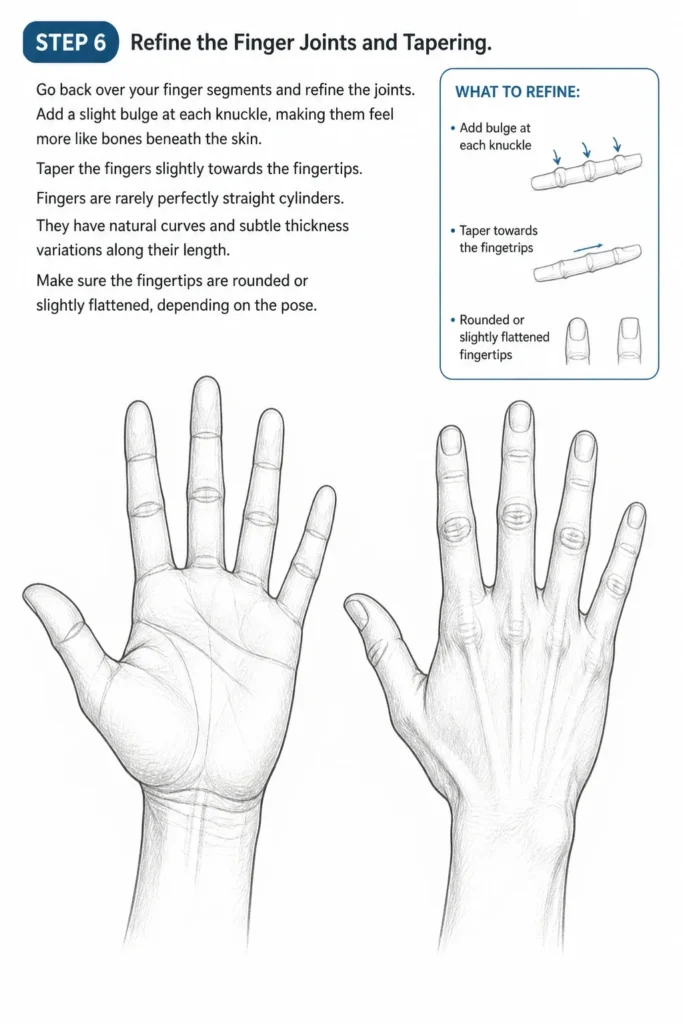
Fingers are rarely perfectly straight cylinders. They have natural curves and subtle thickness variations along their length. Make sure the fingertips are rounded or slightly flattened, depending on the pose.
Step 7: Add Basic Anatomical Details
Introduce subtle details like the lines of the palm, the creases at the knuckles, and fingernails. These small additions bring the hand to life and add realism. Don’t overdo the lines; less is often more.
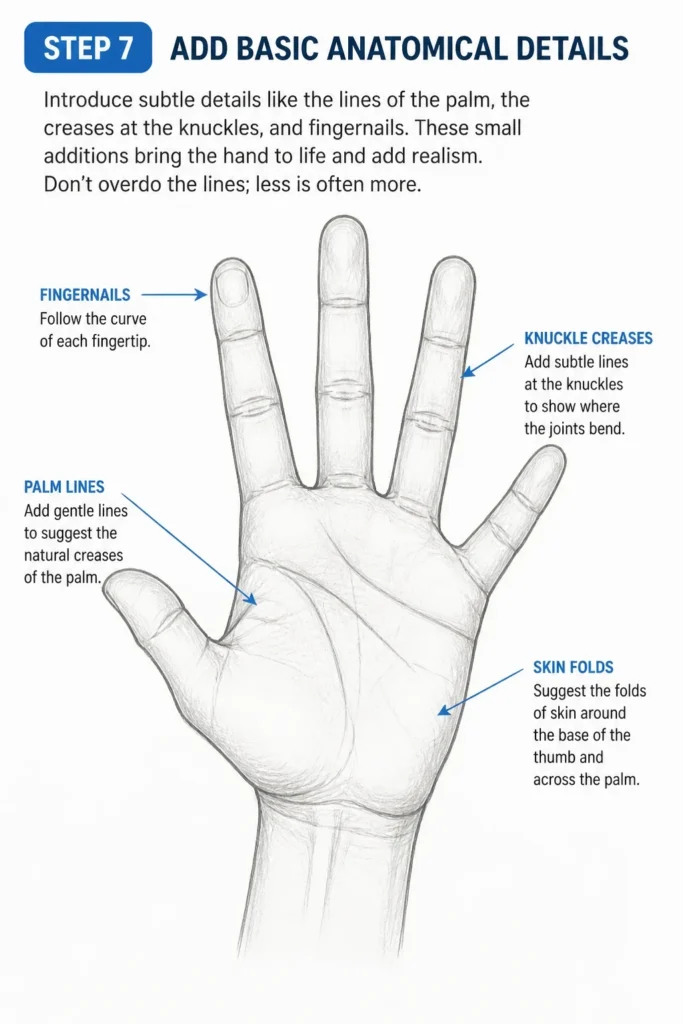
Consider the general shape and placement of the fingernails. They follow the curve of the fingertip. Add gentle lines to suggest the folds of skin on the palm and around the knuckles.
Step 8: Introduce Basic Shading (Optional but Recommended)
Apply some simple shading to give your hand form and depth. Identify a light source and add shadows to the areas that recede, like the underside of the fingers and the hollow of the palm.
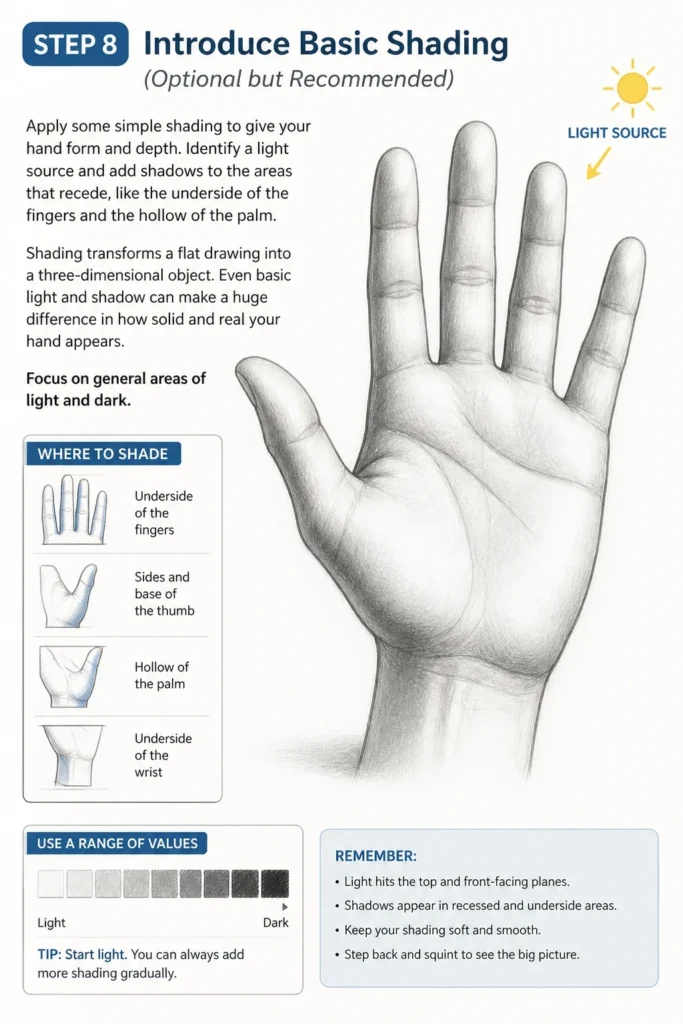
Shading transforms a flat drawing into a three-dimensional object. Even basic light and shadow can make a huge difference in how solid and real your hand appears. Focus on general areas of light and dark.
Common Mistakes to Avoid
Sausage Fingers
Many beginners draw fingers as perfectly uniform, cylindrical tubes, resembling sausages. This makes the hand look stiff and unnatural. Fingers have distinct joints and taper towards the tips.
To correct this, think of fingers as a series of connected, slightly tapering segments. Emphasize the knuckles and the varying thickness along each digit. Observe how fingers naturally bend and thin out.
Flat, Lifeless Hands
Another common error is drawing hands as if they are pressed flat against a surface. Hands are three-dimensional objects with curves, bumps, and hollows. Ignoring this makes them appear two-dimensional.
Always remember the volume of the hand. Think of the palm as a curved scoop, and the fingers as individual cylinders. Use lighter lines for areas further away and darker lines for closer edges to suggest depth.
Incorrect Thumb Placement
The thumb is often misplaced or drawn too small, making the hand look awkward. The thumb is a powerful, opposable digit that attaches significantly lower and more to the side of the palm compared to other fingers.
Pay close attention to where the thumb block emerges from the palm. It has a robust base and a wide range of motion. Study how it connects and articulate its distinct base, separate from the main four fingers.
Ignoring Basic Anatomy
Drawing without considering the underlying bone structure and muscle groups leads to incorrect proportions and stiffness. While you don’t need to be an anatomist, understanding key landmarks is crucial.
Focus on identifying the knuckles, wrist bone, and the general mass of the thumb. Even simple knowledge of these elements helps you create a more convincing and functional hand drawing.
Troubleshooting
My Hands Look Stiff and Unnatural
If your hands appear rigid, it’s likely due to drawing straight lines and uniform shapes. Hands are full of subtle curves and organic forms. They rarely sit completely flat or straight.
Try to introduce more curves into your lines. Observe how fingers naturally bend and how the palm creates a gentle cup. Practice drawing hands in various relaxed poses, letting gravity and natural posture influence your lines. Think about the flow of movement.
I Struggle with Proportions
Getting the size relationships between the palm, fingers, and thumb right can be challenging. Often, fingers are drawn too short or too long relative to the palm, or the thumb is out of scale.
A good rule of thumb (pun intended!) is that the palm from wrist to the base of the middle finger is roughly the same length as the middle finger itself. Use your own hand as a reference to check these proportions. Measure with your pencil on your paper.
Difficulty with Different Poses
Once you master a basic open hand, drawing hands in different poses can feel daunting. Foreshortening (when parts appear shorter because they are closer to the viewer) is often the biggest hurdle.
Start by breaking down complex poses into the same basic blocks you learned. Simplify the pose into its core shapes first. Then, gradually add details. Use plenty of reference photos for specific poses you want to draw.
Key Takeaways
- Always start with basic, simple shapes like rectangles and ovals for the palm and thumb.
- Build the fingers segment by segment, remembering their varying lengths and joint structures.
- Focus on the overall flow and natural curves of the hand, avoiding stiff, straight lines.
- Pay special attention to the thumb’s unique placement and robust connection to the palm.
- Use reference photos frequently to understand real-world anatomy and diverse poses.
- Practice regularly; drawing hands gets easier with consistent observation and effort.
Frequently Asked Questions
How can I make my hands look more expressive?
Expression in hands comes from understanding their flexibility and how they convey emotion. Focus on the pose, the tension in the fingers, and the overall gesture. A clenched fist shows anger, while open palms suggest vulnerability. Study how different emotions manifest in hand gestures.
Should I draw every single wrinkle and knuckle line?
No, you absolutely don’t need to draw every single detail. In fact, over-detailing can make hands look busy and old. Focus on the major creases that define the form and movement. Use lighter lines for subtle details and darker lines for prominent features.
What’s the best way to practice drawing hands?
The best practice involves a combination of methods. Sketch hands from life, using your own hand or a friend’s. Draw from photos, paying attention to different angles and poses. Also, practice drawing the underlying bone structure to understand the anatomy. Consistent, varied practice is key.
How do I make hands look less “cartoony” and more realistic?
To move beyond a cartoony look, emphasize subtle anatomical details and realistic proportions. Avoid overly simplified shapes. Focus on the tapering of fingers, the subtle bumps of knuckles, and the natural curves of the palm. Shading also plays a vital role in adding realism.
Our Top Recommended Finds
- Good Quality Sketchbook: A durable sketchbook with smooth paper provides a pleasant surface for practicing and allows for easy erasing and layering.
- Variety Pack of Pencils (HB, 2B, 4B): Having pencils with different lead hardness lets you achieve a range of line weights and shading values, from light construction lines to deep shadows.
- Kneaded Eraser: This versatile eraser is excellent for lifting graphite gently without damaging the paper, allowing for subtle corrections and highlights.
Your Journey to Confident Hand Drawing Starts Now
You now have a clear roadmap to approach drawing hands with confidence. Remember, every master artist started with basic shapes and consistent practice. Don’t be discouraged if your first few attempts aren’t perfect. Each line you draw is a step forward.
Keep observing hands around you, whether it’s your own, a friend’s, or in photographs. The more you look, the more you’ll understand their amazing structure and expressiveness. Pick up your pencil today and bring those hands to life on your page!
& Painting
No rigid rules or pretension. Just practical guides, medium comparisons, and encouraging tips to help you enjoy the drawing & painting process.