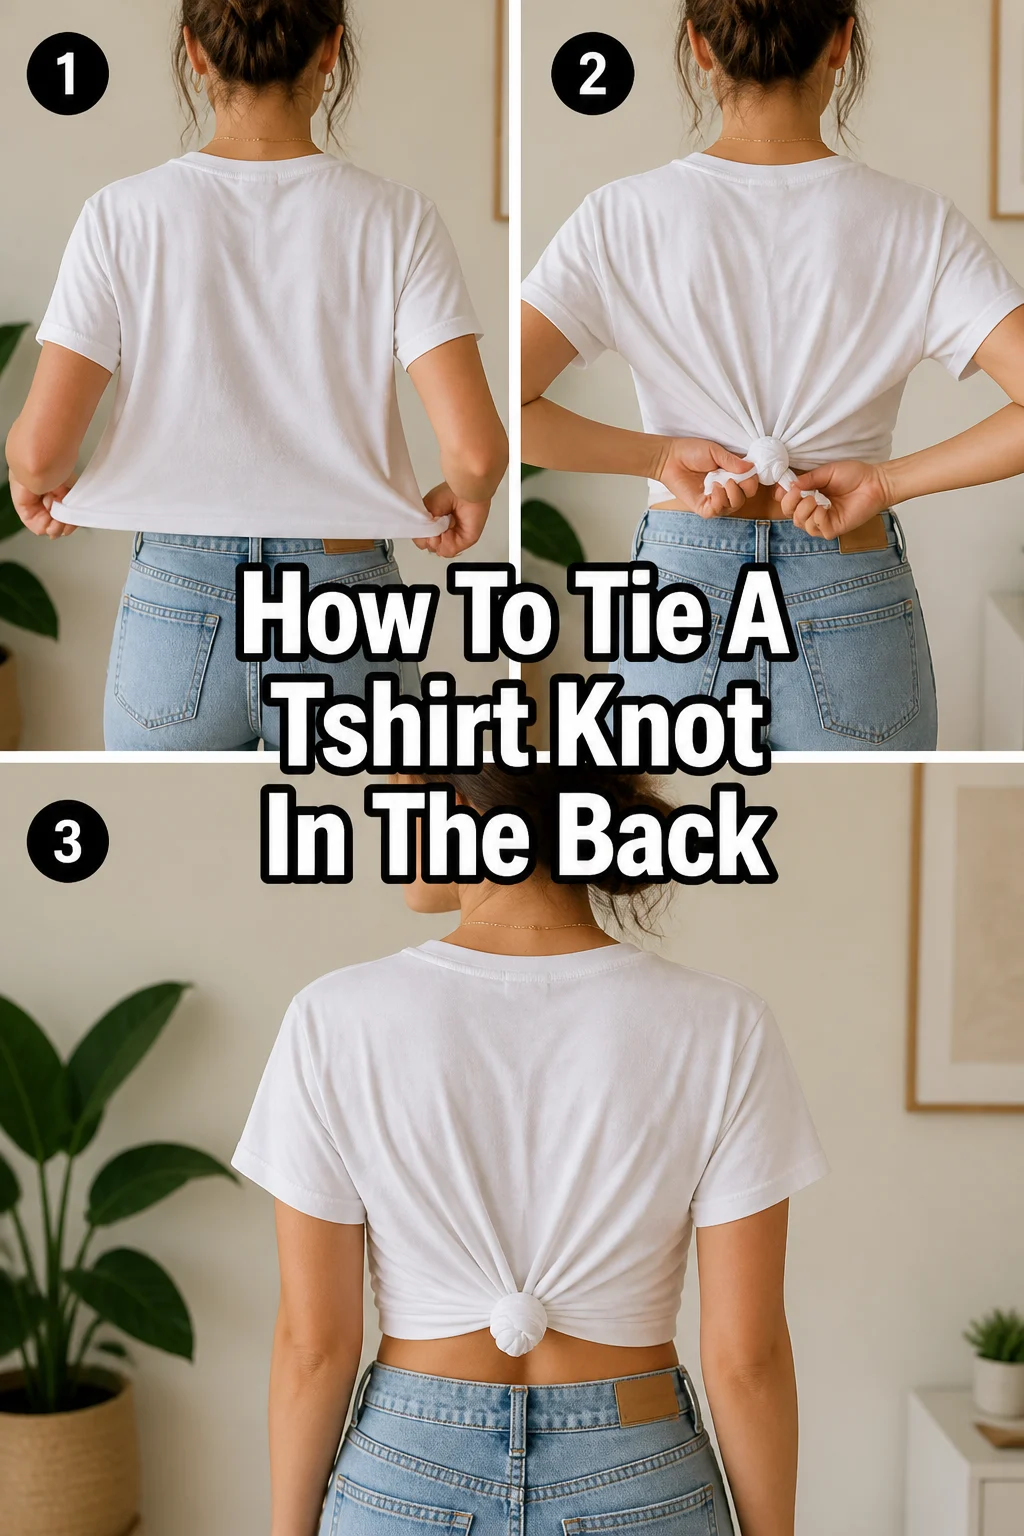
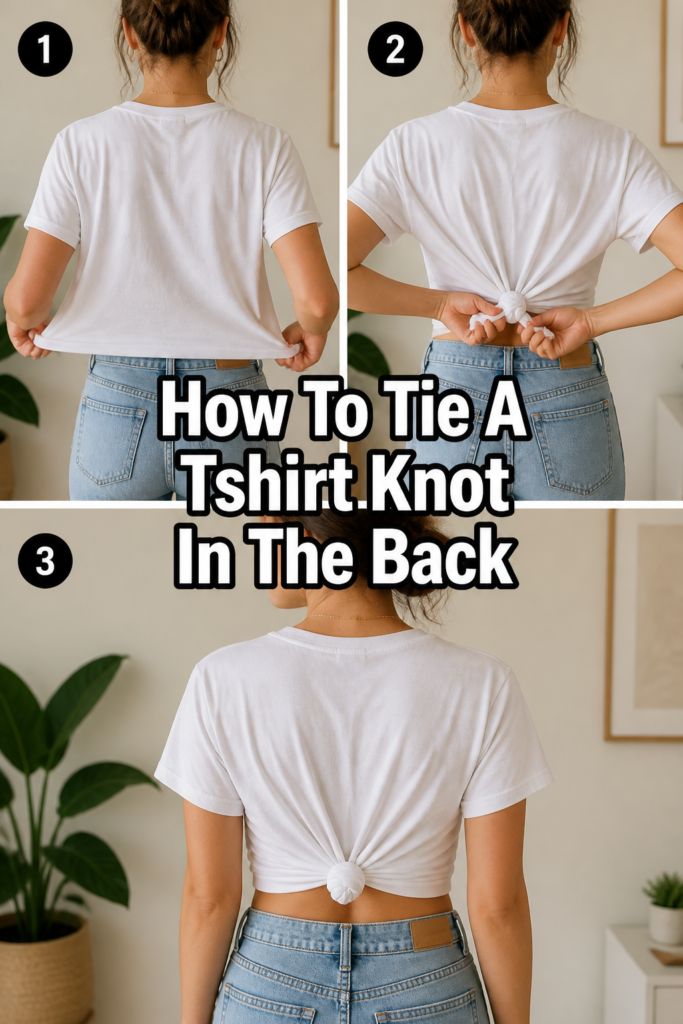
👕 How To Tie A Tshirt Knot In The Back
Tying a t-shirt knot in the back can completely transform your outfit.
I’ve personally used this simple trick to elevate countless casual looks, making oversized tees feel more tailored and stylish.
This guide will walk you through each step to achieve that perfect, flattering knot with ease.
Quick Overview
You’re about to learn how to cinch your t-shirt at the back, creating a flattering silhouette and adding a touch of personal style.
- Time needed: 5-10 minutes
- Difficulty: Beginner
- What you’ll need: A t-shirt (preferably a bit oversized or regular fit), your hands, a mirror.
Step-by-Step Instructions
Step 1: Choose Your T-Shirt Wisely
Pick a t-shirt that isn’t too tight. A slightly oversized or regular-fit tee works best, as you need enough fabric to gather and tie.
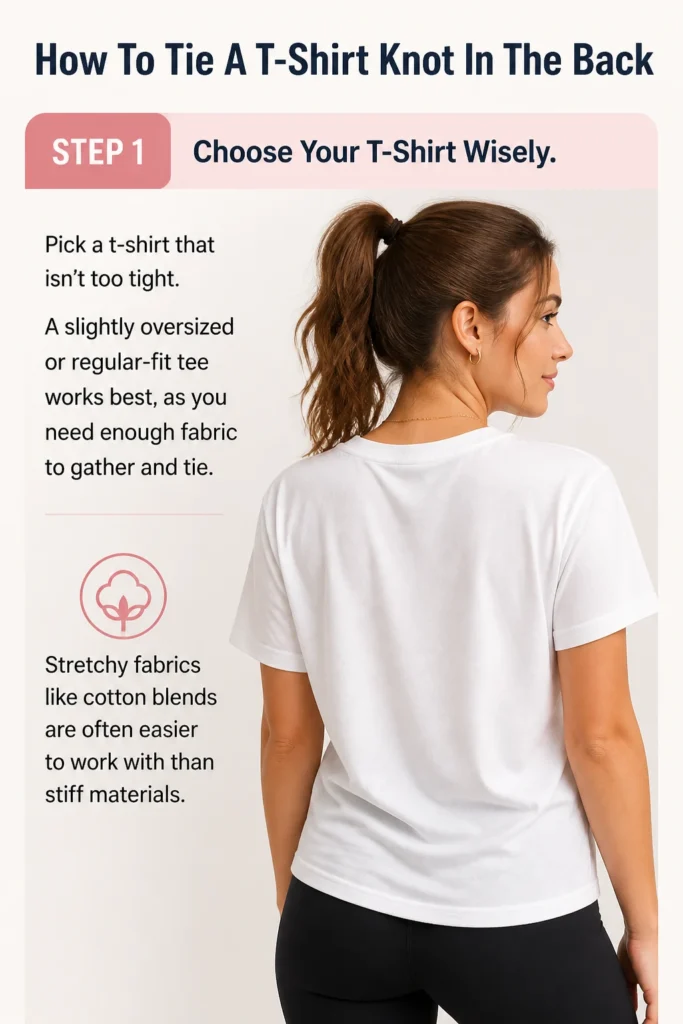
Stretchy fabrics like cotton blends are often easier to work with than stiff materials.
Step 2: Put On Your T-Shirt
Wear your chosen t-shirt as you normally would. Ensure it sits comfortably on your shoulders and chest.
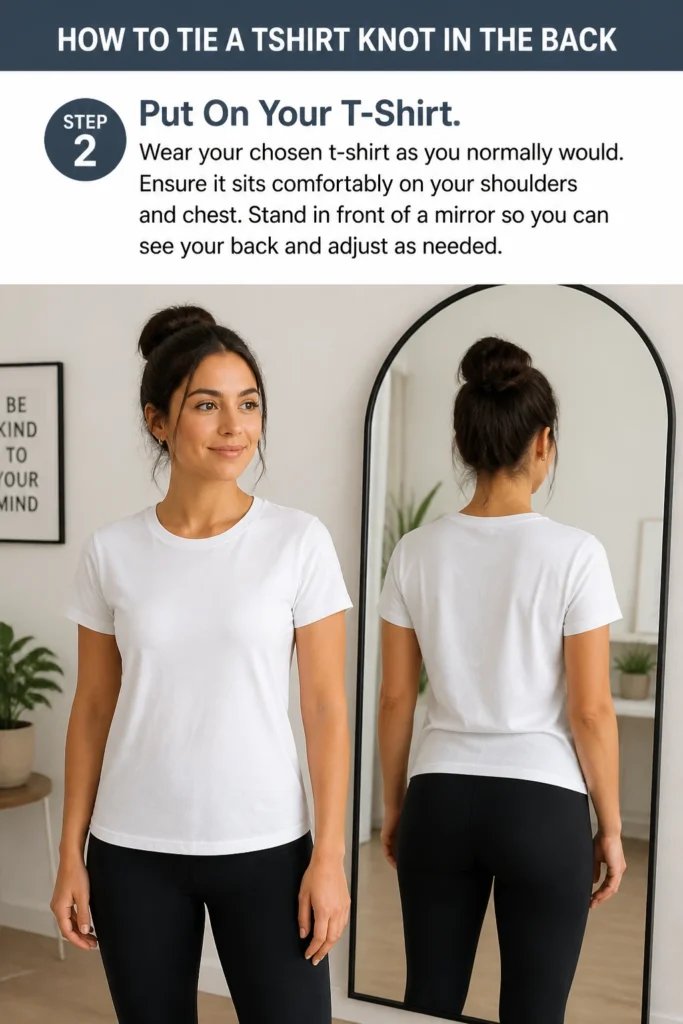
Stand in front of a mirror so you can see your back and adjust as needed.
Step 3: Gather the Fabric
Reach behind you with both hands. Find the excess fabric at the bottom hem of your t-shirt, typically around your lower back or waistline.
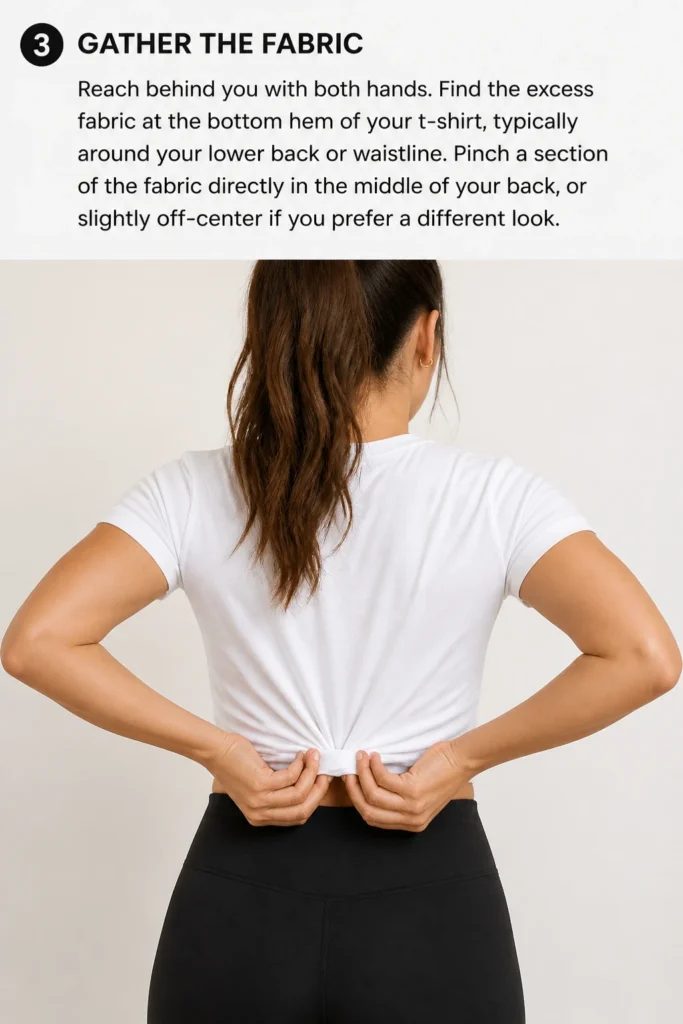
Pinch a section of the fabric directly in the middle of your back, or slightly off-center if you prefer a different look.
Step 4: Determine the Knot Placement
Decide how high or low you want the knot to sit. Pinching higher creates a more defined waist, while pinching lower gives a relaxed, casual vibe.
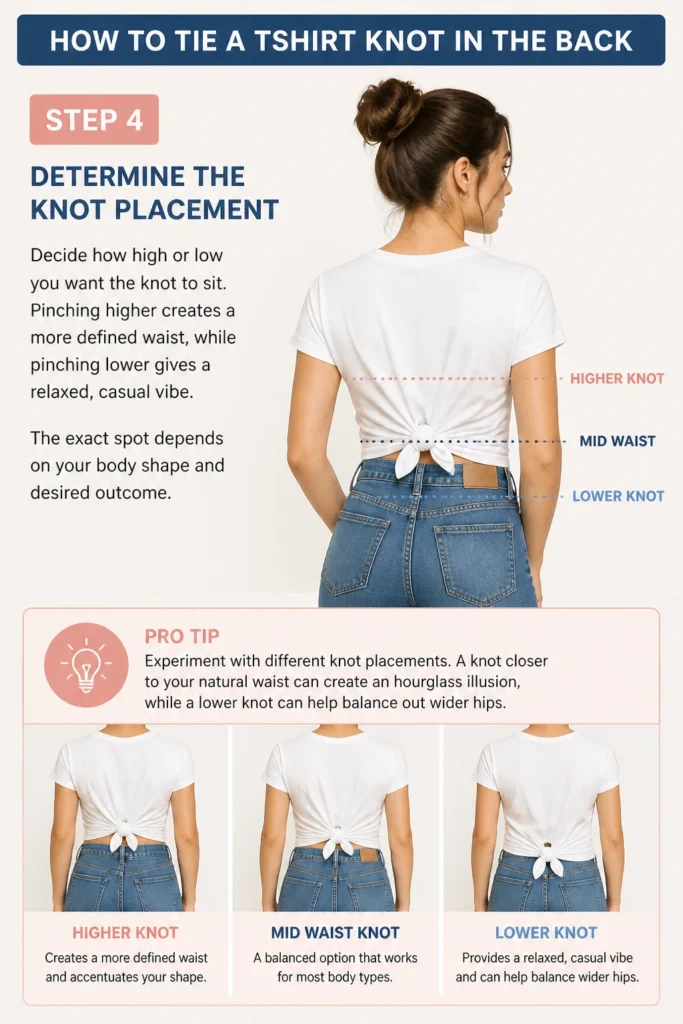
The exact spot depends on your body shape and desired outcome.
Pro Tip: Experiment with different knot placements. A knot closer to your natural waist can create an hourglass illusion, while a lower knot can help balance out wider hips.
Step 5: Twist the Fabric
Once you’ve gathered a good amount of fabric, twist it tightly. This creates a more compact base for your knot and helps prevent it from unraveling.
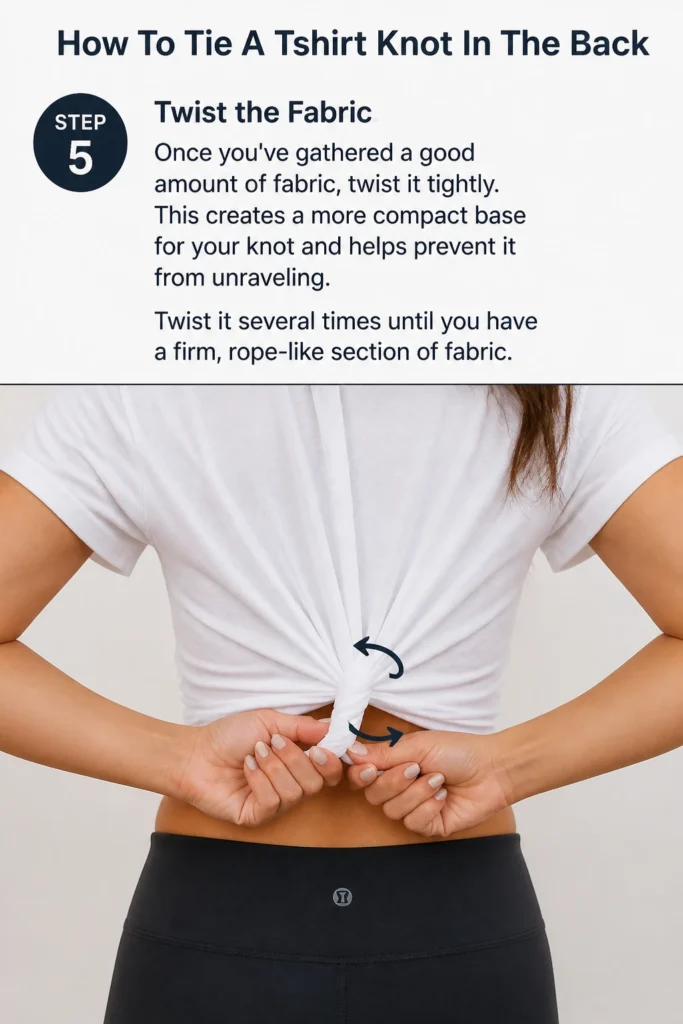
Twist it several times until you have a firm, rope-like section of fabric.
Step 6: Form the First Loop
Bring the twisted fabric around to form a loop. Imagine you’re starting to tie a shoelace, but with your t-shirt fabric.
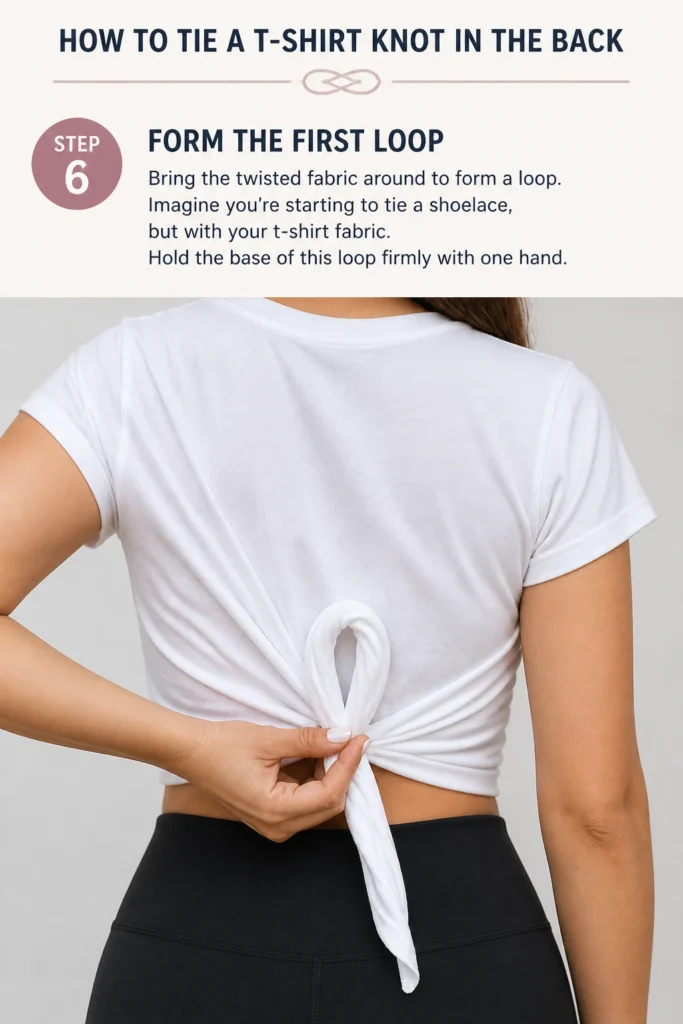
Hold the base of this loop firmly with one hand.
Step 7: Tie the Knot
Pass the tail end of the twisted fabric through the loop you just formed. This is your first basic knot.
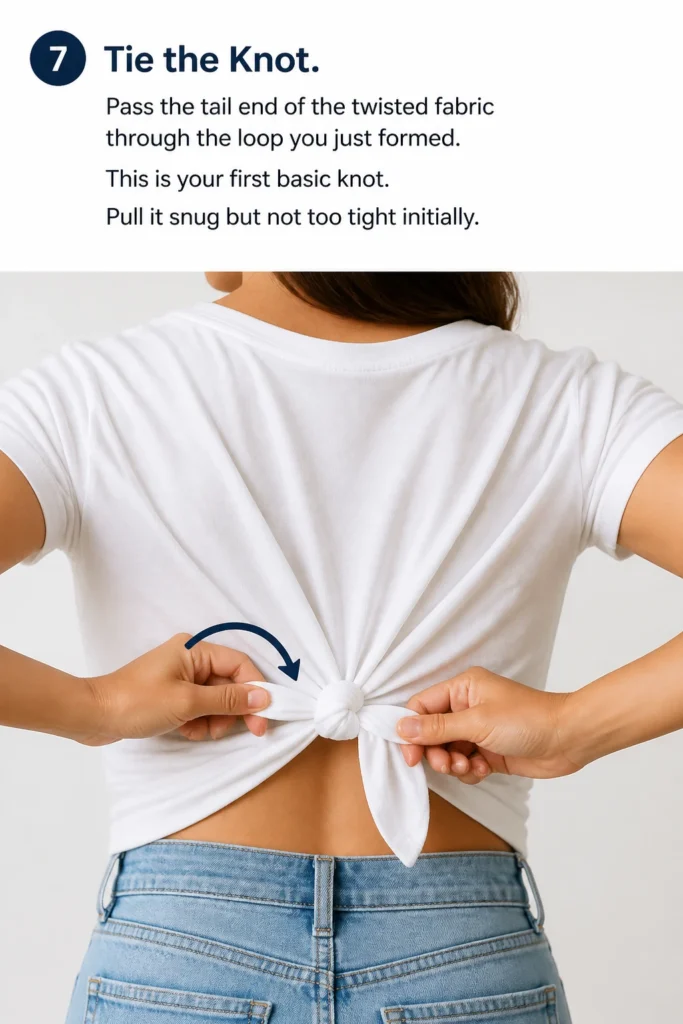
Pull it snug but not too tight initially.
Step 8: Double Knot for Security (Optional but Recommended)
For a more secure knot that won’t come undone, tie a second knot. Bring the tail through the loop again, or simply tie another simple knot over the first one.
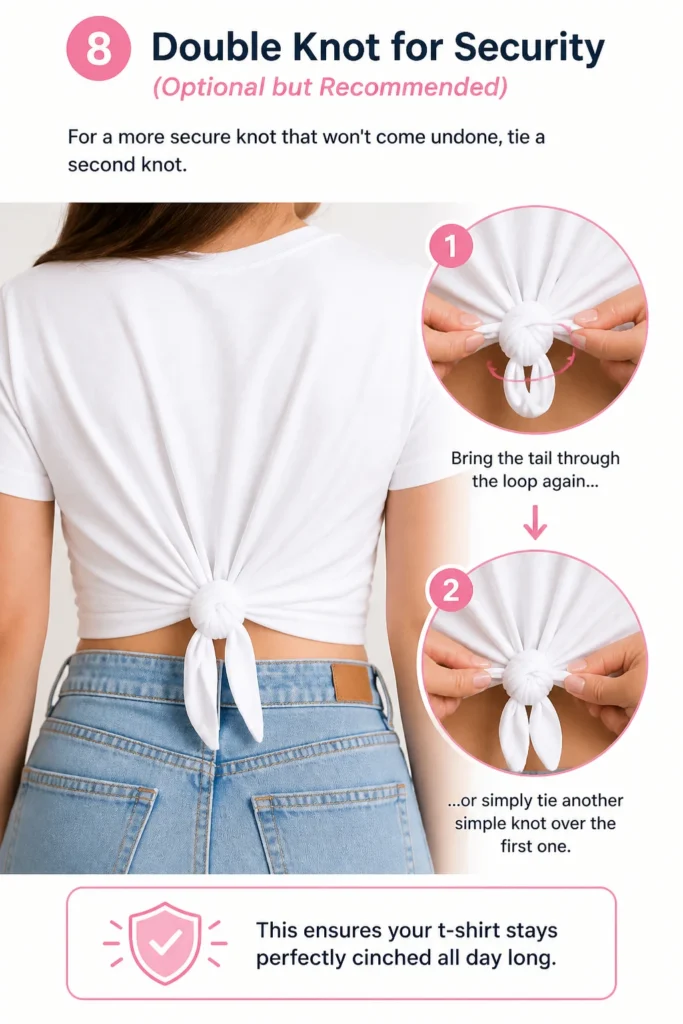
This ensures your t-shirt stays perfectly cinched all day long.
Step 9: Adjust and Refine
Gently tug and adjust the fabric around the knot. You want the front of your t-shirt to drape nicely without looking lumpy or uneven.
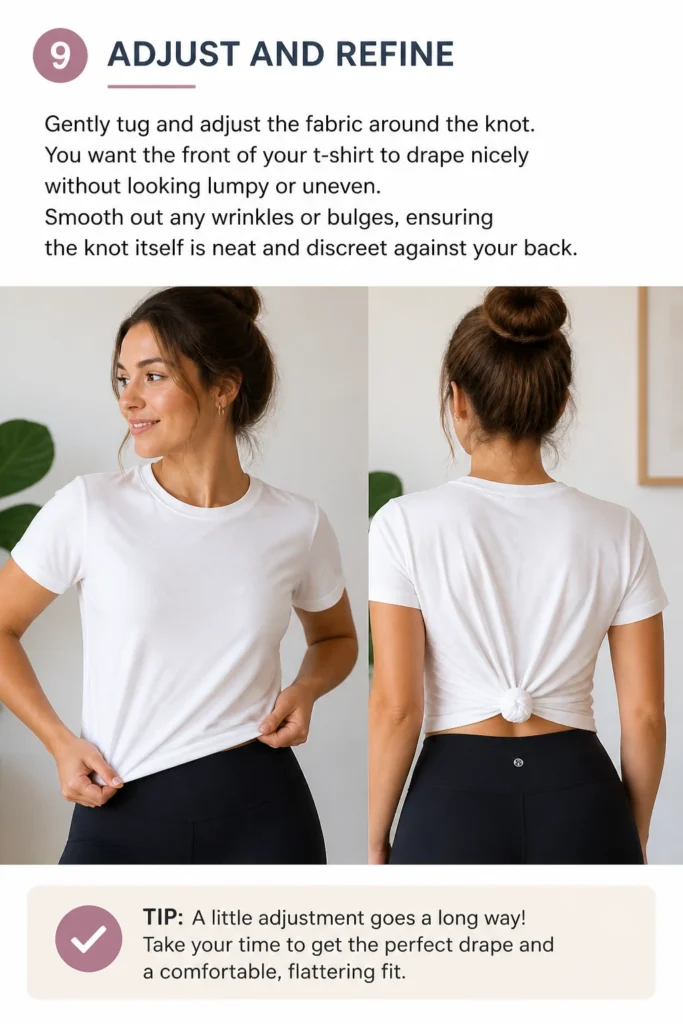
Smooth out any wrinkles or bulges, ensuring the knot itself is neat and discreet against your back.
Step 10: Check Your Reflection
Turn around and inspect your work in the mirror. Look at how the knot affects the overall silhouette of your outfit.
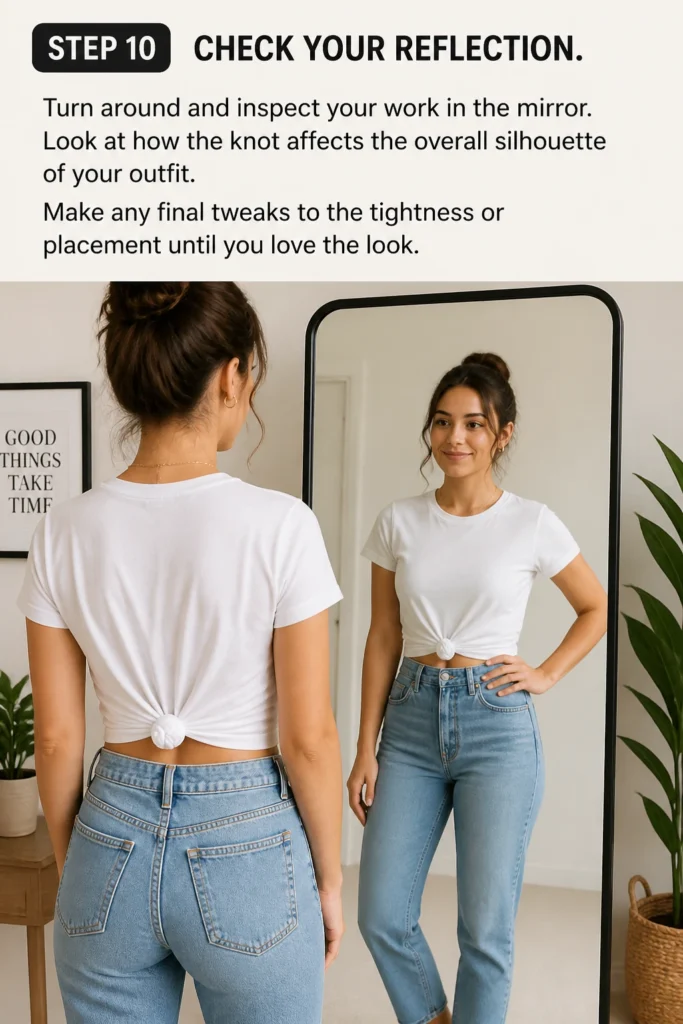
Make any final tweaks to the tightness or placement until you love the look.
Common Mistakes to Avoid
Tying Too Tight
One common error is pulling the knot too taut. This can create an uncomfortable pull on the fabric, distort the t-shirt’s shape, and even make it difficult to move freely.
Aim for a snug fit that still allows for comfort and a natural drape without excessive tension.
Using Too Little Fabric
Trying to tie a knot with only a tiny pinch of fabric often results in a weak knot that quickly comes undone. It also won’t create the desired cinched effect.
Gather a generous amount of fabric, especially if your t-shirt is very loose, to ensure a substantial and stable knot.
Incorrect Placement
Tying the knot too high or too low can sometimes look awkward rather than flattering. A knot placed too high might pull the shirt up uncomfortably, while one too low might not create enough shape.
Experiment to find the sweet spot that best complements your figure and the specific t-shirt you’re wearing.
Leaving the Knot Messy
A poorly finished knot with loose ends or a bulky appearance can detract from the overall polished look. The goal is often a clean, almost invisible cinch.
Always take a moment to tuck in any stray fabric and smooth out the knot, ensuring it lies flat and neatly against your back.
Troubleshooting
Knot Keeps Coming Undone
If your knot isn’t staying put, it’s likely not tied securely enough or you haven’t gathered enough fabric. Ensure you are twisting the fabric tightly before tying, and always opt for a double knot.
A second knot provides much-needed security, especially with slippery fabrics.
Front of the Shirt Looks Uneven or Bulky
An uneven front usually means the fabric isn’t distributed properly around the knot. After tying, gently pull the front of the shirt from the sides, away from the knot, to redistribute the fabric evenly.
Smooth out any folds or bulges from the front to ensure a clean drape.
Knot Feels Uncomfortable
Discomfort often stems from tying the knot too tightly or placing it directly on a sensitive spot. Try loosening the knot slightly, or adjust its position a few inches up or down.
Sometimes, simply rotating the knot slightly to one side can make a big difference in comfort.
Key Takeaways
- Choose the Right T-Shirt: Opt for a slightly oversized or regular fit with enough fabric to work with.
- Gather Generously: Pinch a substantial amount of fabric to create a strong, lasting knot.
- Twist Firmly: Tightly twisting the fabric before tying helps secure the knot and keeps it compact.
- Double Knot for Security: Always tie a second knot to prevent unraveling throughout the day.
- Adjust for Draping: Smooth out the front of your shirt and adjust the knot’s placement for the most flattering silhouette.
- Practice Makes Perfect: Don’t be afraid to experiment with different placements and tightness levels.
Frequently Asked Questions
Can I tie a back knot with any t-shirt?
While you can attempt it with most t-shirts, it works best with those that have some extra fabric, like an oversized or relaxed fit. Very fitted or cropped tees usually don’t have enough material to create a noticeable and secure knot in the back.
Does the knot damage the t-shirt fabric?
When done correctly and without excessive force, tying a t-shirt knot in the back should not damage the fabric. Avoid pulling too hard or using extremely thin, delicate materials that might tear under pressure.
How do I make the knot less noticeable?
To make the knot less noticeable, aim for a tight, compact double knot. You can also try tucking any loose ends securely into the knot itself or beneath the shirt fabric. Placing the knot slightly off-center can also make it blend in more seamlessly.
Can men tie a t-shirt knot in the back?
Absolutely! This styling trick is gender-neutral. Men can use it to cinch oversized t-shirts, create a more defined waist, or simply add a unique style element to their casual outfits, just like women.
Our Top Recommended Finds
- Oversized Cotton T-Shirt: Perfect for practicing and achieving that relaxed, stylish cinch. Look for a soft, breathable cotton blend.
- Full-Length Mirror: Essential for seeing the back of your outfit and making precise adjustments to your knot.
- Hair Ties or Small Rubber Bands: If you’re struggling to keep the fabric twisted while tying, a temporary hair tie can hold the twisted section in place before you knot it.
Elevate Your Everyday Style
Mastering the back t-shirt knot is a simple yet impactful way to refresh your wardrobe without buying new clothes.
It’s about taking what you already own and giving it a fresh, intentional twist.
Try it out today and discover how this small adjustment can make a big difference in how you look and feel.