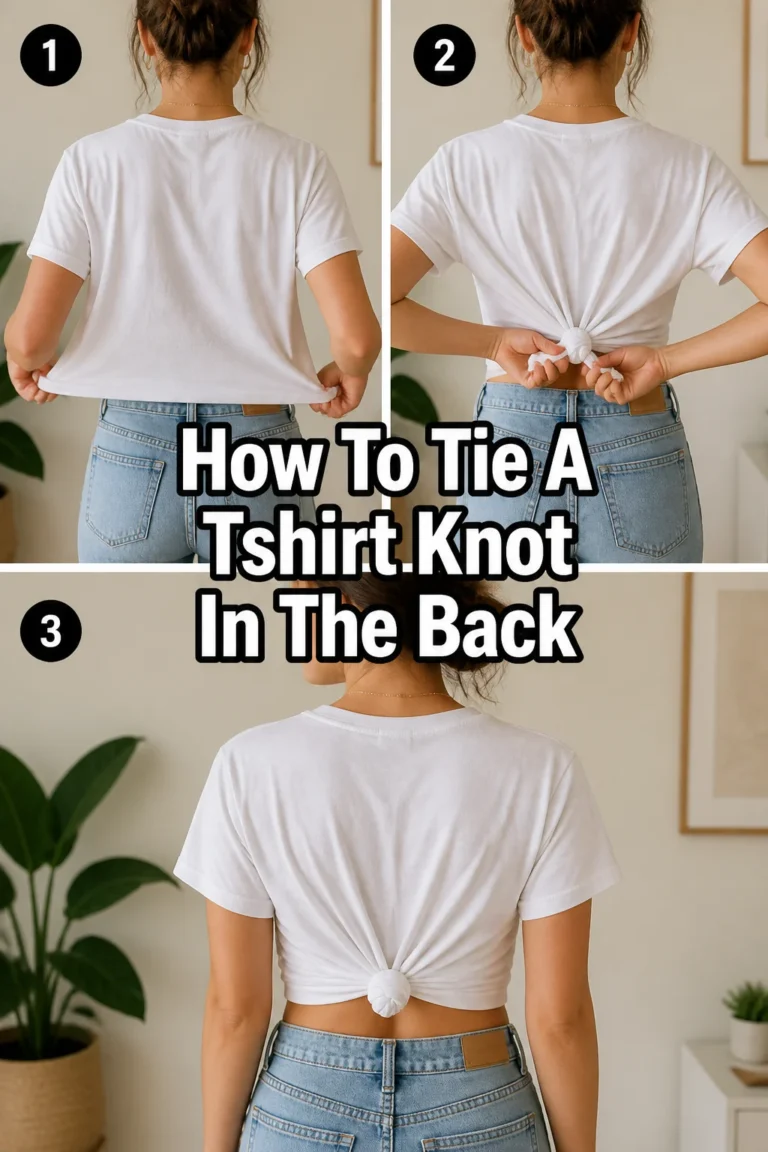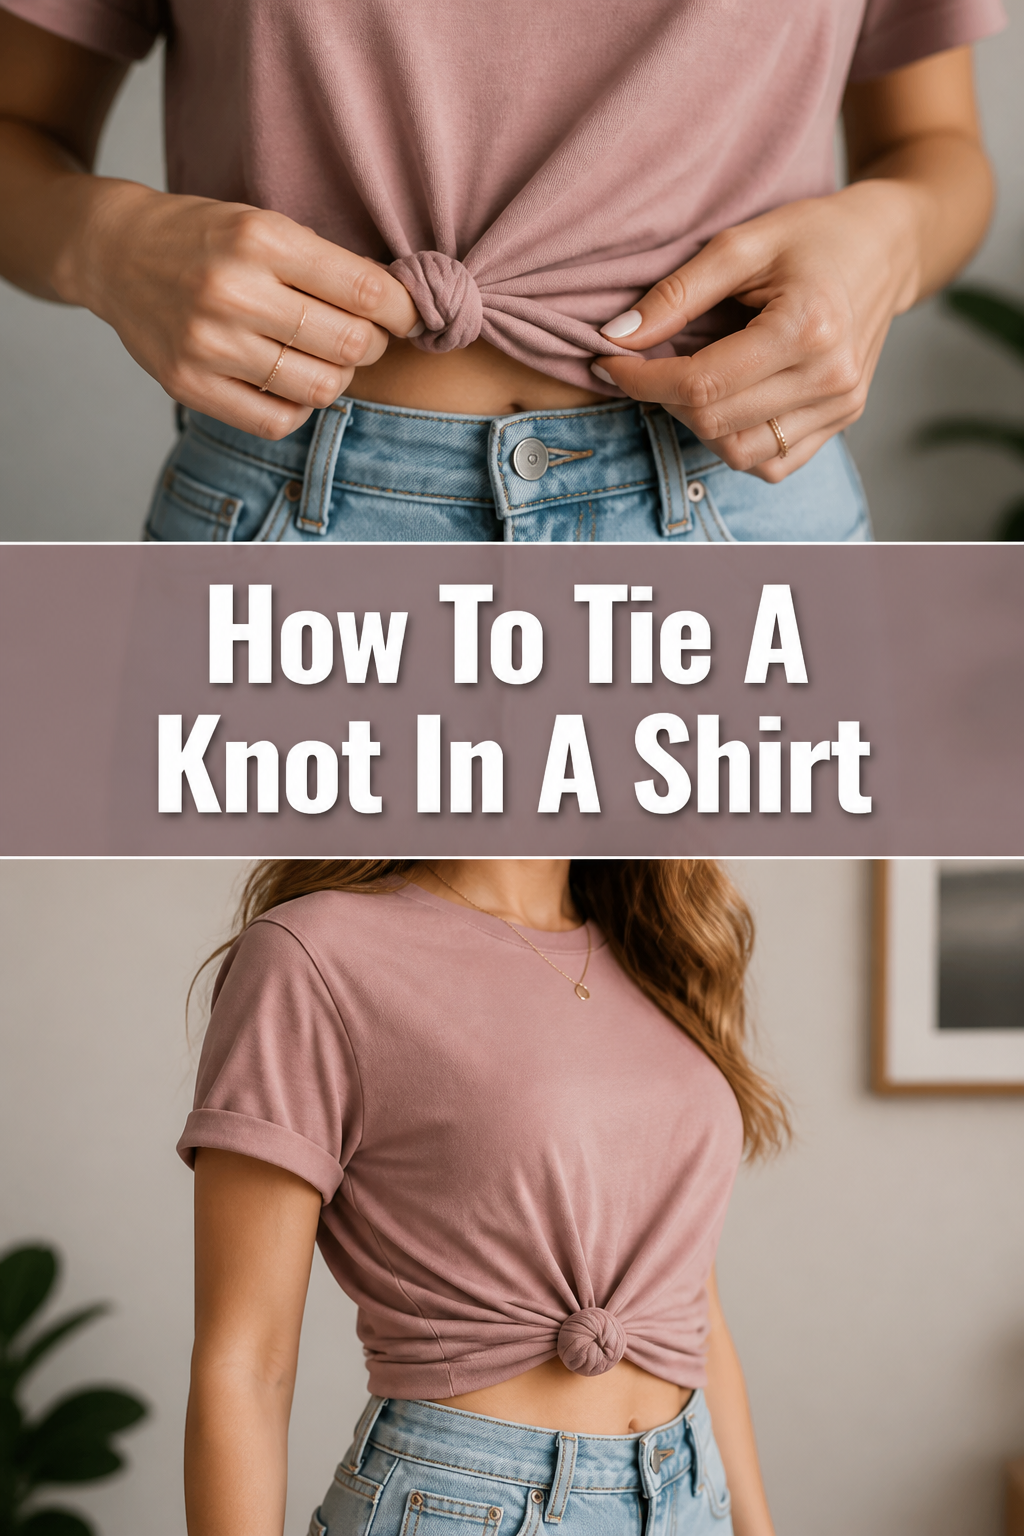
👕 How To Tie A Knot In A Shirt

& Painting
No rigid rules or pretension. Just practical guides, medium comparisons, and encouraging tips to help you enjoy the drawing & painting process.
Ever find yourself staring at a shirt that just doesn’t quite fit right?
Perhaps you want to add a touch of personal style, or simply make a garment more flattering.
I’ve used this simple trick countless times to transform oversized tees into chic tops and give old shirts new life.
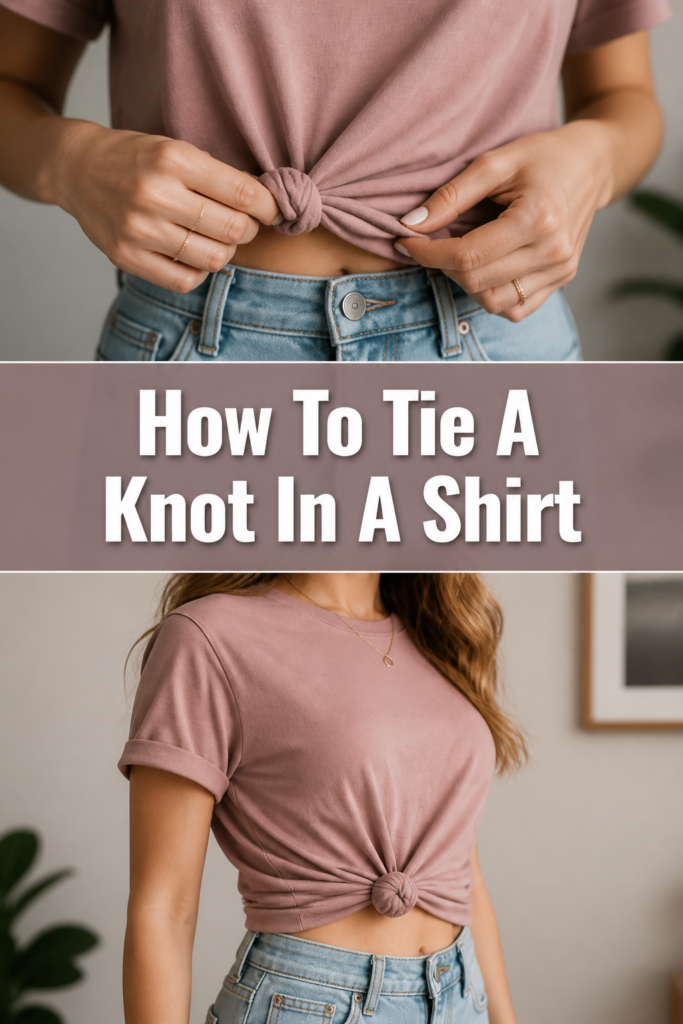
Quick Overview
This guide will walk you through the simple steps to tie a perfect knot in your shirt, enhancing your style and fit in minutes.
- Time needed: 2-5 minutes
- Difficulty: Beginner
- What you’ll need: Any shirt (t-shirt, button-up, blouse)
Step-by-Step Instructions
Step 1: Choose Your Shirt and Placement
Select the shirt you wish to knot. This technique works well with various fabrics, from soft cotton tees to crisp button-downs.
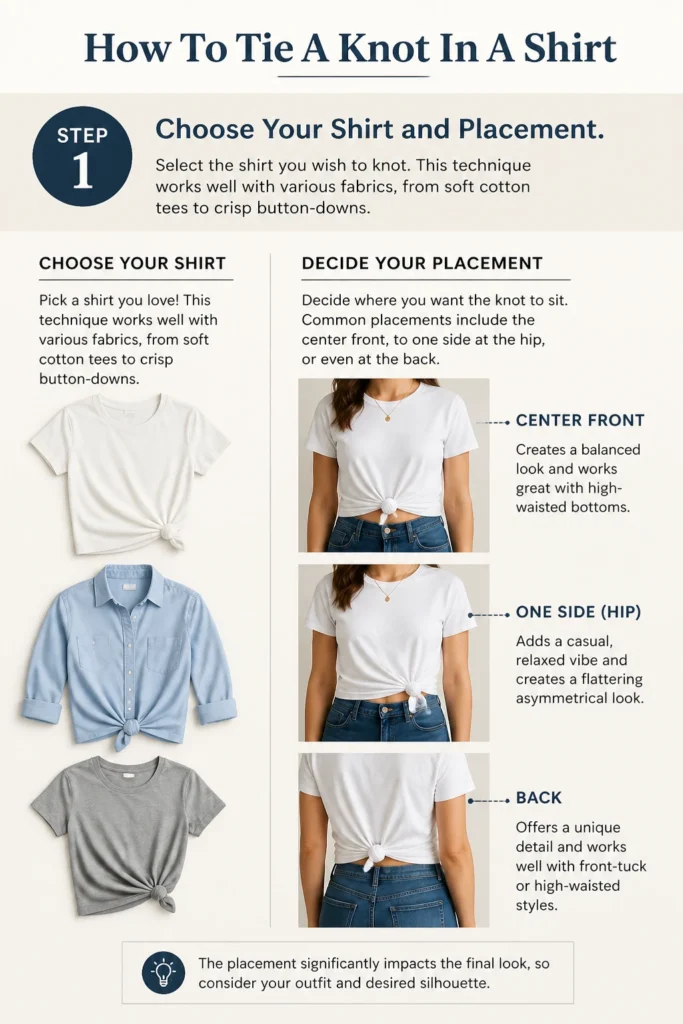
Decide where you want the knot to sit. Common placements include the center front, to one side at the hip, or even at the back.
The placement significantly impacts the final look, so consider your outfit and desired silhouette.
Step 2: Gather the Fabric
Locate the area of the shirt where you intend to tie the knot.
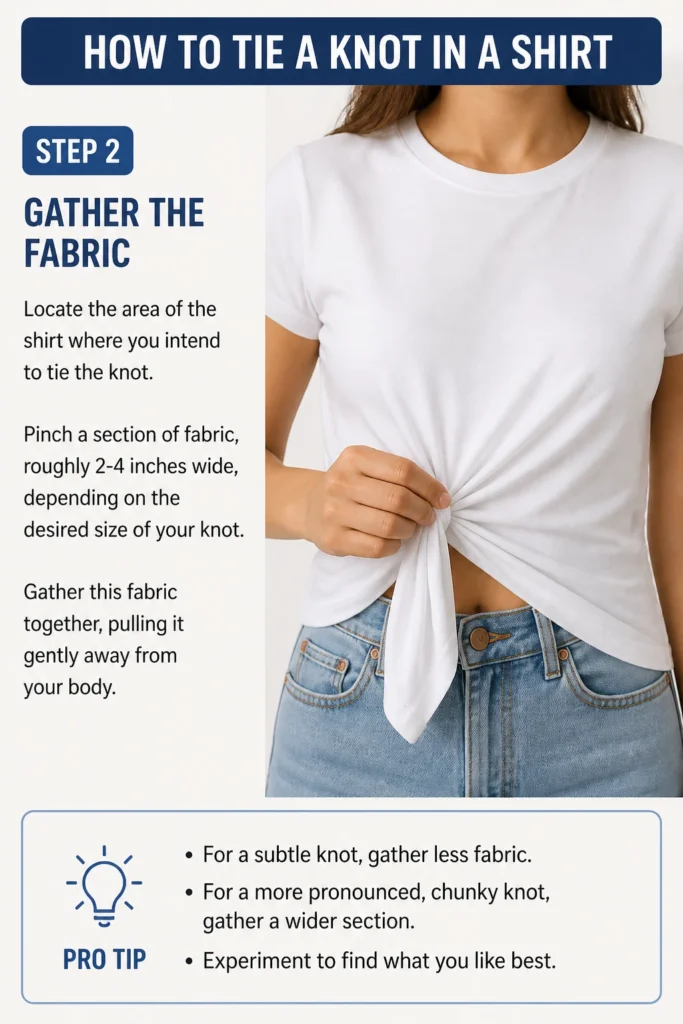
Pinch a section of fabric, roughly 2-4 inches wide, depending on the desired size of your knot.
Gather this fabric together, pulling it gently away from your body.
Pro Tip: For a subtle knot, gather less fabric. For a more pronounced, chunky knot, gather a wider section. Experiment to find what you like best.
Step 3: Twist the Fabric (Optional but Recommended)
Once you have a section of fabric gathered, gently twist it a few times.
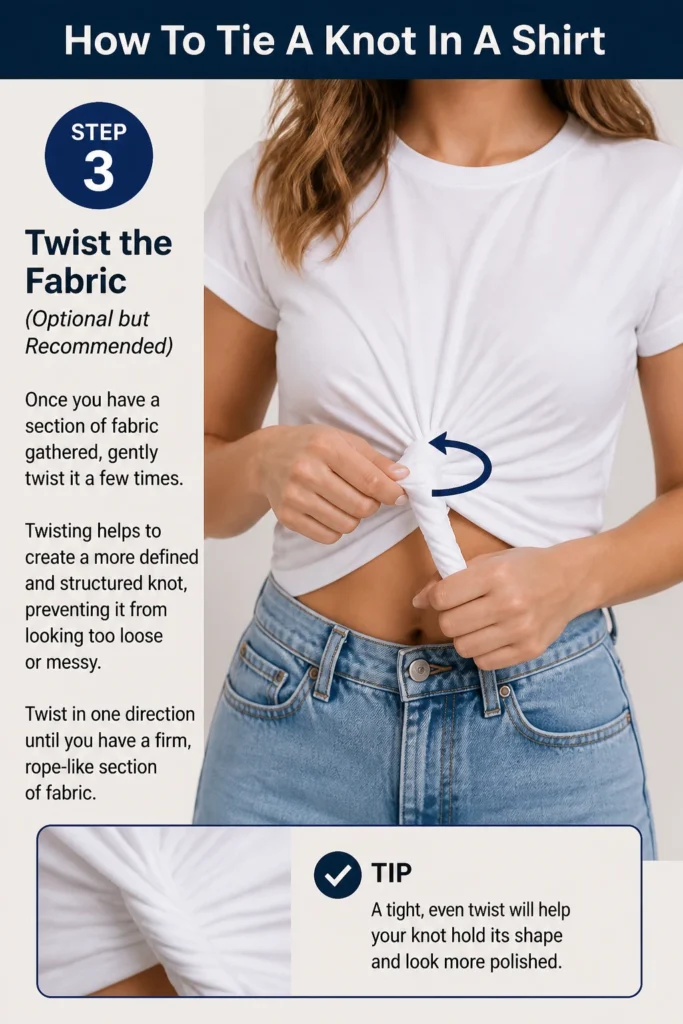
Twisting helps to create a more defined and structured knot, preventing it from looking too loose or messy.
Twist in one direction until you have a firm, rope-like section of fabric.
Step 4: Form the First Loop
With the twisted fabric in hand, bring the end of the twisted section around to form a loop.
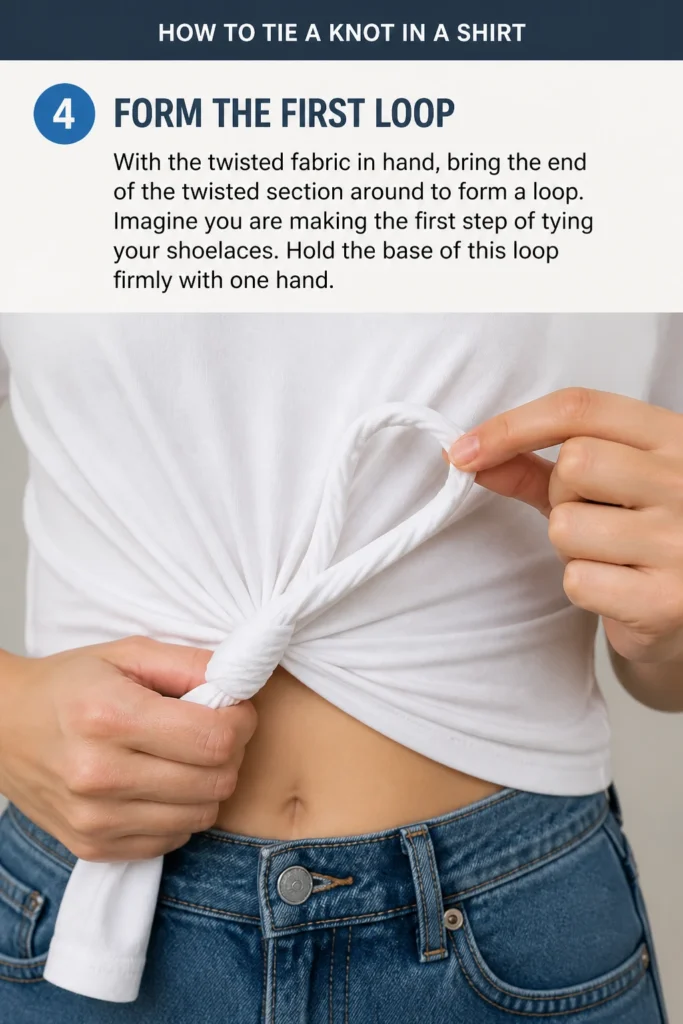
Imagine you are making the first step of tying your shoelaces.
Hold the base of this loop firmly with one hand.
Step 5: Thread Through the Loop
Take the remaining tail of the twisted fabric.
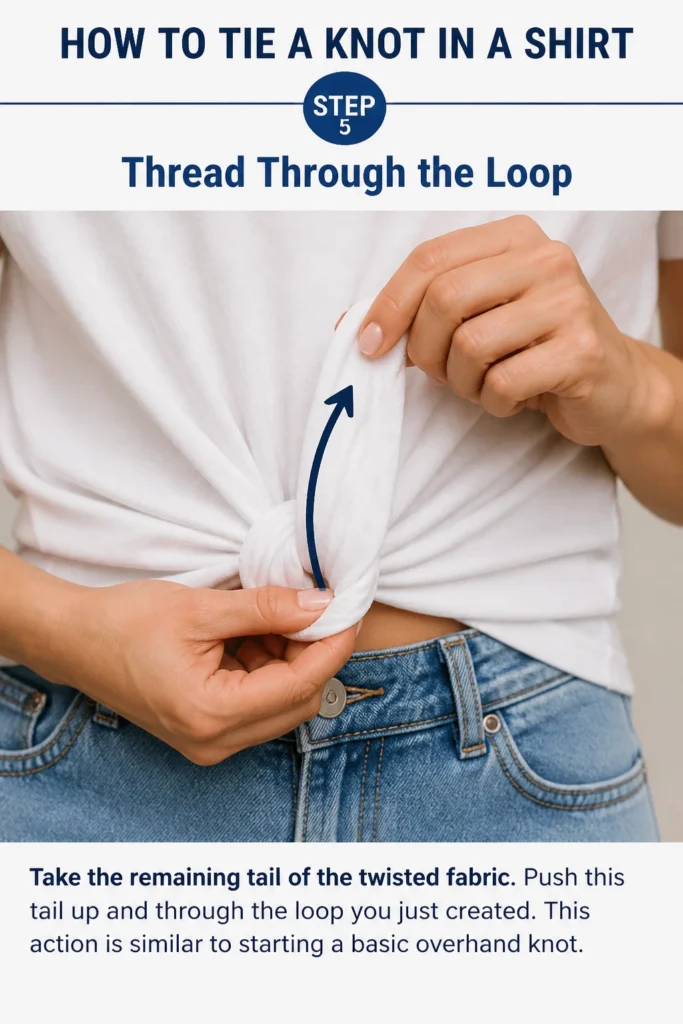
Push this tail up and through the loop you just created.
This action is similar to starting a basic overhand knot.
Step 6: Pull and Tighten Gently
Once the tail is threaded through, pull both ends of the knot.
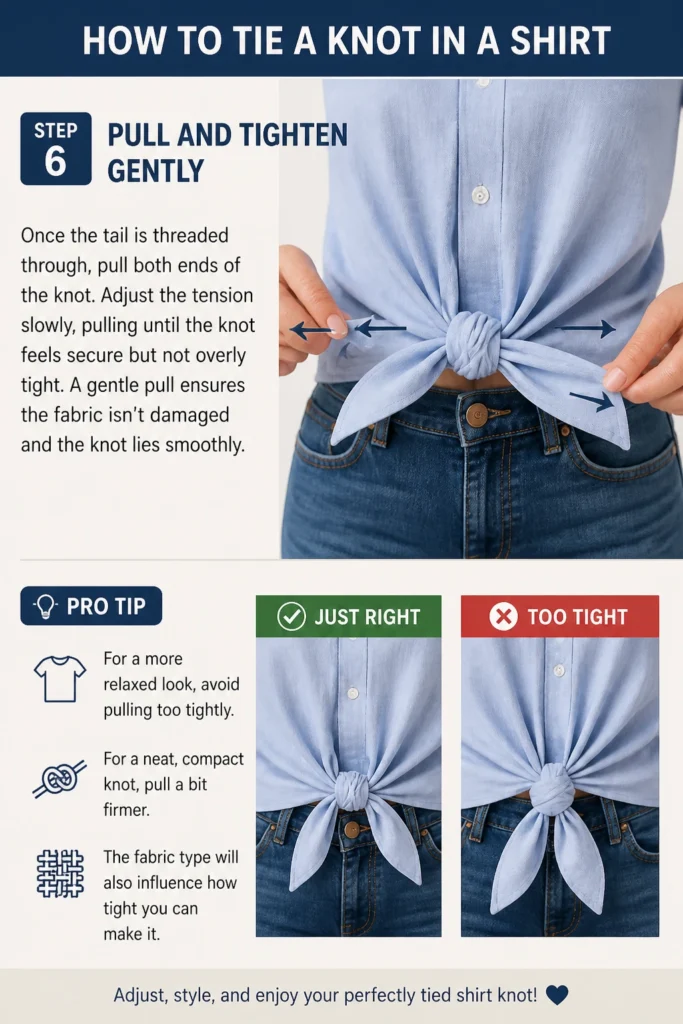
Adjust the tension slowly, pulling until the knot feels secure but not overly tight.
A gentle pull ensures the fabric isn’t damaged and the knot lies smoothly.
Pro Tip: For a more relaxed look, avoid pulling too tightly. For a neat, compact knot, pull a bit firmer. The fabric type will also influence how tight you can make it.
Step 7: Adjust and Refine the Knot
After the knot is tied, examine its appearance.
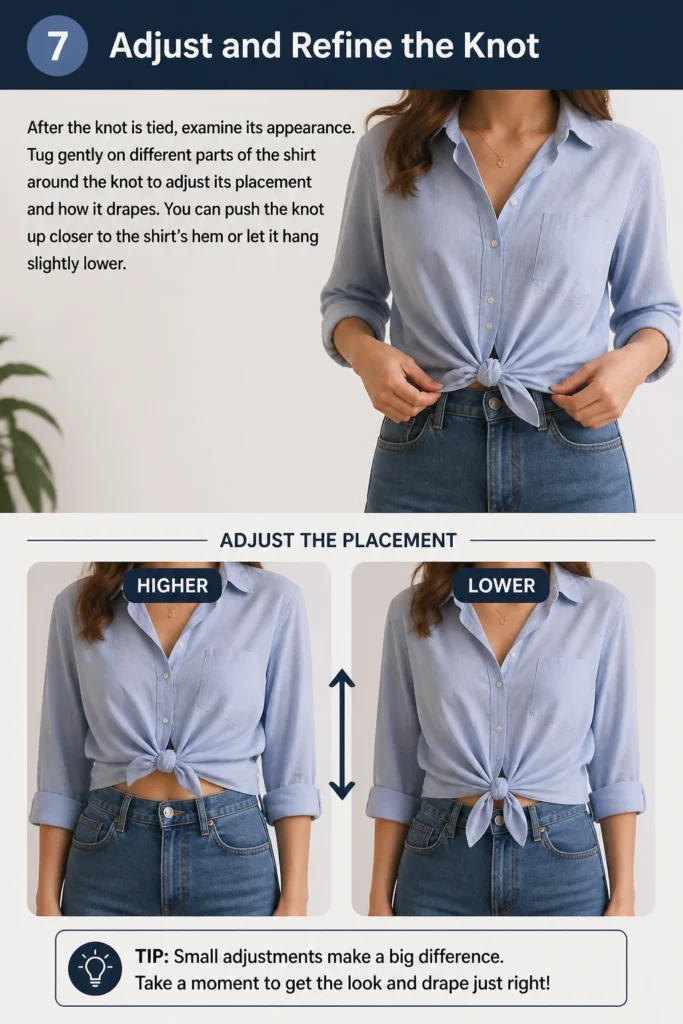
Tug gently on different parts of the shirt around the knot to adjust its placement and how it drapes.
You can push the knot up closer to the shirt’s hem or let it hang slightly lower.
Step 8: Shape the Remaining Fabric
The fabric around the knot can also be styled.
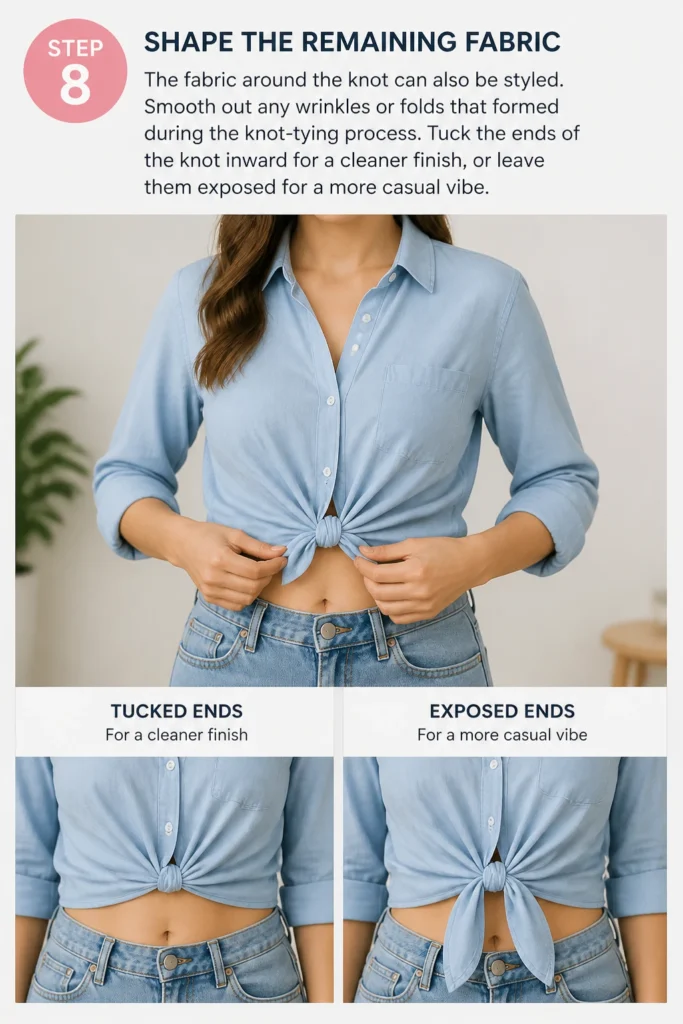
Smooth out any wrinkles or folds that formed during the knot-tying process.
Tuck the ends of the knot inward for a cleaner finish, or leave them exposed for a more casual vibe.
Common Mistakes to Avoid
Tying Too Tightly
Pulling the knot too tight can damage the fabric, especially with delicate materials. It can also create an unflattering, bunched-up look.
Always pull gently and ensure the knot is secure without straining the fabric. You want a relaxed, natural drape, not a constricted one.
Using Too Much Fabric
Gathering too much fabric for the knot can result in a bulky, awkward lump. This can detract from your outfit rather than enhance it.
Start with a smaller section of fabric and gradually increase it if you desire a larger knot. Aim for balance with your body shape and the shirt’s style.
Uneven Fabric Gathering
If you don’t gather the fabric evenly, the knot can look lopsided or messy. This impacts the overall neatness and style.
Take a moment to ensure the fabric you pinch is symmetrical and smooth before you begin twisting or tying. This sets the foundation for a polished knot.
Troubleshooting
Knot Keeps Coming Undone
If your knot unravels easily, it might not have been pulled tight enough initially, or the fabric is very slippery. Ensure you’ve completed a full overhand knot.
Try twisting the fabric more firmly before tying, creating a more stable base. For very slick fabrics, a double knot might be necessary to secure it.
Knot Looks Too Bulky
A bulky knot often means too much fabric was gathered, or the knot wasn’t adjusted properly after tying. The goal is a stylish accent, not a large protrusion.
Untie the knot and re-gather a smaller section of fabric. Once tied, gently pull and flatten the knot, tucking in any excess ends to streamline its appearance.
Shirt Doesn’t Drape Right Around the Knot
Sometimes the fabric around the knot can look stiff or awkward instead of flowing naturally. This can happen if the knot is placed incorrectly or pulled in a strange direction.
Adjust the placement of the knot slightly. Try moving it to the side or more centrally. Gently tug and smooth the fabric around the knot until it falls in a flattering way, allowing the shirt to hang naturally.
Key Takeaways
- Choosing the right placement for your knot is crucial for the desired style.
- Gathering the correct amount of fabric prevents bulkiness or an overly small knot.
- Twisting the fabric before tying helps create a more defined and stable knot.
- Gentle tightening is key to avoid damaging fabric and achieve a natural drape.
- Always take time to adjust and refine the knot for a polished finish.
- Experiment with different shirts and knot styles to find your favorite looks.
Frequently Asked Questions
Can I knot any type of shirt?
Most shirts can be knotted, but some fabrics work better than others. Soft, pliable materials like cotton, jersey, and rayon are ideal. Stiffer fabrics like heavy denim or thick linen can be knotted, but they might produce a bulkier knot.
How do I make the knot stay put all day?
To ensure your knot stays secure, make sure you twist the fabric firmly before tying. Pull the knot just enough so it’s snug but not tight. For extra security, especially with slippery fabrics, you can thread the tail through the loop a second time, creating a double knot.
Will tying a knot damage my shirt?
If tied gently and not excessively tight, knotting a shirt should not cause damage. Avoid pulling with extreme force or tying knots in very delicate or old, worn fabrics. Always untie the knot before washing to prevent permanent creases or stretching.
What’s the best knot for a cropped look?
For a cropped look, gather fabric from the lower hem of your shirt, either centrally or to one side. Tie a standard overhand knot, then pull the knot upwards towards your waist. This lifts the hem, creating the desired cropped effect while keeping the knot visible as a style element.
Our Top Recommended Finds
- Fabric Refresher Spray: Helps remove minor wrinkles and odors, keeping your knotted shirt looking fresh.
- Garment Steamer: Perfect for quickly smoothing out any creases around the knot or the rest of your shirt.
- Shirt Clips: For those who want the look of a knot without actually tying one, or to secure a knot in place.
Master Your Style, One Knot at a Time
Tying a knot in your shirt is a simple yet powerful styling hack.
It lets you personalize your clothes, adapt them to different outfits, and even adjust their fit.
Start experimenting with your wardrobe today and discover the versatility hiding in your closet.
& Painting
No rigid rules or pretension. Just practical guides, medium comparisons, and encouraging tips to help you enjoy the drawing & painting process.