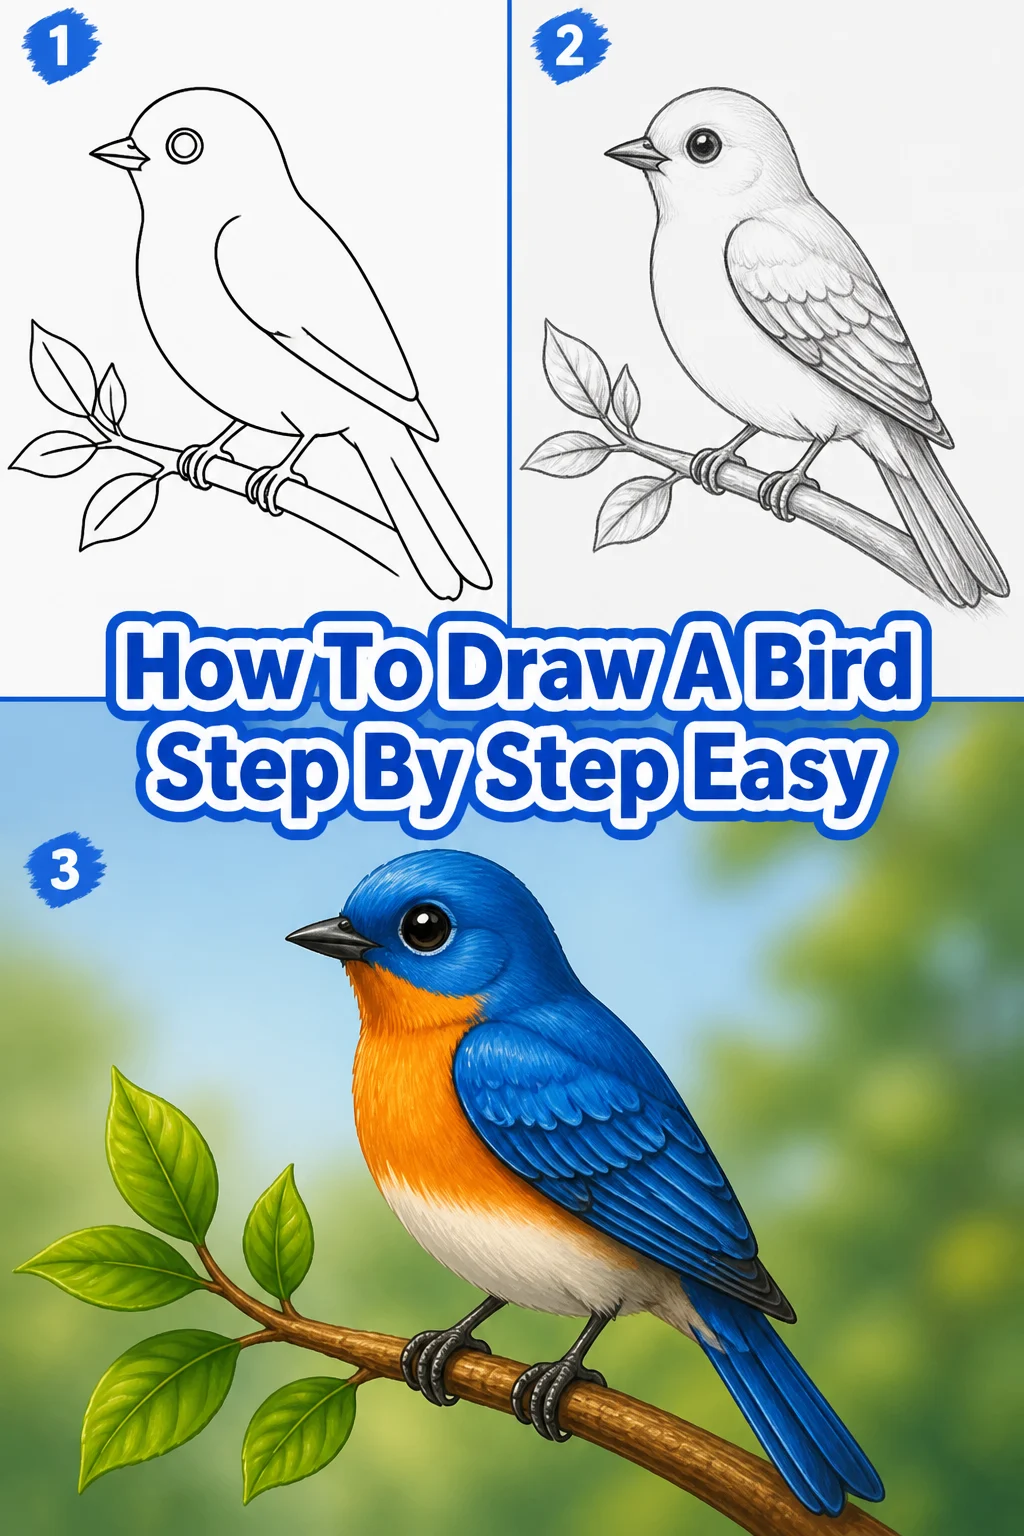
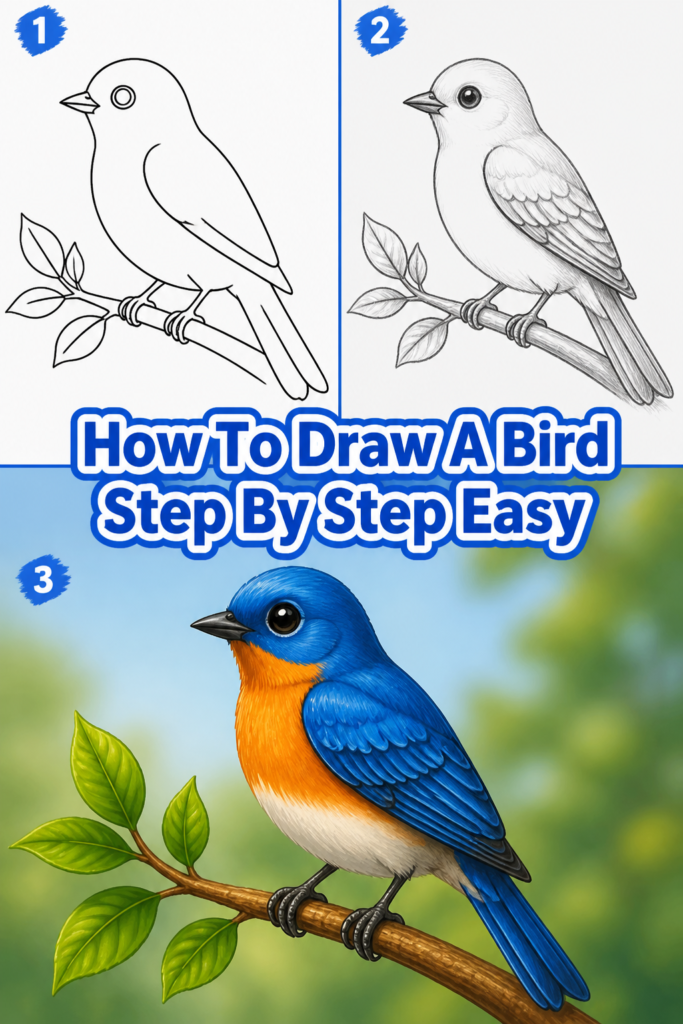
🐦 How To Draw A Bird Step By Step Easy
Learning to draw can feel intimidating, but it doesn’t have to be. I remember my first bird drawing, a wobbly robin that slowly transformed with practice. This guide distills years of sketching into simple steps, making it easy for anyone to create their own feathered friend.
You’ll discover how to break down complex shapes into manageable lines, building confidence with every stroke. Get ready to bring a charming bird to life on your paper.
Quick Overview
This guide will walk you through the process of drawing a simple, charming bird, perfect for beginners. You’ll learn fundamental techniques that you can apply to many other subjects. By the end, you’ll have a complete bird drawing you can be proud of.
- Time needed: 20-30 minutes
- Difficulty: Beginner
- What you’ll need: Pencil (HB or 2B recommended), paper, eraser
Step-by-Step Instructions
Step 1: Sketch the Basic Shapes
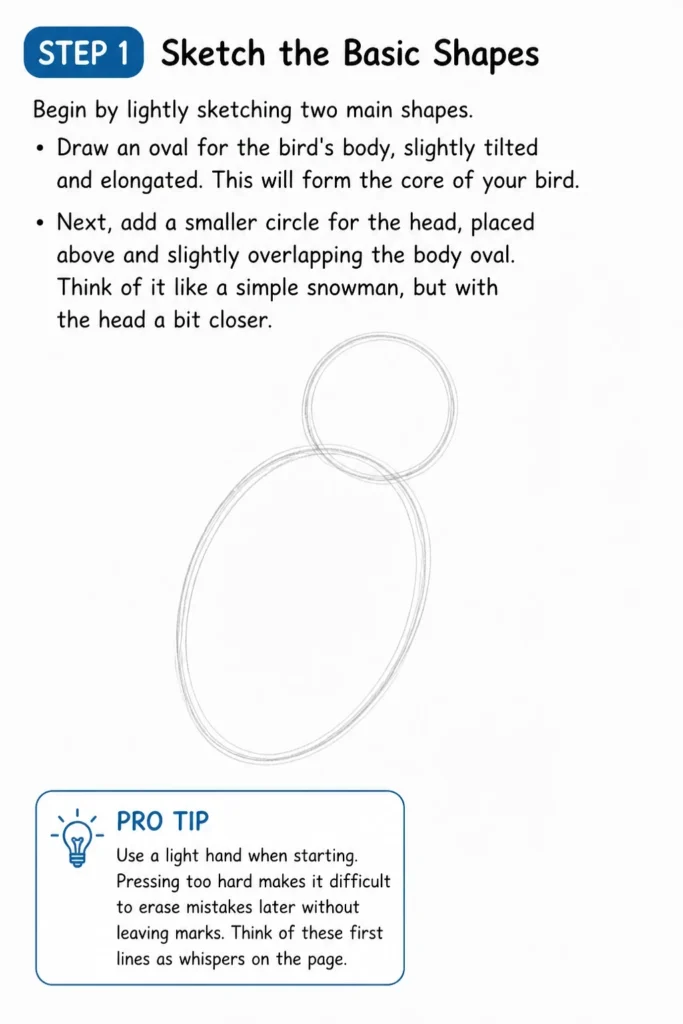
Begin by lightly sketching two main shapes. Draw an oval for the bird’s body, slightly tilted and elongated. This will form the core of your bird.
Next, add a smaller circle for the head, placed above and slightly overlapping the body oval. Think of it like a simple snowman, but with the head a bit closer. Keep these lines very light, as they are just guidelines.
Pro Tip: Use a light hand when starting. Pressing too hard makes it difficult to erase mistakes later without leaving marks. Think of these first lines as whispers on the page.
Step 2: Connect the Head and Body
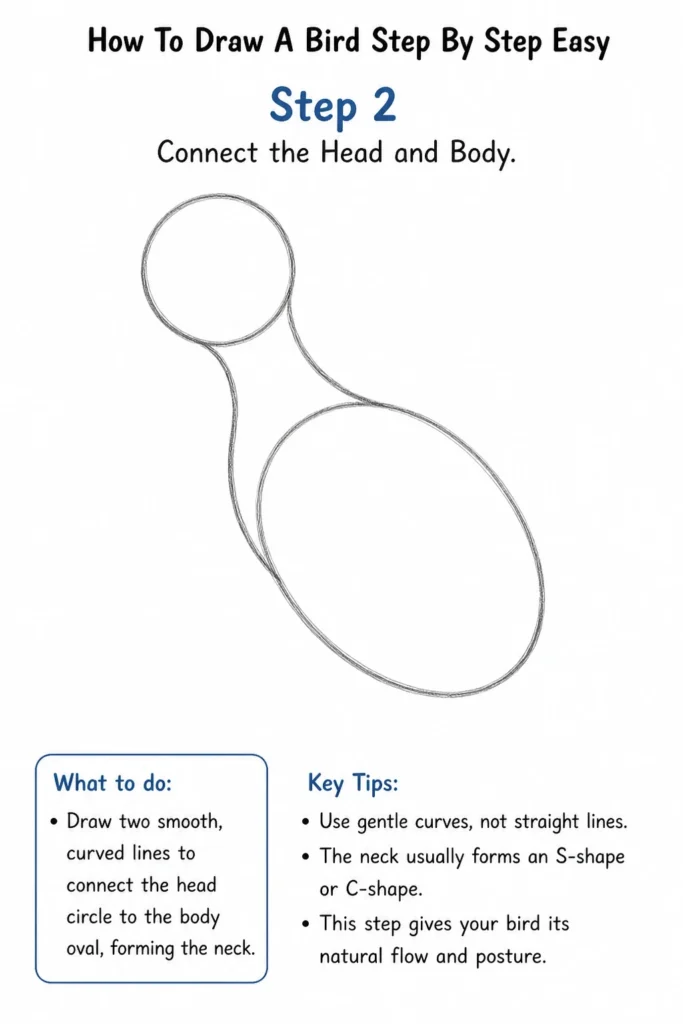
Now, connect the head and body with gentle, curved lines to form the neck. These lines should flow smoothly from the bottom of the head circle to the top of the body oval. Avoid harsh angles here.
Imagine the natural curve of a bird’s neck. It’s usually a graceful S-shape or a soft C-shape, depending on the bird’s posture. This step starts to give your bird its distinct silhouette.
Step 3: Add the Beak and Eye
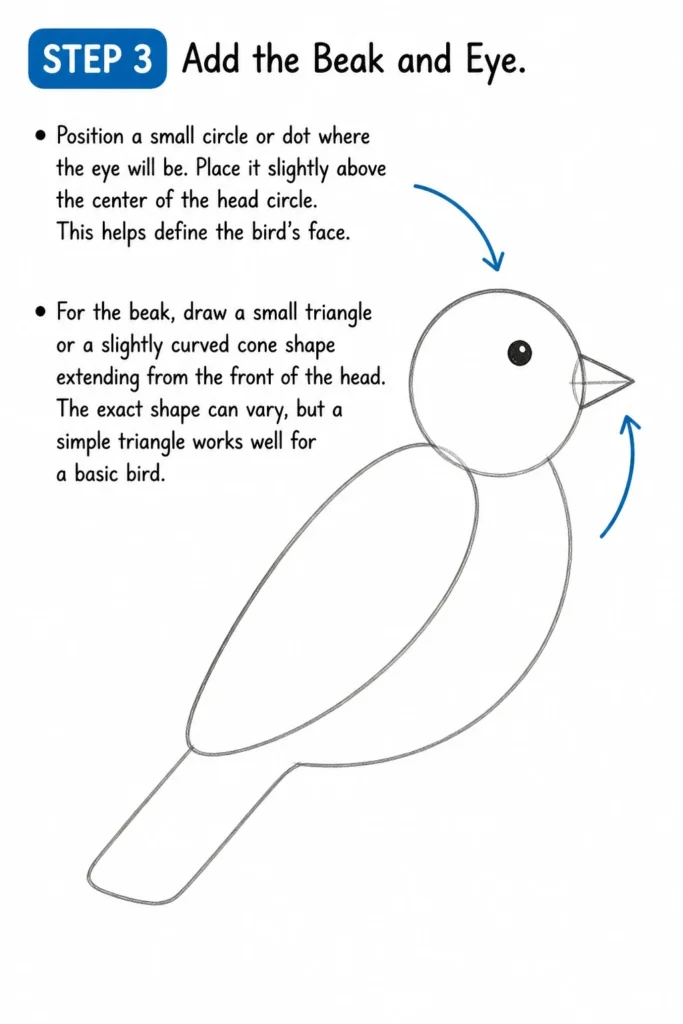
Position a small circle or dot where the eye will be. Place it slightly above the center of the head circle. This helps define the bird’s face.
For the beak, draw a small triangle or a slightly curved cone shape extending from the front of the head. The exact shape can vary, but a simple triangle works well for a basic bird.
Step 4: Outline the Wings
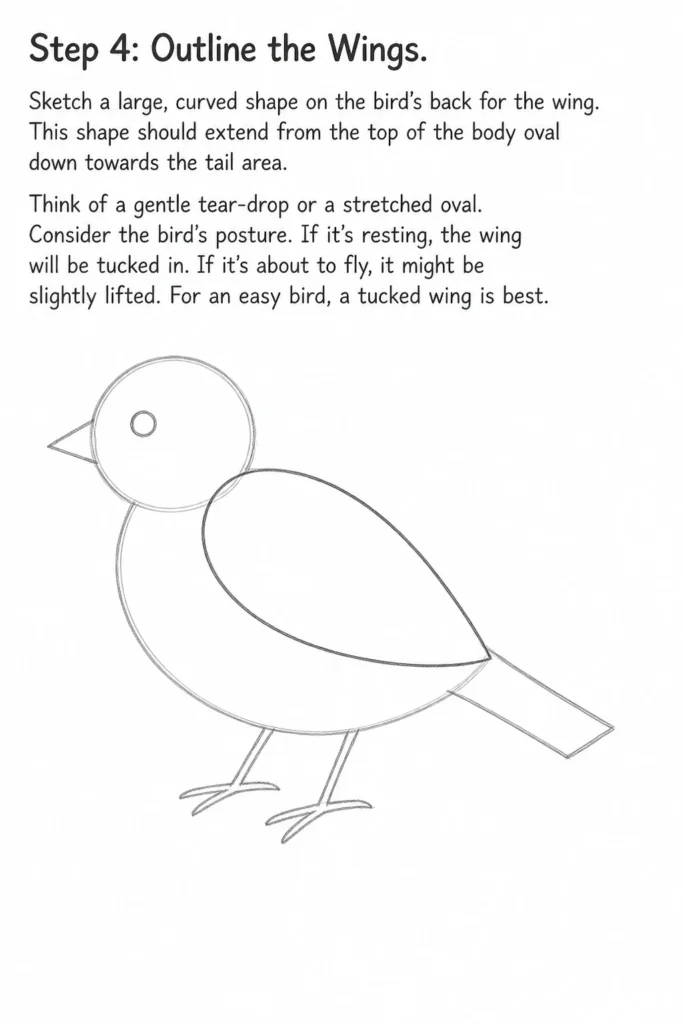
Sketch a large, curved shape on the bird’s back for the wing. This shape should extend from the top of the body oval down towards the tail area. Think of a gentle tear-drop or a stretched oval.
Consider the bird’s posture. If it’s resting, the wing will be tucked in. If it’s about to fly, it might be slightly lifted. For an easy bird, a tucked wing is best.
Step 5: Draw the Tail Feathers
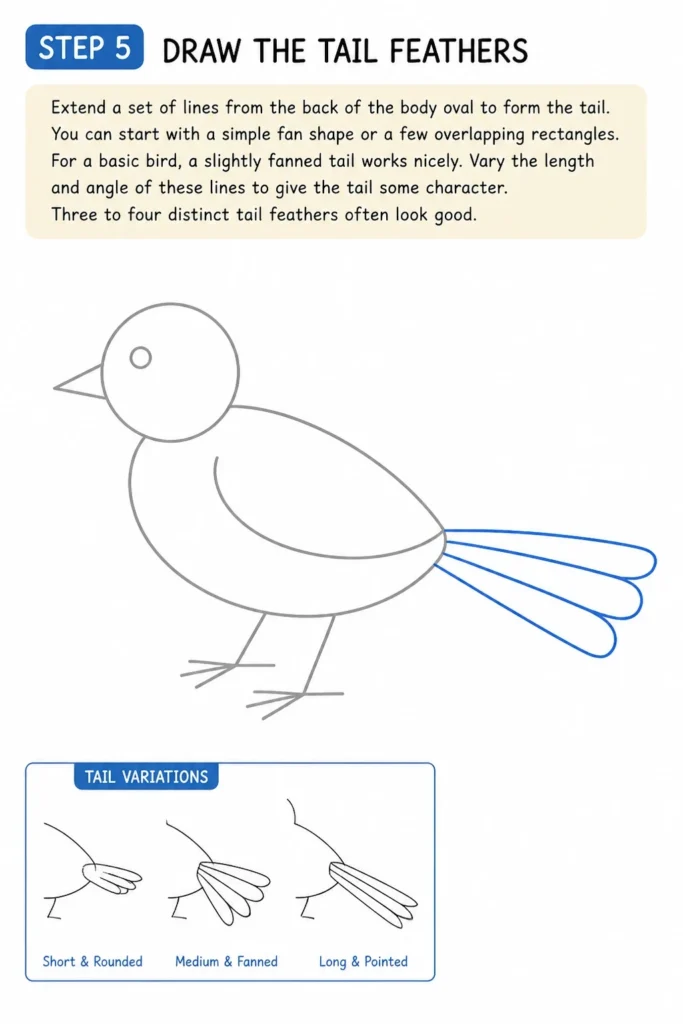
Extend a set of lines from the back of the body oval to form the tail. You can start with a simple fan shape or a few overlapping rectangles. For a basic bird, a slightly fanned tail works nicely.
Vary the length and angle of these lines to give the tail some character. Three to four distinct tail feathers often look good.
Step 6: Add the Legs and Feet
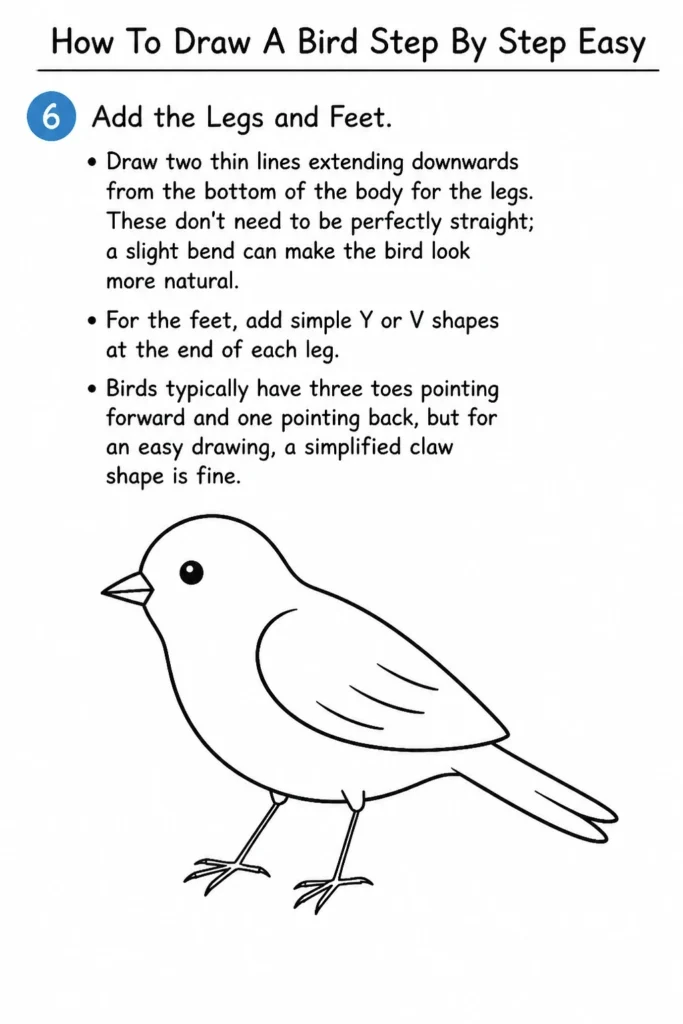
Draw two thin lines extending downwards from the bottom of the body for the legs. These don’t need to be perfectly straight; a slight bend can make the bird look more natural.
For the feet, add simple “Y” or “V” shapes at the end of each leg. Birds typically have three toes pointing forward and one pointing back, but for an easy drawing, a simplified claw shape is fine.
Step 7: Refine the Outline and Add Details
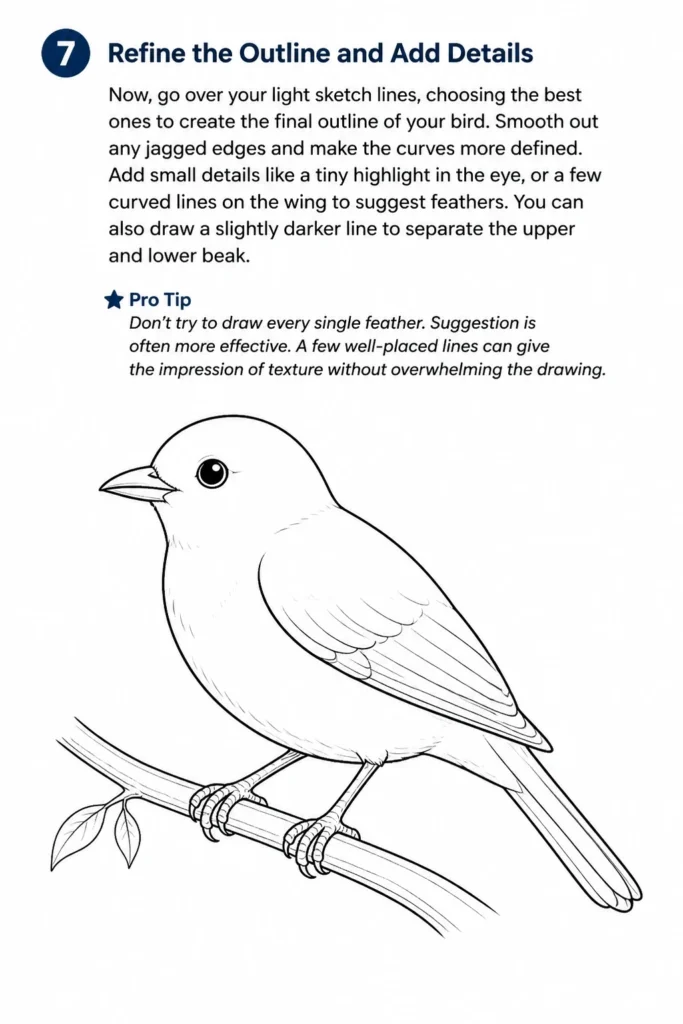
Now, go over your light sketch lines, choosing the best ones to create the final outline of your bird. Smooth out any jagged edges and make the curves more defined.
Add small details like a tiny highlight in the eye, or a few curved lines on the wing to suggest feathers. You can also draw a slightly darker line to separate the upper and lower beak.
Pro Tip: Don’t try to draw every single feather. Suggestion is often more effective. A few well-placed lines can give the impression of texture without overwhelming the drawing.
Step 8: Erase Guidelines and Clean Up
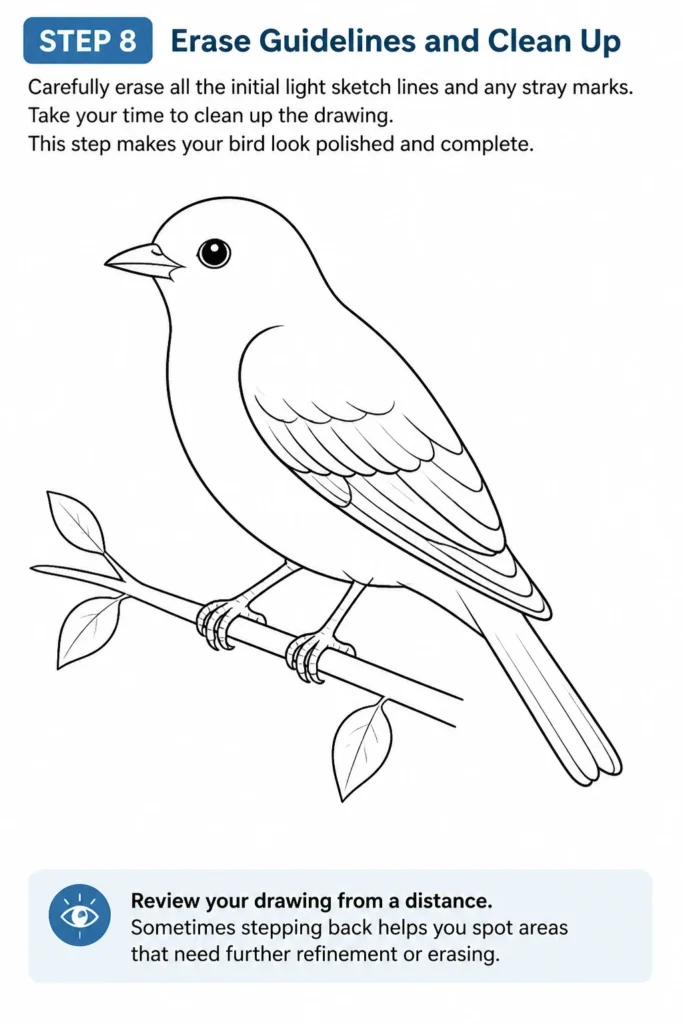
Carefully erase all the initial light sketch lines and any stray marks. Take your time to clean up the drawing. This step makes your bird look polished and complete.
Review your drawing from a distance. Sometimes stepping back helps you spot areas that need further refinement or erasing.
Step 9: (Optional) Add Shading or Color
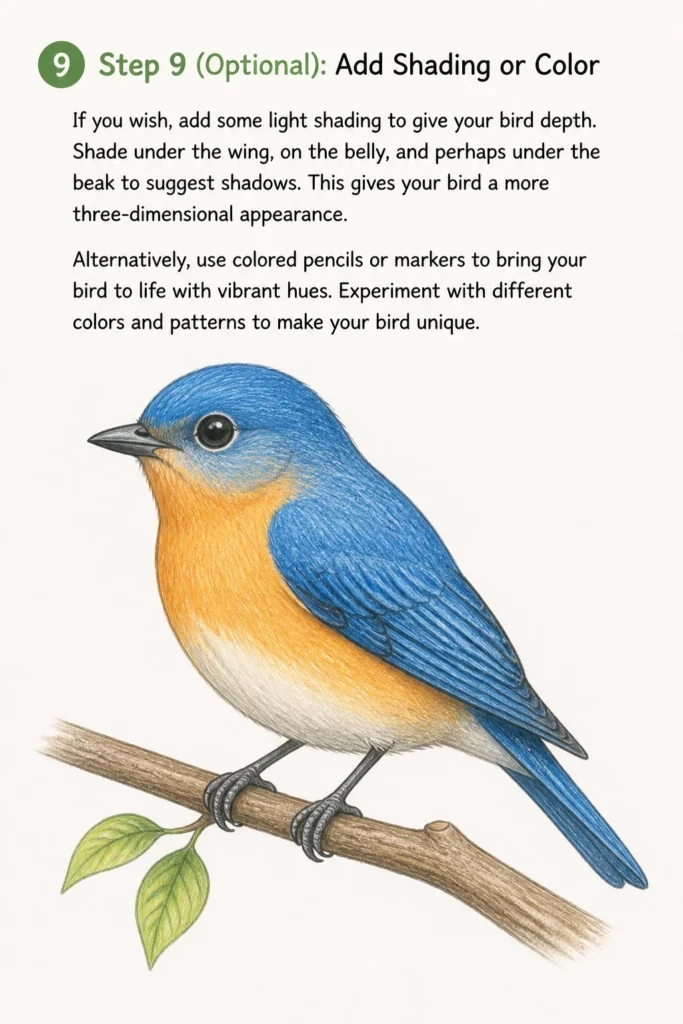
If you wish, add some light shading to give your bird depth. Shade under the wing, on the belly, and perhaps under the beak to suggest shadows. This gives your bird a more three-dimensional appearance.
Alternatively, use colored pencils or markers to bring your bird to life with vibrant hues. Experiment with different colors and patterns to make your bird unique.
Common Mistakes to Avoid
Making Lines Too Dark Too Soon
Starting with heavy lines is a common pitfall for beginners. When you press down hard, it becomes difficult to erase mistakes without leaving indentations on the paper. This can make your drawing look messy and inhibit your willingness to experiment.
Instead, always begin with very light, feathery strokes. Think of these as exploratory lines. Once you are happy with the shape, you can gradually darken the lines you want to keep.
Disproportionate Body Parts
Sometimes, the head might be too big for the body, or the tail might seem out of place. This happens when you focus on one part without considering its relation to the others. The overall balance of the bird is crucial for it to look natural.
Before you commit to details, take a moment to step back and check the proportions of your initial shapes. Ensure the head, body, wings, and tail fit together harmoniously. Adjust your basic shapes until they feel right before moving on.
Stiff or Angular Lines
Birds are living creatures with soft curves and natural flow. Using too many straight lines or sharp angles can make your bird look rigid and unnatural. This is especially true for the neck, wings, and belly.
Practice drawing smooth, continuous curves. Observe how bird bodies are generally rounded and graceful. Embrace the organic nature of your subject to give your drawing more life and movement.
Forgetting to Erase Guidelines
Leaving your initial sketch lines visible can detract from the finished drawing. These guidelines are meant to be temporary supports, not part of the final artwork. They can make your drawing appear cluttered and unfinished.
Always take the time to carefully erase all your preliminary sketch lines once you’ve established your final outline. A clean drawing looks much more professional and complete.
Troubleshooting
My Bird Looks Flat
If your bird drawing appears two-dimensional and lacks depth, it’s likely missing the suggestion of form and volume. This often happens when lines are uniform in thickness and there’s no differentiation in light and shadow.
To add depth, consider where light would hit your bird. Add light shading under the wings, on the underside of the belly, and perhaps a subtle shadow beneath the head. Varying line thickness, making some lines darker or lighter, can also help create a sense of dimension.
The Bird’s Pose Looks Unnatural
Sometimes, the way the bird is standing or sitting just doesn’t look right. This usually stems from the initial basic shapes being too rigid or incorrectly positioned relative to each other. A stiff pose makes the bird seem lifeless.
Revisit Step 1 and 2. Ensure your initial oval and circle are slightly tilted or angled to suggest movement or a natural resting position. Pay attention to the curve of the neck and how the wings sit on the body. A slight bend in the legs can also make a big difference.
My Lines Are Messy and Hairy
If your drawing has many faint, overlapping lines instead of clear, confident strokes, it’s often due to hesitation. This “hairy” line quality can make your drawing look uncertain and unprofessional. It’s a common issue when learning.
Try to draw with more confidence, even if it means making a “wrong” line. Practice drawing long, smooth curves in one go. Remember, you can always erase. The goal is to commit to a line once you’ve decided on its placement, rather than sketching it timidly multiple times.
Key Takeaways
- Start with basic shapes: Break down complex subjects into simple forms like ovals and circles.
- Draw lightly initially: Use a light touch for guidelines to allow for easy corrections.
- Refine gradually: Build your drawing in layers, moving from general shapes to specific details.
- Embrace curves: Birds are organic; use smooth, flowing lines to capture their natural grace.
- Clean up your work: Erase all guidelines for a polished and professional finish.
- Practice makes perfect: The more you draw, the better your hand-eye coordination and confidence will become.
Frequently Asked Questions
What kind of pencil is best for beginners?
An HB pencil is a great all-rounder for beginners. It’s not too hard, so it won’t indent the paper, and not too soft, so it won’t smudge excessively. As you get more comfortable, you might explore 2B for darker lines and H pencils for lighter details.
How can I make my bird look more realistic?
To add realism, observe real birds or high-quality photos. Pay attention to feather patterns, the texture of their feet, and how light interacts with their body. Adding subtle shading, varying feather directions, and refining the eye can make a big difference.
Should I draw from reference photos or imagination?
For beginners, drawing from reference photos is highly recommended. It helps you understand proportions, shapes, and details accurately. Once you’ve gained confidence and a good understanding of bird anatomy, you can start experimenting with drawing from imagination.
How do I draw different types of birds?
The fundamental steps remain the same: start with basic shapes, then refine. The key is to observe the unique characteristics of each bird. Is its beak long or short? Are its tail feathers fanned or pointed? Adjust your initial shapes and details to match the specific bird you’re trying to draw.
Our Top Recommended Finds
- Sketchbook with quality paper: A good sketchbook prevents bleed-through and holds pencil marks well, making your practice more enjoyable.
- Set of drawing pencils (HB, 2B, 4B): Having a range of pencil hardnesses allows for greater control over line weight and shading.
- Kneaded eraser: This type of eraser is excellent for lifting graphite gently without damaging the paper, perfect for subtle corrections and highlights.
Let Your Creativity Take Flight Today
You’ve just taken a wonderful step towards unlocking your artistic potential. Drawing a bird is more than just putting lines on paper; it’s about seeing the world with fresh eyes and expressing what you observe. Every stroke is a journey of discovery.
Why not grab your pencil and paper right now and create another bird? Perhaps a different pose, or with some imaginative colors. Keep exploring, keep sketching, and watch your skills soar.