🍁 How To Draw A Maple Leaf Step By Step

& Painting
No rigid rules or pretension. Just practical guides, medium comparisons, and encouraging tips to help you enjoy the drawing & painting process.
Have you ever admired the intricate beauty of a maple leaf and wished you could capture it on paper? Its iconic shape, especially vibrant in autumn, is a symbol of nature’s artistry. Learning to draw it is a rewarding journey into botanical illustration.
This guide will walk you through each curve and line, helping you create a stunning maple leaf drawing. I’ve spent countless hours sketching nature’s wonders, and I’m excited to share my easy-to-follow method with you. Let’s bring this natural masterpiece to life with your own hands.
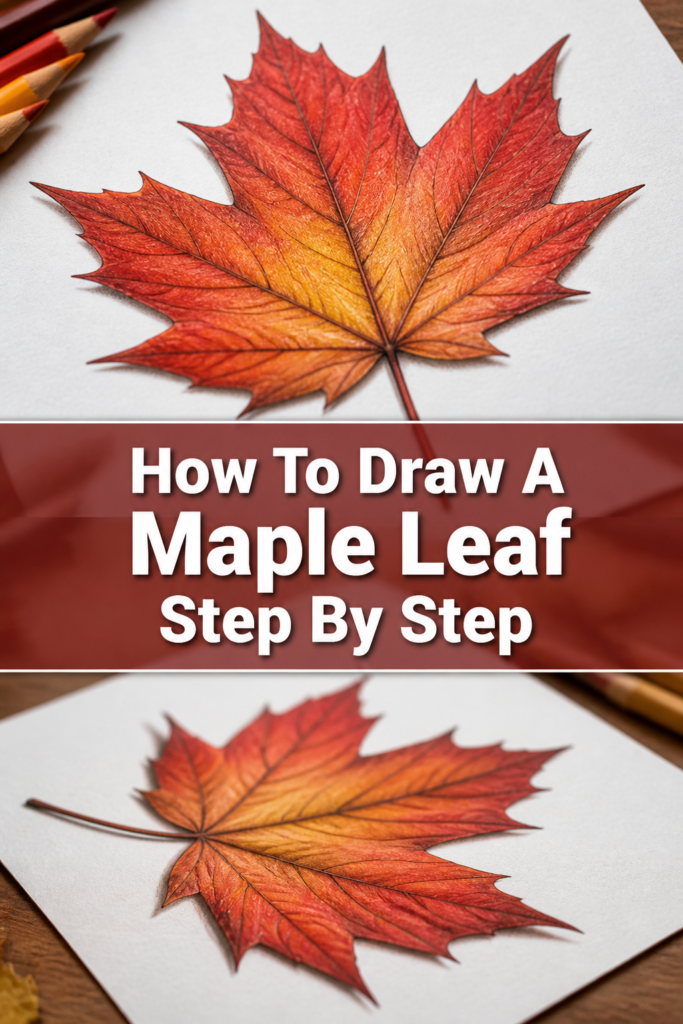
Quick Overview
This guide will empower you to sketch a realistic maple leaf from scratch, building your confidence in observational drawing. You’ll master its distinctive lobes, serrated edges, and delicate veining. By the end, you’ll have a beautiful piece of art you created yourself.
- Time needed: 30-60 minutes (depending on detail)
- Difficulty: Beginner to Intermediate
- What you’ll need: Pencil (HB, 2B), Eraser (kneaded and regular), Drawing paper, Optional: Fine-tip pen, Colored pencils/watercolors
Step-by-Step Instructions
Step 1: Prepare Your Workspace and Light Guidelines
Before you begin, ensure your drawing area is comfortable and well-lit. Gather all your materials, making sure your pencil is sharpened and your paper is ready. A clear mind helps immensely with focus.
Start by drawing a faint vertical line down the center of your paper. This will act as the central axis for your maple leaf’s stem and primary structure. Then, sketch a light, wide “V” shape at the top of this line, opening upwards. This “V” will help guide the overall spread of the upper lobes.
Use a very light hand for these initial lines. They are merely guides and will be erased later. The goal is to establish the general placement and balance of your leaf on the page.
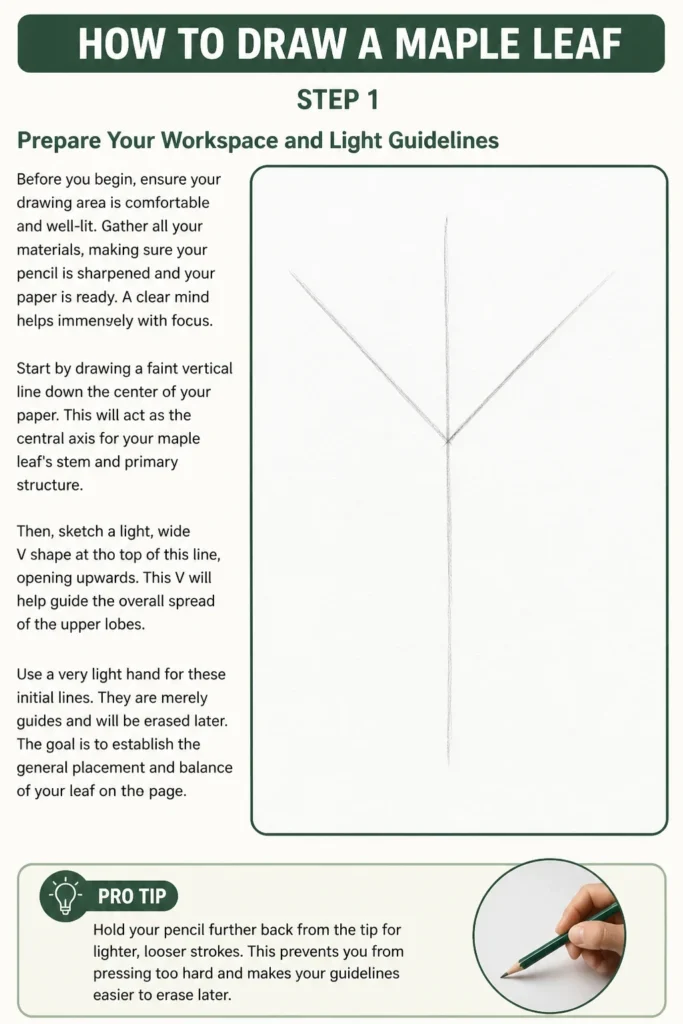
Pro Tip: Hold your pencil further back from the tip for lighter, looser strokes. This prevents you from pressing too hard and making permanent indentations.
Step 2: Draw the Central Stem (Petiole)
Now, focus on the petiole, which is the leaf’s stem. Extend a moderately long, slightly curved line downwards from the base of your central guideline. This line should connect to the point where your initial “V” guide begins.
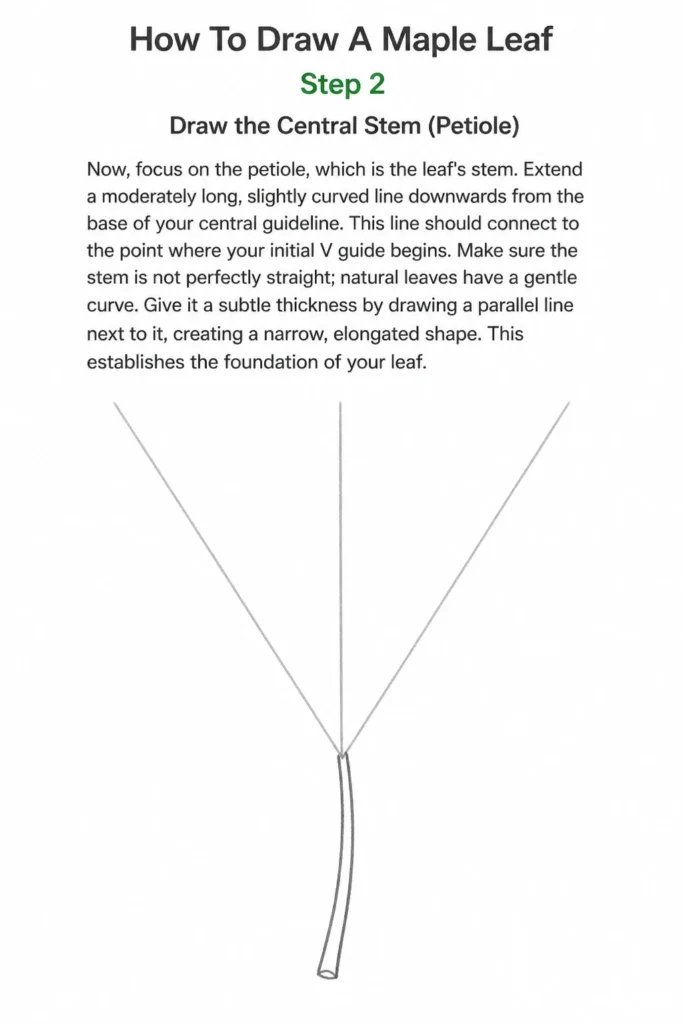
Make sure the stem is not perfectly straight; natural leaves have a gentle curve. Give it a subtle thickness by drawing a parallel line next to it, creating a narrow, elongated shape. This establishes the foundation of your leaf.
Step 3: Establish the Main Veins
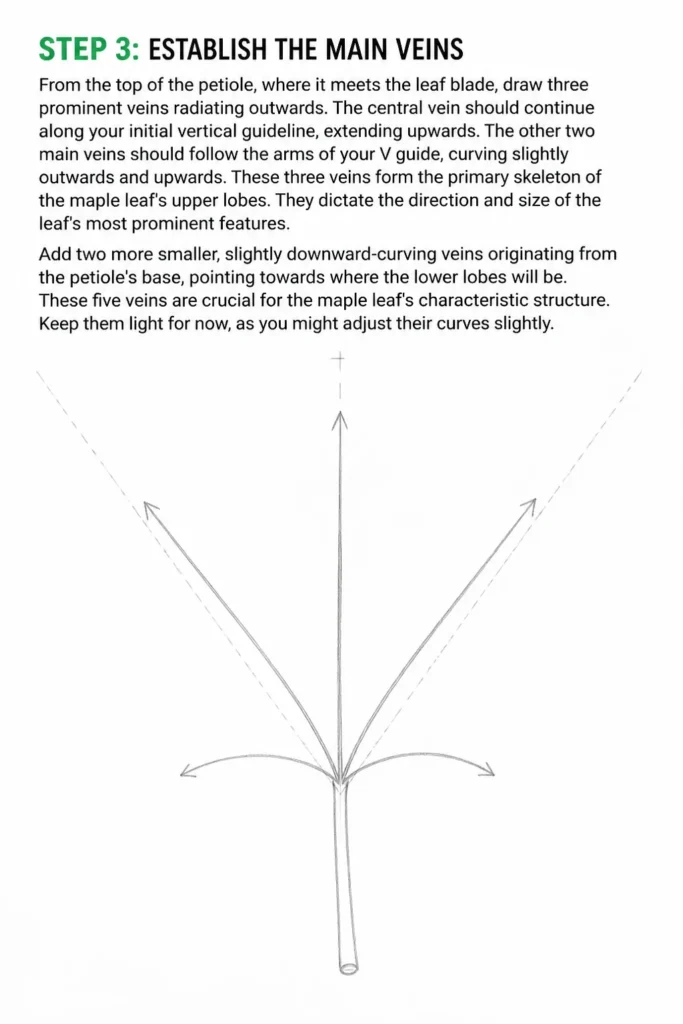
From the top of the petiole, where it meets the leaf blade, draw three prominent veins radiating outwards. The central vein should continue along your initial vertical guideline, extending upwards. The other two main veins should follow the arms of your “V” guide, curving slightly outwards and upwards.
These three veins form the primary skeleton of the maple leaf’s upper lobes. They dictate the direction and size of the leaf’s most prominent features. Add two more smaller, slightly downward-curving veins originating from the petiole’s base, pointing towards where the lower lobes will be.
These five veins are crucial for the maple leaf’s characteristic structure. Keep them light for now, as you might adjust their curves slightly.
Step 4: Sketch the General Outline of the Lobes
Using your main veins as guides, begin to sketch the broad, rounded shapes of the five main lobes. Start with the central top lobe, following the central vein. Then, draw the two upper-side lobes, using the “V” veins as their core.
Finally, add the two smaller, lower lobes, following the downward-curving veins you drew earlier. Think of these as gently rounded bumps that flow outwards from the center. At this stage, don’t worry about the jagged edges; focus on the overall smooth, hand-like silhouette.
Connect these lobe shapes loosely, forming a rough, rounded perimeter for your leaf. This creates the basic, recognizable maple leaf form.
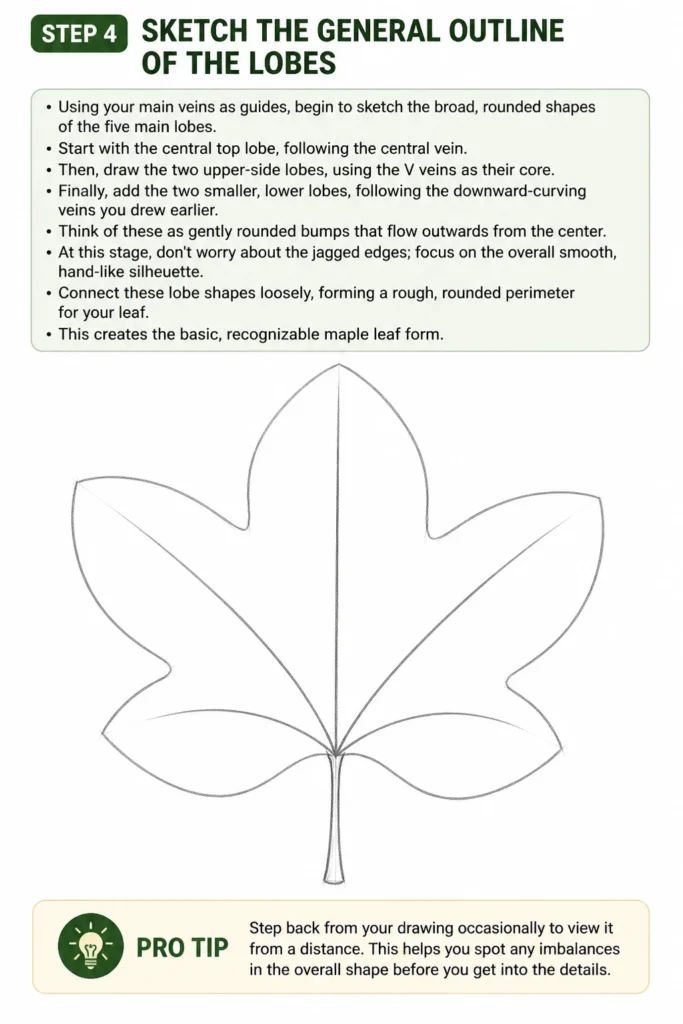
Pro Tip: Step back from your drawing occasionally to view it from a distance. This helps you spot any imbalances in the overall shape before you get into fine details.
Step 5: Refine the Lobe Shapes and Add Notches
This is where your maple leaf starts to gain its distinct character. Go back to each lobe and refine its curvature, making it more organic and less perfectly round. Maple leaves have specific, deep indentations or “notches” between their lobes.
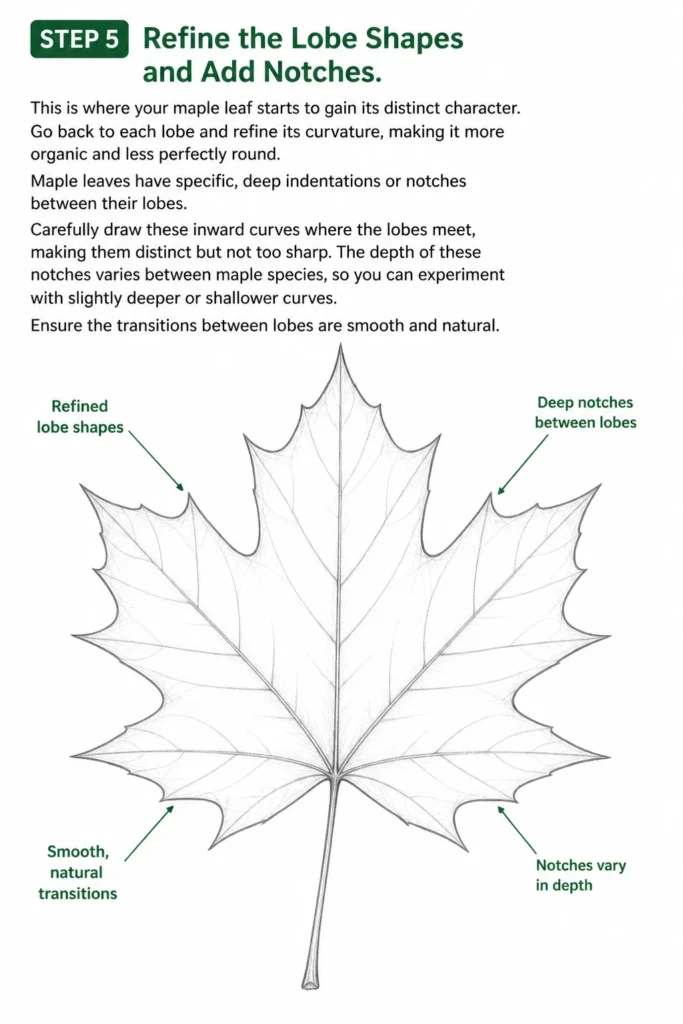
Carefully draw these inward curves where the lobes meet, making them distinct but not too sharp. The depth of these notches varies between maple species, so you can experiment with slightly deeper or shallower curves. Ensure the transitions between lobes are smooth and natural.
Step 6: Introduce the Serrated Edges
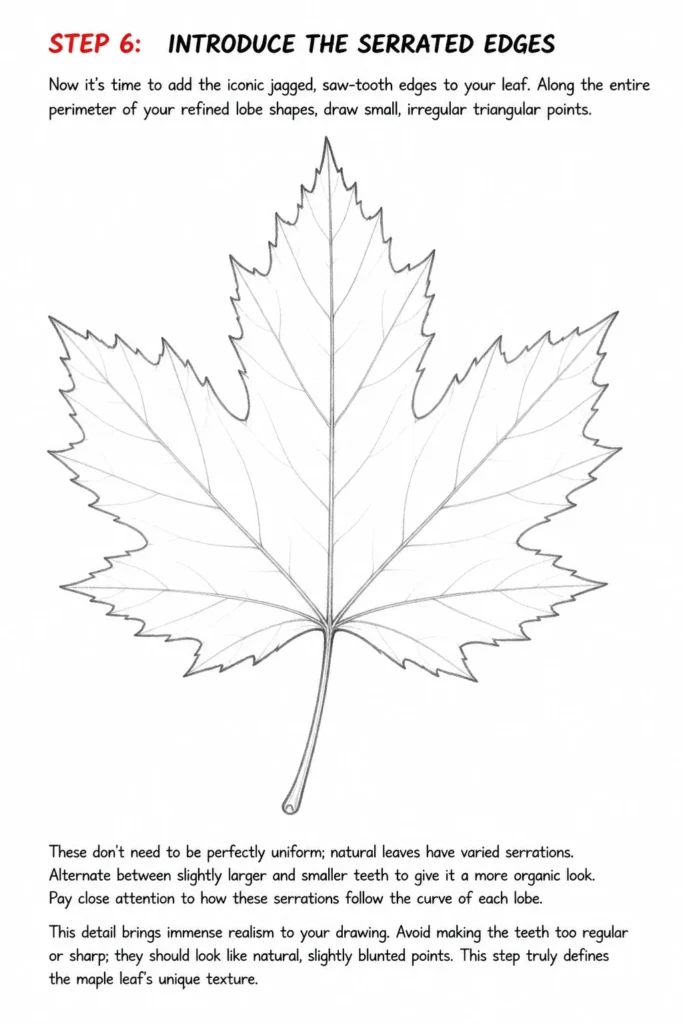
Now it’s time to add the iconic jagged, saw-tooth edges to your leaf. Along the entire perimeter of your refined lobe shapes, draw small, irregular triangular points. These don’t need to be perfectly uniform; natural leaves have varied serrations.
Alternate between slightly larger and smaller “teeth” to give it a more organic look. Pay close attention to how these serrations follow the curve of each lobe. This detail brings immense realism to your drawing.
Avoid making the teeth too regular or sharp; they should look like natural, slightly blunted points. This step truly defines the maple leaf’s unique texture.
Step 7: Erase Guidelines and Clean Up
Once you are satisfied with the outline and serrated edges, gently erase all your initial light guidelines. Use a kneaded eraser for larger areas to lift graphite without smudging, and a regular eraser for precise clean-up.
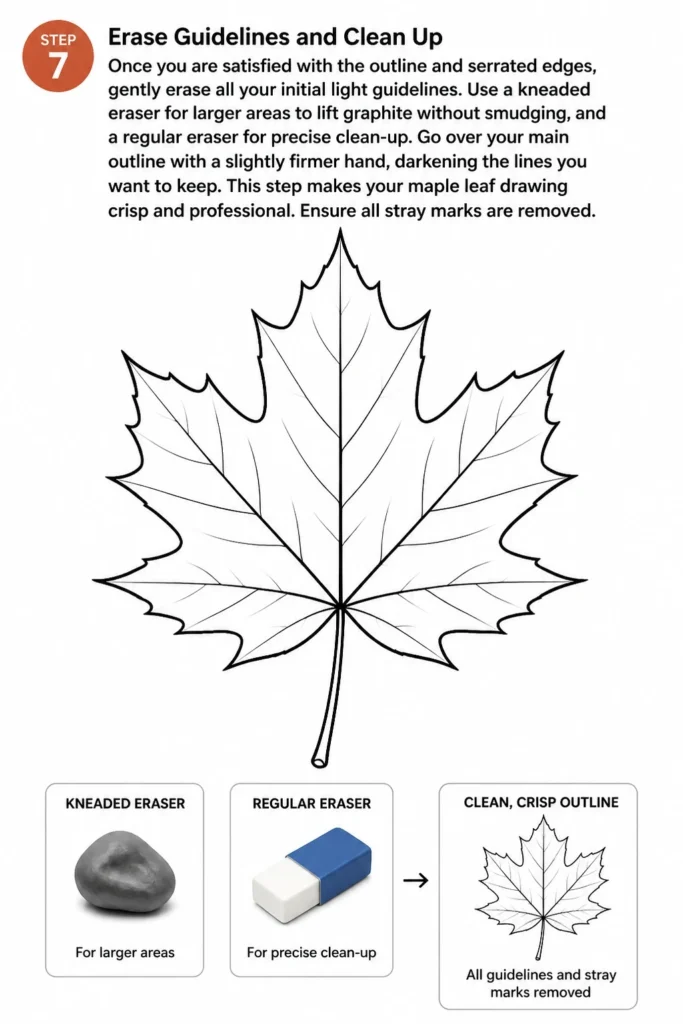
Go over your main outline with a slightly firmer hand, darkening the lines you want to keep. This step makes your maple leaf drawing crisp and professional. Ensure all stray marks are removed.
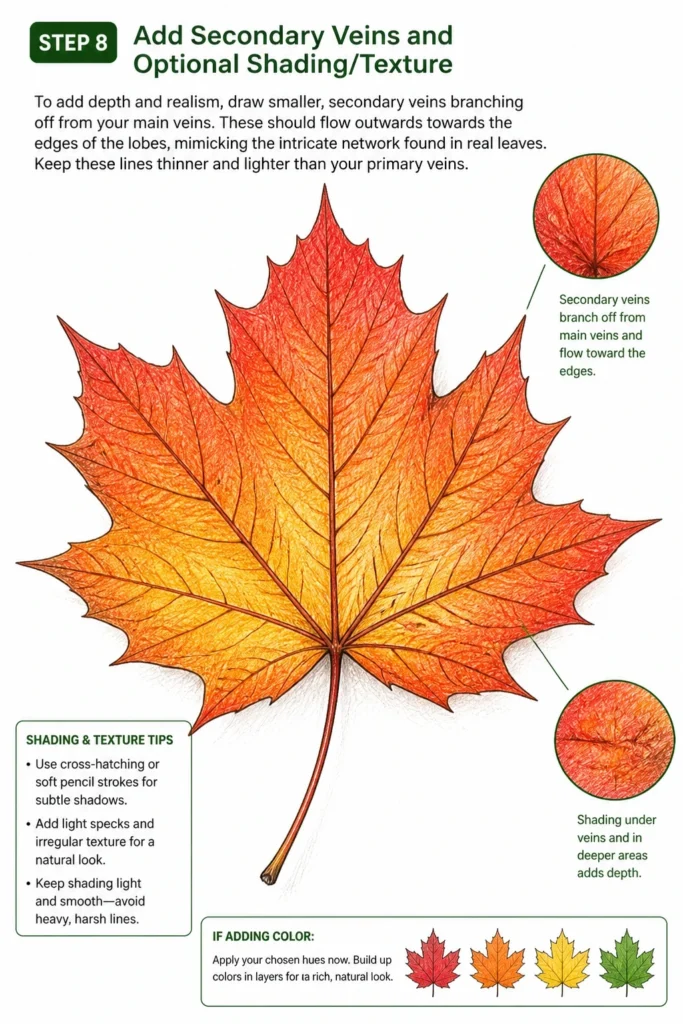
Step 8: Add Secondary Veins and Optional Shading/Texture
To add depth and realism, draw smaller, secondary veins branching off from your main veins. These should flow outwards towards the edges of the lobes, mimicking the intricate network found in real leaves. Keep these lines thinner and lighter than your primary veins.
For shading, imagine a light source. Use cross-hatching or soft pencil strokes to add subtle shadows under the main veins and in the deeper parts of the leaf, giving it a three-dimensional feel. You can also add very light, irregular specks or subtle texture to simulate the leaf’s surface.
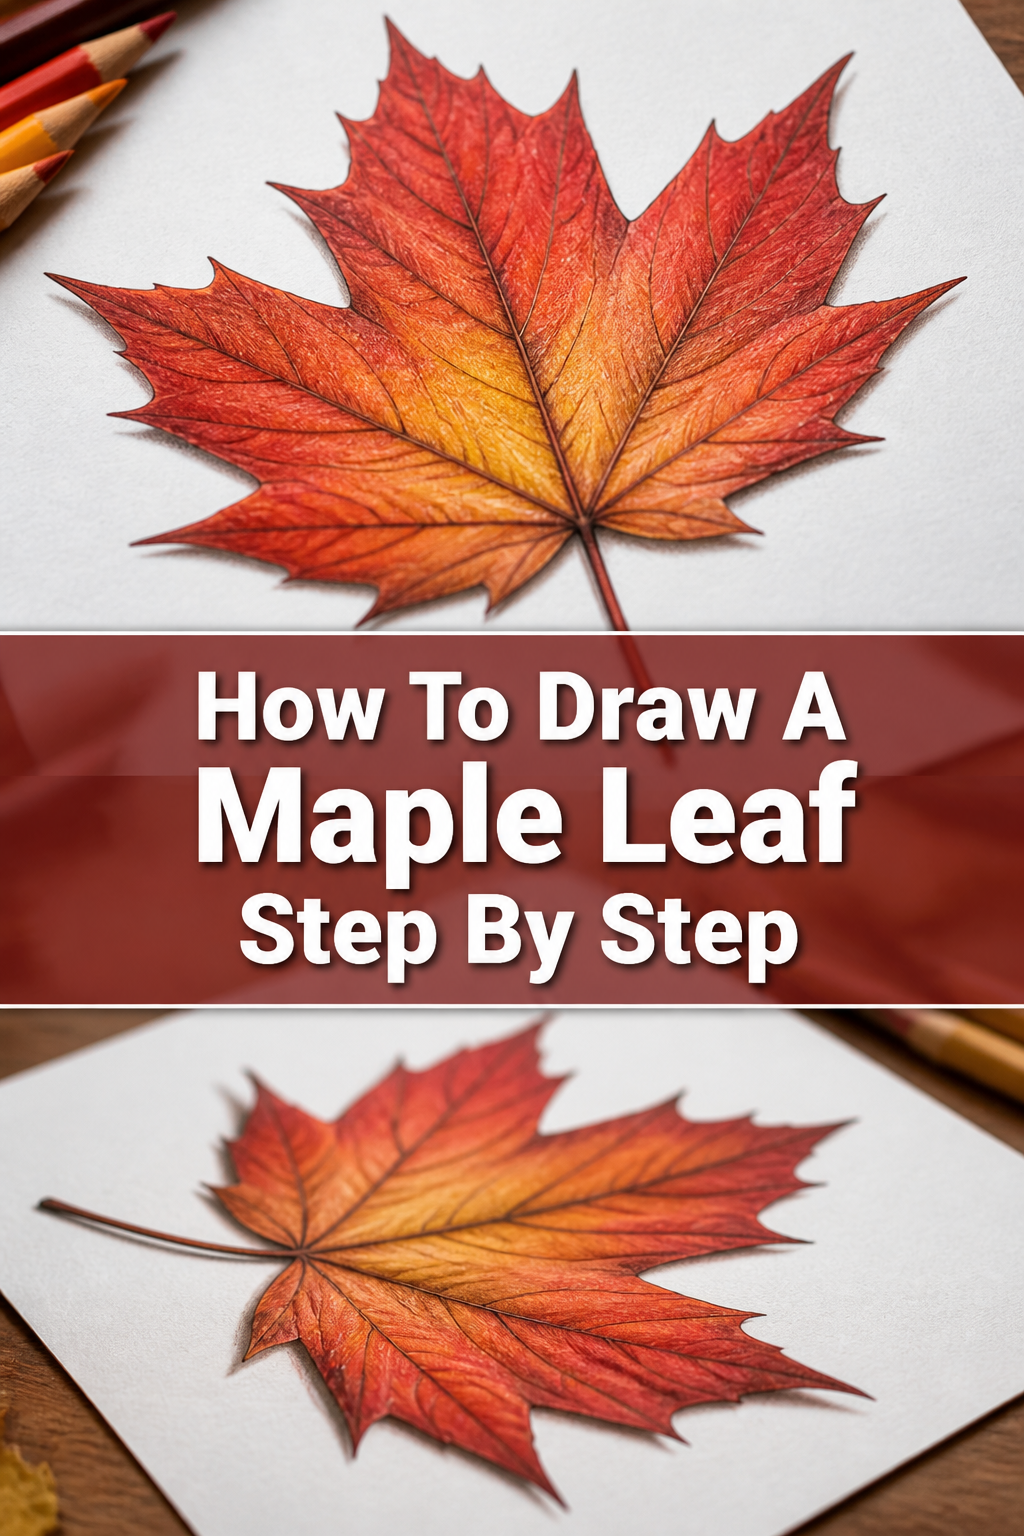
If you’re adding color, this is the stage to apply your chosen hues. Think about autumn colors like reds, oranges, and yellows, or vibrant greens for a summer leaf. Build up colors in layers for a rich, natural look.
Common Mistakes to Avoid
Making the Lobes Too Symmetrical
Many beginners try to make each lobe a perfect mirror image of the others. Real maple leaves, while generally symmetrical, have subtle variations. This rigid symmetry can make your drawing look stiff and unnatural. Instead, allow for slight differences in size and curve among the lobes. Embrace these small imperfections to achieve a more organic and lively appearance.
Overlooking the Notches Between Lobes
The deep indentations, or notches, between the lobes are a signature feature of a maple leaf. If you draw the lobes too close together or make the transitions too shallow, your leaf might resemble a different species. Pay careful attention to these inward curves, ensuring they are distinct and contribute to the overall shape. These negative spaces are just as important as the positive shapes of the lobes themselves.
Creating Uniform Serrated Edges
While serrated edges are characteristic, making every “tooth” identical will detract from the natural look. Real leaves have irregular serrations, varying slightly in size and sharpness along the edge. Aim for a natural variation, with some points larger and others smaller, to give your leaf an authentic texture. This irregularity adds to the organic feel.
Pressing Too Hard with Initial Guidelines
Starting your drawing with heavy lines for your guidelines can be a significant hurdle. These dark lines are difficult to erase completely, often leaving behind unsightly smudges or indentations on your paper. Always use a very light touch for your initial sketches, allowing you to easily erase and refine as you progress. This keeps your final drawing clean and crisp.
Troubleshooting
My Leaf Looks Flat and Lifeless
If your maple leaf lacks depth, it might be due to a lack of dimension. The solution is to incorporate subtle shading and vary your line weights. Add soft shadows where the main veins meet the leaf surface and in the deeper areas between lobes. Use a slightly darker line for the main outline and lighter lines for the internal veins. This contrast creates a sense of form and makes your leaf pop off the page.
The Lobes Don’t Look Right, They’re Too Round or Too Pointy
The shape of the lobes is crucial for identifying a maple leaf. If yours aren’t quite right, review reference images of actual maple leaves. Pay attention to the gentle curves of each lobe and the specific depth and shape of the notches between them. Practice drawing these individual lobe shapes and their connections separately before integrating them into the full leaf. Adjusting the initial “V” guideline in Step 1 can also help guide the overall spread.
My Serrated Edges Appear Messy or Unnatural
Creating natural-looking serrations requires a delicate touch. If your edges look too jagged or uneven in a bad way, try to simplify. Instead of drawing tiny, individual points, think of the serrations as a rhythmic pattern along the curve of the lobe. Practice drawing a section of serrated edge on scrap paper first. Focus on creating a consistent, yet slightly varied, rhythm of small “peaks and valleys” rather than sharp, spiky teeth.
Key Takeaways
- Start Light, Build Up: Always begin with faint guidelines and gradually darken your lines as you refine the shape.
- Master the Vein Structure: The five main veins are the skeleton of the maple leaf; get them right, and the rest follows.
- Embrace Imperfection: Natural leaves are not perfectly symmetrical; allow for slight variations to achieve realism.
- Focus on Notches and Serrations: These distinct features are key to a recognizable maple leaf.
- Layer for Depth: Add secondary veins and subtle shading to give your drawing a three-dimensional quality.
- Practice Makes Progress: Drawing is a skill that improves with consistent effort and observation.
Frequently Asked Questions
What kind of pencil is best for drawing a maple leaf?
An HB pencil is excellent for initial sketching and lighter details because it’s versatile and erases cleanly. For darker lines, shading, and adding depth, a 2B or 4B pencil works wonderfully, providing richer tones. Using a combination of pencils allows for a greater range of values in your drawing.
How can I make my maple leaf drawing look more realistic?
To enhance realism, focus on the subtle details. Observe real maple leaves closely for their unique vein patterns, the texture of their surface, and any natural imperfections. Incorporate varied line weights, using darker lines for prominent features and lighter lines for subtle details. Adding soft shadows and highlights will also significantly increase its three-dimensional quality.
Should I draw all the tiny veins?
You don’t need to draw every single tiny vein, as that can make the leaf look overly busy. Instead, focus on the main five veins, then add a reasonable number of secondary veins branching off them. These secondary veins should flow naturally towards the edges of the lobes. A selective approach to veining suggests detail without overwhelming the drawing.
What if my leaf looks too stiff or unnatural?
A stiff-looking leaf often results from rigid, straight lines or perfect symmetry. To make it more natural, introduce subtle curves to the stem and veins. Allow for slight irregularities in the lobe shapes and serrated edges, as no two leaves are exactly alike. Imagine the leaf gently swaying or slightly curling, and incorporate those organic movements into your lines.
Our Top Recommended Finds
- Staedtler Mars Lumograph Pencils: A fantastic set offering a range of graphite hardness for all your sketching and shading needs.
- Kneaded Eraser: Essential for lifting graphite gently without smudging, perfect for cleaning up guidelines.
- Strathmore Bristol Smooth Paper: Provides a smooth surface that allows for fine detail work and crisp lines, ideal for botanical drawings.
Embrace Your Artistic Journey Today
You’ve now walked through the intricate steps of drawing a beautiful maple leaf. Each line you’ve drawn, each curve you’ve perfected, contributes to a greater understanding of art and nature. This isn’t just about drawing a leaf; it’s about seeing the world with an artist’s eye.
Don’t let your artistic momentum stop here. Try drawing another maple leaf, perhaps from a different angle or with varied autumn colors. Consider exploring other natural forms like oak leaves or flowers. Your creative journey has just begun; pick up your pencil and keep exploring the wonders of drawing.
& Painting
No rigid rules or pretension. Just practical guides, medium comparisons, and encouraging tips to help you enjoy the drawing & painting process.