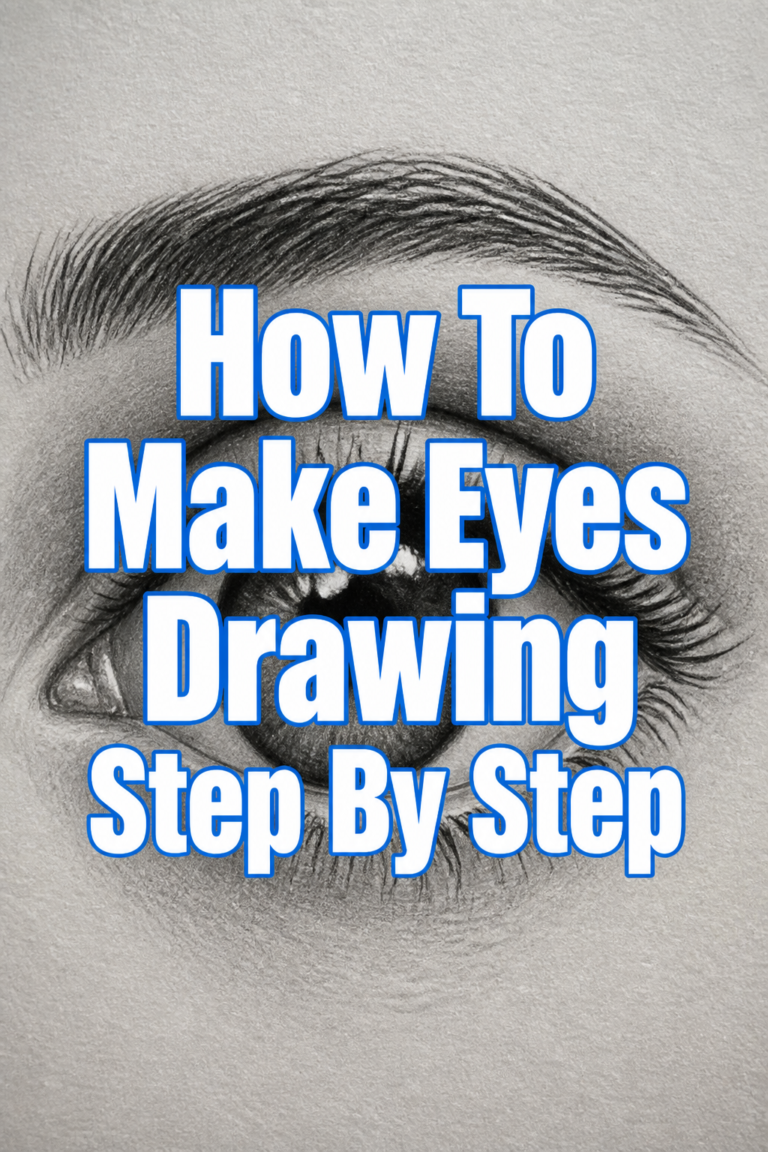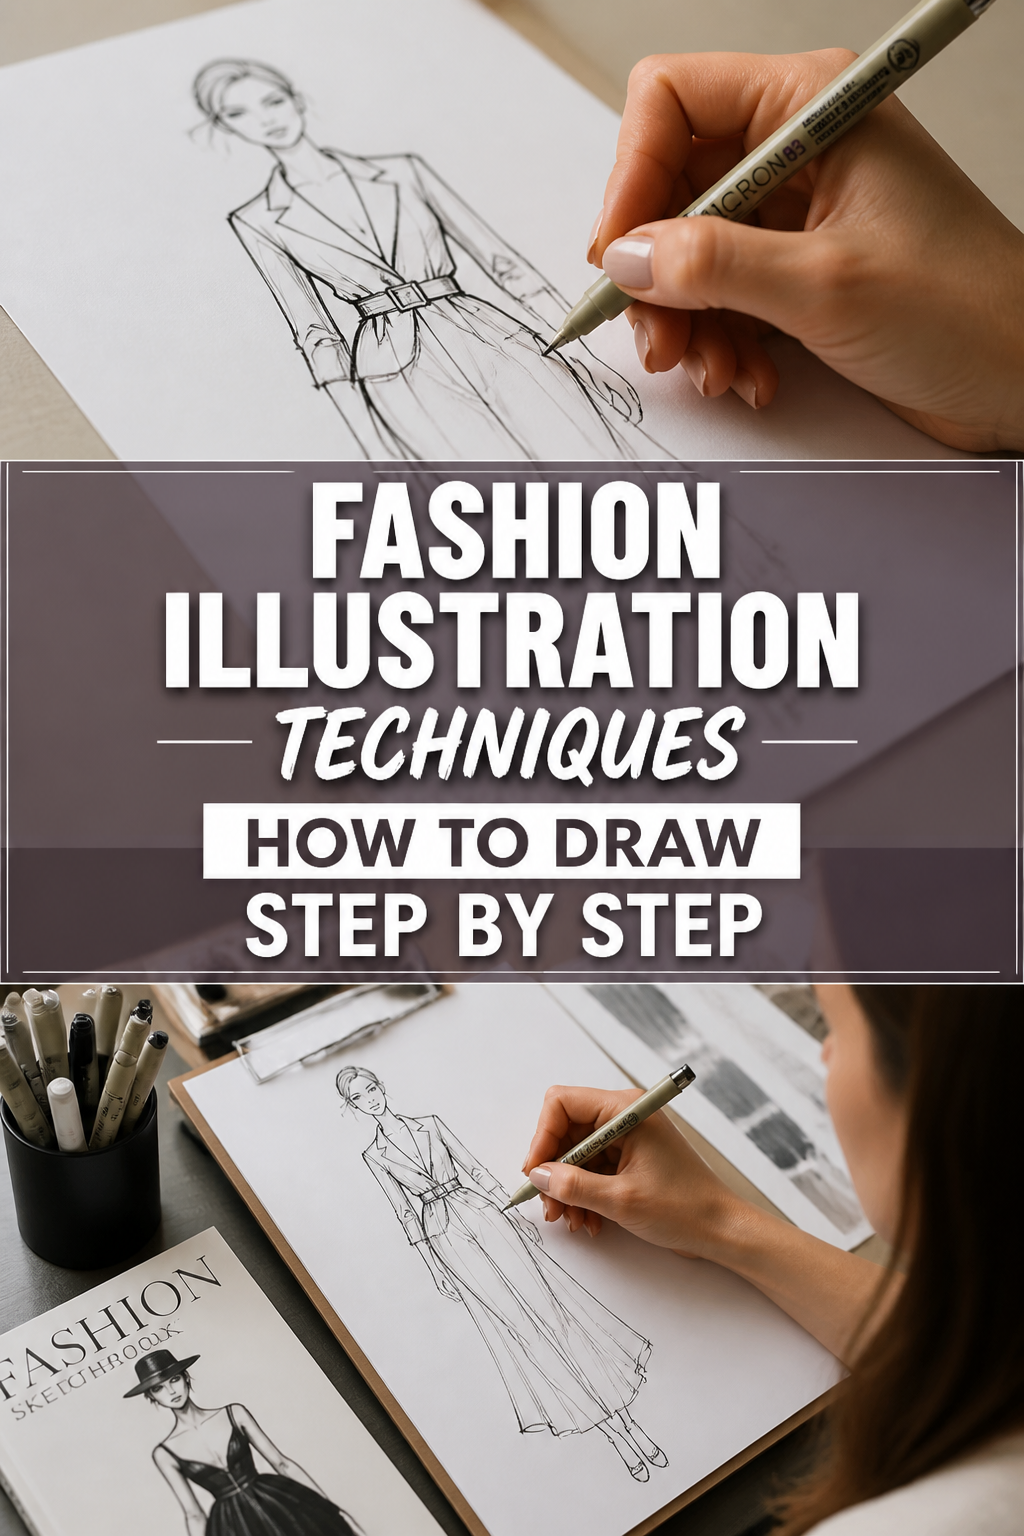
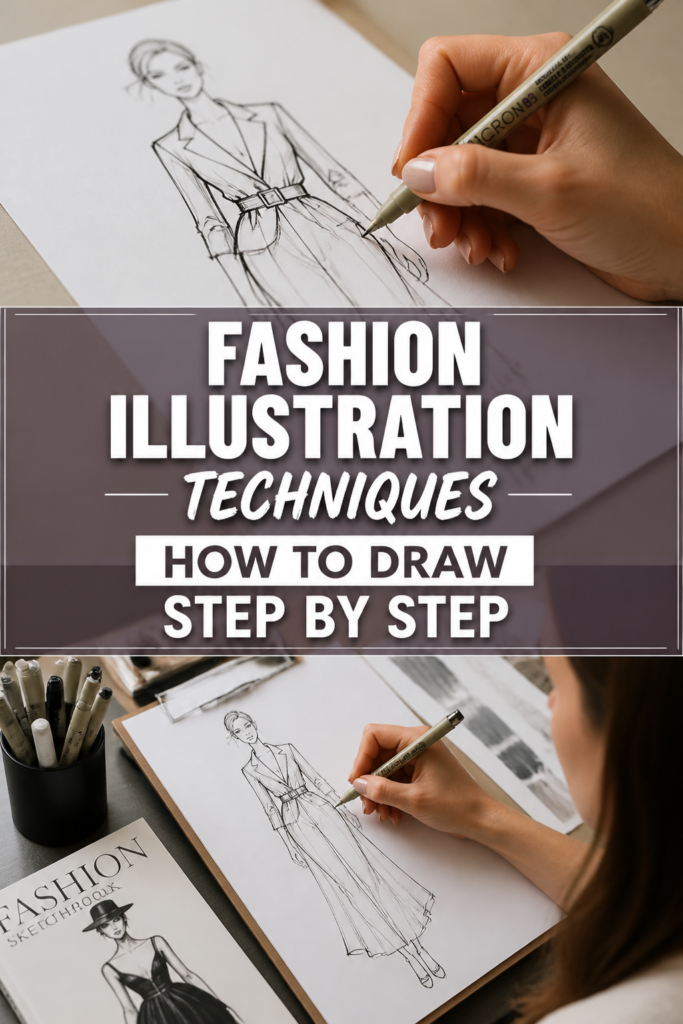
🌟 Fashion Illustration Techniques How To Draw Step By Step

& Painting
No rigid rules or pretension. Just practical guides, medium comparisons, and encouraging tips to help you enjoy the drawing & painting process.
Have you ever dreamed of bringing your fashion visions to life on paper?
Learning fashion illustration opens up a world where your creative ideas take tangible form.
Having spent years refining my own approach, I understand the initial hurdles and the joy of seeing a design emerge from a blank page.
Quick Overview
This guide will walk you through the essential techniques to begin your journey in fashion illustration. You’ll learn to construct dynamic figures, drape garments, and add expressive details, building a solid foundation for your artistic growth.
- Time needed: 4-8 hours of focused practice to grasp the basics
- Difficulty: Beginner
- What you’ll need: Pencils (HB, 2B), eraser, sketchbook or drawing paper, ruler, fashion reference images
Step-by-Step Instructions
Step 1: Gather Your Essential Tools
Starting with the right equipment makes a significant difference in your illustration journey. You don’t need expensive supplies to begin, just the basics.
A good foundation in tools helps you focus on technique rather than struggling with inadequate materials.
- Choose pencils of varying hardness, like an HB for light sketching and a 2B for darker lines.
- Select a smooth, white drawing paper or a dedicated sketchbook. Avoid overly textured paper for initial sketches.
- Keep a reliable eraser handy for corrections and a ruler for establishing guidelines.
Pro Tip: Invest in a kneaded eraser. It’s excellent for lifting graphite without damaging the paper, allowing for subtle adjustments.
Step 2: Understand the Croquis (Figure Foundation)
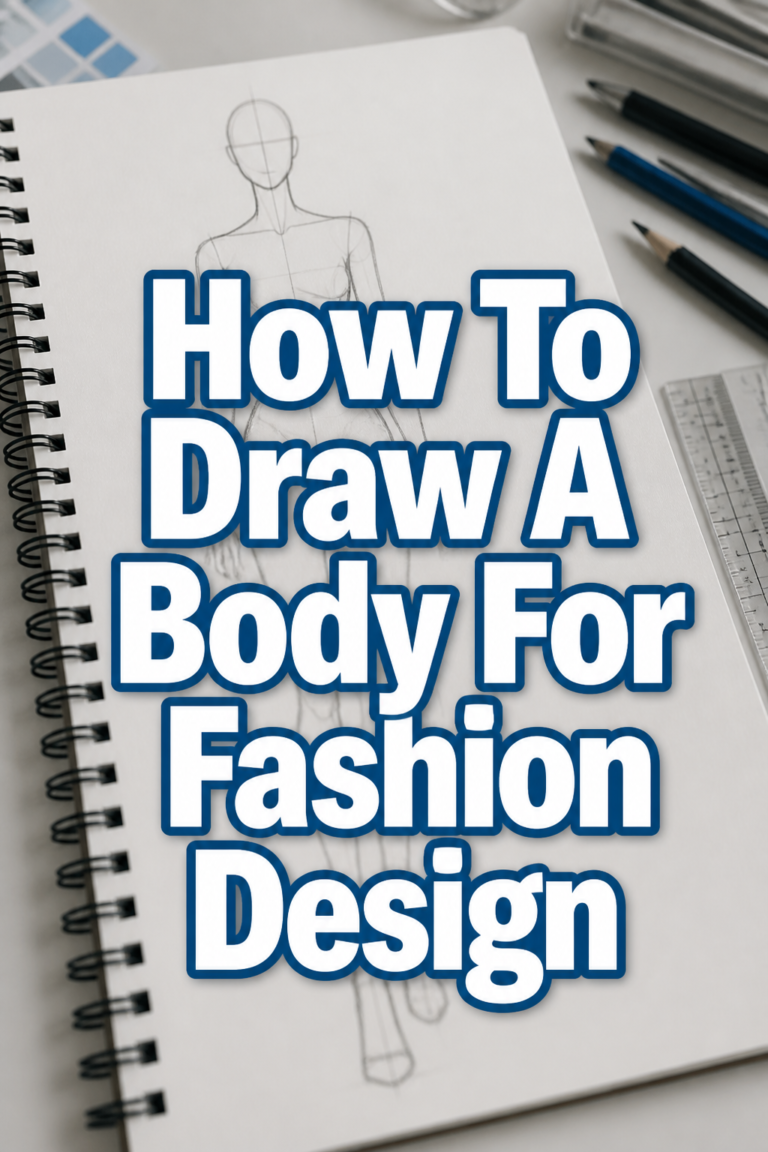
The croquis is the underlying figure sketch in fashion illustration. It’s typically elongated to represent the ideal fashion silhouette, often 9-10 head lengths tall.
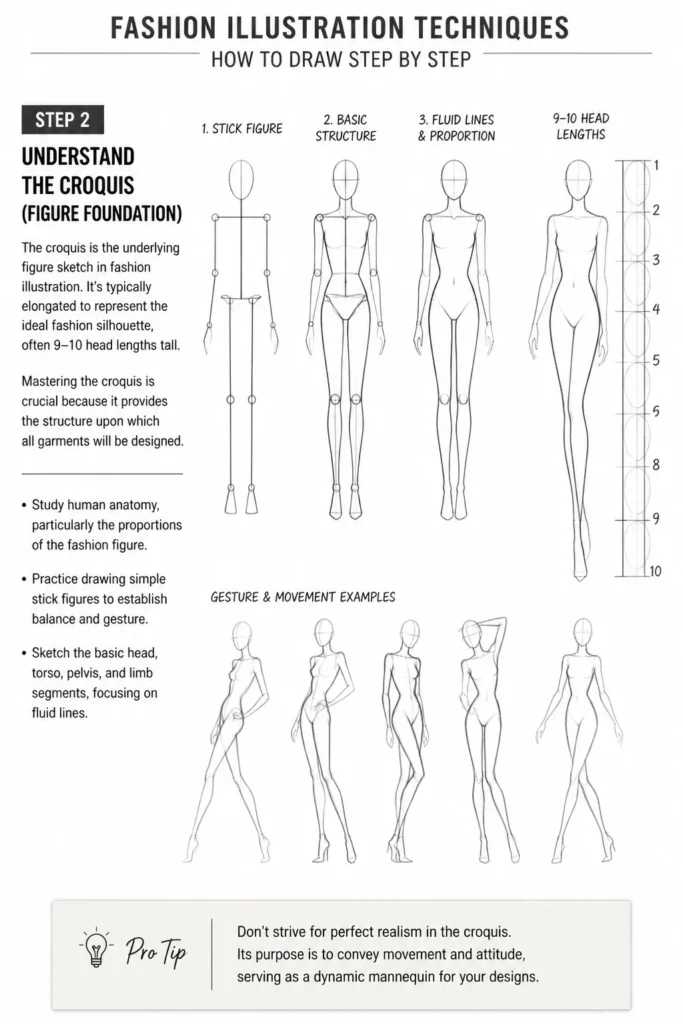
Mastering the croquis is crucial because it provides the structure upon which all garments will be designed.
- Study human anatomy, particularly the proportions of the fashion figure.
- Practice drawing simple stick figures to establish balance and gesture.
- Sketch the basic head, torso, pelvis, and limb segments, focusing on fluid lines.
Pro Tip: Don’t strive for perfect realism in the croquis. Its purpose is to convey movement and attitude, serving as a dynamic mannequin for your designs.
Step 3: Sketch the Basic Pose and Form
A compelling pose brings your illustration to life, conveying emotion and context for your design. Start with light, gestural lines to capture the figure’s movement.
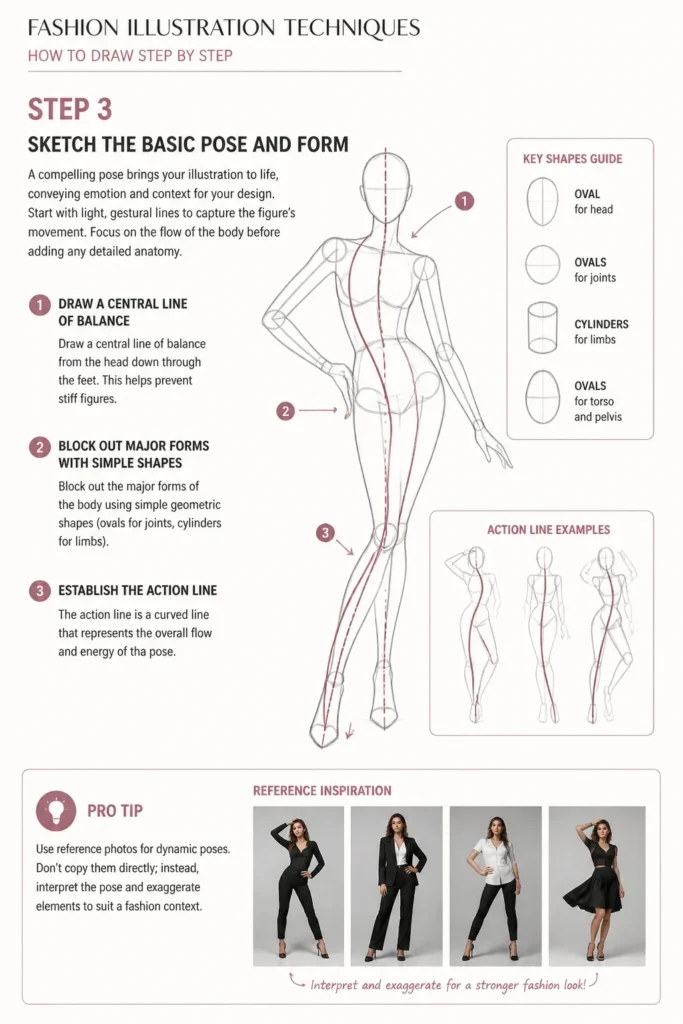
Focus on the flow of the body before adding any detailed anatomy.
- Draw a central line of balance from the head down through the feet. This helps prevent stiff figures.
- Block out the major forms of the body using simple geometric shapes (ovals for joints, cylinders for limbs).
- Establish the “action line” – a curved line that represents the overall flow and energy of the pose.
Pro Tip: Use reference photos for dynamic poses. Don’t copy them directly; instead, interpret the pose and exaggerate elements to suit a fashion context.
Step 4: Add Garment Details and Silhouettes
Once your croquis is established, you can begin to drape your chosen garment onto the figure. Think about the fabric’s weight and how it would naturally fall.
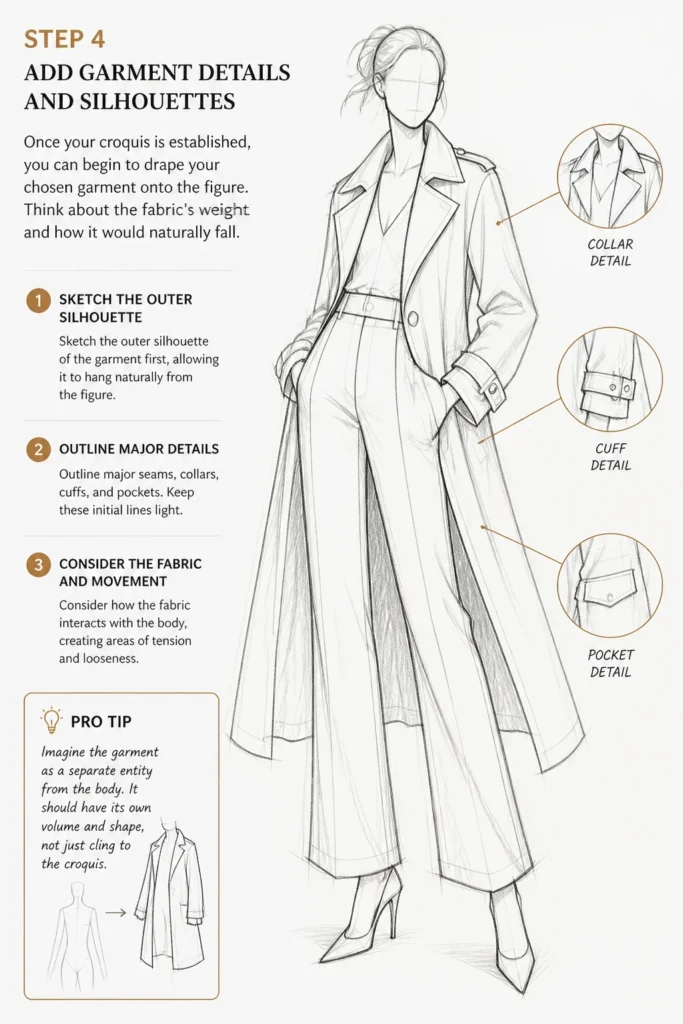
The silhouette is key to defining the garment’s style and impact.
- Sketch the outer silhouette of the garment first, allowing it to hang naturally from the figure.
- Outline major seams, collars, cuffs, and pockets. Keep these initial lines light.
- Consider how the fabric interacts with the body, creating areas of tension and looseness.
Pro Tip: Imagine the garment as a separate entity from the body. It should have its own volume and shape, not just cling to the croquis.
Step 5: Define Fabric and Folds
Folds are essential for illustrating how fabric behaves and adding realism to your designs. Different fabrics create different types of folds.
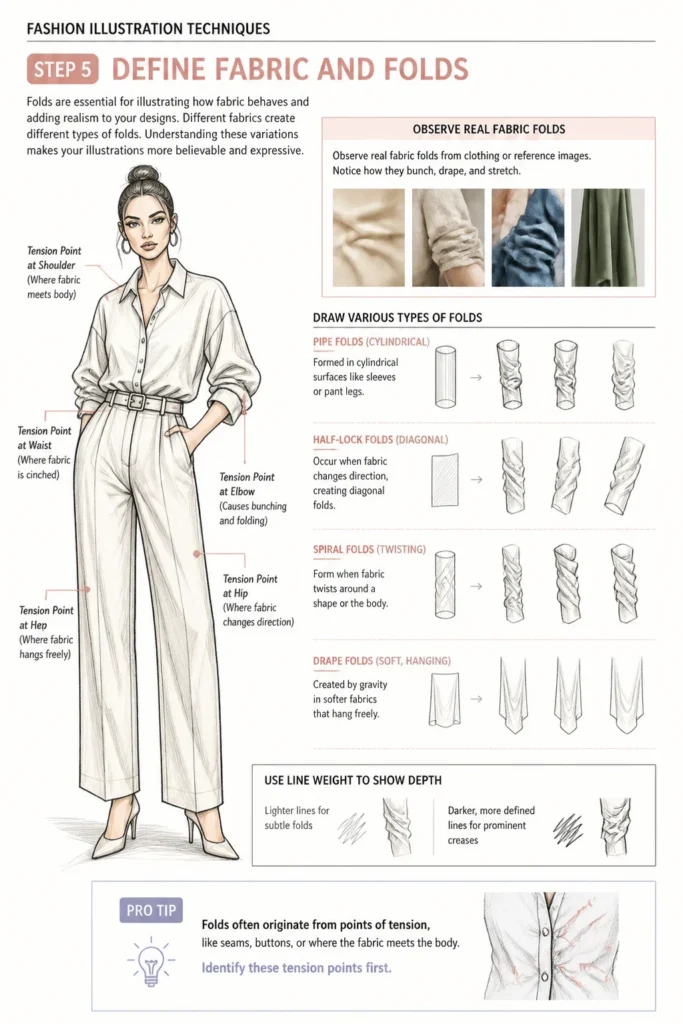
Understanding these variations makes your illustrations more believable and expressive.
- Observe real fabric folds from clothing or reference images. Notice how they bunch, drape, and stretch.
- Draw various types of folds: pipe folds (cylindrical), half-lock folds (diagonal), spiral folds (twisting), and drape folds (soft, hanging).
- Use lighter lines for subtle folds and darker, more defined lines for prominent creases.
Pro Tip: Folds often originate from points of tension, like seams, buttons, or where the fabric meets the body. Identify these tension points first.
Step 6: Introduce Color and Texture
Color and texture bring your fashion illustration to life, communicating the material and mood of your design. Experiment with different mediums to find what you enjoy.
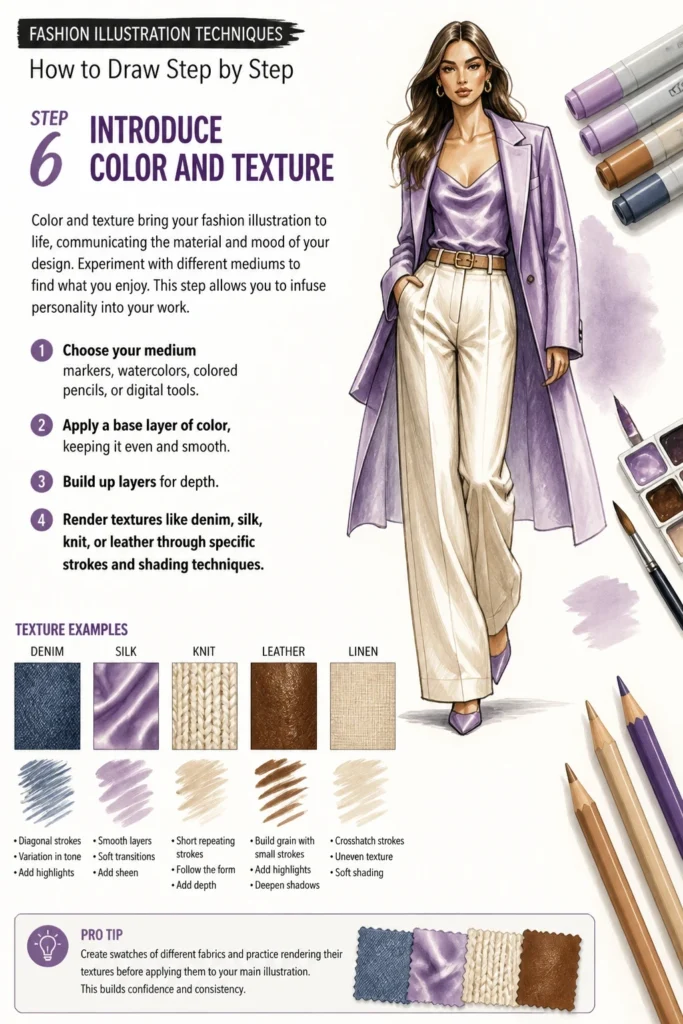
This step allows you to infuse personality into your work.
- Choose your medium: markers, watercolors, colored pencils, or digital tools.
- Apply a base layer of color, keeping it even and smooth. Build up layers for depth.
- Render textures like denim, silk, knit, or leather through specific strokes and shading techniques.
Pro Tip: Create swatches of different fabrics and practice rendering their textures before applying them to your main illustration. This builds confidence and consistency.
Step 7: Refine and Polish Your Drawing
Refinement is where your illustration truly shines. This stage involves adding details, strengthening lines, and ensuring overall cohesion.
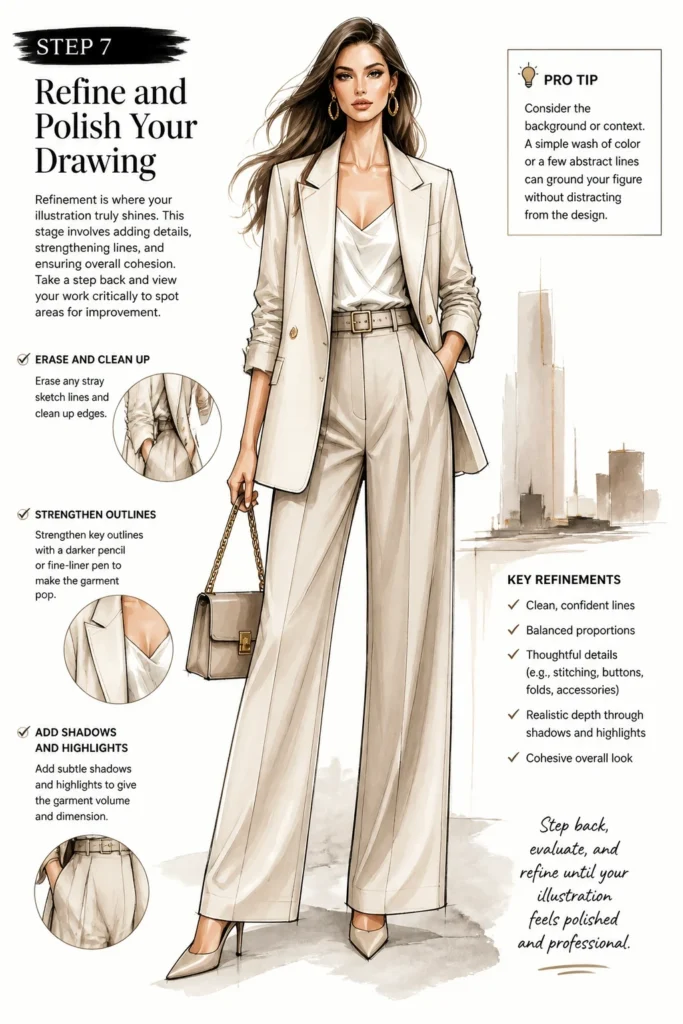
Take a step back and view your work critically to spot areas for improvement.
- Erase any stray sketch lines and clean up edges.
- Strengthen key outlines with a darker pencil or fine-liner pen to make the garment pop.
- Add subtle shadows and highlights to give the garment volume and dimension.
Pro Tip: Consider the background or context. A simple wash of color or a few abstract lines can ground your figure without distracting from the design.
Step 8: Practice and Develop Your Style
Fashion illustration is a skill that grows with consistent practice. Don’t be afraid to experiment and deviate from traditional methods.
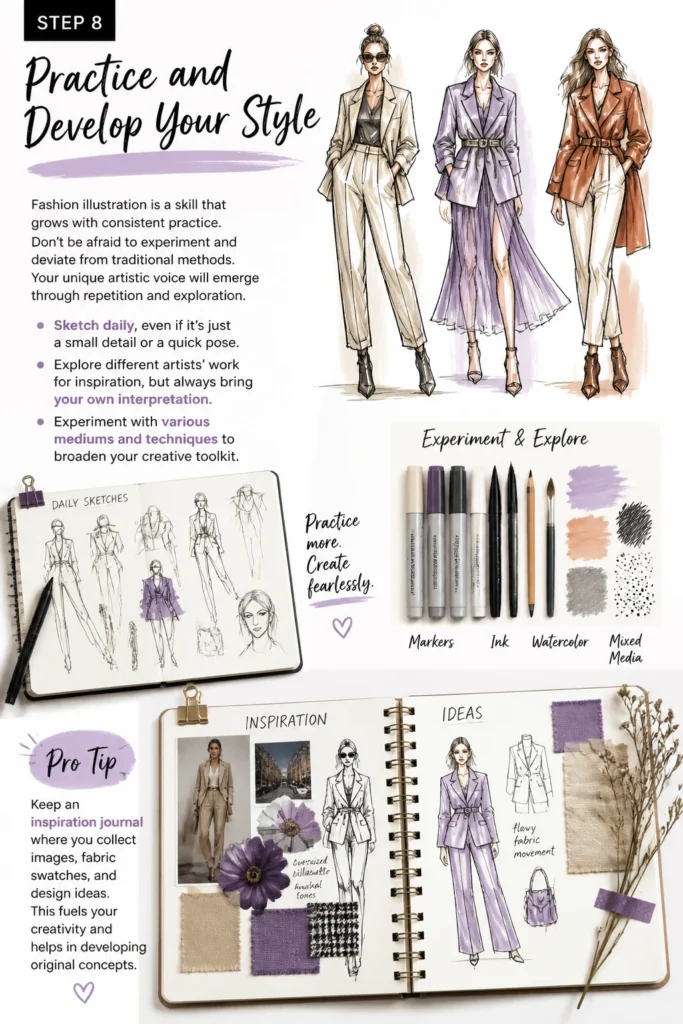
Your unique artistic voice will emerge through repetition and exploration.
- Sketch daily, even if it’s just a small detail or a quick pose.
- Explore different artists’ work for inspiration, but always bring your own interpretation.
- Experiment with various mediums and techniques to broaden your creative toolkit.
Pro Tip: Keep an “inspiration journal” where you collect images, fabric swatches, and design ideas. This fuels your creativity and helps in developing original concepts.
Common Mistakes to Avoid
Ignoring Proportions
A common pitfall is drawing figures that are either too short, too wide, or have disproportionate limbs. This makes the garments look awkward and unrealistic, even if the design itself is strong.
Always start with a well-proportioned croquis, using head lengths as a guide, before adding any clothing. This ensures a balanced foundation.
Overlooking Fabric Movement
Many beginners draw garments as flat shapes, neglecting how fabric drapes, gathers, or stretches. This results in stiff, lifeless clothing that doesn’t convey its material properties.
Actively observe real clothing and practice drawing different types of folds and wrinkles. Think about the fabric’s weight and texture and how it would respond to the body’s movement.
Rushing the Sketch
Skipping the initial light sketching phase and jumping straight to dark, defined lines can lead to mistakes that are hard to correct. This often results in messy lines and a lack of fluidity.
Begin with very light, gestural lines to establish the pose and garment shape. Gradually build up detail and darken lines as you become confident in your drawing. This allows for easy adjustments.
Copying Instead of Interpreting
While using references is vital, simply copying a photograph or another artist’s work limits your growth. It prevents you from developing your own unique perspective and style.
Use references as a starting point for understanding form, texture, and pose. Then, interpret these elements through your own artistic lens, exaggerating or simplifying as needed to express your vision.
Troubleshooting
My Figures Look Stiff
If your fashion figures lack natural movement, they might be too symmetrical or lack a clear “action line.” Stiff poses appear robotic and unengaging.
Focus on the line of action before anything else. This is a single, curving line that flows through the figure, conveying its energy. Exaggerate the natural curves of the spine and hips, and remember that the shoulders and hips often tilt in opposite directions.
Garments Don’t Look Realistic
When clothing appears flat or painted on, it usually means you haven’t considered volume or fabric folds. The garment needs to exist in three dimensions, independent of the body.
Think about where gravity would pull the fabric and where the body creates tension. Sketch the garment’s outer silhouette first, then add folds that emanate from points of stress or drape. Use shading to indicate depth and form.
Difficulty with Shading
Struggling with shading can make your illustrations look flat or muddy. Incorrect light sources or inconsistent application can lead to confusion about the garment’s form.
Establish a clear light source at the beginning of your shading process. Identify where light hits the garment directly (highlights) and where shadows would naturally fall. Build up your shading in layers, from light to dark, to create smooth transitions and depth.
Key Takeaways
- Start with basic tools; expensive supplies aren’t necessary for beginners.
- Master the elongated croquis as the foundation for all your fashion designs.
- Prioritize dynamic poses and the natural flow of the figure.
- Learn to illustrate fabric behavior and various types of folds.
- Experiment with color and texture to bring your designs to life.
- Refine your work by cleaning lines and adding subtle shading for depth.
- Consistent practice is key to developing your unique artistic style.
Frequently Asked Questions
Do I need to be good at drawing people already?
No, not necessarily. Fashion illustration focuses on a stylized interpretation of the human form, often elongated and expressive. While a basic understanding of anatomy helps, this guide provides the specific techniques for drawing fashion figures, which differ from realistic portraiture or life drawing.
What’s the best paper for fashion illustration?
Smooth, white drawing paper (like Bristol board or a good quality cartridge paper) is often preferred. It allows for crisp lines and smooth application of markers or colored pencils. Avoid overly textured paper for detailed fashion work, as it can interfere with fine lines and even color washes.
How do I find my own style?
Developing your style is a journey of exploration. It emerges through consistent practice, experimenting with different mediums, studying other artists, and most importantly, understanding what aspects of fashion and art resonate with you personally. Don’t force it; let it evolve naturally as you create more work.
Can I draw digitally?
Absolutely! Digital fashion illustration is increasingly popular. The principles of croquis, proportion, garment rendering, and color application remain the same. Software like Procreate, Adobe Photoshop, or Illustrator, combined with a drawing tablet, offers immense flexibility and tools for fashion artists.
Our Top Recommended Finds
- Fashion Croquis Templates: These pre-drawn light figures save time on the initial sketch, letting you focus directly on garment design.
- High-Quality Sketchbook: A durable sketchbook with smooth, bleed-resistant paper is perfect for experimenting with various mediums and keeping your work organized.
- Set of Grey Tone Markers: Mastering value (light and shadow) is crucial. A set of cool or warm grey markers helps you practice shading and add dimension to your designs.
Unleash Your Inner Fashion Artist
Embarking on fashion illustration is a creative adventure. Each line you draw, every color you choose, contributes to a unique expression of style.
Don’t wait for inspiration to strike; pick up your pencil and start sketching today.
Consider exploring different fabric textures or experimenting with digital tools as your next step. The world of fashion illustration is vast and waiting for your personal touch.
& Painting
No rigid rules or pretension. Just practical guides, medium comparisons, and encouraging tips to help you enjoy the drawing & painting process.