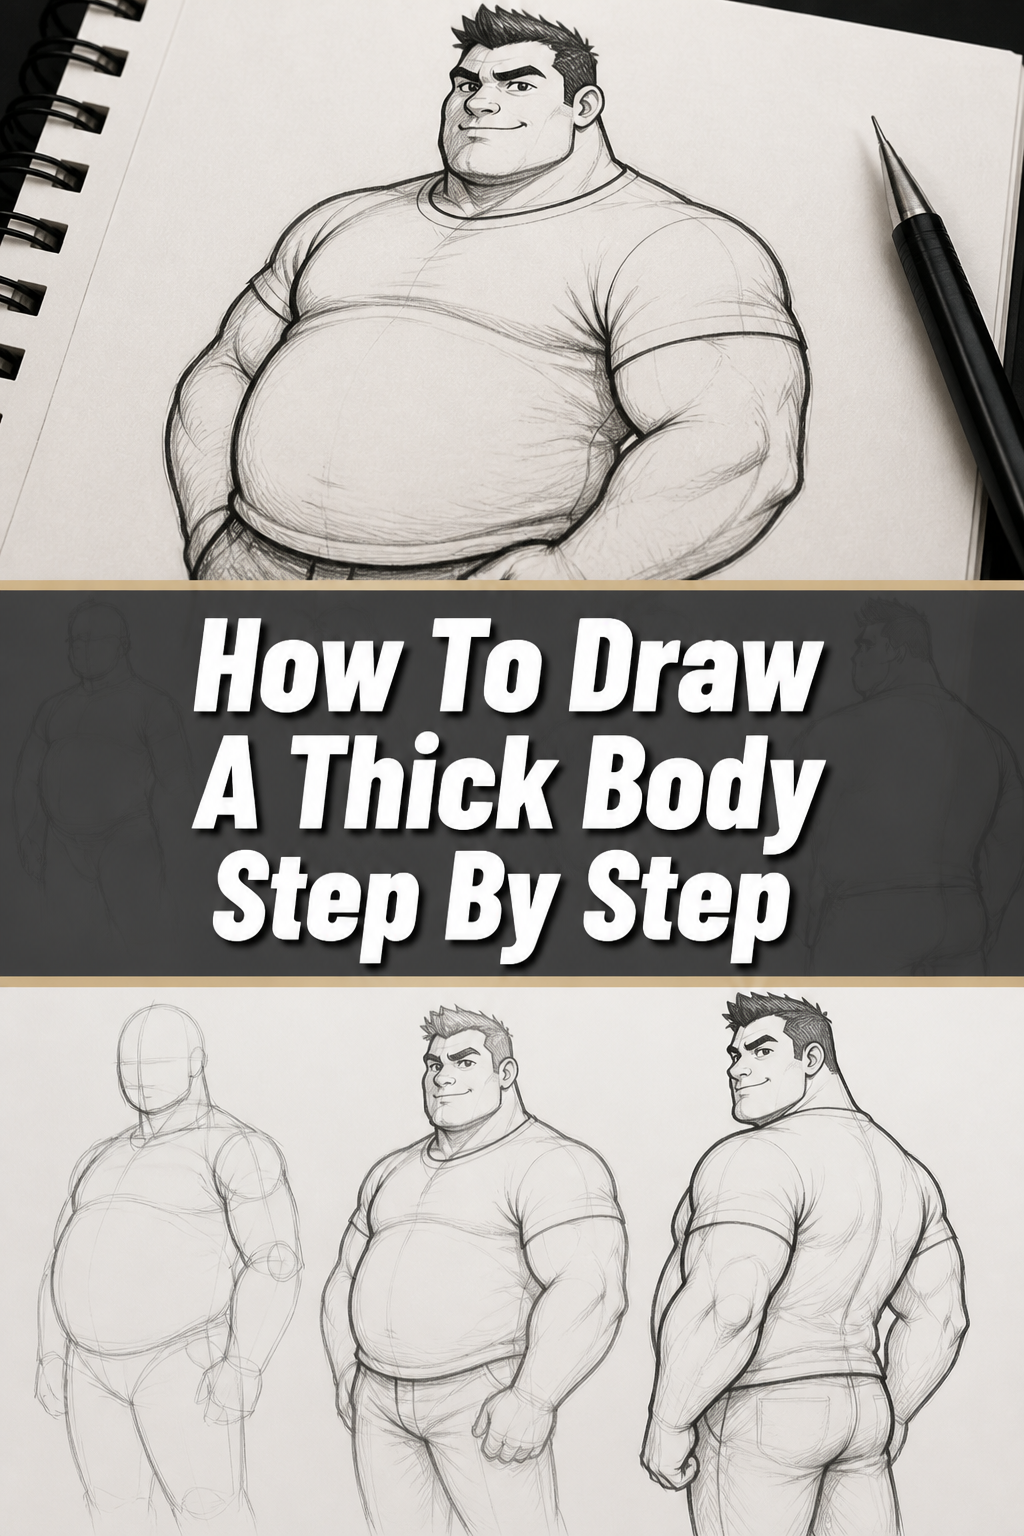
🎨 How To Draw A Thick Body Step By Step

& Painting
No rigid rules or pretension. Just practical guides, medium comparisons, and encouraging tips to help you enjoy the drawing & painting process.
Drawing diverse body types makes your artwork feel more grounded and realistic.
I remember spending years only drawing thin, wiry figures because I was afraid of getting the proportions of a thicker body wrong.
Once I started studying how weight actually sits on a frame, my characters began to feel much more alive and expressive.
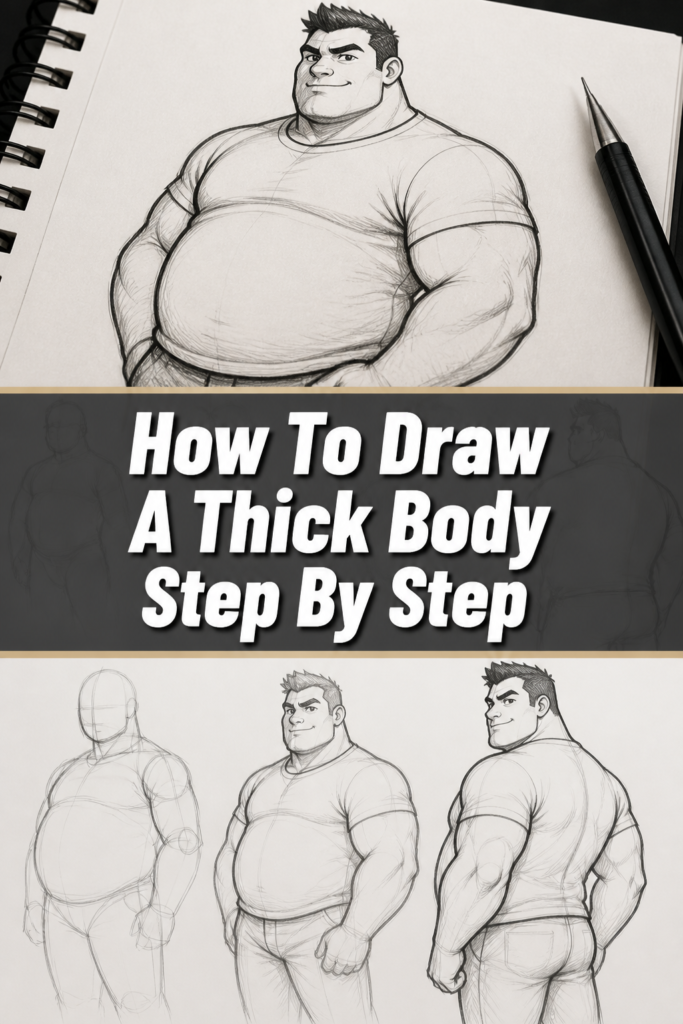
Quick Overview
This guide will show you how to construct a figure with volume, focusing on how weight distributes across the hips, thighs, and torso.
- Time needed: 45 to 60 minutes
- Difficulty: Intermediate
- What you’ll need: Graphite pencils (2B and 4B), a high-quality eraser, smooth drawing paper, and a reference photo.
Step-by-Step Instructions
Step 1: Sketch the Gesture Line
Start by drawing a long, curved line that represents the spine and the overall flow of the pose.
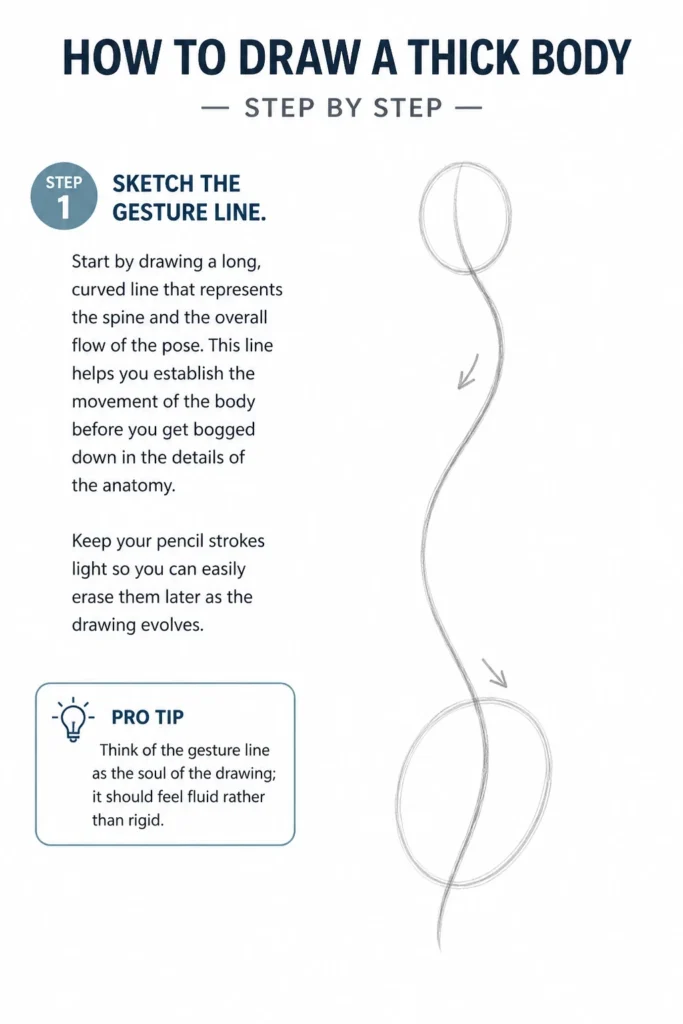
This line helps you establish the movement of the body before you get bogged down in the details of the anatomy.
Keep your pencil strokes light so you can easily erase them later as the drawing evolves.
Pro Tip: Think of the gesture line as the “soul” of the drawing; it should feel fluid rather than rigid.
Step 2: Map the Head and Ribcage
Draw an oval for the head at the top of your gesture line to set the scale for the rest of the body.
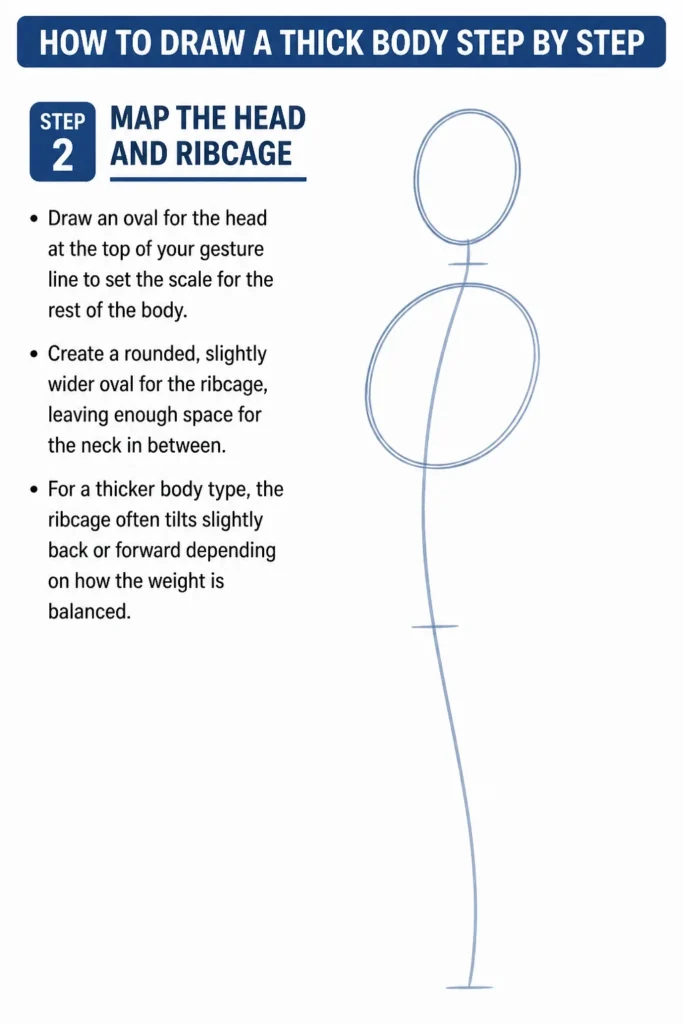
Create a rounded, slightly wider oval for the ribcage, leaving enough space for the neck in between.
For a thicker body type, the ribcage often tilts slightly back or forward depending on how the weight is balanced.
Step 3: Define the Wide Pelvis
Establish the hips by drawing a large, wide circle or a “bowl” shape that is significantly broader than the ribcage.
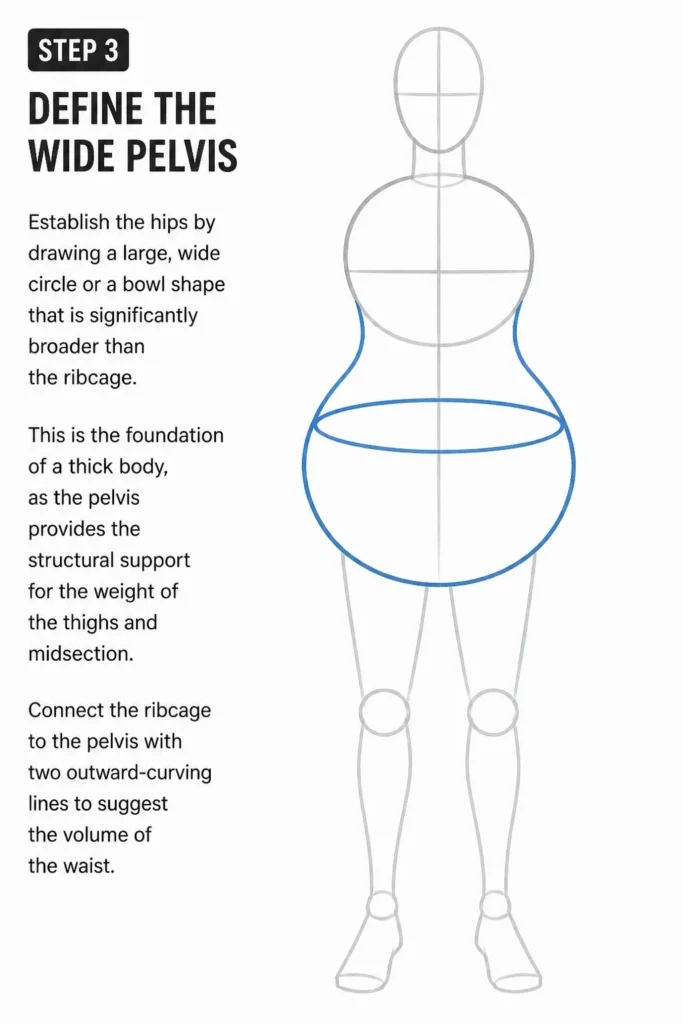
This is the foundation of a thick body, as the pelvis provides the structural support for the weight of the thighs and midsection.
Connect the ribcage to the pelvis with two outward-curving lines to suggest the volume of the waist.
Step 4: Build the Thighs with Volume
Construct the thighs using large, teardrop shapes that start wide at the hip and taper slightly toward the knee.
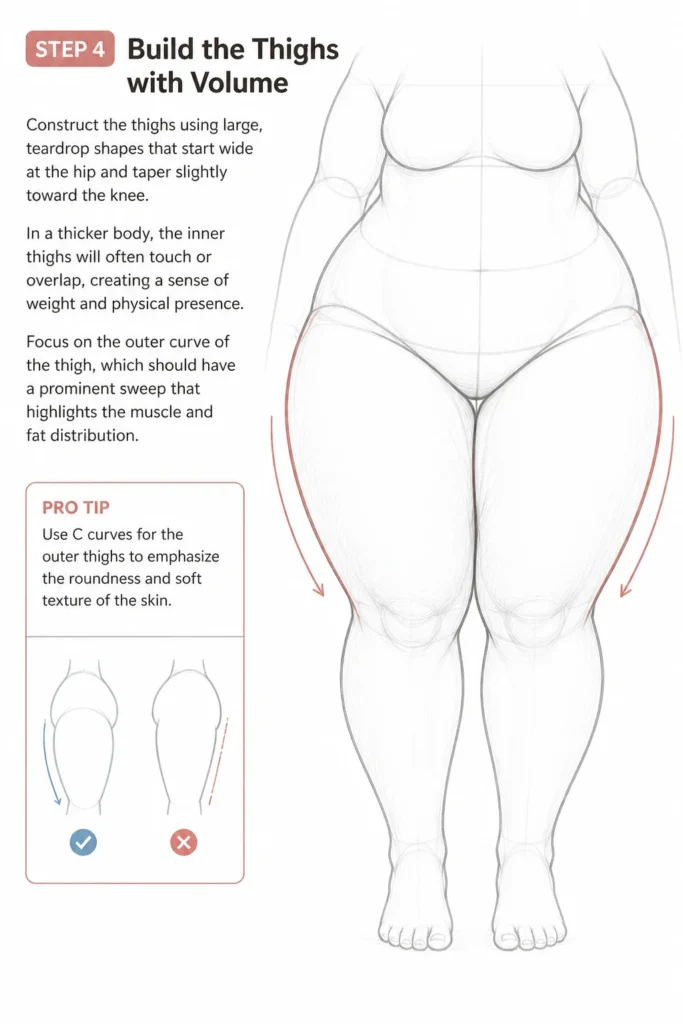
In a thicker body, the inner thighs will often touch or overlap, creating a sense of weight and physical presence.
Focus on the outer curve of the thigh, which should have a prominent “sweep” that highlights the muscle and fat distribution.
Pro Tip: Use “C” curves for the outer thighs to emphasize the roundness and soft texture of the skin.
Step 5: Add the Lower Legs and Calves
Sketch the calves by drawing rounded shapes that are thickest just below the knee and taper down to the ankles.
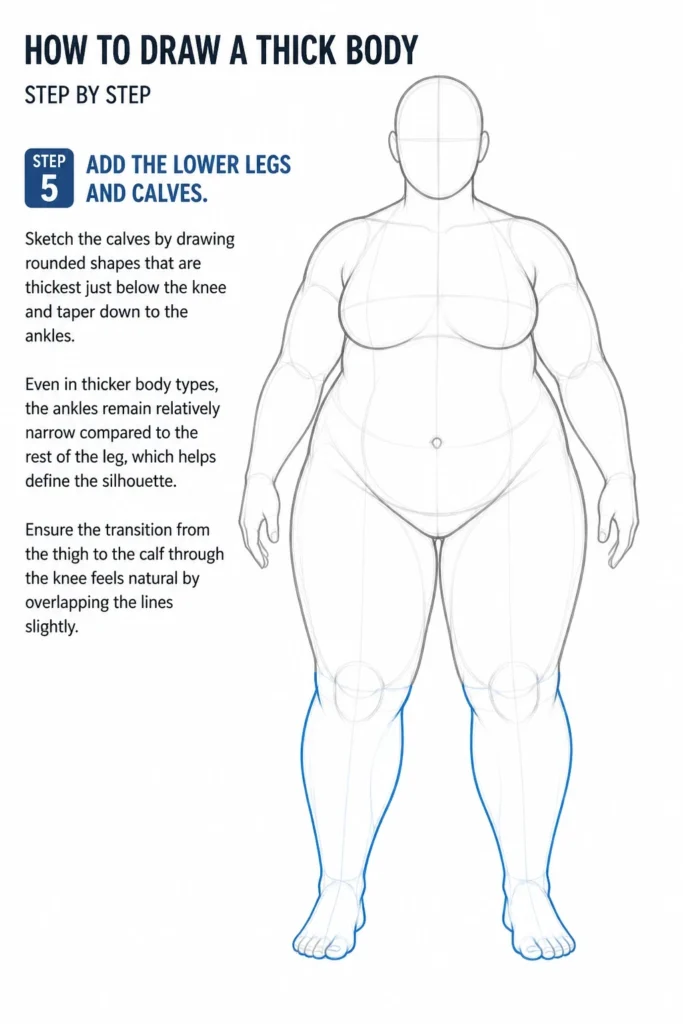
Even in thicker body types, the ankles remain relatively narrow compared to the rest of the leg, which helps define the silhouette.
Ensure the transition from the thigh to the calf through the knee feels natural by overlapping the lines slightly.
Step 6: Shape the Torso and Midsection
Fill in the space between the ribcage and the hips by adding soft, rounded lines for the stomach and waist.
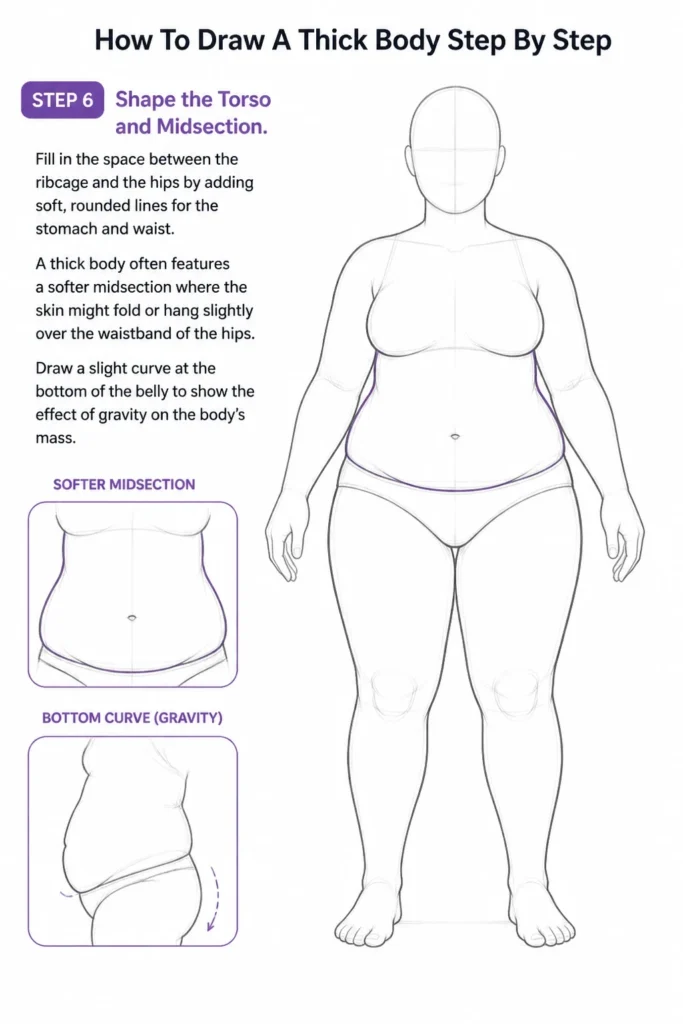
A thick body often features a softer midsection where the skin might fold or hang slightly over the waistband of the hips.
Draw a slight curve at the bottom of the belly to show the effect of gravity on the body’s mass.
Step 7: Position the Arms and Shoulders
Attach the arms to the ribcage using rounded shoulder joints that flow into thick upper arms.
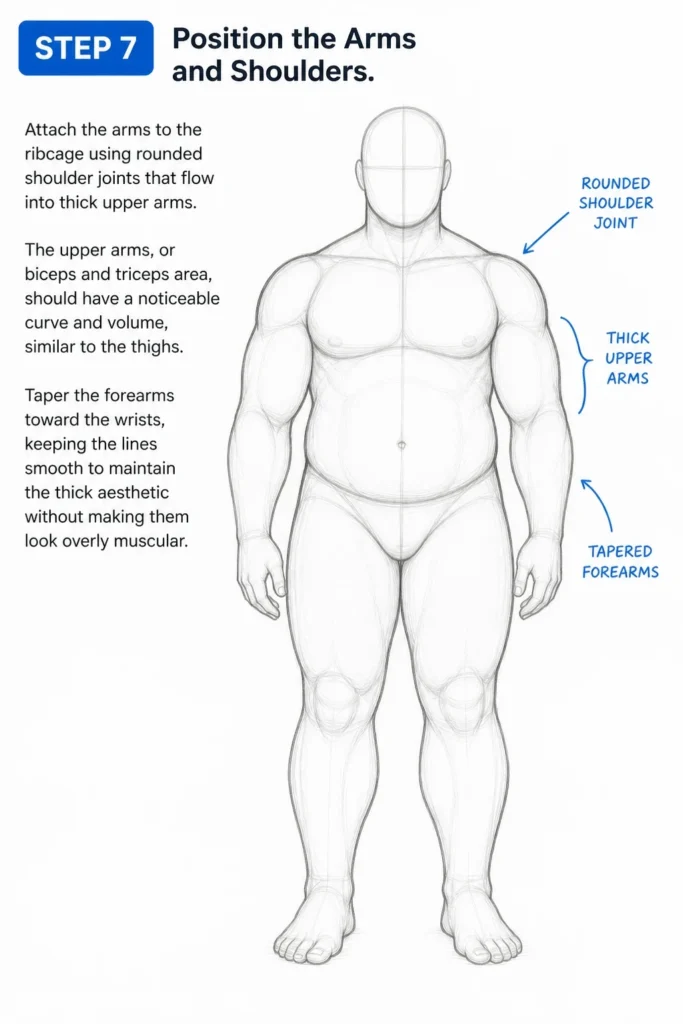
The upper arms, or biceps and triceps area, should have a noticeable curve and volume, similar to the thighs.
Taper the forearms toward the wrists, keeping the lines smooth to maintain the “thick” aesthetic without making them look overly muscular.
Step 8: Incorporate Gravity and Folds
Look for areas where the body parts press against each other, such as the armpits, the waist, or the inner thighs.
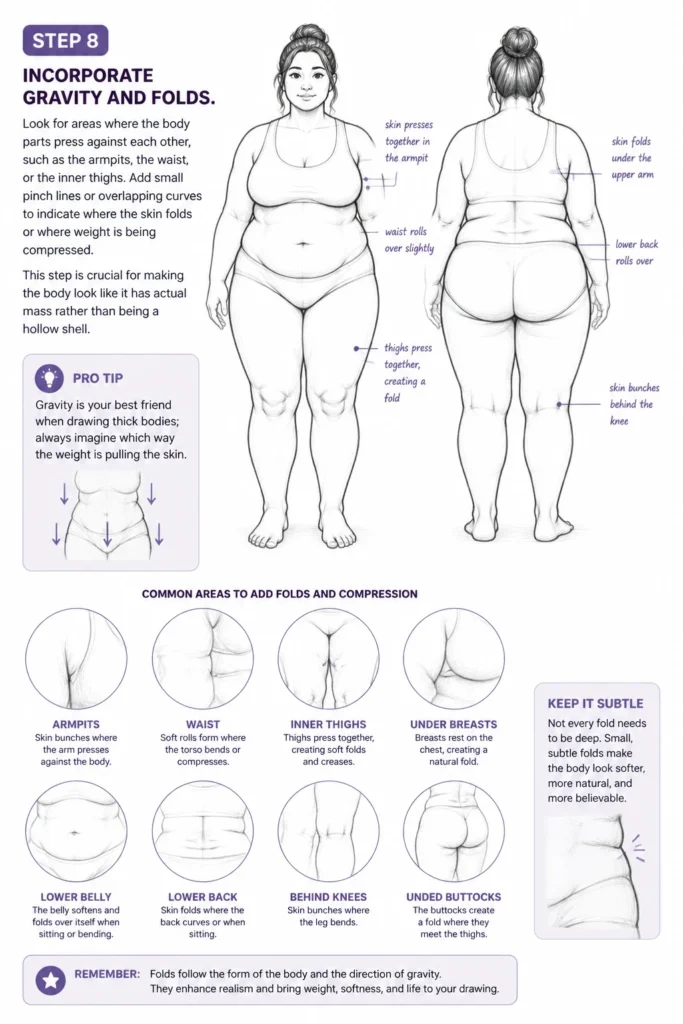
Add small “pinch” lines or overlapping curves to indicate where the skin folds or where weight is being compressed.
This step is crucial for making the body look like it has actual mass rather than being a hollow shell.
Pro Tip: Gravity is your best friend when drawing thick bodies; always imagine which way the weight is pulling the skin.
Step 9: Refine the Silhouette
Go over your initial construction lines with a darker pencil to finalize the outer edges of the body.
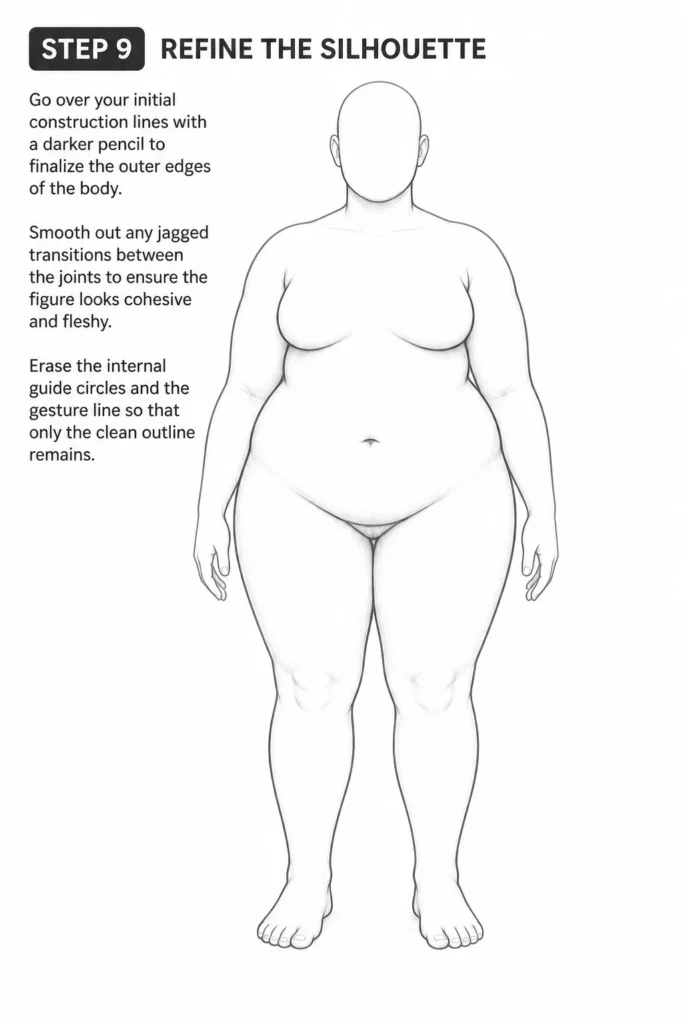
Smooth out any jagged transitions between the joints to ensure the figure looks cohesive and fleshy.
Erase the internal guide circles and the gesture line so that only the clean outline remains.
Step 10: Add Depth with Shading
Identify your light source and apply soft shading to the undersides of the breasts, belly, and thighs.
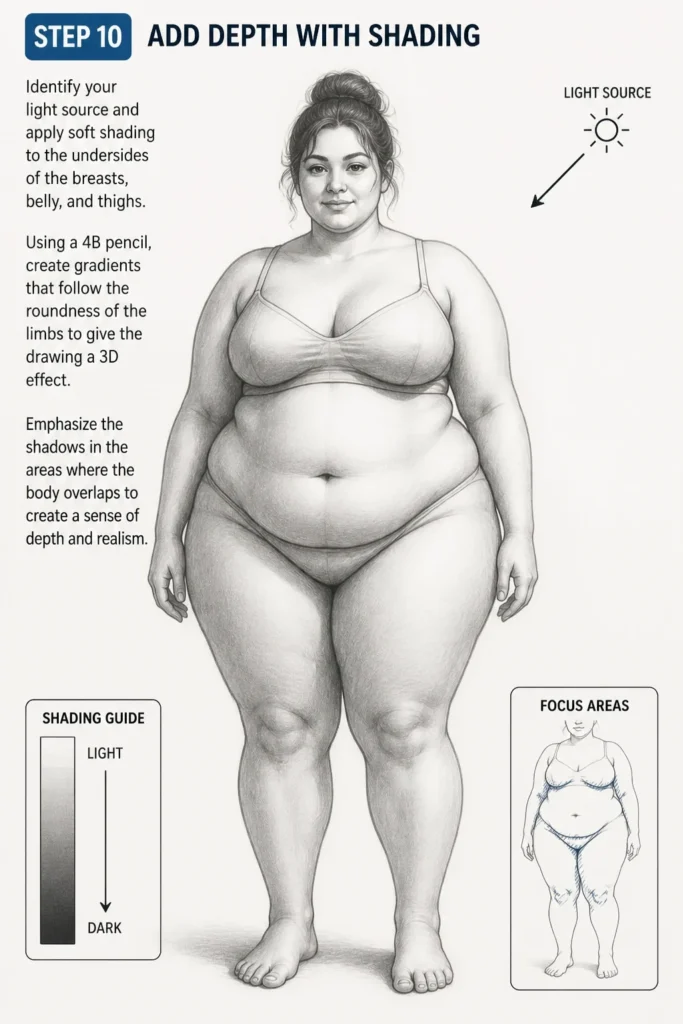
Using a 4B pencil, create gradients that follow the roundness of the limbs to give the drawing a 3D effect.
Emphasize the shadows in the areas where the body overlaps to create a sense of depth and realism.
Common Mistakes to Avoid
The Cardboard Effect
Many artists make the mistake of drawing a thick body as a flat, wide rectangle without any internal curves. This results in a figure that looks stiff and lacks the natural flow of human anatomy. To avoid this, always use rounded shapes like spheres and ovals during the construction phase.
Ignoring the Skeleton
It is easy to get carried away with adding volume and forget that there is a skeletal structure underneath. If the bones aren’t placed correctly, the limbs will look like they are floating or disconnected from the torso. Always start with a basic frame to ensure the proportions remain grounded in reality.
Uniform Thickness
A common error is making the arms, legs, and torso all the same width from top to bottom. Real bodies have points of tension and points of release, meaning some areas are much thicker than others. Focus on the tapering at the wrists, ankles, and neck to create a dynamic and believable silhouette.
Troubleshooting
The Figure Looks Stiff
If your drawing looks like a statue, your gesture line might have been too straight. Try redrawing the pose with more exaggerated curves in the spine and hips. Remember that a thick body moves with a lot of rhythm, and the weight shifts significantly with every step.
The Weight Looks Unnatural
Sometimes the added volume can look like “bloating” rather than natural weight. This usually happens when you don’t account for gravity pulling the flesh downward. Ensure the curves on the bottom of the shapes are slightly heavier and flatter than the curves on the top.
Losing the Proportions
If the legs look too short or the torso looks too long, go back to your head-count measurement. Generally, a thick body is still about 7 to 7.5 heads tall, but the width of the “units” is simply larger. Use a ruler or your pencil to double-check that the midpoint of the body is at the crotch level.
Key Takeaways
- Start with a fluid gesture line to capture the movement of the pose before adding mass.
- Use wide ovals and circles to establish the foundation of the hips and ribcage.
- Emphasize the “overlap” where limbs meet the torso to show realistic weight distribution.
- Apply the laws of gravity by drawing skin folds and soft curves that pull downward.
- Maintain a balance between thick volumes and tapered joints like ankles and wrists.
- Use soft shading to define the roundness and three-dimensional form of the figure.
Frequently Asked Questions
How do I make the skin look soft instead of muscular?
To achieve a soft look, avoid drawing sharp, defined lines for every muscle group. Instead, use long, continuous curves and keep your shading very smooth. Muscular bodies have “hard” edges where the muscle meets the skin, while thicker bodies have “soft” edges where the fat layers smooth out the underlying structure.
Should I draw the clothes first or the body?
You should always draw the body first, even if you plan on covering it with heavy clothing. Understanding where the hips and stomach sit allows you to draw how the fabric drapes and stretches over those areas. Drawing clothes over a “blank” space often leads to confusing proportions and unrealistic folds.
How do I draw a thick body from a side profile?
From the side, focus on the “S” curve of the spine and how the belly and buttocks balance each other out. The weight of the stomach will pull forward, while the glutes will provide a counter-balance in the back. Make sure the thighs have a significant thickness from front to back, not just from the front view.
What is the best way to practice drawing different weights?
The best way to practice is through “life drawing” using photos of real people with diverse body types. Sites like Line of Action or Croquis Cafe offer references that show how skin and fat behave in different poses. Try doing 2-minute sketches to capture the “mass” of the body without worrying about the details.
Our Top Recommended Finds
- Morpho: Fat and Skin Folds by Michel Lauricella: An incredible anatomy book that focuses specifically on how weight sits on the human frame.
- Kneaded Eraser: Essential for lifting graphite gently to create highlights on rounded surfaces like the stomach or thighs.
- Blending Stumps: These tools help you create the smooth, soft gradients necessary for depicting soft skin textures.
Take Your Art To The Next Level
Now that you have a solid foundation for drawing a thick body, the best thing you can do is experiment with different poses.
Try drawing your character sitting down or twisting, as these movements create the most interesting skin folds and weight shifts.
Don’t be afraid to make “ugly” sketches while you are learning how volume works in 3D space.
The more you practice observing the relationship between gravity and anatomy, the more natural your figures will become.
Grab your sketchbook and try drawing three different figures using these steps today.
& Painting
No rigid rules or pretension. Just practical guides, medium comparisons, and encouraging tips to help you enjoy the drawing & painting process.