🌙 How To Draw A Crescent Moon Step By Step

& Painting
No rigid rules or pretension. Just practical guides, medium comparisons, and encouraging tips to help you enjoy the drawing & painting process.
Have you ever wanted to capture the ethereal glow of a crescent moon on paper?
It’s a deceptively simple shape that, with a few practical steps, anyone can master.
Through countless sketches and artistic explorations, I’ve refined a straightforward method to help you draw a beautiful crescent moon every time.
Quick Overview
This guide will walk you through creating a visually appealing crescent moon, from initial shapes to final shading.
- Time needed: 15-30 minutes
- Difficulty: Beginner
- What you’ll need: Pencil (HB, 2B, 4B recommended), paper, eraser, optional: compass, blending stump
Step-by-Step Instructions
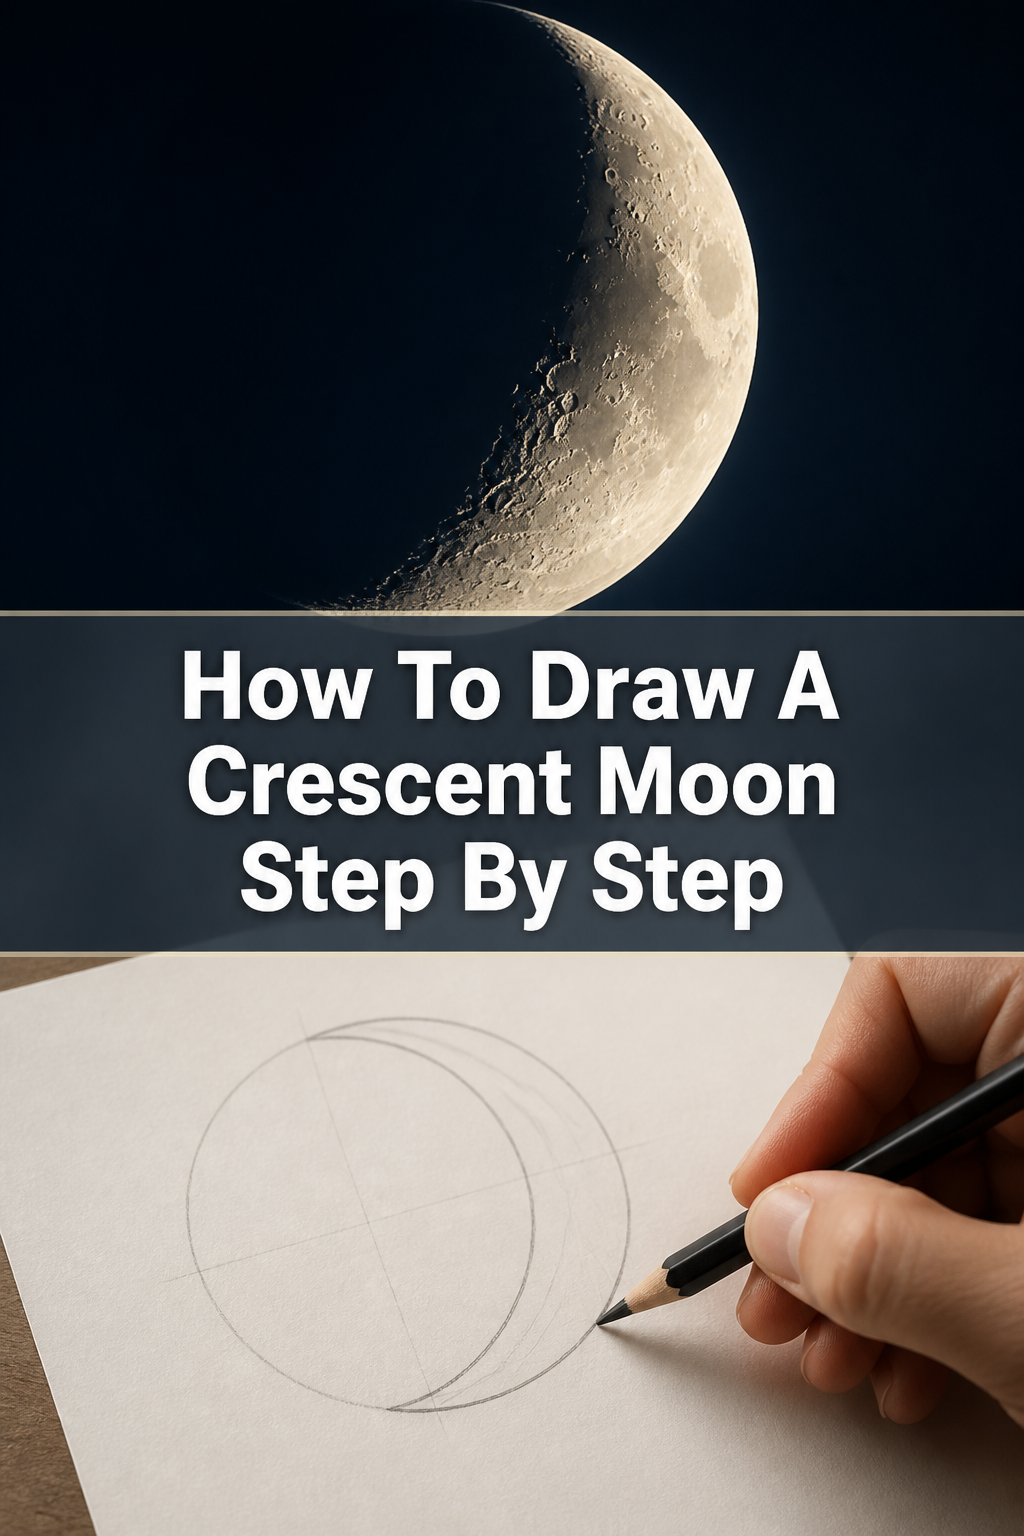
Step 1: Sketch Your Foundation Circle
Begin by lightly sketching a perfect circle on your paper. This initial circle acts as the primary boundary for your moon.
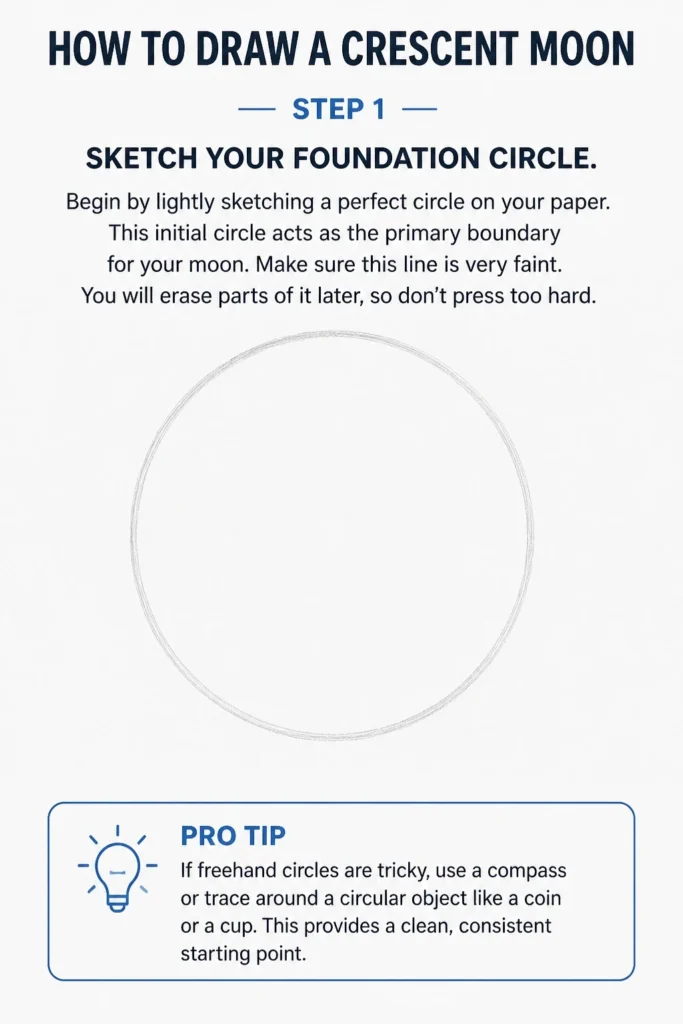
Make sure this line is very faint. You will erase parts of it later, so don’t press too hard.
Pro Tip: If freehand circles are tricky, use a compass or trace around a circular object like a coin or a cup. This provides a clean, consistent starting point.
Step 2: Define the Overlapping Second Circle
Draw a second circle that overlaps your first one. This is the key to creating the crescent shape.
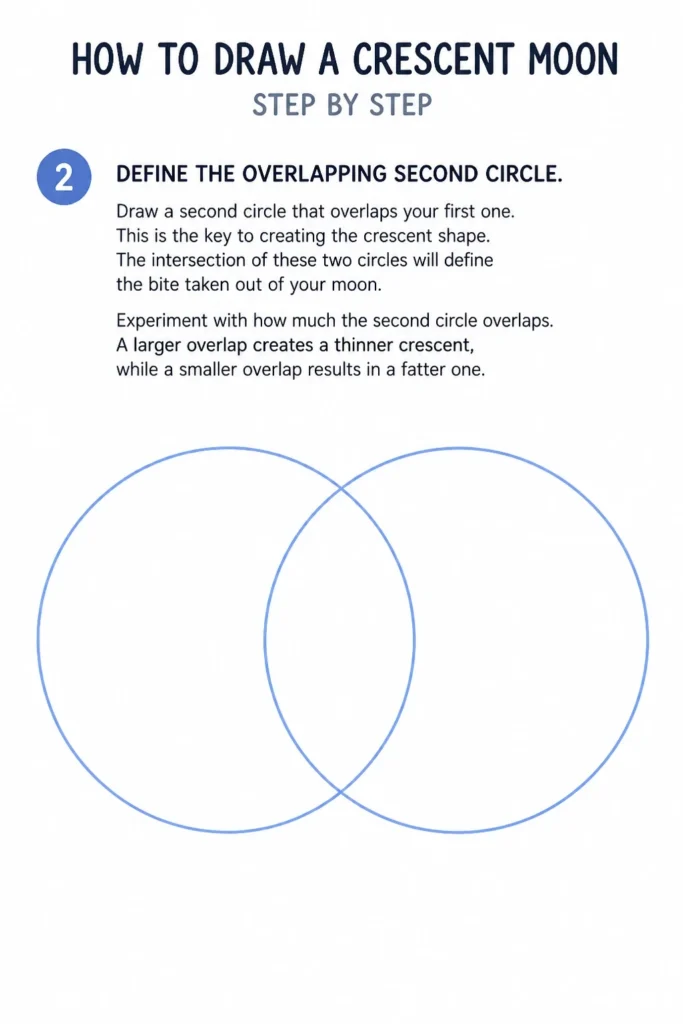
The intersection of these two circles will define the “bite” taken out of your moon.
Experiment with how much the second circle overlaps. A larger overlap creates a thinner crescent, while a smaller overlap results in a fatter one.
Step 3: Outline the Crescent Shape
Trace the outer curve of the first circle and the inner curve of the second circle where they meet.
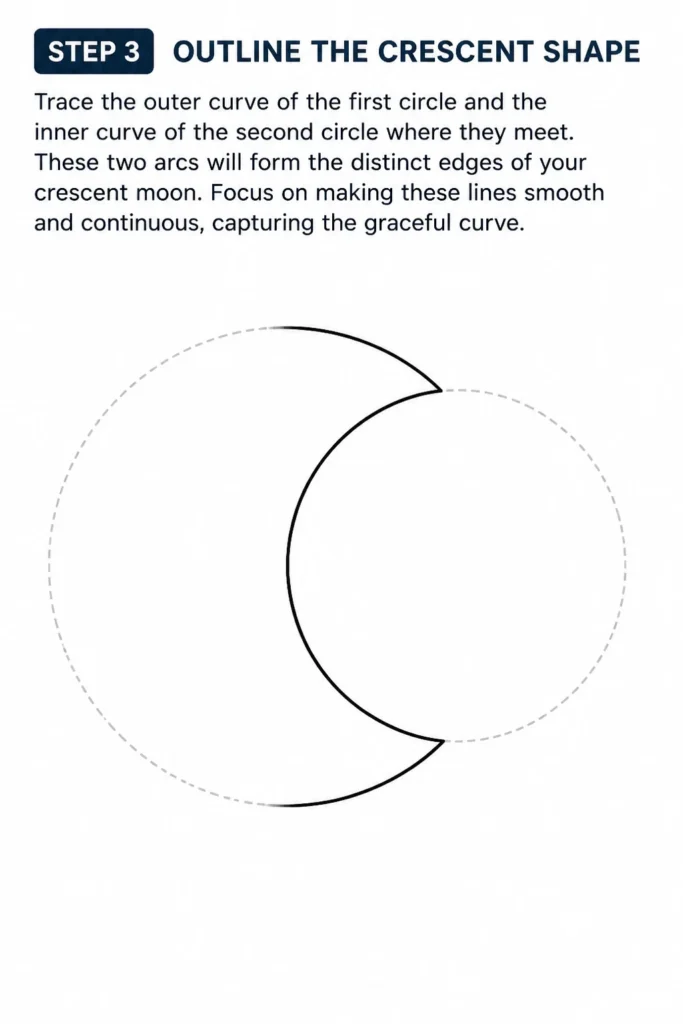
These two arcs will form the distinct edges of your crescent moon.
Focus on making these lines smooth and continuous, capturing the graceful curve.
Step 4: Erase Unnecessary Lines
Carefully erase the parts of the original two circles that are not part of your crescent outline.
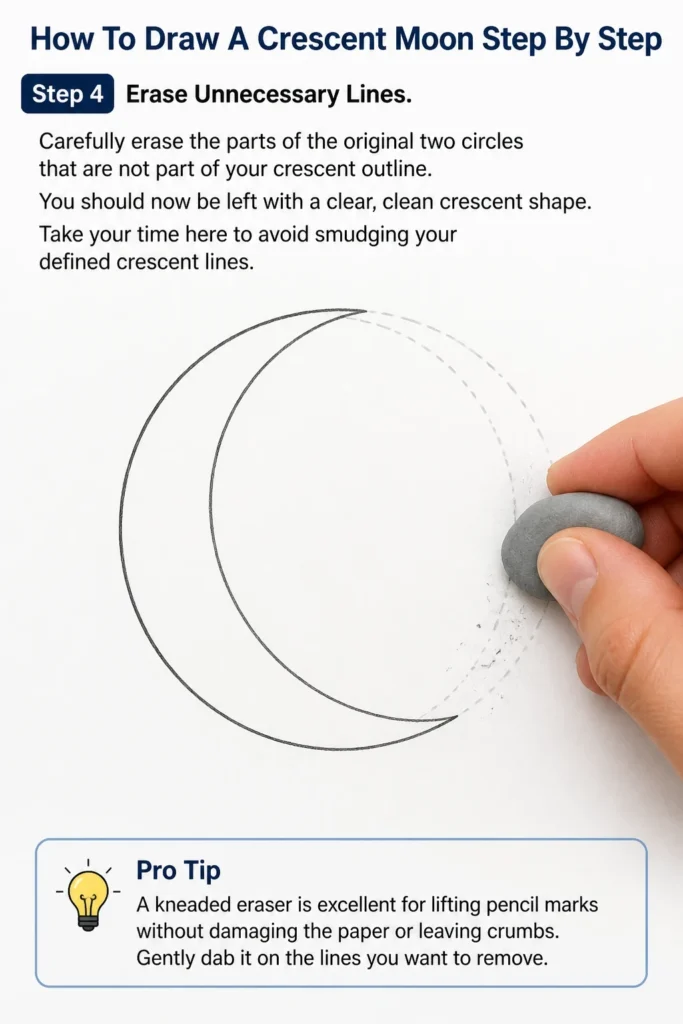
You should now be left with a clear, clean crescent shape.
Take your time here to avoid smudging your defined crescent lines.
Pro Tip: A kneaded eraser is excellent for lifting pencil marks without damaging the paper or leaving crumbs. Gently dab it on the lines you want to remove.
Step 5: Introduce Basic Shading
Determine your light source. This dictates where the shadows will fall.
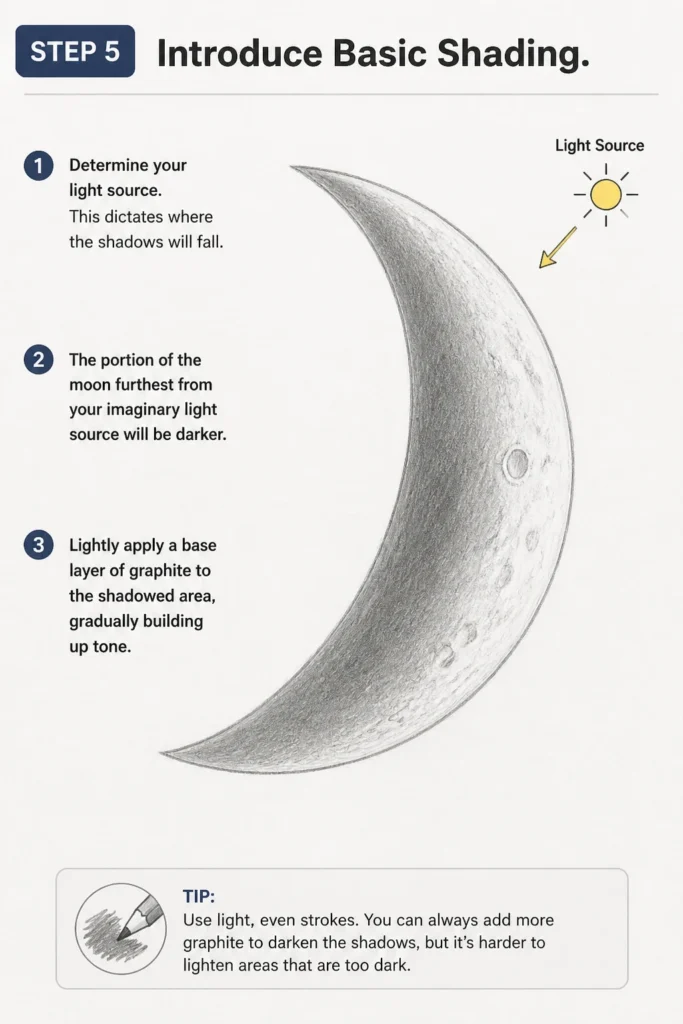
The portion of the moon furthest from your imaginary light source will be darker.
Lightly apply a base layer of graphite to the shadowed area, gradually building up tone.
Step 6: Build Depth and Volume
Add more layers of shading to deepen the shadows and create a sense of three-dimensionality.
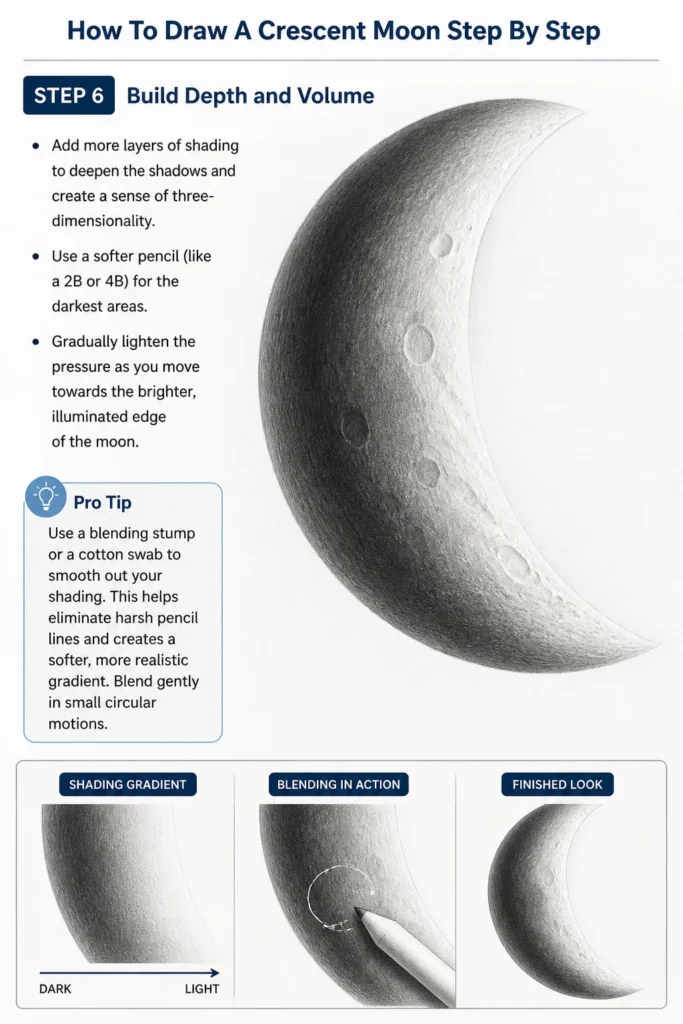
Use a softer pencil (like a 2B or 4B) for the darkest areas.
Gradually lighten the pressure as you move towards the brighter, illuminated edge of the moon.
Pro Tip: Use a blending stump or a cotton swab to smooth out your shading. This helps eliminate harsh pencil lines and creates a softer, more realistic gradient. Blend gently in small circular motions.
Step 7: Add Texture and Subtle Details
Consider adding subtle texture to your moon’s surface. Small, irregular marks can suggest craters or lunar dust.
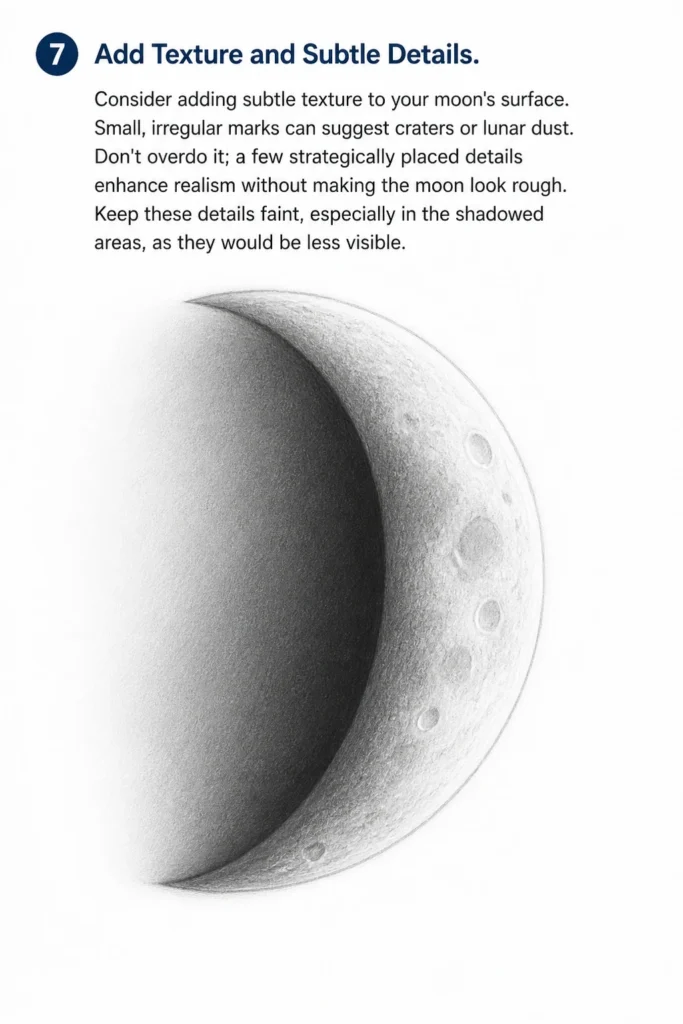
Don’t overdo it; a few strategically placed details enhance realism without making the moon look rough.
Keep these details faint, especially in the shadowed areas, as they would be less visible.
Step 8: Refine Highlights and Final Touches
Use your eraser to gently lift some graphite from the brightest areas, creating highlights.
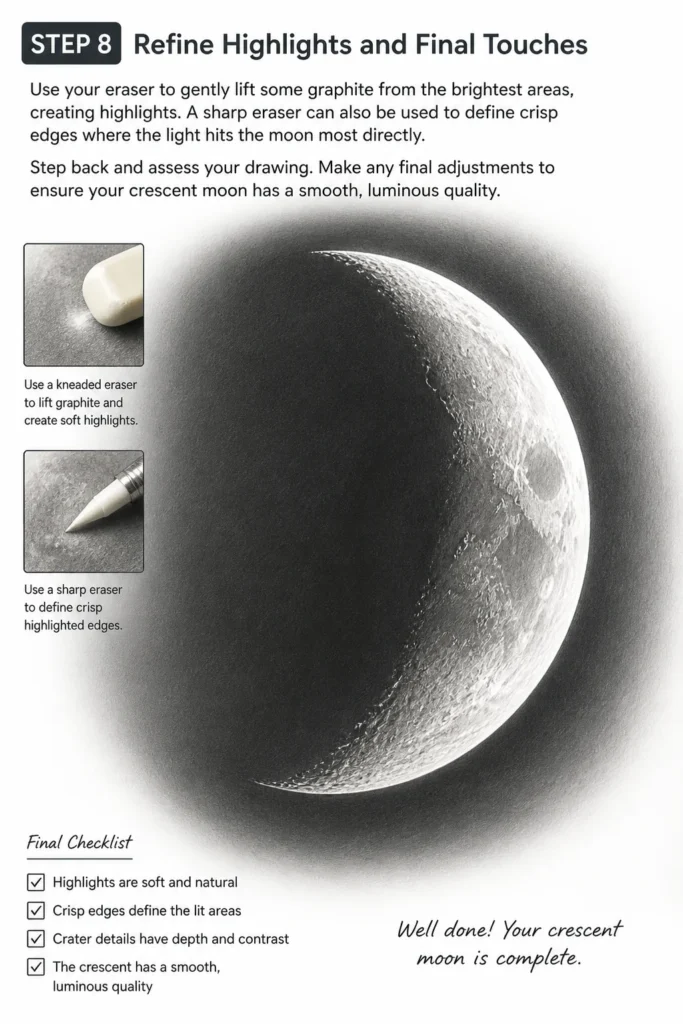
A sharp eraser can also be used to define crisp edges where the light hits the moon most directly.
Step back and assess your drawing. Make any final adjustments to ensure your crescent moon has a smooth, luminous quality.
Common Mistakes to Avoid
Making the Crescent Too Uniform
Many beginners draw a crescent that looks like two perfectly parallel curves. A natural crescent moon, however, has one curve that is slightly longer and more pronounced than the other, giving it a gentle taper. Allow for a subtle asymmetry to achieve a more organic look.
Ignoring Shading
A flat, unshaded crescent will lack depth and realism. The moon is a sphere, and even a sliver of it should show signs of its spherical form through light and shadow. Always consider a light source and apply gradients to indicate volume.
Using Heavy Lines Early On
Pressing too hard with your pencil in the initial sketching phases makes it difficult to erase guide lines cleanly. This can leave unwanted indentations or smudges. Start with the lightest possible touch and darken your lines only when you are confident in your shape.
Poor Blending
Leaving harsh pencil lines and inconsistent shading can make your moon look rough or unfinished. Proper blending is crucial for creating smooth transitions between light and shadow. Take the time to blend thoroughly, ensuring a soft, gradual shift in tones.
Troubleshooting
My Moon Looks Flat
If your crescent moon appears flat, it likely lacks sufficient depth through shading. Revisit Step 5 and 6. Ensure you have a clear distinction between the lit and shadowed areas. Build up darker tones in the shadow with a softer pencil, and use a blending stump to create smooth transitions. The contrast between light and dark is what gives it dimension.
The Curve Isn’t Smooth
Jagged or uneven curves can detract from the moon’s elegance. In Step 3, focus on making your outlines with confident, continuous strokes. If you struggle, try rotating your paper so your hand is in a comfortable position to draw the curve. Practice drawing arcs separately before connecting them. Using a compass for the initial circles in Step 1 and 2 can also significantly improve curve smoothness.
It Doesn’t Look Like a Moon at All
Sometimes the initial overlapping circles don’t quite create the desired lunar shape. This often happens if the second circle is either too small, too large, or placed incorrectly. Experiment with the size and placement of your second circle in Step 2. Adjust its position relative to the first circle until you find the “sweet spot” that creates a recognizable crescent form.
Key Takeaways
- Start Lightly: Always begin with faint lines for easy corrections.
- Master Overlapping Circles: The secret to a perfect crescent lies in the precise intersection of two circles.
- Embrace Shading: Lighting and shadow are crucial for giving your moon depth and a realistic, spherical appearance.
- Blend for Smoothness: Use blending tools to create soft transitions and eliminate harsh pencil marks.
- Practice Makes Perfect: Don’t be discouraged if your first attempt isn’t flawless; drawing is a skill that improves with repetition.
- Observe Real Moons: Pay attention to how light falls on the moon in photographs or the night sky for inspiration.
Frequently Asked Questions
What’s the best pencil hardness for this?
A good range to start with is an HB pencil for initial sketching and lighter shading. Then, use a 2B or 4B for deeper shadows and richer tones. The varying hardness allows for a wider range of values and helps create a more dynamic drawing.
Can I use a compass?
Absolutely! Using a compass for your initial two circles (Step 1 and 2) is highly recommended, especially for beginners or those aiming for precise curves. It ensures your foundation is perfectly round and symmetrical, making the subsequent steps much easier.
How do I make it look more realistic?
Realism comes from careful observation and application of light and shadow. Focus on creating smooth gradients, adding subtle textures like very faint craters, and ensuring your highlights are strategically placed. A clean drawing with good contrast and blending will always appear more realistic.
What about different moon phases?
Once you master the crescent, you can adapt this technique for other phases. For a half-moon, you’d effectively draw a full circle and then shade exactly half of it. For a gibbous moon, you’d reverse the crescent technique slightly, creating a larger, almost full moon shape with a smaller “bite” taken out.
Our Top Recommended Finds
- Sketching Pencil Set: A set with various lead hardnesses (e.g., 2H to 6B) provides the versatility needed for sketching, shading, and adding dark accents.
- Blending Stumps/Tortillons: These paper tools are essential for achieving smooth, even shading and blending pencil marks without using your fingers.
- Kneaded Eraser: Unlike standard erasers, a kneaded eraser can be molded into various shapes for precise erasing and lifting graphite without leaving crumbs or smudges.
Your Artistic Journey Continues
You now have a solid foundation for drawing a beautiful crescent moon. This process isn’t just about lines on paper; it’s about seeing shapes, understanding light, and patiently building up your vision.
Don’t stop here. Take these skills and apply them to other celestial bodies, or even everyday objects.
Grab your pencil and paper right now and bring the serene beauty of the night sky to life through your art.
& Painting
No rigid rules or pretension. Just practical guides, medium comparisons, and encouraging tips to help you enjoy the drawing & painting process.