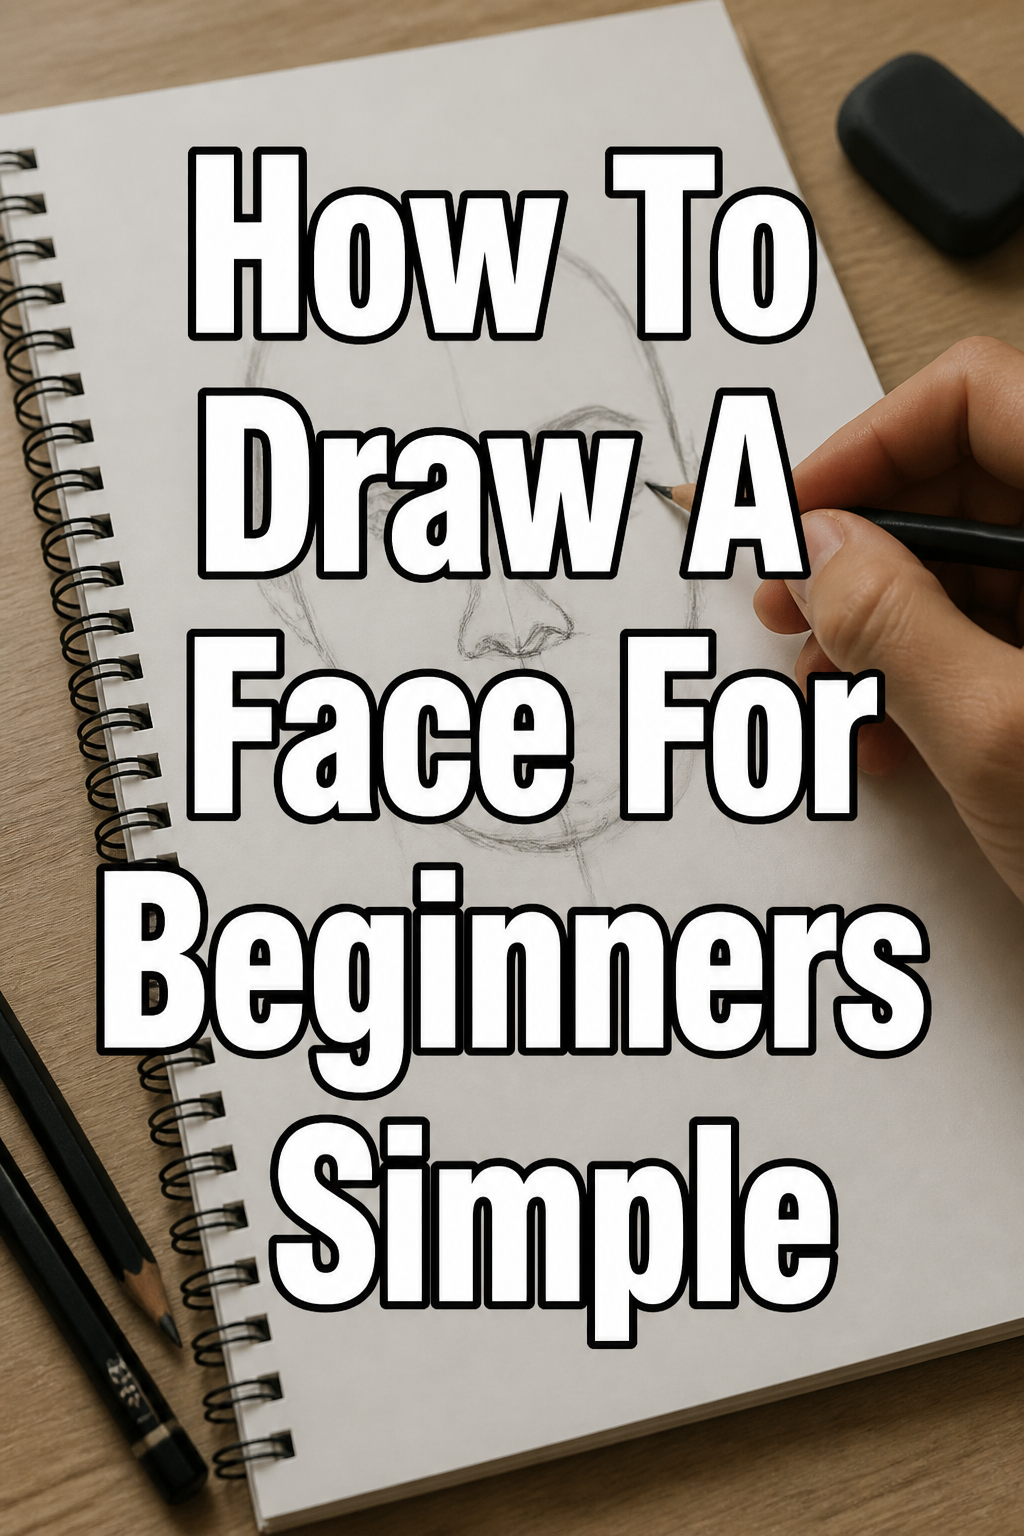
🎨 How To Draw A Face For Beginners Simple

& Painting
No rigid rules or pretension. Just practical guides, medium comparisons, and encouraging tips to help you enjoy the drawing & painting process.
Drawing a human face used to feel like solving a complex puzzle that I could never quite finish.
After years of teaching art classes and filling countless sketchbooks, I discovered that the “secret” isn’t talent—it’s geometry.
This guide breaks down the process into simple shapes so you can stop guessing and start creating realistic portraits today.
Quick Overview
In this guide, you will learn the universal proportions of the human head and how to place features accurately on the page.
- Time needed: 30-45 minutes
- Difficulty: Beginner
- What you’ll need: HB pencil, eraser, sketchbook, and a ruler (optional).
Step-by-Step Instructions
Step 1: Sketch a Perfect Circle
Draw a simple circle in the center of your paper to represent the cranium.
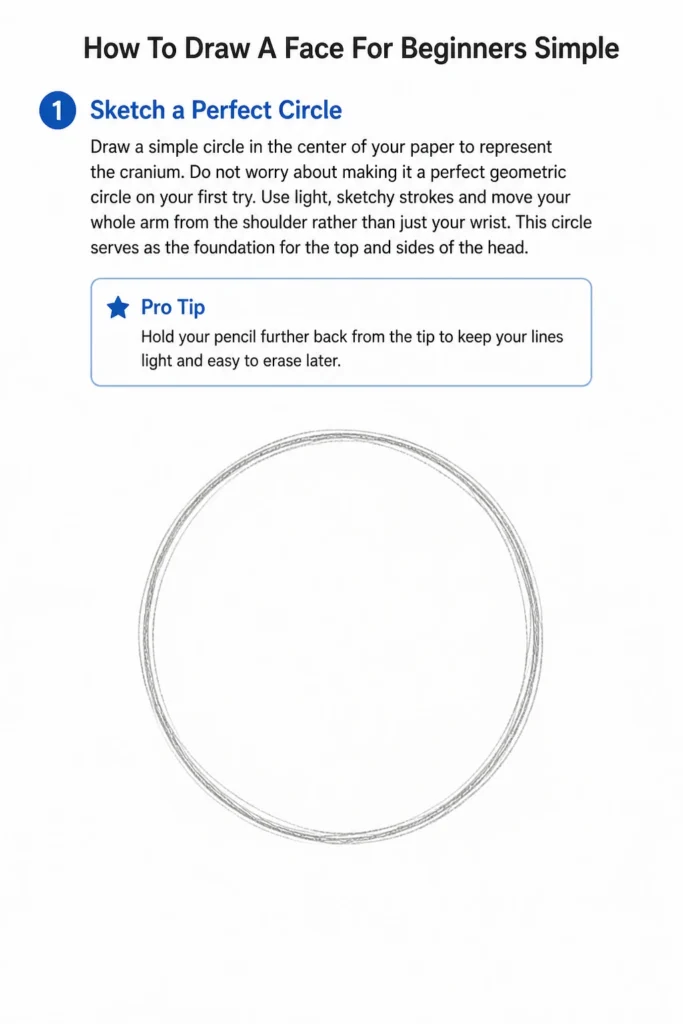
Do not worry about making it a perfect geometric circle on your first try.
Use light, sketchy strokes and move your whole arm from the shoulder rather than just your wrist.
This circle serves as the foundation for the top and sides of the head.
Pro Tip: Hold your pencil further back from the tip to keep your lines light and easy to erase later.
Step 2: Extend the Jawline
Find the center point of your circle and draw a vertical line straight down through the middle.
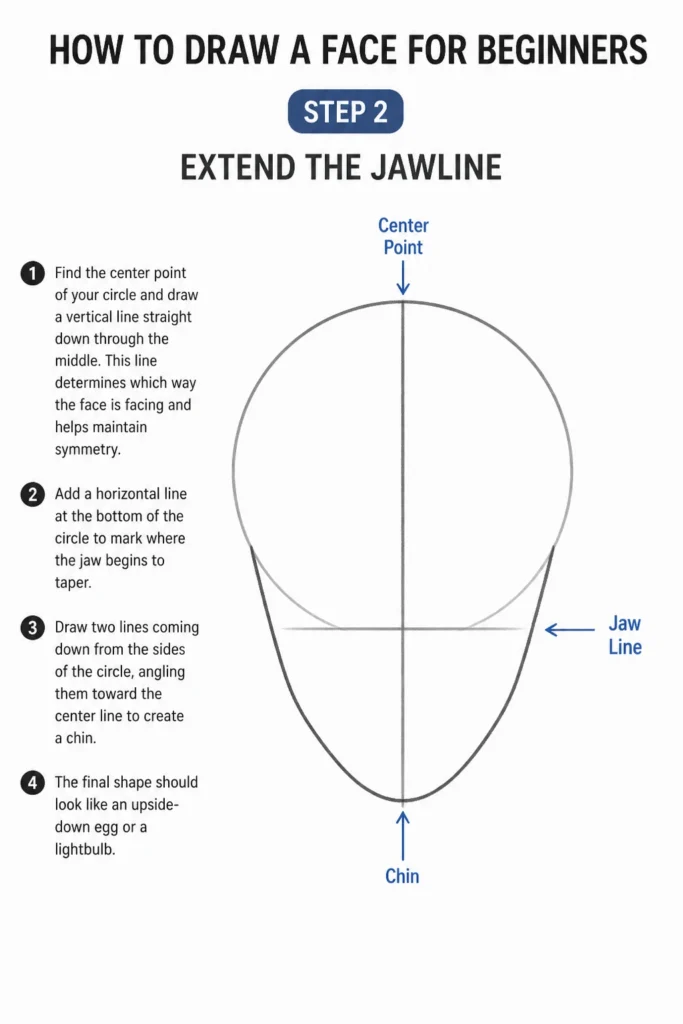
This line determines which way the face is facing and helps maintain symmetry.
Add a horizontal line at the bottom of the circle to mark where the jaw begins to taper.
Draw two lines coming down from the sides of the circle, angling them toward the center line to create a chin.
The final shape should look like an upside-down egg or a lightbulb.
Step 3: Map the Eye Line
Divide the entire head shape in half horizontally with a light line.
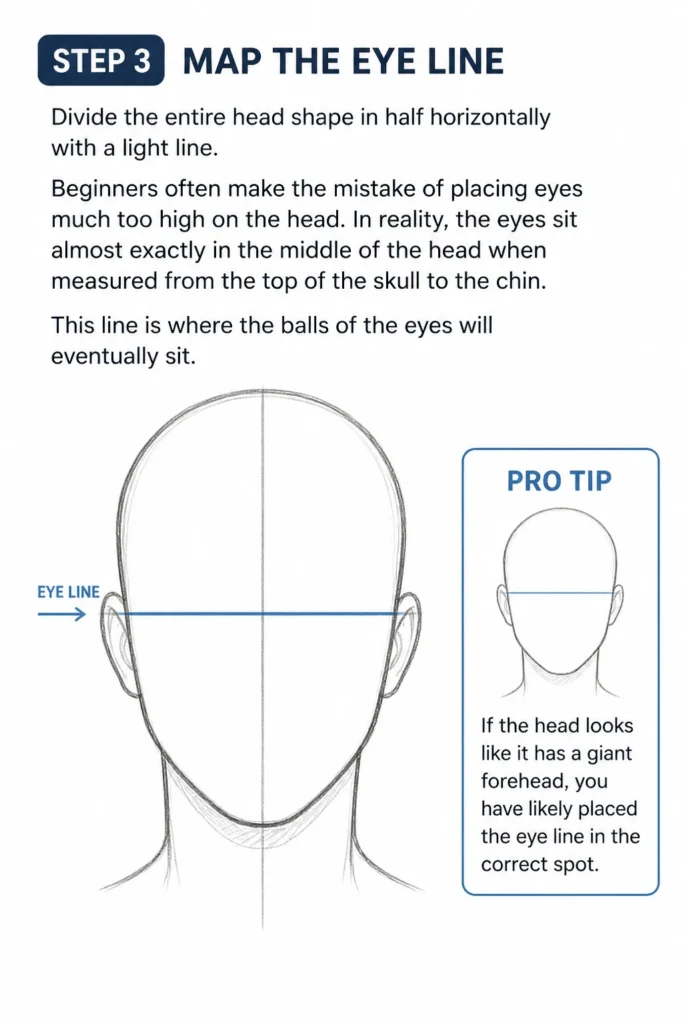
Beginners often make the mistake of placing eyes much too high on the head.
In reality, the eyes sit almost exactly in the middle of the head when measured from the top of the skull to the chin.
This line is where the “balls” of the eyes will eventually sit.
Pro Tip: If the head looks like it has a “giant forehead,” you have likely placed the eye line in the correct spot.
Step 4: Space the Eyes Correctly
Measure the width of the head along your horizontal eye line.
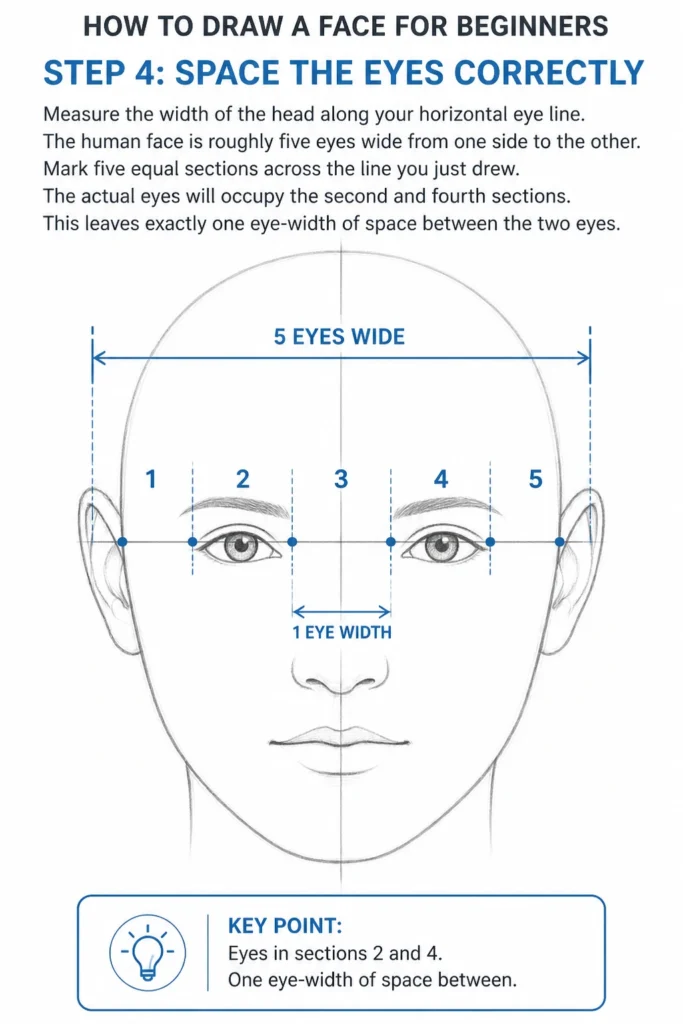
The human face is roughly five “eyes” wide from one side to the other.
Mark five equal sections across the line you just drew.
The actual eyes will occupy the second and fourth sections.
This leaves exactly one eye-width of space between the two eyes.
Step 5: Position the Nose and Mouth
Split the area between the eye line and the bottom of the chin into two equal halves.
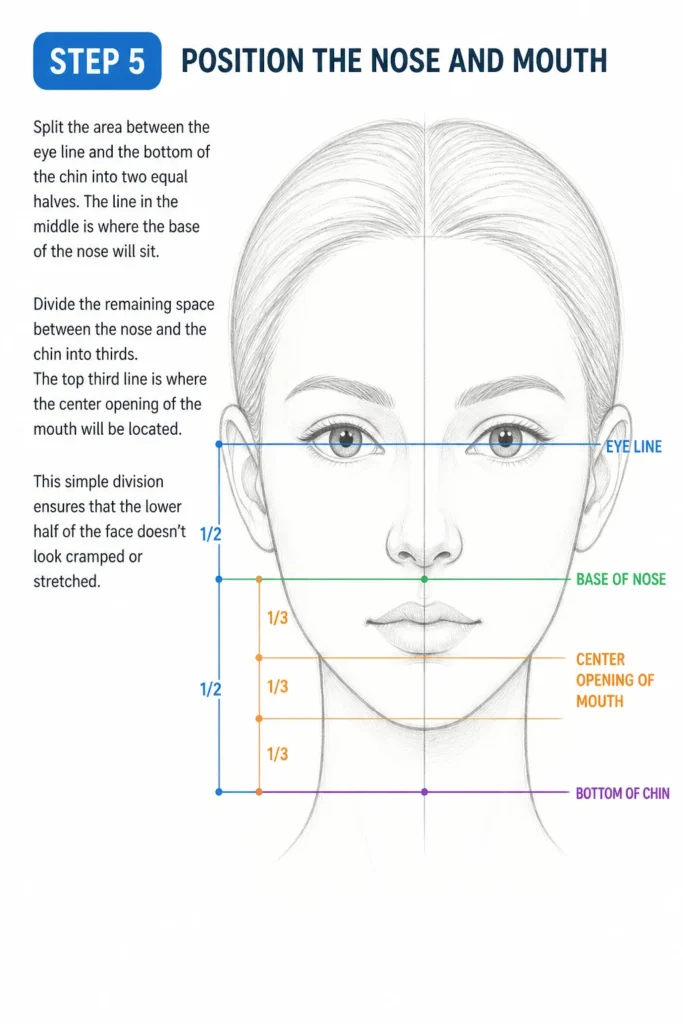
The line in the middle is where the base of the nose will sit.
Divide the remaining space between the nose and the chin into thirds.
The top third line is where the center opening of the mouth will be located.
This simple division ensures that the lower half of the face doesn’t look cramped or stretched.
Step 6: Outline the Features
Sketch simple almond shapes for the eyes on the eye line you created earlier.
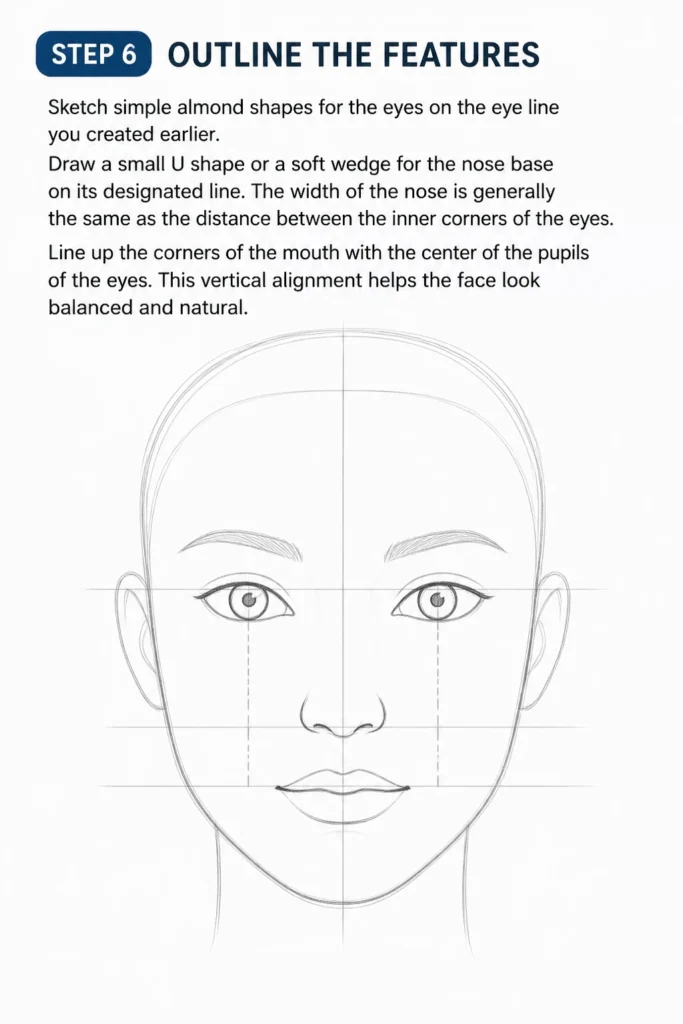
Draw a small “U” shape or a soft wedge for the nose base on its designated line.
The width of the nose is generally the same as the distance between the inner corners of the eyes.
Line up the corners of the mouth with the center of the pupils of the eyes.
This vertical alignment helps the face look balanced and natural.
Step 7: Add the Ears and Hairline
Place the ears between the eye line and the nose line on the sides of the head.
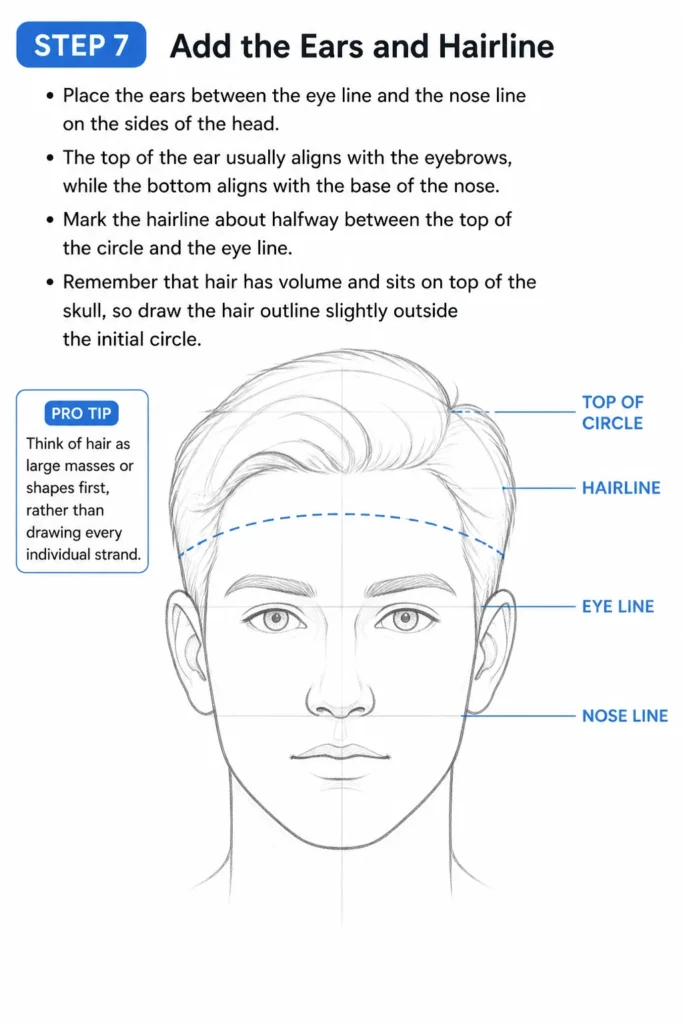
The top of the ear usually aligns with the eyebrows, while the bottom aligns with the base of the nose.
Mark the hairline about halfway between the top of the circle and the eye line.
Remember that hair has volume and sits “on top” of the skull, so draw the hair outline slightly outside the initial circle.
Pro Tip: Think of hair as large masses or shapes first, rather than drawing every individual strand.
Step 8: Refine and Shade
Darken the lines you want to keep and erase your initial construction guidelines.
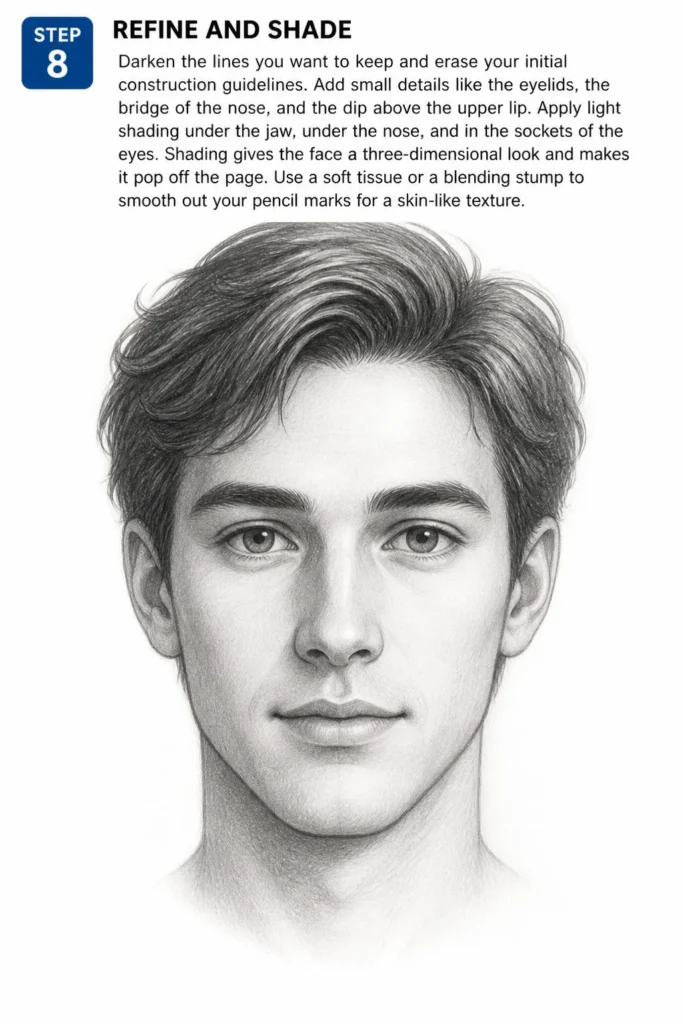
Add small details like the eyelids, the bridge of the nose, and the dip above the upper lip.
Apply light shading under the jaw, under the nose, and in the sockets of the eyes.
Shading gives the face a three-dimensional look and makes it pop off the page.
Use a soft tissue or a blending stump to smooth out your pencil marks for a skin-like texture.
Common Mistakes to Avoid
Placing Eyes Too High
This is the most frequent error for new artists because we focus so much on the face that we forget the top of the skull.
When you place eyes near the top of the head, the person looks like they have no room for a brain.
Always measure from the very top of the hair/head to the chin and find the true center.
Drawing Symbol Eyes
Many beginners draw what they “think” an eye looks like—a perfect football shape with a circle in the middle.
In reality, the upper eyelid covers part of the iris, and the corners of the eyes are not perfectly symmetrical.
Look closely at a mirror or a photo to see the actual curves and folds of the skin.
Ignoring the Neck Width
Drawing a thin, “pencil” neck makes the head look like it is floating or unstable.
The neck is a powerful group of muscles that usually starts just behind the ears and curves inward toward the collarbone.
A wider neck provides a sense of weight and realism to your portrait.
Using Heavy Outlines
Human faces do not have hard black lines around the nose or the lips.
Features are defined by changes in light and shadow, not by ink-like borders.
Keep your outlines very soft and use shading to define where one feature ends and another begins.
Troubleshooting
The Face Looks Asymmetrical
If one side of the face looks “off,” try holding your drawing up to a mirror.
Seeing the image in reverse tricks your brain into spotting errors you have become “blind” to while drawing.
You can also turn your paper upside down to check the proportions from a fresh perspective.
The Features Look Flat
Flatness usually happens when there is a lack of contrast between light and dark areas.
Identify a single light source and make sure the shadows all fall on the opposite side of the features.
Adding a small white highlight in the eyes can instantly bring a flat drawing to life.
The Person Looks Older Than Intended
Heavy lines around the eyes, mouth, and forehead often look like wrinkles to the viewer.
If you want to draw a younger person, keep your lines minimal and your shading very soft.
Focus on the large shapes and avoid adding every tiny crease or skin fold.
Key Takeaways
- The eyes are located at the vertical midpoint of the entire head.
- There is exactly one eye-width of space between the two eyes.
- The corners of the mouth generally align with the center of the pupils.
- The tops of the ears align with the eyebrows, and the bottoms align with the nose.
- Hair should be drawn as a mass that sits above the skull line.
- Use light pressure for guidelines so they can be erased without leaving ghosts.
Frequently Asked Questions
Do these proportions work for children?
Children have different proportions than adults, usually with larger foreheads and features placed lower on the face.
Their eyes are often larger in proportion to their head, and their faces are rounder with less defined jawlines.
As humans age, the jaw grows longer and the features become more defined and angular.
What is the best way to practice drawing faces?
The best method is to carry a small sketchbook and draw “quick sketches” of people in real life or from photos.
Focus on capturing the basic egg shape and the placement of the features in under two minutes.
Quantity often leads to quality because it trains your eyes to see proportions faster.
How do I draw a face from a side view?
The side view, or profile, still starts with a circle, but the jaw attaches to the front of the circle like a mask.
The ear sits behind the vertical center line of the circle, and the nose protrudes significantly.
The eye looks more like a triangle or a “V” shape from the side rather than an almond.
Should I use a ruler for the guidelines?
Using a ruler is perfectly fine when you are first learning the measurements and proportions.
It helps build “muscle memory” for where the lines should go so you can eventually draw them by eye.
However, don’t rely on it too much, as organic faces are rarely perfectly symmetrical or straight.
Our Top Recommended Finds
- Staedtler Mars Lumograph Pencil Set: These pencils offer a wide range of hardness levels, making it easier to switch from light guidelines to deep shadows.
- Kneaded Eraser: Unlike standard erasers, these can be molded into tiny points to lift highlights out of eyes or hair without smudging.
- Canson XL Series Mix Media Pad: This paper is thick enough to handle heavy erasing and blending without tearing or pilling.
Mastering The Art Of The Human Portrait
Drawing a face is a skill that rewards patience and observation over raw speed.
Once you feel comfortable with the basic front-facing view, try tilting the head or changing the expression.
Pick up your pencil right now and draw three quick “egg shapes” to practice your eye placement before the day ends.
The more you draw, the more you will begin to see the beautiful geometry in every face you encounter.
& Painting
No rigid rules or pretension. Just practical guides, medium comparisons, and encouraging tips to help you enjoy the drawing & painting process.