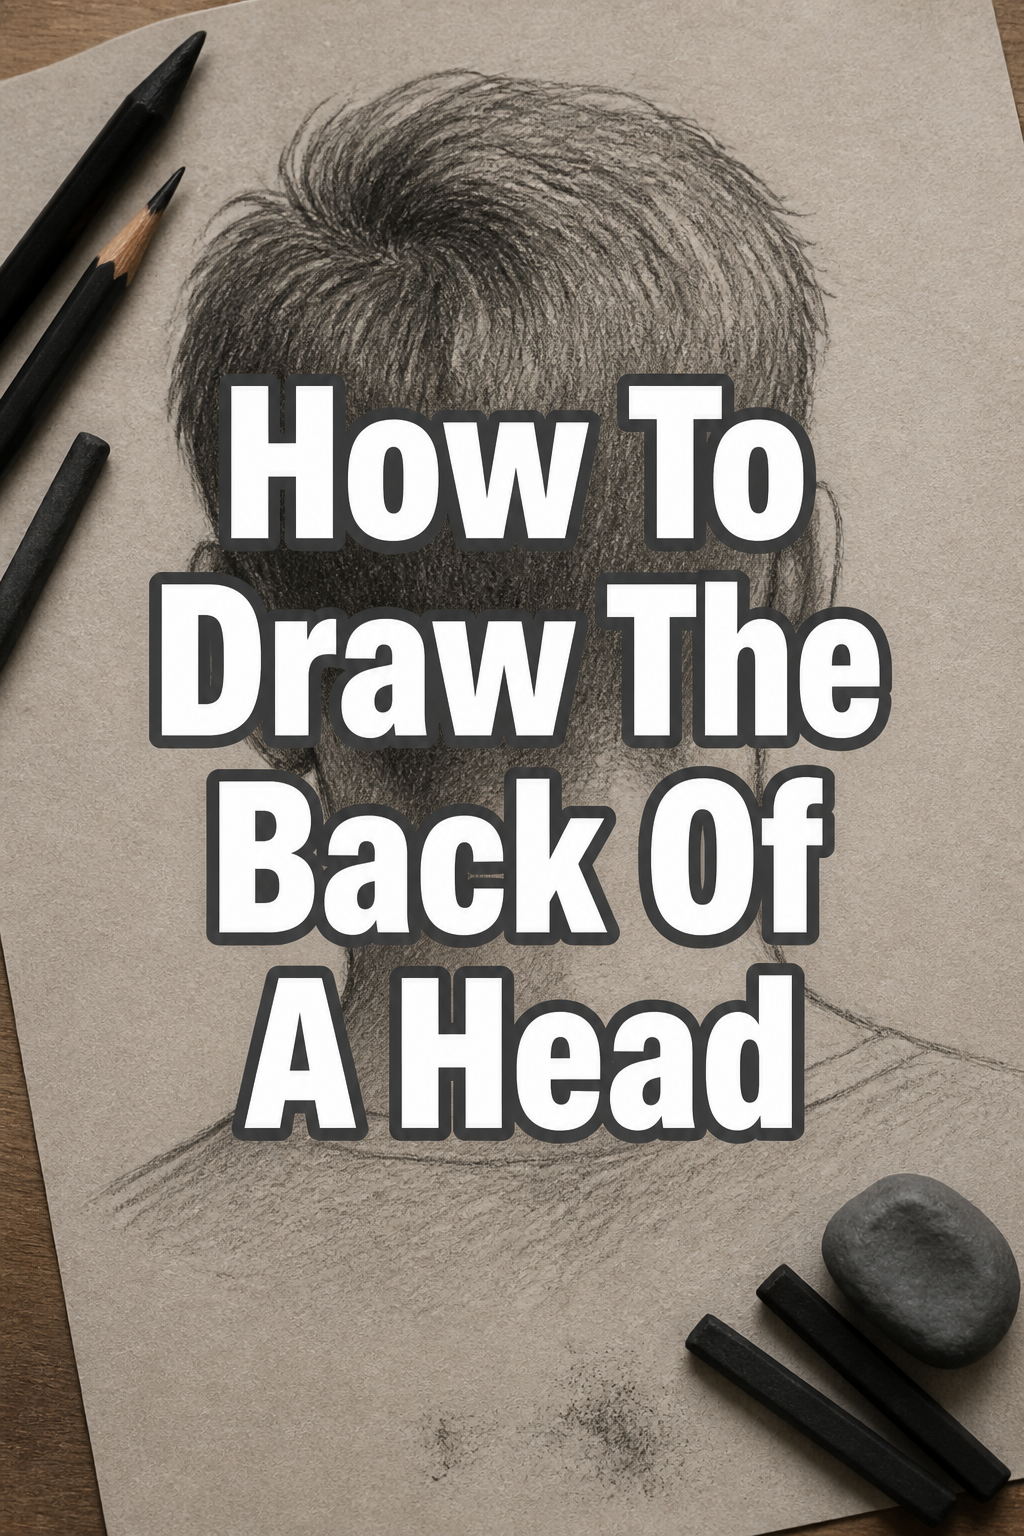
🎨 How To Draw The Back Of A Head

& Painting
No rigid rules or pretension. Just practical guides, medium comparisons, and encouraging tips to help you enjoy the drawing & painting process.
Drawing the back of a head often feels like trying to map a blank wall because there are no facial features to guide you.
I spent years overcomplicating this view until I realized it is actually the most stable part of the human figure.
This guide shares the exact geometric framework I use in my professional illustrations to ensure every head looks solid and three-dimensional.
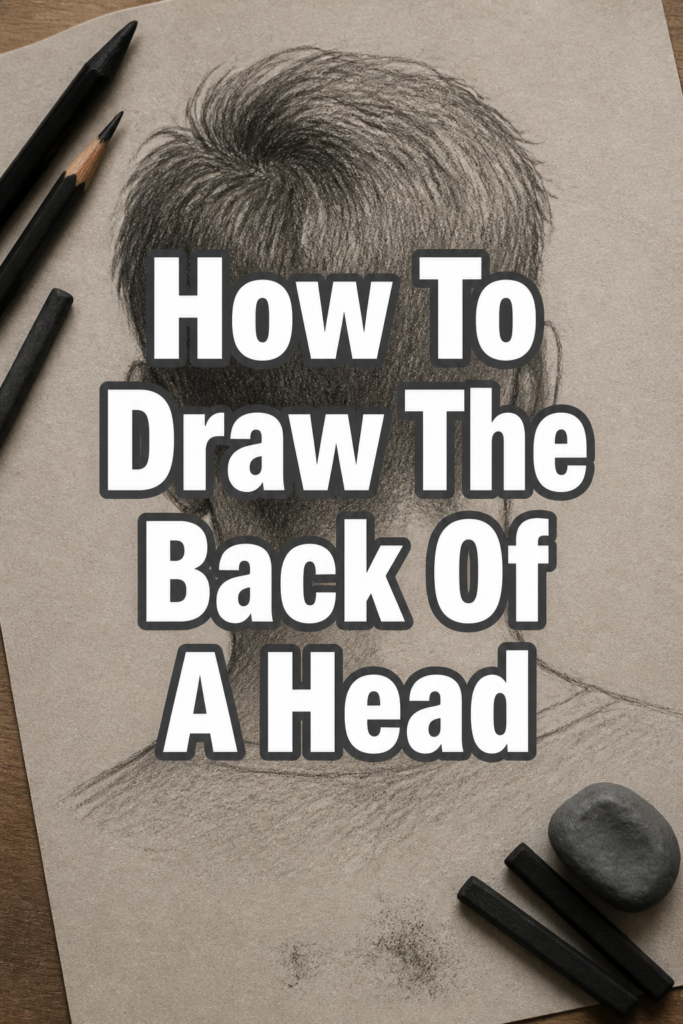
Quick Overview
This tutorial focuses on building the head from the inside out. You will learn to see the skull as a collection of simple 3D forms before adding hair and skin.
- Time needed: 30 to 45 minutes
- Difficulty: Beginner to Intermediate
- What you’ll need: Drawing paper, a set of graphite pencils (HB, 2B, 4B), and a kneaded eraser.
Step-by-Step Instructions
Step 1: Construct the Cranial Sphere
Draw a simple circle to represent the bulk of the skull.
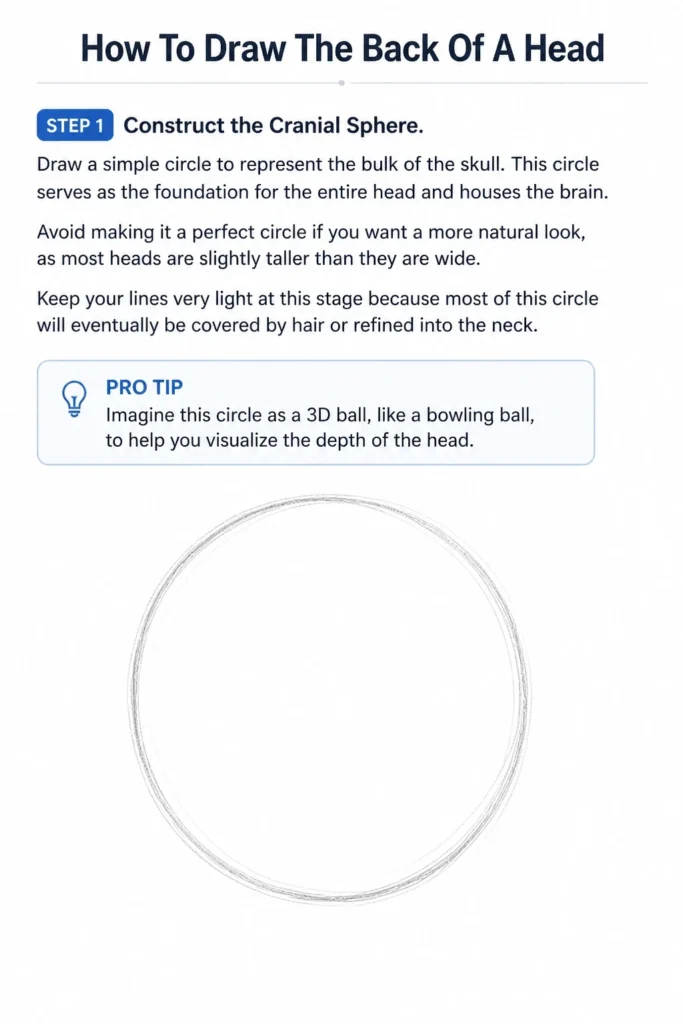
This circle serves as the foundation for the entire head and houses the brain.
Avoid making it a perfect circle if you want a more natural look, as most heads are slightly taller than they are wide.
Keep your lines very light at this stage because most of this circle will eventually be covered by hair or refined into the neck.
Pro Tip: Imagine this circle as a 3D ball, like a bowling ball, to help you visualize the depth of the head.
Step 2: Establish the Vertical Center Line
Place a vertical line straight down the middle of your sphere.
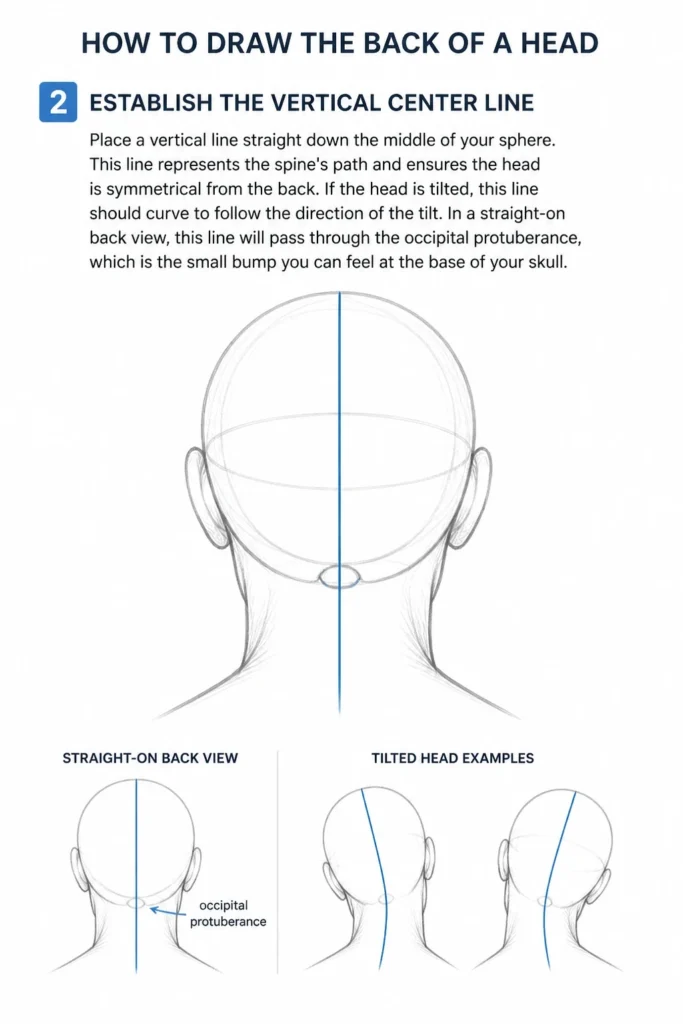
This line represents the spine’s path and ensures the head is symmetrical from the back.
If the head is tilted, this line should curve to follow the direction of the tilt.
In a straight-on back view, this line will pass through the “occipital protuberance,” which is the small bump you can feel at the base of your skull.
Step 3: Define the Occipital Bone and Nape
Mark the bottom of the skull where it meets the neck.
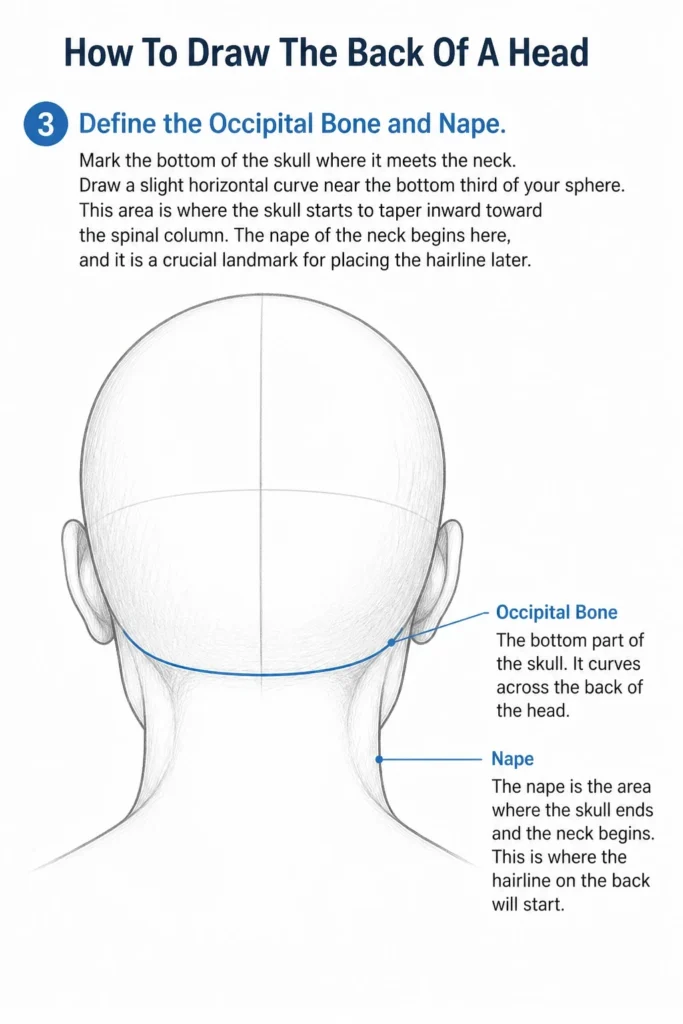
Draw a slight horizontal curve near the bottom third of your sphere.
This area is where the skull starts to taper inward toward the spinal column.
The nape of the neck begins here, and it is a crucial landmark for placing the hairline later.
Step 4: Attach the Neck Cylinder
Extend two lines downward from the base of the sphere to create the neck.
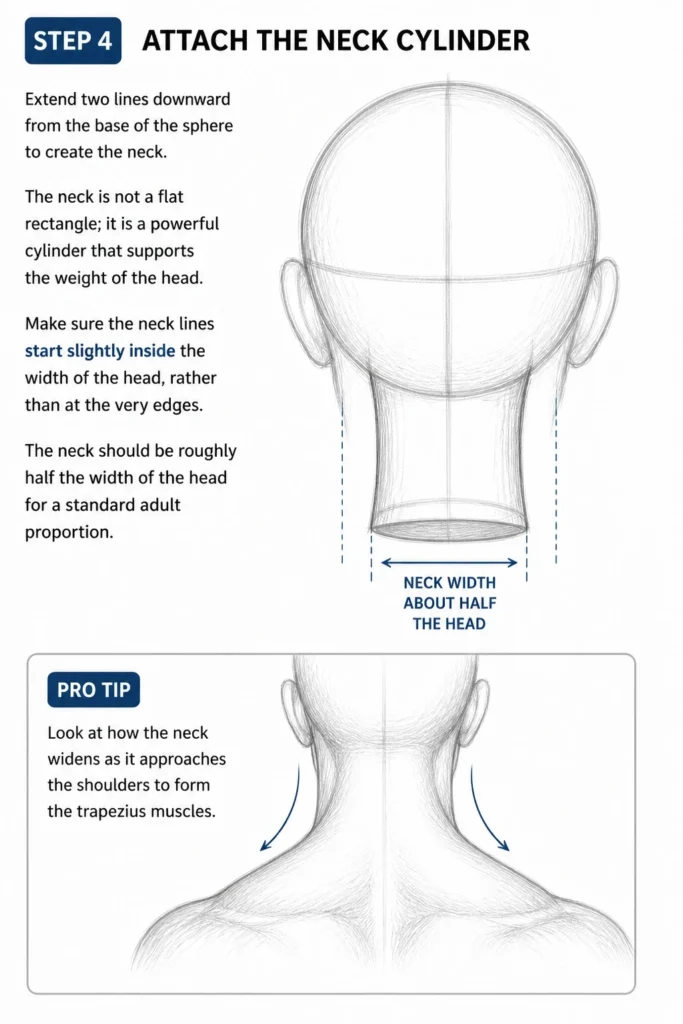
The neck is not a flat rectangle; it is a powerful cylinder that supports the weight of the head.
Make sure the neck lines start slightly inside the width of the head, rather than at the very edges.
The neck should be roughly half the width of the head for a standard adult proportion.
Pro Tip: Look at how the neck widens as it approaches the shoulders to form the trapezius muscles.
Step 5: Position the Ears as Anchors
Sketch the ears on the sides of the head to help establish perspective.
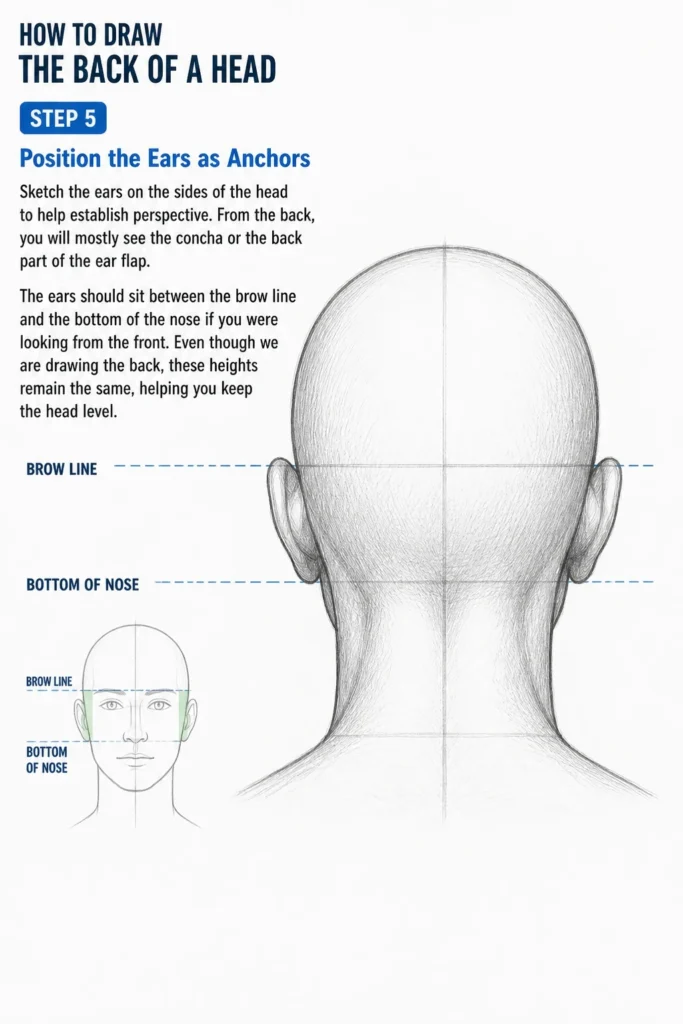
From the back, you will mostly see the “concha” or the back part of the ear flap.
The ears should sit between the brow line and the bottom of the nose if you were looking from the front.
Even though we are drawing the back, these heights remain the same, helping you keep the head level.
Step 6: Map the Hairline and Growth Direction
Outline the shape of the hairline at the base of the neck and around the ears.
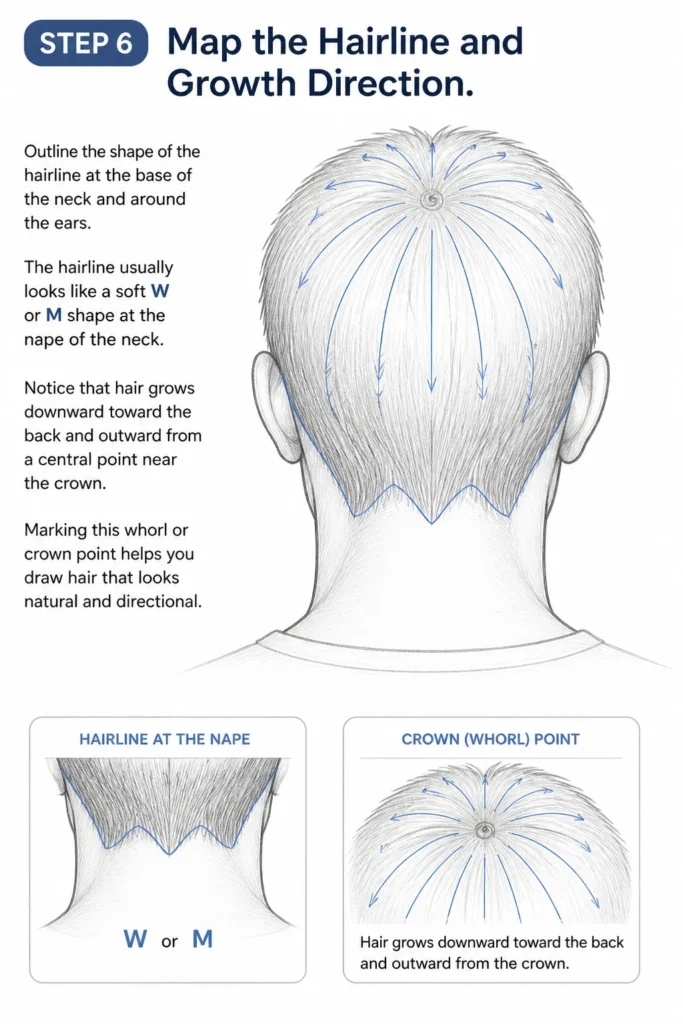
The hairline usually looks like a soft “W” or “M” shape at the nape of the neck.
Notice that hair grows downward toward the back and outward from a central point near the crown.
Marking this “whorl” or “crown” point helps you draw hair that looks natural and directional.
Step 7: Build Hair Volume Above the Skull
Draw the outer silhouette of the hair slightly above the initial cranial sphere.
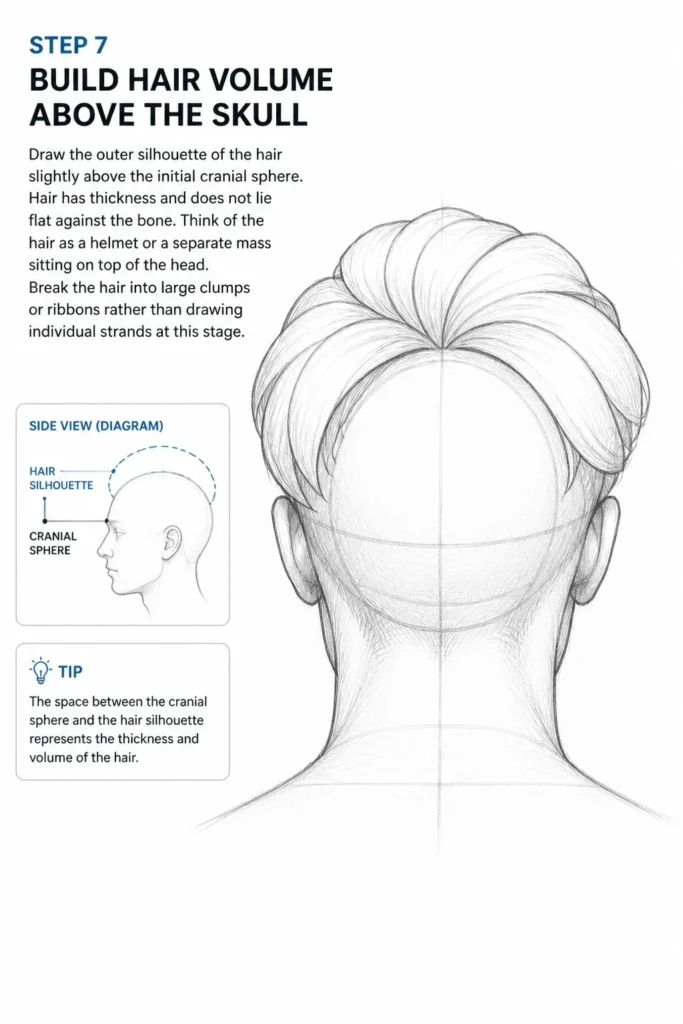
Hair has thickness and does not lie flat against the bone.
Think of the hair as a helmet or a separate mass sitting on top of the head.
Break the hair into large clumps or “ribbons” rather than drawing individual strands at this stage.
Step 8: Detail the Neck Muscles
Add two subtle lines inside the neck cylinder to represent the muscles.
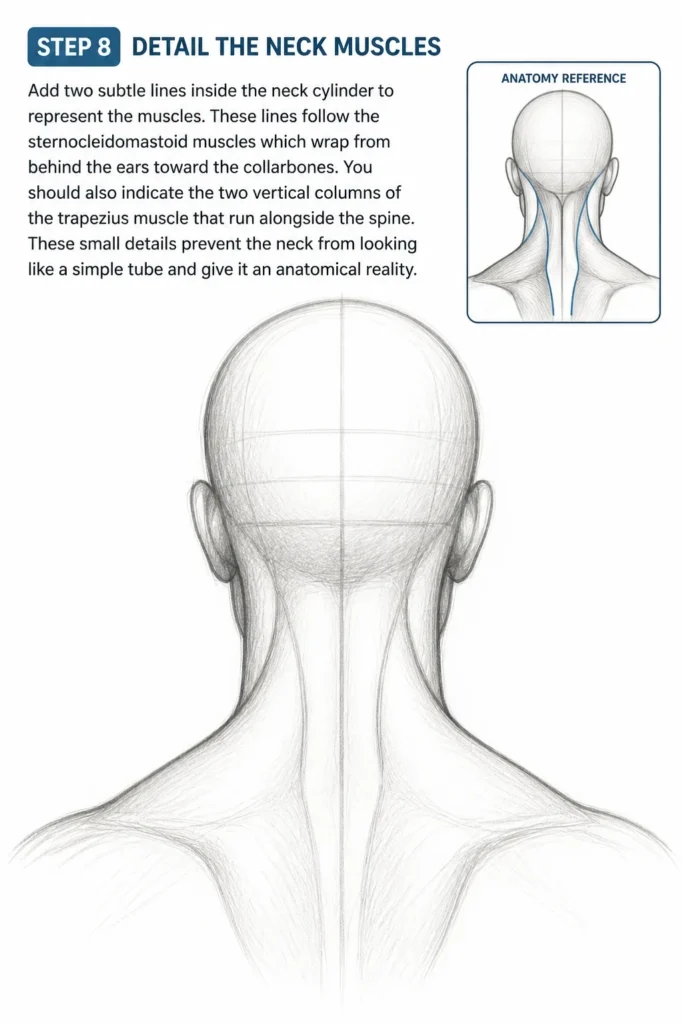
These lines follow the sternocleidomastoid muscles which wrap from behind the ears toward the collarbones.
You should also indicate the two vertical columns of the trapezius muscle that run alongside the spine.
These small details prevent the neck from looking like a simple tube and give it an anatomical reality.
Step 9: Apply Shading to Define Form
Identify your light source and shade the areas where the head blocks the light.
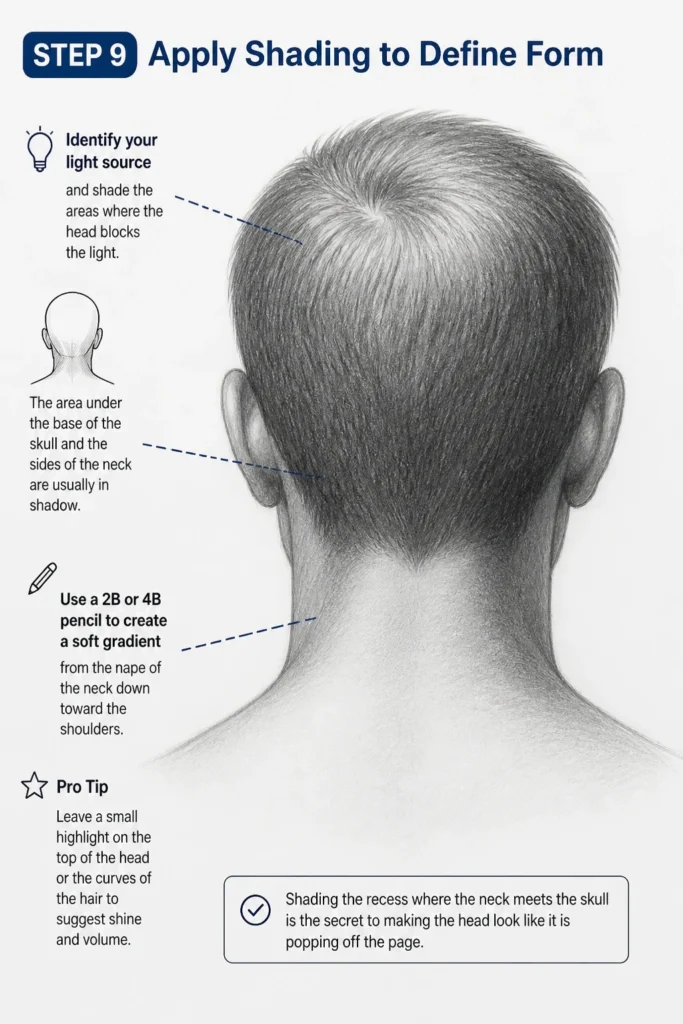
The area under the base of the skull and the sides of the neck are usually in shadow.
Use a 2B or 4B pencil to create a soft gradient from the nape of the neck down toward the shoulders.
Shading the “recess” where the neck meets the skull is the secret to making the head look like it is popping off the page.
Pro Tip: Leave a small highlight on the top of the head or the curves of the hair to suggest shine and volume.
Common Mistakes to Avoid
Making the Neck Too Thin
Many beginners draw the neck as a narrow stick supporting a giant balloon. In reality, the neck is a thick, muscular structure that is almost as wide as the jawline. If the neck is too thin, the head will look unstable and cartoonish in a way that breaks the immersion of your drawing.
Ignoring the Hair Volume
Drawing hair directly on the line of the skull makes the character look like they have painted-on hair. You must leave a gap between the skull line and the hair’s outer edge to account for the natural lift of the hair. This gap varies depending on the hair type, but it is always present to some degree.
Flat Hairline Placement
The hairline at the back of the neck is rarely a straight horizontal line. It usually curves or tapers into two points behind the ears. If you draw it straight across, the neck will look stiff and the head will lose its rounded, organic appearance.
Troubleshooting
The Head Looks Like a Flat Circle
This usually happens because of a lack of shading at the base of the skull. To fix this, darken the area where the neck enters the head. This creates a “socket” effect that pushes the neck back and brings the back of the head forward in space.
The Ears Look Like They Are Glued On
If the ears look out of place, check their angle relative to the center line of the head. From the back, the ears should angle slightly away from the skull. Ensure they are positioned symmetrically on either side of the cranial sphere to maintain the illusion of a 3D object.
The Hair Looks Like a Solid Block
If the hair lacks life, it is likely because you haven’t defined the growth direction. Go back to the “crown” point you marked in Step 6. Make sure all your hair strokes radiate away from that point to create a sense of flow and movement.
Key Takeaways
- Start with a solid sphere to establish the mass of the cranium before adding any details.
- Use a vertical center line to maintain symmetry and align the neck with the spine.
- Treat the neck as a 3D cylinder rather than a flat shape to give the drawing weight.
- Always leave space for hair volume so the character does not look like their hair is flat against the bone.
- Focus on the “W” or “M” shape of the hairline at the nape to create a realistic transition between head and neck.
- Apply shadows at the base of the skull to separate the head from the torso and create depth.
Frequently Asked Questions
How do I draw the back of a head for different hair types?
The underlying skull structure remains the same regardless of hair type. For curly hair, use larger, rounder masses that extend further from the skull. For straight hair, focus on long, sweeping lines that follow the gravity of the head and taper at the ends.
Where should the ears be placed when drawing from the back?
The ears should be placed on the sides of the head, aligned with the middle third of the cranial sphere. From the back, you will see the outer edge of the ear and the back of the lobe. They should be level with each other unless the head is tilted at an extreme angle.
How do I make the neck look masculine vs feminine?
For a masculine look, make the neck wider and emphasize the trapezius muscles and the Adam’s apple area (though less visible from the back). For a feminine look, keep the neck slightly more slender and use smoother, more elongated curves with less emphasis on individual muscle definition.
What is the most important landmark for the back of the head?
The most important landmark is the occipital bone at the base of the skull. This point dictates where the neck begins and where the hair usually stops growing. Once you master the placement of this bone, the rest of the proportions usually fall into place naturally.
Our Top Recommended Finds
- Staedtler Mars Lumograph Pencil Set: These pencils offer a wide range of hardness levels, which is perfect for the light construction lines and deep shadows required for this drawing.
- Kneaded Rubber Eraser: This tool is essential for lifting small amounts of graphite to create highlights in the hair without smudging your work.
- Strathmore 400 Series Drawing Paper: This paper has a slight texture that grips the pencil lead well, allowing for smooth gradients when shading the neck and skull.
Take Your Portrait Skills Further
Now that you have mastered the structural foundation of the back of the head, you can begin exploring different perspectives.
Try drawing the head from a high angle looking down or a low angle looking up to see how the shapes you learned today distort in space.
The best way to solidify these skills is to grab a sketchbook and do ten quick studies of people in public places, focusing specifically on their silhouettes from behind.
Consistent practice with these basic geometric forms will eventually make drawing complex anatomy feel like second nature.
& Painting
No rigid rules or pretension. Just practical guides, medium comparisons, and encouraging tips to help you enjoy the drawing & painting process.