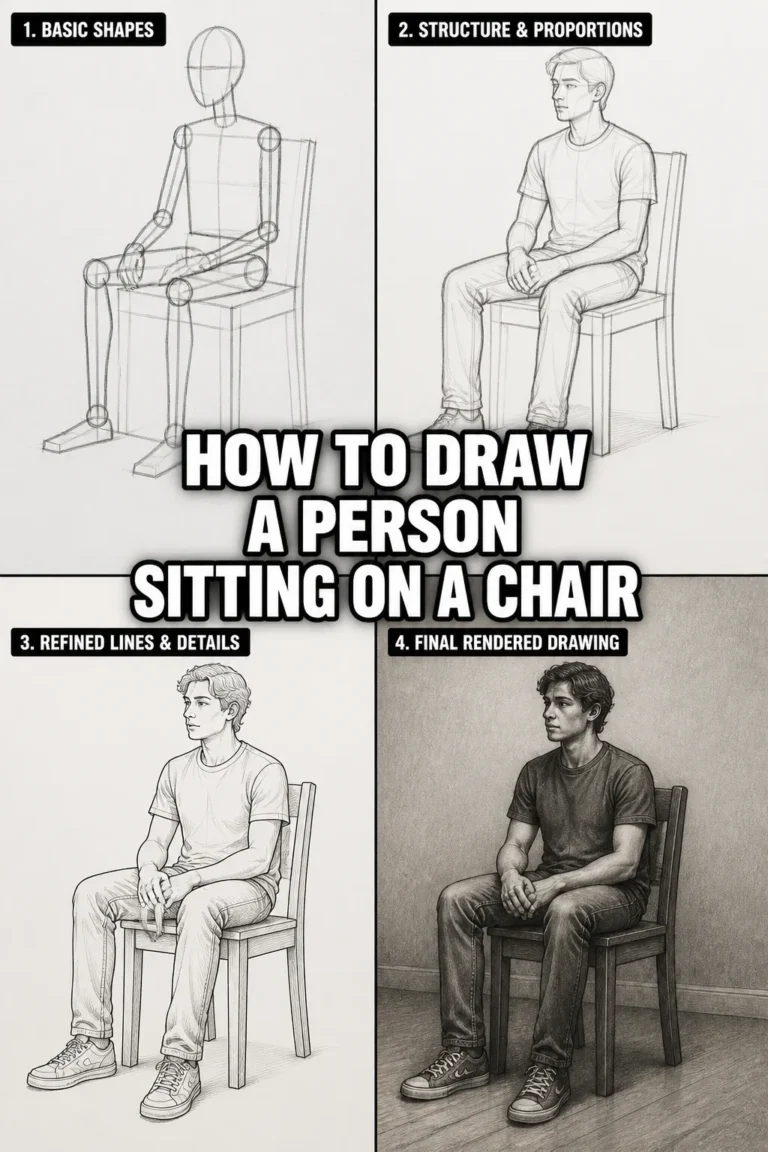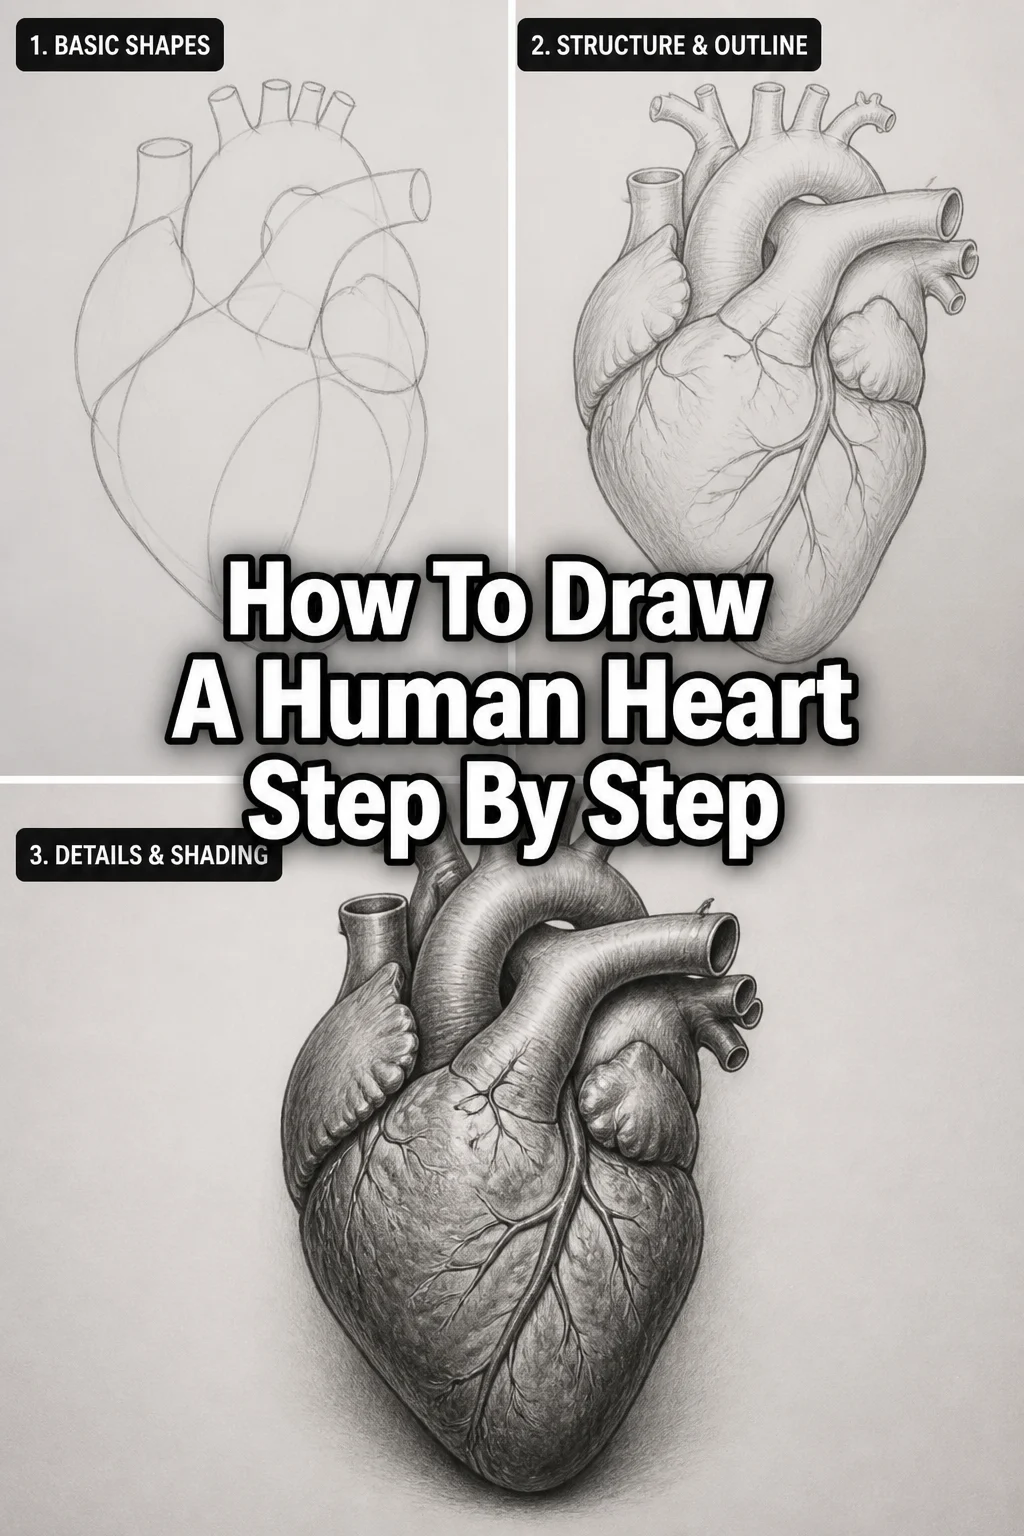
How To Draw A Human Heart Step By Step
❤️ How To Draw A Human Heart Step By Step
Drawing the human heart might seem daunting at first, a complex organ with intricate vessels and chambers. Yet, with a structured approach, anyone can capture its vital essence on paper. I remember my own struggles initially, feeling overwhelmed by the anatomy until I broke it down into manageable shapes.
This guide is designed to simplify that process for you, building your confidence with each line. You’ll discover how to transform intimidating biological structures into an accessible artistic challenge.
Quick Overview
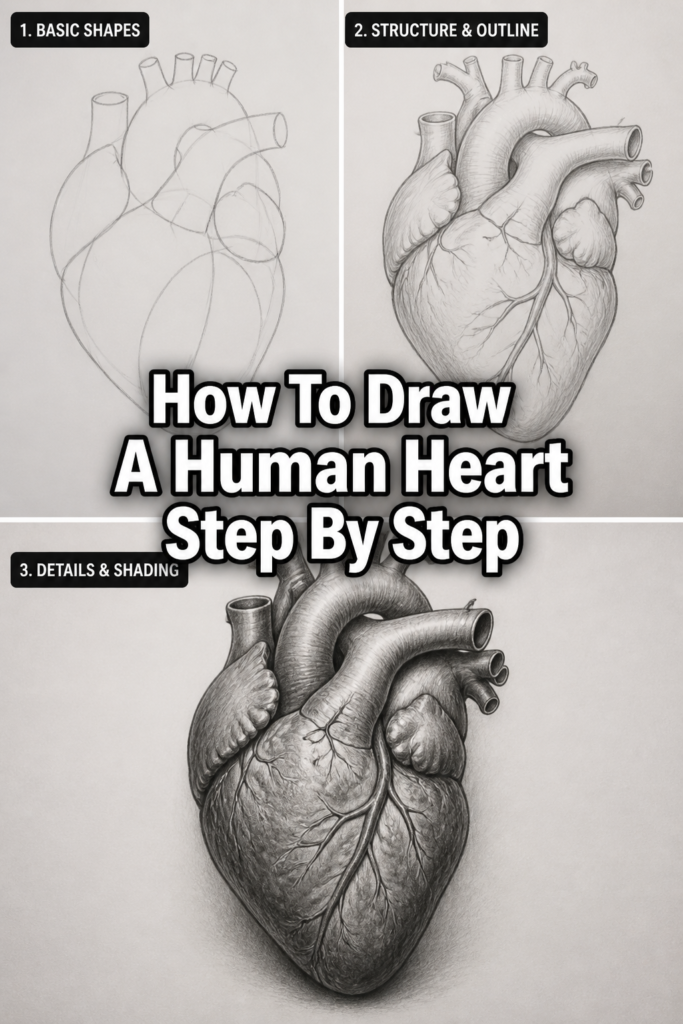
This guide will walk you through creating a recognizable, anatomically inspired human heart drawing. You’ll learn to establish basic forms, add key vessels, and introduce depth.
Time needed: 45-75 minutes (depending on detail and shading)
Difficulty: Beginner to Intermediate
What you’ll need: Sketching pencil (HB or 2B), paper, eraser, optional blending stump or cotton swab.
Step-by-Step Instructions
Step 1: Establish the Basic Heart Shape
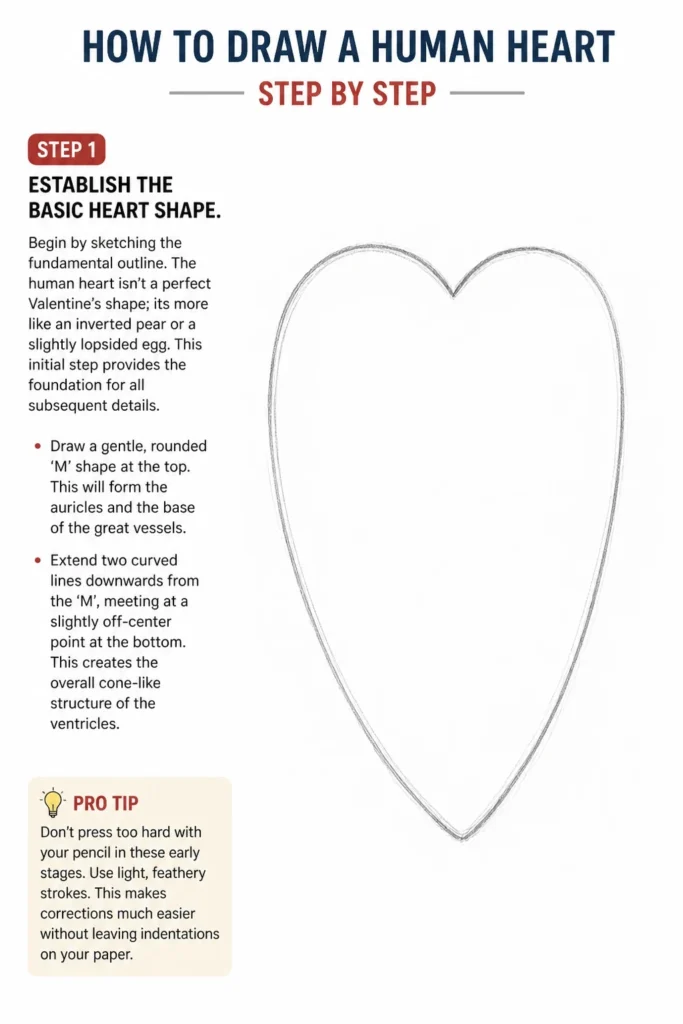
Begin by sketching the fundamental outline. The human heart isn’t a perfect Valentine’s shape; it’s more like an inverted pear or a slightly lopsided egg. This initial step provides the foundation for all subsequent details.
Draw a gentle, rounded ‘M’ shape at the top. This will form the auricles and the base of the great vessels.
Extend two curved lines downwards from the ‘M’, meeting at a slightly off-center point at the bottom. This creates the overall cone-like structure of the ventricles.
Pro Tip: Don’t press too hard with your pencil in these early stages. Use light, feathery strokes. This makes corrections much easier without leaving indentations on your paper.
Step 2: Define the Apex and Base
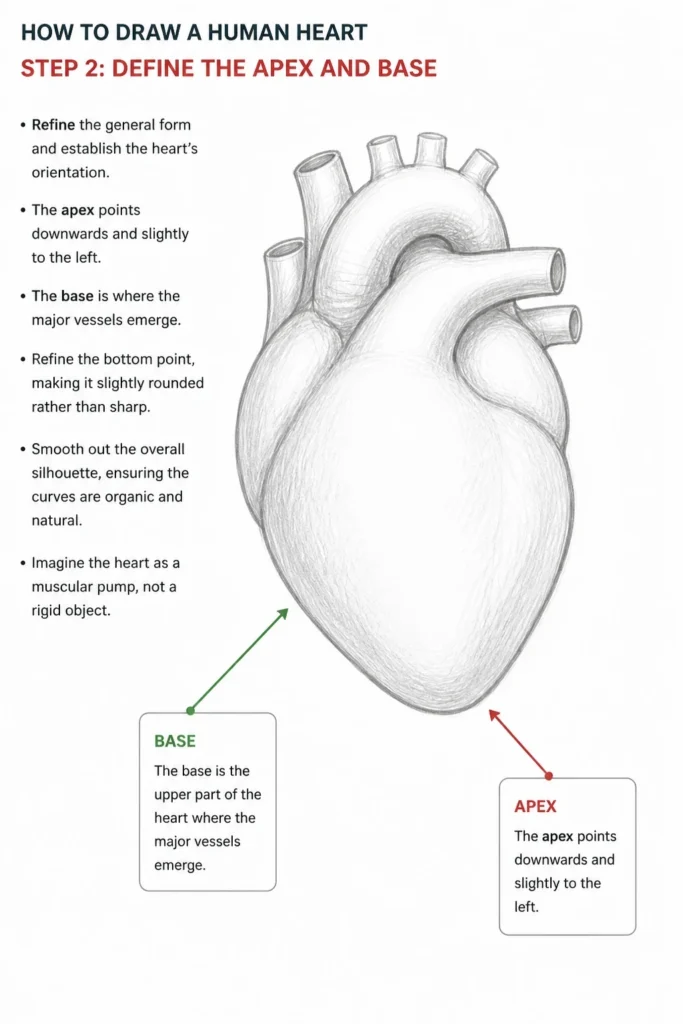
Now, refine the general form and establish the heart’s orientation. The apex points downwards and slightly to the left, while the base is where the major vessels emerge.
Refine the bottom point, making it slightly rounded rather than sharp. This is the apex of the heart.
Smooth out the overall silhouette, ensuring the curves are organic and natural. Imagine the heart as a muscular pump, not a rigid object.
Step 3: Sketch the Atria and Ventricles
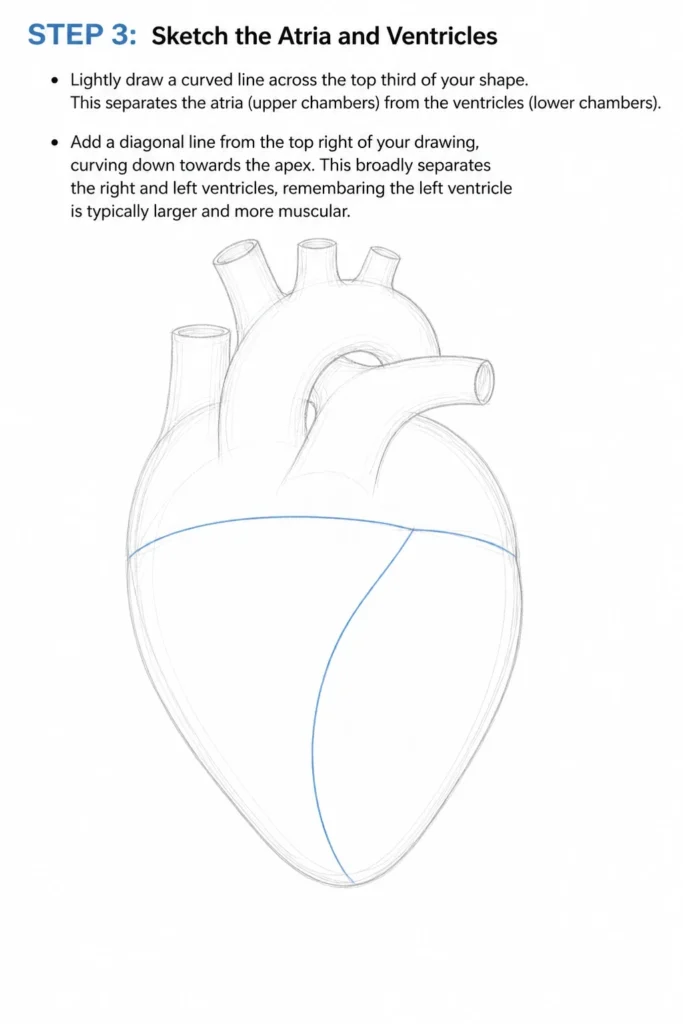
The heart has four chambers, and indicating their general position early helps with proportion. We’ll simplify these into major sections.
Lightly draw a curved line across the top third of your shape. This separates the atria (upper chambers) from the ventricles (lower chambers).
Add a diagonal line from the top right of your drawing, curving down towards the apex. This broadly separates the right and left ventricles, remembering the left ventricle is typically larger and more muscular.
Step 4: Introduce the Great Vessels
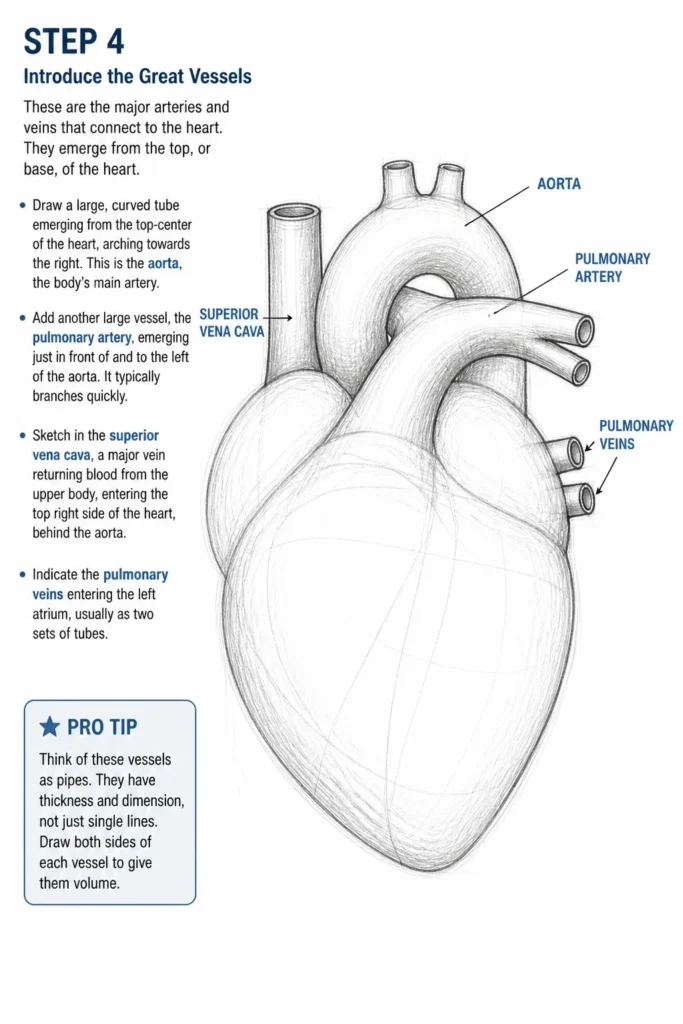
These are the major arteries and veins that connect to the heart. They emerge from the top, or base, of the heart.
Draw a large, curved tube emerging from the top-center of the heart, arching towards the right. This is the aorta, the body’s main artery.
Add another large vessel, the pulmonary artery, emerging just in front of and to the left of the aorta. It typically branches quickly.
Sketch in the superior vena cava, a major vein returning blood from the upper body, entering the top right side of the heart, behind the aorta.
Indicate the pulmonary veins entering the left atrium, usually as two sets of tubes.
Pro Tip: Think of these vessels as pipes. They have thickness and dimension, not just single lines. Draw both sides of each vessel to give them volume.
Step 5: Detail the Coronary Sulcus and Apex
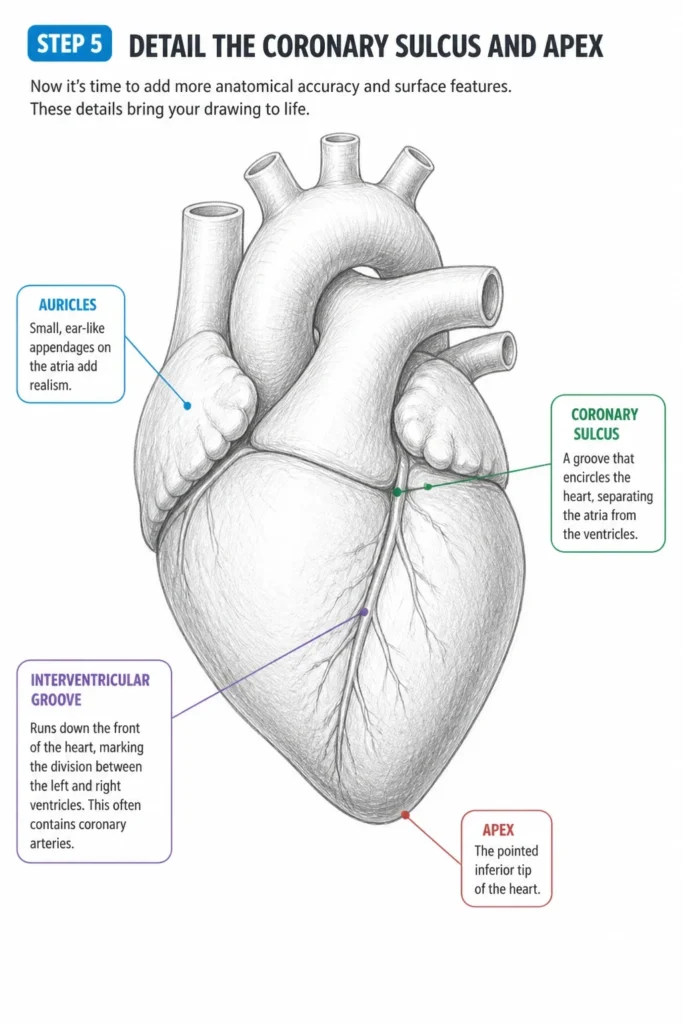
Now it’s time to add more anatomical accuracy and surface features. These details bring your drawing to life.
Define the coronary sulcus, a groove that encircles the heart, separating the atria from the ventricles. This can be indicated by a subtle, slightly deeper line around the top third of the heart.
Add the interventricular groove, which runs down the front of the heart, marking the division between the left and right ventricles. This often contains coronary arteries.
Consider adding small, ear-like appendages on the atria – these are the auricles. They add a touch of realism to the upper chambers.
Step 6: Refine Outlines and Erase Guidelines
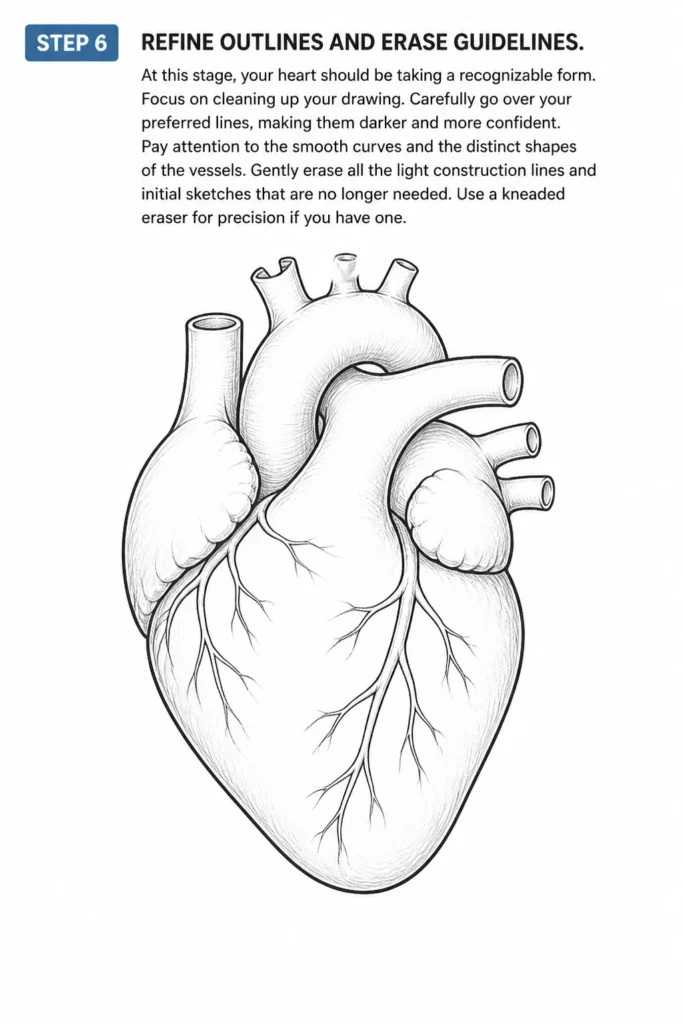
At this stage, your heart should be taking a recognizable form. Focus on cleaning up your drawing.
Carefully go over your preferred lines, making them darker and more confident. Pay attention to the smooth curves and the distinct shapes of the vessels.
Gently erase all the light construction lines and initial sketches that are no longer needed. Use a kneaded eraser for precision if you have one.
Step 7: Add Form and Shading
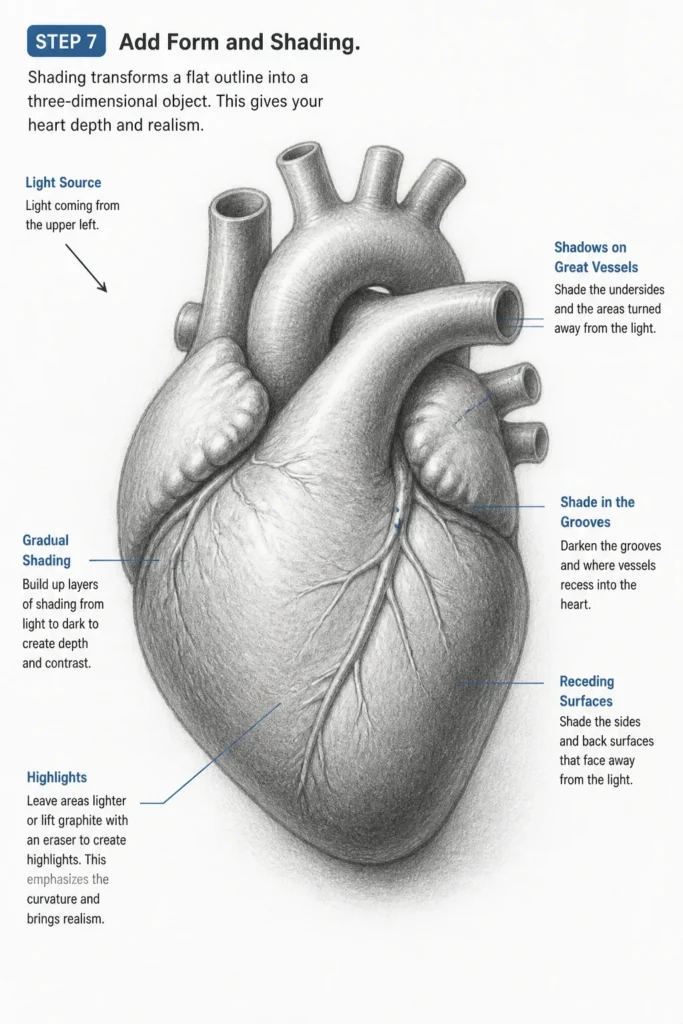
Shading transforms a flat outline into a three-dimensional object. This gives your heart depth and realism.
Determine a light source. Imagine where the light is coming from; this will dictate where the shadows fall.
Apply light shading to the areas that would be in shadow, such as the undersides of the great vessels, within the grooves, and on the receding surfaces of the heart.
Build up layers of shading, gradually darkening tones to create contrast and depth. Use a blending stump or cotton swab to smooth out graphite if desired.
Add subtle highlights by leaving certain areas untouched or by carefully lifting graphite with an eraser. This emphasizes the curvature of the heart muscle and vessels.
Common Mistakes to Avoid
Drawing a Flat or Symmetrical Shape
Many beginners draw the heart as a perfectly symmetrical, two-dimensional Valentine’s symbol. The real heart is an asymmetrical, three-dimensional organ, tilted in the chest. Avoid making it look flat by always thinking about its volume and slight rotation. Introduce subtle variations in size and curvature to each side.
Incorrect Vessel Placement
The great vessels (aorta, pulmonary artery, vena cava) don’t just “stick out” randomly. They emerge from specific points at the base of the heart and have distinct relationships to each other. Misplacing them or drawing them as single lines rather than volumetric tubes can make the drawing look inaccurate. Always visualize them as pipes connecting to the organ, with their own thickness and direction.
Lack of Depth and Dimension
Without proper shading and consideration of overlapping forms, your heart drawing can appear lifeless. Neglecting to show how vessels overlap the main heart body, or how grooves create shadows, flattens the image. Focus on creating contrast between light and shadow to make the heart appear round and substantial, giving it a sense of weight and presence.
Troubleshooting
My Heart Looks Too Flat or Cartoonish
If your drawing lacks depth, it’s likely due to insufficient shading or a lack of attention to overlapping forms. To fix this, revisit Step 7. Imagine the heart as a sphere or a rounded cone. Identify where light would hit and where shadows would naturally form. Use varied pencil pressure to create a range of tones, from light grays to dark blacks. Ensure that vessels appear to wrap around or emerge from the heart, rather than just sitting on top of it.
The Vessels Don’t Look Right
Inaccurate vessel representation often stems from drawing them as single lines instead of three-dimensional tubes. To correct this, focus on drawing both sides of each vessel, giving it thickness. Also, pay close attention to their points of origin and direction. The aorta arches, while the pulmonary artery branches. Use a reference image to verify their typical arrangement and ensure they appear to connect organically to the heart’s main body, not just float above it.
I Can’t Get the Proportions Correct
Proportional issues are common, especially in early stages. If your heart looks too wide, too narrow, or the chambers seem off, go back to Step 1 and 2. Start with very light, loose construction lines. Use the overall “inverted pear” or “lopsided egg” as your primary guide. Break the heart into thirds or halves to ensure the atria and ventricles occupy appropriate space. Don’t be afraid to erase and redraw your foundational shapes until they feel right before adding details.
Key Takeaways
Start with light, basic shapes to establish the heart’s overall form before adding details.
Think of the heart as a three-dimensional, slightly asymmetrical object, not a flat symbol.
Pay attention to the major vessels, drawing them with volume and ensuring their correct placement.
Use shading to create depth and dimension, making your heart appear realistic and substantial.
Don’t be afraid to use an eraser; drawing is an iterative process of building and refining.
Practice observing real-world references (diagrams, models) to better understand anatomy.
Frequently Asked Questions
What kind of pencil is best for anatomical drawing?
An HB pencil is a great all-rounder for initial sketching and general outlines. For adding depth and shading, a softer pencil like a 2B or 4B is excellent as it produces darker tones more easily. A harder pencil, such as 2H, can be useful for very light construction lines.
Should I use a reference image?
Absolutely, using a reference image is highly recommended, especially when you’re starting out. Look for anatomical diagrams or realistic illustrations of the human heart. This helps you understand the correct proportions, vessel placement, and surface details that are hard to invent from memory.
How can I make my drawing look more realistic?
Realism comes from accurate observation and effective use of light and shadow. Focus on subtle curves, the texture of the muscle, and the way light interacts with the surfaces. Layer your shading, use a variety of tones, and ensure your highlights and shadows are well-defined. Don’t rush the detailing process.
Is it important to know the exact names of all the parts?
While knowing the anatomical names is helpful for understanding, it’s not strictly necessary for drawing a visually convincing heart. Focus more on understanding the shapes, relationships, and functions of the major components (e.g., the aorta is a large arching vessel, the ventricles are the main pump). The visual understanding is paramount for an artist.
Our Top Recommended Finds
Sketchbook with Quality Paper: A good sketchbook with paper that can handle multiple erasures and blending will significantly improve your drawing experience. Look for acid-free paper with a medium tooth.
Set of Graphite Pencils: A basic set ranging from H (hard) to B (soft) pencils (e.g., 2H, HB, 2B, 4B) provides versatility for sketching, outlining, and shading.
* Kneaded Eraser: Unlike a standard pink eraser, a kneaded eraser can be molded to a point for precise erasing, or dabbed to lift graphite without smudging or damaging the paper.
Your Creative Journey Continues
You’ve just taken a significant step in understanding and depicting one of the most vital organs. Drawing the human heart is a fantastic exercise in observation, patience, and anatomical artistry. It combines scientific accuracy with creative interpretation, a truly rewarding blend.
Don’t let this be your last anatomical drawing. Consider exploring other organs or even the skeletal system next. The skills you’ve developed here – foundational sketching, understanding form, and applying shading – are transferable to countless other subjects. Pick up your pencil again today and continue to explore the incredible world of drawing!