🌹 How To Draw A Rose Step By Step Simple
Have you ever admired a beautiful rose and wished you could capture its elegance on paper?
Drawing a rose might seem complex, but I remember starting exactly where you are, with just a pencil and a blank page.
This guide is built from my own journey, breaking down the intricate beauty of a rose into easy, manageable steps anyone can follow.
Quick Overview
By the end of this guide, you will have the skills to draw a lovely, simple rose, ready to add to your personal sketchbook or share with others.
- Time needed: 20-40 minutes
- Difficulty: Beginner
- What you’ll need: Pencil, eraser, paper
Step-by-Step Instructions
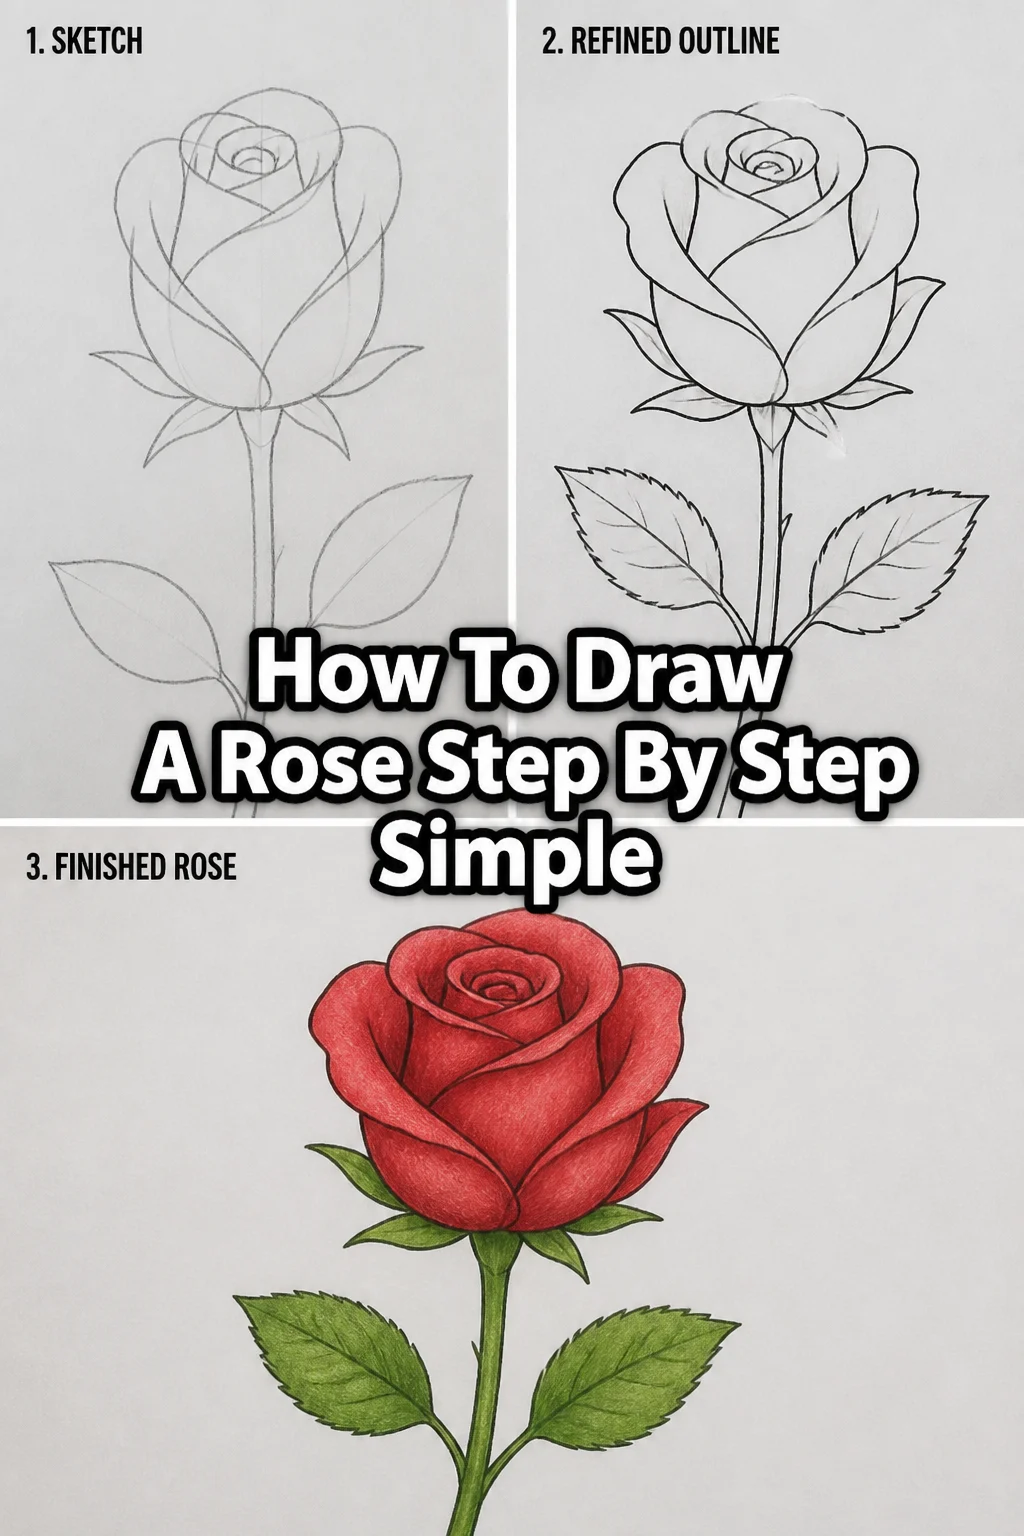
Step 1: Start with the Central Bud
Begin by drawing a small, irregular oval or a teardrop shape near the center of your page.
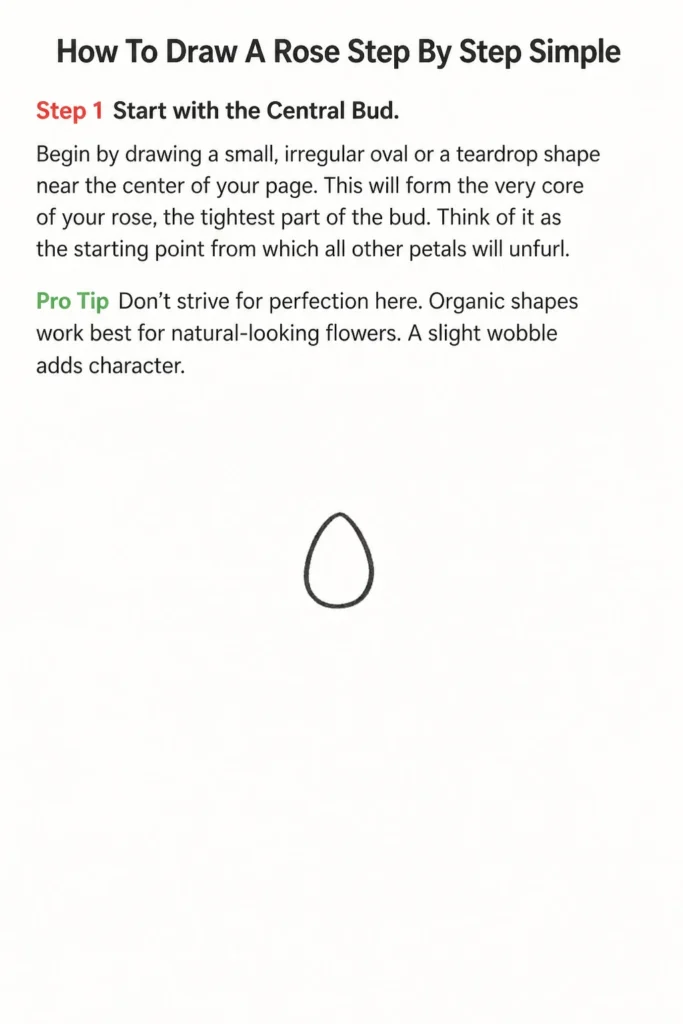
This will form the very core of your rose, the tightest part of the bud.
Think of it as the starting point from which all other petals will unfurl.
Pro Tip: Don’t strive for perfection here. Organic shapes work best for natural-looking flowers. A slight wobble adds character.
Step 2: Add the Inner Petals
Around your central bud, draw a series of small, curved lines that resemble a loose spiral.
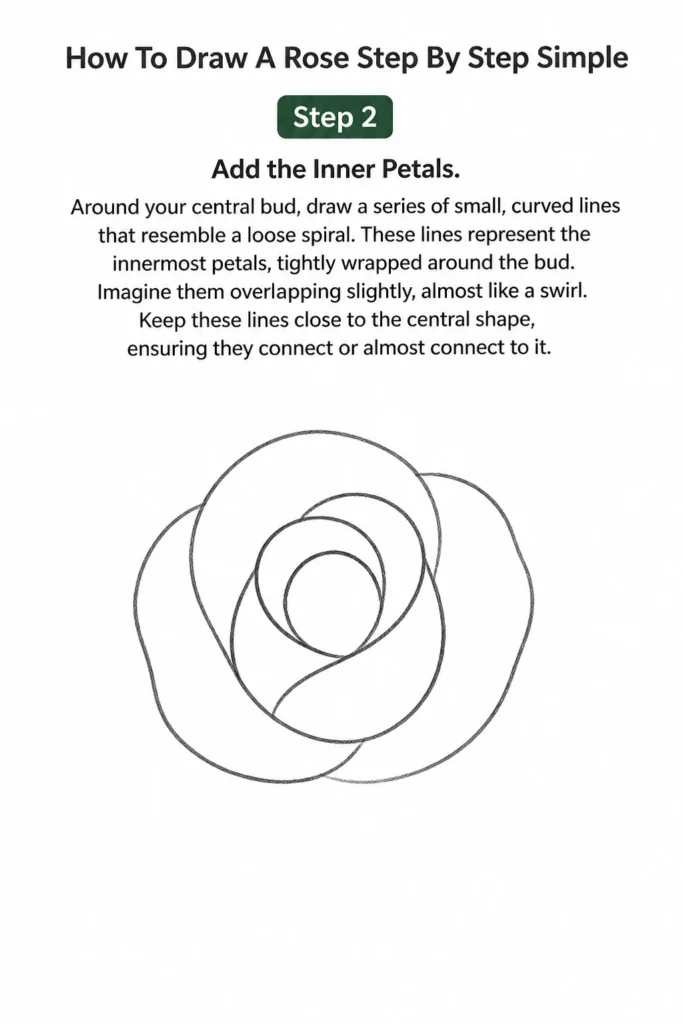
These lines represent the innermost petals, tightly wrapped around the bud.
Imagine them overlapping slightly, almost like a swirl.
Keep these lines close to the central shape, ensuring they connect or almost connect to it.
Step 3: Create the First Layer of Outer Petals
Now, expand outwards from your inner petals.
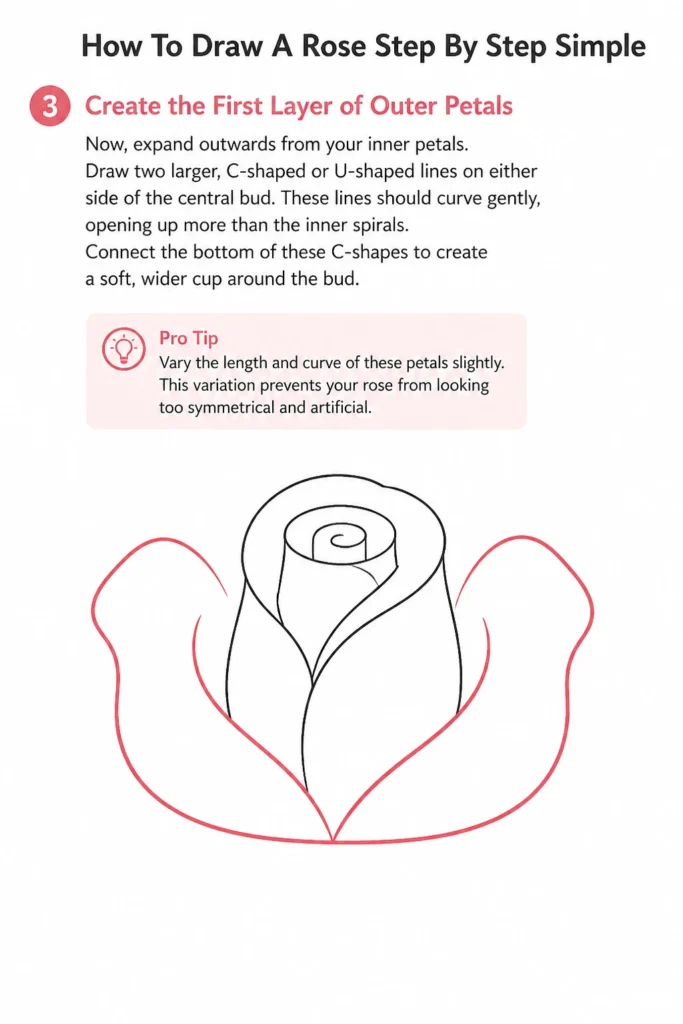
Draw two larger, C-shaped or U-shaped lines on either side of the central bud.
These lines should curve gently, opening up more than the inner spirals.
Connect the bottom of these C-shapes to create a soft, wider cup around the bud.
Pro Tip: Vary the length and curve of these petals slightly. This variation prevents your rose from looking too symmetrical and artificial.
Step 4: Develop the Mid-Layer Petals
Continue building the rose by adding another layer of petals just outside the previous ones.
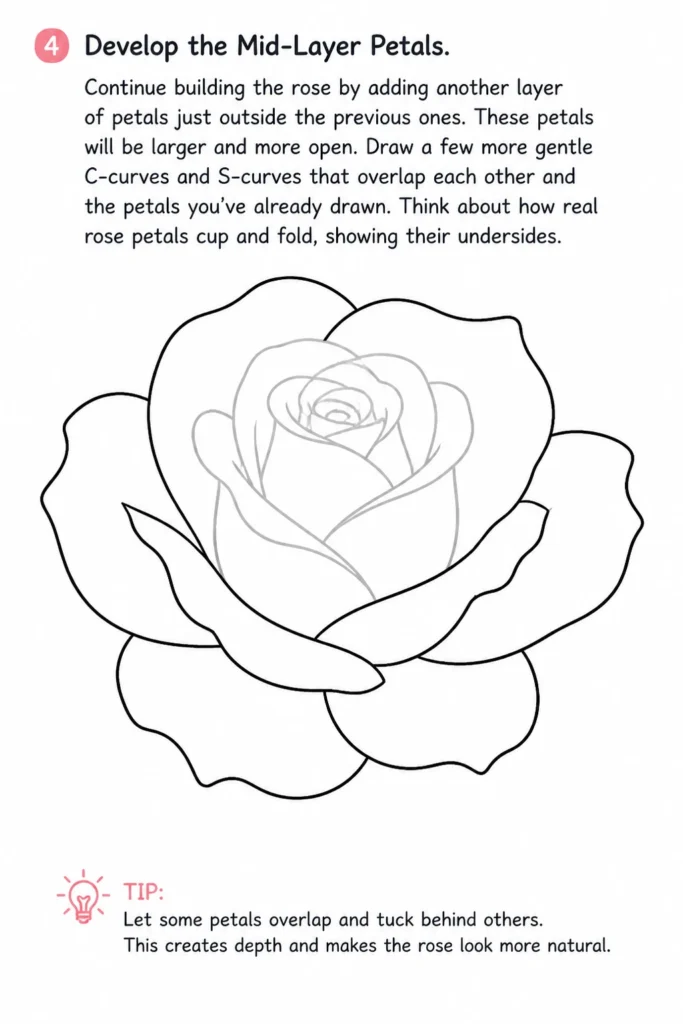
These petals will be larger and more open.
Draw a few more gentle C-curves and S-curves that overlap each other and the petals you’ve already drawn.
Think about how real rose petals cup and fold, showing their undersides.
Step 5: Define the Outermost Petals
For the final layer of petals, draw even broader, more relaxed curves.
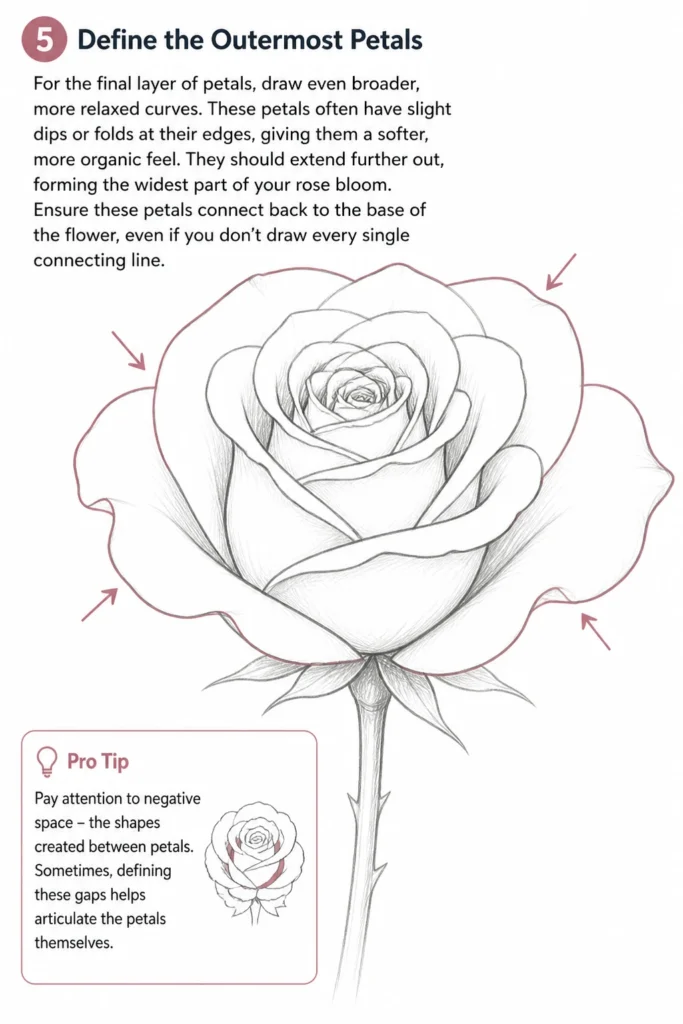
These petals often have slight dips or folds at their edges, giving them a softer, more organic feel.
They should extend further out, forming the widest part of your rose bloom.
Ensure these petals connect back to the base of the flower, even if you don’t draw every single connecting line.
Pro Tip: Pay attention to negative space – the shapes created between petals. Sometimes, defining these gaps helps articulate the petals themselves.
Step 6: Draw the Stem and Sepals
Beneath your rose bloom, draw two slightly curved lines for the stem, starting directly below the widest part of the flower.
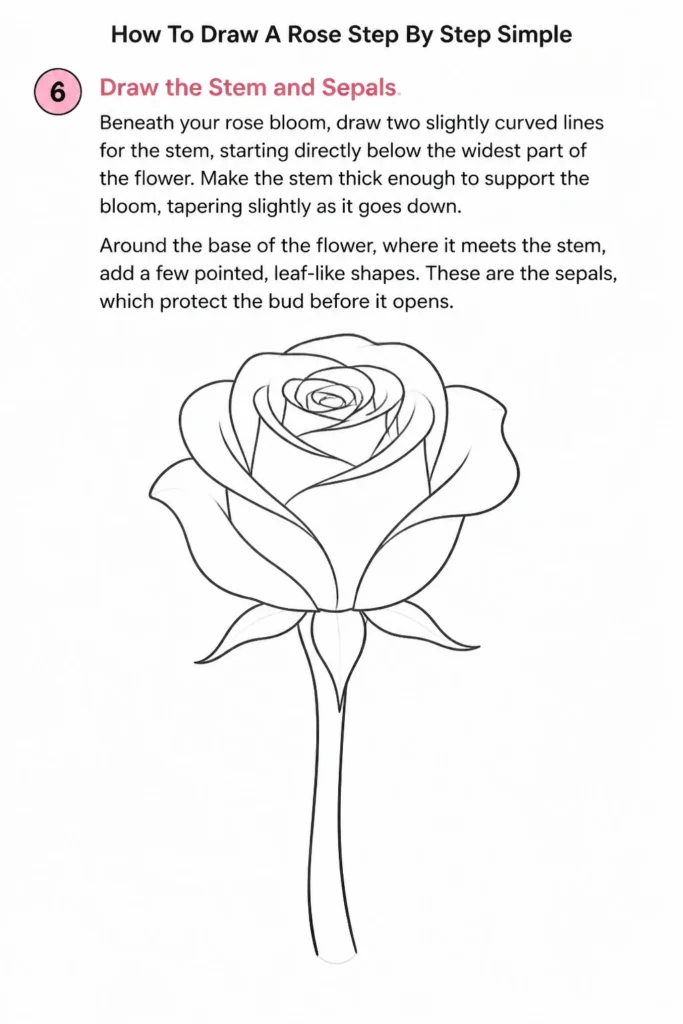
Make the stem thick enough to support the bloom, tapering slightly as it goes down.
Around the base of the flower, where it meets the stem, add a few pointed, leaf-like shapes.
These are the sepals, which protect the bud before it opens.
Step 7: Add Leaves and Thorns
Roses are known for their distinctive leaves.
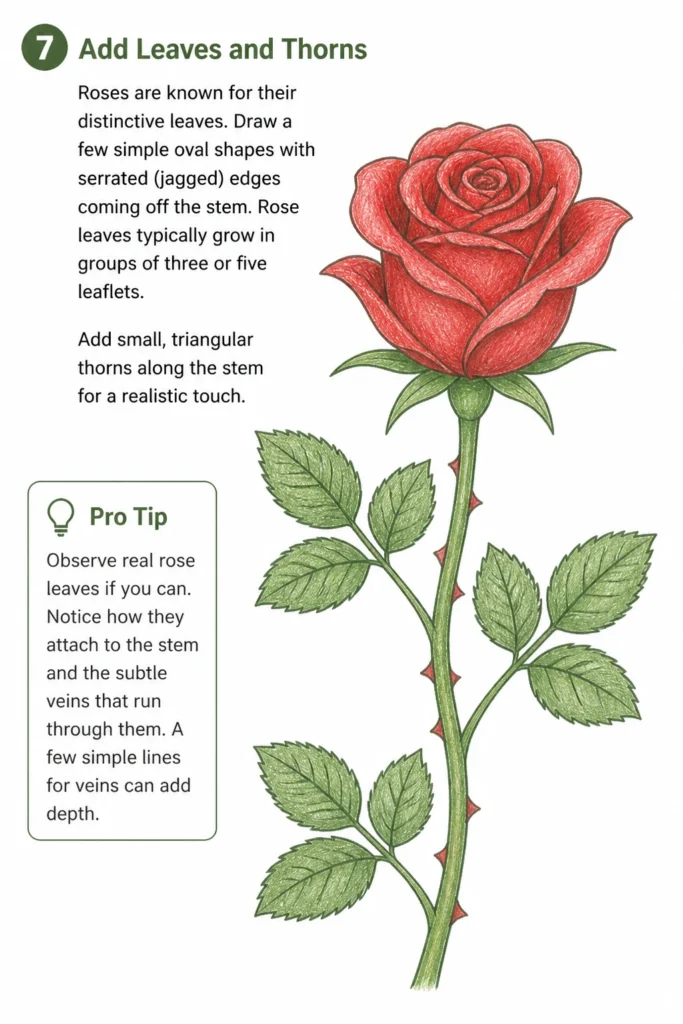
Draw a few simple oval shapes with serrated (jagged) edges coming off the stem.
Rose leaves typically grow in groups of three or five leaflets.
Add small, triangular thorns along the stem for a realistic touch.
Pro Tip: Observe real rose leaves if you can. Notice how they attach to the stem and the subtle veins that run through them. A few simple lines for veins can add depth.
Step 8: Refine and Clean Up
Once you’re happy with the basic structure, gently erase any unnecessary construction lines or overlaps.
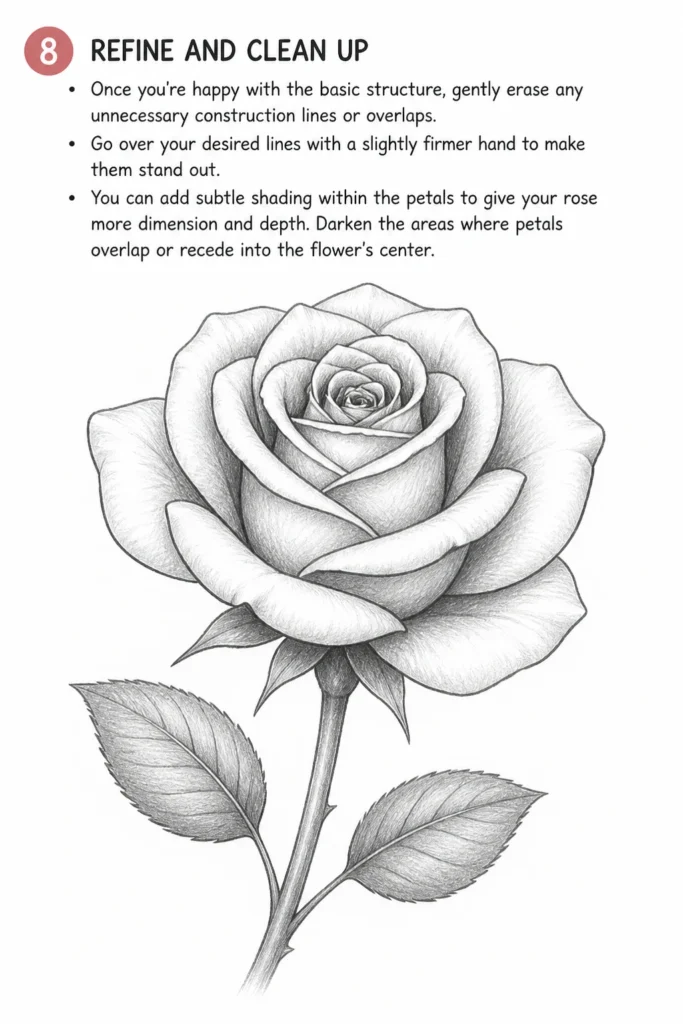
Go over your desired lines with a slightly firmer hand to make them stand out.
You can add subtle shading within the petals to give your rose more dimension and depth.
Darken the areas where petals overlap or recede into the flower’s center.
Common Mistakes to Avoid
Making Petals Too Symmetrical
A common pitfall is trying to make every petal perfectly uniform in size and shape.
This often results in a stiff, unnatural-looking flower, as real roses are beautifully imperfect.
Instead, embrace variety in your petal shapes and curves to give your rose an organic, lively appearance.
Drawing Petals Too Flat
Beginners sometimes draw petals as flat, two-dimensional shapes, like cutouts.
Roses have depth and volume, with petals that cup, fold, and overlap.
Think of them as three-dimensional forms, using curved lines to suggest their roundness and the way they turn away from you.
Over-Complicating the Center
It’s easy to get lost in the intricate swirl of a rose’s center, trying to draw every tiny fold.
This can make the center look messy or confusing, rather than elegant.
Focus on a few key spiral lines to suggest the tightly wound bud, letting the viewer’s eye fill in the rest.
Ignoring the Sepals and Stem
Sometimes, the focus is entirely on the bloom, and the sepals and stem are an afterthought.
Skipping or simplifying these elements too much can make the rose look disconnected or float awkwardly on the page.
Include the sepals and a sturdy stem to ground your rose and make it feel complete.
Troubleshooting
My Rose Looks Flat
If your rose appears to lack depth, it’s likely due to insufficient use of curved lines and overlapping petals.
Go back to your petals and add more C-curves and S-curves, making sure some petals clearly tuck behind others.
Consider adding very light shading where petals overlap or curve inwards to enhance the illusion of depth.
The Petals Look Stiff and Unnatural
Stiff petals often result from drawing straight lines or overly uniform shapes.
Remember that rose petals are soft and organic; they rarely have perfectly straight edges.
Practice drawing loose, flowing curves and vary the size and direction of your petals to introduce more natural movement.
I Can’t Get the Center Right
The center of a rose is notoriously tricky because of its tight, spiraling nature.
Instead of trying to draw every single tiny curl, focus on creating a few main, gentle spiral lines that suggest the core.
Build outwards from there, letting the subsequent petals define the center’s boundaries.
Key Takeaways
- Start Simple: Begin with a basic oval for the bud and build outwards gradually.
- Embrace Curves: Rose petals are all about graceful, flowing lines, not straight edges.
- Layer and Overlap: Create depth by having petals tuck behind and partially cover each other.
- Vary Shapes: Avoid symmetry; give each petal a unique, organic form.
- Don’t Forget the Details: Sepals, stem, leaves, and thorns complete the rose.
- Practice Shading: A little bit of subtle shading can bring your drawing to life.
Frequently Asked Questions
What kind of pencil should I use for drawing a rose?
For beginners, a standard HB pencil is excellent for general sketching and line work, offering a good balance between darkness and erasability.
You might also try a 2B pencil for slightly darker lines and softer shading if you want more contrast.
How do I make my rose look more realistic?
To enhance realism, focus on observing actual roses or reference photos closely.
Pay attention to the subtle folds, wrinkles, and natural imperfections of the petals, and incorporate light shading to show volume and texture.
Varying line weight can also add a sense of dimension.
Should I draw the whole rose before erasing guidelines?
It’s generally a good idea to lay down all your light construction lines and establish the overall form of the rose first.
Once you’re satisfied with the structure, you can then go back and gently erase the unnecessary lines before firming up your final drawing.
Can I color my drawn rose?
Absolutely! Once you’ve completed your line drawing, you can add color using colored pencils, markers, watercolors, or pastels.
Think about the light source and how it hits the petals to apply colors and shadows effectively, bringing your rose to vibrant life.
Our Top Recommended Finds
- Graphite Sketching Pencil Set: A set with varying lead hardness (e.g., 2H, HB, 2B, 4B) provides versatility for light sketching, dark lines, and shading.
- Kneaded Eraser: This type of eraser is fantastic for gently lifting graphite without damaging the paper, perfect for subtle clean-ups and highlights.
- Smooth Drawing Paper: Opt for a pad of smooth, medium-weight drawing paper that holds graphite well and allows for easy erasing without smudging too much.
Your Petal-Perfect Journey Begins Now
Drawing a rose is a delightful way to explore form and beauty, and it’s a skill that blossoms with practice.
Every line you draw is a step closer to capturing the intricate charm of this beloved flower.
Don’t just read this guide; grab your pencil and paper today and start bringing your own beautiful roses to life!
Consider trying different angles or adding dew drops to your next rose, expanding on the skills you’ve just learned.