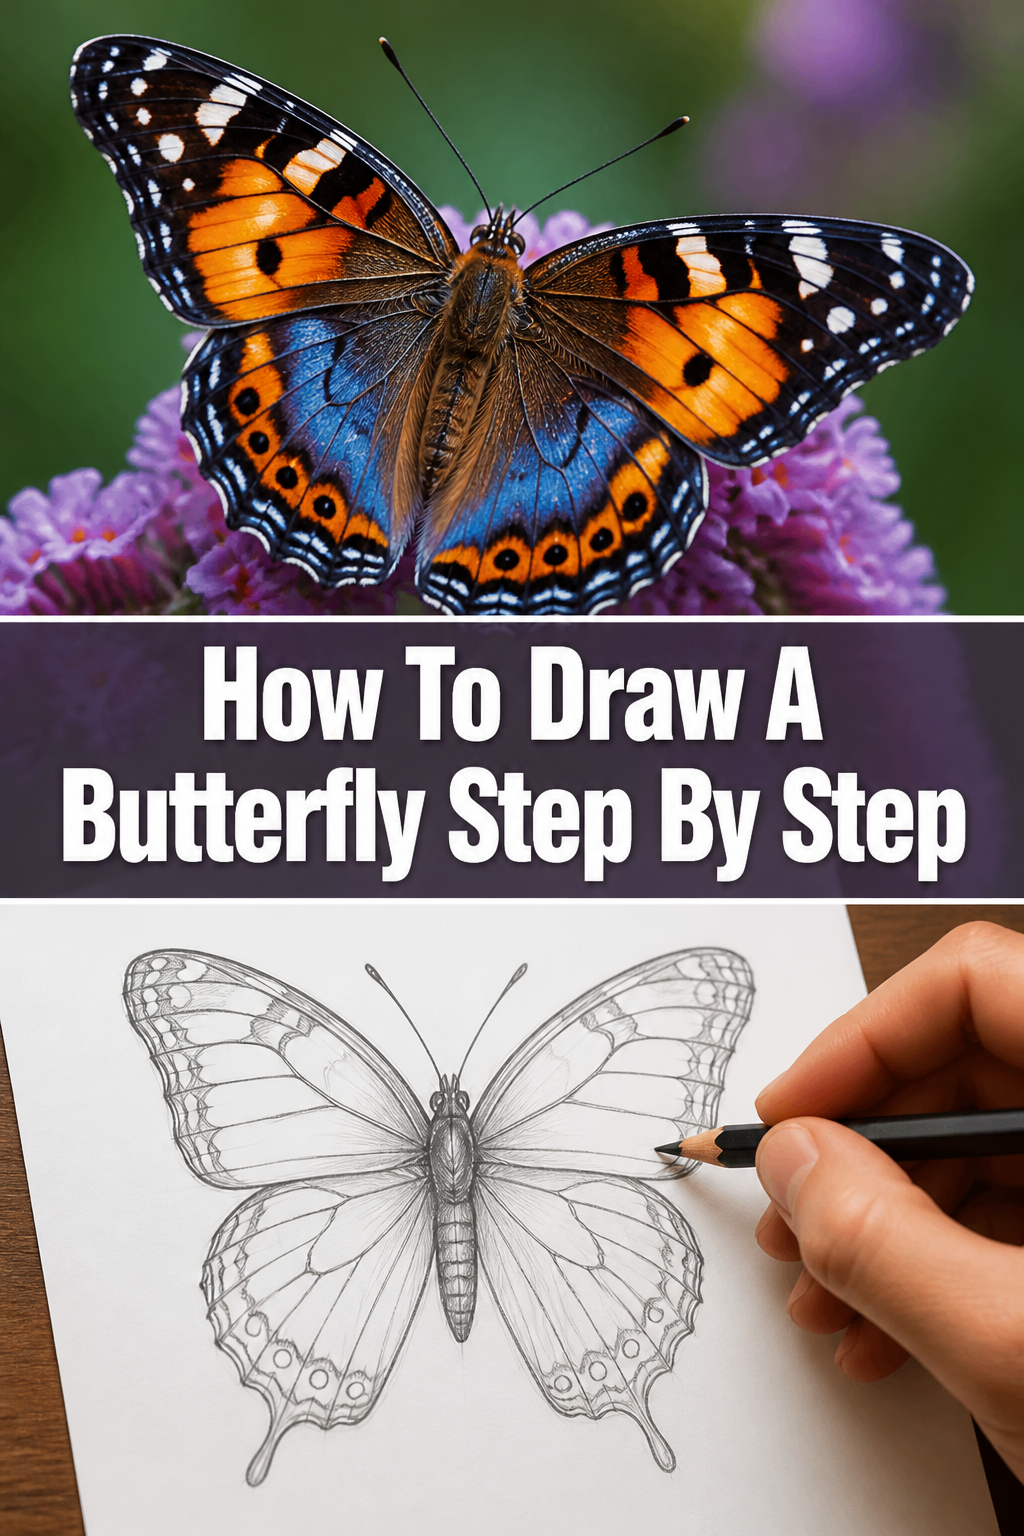
🦋 How To Draw A Butterfly Step By Step

& Painting
No rigid rules or pretension. Just practical guides, medium comparisons, and encouraging tips to help you enjoy the drawing & painting process.
Drawing can be a wonderfully calming and creative pursuit.
There’s a special satisfaction in seeing a blank page transform into something beautiful, like the delicate wings of a butterfly.
I’ve spent countless hours with a pencil and paper, discovering simple techniques that make drawing accessible to everyone, and I’m excited to share a straightforward path to creating your own butterfly masterpiece.
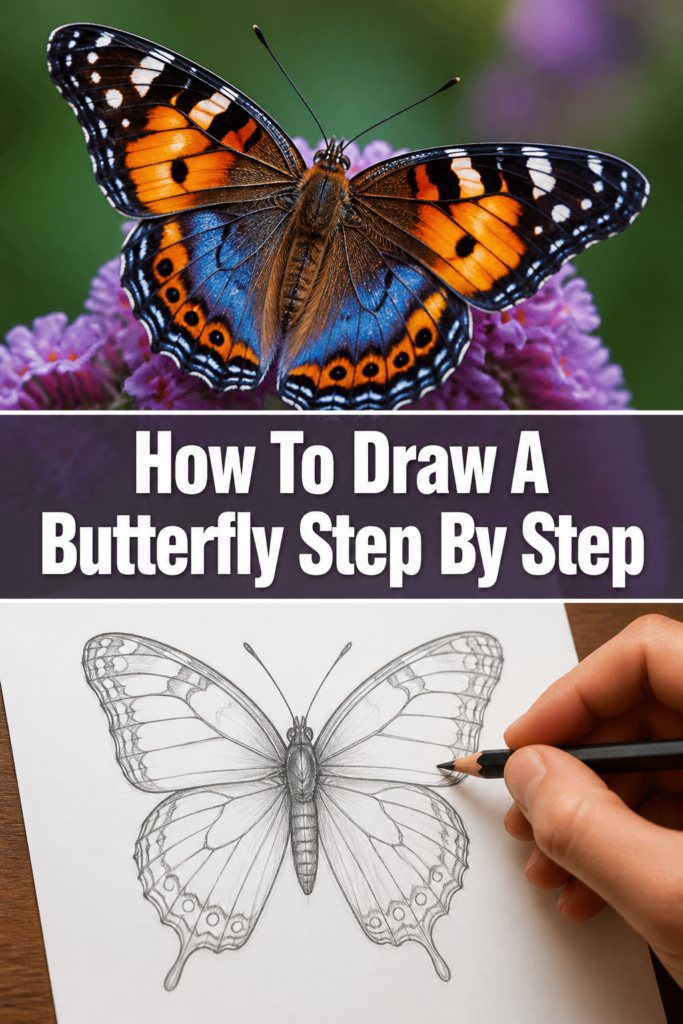
Quick Overview
This guide will walk you through the process of drawing a charming butterfly, from its initial basic shapes to adding intricate details.
You’ll gain confidence in sketching and understanding fundamental forms, creating a lovely piece of art by the end.
- Time needed: 30-60 minutes
- Difficulty: Beginner
- What you’ll need: Pencil (HB or 2B recommended), eraser, paper, optional: colored pencils or markers
Step-by-Step Instructions
Step 1: Lay Down the Foundation with the Body
Begin by sketching the butterfly’s body. Draw a long, slightly curved oval shape in the center of your paper.
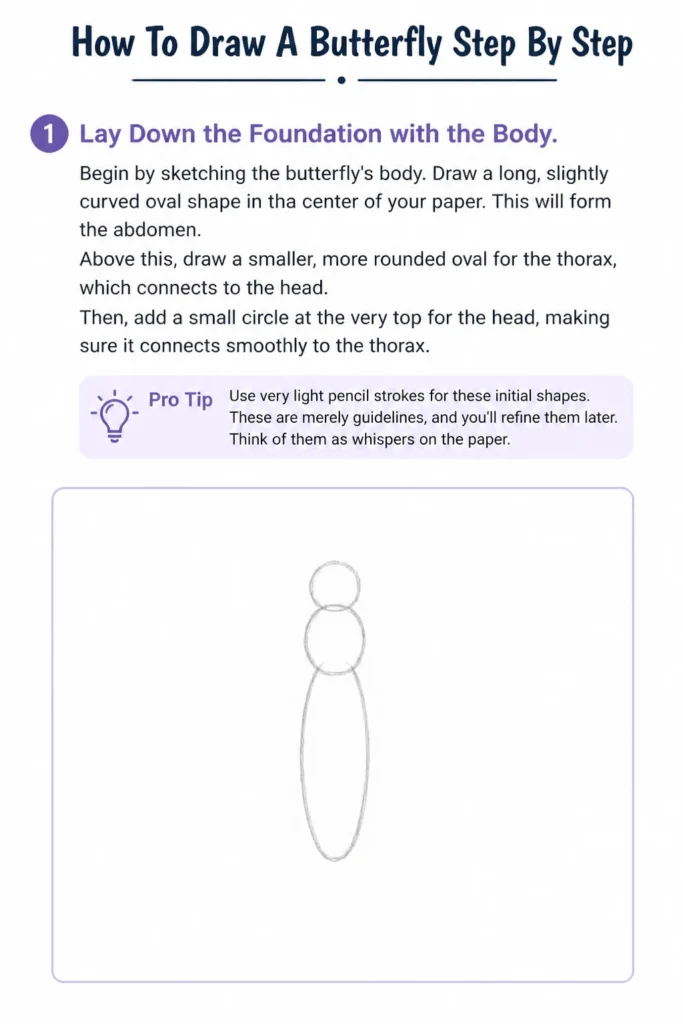
This will form the abdomen. Above this, draw a smaller, more rounded oval for the thorax, which connects to the head.
Then, add a small circle at the very top for the head, making sure it connects smoothly to the thorax.
Pro Tip: Use very light pencil strokes for these initial shapes. These are merely guidelines, and you’ll refine them later. Think of them as whispers on the paper.
Step 2: Establish the Centerline and Wing Guides
Draw a light, vertical line extending downwards from the butterfly’s head, through the center of its body.
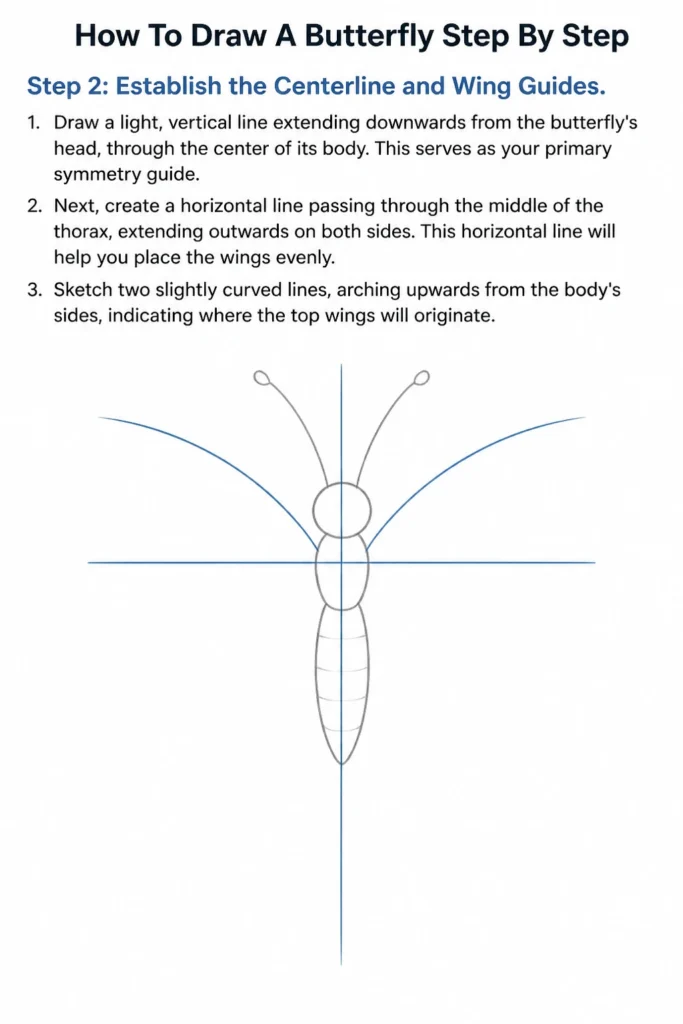
This serves as your primary symmetry guide. Next, create a horizontal line passing through the middle of the thorax, extending outwards on both sides.
This horizontal line will help you place the wings evenly.
Sketch two slightly curved lines, arching upwards from the body’s sides, indicating where the top wings will originate.
Step 3: Define the Upper Wings
Now, focus on the upper, or forewings. From the top of the body (near the head), extend a gentle curve outwards and upwards, then bring it back down towards the horizontal guideline.
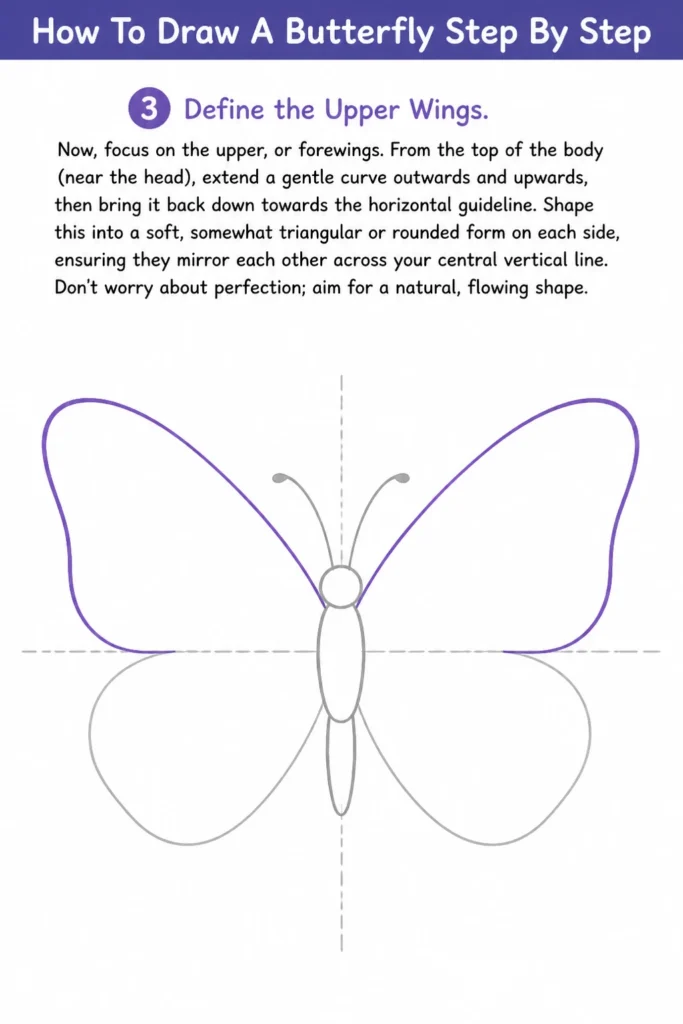
Shape this into a soft, somewhat triangular or rounded form on each side, ensuring they mirror each other across your central vertical line.
Don’t worry about perfection; aim for a natural, flowing shape.
Step 4: Form the Lower Wings
Next, move to the lower, or hindwings. These usually begin below the upper wings, connecting to the lower part of the thorax or the upper abdomen.
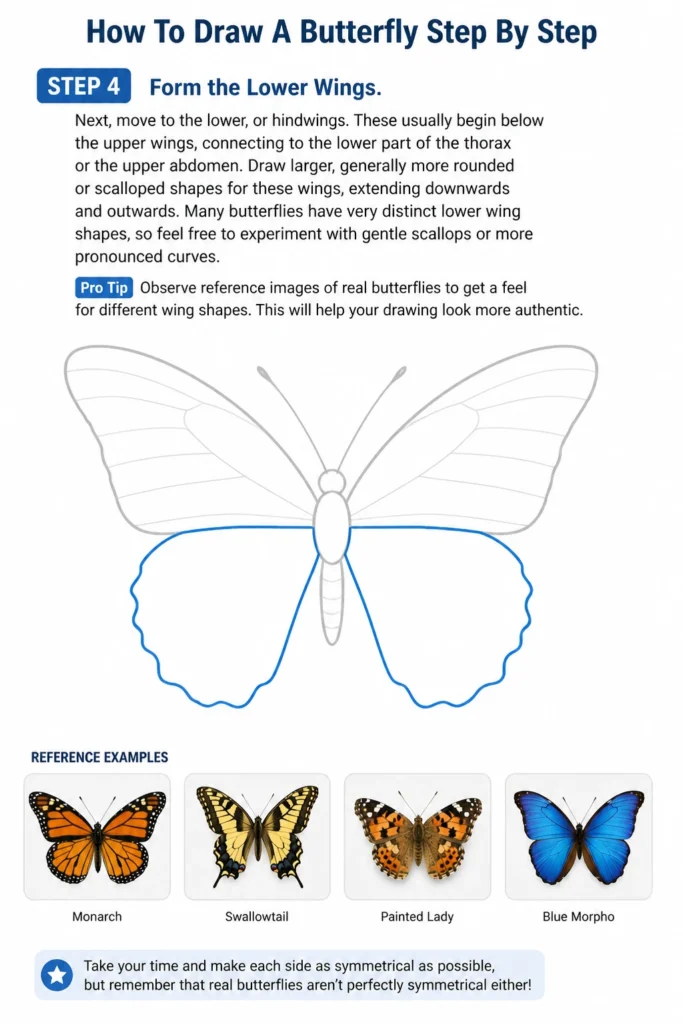
Draw larger, generally more rounded or scalloped shapes for these wings, extending downwards and outwards.
Many butterflies have very distinct lower wing shapes, so feel free to experiment with gentle scallops or more pronounced curves.
Pro Tip: Observe reference images of real butterflies to get a feel for different wing shapes. This will help your drawing look more authentic.
Step 5: Refine the Outline and Add Antennae
Review your initial wing and body shapes. Now is the time to darken and smooth out the lines you want to keep.
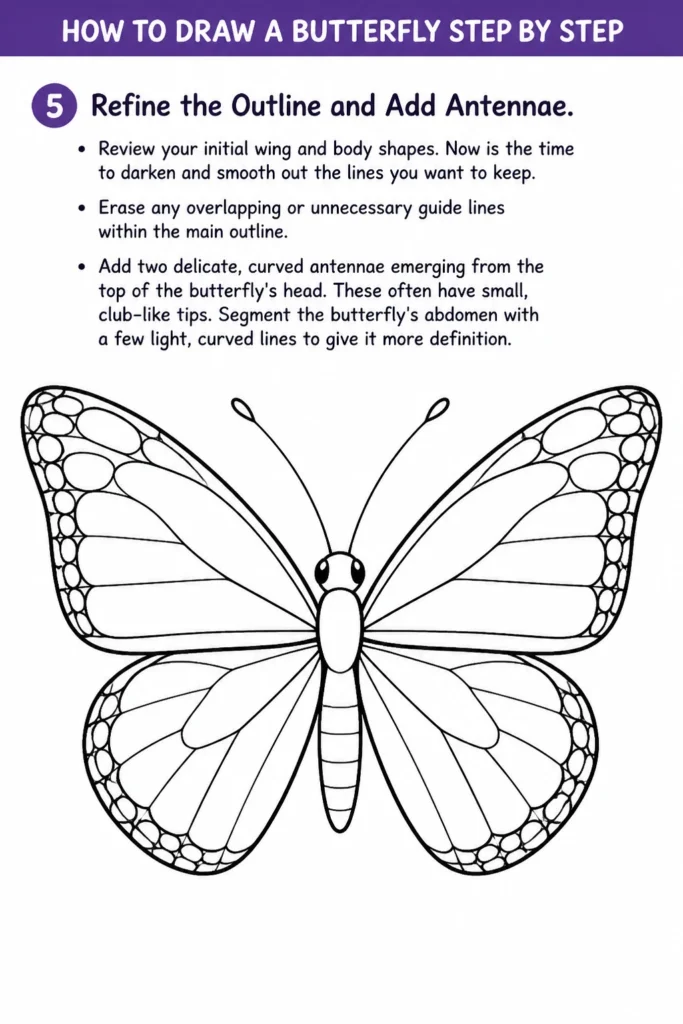
Erase any overlapping or unnecessary guide lines within the main outline. Add two delicate, curved antennae emerging from the top of the butterfly’s head.
These often have small, club-like tips. Segment the butterfly’s abdomen with a few light, curved lines to give it more definition.
Step 6: Introduce Inner Wing Details and Veins
This step brings your butterfly to life. Draw subtle veins within the wings.
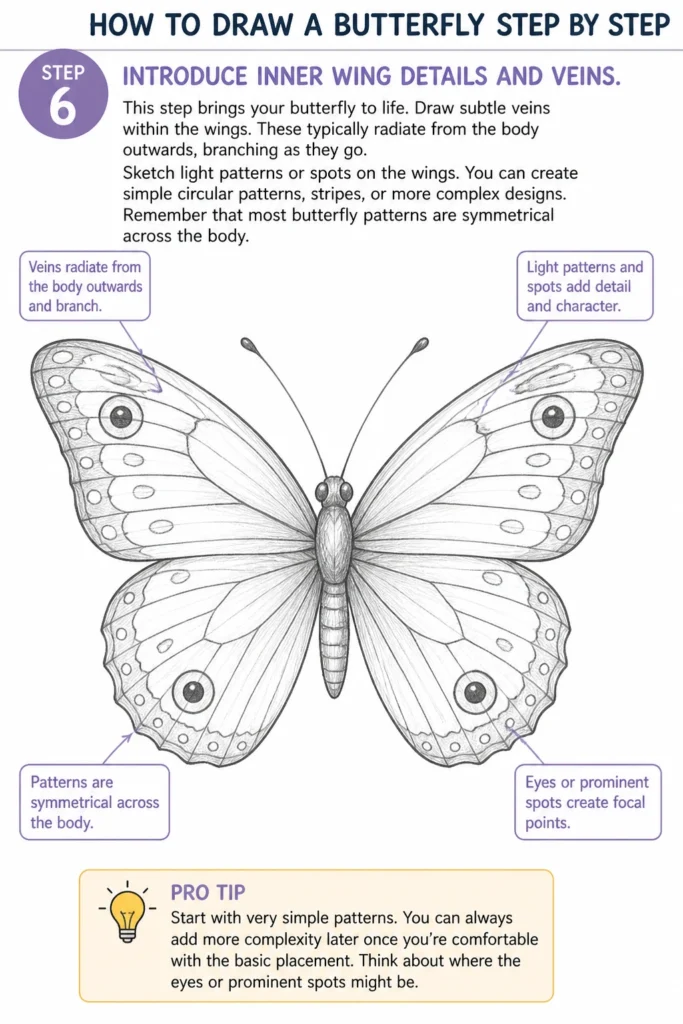
These typically radiate from the body outwards, branching as they go. Sketch light patterns or spots on the wings.
You can create simple circular patterns, stripes, or more complex designs.
Remember that most butterfly patterns are symmetrical across the body.
Pro Tip: Start with very simple patterns. You can always add more complexity later once you’re comfortable with the basic placement. Think about where the “eyes” or prominent spots might be.
Step 7: Erase Remaining Guides and Darken Key Lines
Carefully erase all the remaining light sketch lines and guidelines that you no longer need.
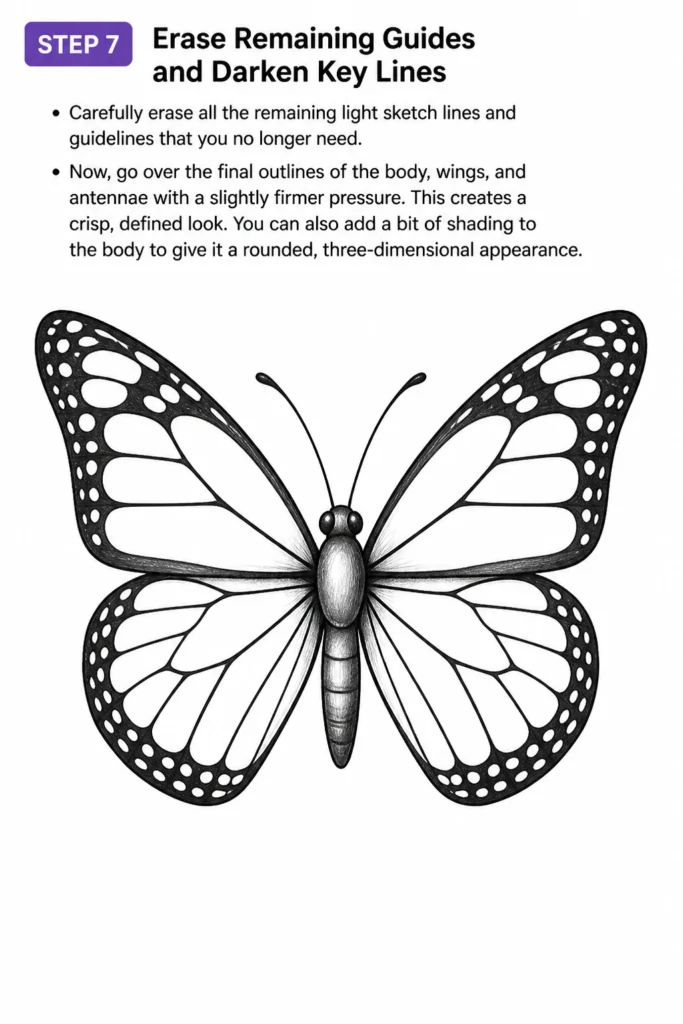
This cleans up your drawing significantly. Now, go over the final outlines of the body, wings, and antennae with a slightly firmer pressure.
This creates a crisp, defined look. You can also add a bit of shading to the body to give it a rounded, three-dimensional appearance.
Step 8: Bring it to Life with Color and Shading (Optional)
If you wish, add color to your butterfly. Use colored pencils, markers, or watercolors to fill in the patterns and wings.
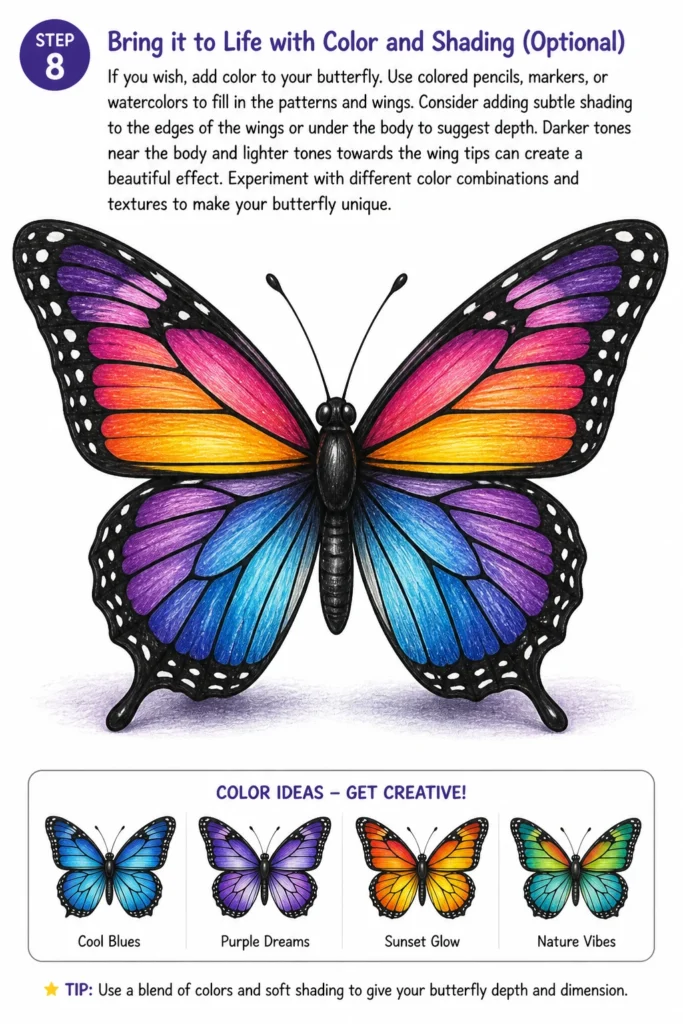
Consider adding subtle shading to the edges of the wings or under the body to suggest depth.
Darker tones near the body and lighter tones towards the wing tips can create a beautiful effect.
Experiment with different color combinations and textures to make your butterfly unique.
Common Mistakes to Avoid
Struggling with Symmetry
One common challenge is making both sides of the butterfly look the same. It’s easy for one wing to appear larger or shaped differently from the other.
The problem often stems from not using clear guidelines from the start. Always establish a strong central vertical line and horizontal wing guides.
These foundational lines act as your mirror, helping you keep proportions and shapes balanced as you draw.
Stiff, Unnatural Wings
Sometimes, beginners draw wings that look rigid or flat, lacking the natural grace of a real butterfly. This happens when you focus too much on straight lines or sharp angles.
Butterflies have soft, organic curves in their wings. Practice drawing flowing, gentle arcs and rounded shapes.
Imagine the gentle flutter of wings, and try to infuse that movement into your lines.
Over-detailing Too Soon
It’s tempting to jump straight into drawing intricate patterns and tiny veins. However, trying to add small details before the main structure is solid can lead to frustration and a messy drawing.
Always build your drawing from general shapes to specific details. First, get the body and overall wing shapes right.
Once those foundations are firm, then you can confidently add the delicate patterns and textures.
Ignoring Reference Images
Drawing from memory is good for practice, but relying solely on it can make your butterfly look generic or incorrect. Real butterflies have an incredible variety of shapes, patterns, and colors.
Take time to look at actual butterfly photographs. Pay attention to how their wings attach, the curve of their antennae, and the unique markings.
Using references will significantly improve the realism and interest of your drawings.
Troubleshooting
My Wings Don’t Match
If your butterfly’s wings look uneven, it’s a very common issue. The initial light guidelines are crucial here.
Go back to your central vertical and horizontal lines. Lightly redraw one side of the wings, ensuring it looks correct, then use your guidelines to mirror that shape on the other side.
You can even try folding your paper lightly down the central line and tracing one wing’s outline to transfer it to the other side for perfect symmetry.
My Drawing Looks Flat
A flat drawing usually lacks dimension and life. To make your butterfly pop, consider varying your line weight.
Use slightly darker lines for the parts that are closer or cast a shadow, and lighter lines for details or areas further away.
Adding subtle shading to the butterfly’s body, where the wings meet the body, or along the prominent wing veins can also create a sense of depth and form.
I Can’t Get the Inner Wing Details Right
Intricate wing patterns can be daunting. If you’re struggling, simplify them significantly.
Instead of complex swirls, start with simple dots, circles, or broad stripes. Break down complex patterns into basic geometric shapes first.
Practice drawing these simplified patterns on a separate piece of paper before transferring them to your main drawing. Remember, practice makes progress.
Key Takeaways
- Start Light, Build Up: Always begin with very light, foundational lines before committing to darker strokes.
- Embrace Symmetry: Utilize central guidelines to ensure your butterfly’s wings are balanced and harmonious.
- Shape Before Detail: Establish the overall body and wing shapes first, then gradually add intricate patterns and textures.
- Observe and Learn: Look at real butterflies or reference photos to understand their diverse forms and markings.
- Practice Patience: Drawing is a skill that develops over time; enjoy the process and don’t be afraid to make mistakes.
- Personalize Your Art: Feel free to experiment with different wing shapes, patterns, and colors to make your butterfly unique.
Frequently Asked Questions
What kind of pencil is best for drawing a butterfly?
For initial sketches and guidelines, an HB or 2H pencil is ideal as it creates light lines that are easy to erase. For darker outlines and details, a 2B or 4B pencil will give you richer, deeper lines.
How can I make my butterfly drawing look more realistic?
To achieve a realistic look, pay close attention to reference photos of actual butterflies. Focus on subtle details like the texture of the body, the way light hits the wings, and the slight variations in wing patterns. Shading and varying line weights will also add depth.
Should I use a ruler for symmetry?
While you can use a ruler for your initial central vertical and horizontal guidelines to ensure they are perfectly straight, try to draw the wing shapes freehand. This helps develop your eye-hand coordination and gives the butterfly a more organic, less rigid appearance.
How do I draw different types of butterflies?
The basic steps remain the same, but the key lies in altering the wing shapes, proportions, and patterns. Research specific butterfly species, like a Monarch or a Swallowtail, and observe their unique characteristics. Practice adapting the core structure to these variations.
Our Top Recommended Finds
- Artist’s Sketchbook: A good quality sketchbook offers a dedicated space for practice and allows you to track your artistic progress.
- Drawing Pencil Set: A set with various lead hardness (e.g., 2H to 6B) provides versatility for light sketching, dark outlines, and shading.
- Kneaded Eraser: This type of eraser is excellent for lifting pencil marks gently without damaging the paper, making it perfect for cleaning up guidelines.
Begin Your Artistic Flight
You’ve now walked through the steps to create your very own butterfly drawing.
Each line you draw, each curve you shape, is a step in your artistic journey.
Don’t just read these instructions; grab your pencil and paper right now and bring a beautiful butterfly to life.
Once you’ve mastered the butterfly, consider trying other winged creatures like dragonflies or even birds, applying the same principles of observation and foundational shapes.
& Painting
No rigid rules or pretension. Just practical guides, medium comparisons, and encouraging tips to help you enjoy the drawing & painting process.