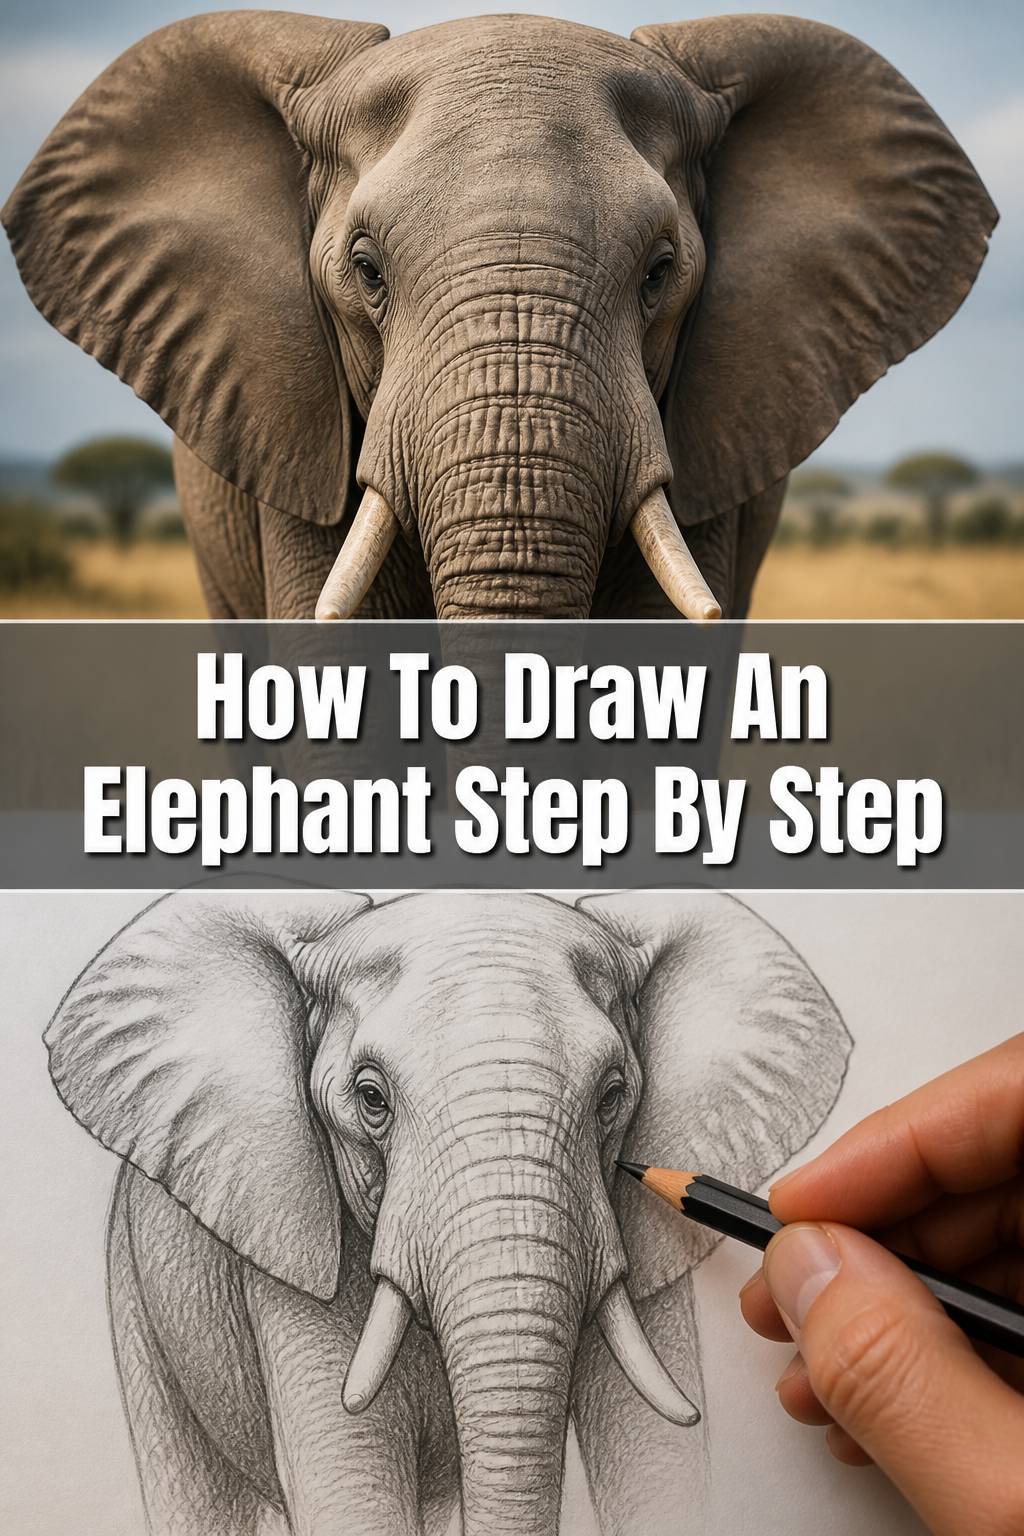
🐘 How To Draw An Elephant Step By Step

& Painting
No rigid rules or pretension. Just practical guides, medium comparisons, and encouraging tips to help you enjoy the drawing & painting process.
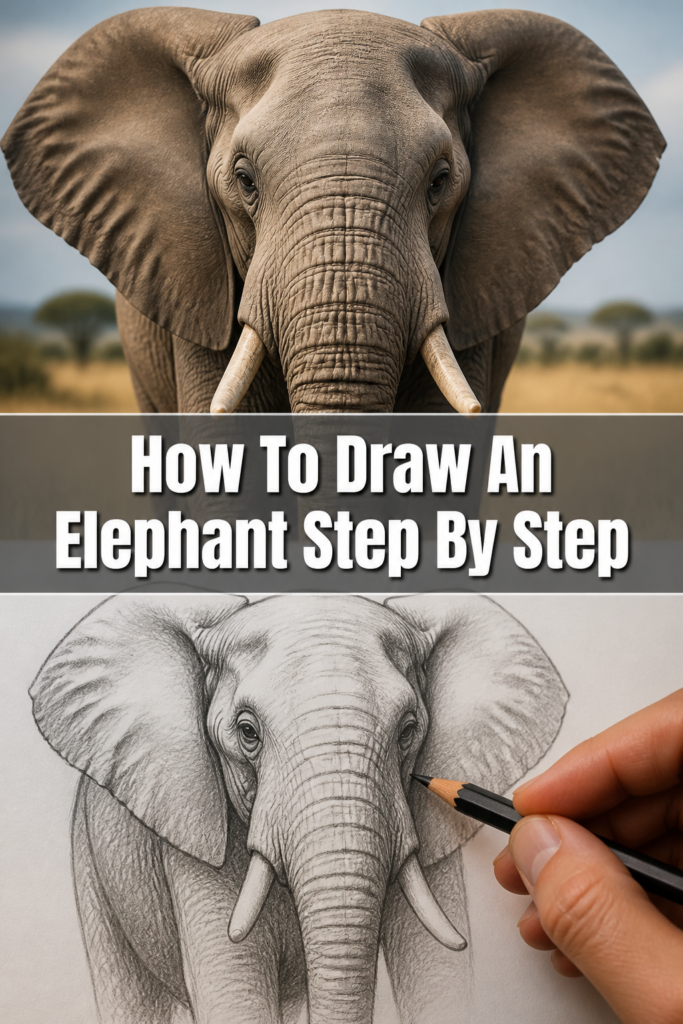
Learning to draw an elephant can be a truly rewarding experience, especially when you break it down into simple, manageable steps.
I remember my first attempt, a rather lopsided creature, but with practice and understanding of basic shapes, my elephants began to take on a majestic form.
This guide shares that structured approach, making it easy for anyone to create a fantastic elephant drawing.
Quick Overview
By following these steps, you will create a charming elephant drawing, building confidence in your artistic abilities.
We’ll start with fundamental shapes and gradually add details, bringing your elephant to life on the page.
- Time needed: 30-60 minutes (depending on detail)
- Difficulty: Beginner to Intermediate
- What you’ll need: Pencil, eraser, paper, optional fine-liner and colored pencils
Step-by-Step Instructions
Step 1: Sketch the Basic Shapes for the Body
Begin by lightly drawing two overlapping oval shapes on your paper. These will form the main structure of your elephant’s body.
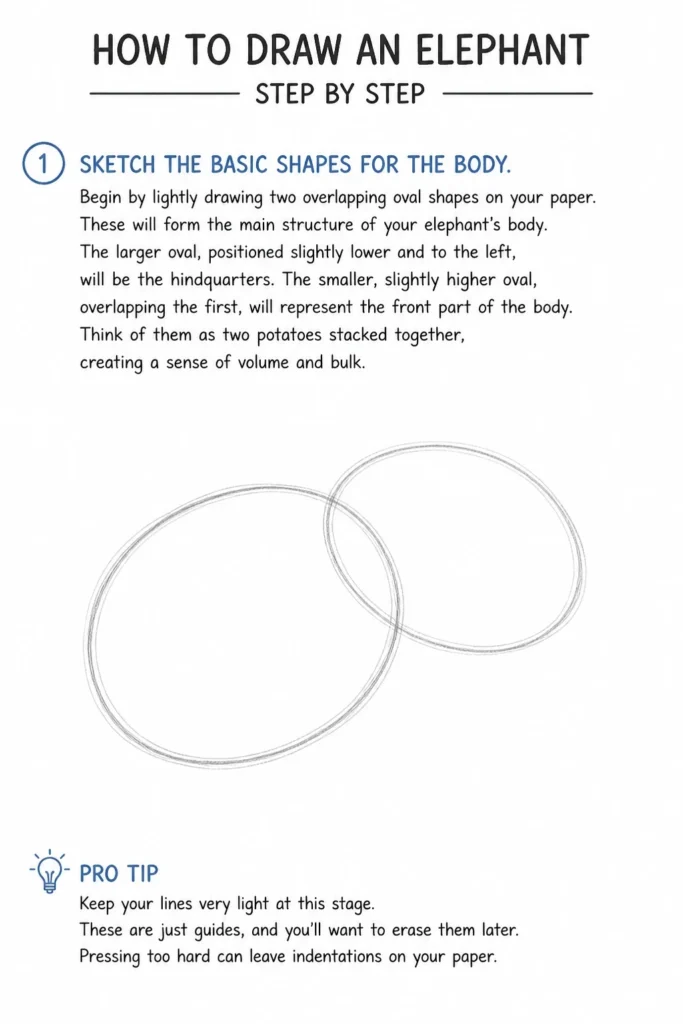
The larger oval, positioned slightly lower and to the left, will be the hindquarters. The smaller, slightly higher oval, overlapping the first, will represent the front part of the body.
Think of them as two potatoes stacked together, creating a sense of volume and bulk.
Pro Tip: Keep your lines very light at this stage. These are just guides, and you’ll want to erase them later. Pressing too hard can leave indentations on your paper.
Step 2: Add the Head and Trunk Guides
Draw a medium-sized circle above and to the left of the front body oval. This circle will serve as the guide for the elephant’s head.
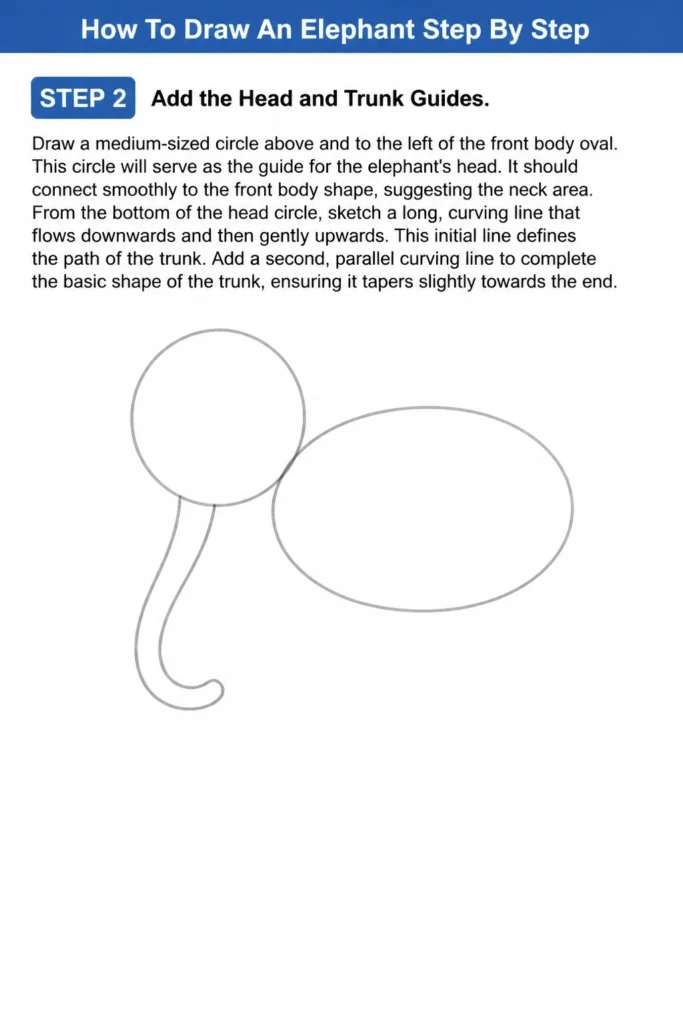
It should connect smoothly to the front body shape, suggesting the neck area.
From the bottom of the head circle, sketch a long, curving line that flows downwards and then gently upwards. This initial line defines the path of the trunk.
Add a second, parallel curving line to complete the basic shape of the trunk, ensuring it tapers slightly towards the end.
Step 3: Outline the Legs and Ears
Create four cylindrical shapes for the legs, extending downwards from the body ovals. The front two legs should originate from the front body oval, and the back two from the hindquarters.
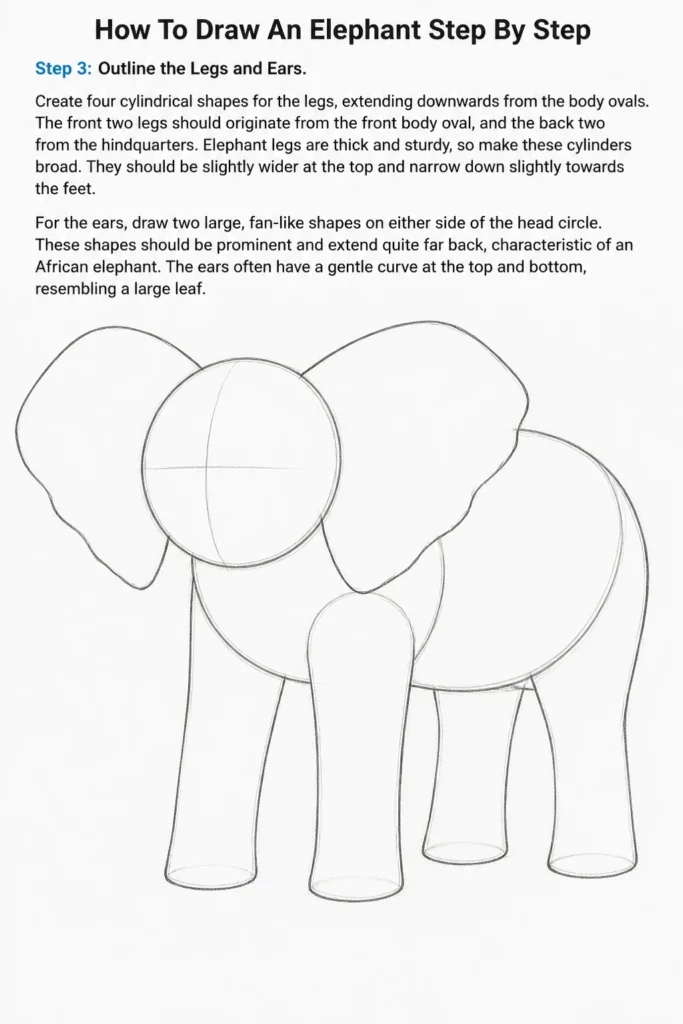
Elephant legs are thick and sturdy, so make these cylinders broad. They should be slightly wider at the top and narrow down slightly towards the feet.
For the ears, draw two large, fan-like shapes on either side of the head circle. These shapes should be prominent and extend quite far back, characteristic of an African elephant.
The ears often have a gentle curve at the top and bottom, resembling a large leaf.
Step 4: Connect and Refine the Body Outline
Use smooth, continuous lines to connect all the basic shapes you’ve drawn. This is where your elephant starts to take on its recognizable form.
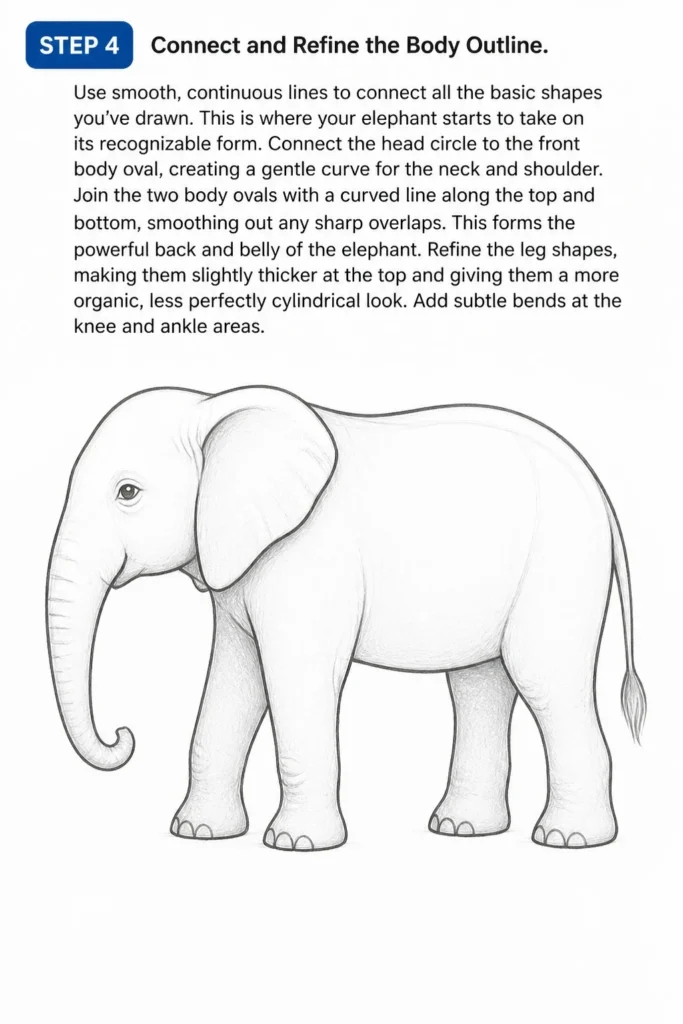
Connect the head circle to the front body oval, creating a gentle curve for the neck and shoulder.
Join the two body ovals with a curved line along the top and bottom, smoothing out any sharp overlaps. This forms the powerful back and belly of the elephant.
Refine the leg shapes, making them slightly thicker at the top and giving them a more organic, less perfectly cylindrical look. Add subtle bends at the knee and ankle areas.
Step 5: Add Facial Features and Details
Draw a small, almond-shaped eye near the front of the head, slightly above where the trunk begins. Give it a gentle curve to suggest a kind expression.
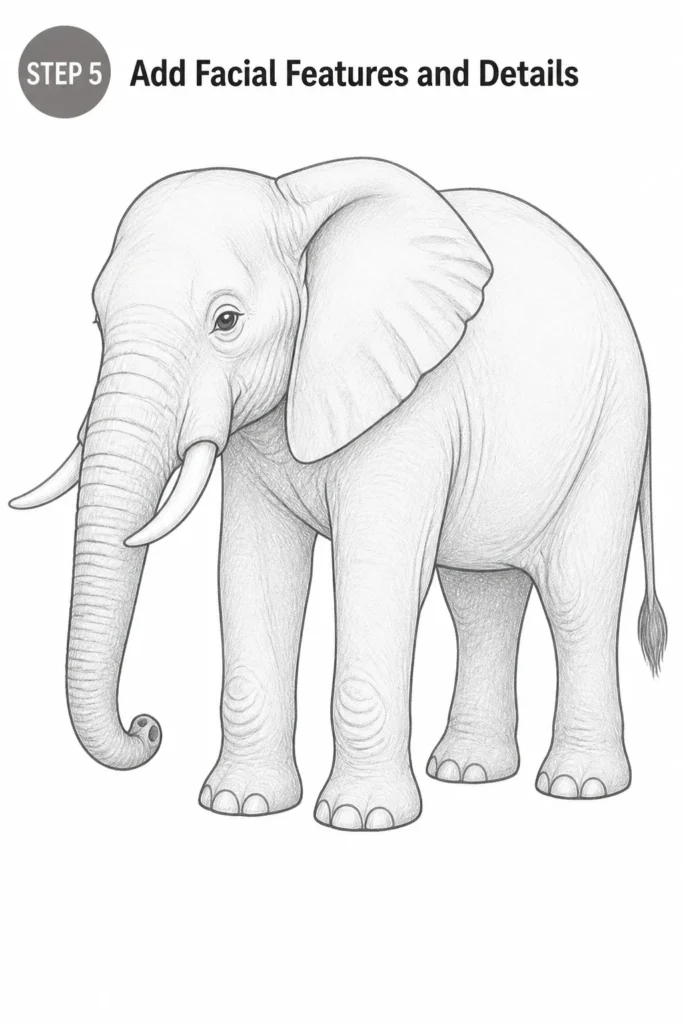
Sketch the tusks, curving outwards and slightly upwards from the base of the trunk. These should be thick near the head and taper to a point.
Detail the trunk by adding horizontal wrinkles and folds, especially near the base and where it bends. Don’t forget the two small nostrils at the very end of the trunk.
Refine the ears, adding subtle folds and creases to give them texture and depth. Show where the ear attaches to the head with a curved line.
Step 6: Refine Legs and Feet, Add Tail
Define the elephant’s feet by drawing rounded, flat bases at the bottom of each leg. Add short, thick toenails to each foot.
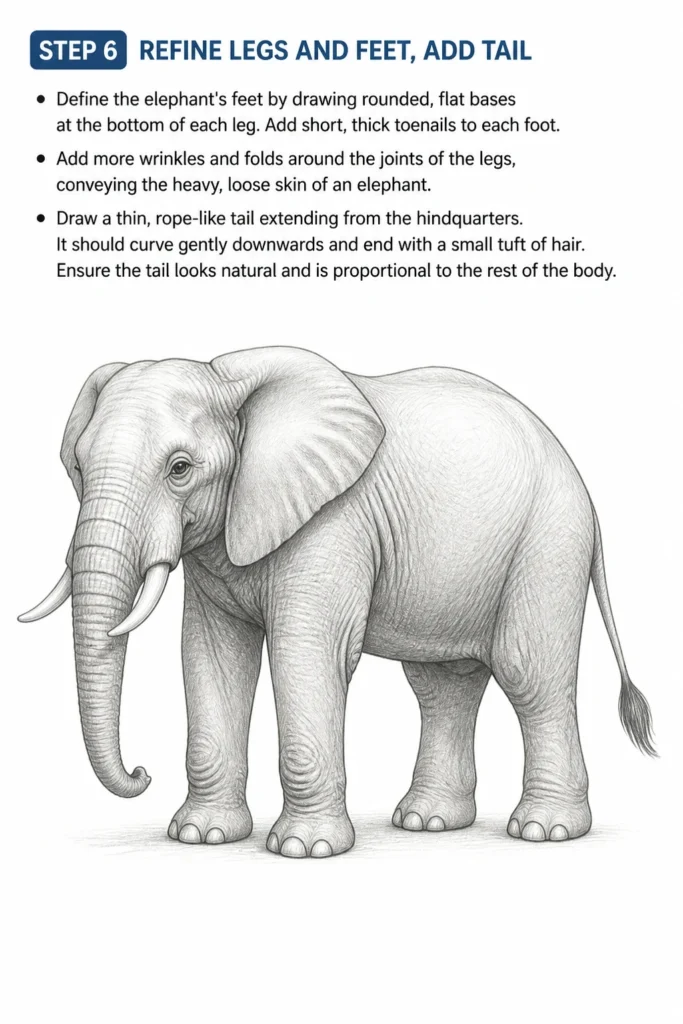
Add more wrinkles and folds around the joints of the legs, conveying the heavy, loose skin of an elephant.
Draw a thin, rope-like tail extending from the hindquarters. It should curve gently downwards and end with a small tuft of hair.
Ensure the tail looks natural and is proportional to the rest of the body.
Step 7: Erase Guide Lines and Add Shading
Carefully erase all the initial light guide lines that are no longer needed. This will clean up your drawing and make your elephant’s outline stand out.
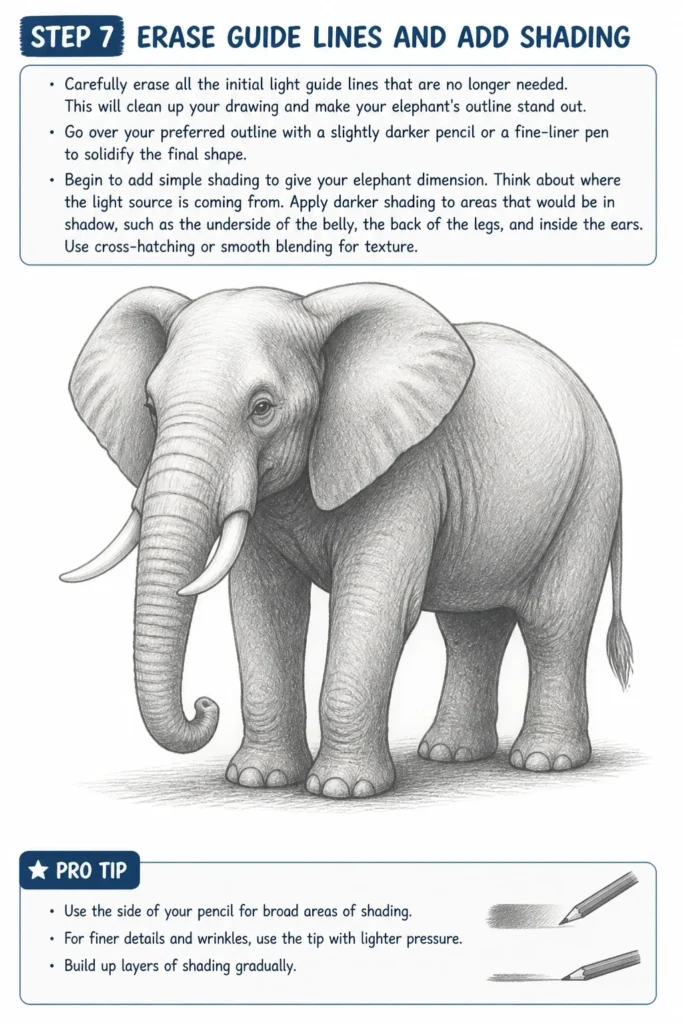
Go over your preferred outline with a slightly darker pencil or a fine-liner pen to solidify the final shape.
Begin to add simple shading to give your elephant dimension. Think about where the light source is coming from.
Apply darker shading to areas that would be in shadow, such as the underside of the belly, the back of the legs, and inside the ears. Use cross-hatching or smooth blending for texture.
Pro Tip: Use the side of your pencil for broad areas of shading. For finer details and wrinkles, use the tip with lighter pressure. Build up layers of shading gradually.
Common Mistakes to Avoid
Disproportionate Body Parts
A common pitfall is drawing body parts that are out of scale with each other. For instance, a head that’s too small for the body, or legs that are too thin.
This can make your elephant look less realistic and a bit awkward. Always compare the sizes of your initial shapes to ensure they feel balanced.
Regularly step back and look at your drawing from a distance to spot any size inconsistencies early on.
Stiff, Lifeless Poses
Drawing an elephant standing perfectly straight and rigid can make it appear static and uninteresting. Elephants are dynamic creatures, even when standing still.
Avoid perfectly straight lines for legs or a perfectly flat back. Introduce slight curves and angles to suggest movement or a relaxed posture.
Think about the natural weight distribution and subtle shifts in an elephant’s stance. A slight bend in a leg or a gentle curve in the back adds life.
Ignoring Overlapping Shapes
When drawing complex animals, overlapping shapes are crucial for creating depth and realism. Failing to show how one part of the body overlaps another can make the drawing look flat.
For example, the front legs should appear in front of the belly, and the ears should overlap the head. This technique creates a sense of three-dimensionality.
Always consider which parts are closer to the viewer and ensure they are drawn in front of the parts further away.
Over-detailing Too Early
Jumping straight to intricate details like skin texture or individual hairs before establishing the basic form is a common mistake for beginners.
This often leads to a drawing that lacks underlying structure and can look messy. Always build from large, simple shapes to smaller, more complex details.
Focus on getting the overall silhouette and proportions right first. Details can always be added once the foundation is solid.
Troubleshooting
My Elephant Looks Too Flat
If your elephant appears two-dimensional, it likely needs more attention to overlapping shapes and subtle shading. Ensure you’ve used curved lines to suggest volume, not just outlines.
To fix this, go back and emphasize where one body part is in front of another, like the legs overlapping the body. Add gradual shading from light to dark on rounded surfaces to create a sense of form.
Think of your elephant as a collection of cylinders and spheres, and shade them accordingly to give them depth.
The Proportions Seem Off
Disproportionate elements are often a result of not using light guide shapes effectively or not stepping back to assess your drawing.
Take a break and return to your drawing with fresh eyes. Compare the size of the head to the body, the length of the trunk to the legs, and adjust your initial guide shapes.
Use a pencil to measure distances on your drawing, comparing, for instance, the length of the head to the width of the body, to ensure accuracy.
My Lines Are Too Scratchy or Messy
Scratchy lines usually indicate too much pressure or too many short, hesitant strokes. This can make the drawing look unrefined.
Practice drawing long, confident strokes with a lighter hand. Use your whole arm, not just your wrist, for smoother curves.
Remember, your initial guide lines should be barely visible. You can always darken and refine your lines once you are satisfied with the overall shape.
Key Takeaways
- Start with basic shapes: Build your elephant from simple ovals and circles to establish core proportions.
- Keep lines light initially: Use a light touch for guide lines, allowing for easy corrections and refinements.
- Focus on flow and curves: Elephants have powerful, curved forms; avoid stiff, straight lines.
- Layer details gradually: Establish the main body and head before adding intricate features like wrinkles and tusks.
- Use shading for depth: Employ light and shadow to transform your drawing from flat to three-dimensional.
- Practice makes perfect: Don’t be discouraged by initial attempts; consistent practice will improve your skills.
Frequently Asked Questions
What kind of pencil should I use for drawing?
A standard HB pencil is excellent for initial sketches and general drawing. For darker lines and shading, you might want to try a 2B or 4B pencil, which are softer and produce richer darks.
For very light guide lines, an H or 2H pencil can be useful, as they are harder and leave faint marks that are easy to erase.
How do I make the elephant look more realistic?
To enhance realism, pay close attention to details like skin texture, wrinkles, and muscle definition. Study reference photos of real elephants to understand their anatomy.
Subtle shading, especially around joints and folds of skin, can add significant depth. Also, ensure the proportions are accurate and the pose feels natural.
Can I draw a baby elephant using these steps?
Absolutely! The fundamental steps remain the same. For a baby elephant, you would adjust the proportions to make the head larger in relation to the body, and the legs relatively shorter and thicker.
Baby elephants also have shorter trunks and often lack prominent tusks. Emphasize a more rounded, softer appearance overall.
What if my drawing doesn’t look exactly like the example?
That’s perfectly normal and even encouraged! Every artist develops their unique style. The goal is to understand the underlying principles of drawing an elephant, not to create an exact copy.
Embrace your individual interpretation and focus on improving your understanding of form, proportion, and shading. Consistency in practice is far more important than initial perfection.
Our Top Recommended Finds
- Sketching Pencil Set: A good set with varying lead hardness (e.g., HB, 2B, 4B, 6B) allows for greater control over line weight and shading.
- Quality Drawing Paper: Opt for paper with a slight tooth or texture that holds graphite well, preventing smudging and allowing for layering.
- Kneaded Eraser: Unlike traditional erasers, a kneaded eraser lifts graphite without damaging the paper surface, perfect for lightening lines or blending.
Your Creative Journey Begins Now
You’ve taken the first step towards drawing an impressive elephant. Remember, every masterpiece starts with a single line, and every skill is built through consistent effort.
Why not try drawing your elephant from a different angle next, or perhaps add a playful calf beside it?
Pick up your pencil right now and let your creativity flow onto the page. You’ll be amazed at what you can achieve.
& Painting
No rigid rules or pretension. Just practical guides, medium comparisons, and encouraging tips to help you enjoy the drawing & painting process.