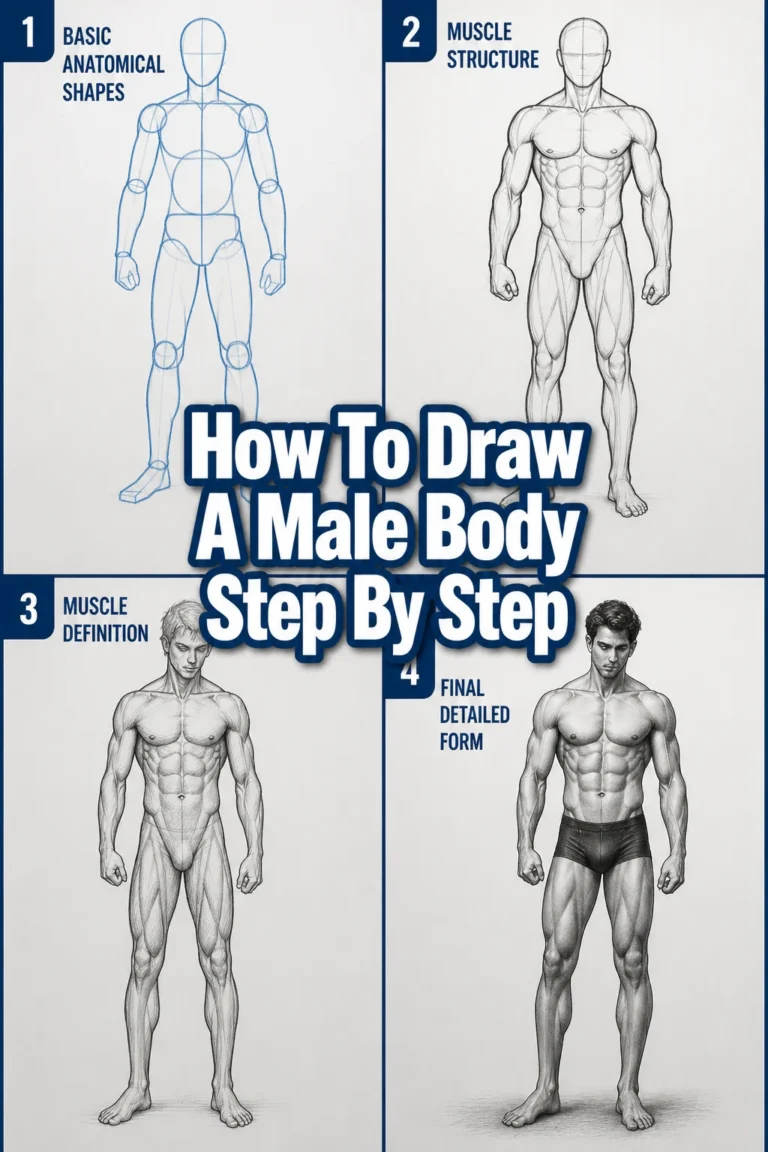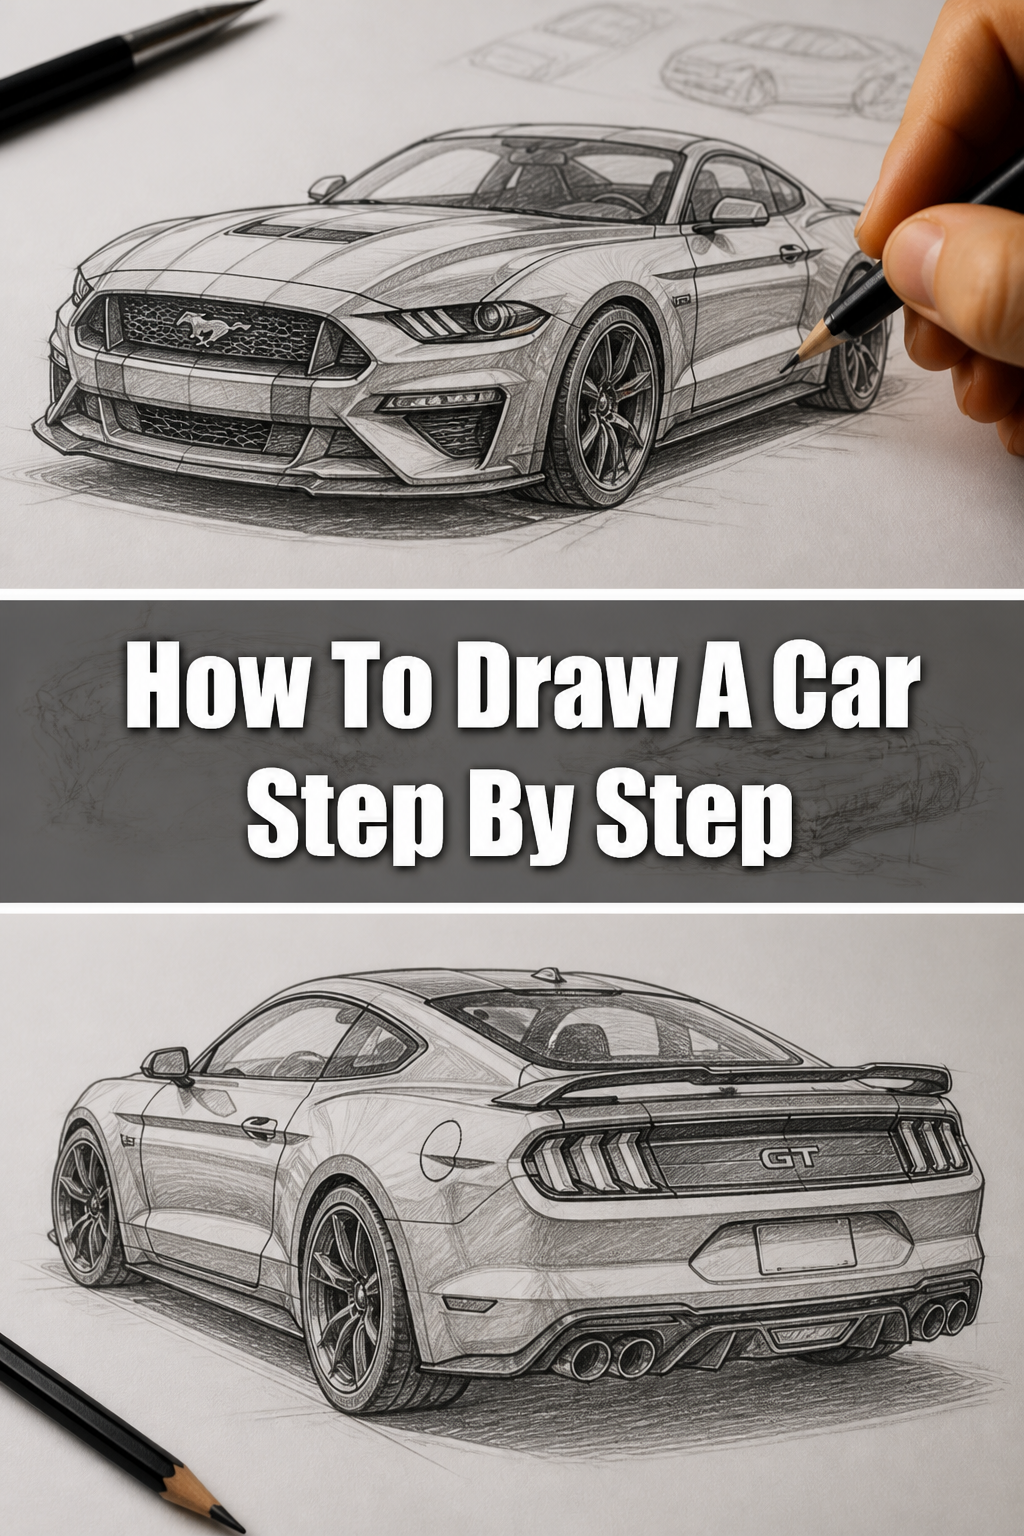
🚗 How To Draw A Car Step By Step

& Painting
No rigid rules or pretension. Just practical guides, medium comparisons, and encouraging tips to help you enjoy the drawing & painting process.
Learning to draw a car can seem challenging at first glance.
I remember my early attempts, sketching countless versions, always striving for that perfect blend of realism and dynamic energy.
This guide distills years of practice into simple, actionable steps, empowering you to create impressive car drawings with confidence.
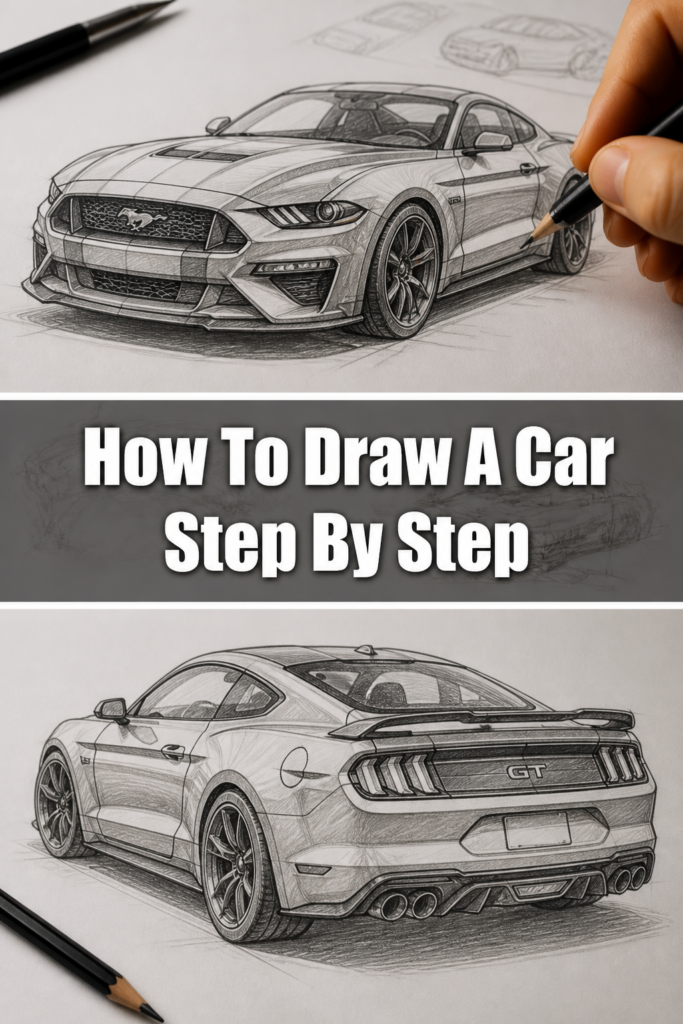
Quick Overview
This comprehensive guide will walk you through the process of drawing a car from basic shapes to refined details.
You’ll learn fundamental techniques that can be applied to various car styles, helping you develop a strong foundation in automotive art.
- Time needed: 1-2 hours (depending on detail level)
- Difficulty: Beginner to Intermediate
- What you’ll need: Paper, pencils (HB, 2B, 4B recommended), eraser, ruler (optional)
Step-by-Step Instructions
Step 1: Establish the Basic Form and Proportion
Begin by lightly sketching a long, horizontal rectangle in the center of your paper. This rectangle will serve as the core body of your car, defining its overall length and height.
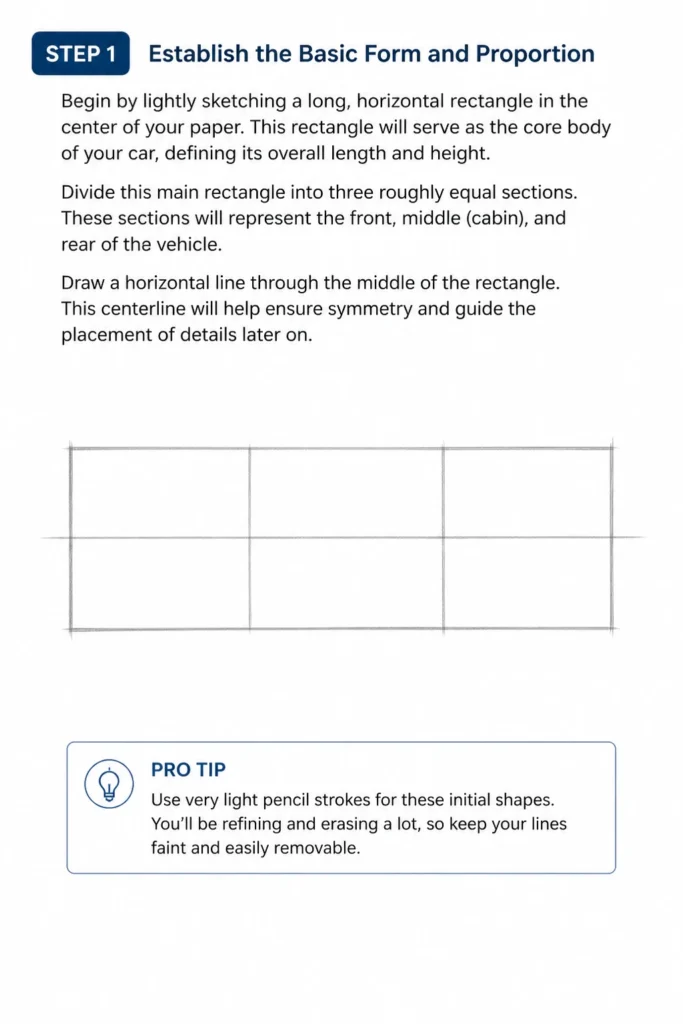
Divide this main rectangle into three roughly equal sections. These sections will represent the front, middle (cabin), and rear of the vehicle.
Draw a horizontal line through the middle of the rectangle. This centerline will help ensure symmetry and guide the placement of details later on.
Pro Tip: Use very light pencil strokes for these initial shapes. You’ll be refining and erasing a lot, so keep your lines faint and easily removable.
Step 2: Define the Wheels and Wheel Arches
Sketch two circles for the wheels, one in the front section and one in the rear section of your main rectangle. Ensure they are aligned with the horizontal centerline you drew.
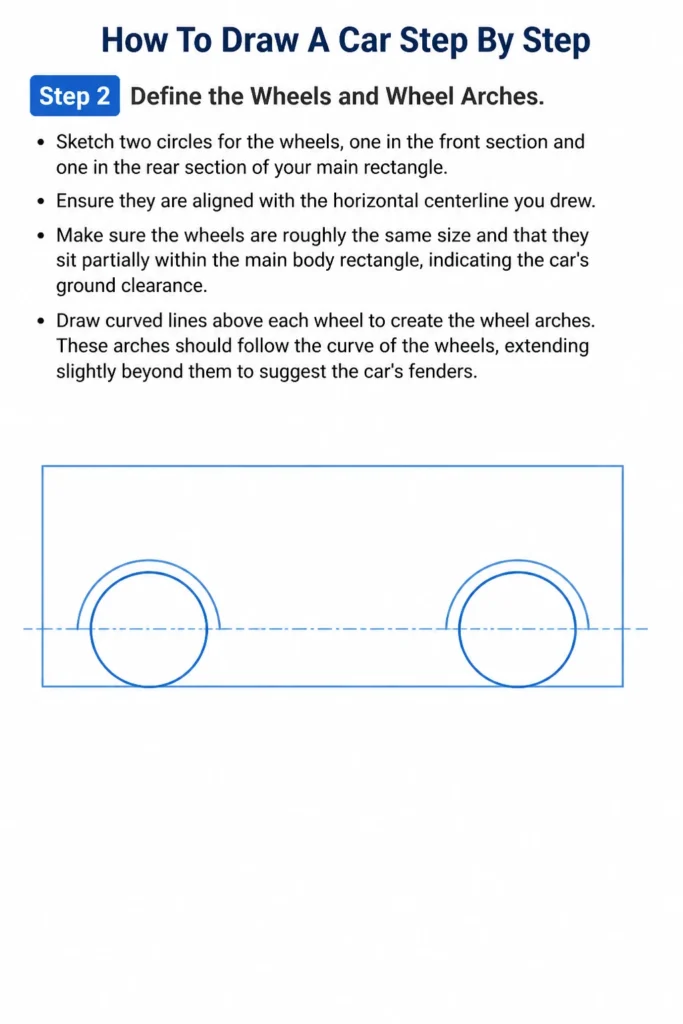
Make sure the wheels are roughly the same size and that they sit partially within the main body rectangle, indicating the car’s ground clearance.
Draw curved lines above each wheel to create the wheel arches. These arches should follow the curve of the wheels, extending slightly beyond them to suggest the car’s fenders.
Step 3: Outline the Main Body Shape
Connect the wheel arches with a gentle curve to form the bottom edge of the car’s body. This line will define the side skirt.
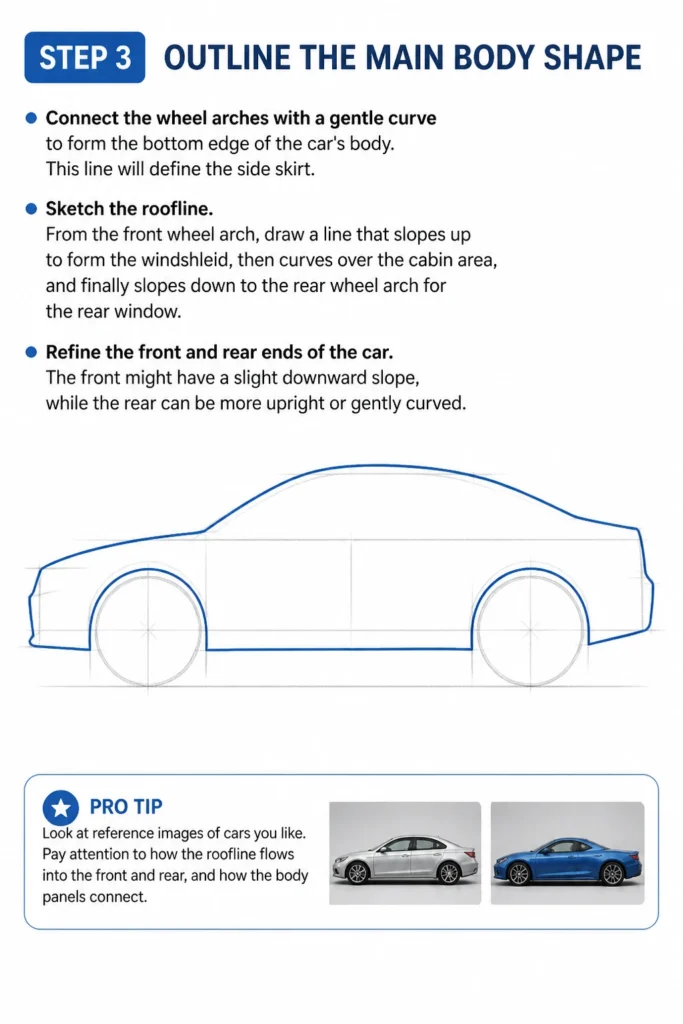
Sketch the roofline. From the front wheel arch, draw a line that slopes up to form the windshield, then curves over the cabin area, and finally slopes down to the rear wheel arch for the rear window.
Refine the front and rear ends of the car. The front might have a slight downward slope, while the rear can be more upright or gently curved.
Pro Tip: Look at reference images of cars you like. Pay attention to how the roofline flows into the front and rear, and how the body panels connect.
Step 4: Add the Windows and Doors
Draw the windshield and rear window within the roofline you established. These should generally follow the angle of the roof.
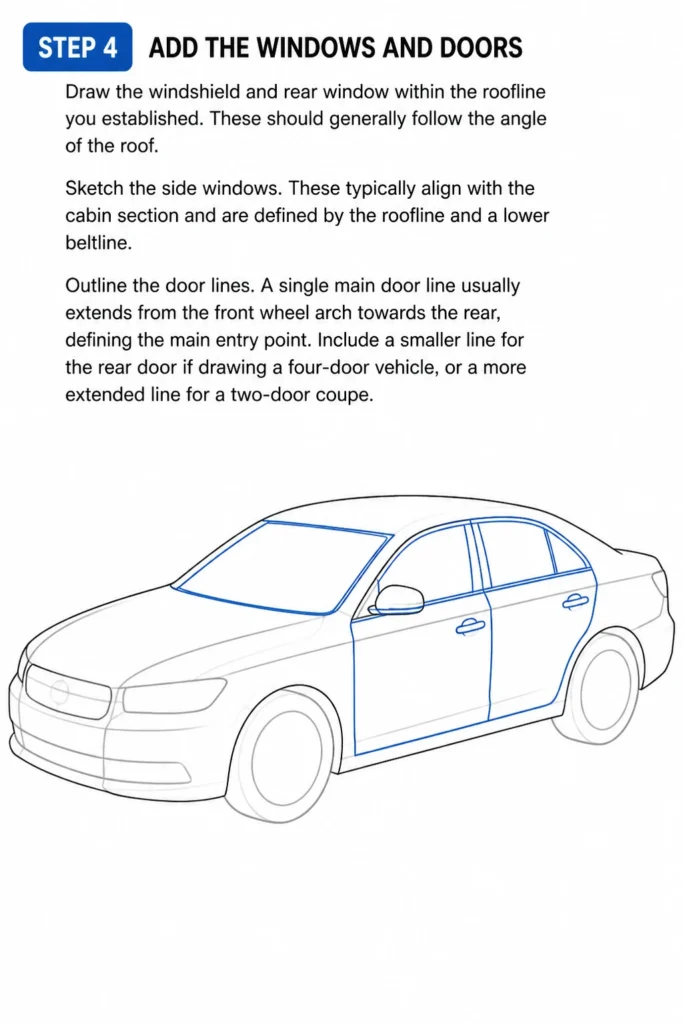
Sketch the side windows. These typically align with the cabin section and are defined by the roofline and a lower beltline.
Outline the door lines. A single main door line usually extends from the front wheel arch towards the rear, defining the main entry point.
Include a smaller line for the rear door if drawing a four-door vehicle, or a more extended line for a two-door coupe.
Step 5: Detail the Headlights, Taillights, and Grille
Position the headlights at the front of the car. Their shape can vary greatly, from simple rectangles to complex, angular designs.
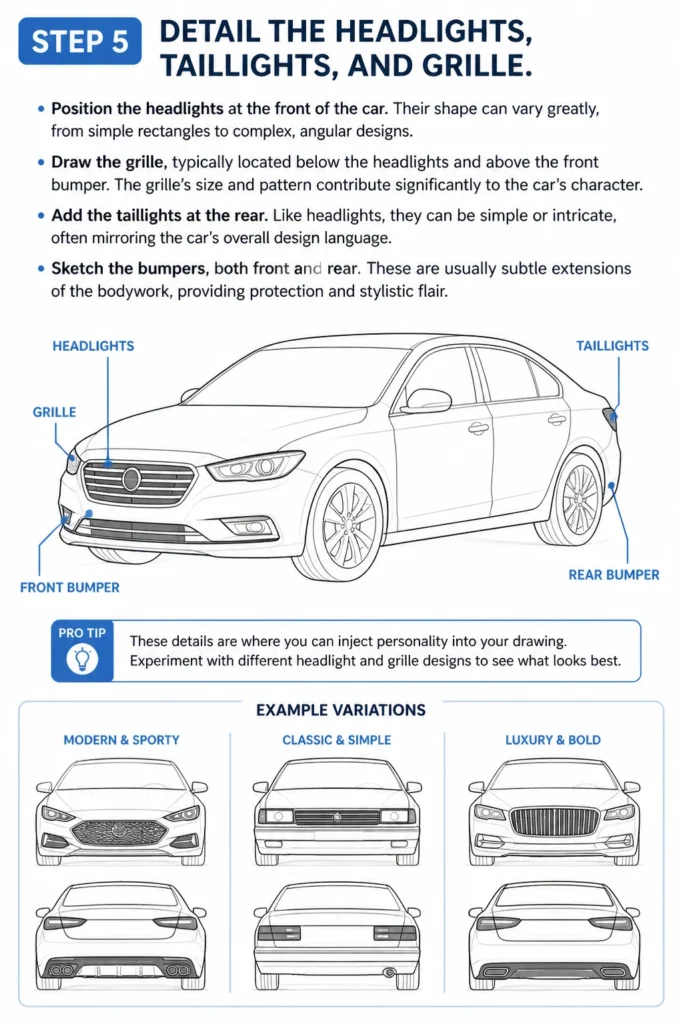
Draw the grille, typically located below the headlights and above the front bumper. The grille’s size and pattern contribute significantly to the car’s character.
Add the taillights at the rear. Like headlights, they can be simple or intricate, often mirroring the car’s overall design language.
Sketch the bumpers, both front and rear. These are usually subtle extensions of the bodywork, providing protection and stylistic flair.
Pro Tip: These details are where you can inject personality into your drawing. Experiment with different headlight and grille designs to see what looks best.
Step 6: Refine the Wheels and Tires
Draw the inner rim and tire details. Add a smaller circle inside each wheel to indicate the hubcap or rim.
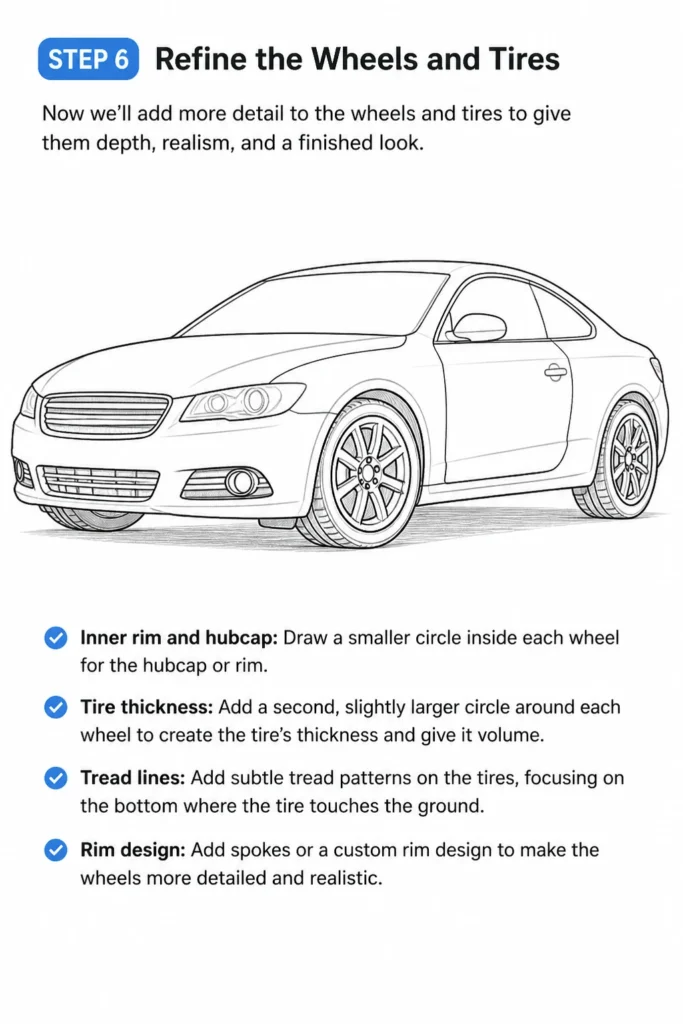
Create the tire thickness by adding a second, slightly larger circle around the initial wheel circle. This gives the tire its volume.
Add subtle tread lines on the tires, especially at the bottom where they meet the ground, to enhance realism.
Consider adding spokes or a specific rim design if you want to add more detail to the wheels.
Step 7: Introduce Depth and Shading
Use darker pencil strokes to go over your final lines, making them more defined and crisp. Erase any remaining light sketch lines.
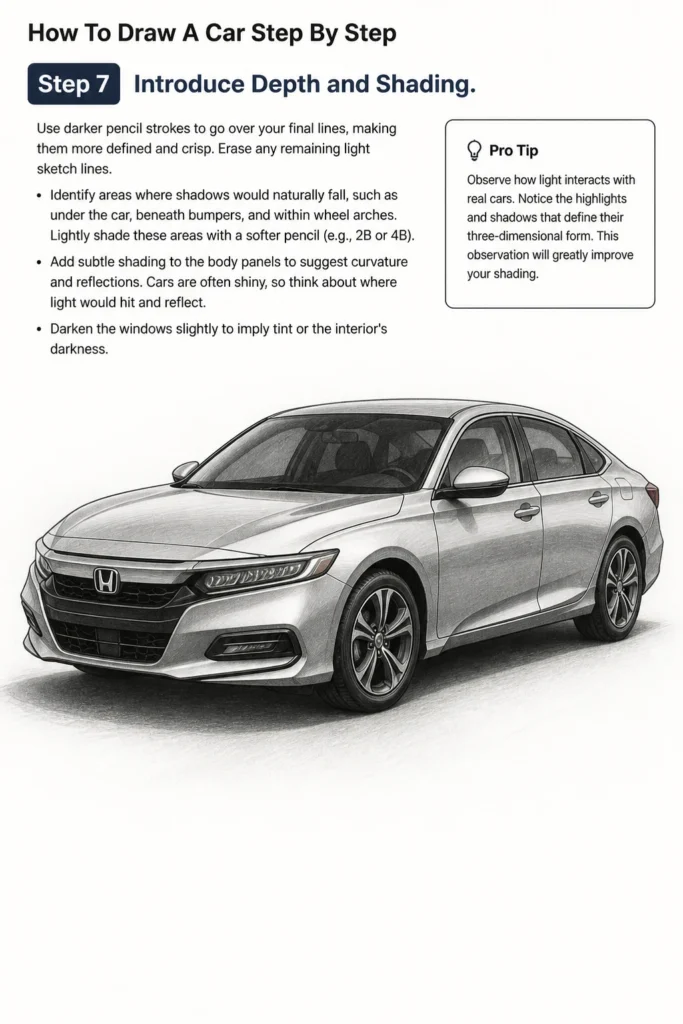
Identify areas where shadows would naturally fall, such as under the car, beneath bumpers, and within wheel arches. Lightly shade these areas with a softer pencil (e.g., 2B or 4B).
Add subtle shading to the body panels to suggest curvature and reflections. Cars are often shiny, so think about where light would hit and reflect.
Darken the windows slightly to imply tint or the interior’s darkness.
Pro Tip: Observe how light interacts with real cars. Notice the highlights and shadows that define their three-dimensional form. This observation will greatly improve your shading.
Step 8: Add Finishing Touches
Draw door handles, side mirrors, and any subtle body lines or creases that define the car’s design.
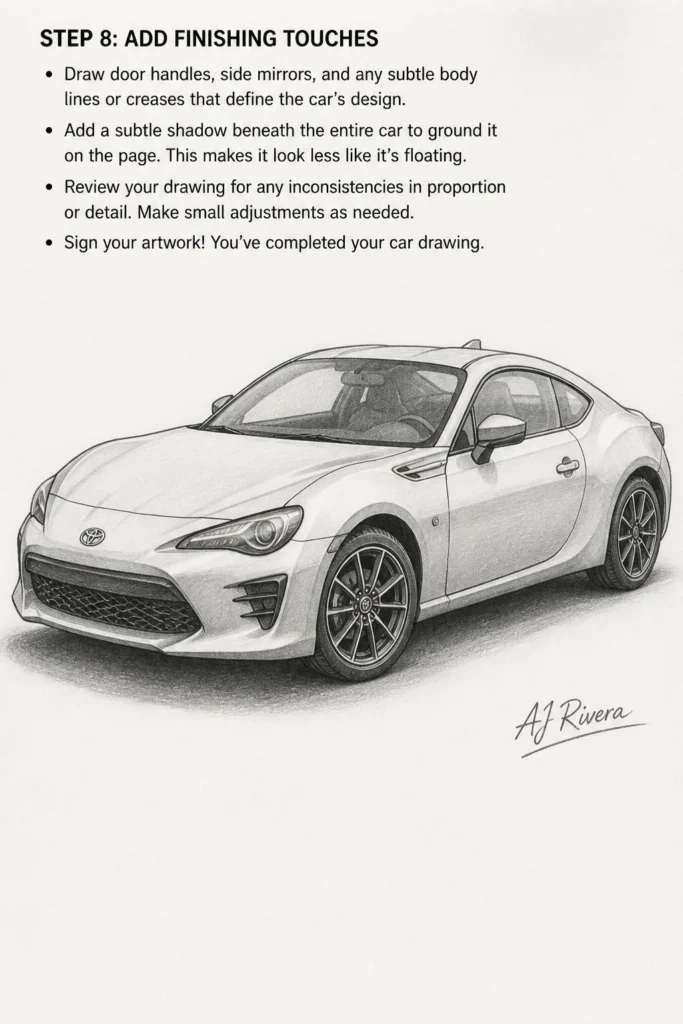
Consider adding a subtle shadow beneath the entire car to ground it on the page. This makes it look less like it’s floating.
Review your drawing for any inconsistencies in proportion or detail. Make small adjustments as needed.
Sign your artwork! You’ve completed your car drawing.
Common Mistakes to Avoid
Ignoring Basic Proportions
One frequent error is making the wheels too small or too large in relation to the car’s body. Incorrect proportions can make the car look cartoonish or unstable, regardless of how well other details are drawn. Always start with basic shapes and check their relationships before adding intricate details.
To correct this, always establish the main body rectangle and wheel circles first, ensuring they have a sensible relationship. Use your initial light lines to guide all subsequent elements, regularly stepping back to assess the overall balance.
Over-Pressing Initial Sketch Lines
Many beginners press too hard when laying down their initial construction lines. This makes it difficult to erase them later without leaving visible indentations or smudges on the paper. The final drawing often looks messy as a result.
Always start with the lightest touch possible for your guide shapes. Think of them as temporary scaffolding. Only apply more pressure when you are confident in your final lines and are ready to commit to them.
Lack of Perspective Understanding
Drawing a car without considering basic perspective principles can result in a flat, unrealistic image. Objects closer to the viewer should appear larger, and lines should converge towards vanishing points, even subtly for a side view.
Even for a simple side profile, imagine a horizon line. The bottom of the tires should touch the ground plane. For three-quarter views, actively use vanishing points to guide the convergence of lines, making the car appear three-dimensional and dynamic.
Neglecting Shading and Depth
A common pitfall is to finish a drawing with only outlines, leaving it looking flat and two-dimensional. Cars have complex surfaces that reflect light and cast shadows, which are crucial for conveying form and realism.
After completing your line work, dedicate time to shading. Observe where light hits and where shadows form. Use varying pencil pressures to create a range of tones, from bright highlights to deep shadows, giving your car volume and presence.
Troubleshooting
My Car Looks Flat and Lifeless
If your car drawing lacks dimension, it’s often due to insufficient shading or a lack of attention to line weight. Flat drawings don’t convey the car’s curved surfaces effectively.
Solution: Revisit your shading. Add darker shadows in areas like under the car, within wheel wells, and along the underside of bumpers. Use lighter shading on the main body panels to suggest curvature. Vary your line weight; make lines closer to the viewer slightly darker and bolder, and those further away a bit lighter.
The Wheels Don’t Look Round
Drawing perfect circles freehand can be tricky. If your wheels appear lopsided or irregular, it can throw off the entire car’s balance.
Solution: Practice drawing circles repeatedly. For initial sketches, you can lightly draw a square, then draw an X through it to find the center, and then sketch your circle within the square, touching all four sides. Alternatively, use a circular object (like a coin or a compass) as a template for your initial light circles, then refine them freehand.
My Car Looks Stiff and Static
A car that appears too rigid might be suffering from overly straight lines or a lack of dynamic flow in its design. Cars, even when stationary, often have a sense of motion.
Solution: Introduce subtle curves and angles. Even a straight line can have a slight taper or a gentle bend. Think about the “flow” of the car’s design, from front to back. Consider adding a slight tilt or angle to the car’ on the page, rather than perfectly horizontal, to give a sense of dynamism. Exaggerate the wheel arches or the slope of the roofline slightly.
Key Takeaways
- Start with Basic Shapes: Always begin with simple rectangles and circles to establish fundamental proportions.
- Light Hand for Initial Sketches: Use faint lines for construction, making adjustments and erasing much easier.
- Observe and Reference: Pay close attention to real cars or reference photos for accurate details and proportions.
- Layer Details Gradually: Build your drawing from large forms to smaller, intricate elements.
- Shading Adds Dimension: Use varying tones and shadows to give your car depth and realism.
- Practice is Essential: Consistent drawing practice will significantly improve your skills over time.
Frequently Asked Questions
What type of pencil is best for drawing cars?
A range of pencils is ideal. An HB pencil is great for initial sketches and general line work. Softer pencils like 2B or 4B are excellent for shading and creating darker, richer tones. A harder pencil like 2H can be used for very light construction lines that are easy to erase.
How can I make my car drawings look more realistic?
Realism comes from several factors: accurate proportions, detailed shading to show form and reflections, and precise attention to small details like door handles, mirrors, and body lines. Studying light and shadow on actual cars is crucial. Also, don’t forget to add a ground shadow to anchor the car.
Should I draw from imagination or use reference photos?
While drawing from imagination is fun, using reference photos is highly recommended, especially when you’re learning. References help you understand complex forms, proportions, and how light interacts with surfaces. Once you’ve built a strong foundation, you can more confidently draw from imagination, incorporating elements from various cars you’ve studied.
How do I draw different types of cars, like sports cars vs. SUVs?
The basic principles remain the same, but the initial proportions will change significantly. Sports cars will have lower, sleeker main rectangles and larger wheels relative to body height. SUVs will have taller, more boxy main rectangles, often with higher ground clearance and more rugged details. Always start by adjusting your initial basic shapes to match the general form of the car type you want to draw.
Our Top Recommended Finds
- Sketchbook with Quality Paper: Look for acid-free, medium-weight paper (around 80-100gsm) that can handle erasing without tearing or smudging easily.
- Set of Graphite Pencils: A basic set including HB, 2B, 4B, and 6B will give you a good range for sketching, line work, and shading.
- Kneaded Eraser: This type of eraser is excellent for lifting graphite without damaging the paper and can be molded into fine points for precise erasing.
Your Journey into Automotive Art Begins Now
You now have the foundational steps to embark on your car drawing adventure. Each sketch is an opportunity to improve and express your creativity.
Don’t be afraid to experiment with different car models, angles, and even adding backgrounds to your drawings.
Pick up your pencil today and start transforming those basic shapes into dynamic automotive masterpieces. The road to becoming a skilled automotive artist is paved with practice and passion.
& Painting
No rigid rules or pretension. Just practical guides, medium comparisons, and encouraging tips to help you enjoy the drawing & painting process.