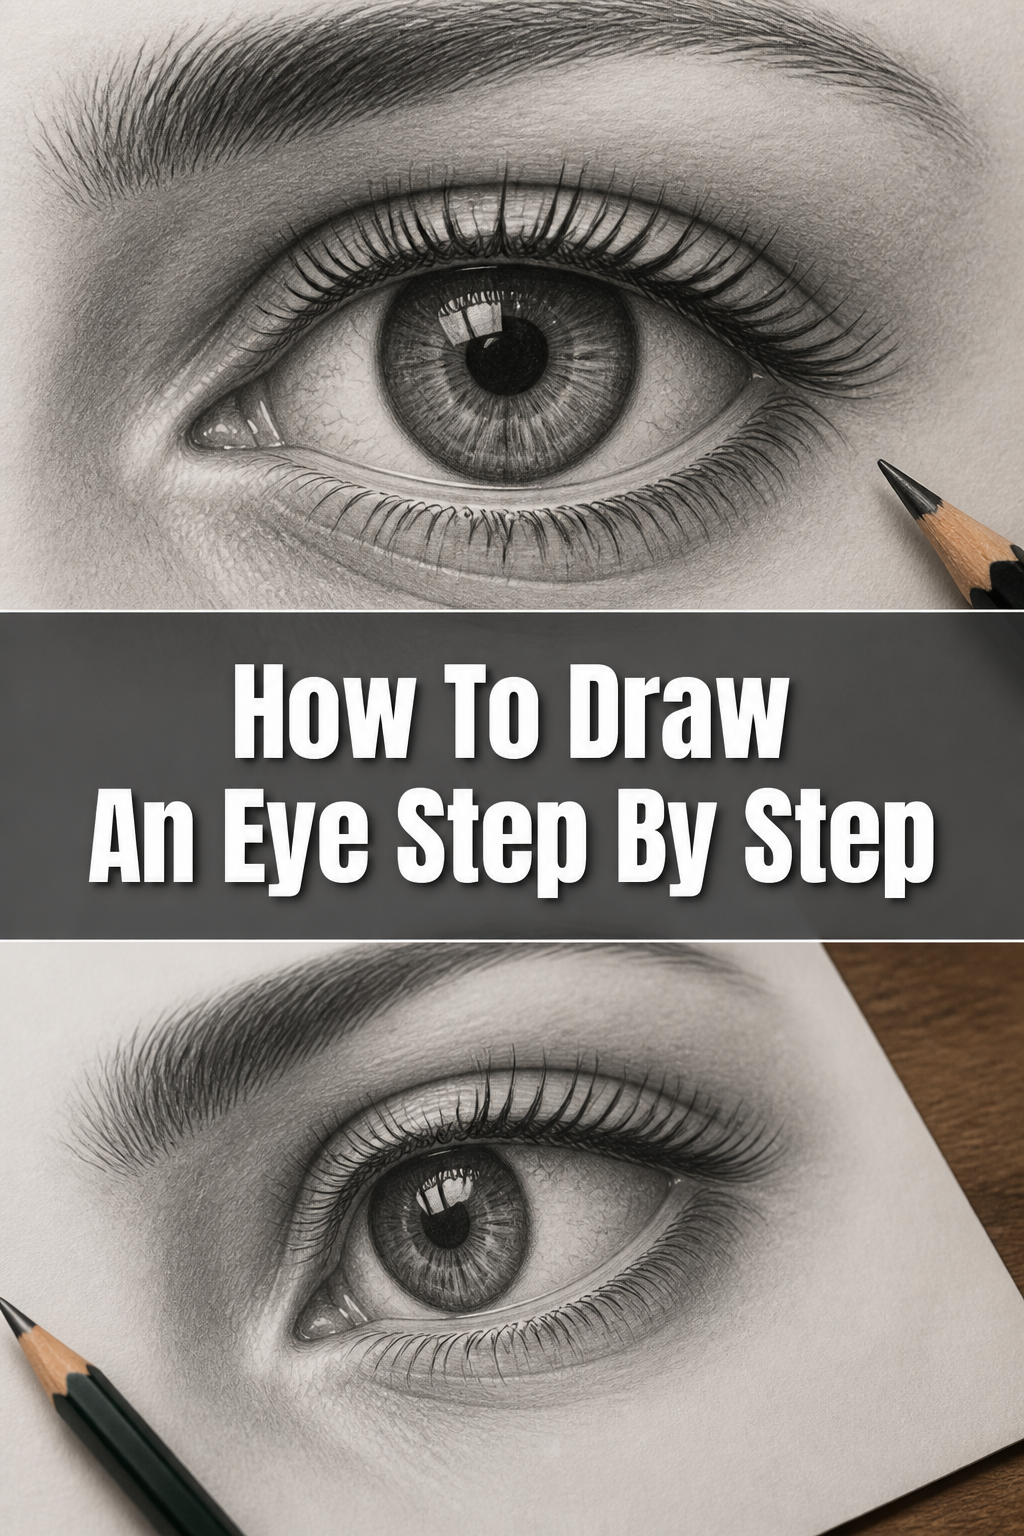
👁️ How To Draw An Eye Step By Step

& Painting
No rigid rules or pretension. Just practical guides, medium comparisons, and encouraging tips to help you enjoy the drawing & painting process.
Drawing a realistic eye might seem daunting at first glance. Many aspiring artists feel intimidated by its complexity and the subtle nuances that bring it to life. I remember struggling with eyes myself, often ending up with flat or unexpressive results. This guide will break down the process into manageable steps, sharing the techniques I’ve learned to create expressive, lifelike eyes.
Quick Overview
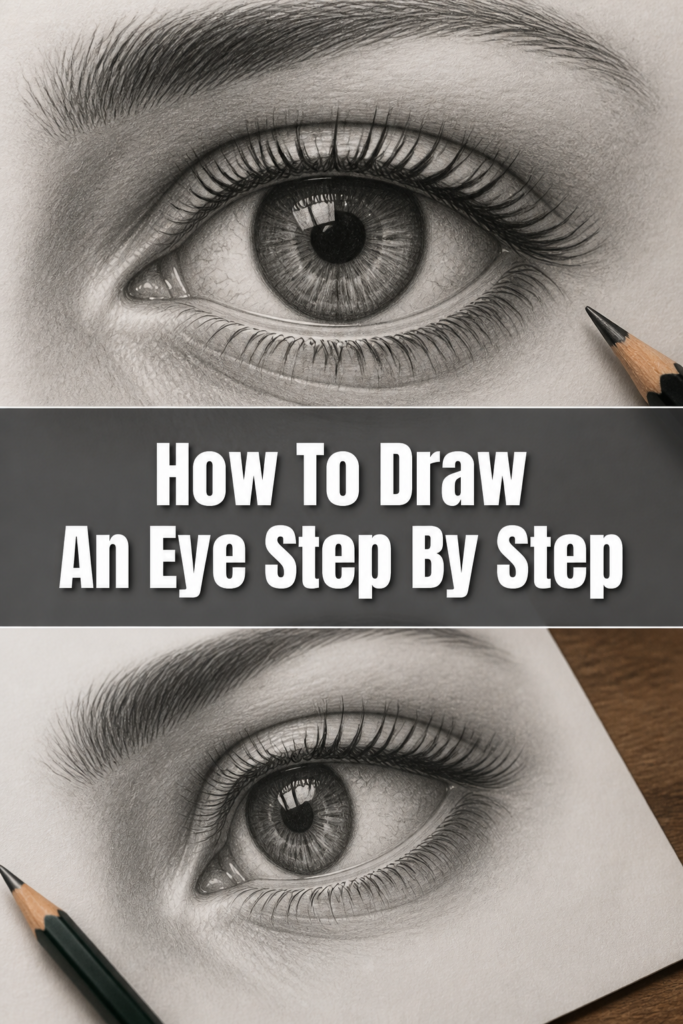
This guide will walk you through creating a detailed eye drawing, focusing on structure, shading, and realism. You’ll learn to layer graphite for depth and add those crucial highlights.
- Time needed: 45-90 minutes (depending on detail and blending)
- Difficulty: Beginner
- What you’ll need: Sketching pencils (HB, 2B, 4B, 6B), drawing paper, kneaded eraser, blending stump or cotton swab
Step-by-Step Instructions
Step 1: Outline the Basic Eye Shape
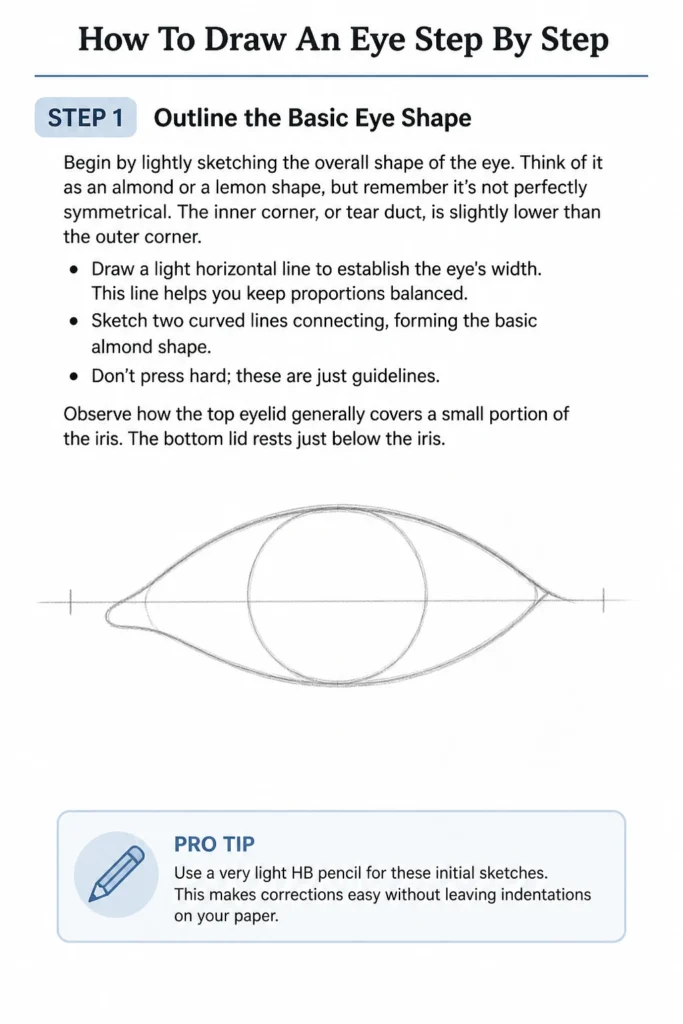
Begin by lightly sketching the overall shape of the eye. Think of it as an almond or a lemon shape, but remember it’s not perfectly symmetrical. The inner corner, or tear duct, is slightly lower than the outer corner.
Draw a light horizontal line to establish the eye’s width. This line helps you keep proportions balanced.
Sketch two curved lines connecting, forming the basic almond shape. Don’t press hard; these are just guidelines.
Observe how the top eyelid generally covers a small portion of the iris. The bottom lid rests just below the iris.
Pro Tip: Use a very light HB pencil for these initial sketches. This makes corrections easy without leaving indentations on your paper.
Step 2: Place the Iris and Pupil
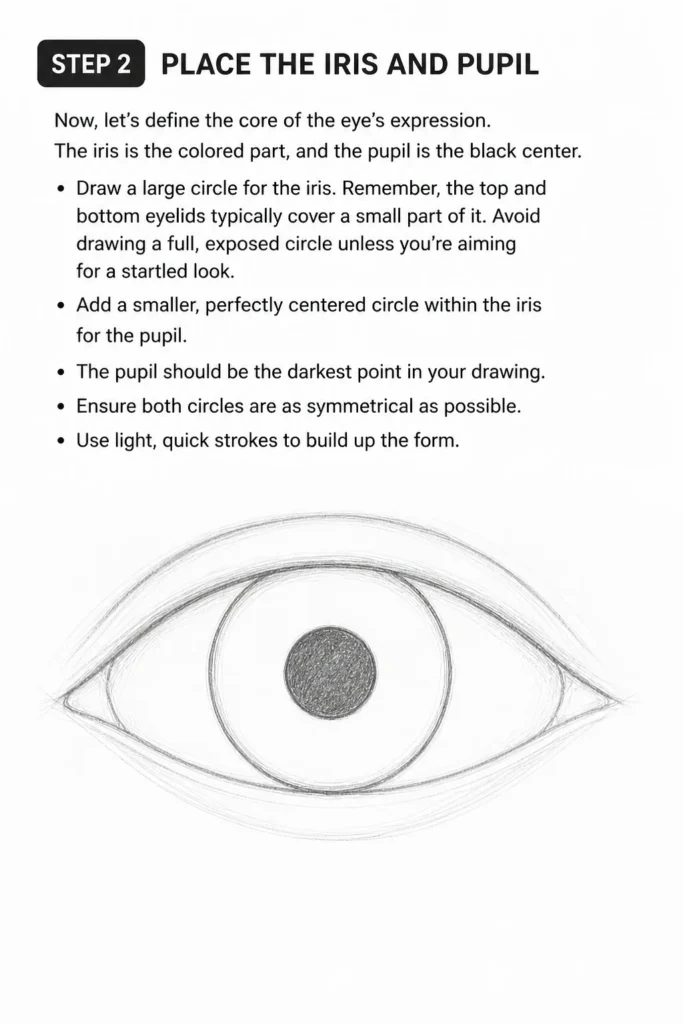
Now, let’s define the core of the eye’s expression. The iris is the colored part, and the pupil is the black center.
Draw a large circle for the iris. Remember, the top and bottom eyelids typically cover a small part of it. Avoid drawing a full, exposed circle unless you’re aiming for a startled look.
Add a smaller, perfectly centered circle within the iris for the pupil. The pupil should be the darkest point in your drawing.
Ensure both circles are as symmetrical as possible. Use light, quick strokes to build up the form.
Step 3: Define the Eyelids and Tear Duct
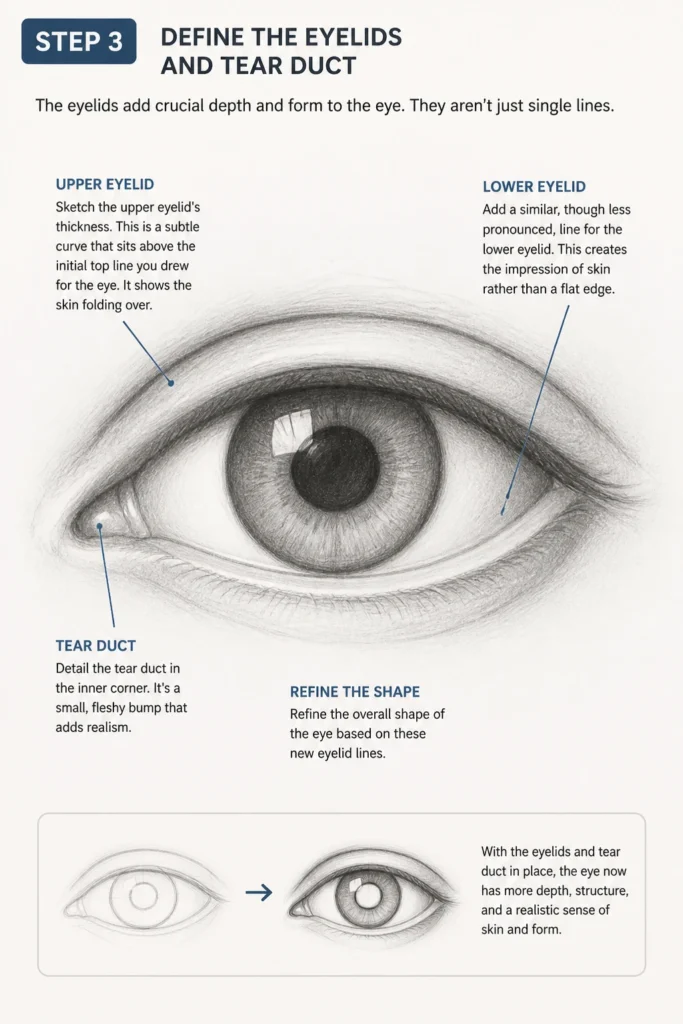
The eyelids add crucial depth and form to the eye. They aren’t just single lines.
Sketch the upper eyelid’s thickness. This is a subtle curve that sits above the initial top line you drew for the eye. It shows the skin folding over.
Add a similar, though less pronounced, line for the lower eyelid. This creates the impression of skin rather than a flat edge.
Detail the tear duct in the inner corner. It’s a small, fleshy bump that adds realism.
Refine the overall shape of the eye based on these new eyelid lines.
Step 4: Establish the Eyebrow and Surrounding Area
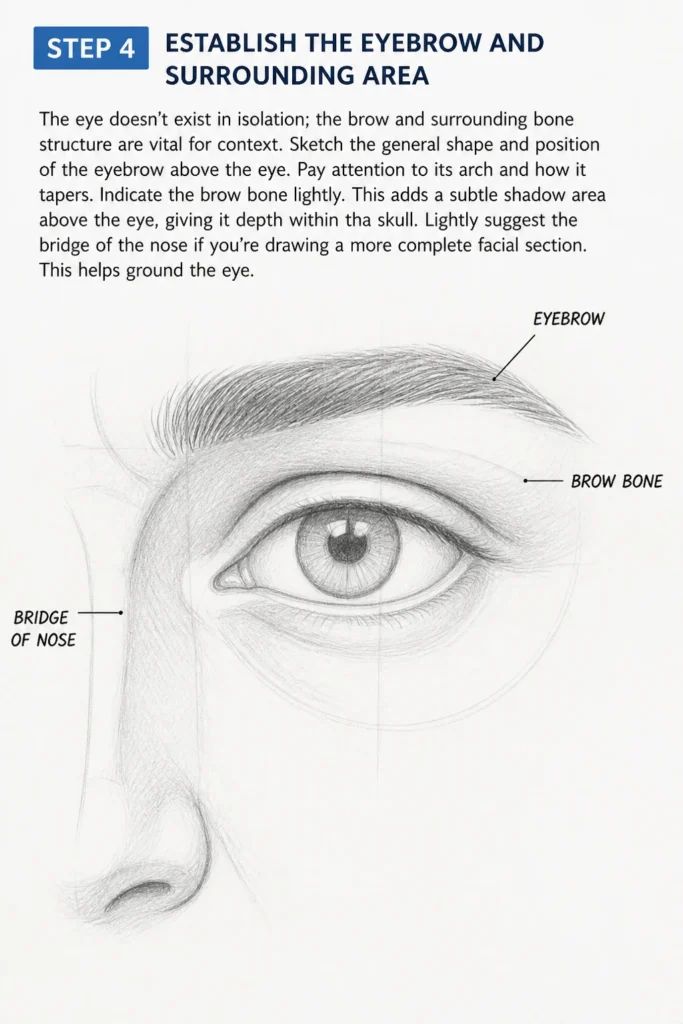
The eye doesn’t exist in isolation; the brow and surrounding bone structure are vital for context.
Sketch the general shape and position of the eyebrow above the eye. Pay attention to its arch and how it tapers.
Indicate the brow bone lightly. This adds a subtle shadow area above the eye, giving it depth within the skull.
Lightly suggest the bridge of the nose if you’re drawing a more complete facial section. This helps ground the eye.
Step 5: Begin Initial Shading and Form
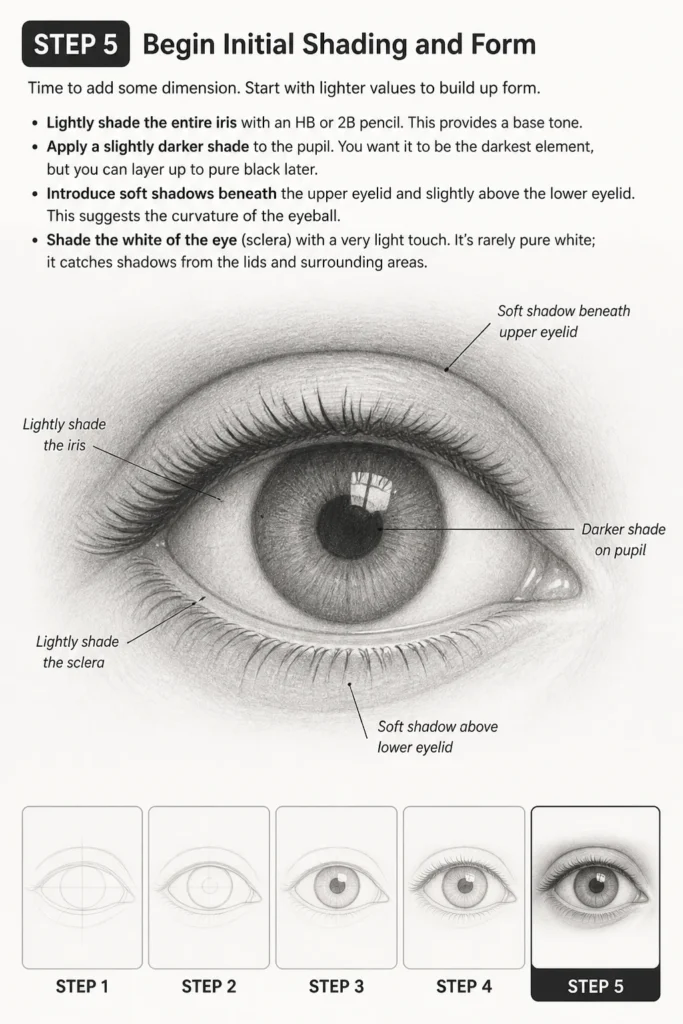
Time to add some dimension. Start with lighter values to build up form.
Lightly shade the entire iris with an HB or 2B pencil. This provides a base tone.
Apply a slightly darker shade to the pupil. You want it to be the darkest element, but you can layer up to pure black later.
Introduce soft shadows beneath the upper eyelid and slightly above the lower eyelid. This suggests the curvature of the eyeball.
Shade the white of the eye (sclera) with a very light touch. It’s rarely pure white; it catches shadows from the lids and surrounding areas.
Step 6: Develop Iris Details and Texture
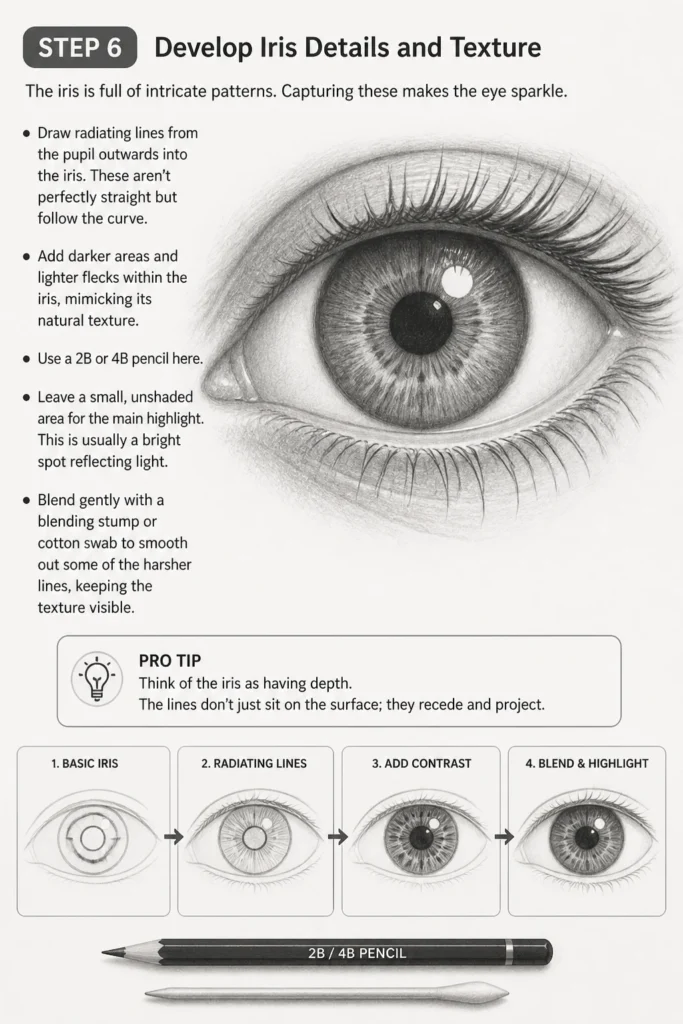
The iris is full of intricate patterns. Capturing these makes the eye sparkle.
Draw radiating lines from the pupil outwards into the iris. These aren’t perfectly straight but follow the curve.
Add darker areas and lighter flecks within the iris, mimicking its natural texture. Use a 2B or 4B pencil here.
Leave a small, unshaded area for the main highlight. This is usually a bright spot reflecting light.
Blend gently with a blending stump or cotton swab to smooth out some of the harsher lines, keeping the texture visible.
Pro Tip: Think of the iris as having depth. The lines don’t just sit on the surface; they recede and project.
Step 7: Add Eyelashes
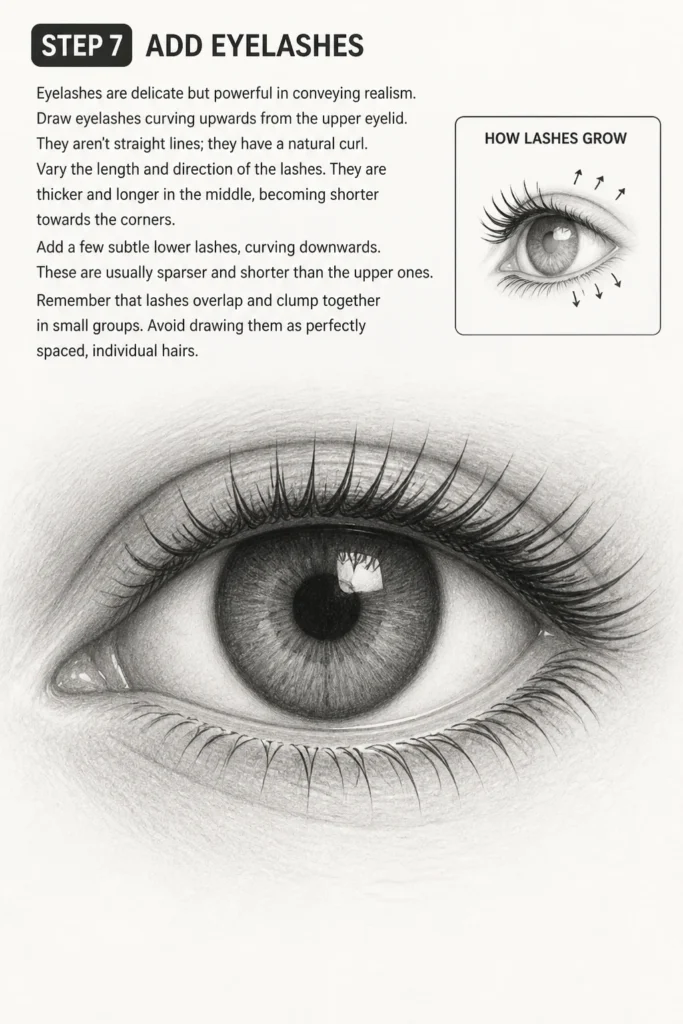
Eyelashes are delicate but powerful in conveying realism.
Draw eyelashes curving upwards from the upper eyelid. They aren’t straight lines; they have a natural curl.
Vary the length and direction of the lashes. They are thicker and longer in the middle, becoming shorter towards the corners.
Add a few subtle lower lashes, curving downwards. These are usually sparser and shorter than the upper ones.
Remember that lashes overlap and clump together in small groups. Avoid drawing them as perfectly spaced, individual hairs.
Step 8: Refine Shading and Add Highlights
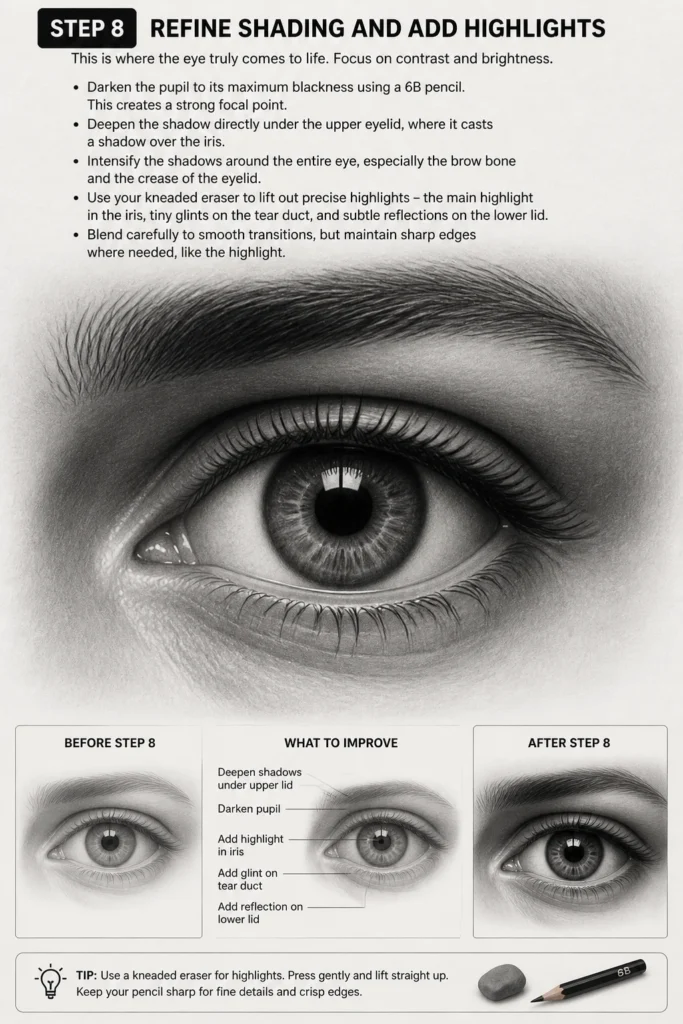
This is where the eye truly comes to life. Focus on contrast and brightness.
Darken the pupil to its maximum blackness using a 6B pencil. This creates a strong focal point.
Deepen the shadow directly under the upper eyelid, where it casts a shadow over the iris.
Intensify the shadows around the entire eye, especially the brow bone and the crease of the eyelid.
Use your kneaded eraser to lift out precise highlights: the main highlight in the iris, tiny glints on the tear duct, and subtle reflections on the lower lid.
Blend carefully to smooth transitions, but maintain sharp edges where needed, like the highlight.
Step 9: Final Touches and Blending
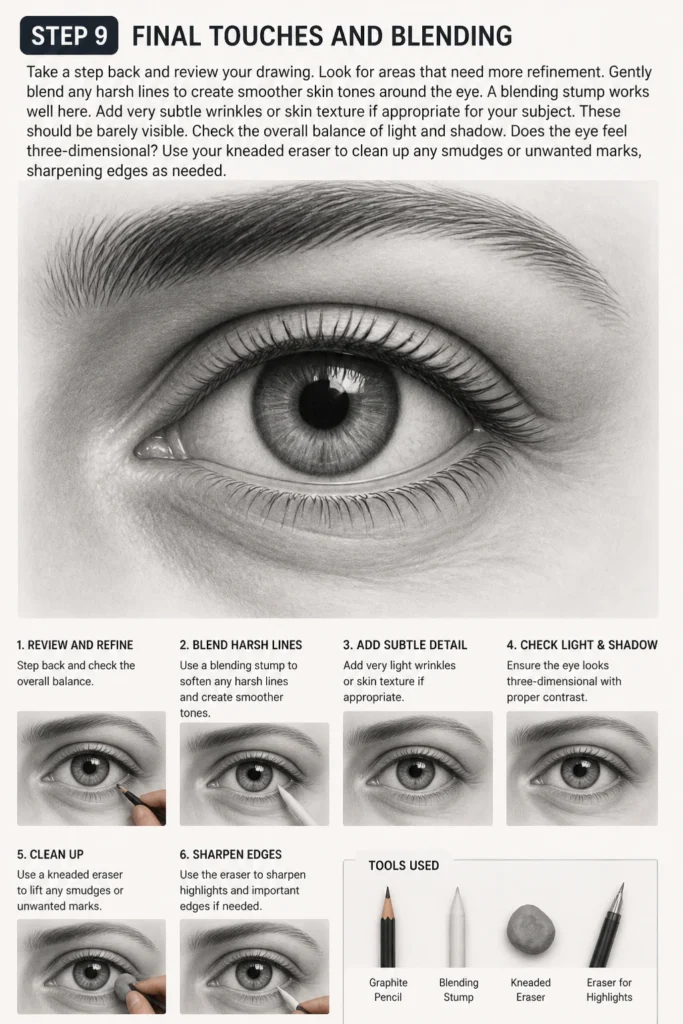
Take a step back and review your drawing. Look for areas that need more refinement.
Gently blend any harsh lines to create smoother skin tones around the eye. A blending stump works well here.
Add very subtle wrinkles or skin texture if appropriate for your subject. These should be barely visible.
Check the overall balance of light and shadow. Does the eye feel three-dimensional?
Use your kneaded eraser to clean up any smudges or unwanted marks, sharpening edges as needed.
Common Mistakes to Avoid
Drawing the Eye Too Flat
Many beginners draw the eye as a flat shape rather than a sphere sitting in a socket. This makes the eye look pasted on. Always remember the eyeball is a round form. Shade the sclera (white part) to show its curvature and how it recedes into the socket.
Making the Iris a Perfect Circle
While the iris is circular, it’s rarely fully exposed. The eyelids always cover a portion of it, usually the top and bottom. Drawing a perfectly visible circle for the iris makes the eye look wide-eyed or surprised, which isn’t always the desired expression.
Lashes All the Same
Drawing eyelashes as uniform, evenly spaced lines makes them look stiff and unnatural. Eyelashes vary in length, thickness, and direction. They often clump together and grow in multiple layers, especially on the upper lid. Varying them adds realism.
Leaving the Sclera Pure White
The “white” of the eye is almost never pure white. It’s a curved surface that catches shadows from the eyelids, the brow bone, and even the reflections of the environment. Lightly shade the sclera, especially near the corners and under the upper lid, to give it form and depth.
Troubleshooting
Eye Looks Lifeless or Flat
If your eye drawing lacks vitality, it’s often due to insufficient contrast. You might not have dark enough shadows or bright enough highlights. Go back and deepen the pupil, the crease of the eyelid, and the shadow under the upper lid. Ensure your main highlight is crisp.
Another reason for a flat look can be a lack of form. Remember the eye is a sphere. Shade the “white” of the eye subtly to show its curve, and ensure the eyelids wrap around it, not just sit on top.
Proportions Seem Off
If the eye looks too big, too small, or distorted, re-evaluate your initial outline. The distance between the eyes is roughly the width of one eye. The tear duct is usually slightly lower than the outer corner. Use your pencil to measure distances on your reference photo or mentally.
Sometimes, the issue is the surrounding features. If the eyebrow is too high or low, or the nose bridge is incorrectly placed, it can throw off the eye’s appearance. Check the relationships between all elements.
Shading Looks Muddy or Messy
Muddy shading often happens from pressing too hard with soft pencils too early, or from over-blending. Start with light layers using harder pencils (HB, 2B) and gradually build up darkness. Use a light touch when blending.
If your paper is getting dirty, it might be due to smudging. Place a clean sheet of paper under your hand as you draw. A kneaded eraser can also help lift away excess graphite without smudging.
Key Takeaways
- Start Light, Build Dark: Always begin with light sketches and gradually add darker values.
- Embrace Form: Remember the eye is a sphere, not a flat shape; shade to show its curvature.
- Vary Your Lines: Eyelashes and iris details should not be uniform; embrace natural variation.
- Contrast is Key: Strong darks and sharp lights bring an eye to life and add realism.
- Blend Thoughtfully: Use blending to smooth transitions, but don’t erase important textures.
- Practice Consistently: The more you draw, the better you’ll become at observing and rendering details.
Frequently Asked Questions
How can I make the eyes look more realistic?
Realism comes from careful observation and layering. Pay close attention to subtle shifts in value, the specific patterns in the iris, and the way light reflects. Don’t be afraid to add deep shadows and very bright highlights, as contrast is crucial for a lifelike appearance.
What kind of pencils are best for drawing eyes?
A good range of graphite pencils is essential. An HB pencil is perfect for light outlines. 2B and 4B are great for mid-tones and iris details. For the darkest areas like the pupil, a 6B or even 8B pencil will give you rich, deep blacks.
Can I draw different eye shapes using this guide?
Absolutely. While this guide focuses on a general eye shape, the fundamental principles remain the same. The initial outline is where you’d adjust for hooded eyes, almond eyes, round eyes, or monolid eyes. The steps for iris, pupil, and shading will then adapt to that specific initial shape.
How much detail is too much detail?
The “right” amount of detail depends on your style and the overall piece. For realism, more detail is generally better, but it should be purposeful. Avoid drawing every single pore or hair if it makes the eye look cluttered. Focus on the details that truly enhance form, texture, and expression.
Our Top Recommended Finds
- Graphite Sketching Pencil Set: A good set with a range from 2H to 8B provides all the necessary tools for varying tones.
- Paper Blending Stumps: These are excellent for smoothing graphite, creating soft transitions, and reaching small areas without smudging.
- Kneaded Eraser: Invaluable for lifting graphite, creating highlights, and cleaning up without damaging the paper.
Keep Practicing, Keep Creating
Learning to draw eyes is a rewarding skill that opens up a world of expressive portraiture. Each eye you draw will teach you something new about light, form, and emotion. Don’t be discouraged by initial results; every stroke is part of your artistic journey.
Now that you have these steps, why not grab your pencils and start your next masterpiece? Experiment with different angles and expressions. Soon, you’ll be drawing eyes that truly captivate.
& Painting
No rigid rules or pretension. Just practical guides, medium comparisons, and encouraging tips to help you enjoy the drawing & painting process.