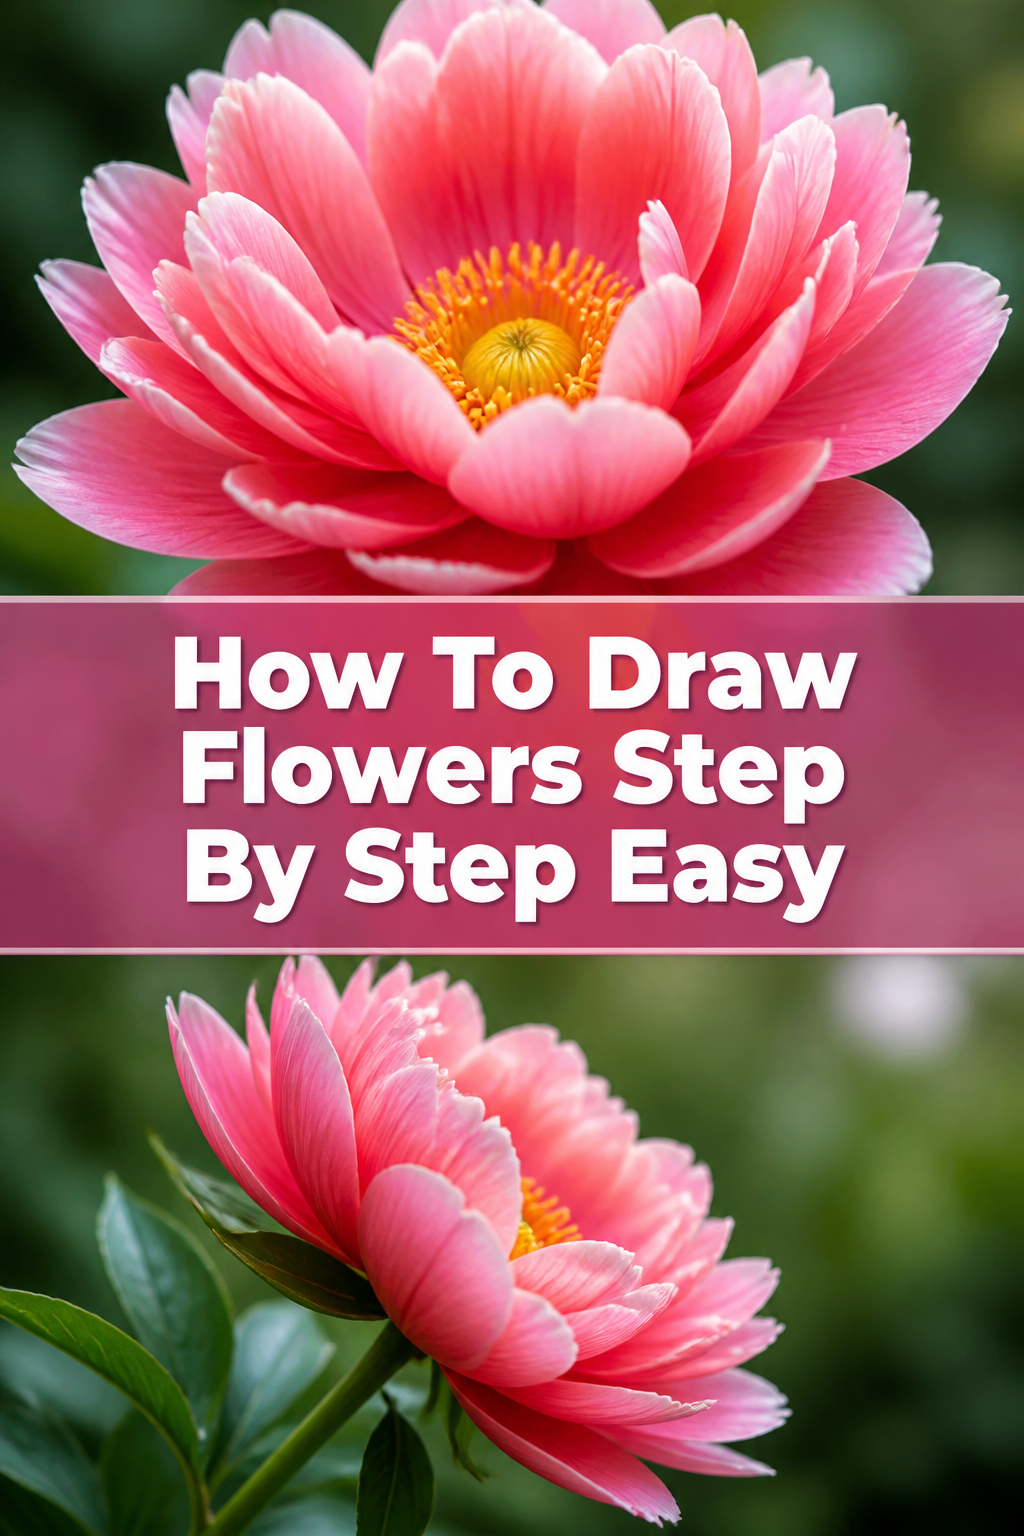
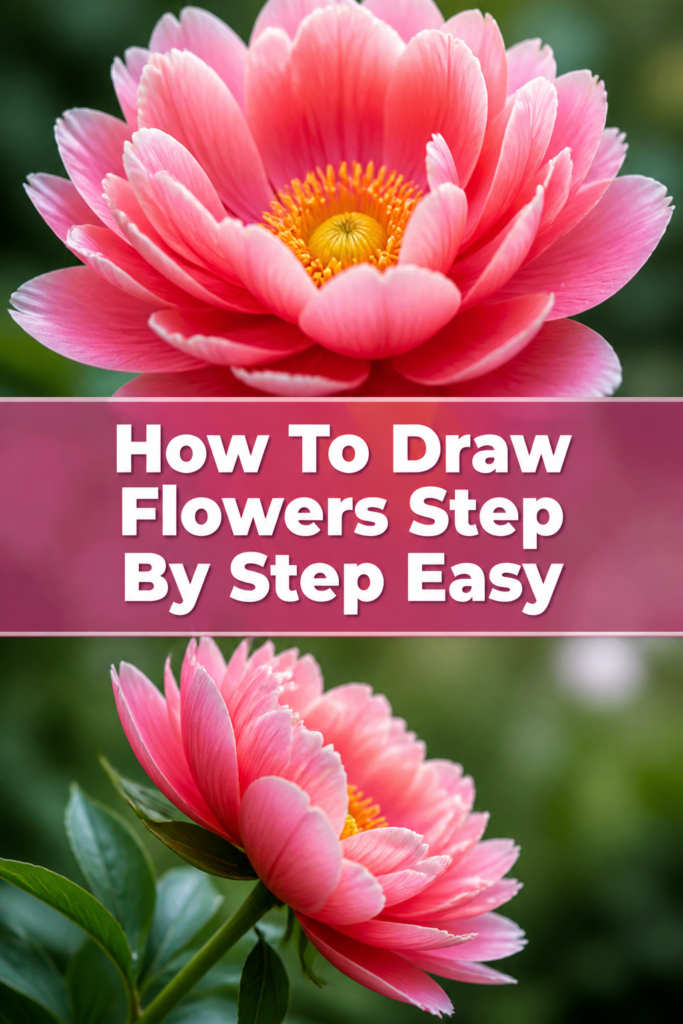
🔥 How To Draw Flowers Step By Step Easy

& Painting
No rigid rules or pretension. Just practical guides, medium comparisons, and encouraging tips to help you enjoy the drawing & painting process.
Drawing flowers is one of the most relaxing ways to spend an afternoon with a sketchbook.
I remember sitting in my garden for hours as a child, trying to capture the curve of a petal without making it look like a jagged mess.
After years of teaching art workshops, I have found that anyone can draw beautiful blooms by breaking them down into basic circles and lines.
Quick Overview
Before you pick up your pencil, let’s look at what this guide covers and what you will need to get started.
- Time needed: 20 to 40 minutes depending on your pace
- Difficulty: Beginner
- What you’ll need: Drawing paper, an HB pencil, a soft eraser, and a fine-liner pen
Understanding Flower Anatomy
Before jumping into the steps, it helps to understand what makes a flower look like a flower.
Most beginners try to draw every single detail they see all at once.
This usually leads to a drawing that feels cluttered or lopsided.
Think of a flower as a collection of simple geometric shapes stacked on top of each other.
The center is usually a circle or an oval, while the petals are variations of triangles, hearts, or teardrops.
The stem is a long, slightly curved cylinder rather than a perfectly straight line.
Leaves are often just two curved lines that meet at a point.
When you see these shapes first, the drawing process becomes much less intimidating.
Take a moment to look at a photo of a daisy or a rose.
Notice how the petals don’t just sit on the edge; they grow out from the center point.
Keeping this “growth point” in mind will help your drawings look more natural and organic.
Step-by-Step Instructions
Step 1: Sketch the Basic Guidelines
Start by drawing a very light circle in the middle of your paper.
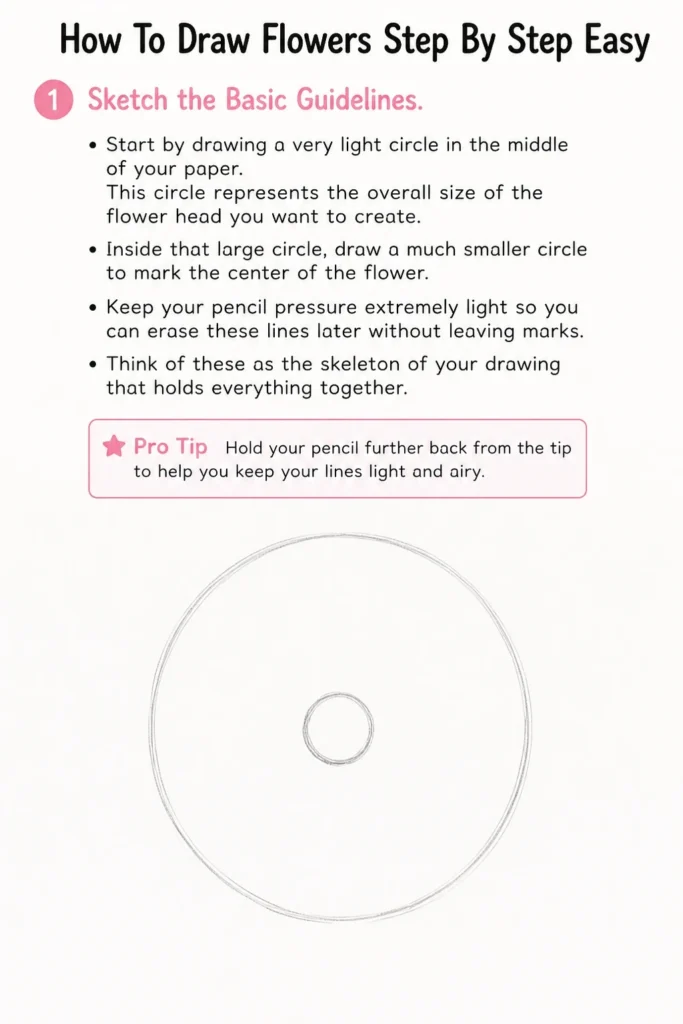
This circle represents the overall size of the flower head you want to create.
Inside that large circle, draw a much smaller circle to mark the center of the flower.
Keep your pencil pressure extremely light so you can erase these lines later without leaving marks.
Think of these as the skeleton of your drawing that holds everything together.
Pro Tip: Hold your pencil further back from the tip to help you keep your lines light and airy.
Step 2: Map Out the Petal Positions
Divide the space between the inner and outer circles into equal sections.
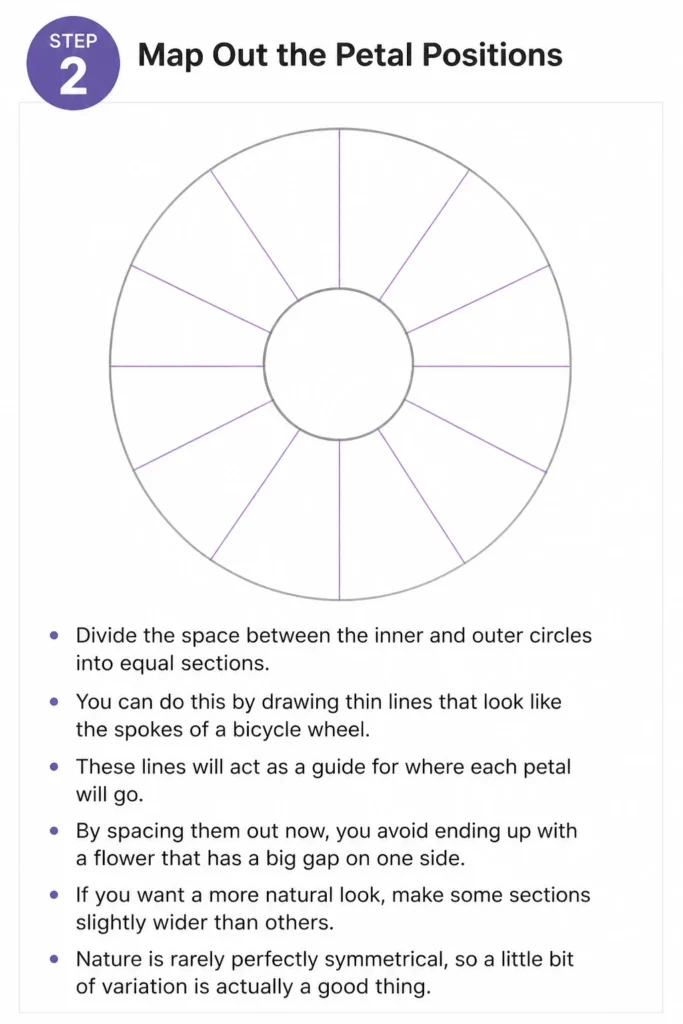
You can do this by drawing thin lines that look like the spokes of a bicycle wheel.
These lines will act as a guide for where each petal will go.
By spacing them out now, you avoid ending up with a flower that has a big gap on one side.
If you want a more natural look, make some sections slightly wider than others.
Nature is rarely perfectly symmetrical, so a little bit of variation is actually a good thing.
Step 3: Define the Center Texture
Add small, bumpy details to the inner circle you drew earlier.
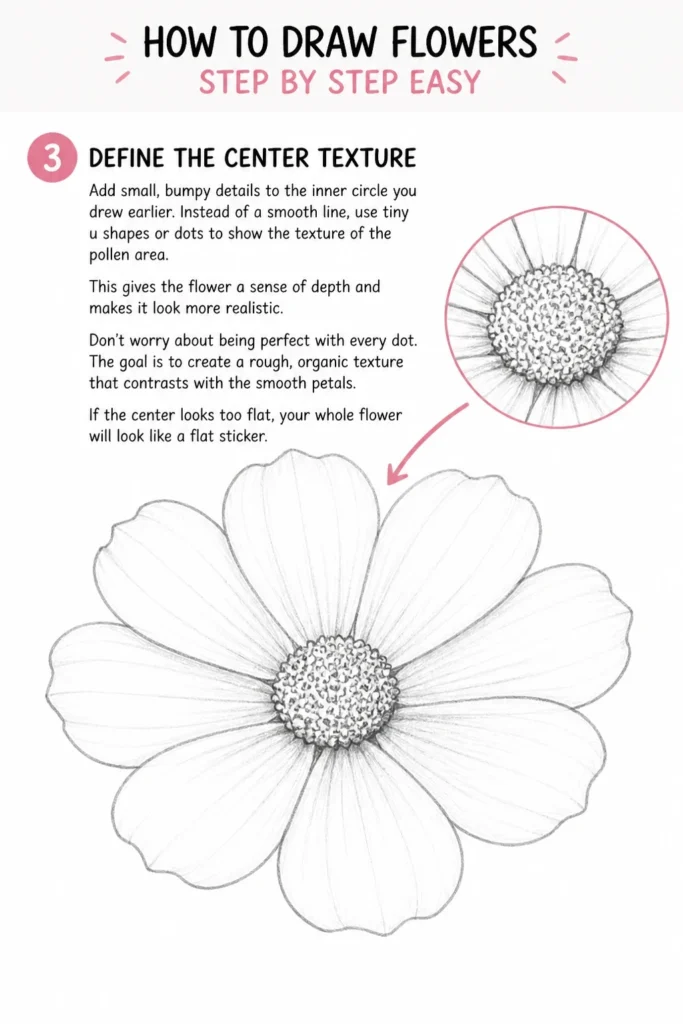
Instead of a smooth line, use tiny “u” shapes or dots to show the texture of the pollen area.
This gives the flower a sense of depth and makes it look more realistic.
Don’t worry about being perfect with every dot.
The goal is to create a rough, organic texture that contrasts with the smooth petals.
If the center looks too flat, your whole flower will look like a flat sticker.
Step 4: Draw the First Layer of Petals
Outline the petals using the “spoke” lines as your center guides.
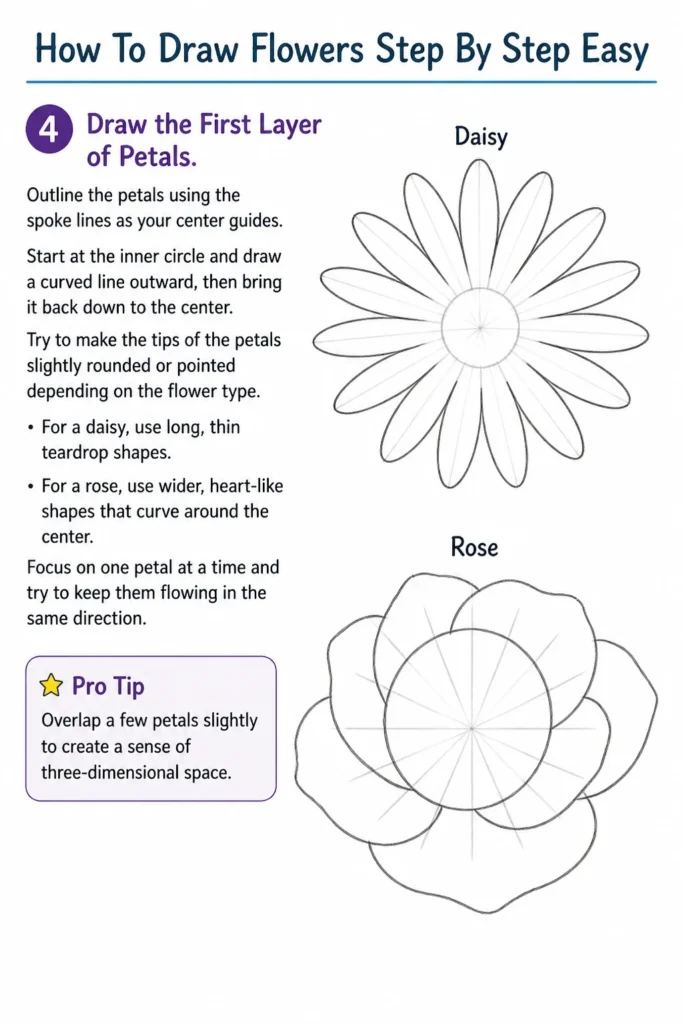
Start at the inner circle and draw a curved line outward, then bring it back down to the center.
Try to make the tips of the petals slightly rounded or pointed depending on the flower type.
For a daisy, use long, thin teardrop shapes.
For a rose, use wider, heart-like shapes that curve around the center.
Focus on one petal at a time and try to keep them flowing in the same direction.
Pro Tip: Overlap a few petals slightly to create a sense of three-dimensional space.
Step 5: Add a Second Layer for Volume
Sketch a few more petals peeking out from behind the first layer.
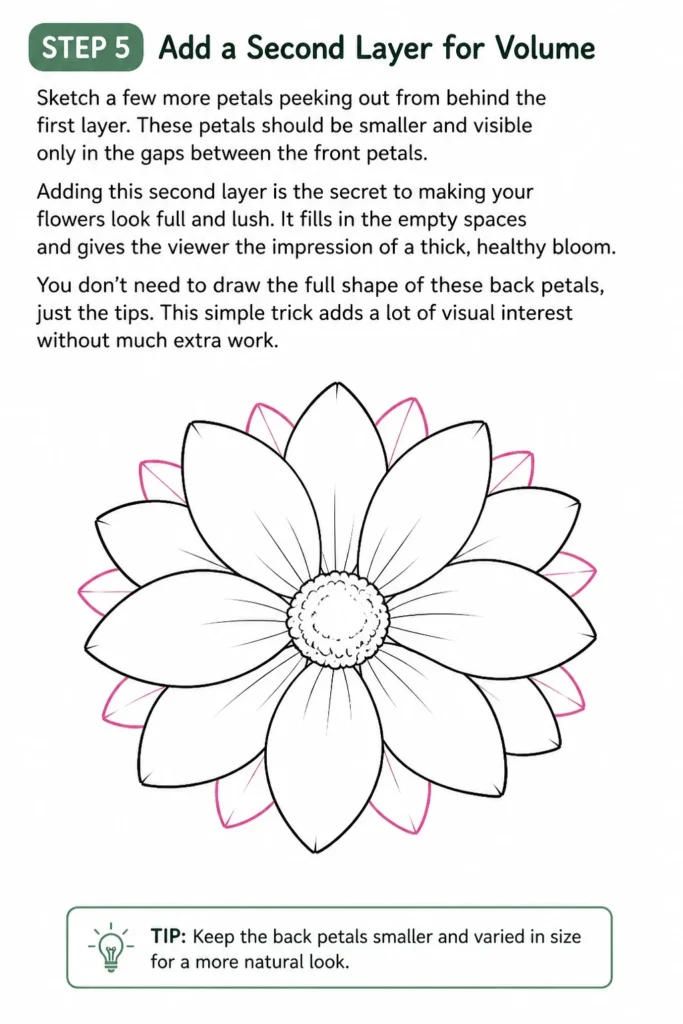
These petals should be smaller and visible only in the gaps between the front petals.
Adding this second layer is the secret to making your flowers look full and lush.
It fills in the empty spaces and gives the viewer the impression of a thick, healthy bloom.
You don’t need to draw the full shape of these back petals, just the tips.
This simple trick adds a lot of visual interest without much extra work.
Step 6: Create the Stem and Leaves
Draw two parallel lines coming down from the base of the flower head.
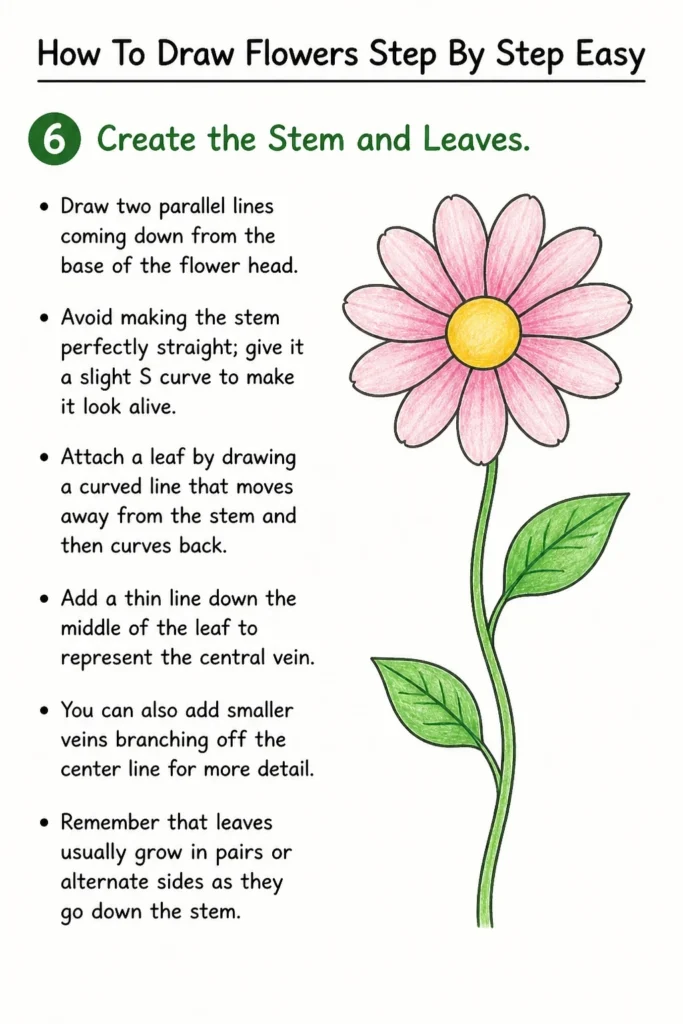
Avoid making the stem perfectly straight; give it a slight “S” curve to make it look alive.
Attach a leaf by drawing a curved line that moves away from the stem and then curves back.
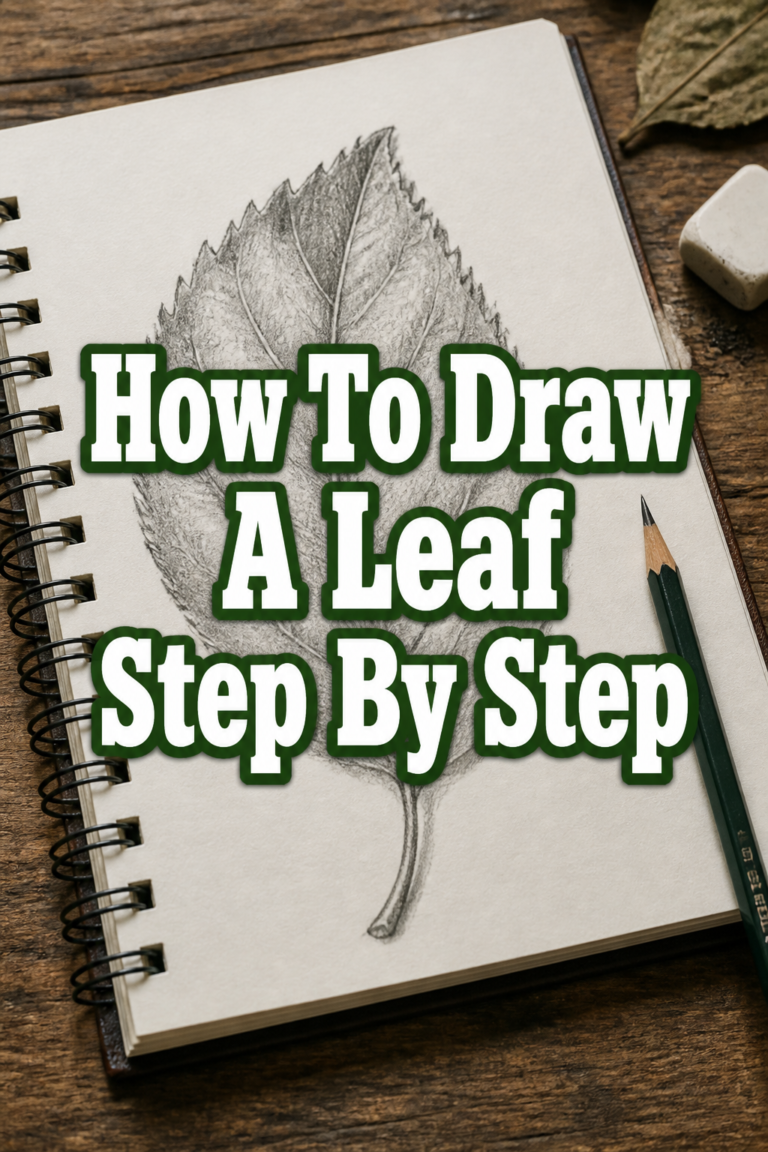
Add a thin line down the middle of the leaf to represent the central vein.
You can also add smaller veins branching off the center line for more detail.
Remember that leaves usually grow in pairs or alternate sides as they go down the stem.
Step 7: Refine the Lines and Erase Guides
Trace over your best pencil lines with a slightly firmer hand or a fine-liner pen.
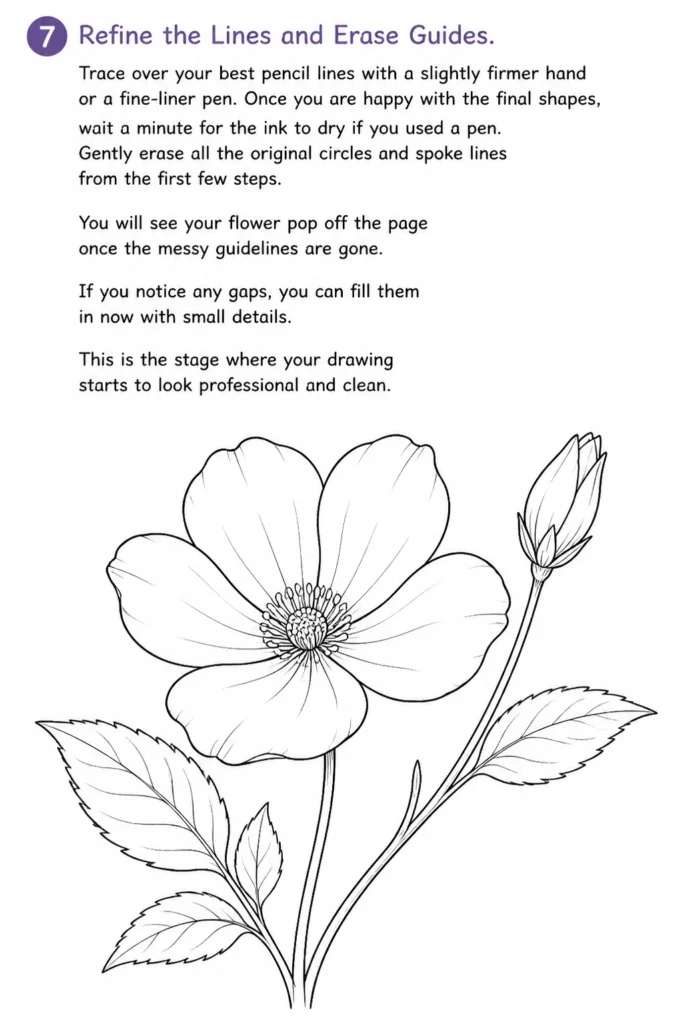
Once you are happy with the final shapes, wait a minute for the ink to dry if you used a pen.
Gently erase all the original circles and “spoke” lines from the first few steps.
You will see your flower “pop” off the page once the messy guidelines are gone.
If you notice any gaps, you can fill them in now with small details.
This is the stage where your drawing starts to look professional and clean.
Step 8: Add Shading and Texture
Place light flicking marks starting from the center of the flower moving outward.
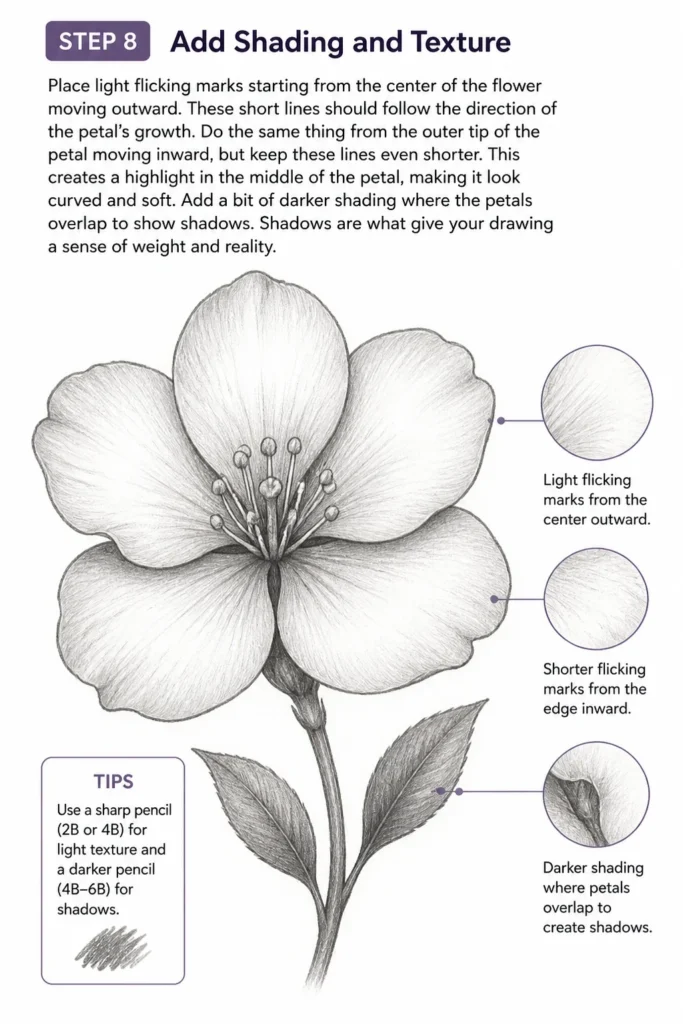
These short lines should follow the direction of the petal’s growth.
Do the same thing from the outer tip of the petal moving inward, but keep these lines even shorter.
This creates a highlight in the middle of the petal, making it look curved and soft.
Add a bit of darker shading where the petals overlap to show shadows.
Shadows are what give your drawing a sense of weight and reality.
Common Mistakes to Avoid
Pressing Too Hard Initially
Many beginners push their pencil down firmly right from the first step.
This creates deep grooves in the paper that are impossible to erase later.
If you make a mistake on a heavy line, you will always see a “ghost” of that line in your final piece.
Always start with the lightest touch possible, almost like you are barely touching the paper.
Using Perfectly Straight Lines
In nature, very few things are perfectly straight or perfectly circular.
If you draw a stem with a ruler, it will look like a plastic pipe rather than a living plant.
The same goes for petals that are all exactly the same size and shape.
Embrace the wobbles and slight imperfections in your lines, as they add character and realism.
Ignoring the Growth Direction
Petals don’t just float around the center; they are attached to it.
A common mistake is drawing petals that look like they are sliding off the side of the flower.
Always ensure the base of every petal points directly back to the very center of your flower head.
If the alignment is off, the flower will look distorted or broken.
Troubleshooting
The Flower Looks Too Flat
If your drawing looks like a 2D cutout, you probably need more contrast in your shading.
Make the areas where petals go under other petals much darker.
You can also try curving your texture lines more to follow the “belly” of the petal.
Adding a small shadow on the stem right under the flower head also helps create depth.
The Petals Look Crowded or Messy
This usually happens when you try to draw too many petals without a plan.
If this happens, stop and look at your guidelines again.
It is better to have five well-shaped petals than fifteen messy ones that overlap poorly.
Try erasing the messy area and using the “spoke” method to re-map the space more clearly.
Key Takeaways
- Start with light shapes: Use circles and ovals to build a foundation before adding any detail.
- Work from the center out: Establishing the middle of the flower helps you keep the petals aligned correctly.
- Use layers: Adding a second row of petals behind the first creates instant depth and volume.
- Keep lines organic: Avoid using rulers or making things perfectly symmetrical to maintain a natural look.
- Shade for dimension: Small lines at the base and tips of petals make them look curved and realistic.
- Practice patience: Erasing your guidelines at the end is what makes the final drawing look clean.
Frequently Asked Questions
What is the best pencil for drawing flowers?
An HB pencil is the best choice for beginners because it is right in the middle of the scale.
It isn’t too hard, which would scratch the paper, and it isn’t too soft, which would smudge everywhere.
As you get more comfortable, you might want a 2B pencil for darker shadows and a 2H for very light guidelines.
How do I make my flowers look more realistic?
Realism comes from observing actual plants rather than drawing from memory.
Look at how petals fold over at the edges or how they have tiny veins running through them.
Adding these small imperfections, like a tiny nick in a leaf, makes the drawing feel much more authentic.
Can I use this method for any type of flower?
Yes, the basic principle of starting with a center and mapping out petals works for almost every bloom.
For a sunflower, you just make the center circle much larger and the petals more numerous.
For a lily, you would use long, triangular petals and skip the circular center for a more trumpet-like shape.
Should I color my flower drawings?
Coloring can be a great way to bring your art to life, but it is best to master the shapes first.
If you do want to color, try using colored pencils or watercolors.
Always test your colors on a scrap piece of paper first to see how they blend together.
Our Top Recommended Finds
- Strathmore 400 Series Sketch Pad: This paper has a nice texture that grabs the graphite well without being too rough.
- Sakura Pigma Micron Pens: These fine-liners come in various sizes and use archival ink that won’t smudge when you erase your pencil marks.
- Kneaded Eraser: This type of eraser can be molded into points to pick up small mistakes without damaging the surface of your paper.
Expanding Your Botanical Art Skills
Once you feel comfortable with a single flower, try drawing a small bouquet.
You can vary the heights of the stems and the sizes of the flower heads to create a beautiful composition.
Experiment with different angles, like drawing a flower from the side rather than looking straight at it.
The more you practice these basic shapes, the more confident your hand will become.
Grab your sketchbook and try drawing one new flower every day this week.
You will be surprised at how quickly your skills improve when you focus on these simple steps.
& Painting
No rigid rules or pretension. Just practical guides, medium comparisons, and encouraging tips to help you enjoy the drawing & painting process.