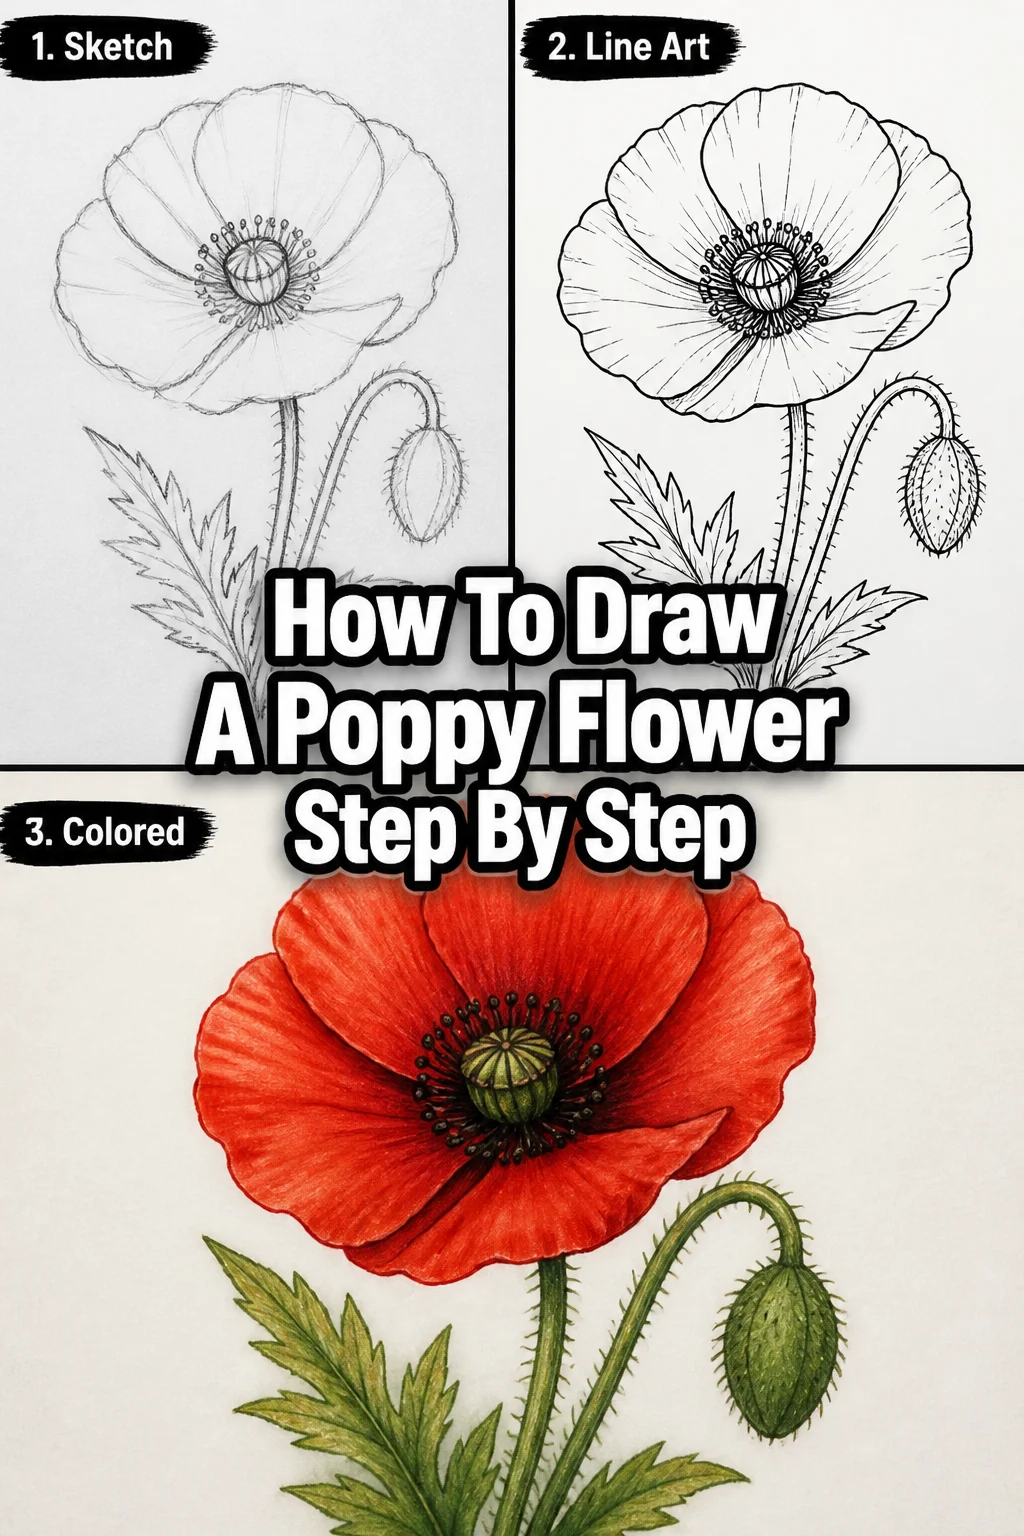
How To Draw A Poppy Flower Step By Step
🎨 How To Draw A Poppy Flower Step By Step
There’s a unique joy in capturing nature’s beauty on paper.
Poppies, with their delicate petals and vibrant hues, are truly captivating subjects.
I’ve spent countless hours sketching flowers, and I’m excited to share a clear, practical method to draw your very own poppy.
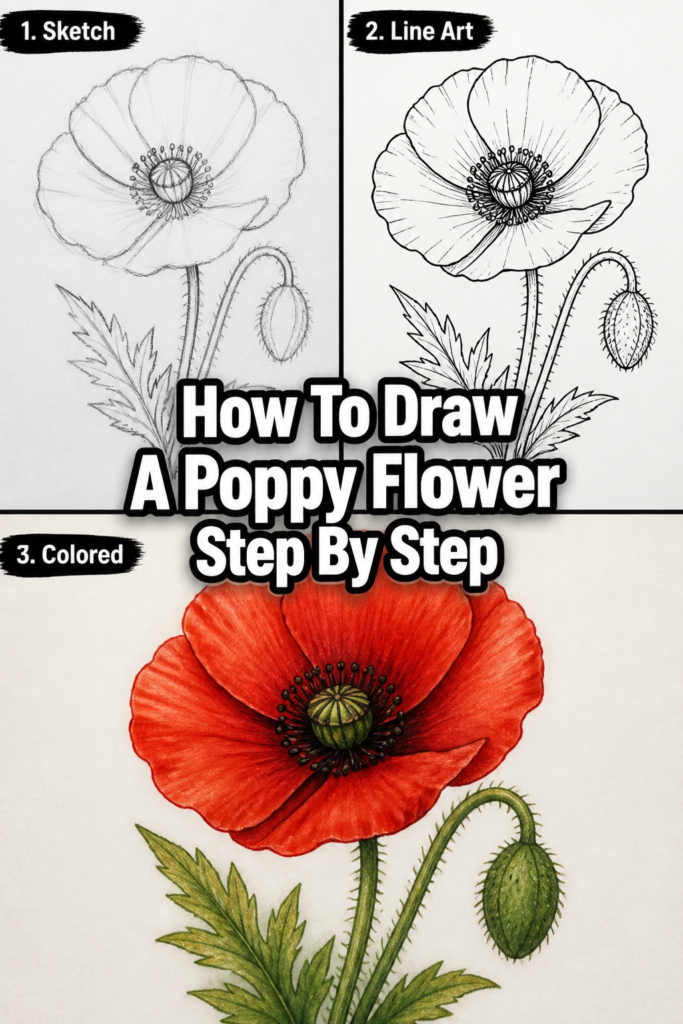
Quick Overview
This guide will walk you through creating a beautiful poppy drawing from initial shapes to final details.
You’ll learn to capture its distinctive form and texture, building your confidence with each stroke.
- Time needed: 30-60 minutes
- Difficulty: Beginner to Intermediate
- What you’ll need: Pencil, paper, eraser
Step-by-Step Instructions
Step 1: Sketch the Basic Form
Begin by lightly sketching the fundamental shapes of your poppy. Think of it as building a skeletal structure.
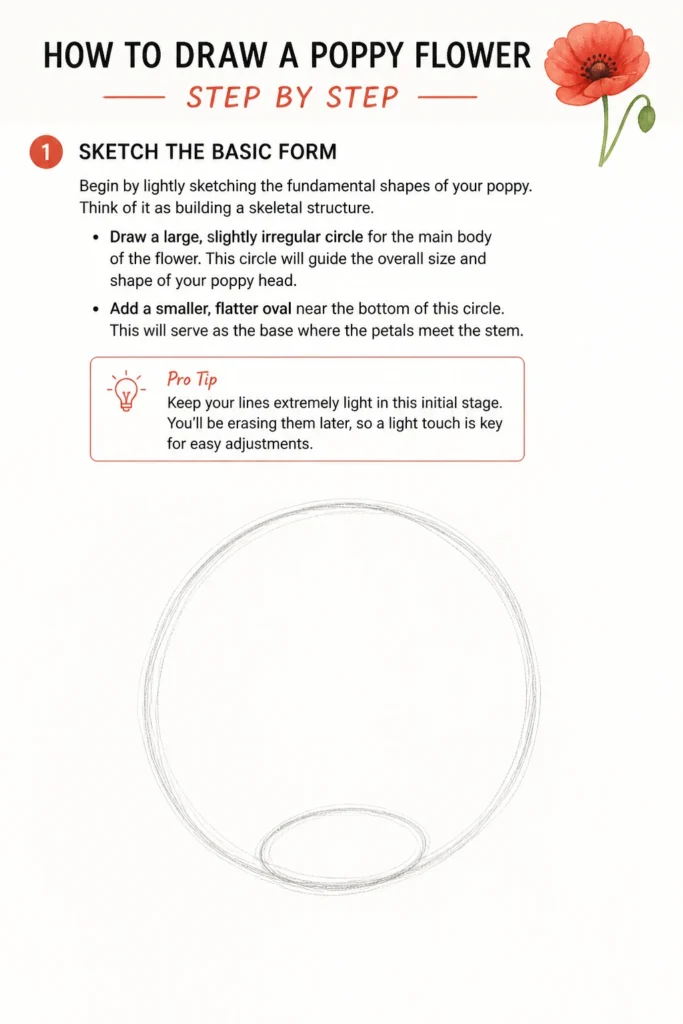
Draw a large, slightly irregular circle for the main body of the flower.
This circle will guide the overall size and shape of your poppy head.
Add a smaller, flatter oval near the bottom of this circle. This will serve as the base where the petals meet the stem.
Pro Tip: Keep your lines extremely light in this initial stage. You’ll be erasing them later, so a light touch is key for easy adjustments.
Step 2: Establish the Center and Bud
The poppy’s center is a defining feature.
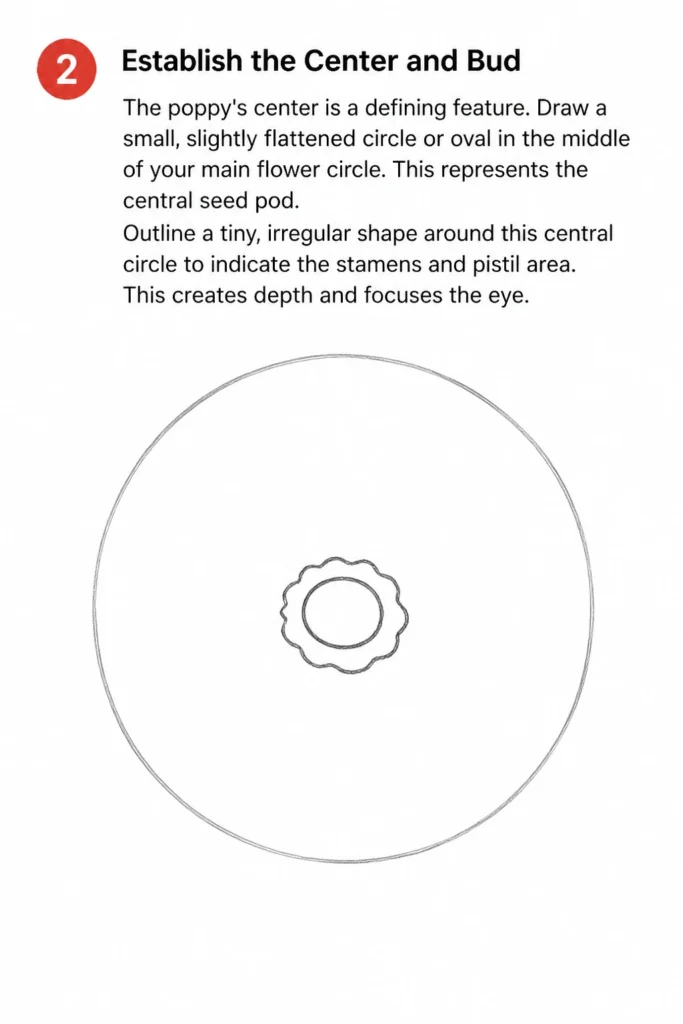
Draw a small, slightly flattened circle or oval in the middle of your main flower circle.
This represents the central seed pod.
Outline a tiny, irregular shape around this central circle to indicate the stamens and pistil area.
This creates depth and focuses the eye.
Step 3: Define the Petal Placement
Poppy petals are often ruffled and overlap beautifully.
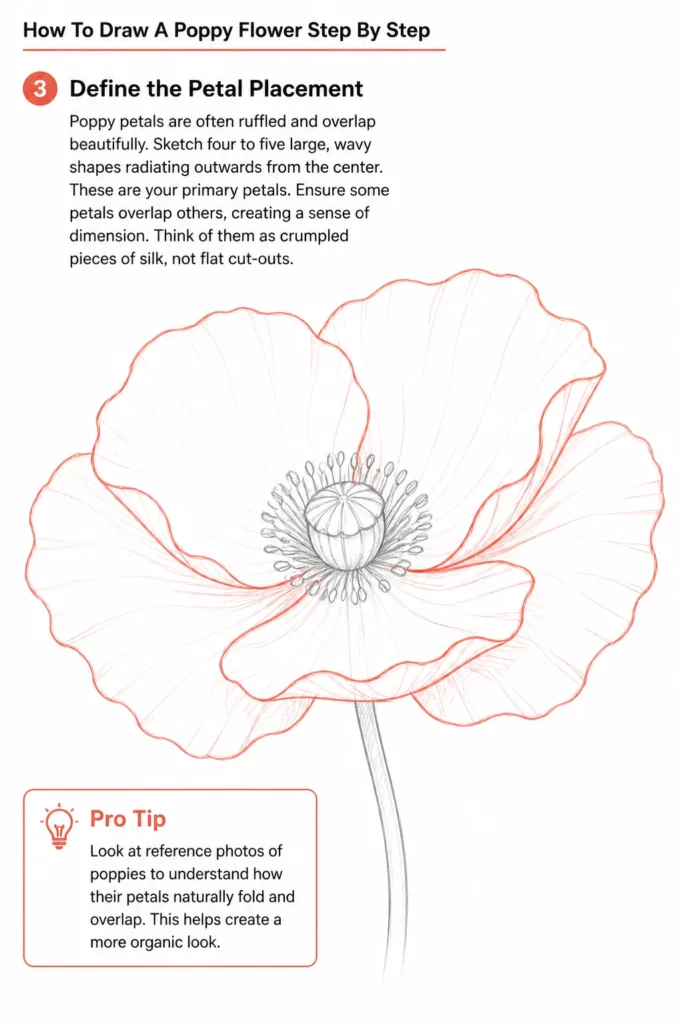
Sketch four to five large, wavy shapes radiating outwards from the center.
These are your primary petals.
Ensure some petals overlap others, creating a sense of dimension.
Think of them as crumpled pieces of silk, not flat cut-outs.
Pro Tip: Look at reference photos of poppies to understand how their petals naturally fold and overlap. This helps create a more organic look.
Step 4: Refine the Petal Edges
Now, bring life to your petals by adding more natural curves and ruffles.
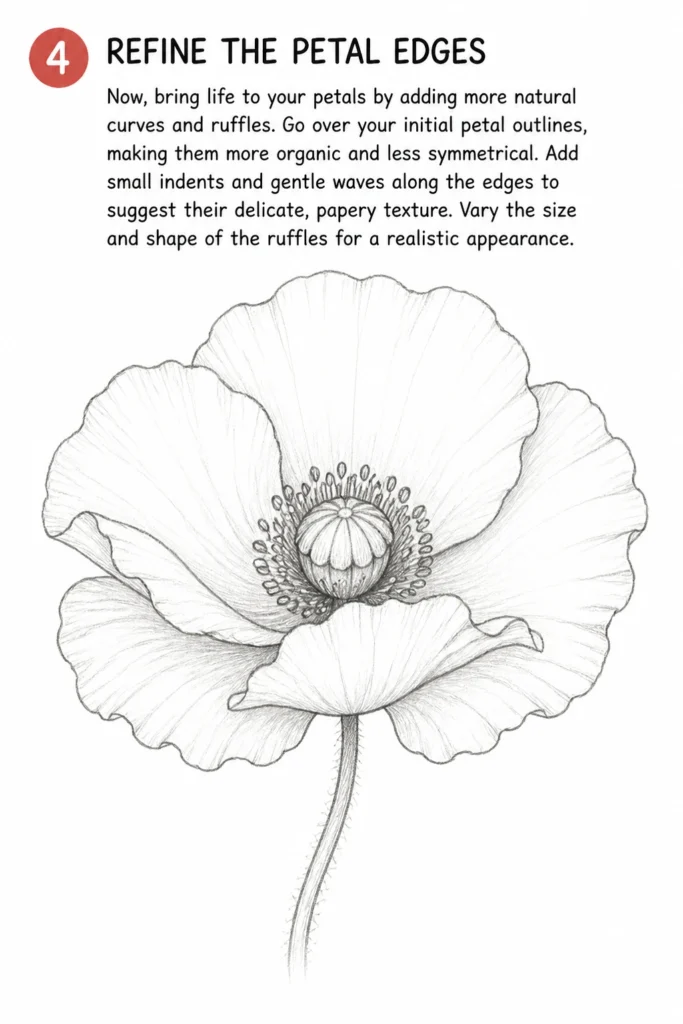
Go over your initial petal outlines, making them more organic and less symmetrical.
Add small indents and gentle waves along the edges to suggest their delicate, papery texture.
Vary the size and shape of the ruffles for a realistic appearance.
Step 5: Draw the Stem and Leaves
The stem provides support and balance to your flower.
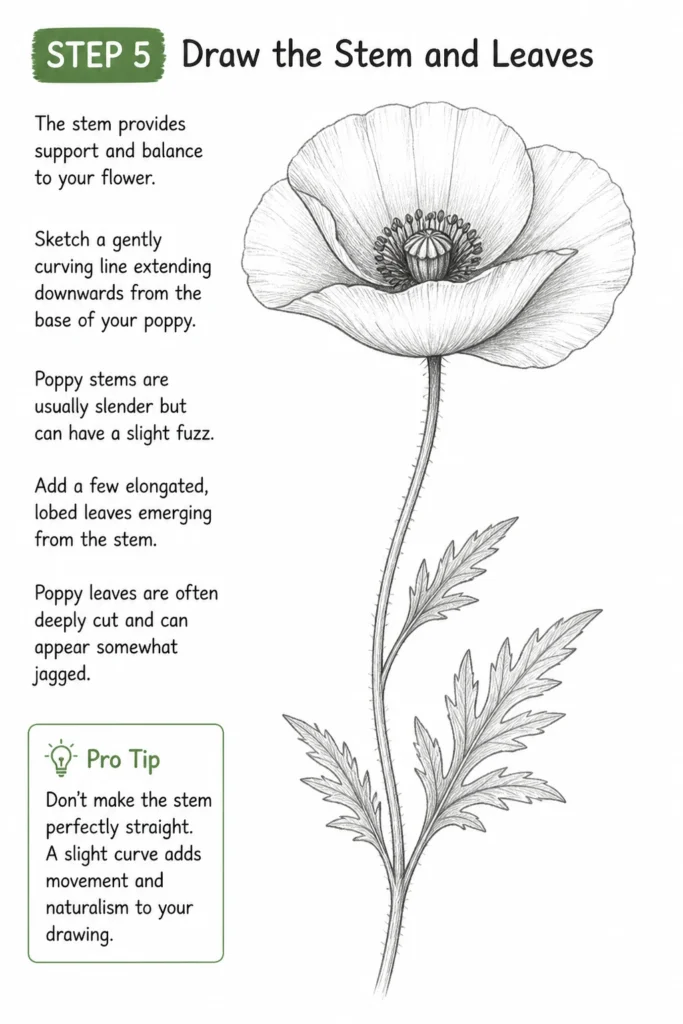
Sketch a gently curving line extending downwards from the base of your poppy.
Poppy stems are usually slender but can have a slight fuzz.
Add a few elongated, lobed leaves emerging from the stem.
Poppy leaves are often deeply cut and can appear somewhat jagged.
Pro Tip: Don’t make the stem perfectly straight. A slight curve adds movement and naturalism to your drawing.
Step 6: Add Interior Details and Texture
Time to add the finer touches that make your poppy recognizable.
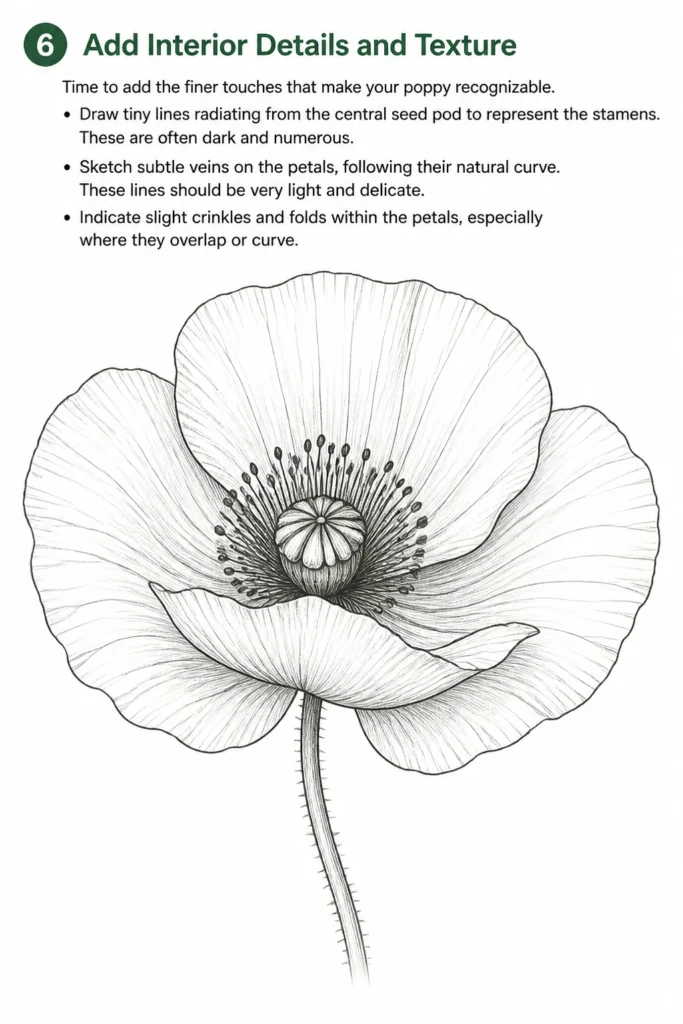
Draw tiny lines radiating from the central seed pod to represent the stamens.
These are often dark and numerous.
Sketch subtle veins on the petals, following their natural curve.
These lines should be very light and delicate.
Indicate slight crinkles and folds within the petals, especially where they overlap or curve.
Step 7: Introduce Shading and Depth
Shading transforms a flat drawing into a three-dimensional form.
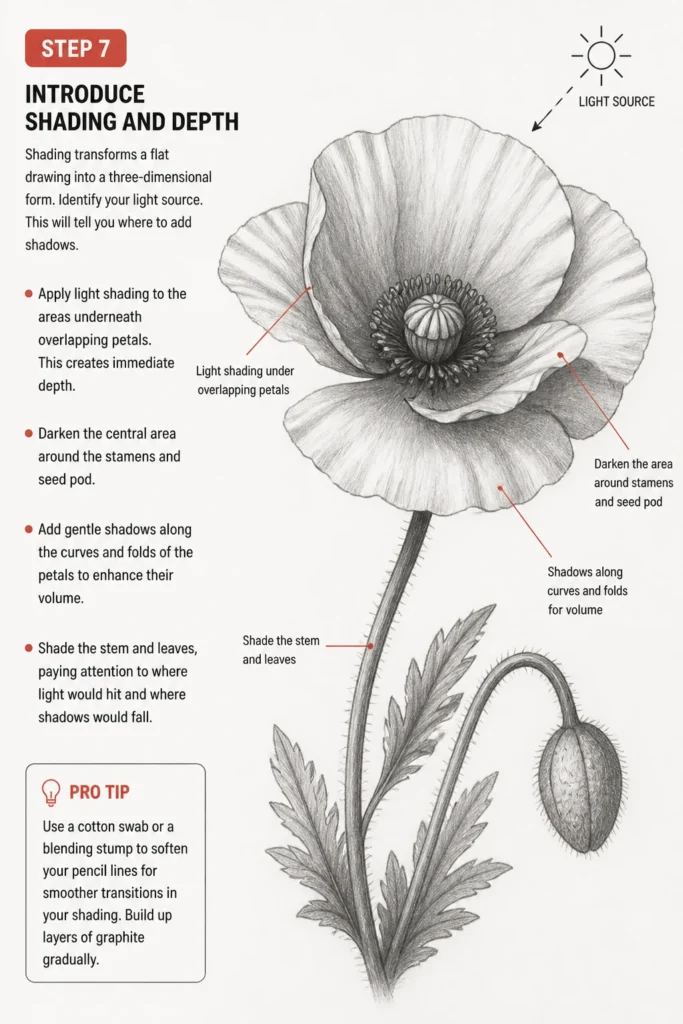
Identify your light source. This will tell you where to add shadows.
Apply light shading to the areas underneath overlapping petals.
This creates immediate depth.
Darken the central area around the stamens and seed pod.
Add gentle shadows along the curves and folds of the petals to enhance their volume.
Shade the stem and leaves, paying attention to where light would hit and where shadows would fall.
Pro Tip: Use a cotton swab or a blending stump to soften your pencil lines for smoother transitions in your shading. Build up layers of graphite gradually.
Step 8: Final Refinements and Erasing
Review your entire drawing for consistency and balance.
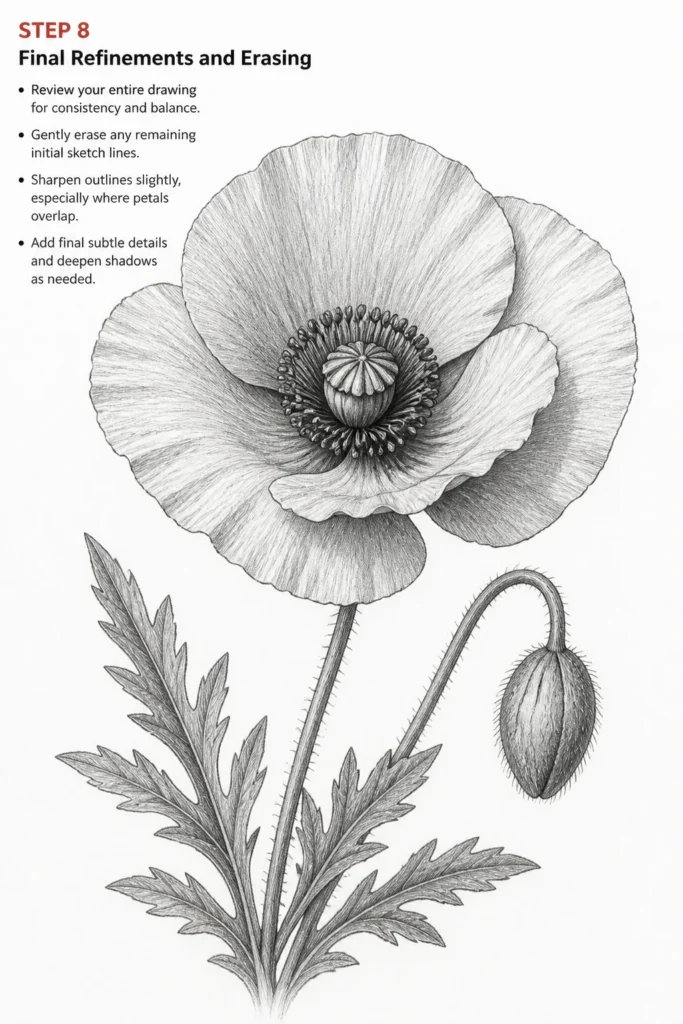
Gently erase any remaining initial sketch lines that are visible.
Sharpen some of your outlines slightly, particularly where one petal clearly overlaps another.
Add any final subtle details or deepen shadows as needed.
Ensure the overall composition feels harmonious and complete.
Common Mistakes to Avoid
Flat, Stiff Petals
A common pitfall is drawing petals that look two-dimensional or rigid. Poppies are known for their delicate, almost crumpled appearance.
To avoid this, focus on varying the petal shapes and ensuring they overlap naturally. Add subtle ruffles and folds along the edges and within the petal surface to convey a sense of movement and softness.
Symmetrical Layout
Nature is rarely perfectly symmetrical, and a poppy is no exception. Drawing petals that are all the same size or perfectly spaced can make your flower look unnatural.
Embrace asymmetry. Allow some petals to be larger or smaller, and let them overlap in an organic, slightly chaotic way. This creates a more dynamic and lifelike drawing.
Lack of Depth
A drawing can appear flat if there isn’t enough contrast or indication of overlapping elements. This makes the poppy look like a cutout rather than a bloom with volume.
Always consider where shadows would naturally fall, especially underneath overlapping petals or within the deep folds. Shading is crucial for giving your poppy a three-dimensional quality and making it pop off the page.
Overworking Details Too Early
Jumping into intricate details like veins or tiny stamens before the basic structure is solid can lead to a messy or disproportionate drawing. It’s like decorating a house before the foundation is built.
Follow a structured approach: establish the main shapes first, then refine the petals, and only then move to finer details. This ensures your drawing maintains its overall integrity and proportions.
Troubleshooting
My Petals Look Flat
If your petals lack dimension, it’s likely due to insufficient variation in their shapes and a lack of proper shading.
Go back and gently add more wavy lines to the edges of the petals. Introduce subtle, curved lines within the petals to suggest folds. Most importantly, add soft shadows where petals overlap or recede, using a light hand and building up layers.
The Center Doesn’t Look Right
The poppy’s center, with its seed pod and stamens, can be tricky to get right. It might look too uniform or out of place.
Ensure the central seed pod is slightly flattened, not a perfect circle. Around it, draw many small, irregular dots or short lines for the stamens. These should be denser and darker closest to the center, creating a focal point with varied texture.
My Drawing Lacks Realism
If your poppy doesn’t quite capture the natural beauty you envisioned, it might be missing subtle organic touches.
Observe real poppies or high-quality reference photos closely. Notice the slight imperfections, the varied textures, and the way light interacts with the delicate petals. Incorporate these observations into your drawing, perhaps by adding more nuanced shading or a few more delicate ruffles.
Key Takeaways
- Start with light, basic shapes to establish the overall structure.
- Embrace asymmetry and overlap in petals for a natural, dynamic look.
- Use shading effectively to create depth and a three-dimensional appearance.
- Refine petal edges with gentle waves and ruffles to convey delicacy.
- Pay attention to the unique details of the poppy’s center, stem, and leaves.
- Don’t be afraid to use an eraser and adjust your lines as you go.
Frequently Asked Questions
What kind of pencil should I use?
A standard HB pencil is excellent for initial sketches and light shading. For darker shadows and finer details, you might consider a 2B or 4B pencil. A harder pencil like 2H can be useful for very light guide lines.
How do I make the petals look delicate?
Delicacy comes from light lines, soft shading, and subtle texture. Avoid heavy outlines for the petals. Instead, use gentle, flowing curves and suggest ruffles rather than drawing them sharply. Blend your shading to create soft transitions, mimicking the papery feel of poppy petals.
Should I draw from a reference photo?
Absolutely! Drawing from reference photos is highly recommended, especially when you’re learning. It helps you understand the plant’s structure, petal arrangements, and how light affects its form. Look for photos with clear lighting and varied angles.
How can I add color to my poppy drawing?
Once your pencil drawing is complete, you can add color using colored pencils, watercolors, or pastels. Start with light layers and build up the intensity. Remember that poppies often have vibrant red or orange hues, with darker centers. Follow the shading you established to guide your color application.
Our Top Recommended Finds
- Strathmore 400 Series Drawing Paper: A versatile, medium-weight paper perfect for pencil, charcoal, and pastels. Its slight tooth holds graphite well.
- Faber-Castell Art Eraser: A high-quality kneaded eraser that lifts graphite without smudging or damaging the paper, essential for fine adjustments.
- Derwent Graphic Drawing Pencils: A set of various graphite grades (e.g., HB, 2B, 4B, 6B) offers flexibility for sketching, shading, and detailing.
Embrace Your Inner Artist
Drawing a poppy is more than just putting lines on paper; it’s about observing, understanding, and translating beauty.
Each stroke you make brings you closer to capturing its unique essence.
Don’t just read these steps; pick up your pencil and start creating your own stunning poppy today.