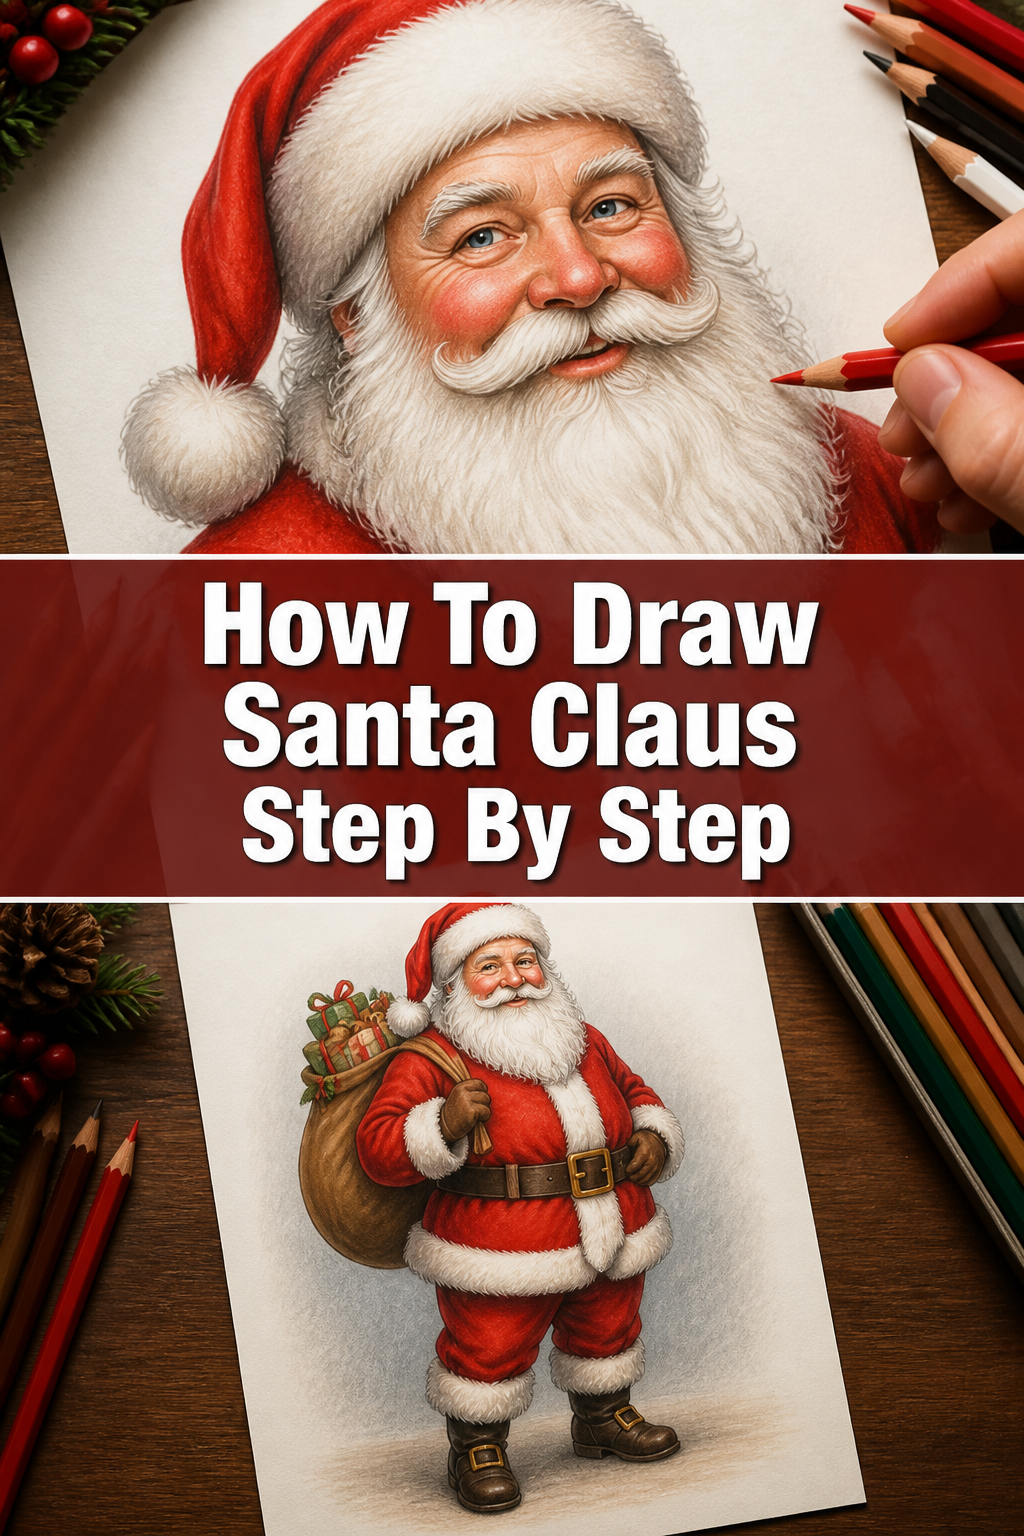
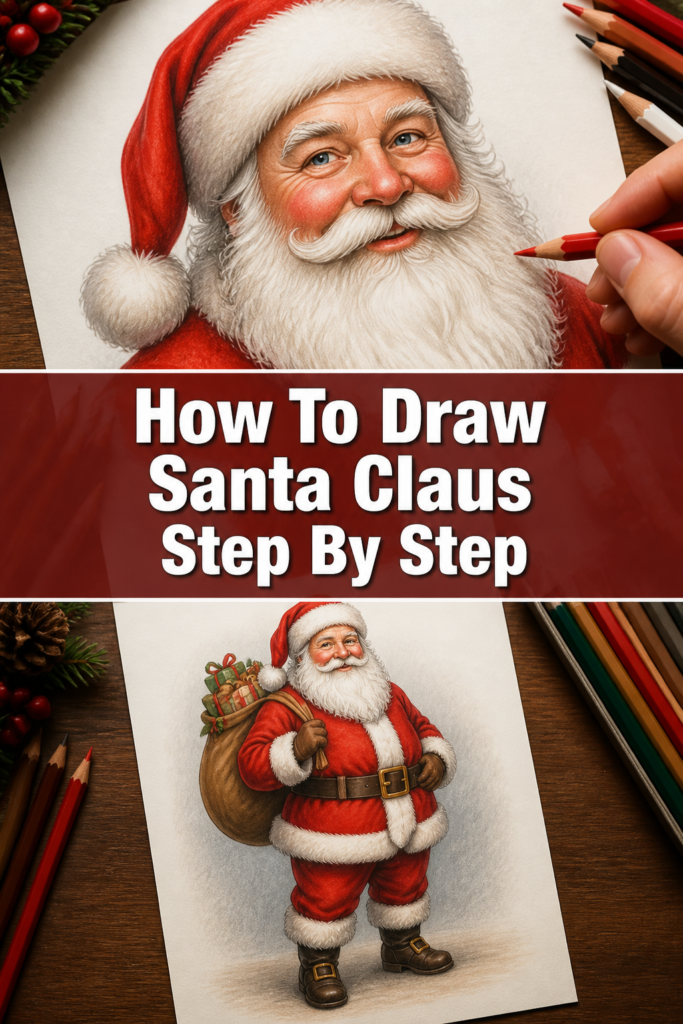
🎅 How To Draw Santa Claus Step By Step

& Painting
No rigid rules or pretension. Just practical guides, medium comparisons, and encouraging tips to help you enjoy the drawing & painting process.
Drawing the man in red is a wonderful way to get into the holiday spirit.
I have spent over a decade teaching holiday art workshops to students of all ages.
This guide uses simple shapes to ensure your Santa looks jolly and well-proportioned every single time.
Quick Overview
This tutorial breaks down the drawing process into manageable parts that anyone can follow.
- Time needed: 30 to 45 minutes
- Difficulty: Beginner
- What you’ll need: Drawing paper, a graphite pencil, an eraser, a black fine-liner, and colored markers or pencils.
Step-by-Step Instructions
Step 1: Sketch the Basic Proportions
Start by drawing a medium-sized circle near the top of your paper for the head.
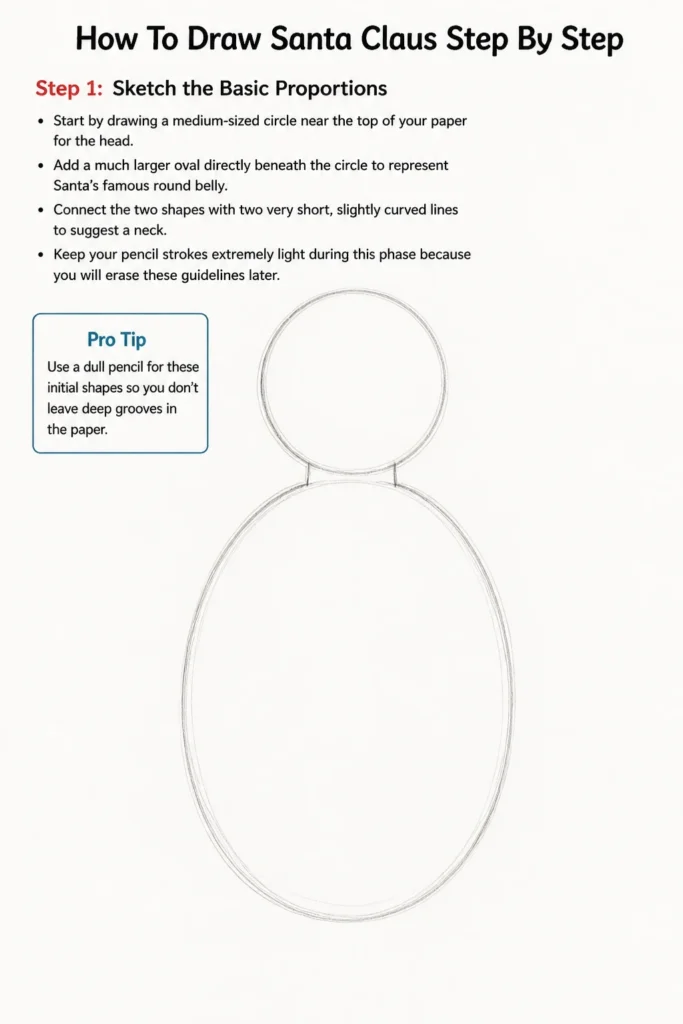
Add a much larger oval directly beneath the circle to represent Santa’s famous round belly.
Connect the two shapes with two very short, slightly curved lines to suggest a neck.
Keep your pencil strokes extremely light during this phase because you will erase these guidelines later.
Think of these shapes as the skeleton that holds your drawing together.
Pro Tip: Use a dull pencil for these initial shapes so you don’t leave deep grooves in the paper.
Step 2: Craft the Facial Features
Position a small oval right in the center of the head circle for the nose.
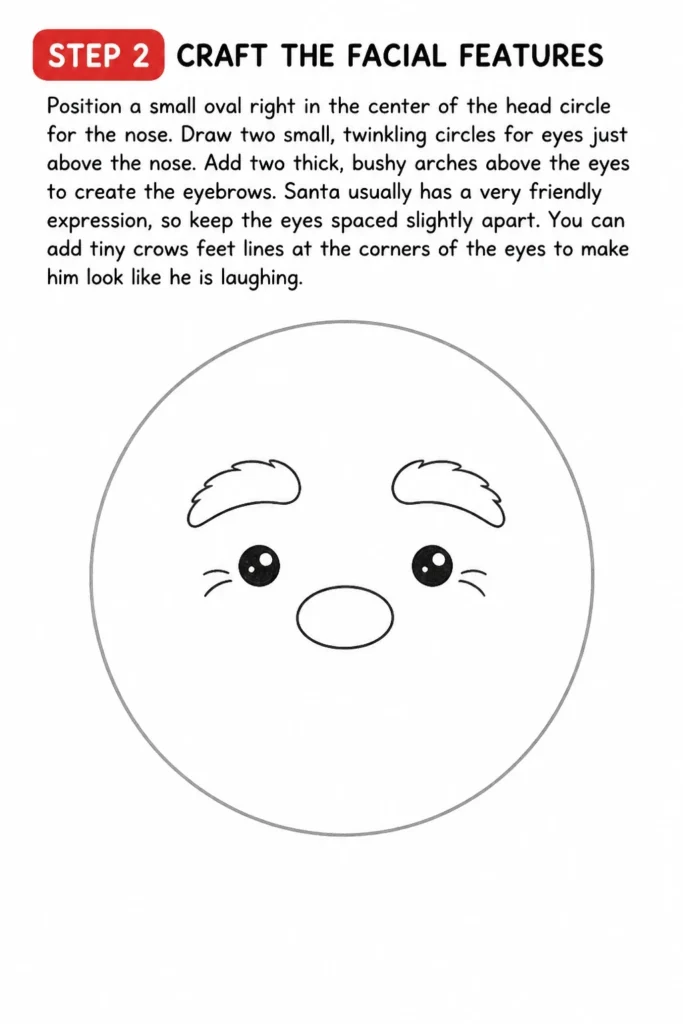
Draw two small, twinkling circles for eyes just above the nose.
Add two thick, bushy arches above the eyes to create the eyebrows.
Santa usually has a very friendly expression, so keep the eyes spaced slightly apart.
You can add tiny “crows feet” lines at the corners of the eyes to make him look like he is laughing.
Step 3: Add the Majestic Beard
Outline a large, fluffy cloud shape that starts at the ears and wraps around the bottom of the face.
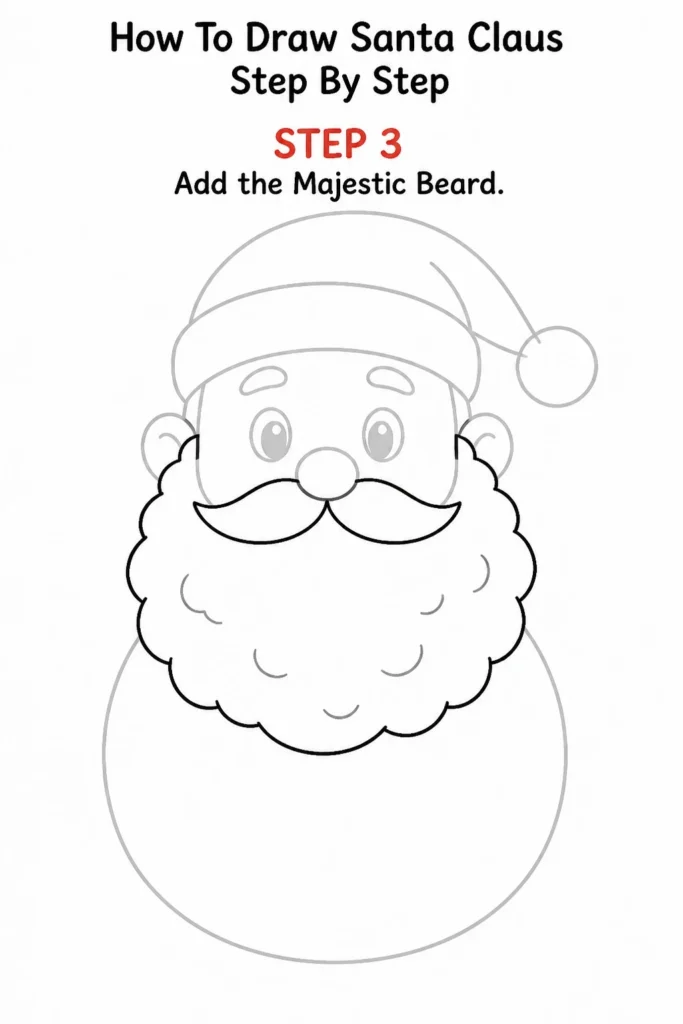
Draw a mustache using two teardrop shapes that meet right under the nose.
Ensure the bottom of the beard reaches down to the middle of the large belly oval.
The beard should look soft and voluminous, so use wavy, irregular lines rather than straight ones.
You can add a few internal “C” curves within the beard to give it more texture and depth.
Pro Tip: Make the mustache slightly wider than the nose to give Santa that classic, full-bearded look.
Step 4: Design the Classic Santa Hat
Draw a thick, rectangular band with rounded corners across the top of the head circle.
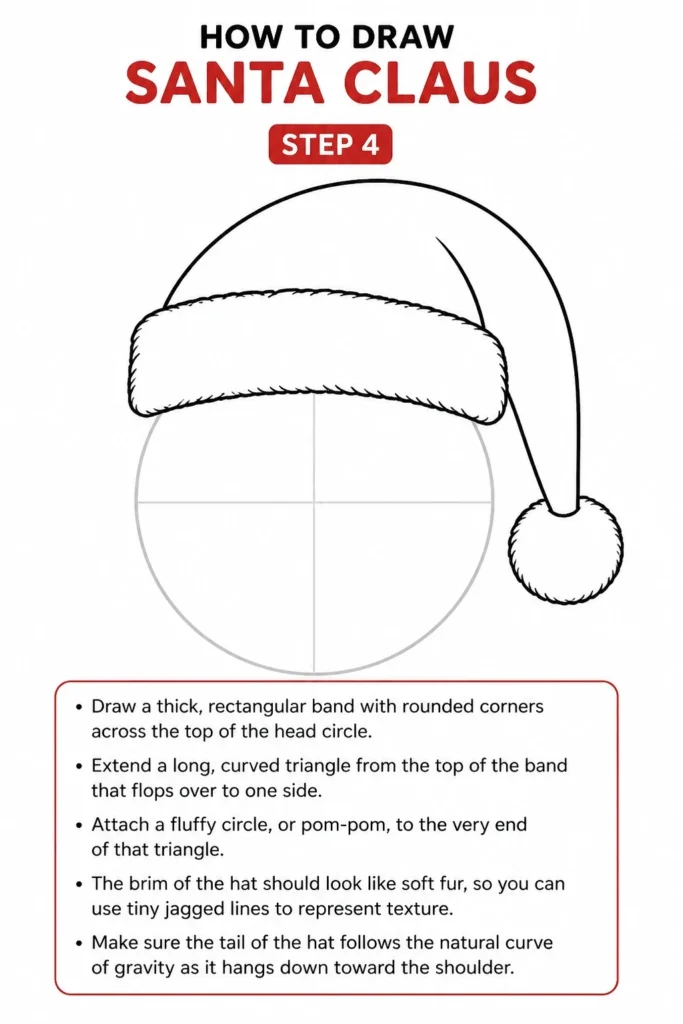
Extend a long, curved triangle from the top of the band that flops over to one side.
Attach a fluffy circle, or pom-pom, to the very end of that triangle.
The brim of the hat should look like soft fur, so you can use tiny jagged lines to represent texture.
Make sure the “tail” of the hat follows the natural curve of gravity as it hangs down toward the shoulder.
Step 5: Construct the Jolly Midsection
Trace over your large oval to define the outer edges of Santa’s coat.
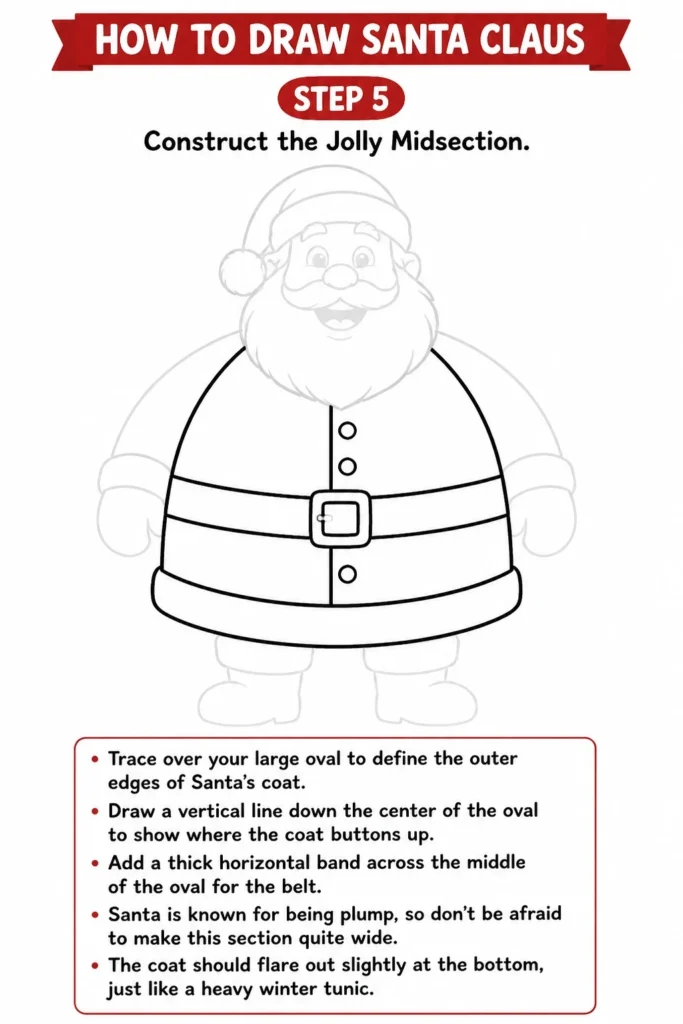
Draw a vertical line down the center of the oval to show where the coat buttons up.
Add a thick horizontal band across the middle of the oval for the belt.
Santa is known for being “plump,” so don’t be afraid to make this section quite wide.
The coat should flare out slightly at the bottom, just like a heavy winter tunic.
Step 6: Drawing the Arms and Cozy Mittens
Extend two thick tube shapes from the sides of the torso for the arms.
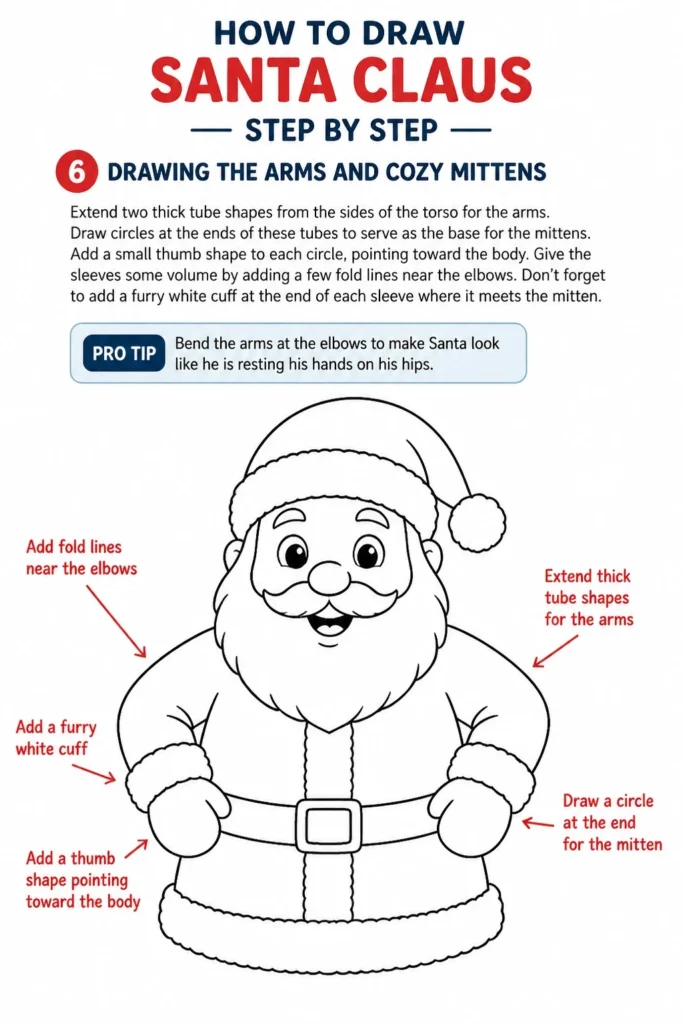
Draw circles at the ends of these tubes to serve as the base for the mittens.
Add a small thumb shape to each circle, pointing toward the body.
Give the sleeves some volume by adding a few “fold” lines near the elbows.
Don’t forget to add a furry white cuff at the end of each sleeve where it meets the mitten.
Pro Tip: Bend the arms at the elbows to make Santa look like he is resting his hands on his hips.
Step 7: Adding the Belt and Trousers
Draw a large square buckle in the center of the belt band you created earlier.
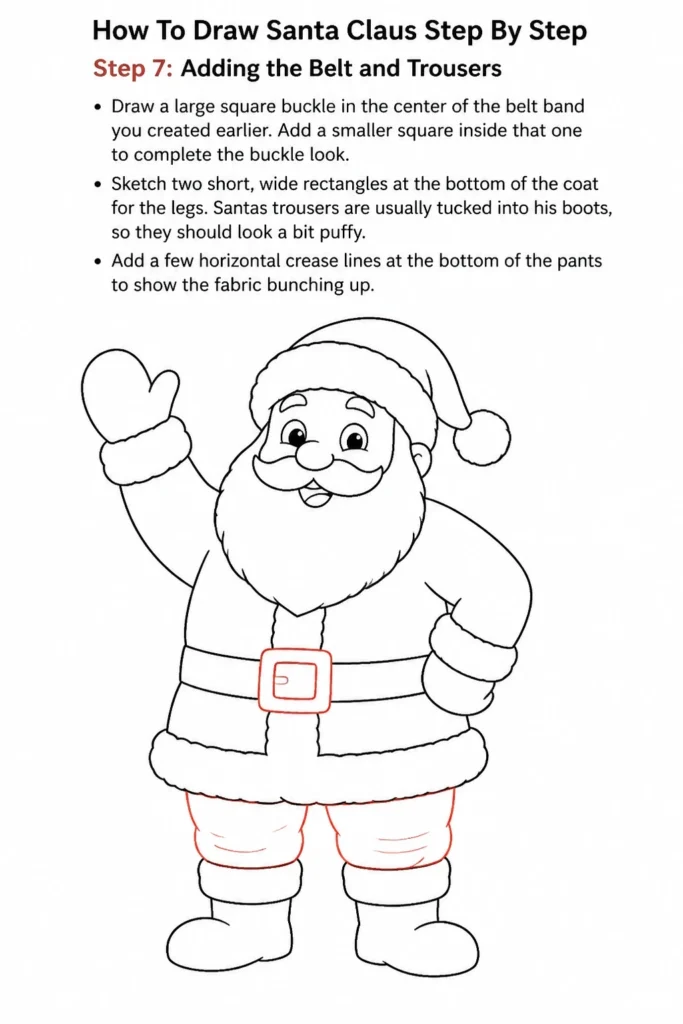
Add a smaller square inside that one to complete the buckle look.
Sketch two short, wide rectangles at the bottom of the coat for the legs.
Santa’s trousers are usually tucked into his boots, so they should look a bit puffy.
Add a few horizontal crease lines at the bottom of the pants to show the fabric bunching up.
Step 8: Sketching the Sturdy Boots
Draw two large L-shapes at the bottom of the legs to form the boots.
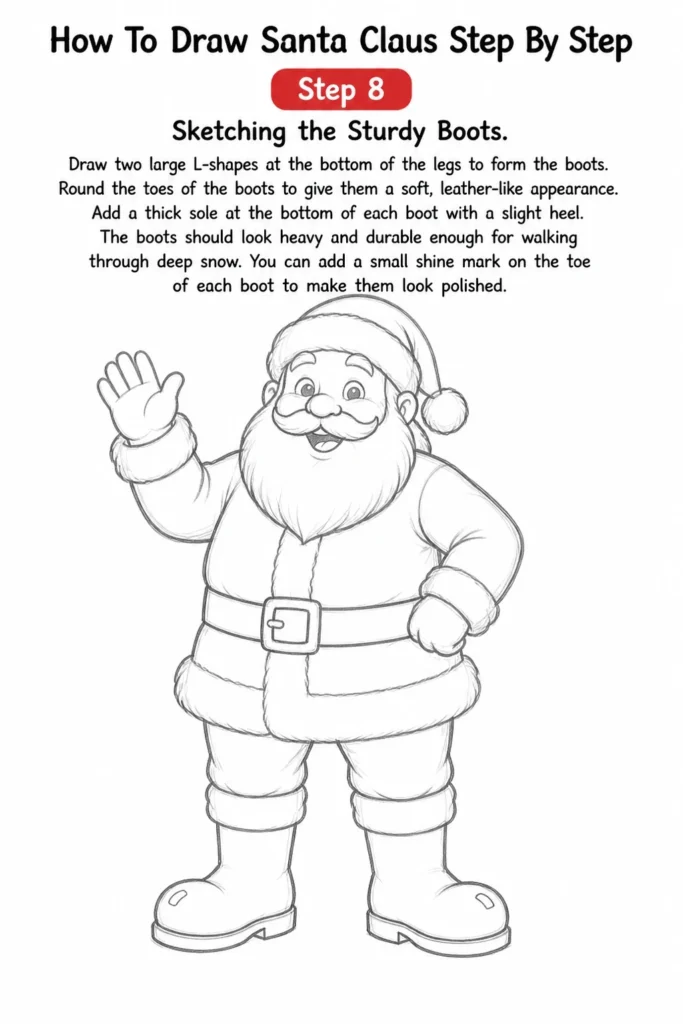
Round the toes of the boots to give them a soft, leather-like appearance.
Add a thick sole at the bottom of each boot with a slight heel.
The boots should look heavy and durable enough for walking through deep snow.
You can add a small shine mark on the toe of each boot to make them look polished.
Step 9: Adding the Sack of Toys
Sketch a giant, lumpy bean shape behind one of Santa’s shoulders.
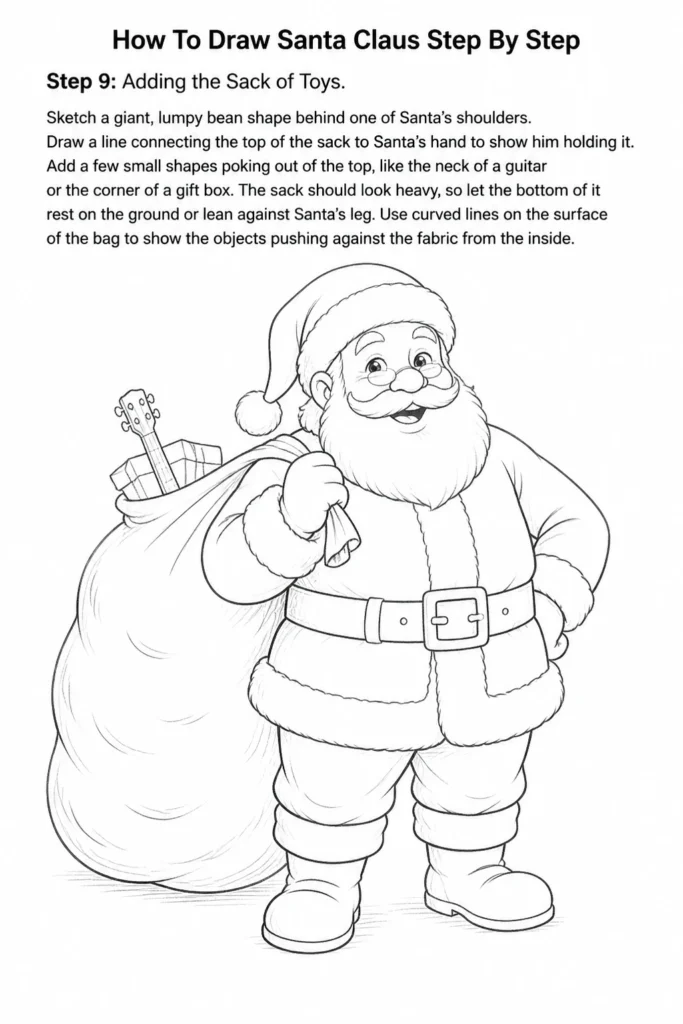
Draw a line connecting the top of the sack to Santa’s hand to show him holding it.
Add a few small shapes poking out of the top, like the neck of a guitar or the corner of a gift box.
The sack should look heavy, so let the bottom of it rest on the ground or lean against Santa’s leg.
Use curved lines on the surface of the bag to show the objects pushing against the fabric from the inside.
Step 10: Refining and Inking Your Work
Trace over your final pencil lines with a black fine-liner or marker.
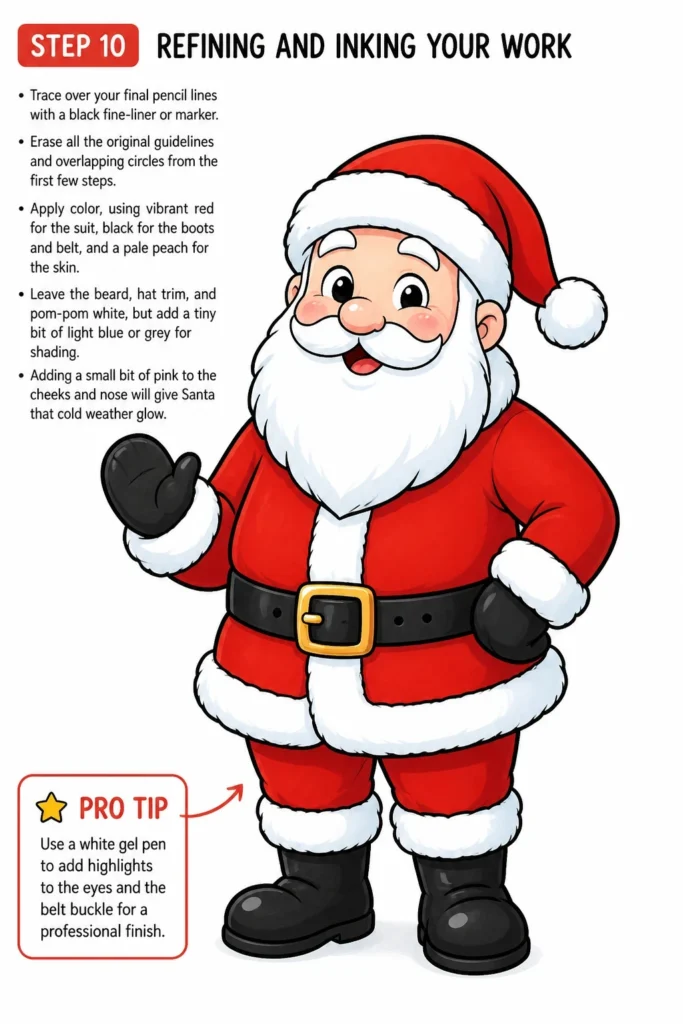
Erase all the original guidelines and overlapping circles from the first few steps.
Apply color, using vibrant red for the suit, black for the boots and belt, and a pale peach for the skin.
Leave the beard, hat trim, and pom-pom white, but add a tiny bit of light blue or grey for shading.
Adding a small bit of pink to the cheeks and nose will give Santa that “cold weather” glow.
Pro Tip: Use a white gel pen to add highlights to the eyes and the belt buckle for a professional finish.
Common Mistakes to Avoid
Making the Beard Too Small
Many beginners draw a tiny beard that only covers the chin. Santa is famous for a large, flowing beard that covers his chest and hides his neck. If the beard is too small, he might look more like a garden gnome than the legendary Father Christmas.
Drawing Stiff Straight Limbs
If you draw the arms and legs as perfectly straight rectangles, the character will look like a robot. Santa is soft, round, and jolly, so his limbs should have slight curves and folds in the fabric. Always try to add a little “bend” to the elbows and knees to create a more natural posture.
Neglecting the Belt Placement
Placing the belt too high or too low can ruin the “big belly” effect. The belt should sit right at the widest part of his midsection to emphasize his roundness. If you put it too high, his torso will look cramped; if it is too low, his legs will look unnaturally short.
Using Too Much Pressure
Pressing down hard with your pencil during the early stages makes it impossible to erase mistakes. These “ghost lines” will show through your final coloring and make the drawing look messy. Always start with the lightest touch possible until you are certain of your final lines.
Troubleshooting
The Face Looks Grumpy
If your Santa looks mean instead of happy, check the angle of the eyebrows and the mouth. Downward-slanting eyebrows create an angry look, so make sure they are arched high and away from the eyes. Also, ensure the corners of the mustache or mouth are pointing upward in a smile.
The Drawing Feels Flat
A flat drawing usually lacks shading or varied line weights. Try making the lines on the underside of the arms and belly slightly thicker than the lines on the top. Adding a small shadow on the ground beneath his boots will also help “anchor” him in space and give the image depth.
Proportions Feel Off
If Santa looks too skinny or his head looks too big, step back from your drawing for a moment. You can fix a skinny Santa by widening the outer coat lines or making the beard fluffier. If the head is too large, try making the hat pom-pom and the coat collar larger to balance the scale.
Key Takeaways
- Start with light, basic shapes like circles and ovals to establish the foundation.
- Focus on the “roundness” of the character to capture Santa’s jolly personality.
- Use wavy lines for the beard and fur trim to create a soft, realistic texture.
- Don’t forget the small details like the belt buckle and the highlights in the eyes.
- Layer your colors by starting with light shades and gradually adding darker shadows.
- Practice the “C” curve for the belly and beard to maintain a consistent style.
Frequently Asked Questions
What is the best way to color Santa’s beard?
The best way to color the beard is to actually leave most of it white. You only need to add very light blue or cool grey shadows in the “clefts” of the hair and under the mustache. This creates the illusion of volume without making the beard look dirty or grey.
How do I make the fur look fluffy?
Instead of drawing a solid straight line for the hat brim and cuffs, use a “scalloped” line or a series of tiny, messy zig-zags. This breaks up the edge and makes it look like soft sheepskin or faux fur. You can also add a few dots or “stippling” to give it a textured feel.
Can I draw Santa sitting down?
Yes, but it requires a slightly different approach to the legs. Instead of vertical rectangles, you would draw the thighs as horizontal ovals and the lower legs dropping down from the knees. His belly would also rest more noticeably on his lap in a sitting position.
What markers are best for holiday drawings?
Alcohol-based markers are excellent because they blend smoothly and don’t leave streak marks. However, if you are working on thinner paper, high-quality colored pencils are often better as they won’t bleed through. Look for “soft core” pencils for the richest red colors.
Our Top Recommended Finds
- Kneaded Eraser: This tool is perfect for lifting light pencil marks without damaging the surface of your paper.
- Dual-Tip Alcohol Markers: These provide a broad chisel tip for the large red suit and a fine tip for the small facial details.
- Heavyweight Sketchbook: Using paper with a bit of “tooth” or thickness will prevent your markers from bleeding and allow for better pencil blending.
Bring Your Holiday Art To Life
Now that you have mastered the basics of drawing Santa, you can start adding your own personal touches.
Try drawing a snowy background, a plate of cookies, or even a few of his trusty reindeer nearby.
The more you practice these shapes, the faster and more confident your drawing style will become.
Grab your favorite red marker and start creating some holiday magic on your paper today.
& Painting
No rigid rules or pretension. Just practical guides, medium comparisons, and encouraging tips to help you enjoy the drawing & painting process.