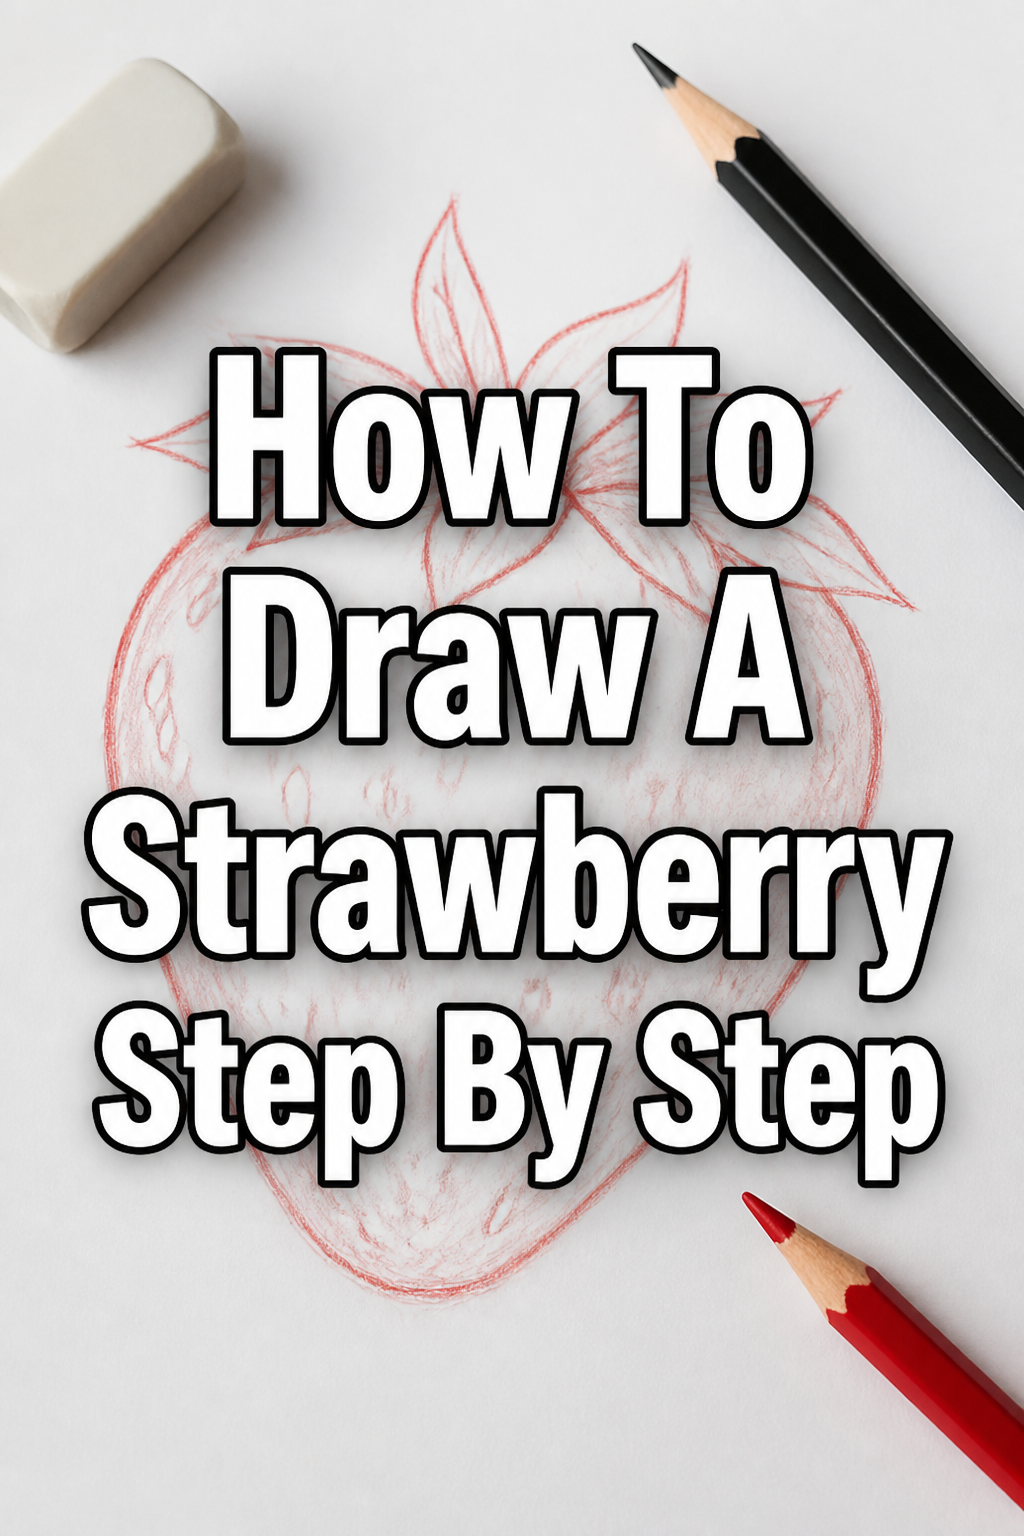
✨ How To Draw A Strawberry Step By Step

& Painting
No rigid rules or pretension. Just practical guides, medium comparisons, and encouraging tips to help you enjoy the drawing & painting process.
Drawing a strawberry can seem tricky with its unique shape and many seeds. I remember my first attempts looked more like a lumpy heart than a juicy berry. But with a few simple steps, you can create a beautiful, realistic drawing. This guide shares the exact process I use, making it easy for anyone to follow along.
Quick Overview
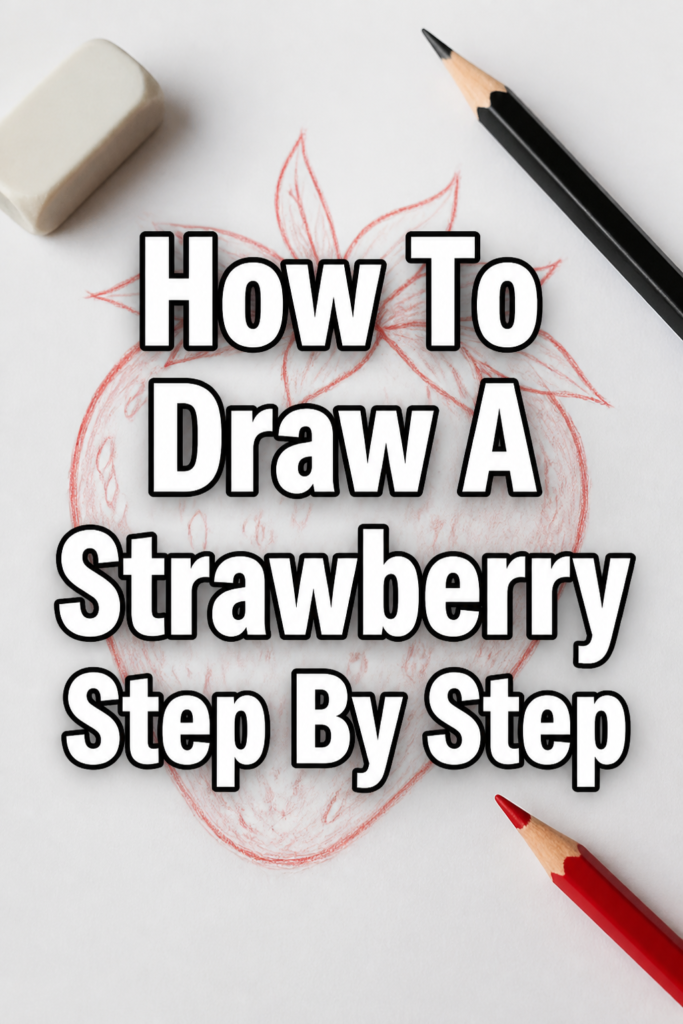
This guide will walk you through creating a charming strawberry drawing from scratch. You’ll learn how to build its basic form, add details, and even suggest texture.
- Time needed: 20-40 minutes (depending on detail)
- Difficulty: Beginner
- What you’ll need: Pencil (HB, 2B), eraser, paper, optional colored pencils or markers
Step-by-Step Instructions
Step 1: Sketch the Basic Shape
Begin by lightly sketching the main body of your strawberry. Think of it as an upside-down heart or a slightly irregular oval that tapers towards the bottom. Don’t press too hard with your pencil.
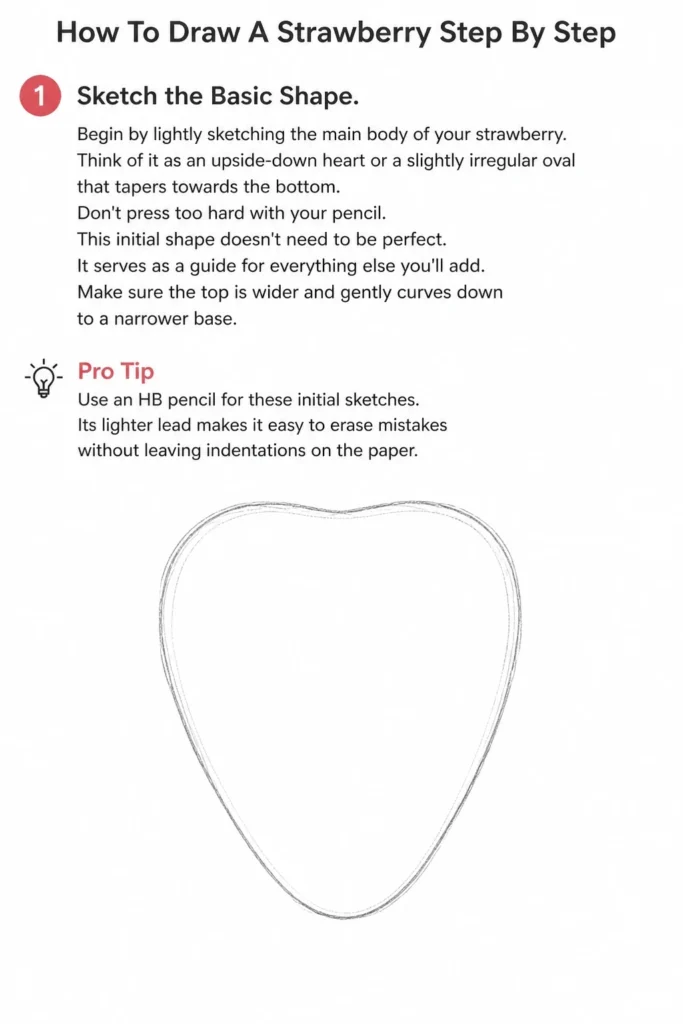
This initial shape doesn’t need to be perfect. It serves as a guide for everything else you’ll add. Make sure the top is wider and gently curves down to a narrower base.
Pro Tip: Use an HB pencil for these initial sketches. Its lighter lead makes it easy to erase mistakes without leaving indentations on the paper.
Step 2: Add the Calyx (Green Leaves)
Now, let’s draw the green leafy top, also known as the calyx. From the wider top of your strawberry shape, draw several small, pointed leaf-like forms radiating outwards. These leaves often overlap slightly.
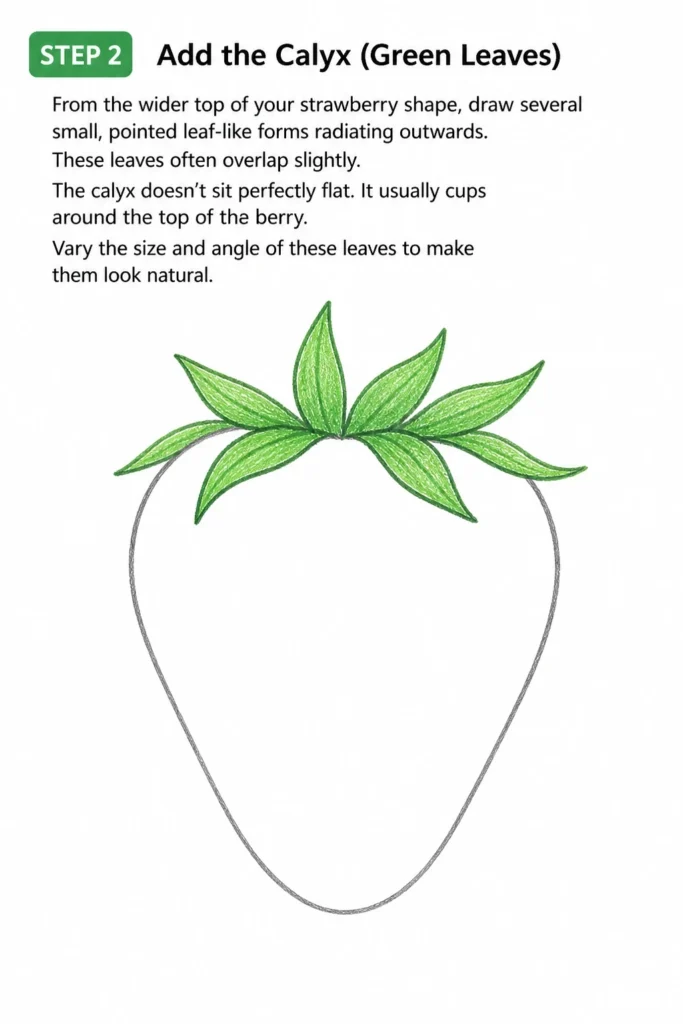
The calyx doesn’t sit perfectly flat. It usually cups around the top of the berry. Vary the size and angle of these leaves to make them look natural.
Step 3: Define the Strawberry’s Outline
Once your basic shape and calyx are in place, refine the outer lines of your strawberry. Make the curves smoother and more organic. Think about the slight bumps and dips you see on real strawberries.
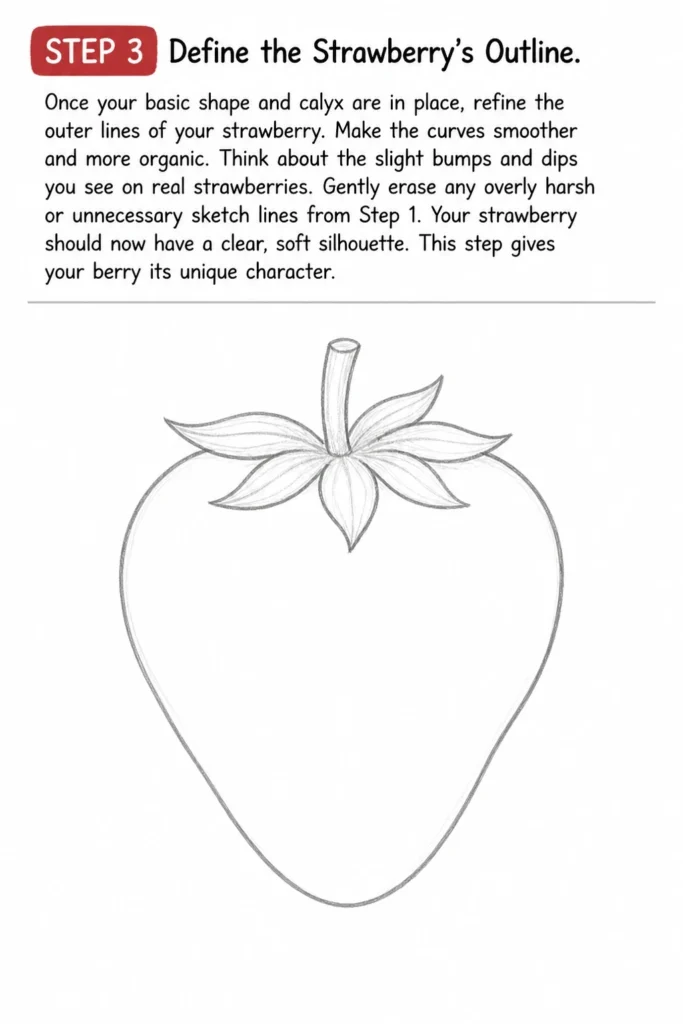
Gently erase any overly harsh or unnecessary sketch lines from Step 1. Your strawberry should now have a clear, soft silhouette. This step gives your berry its unique character.
Step 4: Mark the Seed Placement
Strawberries are famous for their tiny seeds embedded in the surface. To represent these, draw a series of small, shallow ovals or teardrop shapes across the strawberry’s body. These marks indicate where each seed will sit.
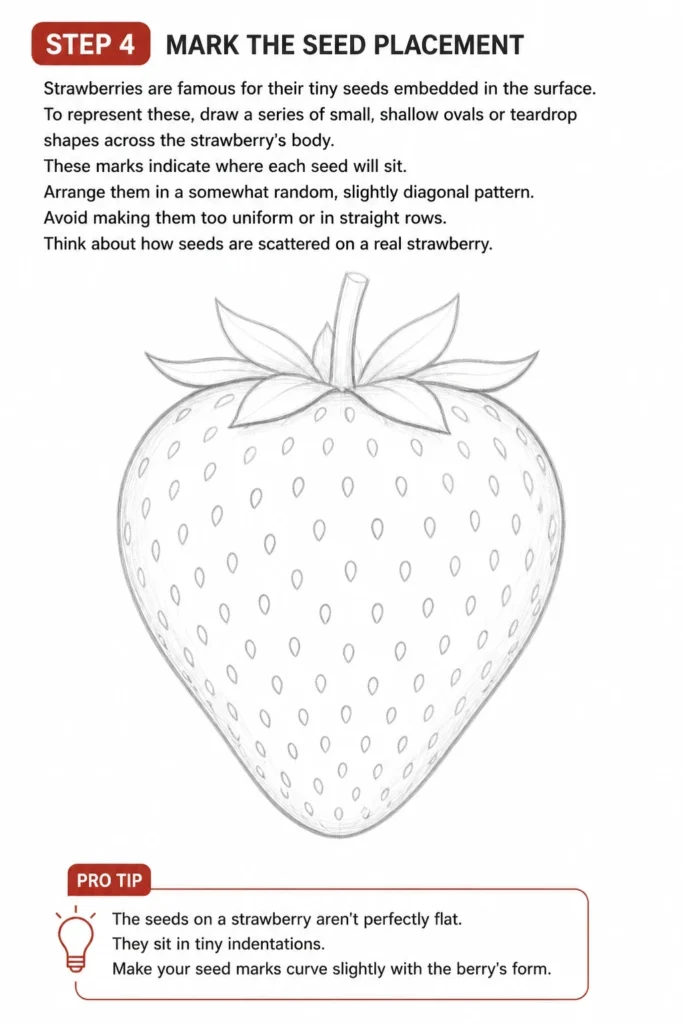
Arrange them in a somewhat random, slightly diagonal pattern. Avoid making them too uniform or in straight rows. Think about how seeds are scattered on a real strawberry.
Pro Tip: The seeds on a strawberry aren’t perfectly flat. They sit in tiny indentations. Make your seed marks curve slightly with the berry’s form.
Step 5: Draw the Individual Seeds
Now, let’s detail those seed placements. Within each small oval or teardrop shape you drew in Step 4, draw a tiny, elongated oval or a very small, pointed teardrop for the actual seed. These seeds are usually darker.
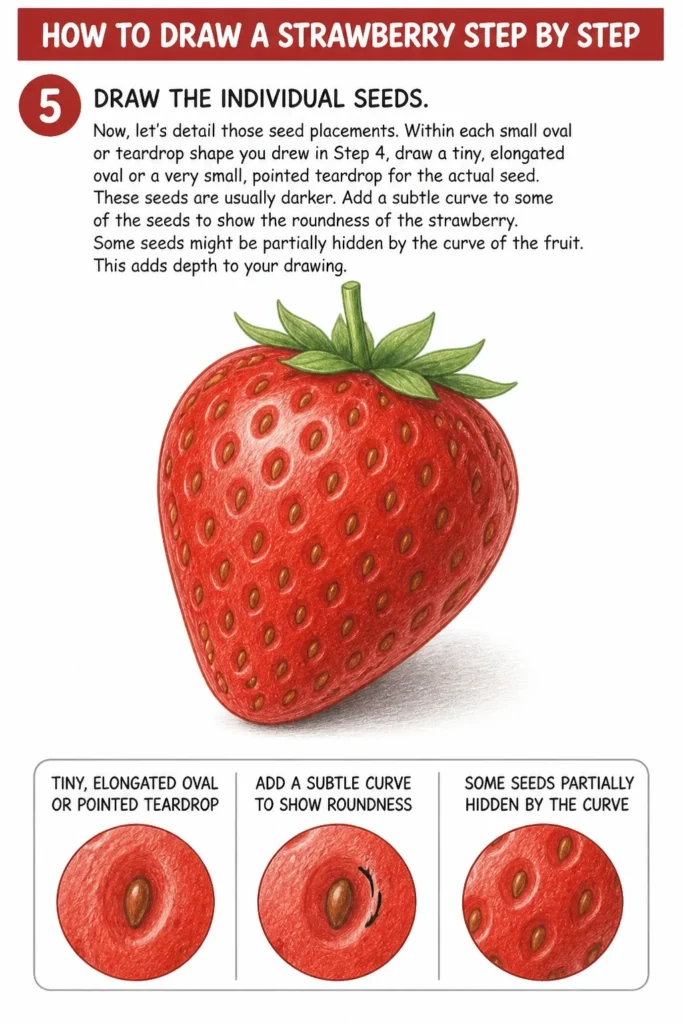
Add a subtle curve to some of the seeds to show the roundness of the strawberry. Some seeds might be partially hidden by the curve of the fruit. This adds depth to your drawing.
Step 6: Add Texture and Shading
This step brings your strawberry to life. Using a softer pencil (like a 2B), add light shading to give the strawberry volume. Think about where a light source would hit your berry. The side opposite the light will be darker.
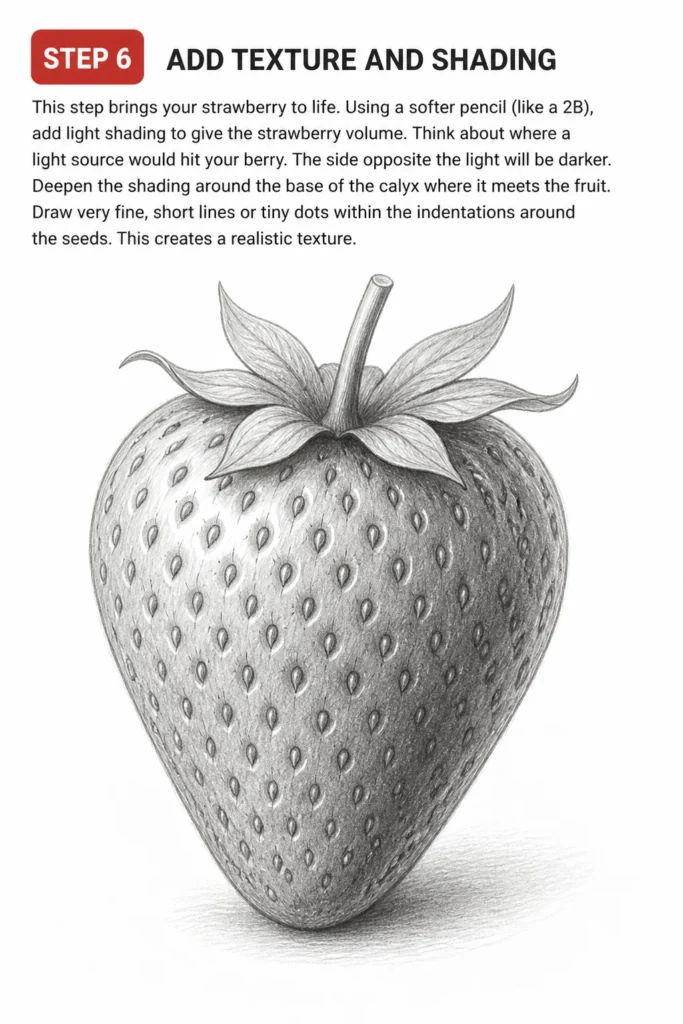
Deepen the shading around the base of the calyx where it meets the fruit. Draw very fine, short lines or tiny dots within the indentations around the seeds. This creates a realistic texture.
Step 7: Detail the Calyx and Stem
Refine the leaves of the calyx. Add a few veins to them and some subtle shading to show their form. The leaves will also have a darker side away from the light.
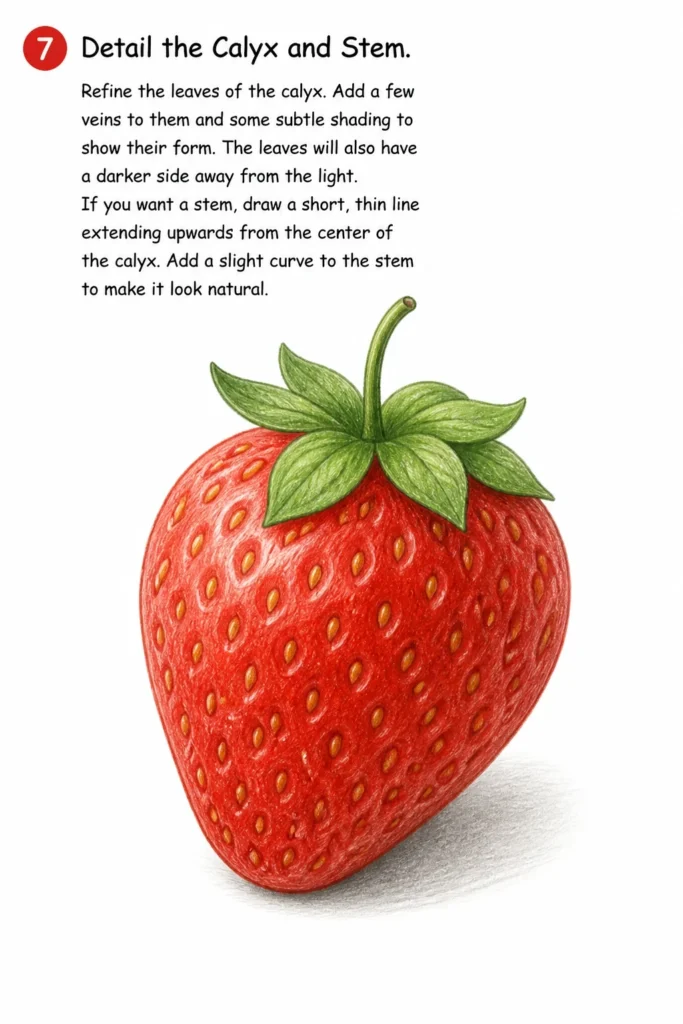
If you want a stem, draw a short, thin line extending upwards from the center of the calyx. Add a slight curve to the stem to make it look natural.
Step 8: Final Touches and Erasing
Review your entire drawing. Darken any lines that need more emphasis, such as the main outline of the strawberry or the edges of the seeds. Make sure your seeds stand out.
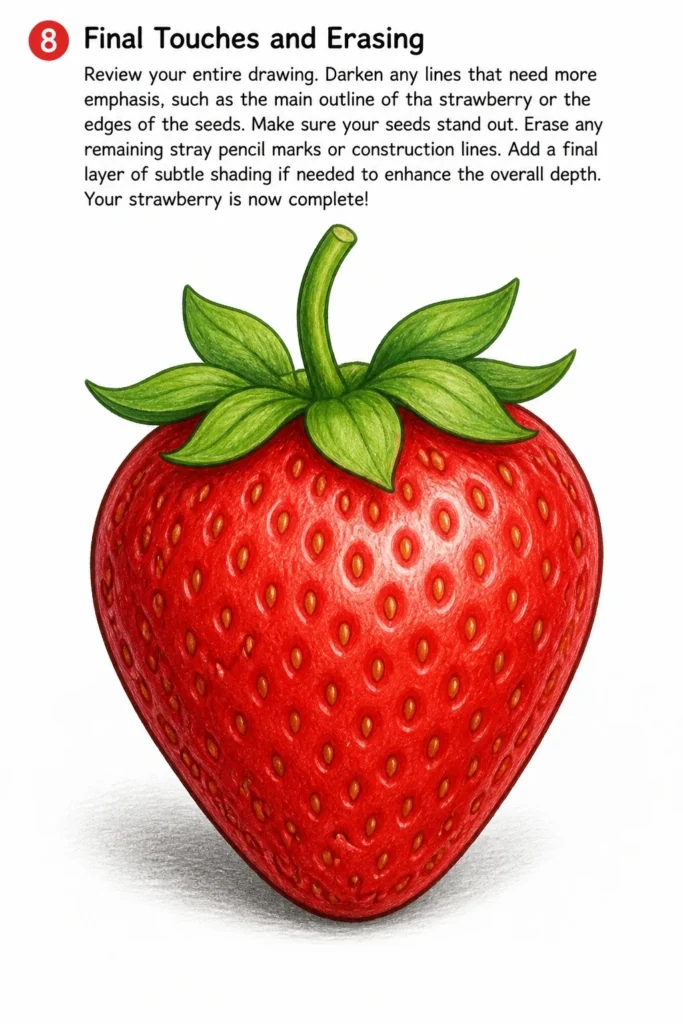
Erase any remaining stray pencil marks or construction lines. Add a final layer of subtle shading if needed to enhance the overall depth. Your strawberry is now complete!
Common Mistakes to Avoid
Making the Shape Too Symmetrical
Many beginners draw strawberries as perfectly symmetrical hearts. Real strawberries are organic and often have unique bumps and slight irregularities. Drawing them too perfectly can make them look unnatural and stiff.
Instead, allow for a bit of asymmetry. One side might be slightly wider or have a gentler curve than the other. This gives your strawberry a more authentic and appealing appearance.
Overlooking Seed Placement
Placing seeds in perfectly straight rows or making them all the same size is a common pitfall. This can make the strawberry look manufactured rather than naturally grown. The seeds are a key part of its texture.
Vary the size and spacing of your seeds. Arrange them in a slightly staggered or diagonal pattern that follows the curve of the fruit. This creates a more dynamic and realistic texture.
Flat Shading
Applying shading uniformly across the entire strawberry can make it look flat and two-dimensional. Shading is what gives a drawing depth and volume, making it appear three-dimensional.
Always consider a light source. The areas closest to the light will be brighter, while areas further away or in shadow will be darker. Use a range of pencil pressures to create smooth transitions from light to dark.
Neglecting the Calyx Details
The green leaves (calyx) at the top of the strawberry are often drawn as simple, flat shapes. However, they contribute significantly to the overall realism and character of the fruit. Ignoring their form can make the top look unconvincing.
Give the calyx leaves some individual shape and curve. Show how they overlap and where they attach to the fruit. Add subtle veins and a bit of shading to suggest their texture and volume.
Troubleshooting
My Strawberry Looks Flat
If your strawberry lacks depth and appears two-dimensional, it’s likely due to insufficient or uniform shading. Shading is crucial for creating the illusion of form and volume.
Focus on establishing a clear light source. Identify the highlight, mid-tones, and shadows. Gradually build up darker values in the areas that recede or are away from the light, and leave highlights bright. This contrast will make your strawberry pop.
The Seeds Don’t Look Right
Seeds that appear too uniform, too large, or poorly integrated into the strawberry’s surface can detract from the drawing. They might look like they’re floating on top rather than embedded.
Ensure your seed marks are small, varied in size, and follow the curve of the strawberry. Remember that seeds sit in tiny indentations. Add subtle, darker shading around each seed to suggest this slight depression, making them look embedded.
The Calyx (Leaves) Seems Unnatural
If the green leaves at the top look stiff or detached, it means they might not be well-integrated with the main body of the fruit. Natural leaves have organic curves and often overlap.
Draw the calyx leaves with varying angles and lengths. Allow them to gently cup the top of the strawberry. Add subtle bends and creases to the leaves to give them a more natural, organic appearance.
Key Takeaways
- Start with a light sketch to establish the basic, slightly irregular shape of the strawberry.
- Define the calyx with varied, overlapping leaves that cup the top of the fruit.
- Place seeds strategically in a non-uniform pattern, following the berry’s curve.
- Use shading effectively to create volume, showing highlights, mid-tones, and shadows.
- Refine details like seed indentations and calyx veins to enhance realism.
- Embrace asymmetry for a more natural and organic strawberry drawing.
Frequently Asked Questions
What’s the best pencil hardness for drawing a strawberry?
For the initial sketch, an HB pencil is ideal because it’s light and easy to erase. For shading and adding details, a softer pencil like a 2B or even a 4B can help you achieve deeper tones and smoother transitions.
How do I make the strawberry look shiny?
To create a shiny appearance, leave some small, distinct areas of your strawberry completely white or very lightly shaded. These are your highlights. Ensure they are placed where the light source would directly hit the berry, creating a stark contrast with the surrounding shaded areas.
Should I draw every single seed?
You don’t need to draw every individual seed. Instead, focus on creating the impression of many seeds. Vary their size and placement, and use subtle shading around them to suggest texture without meticulously drawing each one. It’s about implying detail, not rendering every single element.
How can I make my strawberry drawing more realistic?
To increase realism, observe real strawberries closely. Pay attention to their unique curves, the way the calyx attaches, the texture of the seeds, and how light falls on their bumpy surface. Incorporating these observations into your drawing will make a big difference.
Our Top Recommended Finds
- Sketching Pencils Set: A good set with varying lead hardness (HB, 2B, 4B, 6B) gives you versatility for sketching and shading.
- Kneaded Eraser: This type of eraser is excellent for lifting graphite lightly without smudging, perfect for highlights and corrections.
- Quality Drawing Paper: Paper with a slight tooth (texture) holds graphite well and allows for smooth blending, improving your final result.
Your Next Creative Adventure Awaits
You’ve successfully drawn a delightful strawberry, a fantastic step in your artistic journey. This process of breaking down complex shapes into simple steps is a powerful tool. Keep practicing these skills.
Now that you’ve mastered the strawberry, why not try drawing other fruits or vegetables? The techniques you learned for form, texture, and shading are universally applicable. Pick up your pencil today and let your creativity flow!
& Painting
No rigid rules or pretension. Just practical guides, medium comparisons, and encouraging tips to help you enjoy the drawing & painting process.