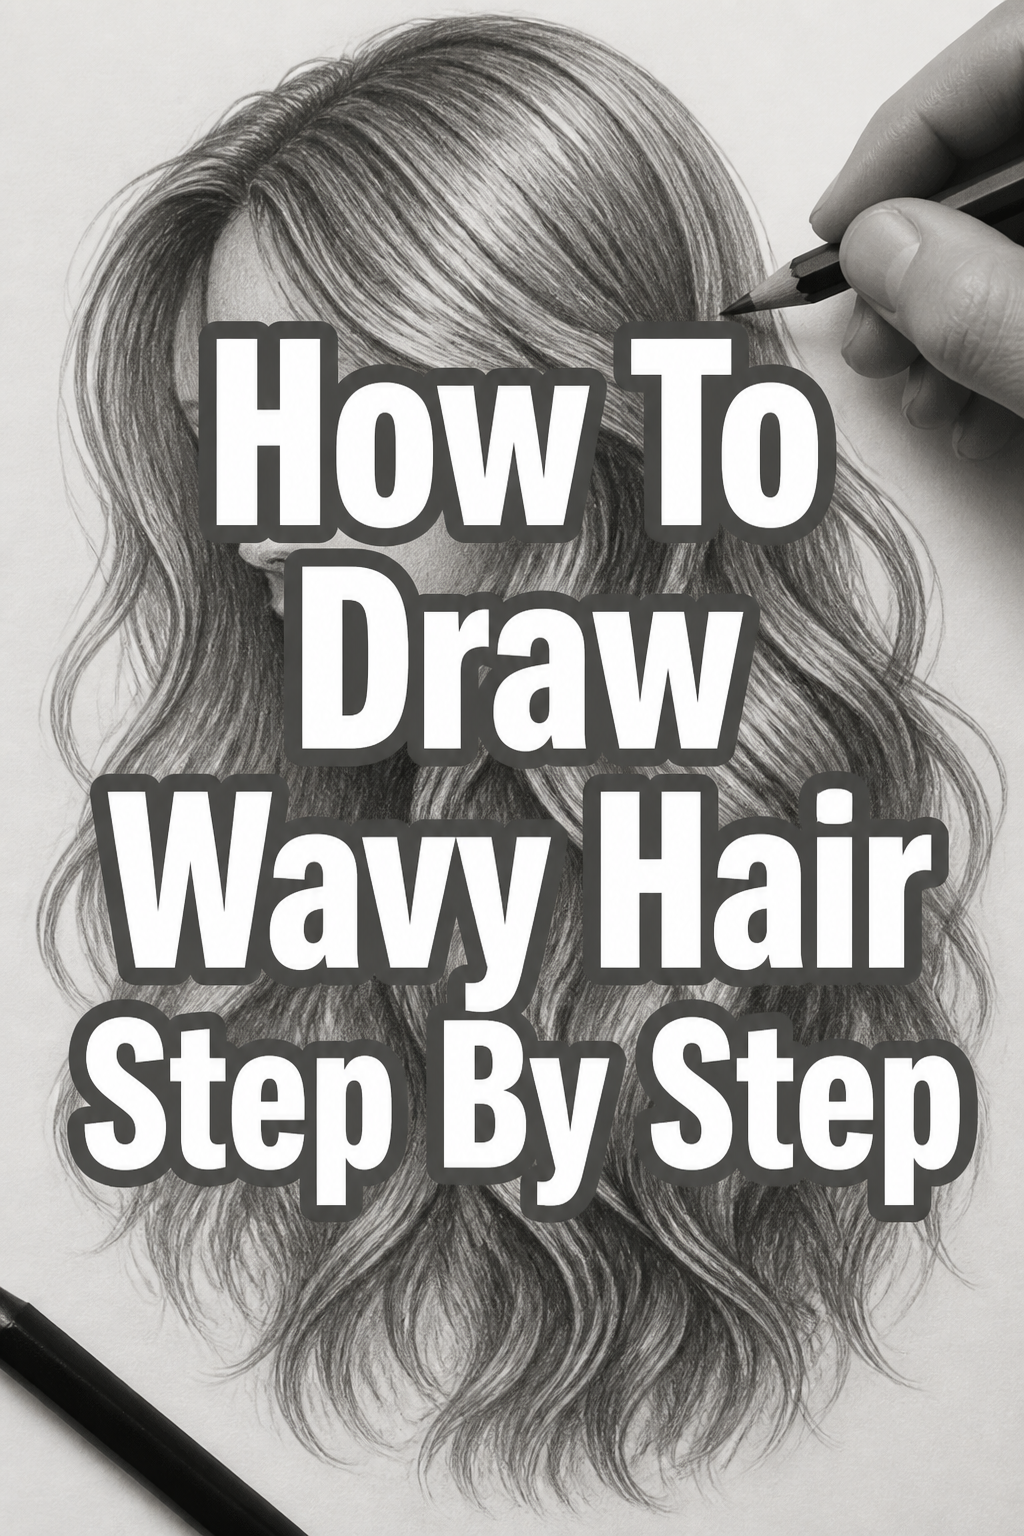
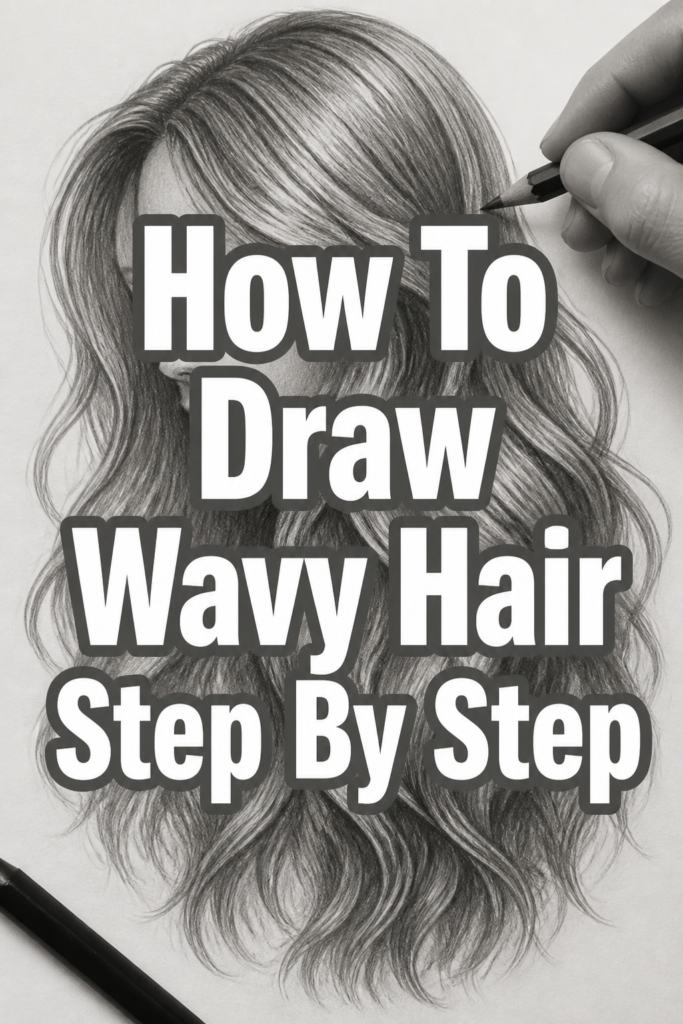
🎨 How To Draw Wavy Hair Step By Step

& Painting
No rigid rules or pretension. Just practical guides, medium comparisons, and encouraging tips to help you enjoy the drawing & painting process.
Learning to draw hair can feel intimidating, especially when aiming for natural movement and flow. Many aspiring artists struggle to capture the organic bounce of waves, often ending up with stiff, unrealistic results.
I remember countless hours spent practicing, trying to make strands look soft and dynamic instead of rigid. This guide distills years of observation and artistic practice into clear, actionable steps, designed to help you achieve beautiful, believable wavy hair in your drawings. You’ll gain the confidence to bring your characters to life with stunning, flowing locks.
Quick Overview
This guide will walk you through the process of drawing wavy hair, from initial structure to final rendering. You’ll learn to build up layers, understand light, and create convincing texture.
- Time needed: 45-60 minutes
- Difficulty: Intermediate
- What you’ll need: Drawing paper, pencils (HB, 2B, 4B, 6B recommended), kneaded eraser, stick eraser, blending stump or cotton swab.
Step-by-Step Instructions
Step 1: Understand the Underlying Head Shape and Hairline
Begin by lightly sketching the basic shape of the head. Even if the hair will cover most of it, understanding the skull’s curve is crucial for realistic hair placement.
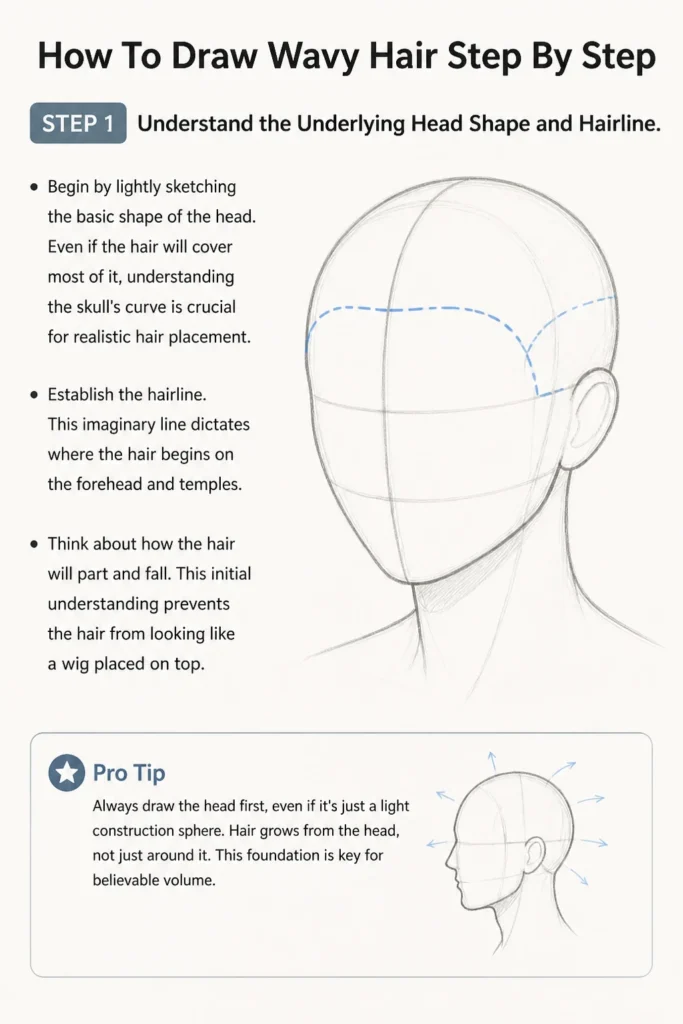
Establish the hairline. This imaginary line dictates where the hair begins on the forehead and temples.
Think about how the hair will part and fall. This initial understanding prevents the hair from looking like a wig placed on top.
Pro Tip: Always draw the head first, even if it’s just a light construction sphere. Hair grows from the head, not just around it. This foundation is key for believable volume.
Step 2: Define the Major Hair Mass and Flow
Sketch the overall silhouette of the hair. Don’t draw individual strands yet.
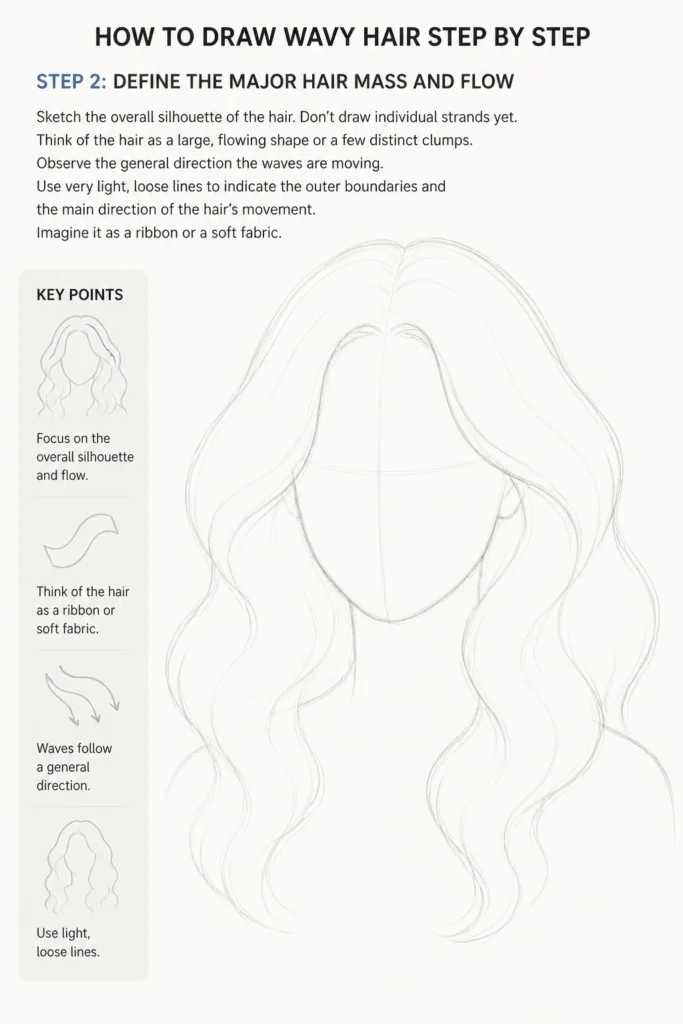
Think of the hair as a large, flowing shape or a few distinct clumps. Observe the general direction the waves are moving.
Use very light, loose lines to indicate the outer boundaries and the main direction of the hair’s movement. Imagine it as a ribbon or a soft fabric.
Step 3: Block In the Primary Wave Shapes
Identify the largest “S” curves or C-shapes within the hair mass. These are the main waves that give the hair its characteristic bounce.
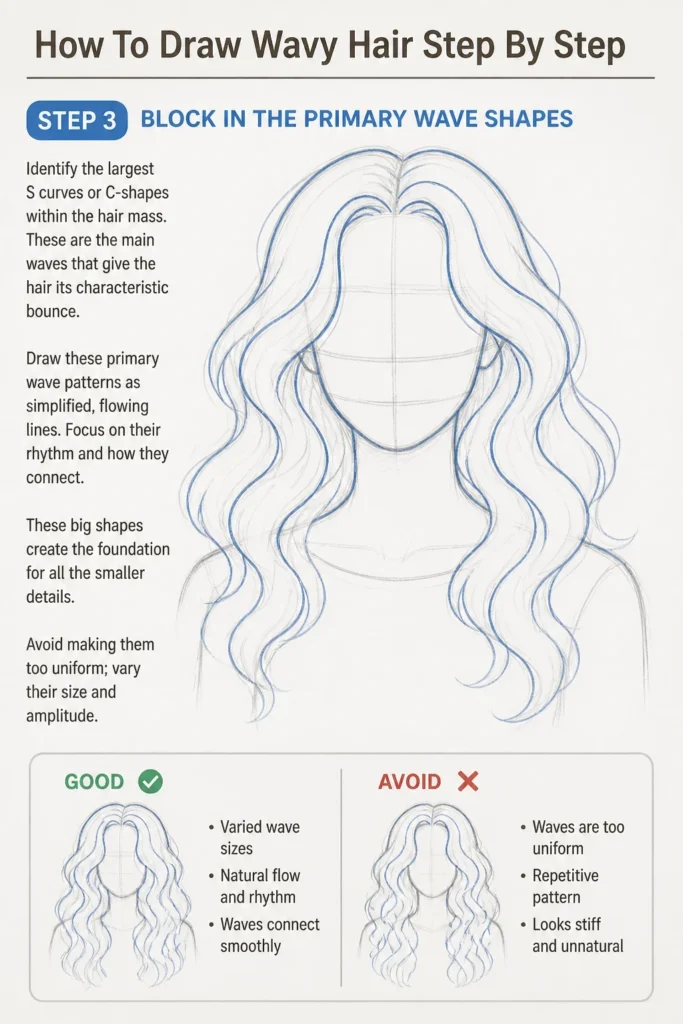
Draw these primary wave patterns as simplified, flowing lines. Focus on their rhythm and how they connect.
These big shapes create the foundation for all the smaller details. Avoid making them too uniform; vary their size and amplitude.
Step 4: Add Secondary Undulations and Overlapping Strands
Introduce smaller, more subtle waves within and around the primary shapes. These add complexity and realism.
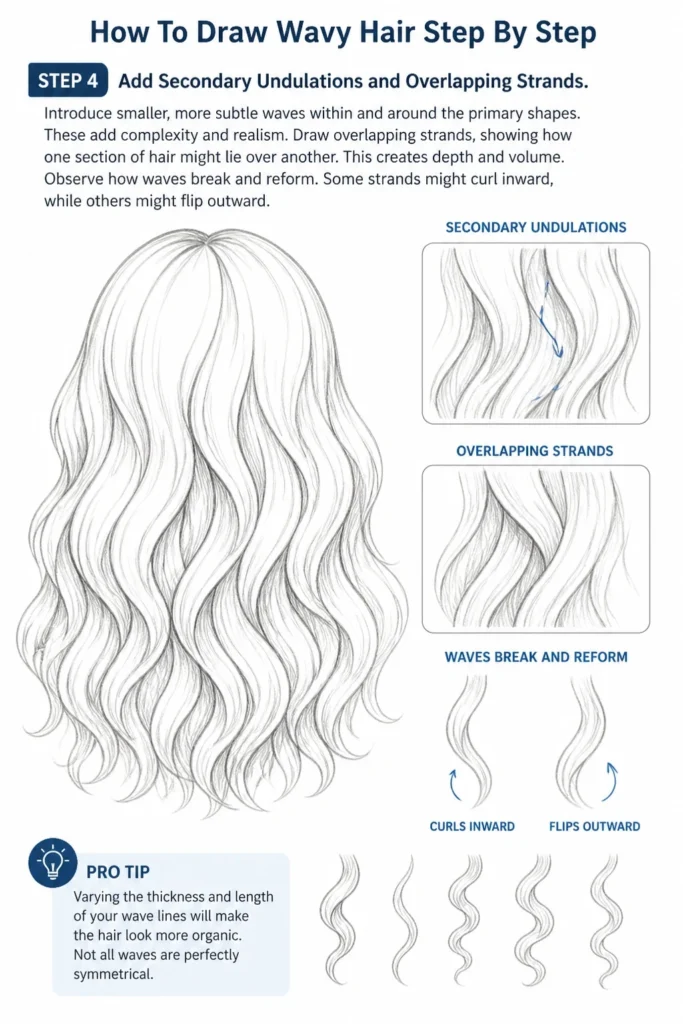
Draw overlapping strands, showing how one section of hair might lie over another. This creates depth and volume.
Observe how waves break and reform. Some strands might curl inward, while others might flip outward.
Pro Tip: Varying the thickness and length of your wave lines will make the hair look more organic. Not all waves are perfectly symmetrical.
Step 5: Introduce Basic Shading and Form
Determine your light source. This is crucial for creating depth and dimension.
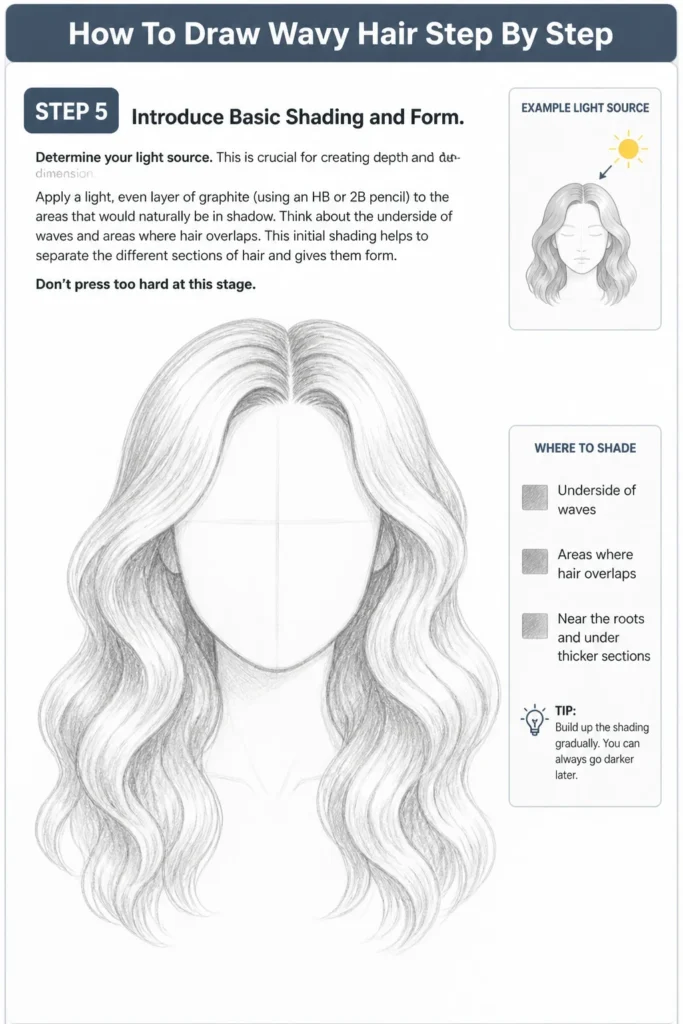
Apply a light, even layer of graphite (using an HB or 2B pencil) to the areas that would naturally be in shadow. Think about the underside of waves and areas where hair overlaps.
This initial shading helps to separate the different sections of hair and gives them form. Don’t press too hard at this stage.
Step 6: Refine Wave Edges and Add Texture
Use a slightly darker pencil (2B or 4B) to define the edges of your waves more clearly. Pay attention to where the light hits and where shadows fall.
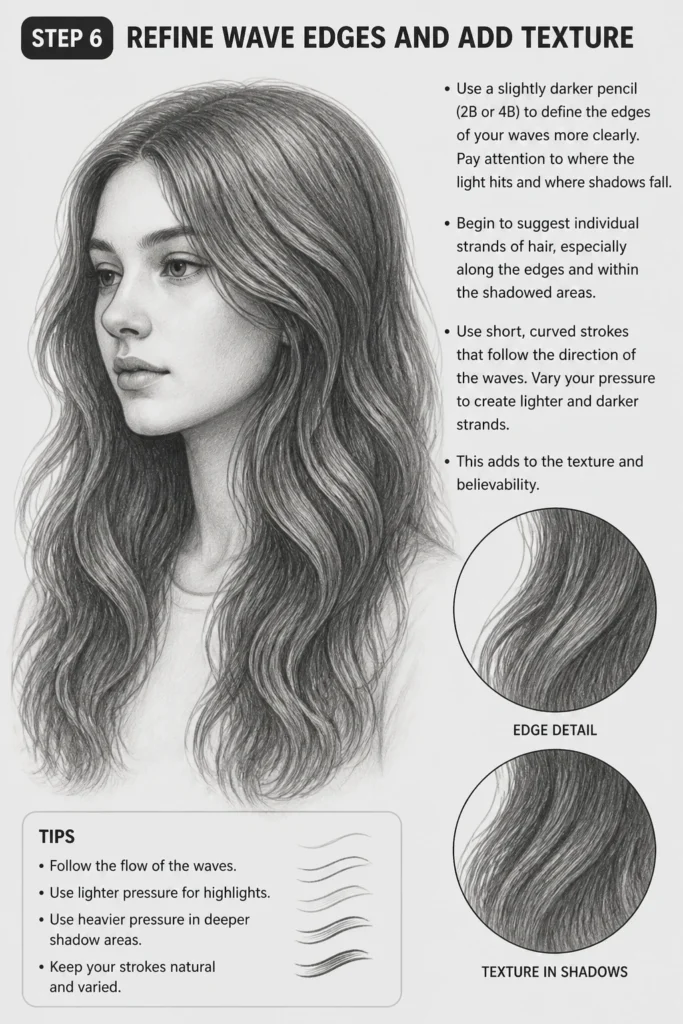
Begin to suggest individual strands of hair, especially along the edges and within the shadowed areas. Use short, curved strokes that follow the direction of the waves.
Vary your pressure to create lighter and darker strands. This adds to the texture and believability.
Step 7: Deepen Shadows and Enhance Contrast
Build up the darker shadows using a softer pencil (4B or 6B). Concentrate on the deepest recesses of the waves and where hair is most densely packed.
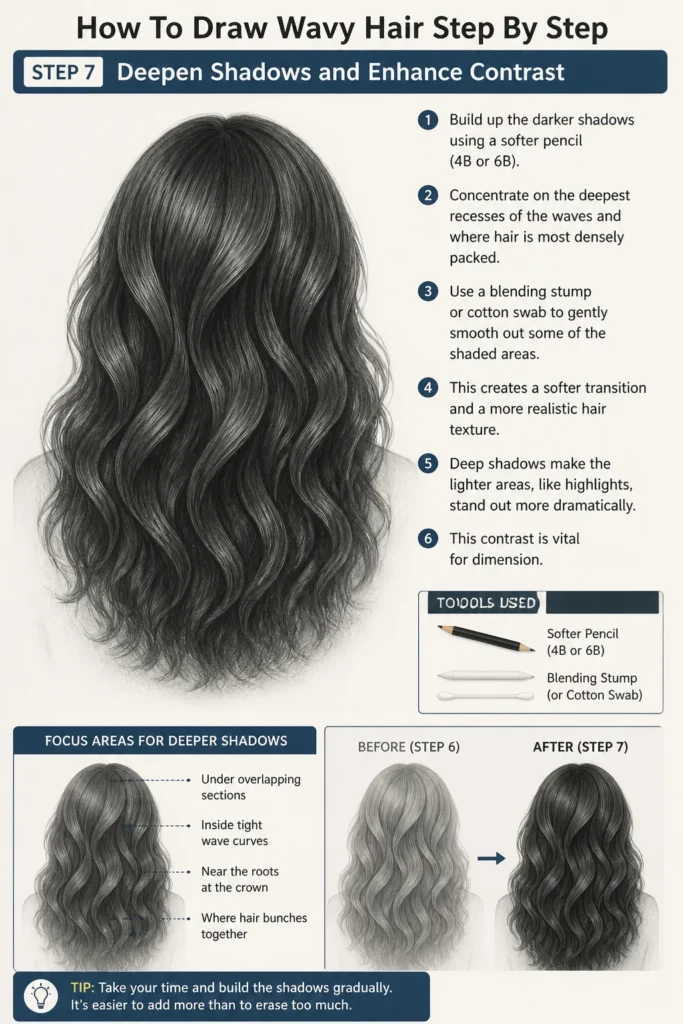
Use a blending stump or cotton swab to gently smooth out some of the shaded areas. This creates a softer transition and a more realistic hair texture.
Deep shadows make the lighter areas, like highlights, stand out more dramatically. This contrast is vital for dimension.
Step 8: Add Highlights and Final Details
Carefully use your kneaded eraser or a stick eraser to lift graphite from areas that would catch the most light. These are your highlights.
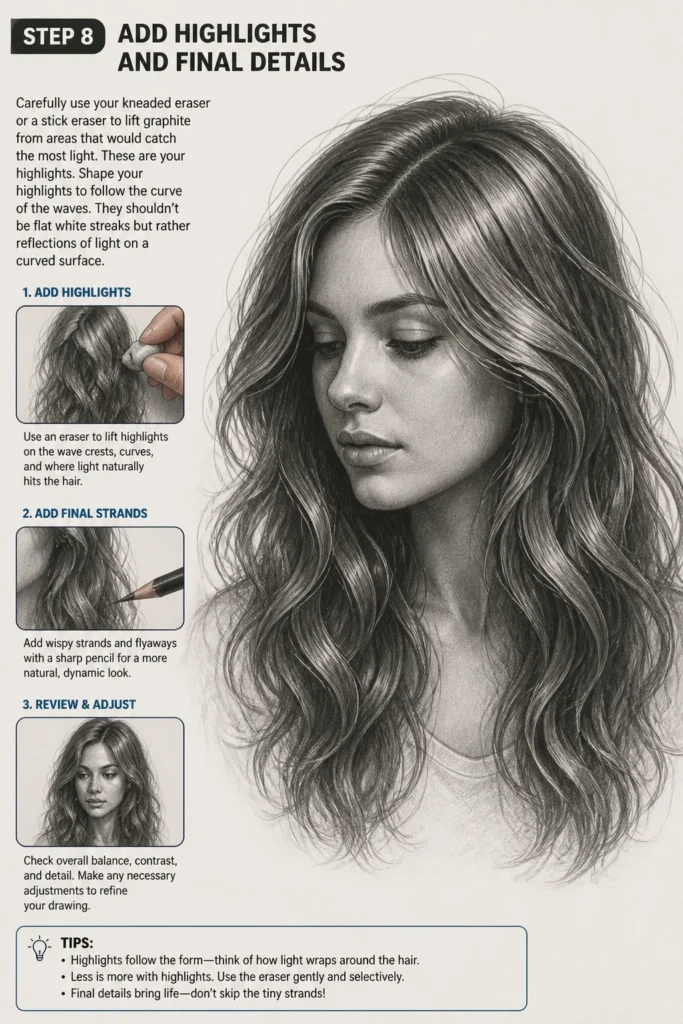
Shape your highlights to follow the curve of the waves. They shouldn’t be flat white streaks but rather reflections of light on a curved surface.
Add any final, wispy strands or flyaways to create a more natural and dynamic look. Use your sharpest pencil for these delicate details. Review your drawing for overall balance and make any necessary adjustments.
Common Mistakes to Avoid
Drawing Individual Hairs Too Early
Many beginners jump straight to drawing individual strands. This often results in hair that looks stiff, stringy, and lacks overall form.
Always focus on the large shapes and flow first. Build up the hair in layers, from general mass to refined detail. Individual strands should be the final touch, not the starting point.
Making Waves Too Uniform or Stiff
If all your waves are the same size, shape, and direction, the hair will look unnatural and manufactured. Real wavy hair has a beautiful irregularity.
Vary the size, amplitude, and direction of your waves. Allow some to be tighter, some looser, and some to overlap in unexpected ways. Embrace the organic chaos.
Neglecting Light and Shadow
Without proper light and shadow, your wavy hair will appear flat and two-dimensional. The interplay of light and dark is what gives hair its volume and form.
Always establish a clear light source. Pay attention to where light hits the curves of the waves and where shadows naturally fall underneath them. Use a range of pencil grades to achieve varied tones.
Forgetting the Underlying Head Structure
Drawing hair without considering the skull beneath it can lead to hair that looks like a hat or a disconnected mass. Hair grows from the head and conforms to its shape.
Always start with a light sketch of the head. This ensures that the hairline is realistic and that the hair’s volume and flow are appropriate for the underlying anatomy.
Troubleshooting
Hair Looks Flat and Lifeless
If your wavy hair lacks dimension, it’s often due to insufficient contrast between light and shadow. The values in your drawing might be too similar.
Go back and deepen your darkest shadows using a softer pencil (like a 4B or 6B). Then, use your eraser to brighten your highlights. This increased contrast will instantly add more depth and make the hair pop.
Waves Appear Unnatural or Too Repetitive
When waves look stiff or like a repeating pattern, you’ve likely over-symmetrized them. Real hair is organic and imperfect.
Break up repetitive patterns by varying the size, direction, and tightness of your waves. Introduce smaller, wispy strands that break away from the main flow. Use reference photos to observe the natural irregularity of wavy hair.
Difficulty Achieving a Shiny or Lustrous Effect
A lack of distinct, sharp highlights can make hair look dull. Shine comes from strong reflections of light.
Ensure your highlights are clean and crisp. Use a stick eraser or a finely pointed kneaded eraser to create sharp, bright lines where light would hit the peak of a wave. These precise highlights, contrasted with deep shadows, create the illusion of shine.
Key Takeaways
- Start with the underlying head shape and overall hair mass before adding details.
- Focus on the large “S” curves and main flow of the waves first, then refine.
- Vary the size, direction, and tightness of your waves to achieve a natural look.
- Utilize a full range of values, from deep shadows to bright highlights, to create dimension.
- Pay close attention to your light source to guide your shading and highlight placement.
- Practice observing real wavy hair to better understand its complex, organic movement.
Frequently Asked Questions
What are the best pencils for drawing hair?
A range of graphite pencils is ideal. An HB pencil is good for initial sketching and mid-tones. Use 2B and 4B for mid-range shadows and defining forms. Softer pencils like 6B or 8B are excellent for the darkest shadows and adding rich contrast.
How can I make the hair look shiny?
To create shine, you need a strong contrast between very dark shadows and very bright, clean highlights. Use a precise eraser to create sharp, reflective streaks where light would hit the curves of the waves. These highlights should follow the form of the hair.
Should I use reference photos when drawing wavy hair?
Absolutely, reference photos are invaluable! They help you observe how light interacts with waves, how different textures appear, and the natural flow of hair. Don’t just copy; analyze the forms and apply those observations to your drawing.
How do I draw different types of wavy hair (e.g., loose waves vs. tight waves)?
The key is to adjust the amplitude and frequency of your “S” curves. For loose waves, draw larger, gentler curves that are spaced further apart. For tighter waves, draw smaller, more frequent, and more pronounced “S” shapes. Observe how individual strands might coil more tightly in denser waves.
Our Top Recommended Finds
- Derwent Graphic Pencils (Sketching Set): A reliable set offering a wide range of graphite grades for all your shading needs.
- Faber-Castell Kneaded Eraser: Essential for lifting graphite gently, shaping highlights, and cleaning up without damaging paper.
- Blending Stumps or Tortillions: Perfect for smoothing out graphite, creating soft transitions, and achieving a realistic hair texture.
Embrace the Flow and Keep Drawing!
Drawing wavy hair is a journey of observation, patience, and continuous practice. Each attempt refines your eye for detail and your hand’s ability to create fluid lines. Don’t let a single drawing define your progress.
Remember the principles of building from large forms to small details, and always consider your light source. Now that you have these steps, why not try drawing different hair textures or incorporating your beautifully drawn wavy hair into a full portrait? Grab your tools and create something beautiful today!
& Painting
No rigid rules or pretension. Just practical guides, medium comparisons, and encouraging tips to help you enjoy the drawing & painting process.