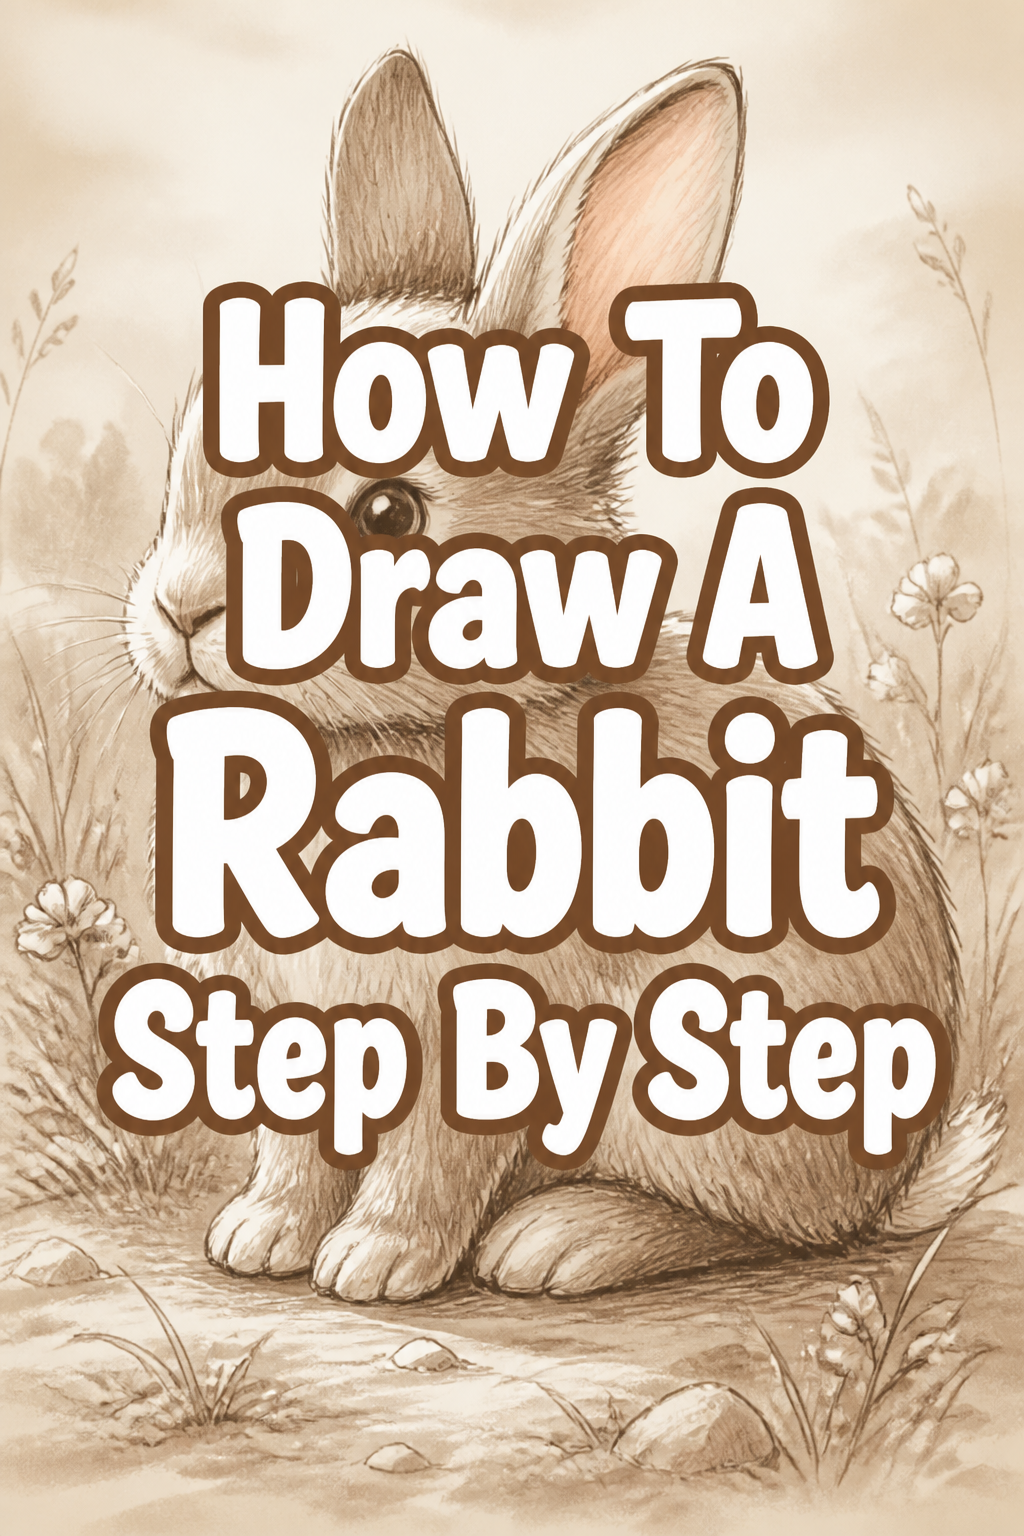
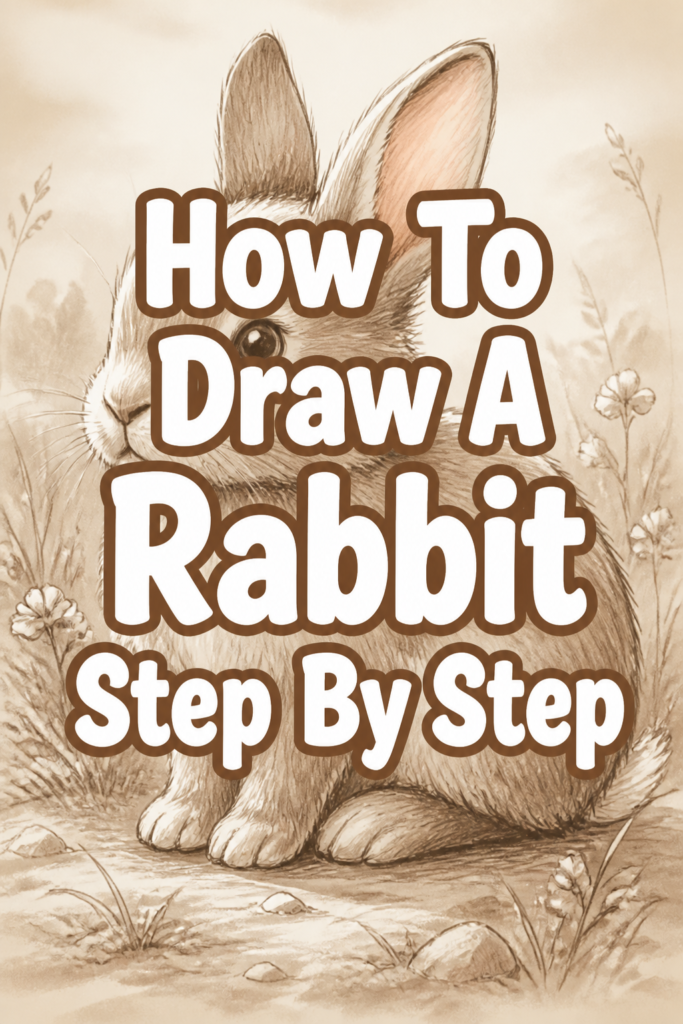
✨ How To Draw A Rabbit Step By Step

& Painting
No rigid rules or pretension. Just practical guides, medium comparisons, and encouraging tips to help you enjoy the drawing & painting process.
Drawing a rabbit can be a delightful and rewarding experience. It’s a chance to capture the charm of these gentle creatures on paper. I remember the first time I successfully sketched a convincing bunny, and the joy it brought.
This guide will help you achieve that same sense of accomplishment, even if you’re just starting out.
Quick Overview
This comprehensive guide will walk you through the process of drawing a charming rabbit from scratch. You will learn how to build your drawing with basic shapes, refine details, and add character. By the end, you’ll have a complete rabbit drawing you can be proud of.
- Time needed: 30-60 minutes (depending on detail and practice)
- Difficulty: Beginner
- What you’ll need: Pencil, eraser, paper
Step-by-Step Instructions
Step 1: Sketch the Basic Shapes for the Head and Body
To begin, draw two overlapping ovals on your paper. These will form the foundation of your rabbit’s head and body.
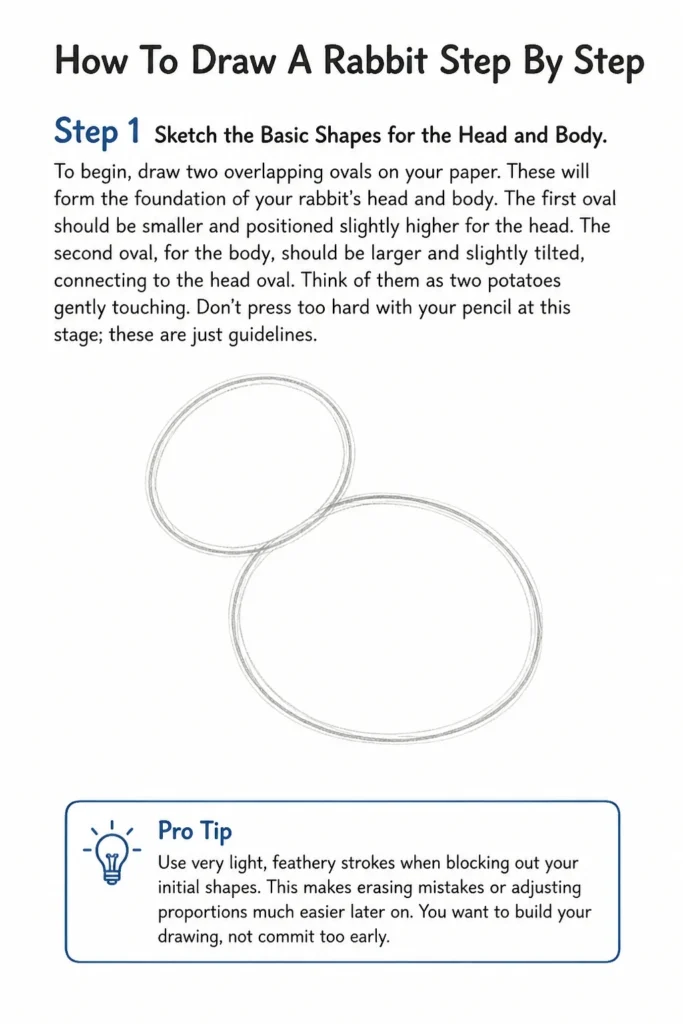
The first oval should be smaller and positioned slightly higher for the head. The second oval, for the body, should be larger and slightly tilted, connecting to the head oval.
Think of them as two potatoes gently touching. Don’t press too hard with your pencil at this stage; these are just guidelines.
Pro Tip: Use very light, feathery strokes when blocking out your initial shapes. This makes erasing mistakes or adjusting proportions much easier later on. You want to build your drawing, not commit too early.
Step 2: Add the Ears and Muzzle Guide
Next, attach two long, almond-shaped ovals to the top of the head oval for the ears. Rabbits have distinctive ears, so make them fairly long and slightly tapered.
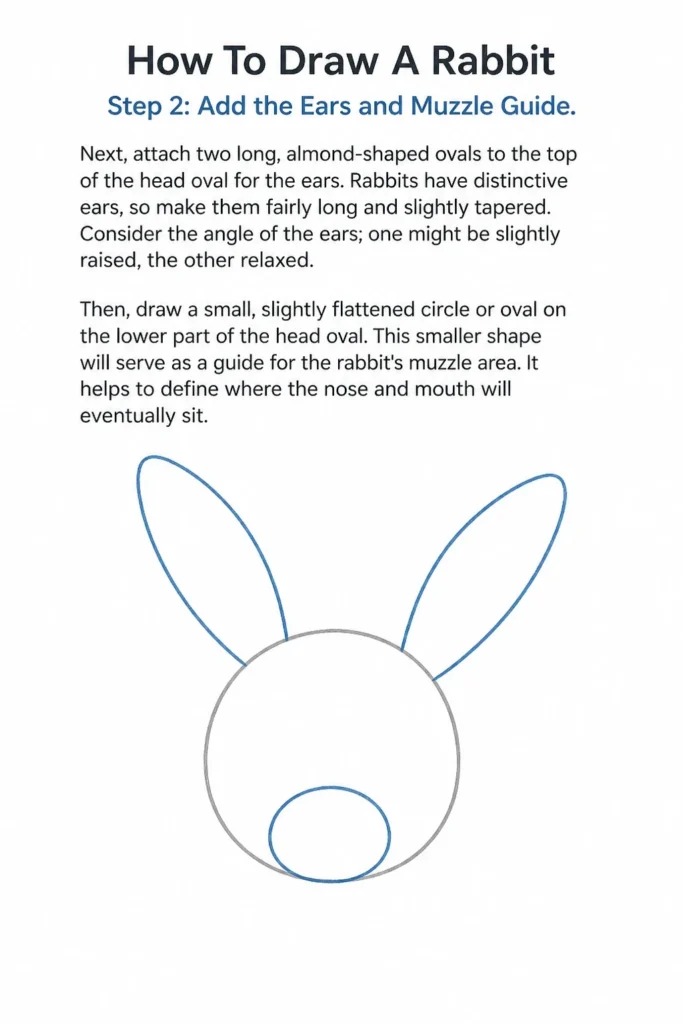
Consider the angle of the ears; one might be slightly raised, the other relaxed. Then, draw a small, slightly flattened circle or oval on the lower part of the head oval.
This smaller shape will serve as a guide for the rabbit’s muzzle area. It helps to define where the nose and mouth will eventually sit.
Step 3: Block Out the Legs and Tail
Now, sketch the basic shapes for the rabbit’s legs and tail. For the front legs, draw two elongated, somewhat cylindrical shapes extending downwards from the body.
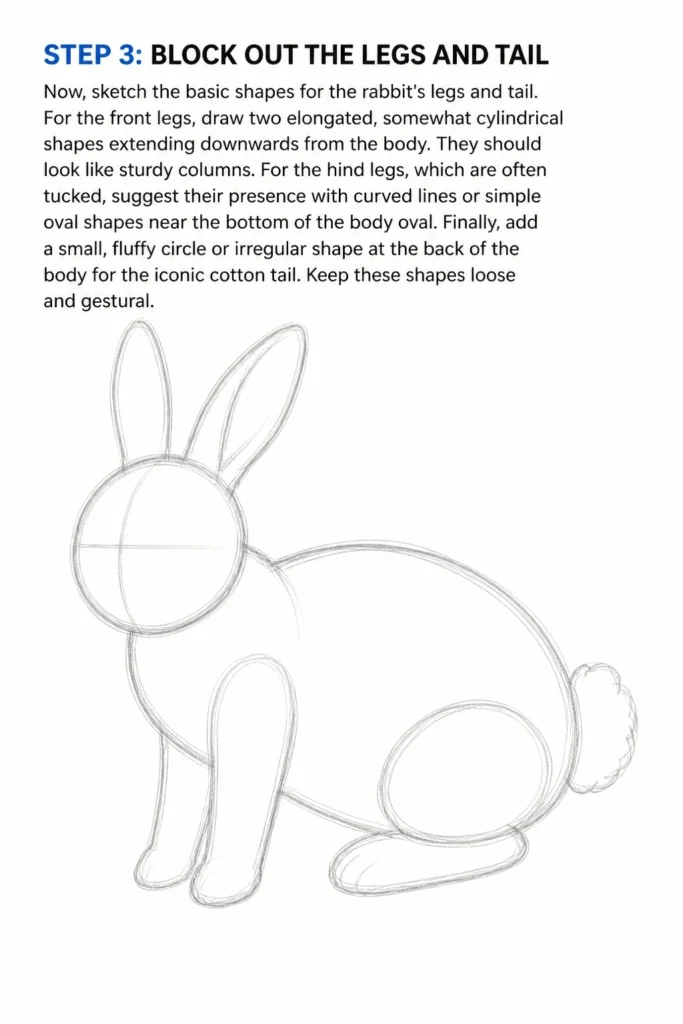
They should look like sturdy columns. For the hind legs, which are often tucked, suggest their presence with curved lines or simple oval shapes near the bottom of the body oval.
Finally, add a small, fluffy circle or irregular shape at the back of the body for the iconic cotton tail. Keep these shapes loose and gestural.
Step 4: Connect the Shapes and Refine the Outline
It’s time to start connecting your basic shapes to form a cohesive outline. Gently draw smoother, continuous lines that flow between the head and body ovals.
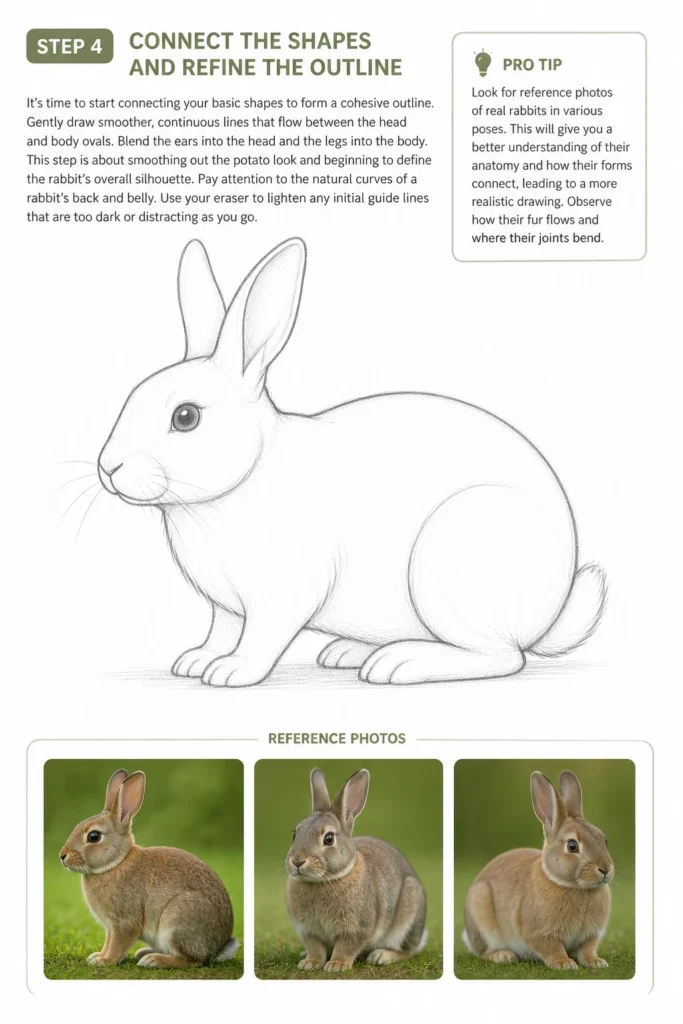
Blend the ears into the head and the legs into the body. This step is about smoothing out the “potato” look and beginning to define the rabbit’s overall silhouette.
Pay attention to the natural curves of a rabbit’s back and belly. Use your eraser to lighten any initial guide lines that are too dark or distracting as you go.
Pro Tip: Look for reference photos of real rabbits in various poses. This will give you a better understanding of their anatomy and how their forms connect, leading to a more realistic drawing. Observe how their fur flows and where their joints bend.
Step 5: Detail the Face
This is where your rabbit starts to come alive. Draw two small circles for the eyes, positioning them slightly to the sides of the head. Rabbits’ eyes are often on the side of their head.
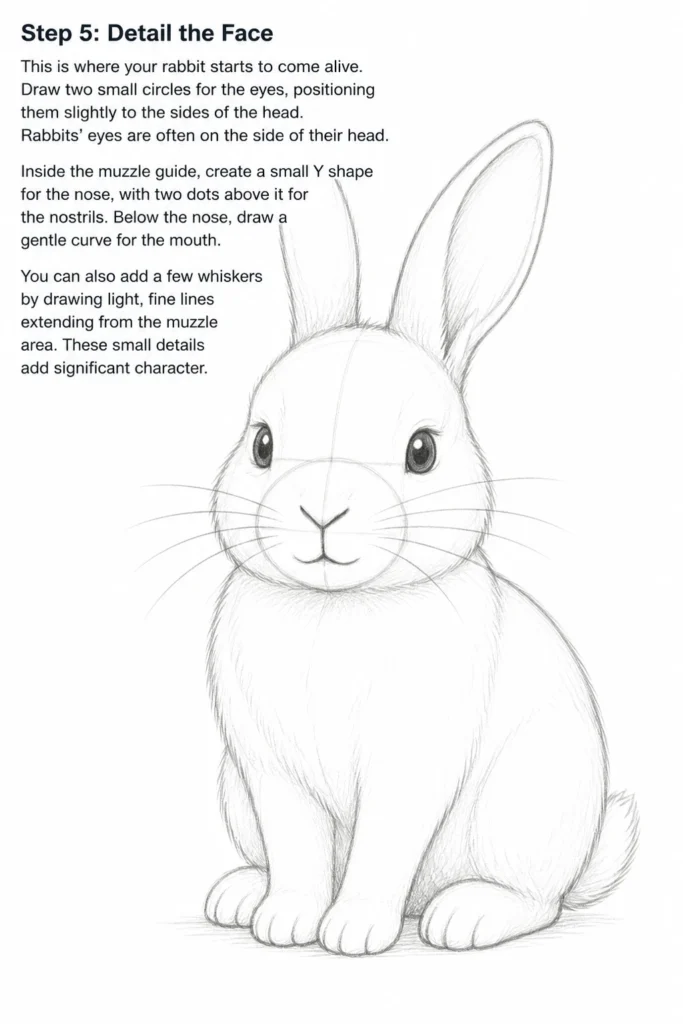
Inside the muzzle guide, create a small “Y” shape for the nose, with two dots above it for the nostrils. Below the nose, draw a gentle curve for the mouth.
You can also add a few whiskers by drawing light, fine lines extending from the muzzle area. These small details add significant character.
Step 6: Refine the Legs and Paws
Now, work on the details of the legs and paws. Refine the cylindrical shapes you drew earlier, adding subtle bends for the joints.
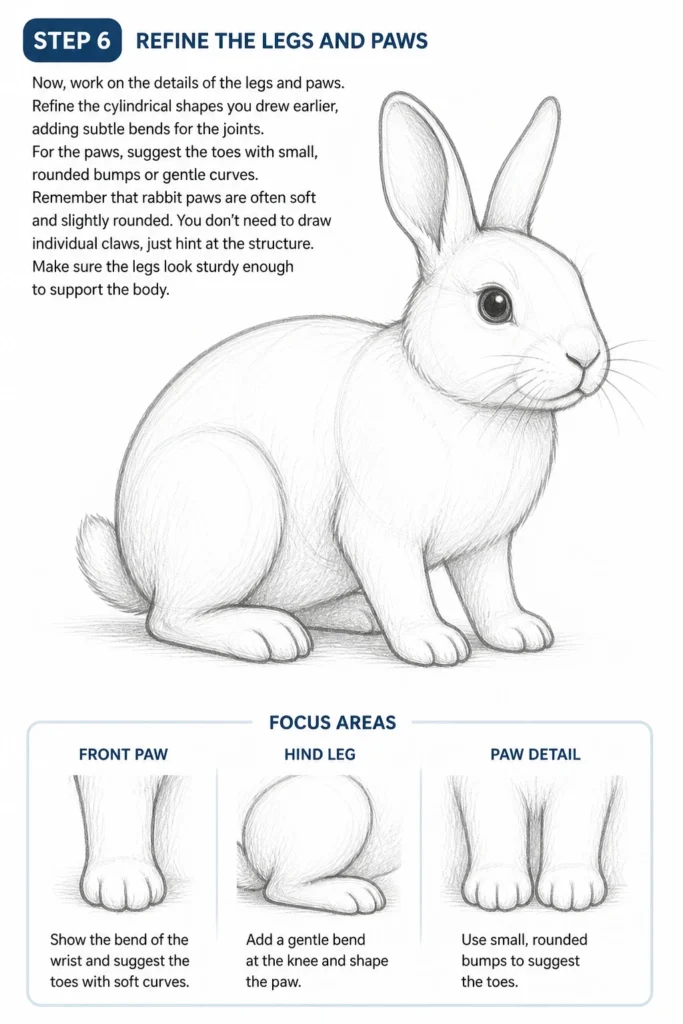
For the paws, suggest the toes with small, rounded bumps or gentle curves. Remember that rabbit paws are often soft and slightly rounded.
You don’t need to draw individual claws, just hint at the structure. Make sure the legs look sturdy enough to support the body.
Step 7: Add Fur Texture and Shading
To give your rabbit a fluffy look, add light, short strokes along the outline, mimicking fur. Vary the direction of these strokes to show the flow of the fur.
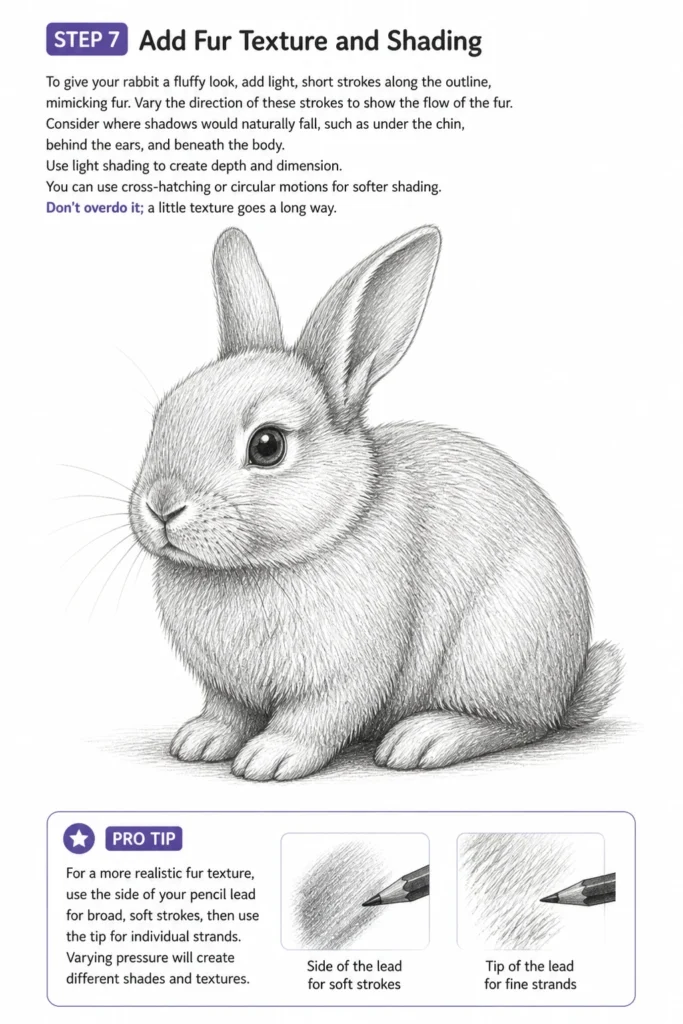
Consider where shadows would naturally fall, such as under the chin, behind the ears, and beneath the body. Use light shading to create depth and dimension.
You can use cross-hatching or circular motions for softer shading. Don’t overdo it; a little texture goes a long way.
Pro Tip: For a more realistic fur texture, use the side of your pencil lead for broad, soft strokes, then use the tip for individual strands. Varying pressure will create different shades and textures.
Step 8: Final Touches and Erasing
Review your entire drawing. Erase any remaining guide lines that are still visible.
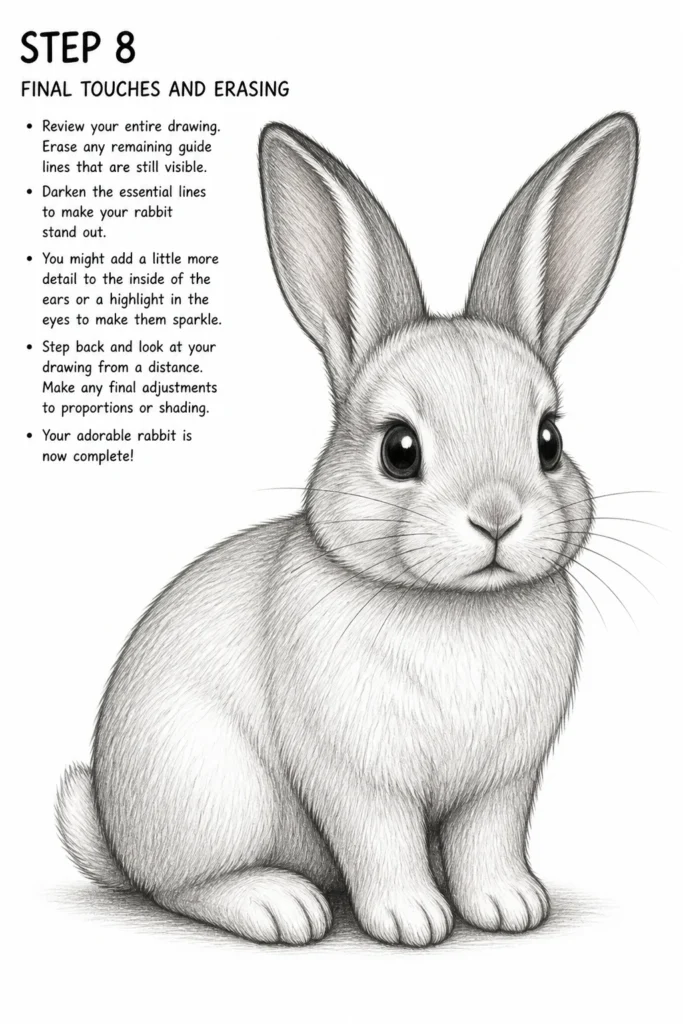
Darken the essential lines to make your rabbit stand out. You might add a little more detail to the inside of the ears or a highlight in the eyes to make them sparkle.
Step back and look at your drawing from a distance. Make any final adjustments to proportions or shading. Your adorable rabbit is now complete!
Common Mistakes to Avoid
Making the Head Too Large or Small
One common pitfall is getting the head-to-body proportion wrong. A head that is too big can make the rabbit look like a cartoon character, while one that is too small can make it look unnatural.
Always start with your basic ovals and compare their sizes to a reference image. Adjust them until they feel balanced before adding details.
Stiff, Unnatural Poses
Rabbits are dynamic creatures, but beginners often draw them in very rigid, straight-legged poses. This can make your drawing look lifeless.
Try to introduce subtle curves and angles to the legs and body. Even a slight tilt of the head or a bend in a leg can add a lot of personality and natural movement.
Ignoring Fur Direction
Simply drawing squiggly lines all over doesn’t create convincing fur. Rabbits have fur that grows in specific directions across their bodies.
Pay attention to how fur flows from the head down the back, or how it might fluff out around the tail. Drawing strokes in these natural directions will make your rabbit look much more realistic and soft.
Over-Complicating Early Stages
Many new artists try to add details like eyes, noses, and fur very early on. This often leads to frustration when the underlying structure is incorrect.
Always build your drawing from simple shapes first. Refine the overall form and proportions before moving on to intricate details. This foundational approach saves time and improves accuracy.
Troubleshooting
My Rabbit Looks Flat
If your rabbit drawing appears two-dimensional, it likely needs more depth and form. This usually means you haven’t fully explored shading and overlapping shapes.
To fix this, go back and lightly shade areas where parts of the rabbit overlap, such as where the head meets the body or where legs are tucked under. Add subtle shadows under the belly and behind the ears. This creates the illusion of volume.
The Ears Don’t Look Right
Ears are a defining feature of a rabbit, and getting them wrong can throw off the whole drawing. They might be too short, too wide, or oddly placed.
Check your ear placement; they should emerge from the top of the head, not the sides. Ensure they have a slight curve and taper towards the tips. Observe how they connect to the skull in real rabbits—they aren’t just stuck on.
The Proportions Are Off
If your rabbit looks disproportionate, with a tiny head on a huge body or vice versa, the initial basic shapes were likely incorrect. This is a common issue.
The best solution is to go back to Step 1 and lightly re-sketch your head and body ovals. Use an eraser to lighten your existing lines and then draw new, more balanced guides. Don’t be afraid to adjust these foundational shapes until they feel right.
Key Takeaways
- Always start with light, basic geometric shapes to build your rabbit’s structure.
- Pay close attention to proportions between the head, body, and limbs for a realistic look.
- Refine your lines gradually, moving from loose guides to a clean, flowing outline.
- Detail the face and paws carefully, as these elements bring character to your drawing.
- Use subtle shading and varied strokes to create convincing fur texture and depth.
- Practice patience and don’t be afraid to erase and adjust as you go; it’s part of the process.
Frequently Asked Questions
What kind of pencil is best for drawing rabbits?
A standard HB pencil is excellent for general sketching and outlining. For shading, you might find softer pencils like 2B or 4B useful, as they create darker tones more easily. A harder pencil like 2H can be good for very light initial guides.
How can I make my rabbit drawing look more realistic?
Realism comes from observing actual rabbits. Study reference photos for their anatomy, fur patterns, and typical poses. Focus on accurate proportions, subtle shading to show form, and adding details like whiskers and the sparkle in their eyes. Don’t forget the direction of fur.
Should I draw the background first or the rabbit?
It’s generally best to draw the main subject, in this case, the rabbit, first. This allows you to focus all your attention on its form and details. Once the rabbit is complete, you can then add a background that complements it without distracting from your primary focus.
How do I make the fur look fluffy without overdoing it?
To achieve fluffy fur, use short, quick strokes that follow the direction of the fur growth. Vary the pressure on your pencil to create different shades, and leave some areas lighter for highlights. Avoid drawing every single strand; instead, suggest the texture with clusters of strokes and soft shading.
Our Top Recommended Finds
- Sketchbook: A good quality sketchbook with smooth paper provides an excellent surface for pencil work and keeps all your drawings organized.
- Pencil Set: A set of drawing pencils with varying hardness (e.g., HB, 2B, 4B, 6B) will give you more control over line weight and shading.
- Kneaded Eraser: Unlike a standard eraser, a kneaded eraser lifts graphite without damaging the paper, allowing for gentle lightening of lines and subtle highlights.
Your Creative Journey Awaits
You now have the tools and knowledge to bring an adorable rabbit to life on paper. Don’t let perfection be the enemy of progress. Every stroke is a step in your artistic journey.
Grab your pencil and paper right now. Start with those simple ovals and watch as your rabbit takes shape. You might be surprised by what you can create.
Consider exploring different rabbit breeds or experimenting with various poses next. The world of drawing is vast and full of possibilities!
& Painting
No rigid rules or pretension. Just practical guides, medium comparisons, and encouraging tips to help you enjoy the drawing & painting process.