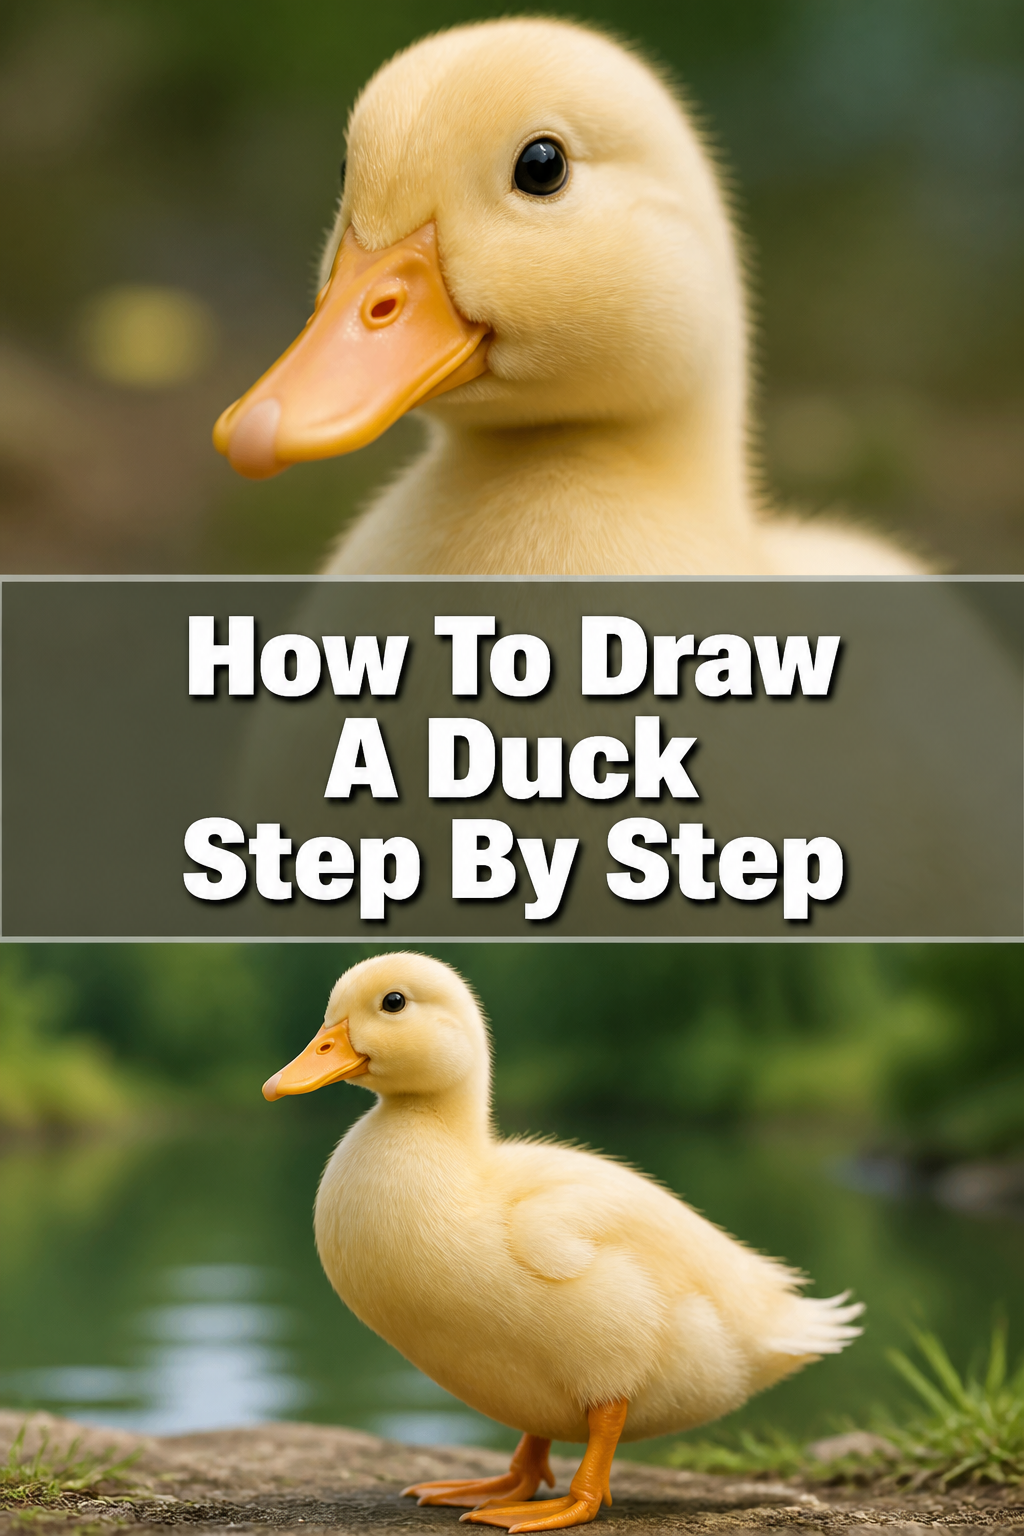
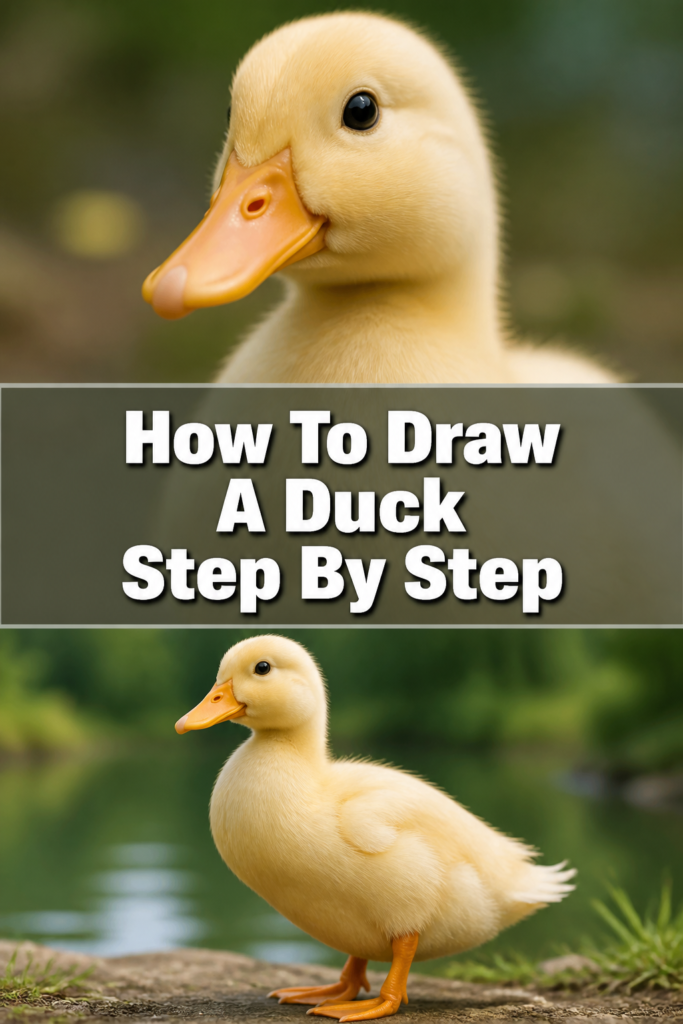
🦆 How To Draw A Duck Step By Step

& Painting
No rigid rules or pretension. Just practical guides, medium comparisons, and encouraging tips to help you enjoy the drawing & painting process.
Have you ever wanted to sketch a charming duck, but felt unsure where to begin? It’s a common feeling, and one I’ve experienced myself many times.
I remember my first attempts at drawing animals; they often looked more like abstract art than actual creatures. But with a few simple shapes and a bit of practice, you can create something truly delightful.
This guide will walk you through each line, helping you bring a lovely duck to life on your page.
Quick Overview
By the end of this guide, you will have created a complete, charming duck drawing. We’ll start with basic shapes and gradually add details, making the process enjoyable and straightforward.
You’ll gain confidence in your drawing skills and learn foundational techniques applicable to other subjects.
- Time needed: 30-60 minutes (depending on detail and pace)
- Difficulty: Beginner
- What you’ll need: Pencil, eraser, paper, optional: colored pencils or markers
Step-by-Step Instructions
Step 1: Start with Basic Shapes for the Body
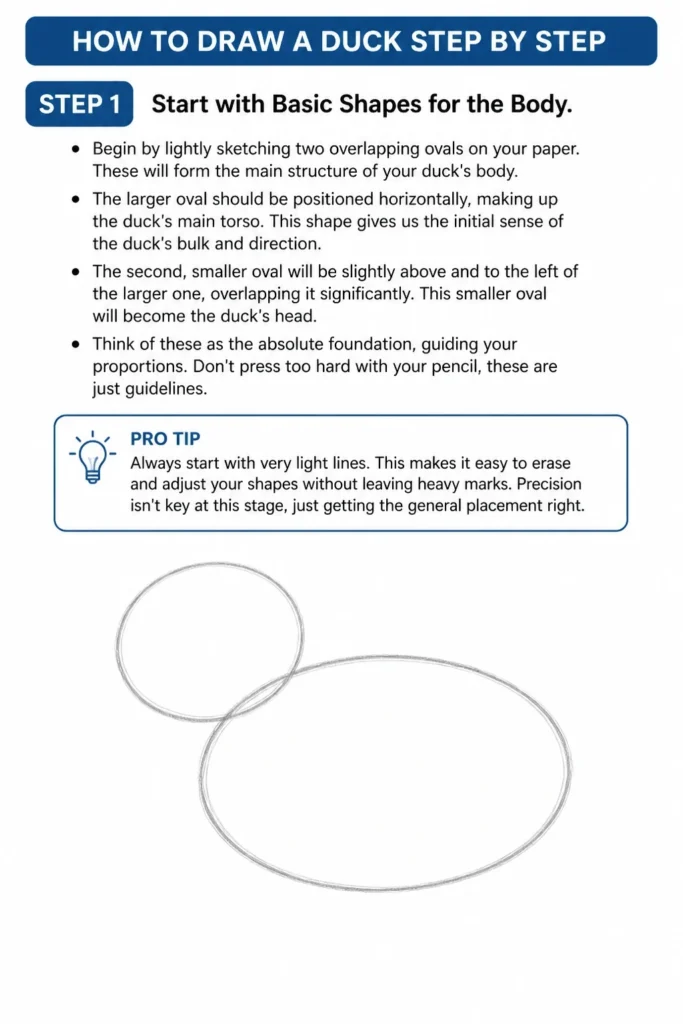
Begin by lightly sketching two overlapping ovals on your paper. These will form the main structure of your duck’s body.
The larger oval should be positioned horizontally, making up the duck’s main torso. This shape gives us the initial sense of the duck’s bulk and direction.
The second, smaller oval will be slightly above and to the left of the larger one, overlapping it significantly. This smaller oval will become the duck’s head.
Think of these as the absolute foundation, guiding your proportions. Don’t press too hard with your pencil; these are just guidelines.
Pro Tip: Always start with very light lines. This makes it easy to erase and adjust your shapes without leaving heavy marks. Precision isn’t key at this stage, just getting the general placement right.
Step 2: Connect the Head and Body with the Neck
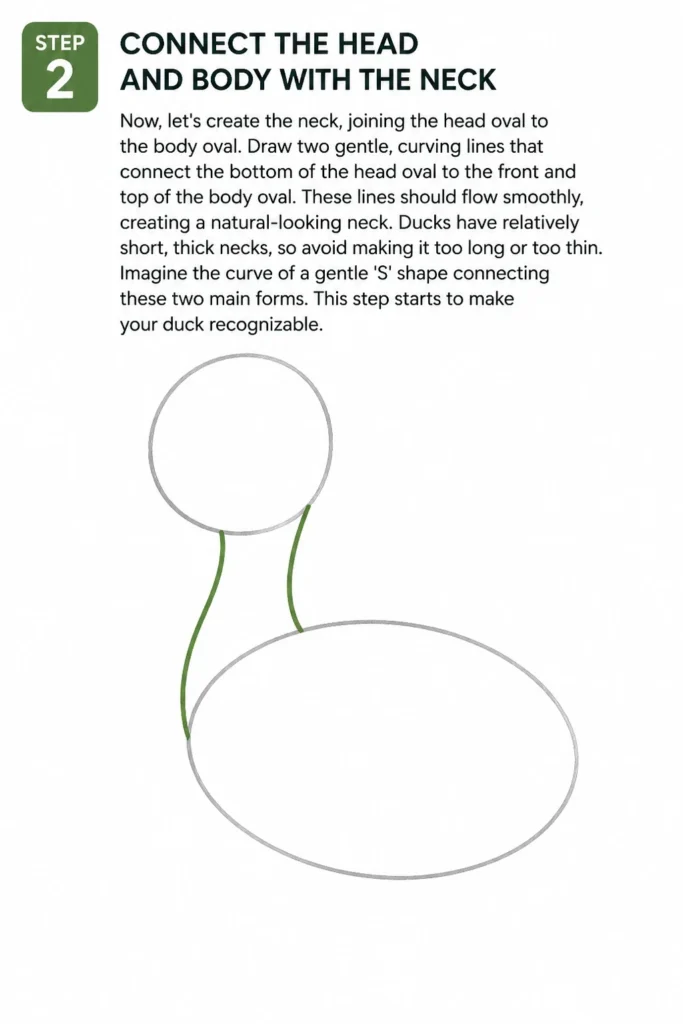
Now, let’s create the neck, joining the head oval to the body oval. Draw two gentle, curving lines that connect the bottom of the head oval to the front and top of the body oval.
These lines should flow smoothly, creating a natural-looking neck. Ducks have relatively short, thick necks, so avoid making it too long or too thin.
Imagine the curve of a gentle ‘S’ shape connecting these two main forms. This step starts to make your duck recognizable.
Step 3: Add the Beak and Eye
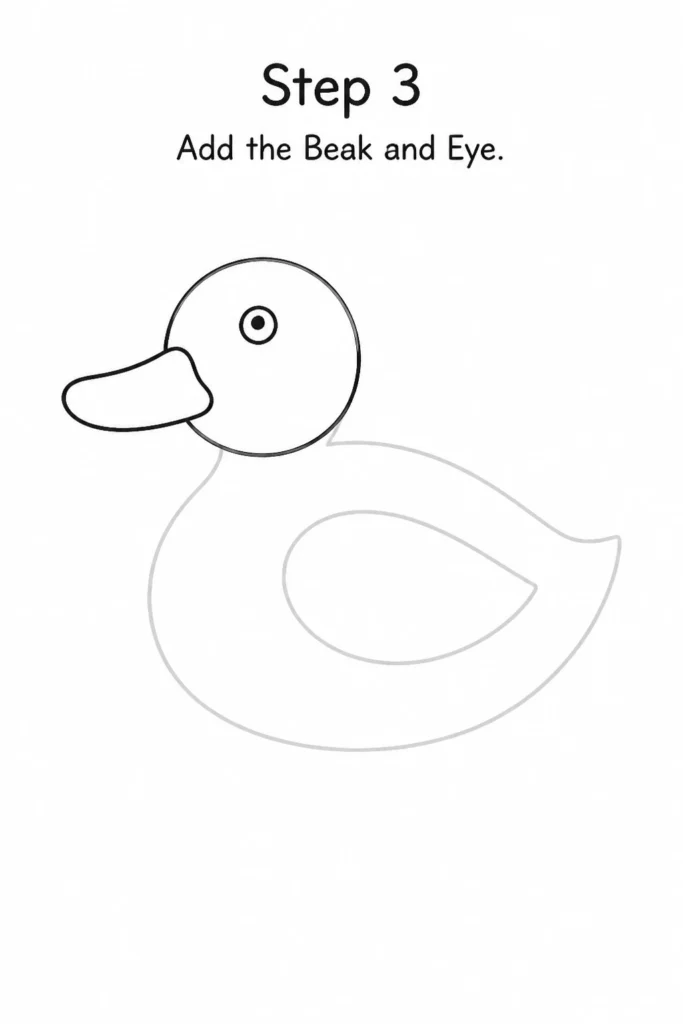
Focus on the head oval now. For the beak, draw a rounded, elongated ‘U’ shape extending from the front of the head.
This shape should be slightly flattened at the top and bottom, giving it that classic duck bill appearance. Make sure it’s proportionate to the head.
Next, place a small, round circle for the eye near the top-center of the head oval, just above where the beak starts. A tiny dot inside the circle will serve as the pupil.
Step 4: Sketch the Wings and Tail
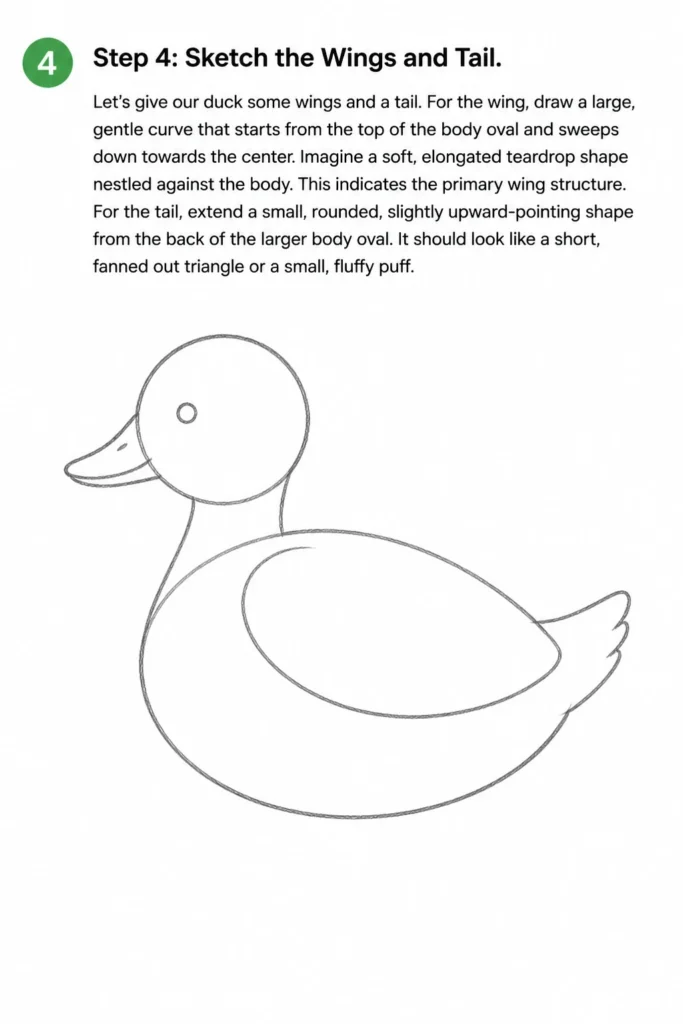
Let’s give our duck some wings and a tail. For the wing, draw a large, gentle curve that starts from the top of the body oval and sweeps down towards the center.
Imagine a soft, elongated teardrop shape nestled against the body. This indicates the primary wing structure.
For the tail, extend a small, rounded, slightly upward-pointing shape from the back of the larger body oval. It should look like a short, fanned out triangle or a small, fluffy puff.
Step 5: Draw the Feet and Water Line (Optional)
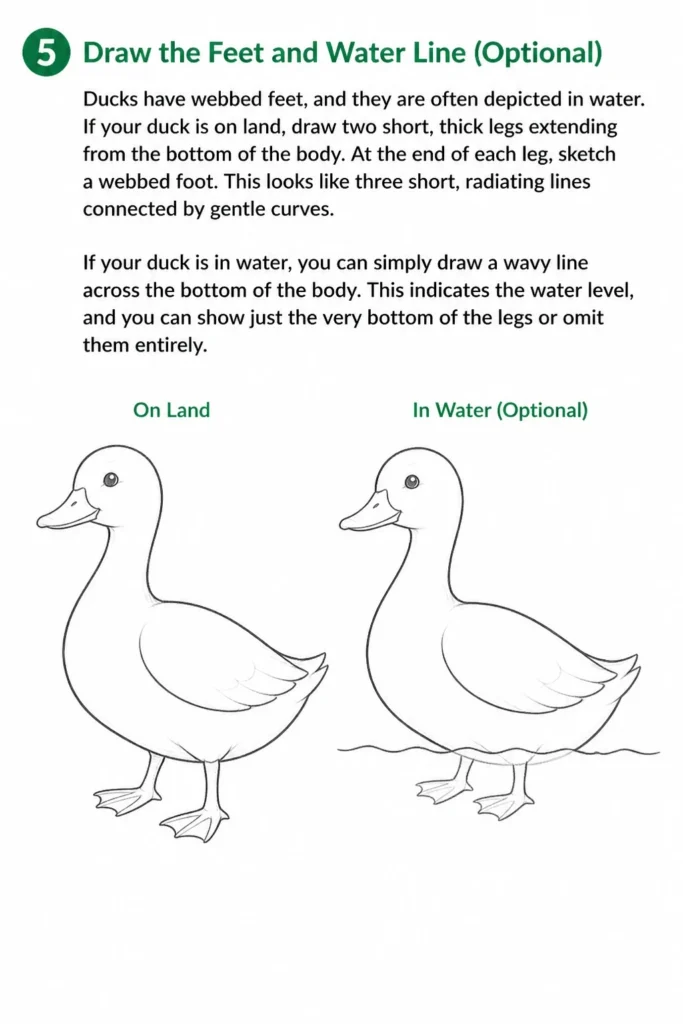
Ducks have webbed feet, and they are often depicted in water. If your duck is on land, draw two short, thick legs extending from the bottom of the body.
At the end of each leg, sketch a webbed foot. This looks like three short, radiating lines connected by gentle curves.
If your duck is in water, you can simply draw a wavy line across the bottom of the body. This indicates the water level, and you can show just the very bottom of the legs or omit them entirely.
Step 6: Refine the Outlines and Erase Guidelines
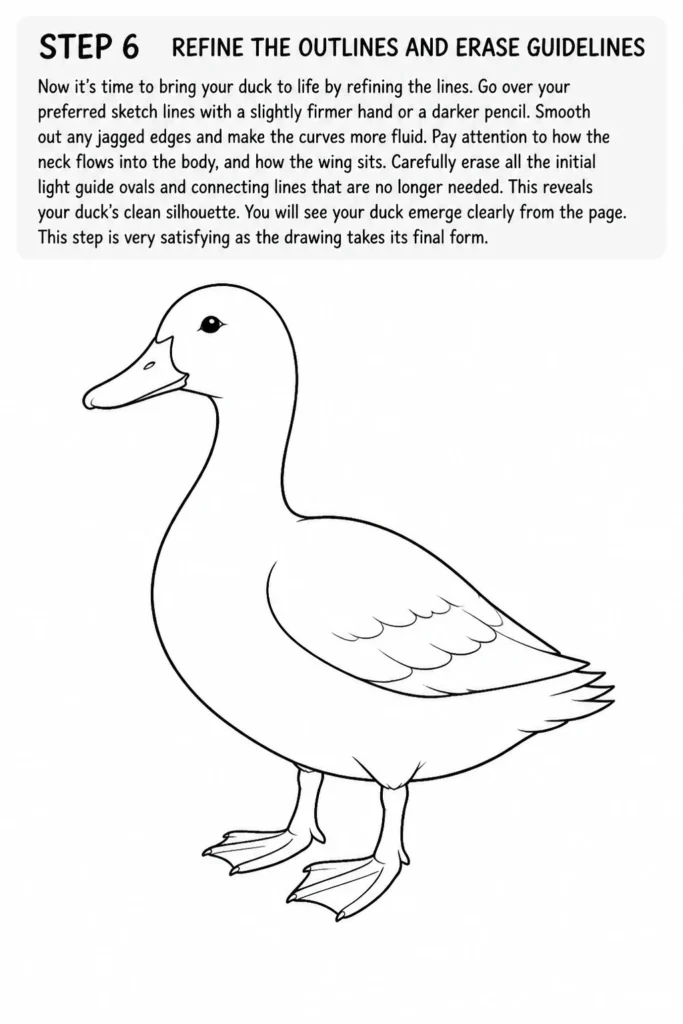
Now it’s time to bring your duck to life by refining the lines. Go over your preferred sketch lines with a slightly firmer hand or a darker pencil.
Smooth out any jagged edges and make the curves more fluid. Pay attention to how the neck flows into the body, and how the wing sits.
Carefully erase all the initial light guide ovals and connecting lines that are no longer needed. This reveals your duck’s clean silhouette.
You will see your duck emerge clearly from the page. This step is very satisfying as the drawing takes its final form.
Step 7: Add Details and Texture
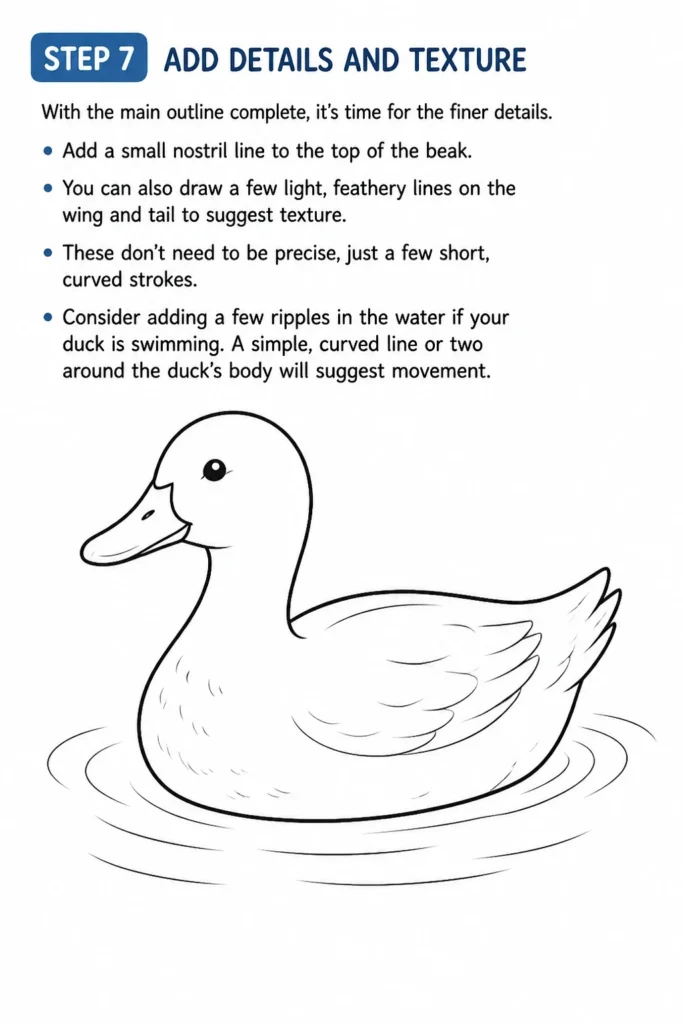
With the main outline complete, it’s time for the finer details. Add a small nostril line to the top of the beak.
You can also draw a few light, feathery lines on the wing and tail to suggest texture. These don’t need to be precise, just a few short, curved strokes.
Consider adding a few ripples in the water if your duck is swimming. A simple, curved line or two around the duck’s body will suggest movement.
Step 8: Final Touches and Shading (Optional)
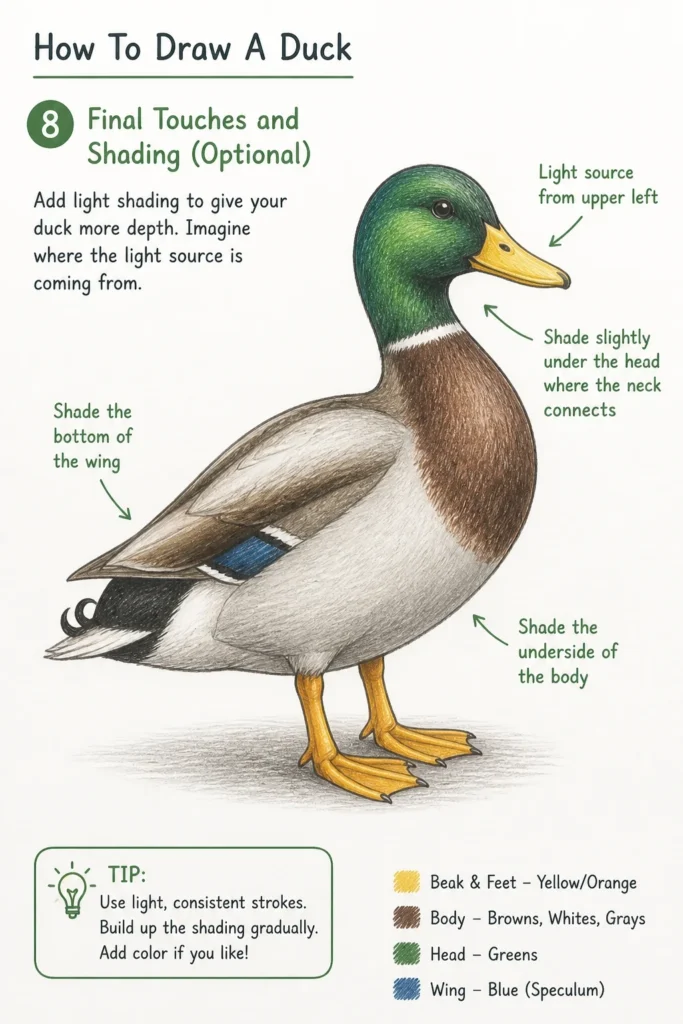
If you wish, you can add some simple shading to give your duck more depth. Imagine where the light source is coming from.
Shade the underside of the duck’s body, the bottom of the wing, and slightly under the head where the neck connects. Use light, consistent strokes.
You can also add a hint of color with colored pencils or markers. Yellow for the beak and feet, and a mix of browns, whites, or greens for the body are classic duck colors.
Remember to keep your shading light and build it up gradually. This adds a professional touch without overcomplicating the drawing.
Common Mistakes to Avoid
Making the Neck Too Long or Thin
A common pitfall is drawing a neck that looks more like a swan’s than a duck’s. Ducks have relatively stout, compact necks, especially compared to their body size. If the neck is too long, the duck will lose its characteristic appearance. Always refer back to your initial ovals and ensure the connecting lines create a short, graceful curve.
Disproportionate Beak Size
Sometimes artists draw the beak either too small, making the duck look like a bird with a tiny pointy nose, or too large, making it appear cartoonish in an unintended way. The duck’s beak is a prominent feature, but it should still fit harmoniously with the size of the head. Aim for a rounded, slightly flattened shape that extends about one-third the length of the head oval.
Ignoring the Overlap of Shapes
When starting with ovals, it’s easy to place them too far apart or not overlap them enough. This can lead to a disjointed drawing where the head and body look separate rather than a unified creature. Ensure your initial ovals overlap significantly, especially where the neck will connect. This creates a more natural flow and makes the subsequent steps much easier.
Overcomplicating Details Too Early
Many beginners try to add feathers, intricate shading, or complex wing patterns right from the start. This often leads to frustration and a messy drawing. Focus on getting the basic shapes and outlines correct first. Details should only be added once the fundamental structure of the duck is solid and refined. Build your drawing layer by layer.
Troubleshooting
My Duck Looks Stiff and Lifeless
If your duck appears rigid, it’s likely due to overly straight lines or a lack of natural curves. Ducks are soft, rounded creatures. Review your initial shapes and ensure they are organic ovals, not perfect circles or squares. When drawing the neck and body lines, aim for gentle, flowing curves rather than sharp angles. Practice drawing ‘C’ and ‘S’ curves to improve fluidity.
The Proportions Seem Off
Proportion issues often stem from the very first step. If your head oval is too small or too large compared to the body oval, the entire duck will look unbalanced. Go back to Step 1 and redraw your initial ovals, paying close attention to their relative sizes and how they overlap. A good rule of thumb is for the head oval to be roughly one-quarter to one-fifth the size of the main body oval.
My Lines Are Messy and Hard to Erase
This is a common issue when pressing too hard with your pencil during the initial sketching phases. The solution is to practice a lighter touch. Think of your first lines as barely visible whispers on the paper. Use an HB or 2H pencil for initial sketches, as they are lighter and easier to erase completely. Save firmer pressure for when you are refining your final outlines.
Key Takeaways
- Start with basic shapes: Ovals are your best friends for establishing the duck’s head and body.
- Build gradually: Don’t rush to details; focus on the overall form before adding features.
- Use light lines initially: This allows for easy corrections and refinements without leaving marks.
- Pay attention to flow: Ensure all parts of the duck connect smoothly with natural curves.
- Practice makes perfect: The more you draw, the more intuitive the process becomes.
- Don’t be afraid to erase: It’s part of the learning process and helps refine your drawing.
Frequently Asked Questions
What kind of pencil is best for beginners?
An HB pencil is an excellent all-around choice for beginners. It’s not too hard, not too soft, offering a good balance for sketching light lines and then pressing a bit harder for darker outlines. You might also find a 2B pencil useful for slightly darker lines and shading.
How do I make my duck look more realistic?
To enhance realism, focus on subtle details and shading. Observe real ducks for their specific feather patterns, the sheen on their beaks, and how light hits their bodies. Adding very light feathery textures, subtle shadows under the head and wings, and a slight reflection in the eye can make a big difference. Don’t forget the small nostril on the beak.
Can I draw different types of ducks with this guide?
Absolutely! While this guide focuses on a general duck shape, the foundational principles apply to many species. You can adjust the head shape, beak size, and body proportions slightly to depict different ducks. For example, a mallard might have a more elongated head and a broader beak, while a wood duck might have a more pronounced crest.
What if my drawing doesn’t look perfect?
That’s perfectly normal and part of the learning journey! Drawing is a skill that develops over time with practice. Don’t aim for perfection on your first try. Celebrate your effort and what you’ve learned. Each drawing is a step forward, and you’ll notice improvements with every attempt. Enjoy the process rather than fixating on a flawless outcome.
Our Top Recommended Finds
- Sketchbook with quality paper: A good sketchbook prevents bleed-through and handles erasures better, making your drawing experience more pleasant.
- Set of drawing pencils (HB, 2B, 4B): Having a range of pencil hardness allows you to create different line weights and shading effects, adding depth to your drawings.
- Kneaded eraser: This type of eraser is gentle on paper, can be molded into various shapes for precise erasing, and lifts graphite without smudging.
Embrace Your Inner Artist
You’ve just taken a fantastic step in your artistic journey. Drawing a duck, from simple ovals to a finished sketch, builds fundamental skills that will serve you well in all your future creative endeavors.
Don’t let your pencil rest for too long. Why not try drawing a duck from a different angle, or perhaps adding a playful duckling beside it?
Grab your materials right now and continue exploring the wonderful world of drawing. Every line you draw is a step towards mastering your craft.
& Painting
No rigid rules or pretension. Just practical guides, medium comparisons, and encouraging tips to help you enjoy the drawing & painting process.